The certificate-based authentication for Azure IoT works like this:
- There will be a root certificate signed by a certificate authority.
- The root certificate will be uploaded to the Azure IoT Hub.
- For each IoT device we want to authenticate, we will create a separate client certificate, signed by the same certificate authority.
- At the time of the authentication, our IoT device will present the client certificate as the proof of identity.
- Azure IoT Hub will verify the identity based on the root certificate and the device name.
This document details how to create a certificate authority, a root certificate, and the client certificate(s).
As a first step, we need to generate the certificate hierarchy.
Create the following folder structure on your local drive to hold the various certificates in the hierarchy that we will be generating:
iotcerts/
├── rootca/
│  ├── device
Create Root Certificate
Create Client (Device) Certificate
Import Server Configuration to IoT Hub
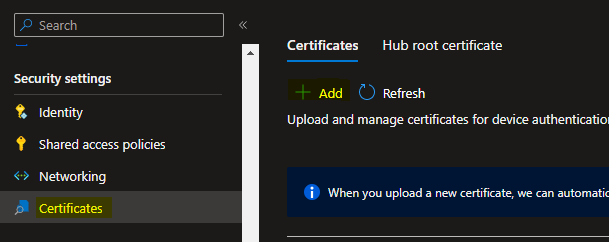
On the IoT Hub resource Overview page, click “Certificates” menu on the left blade, and click the “Add” button.
In the “Certificates” blade that appears, give a certficate name (eg. MyOrgIoTHubRootCertificate).
Browse to the IotCerts/rootca folder on your computer and import the rootca.pem. Check the “Set certificate status to verified on upload” checkbox.
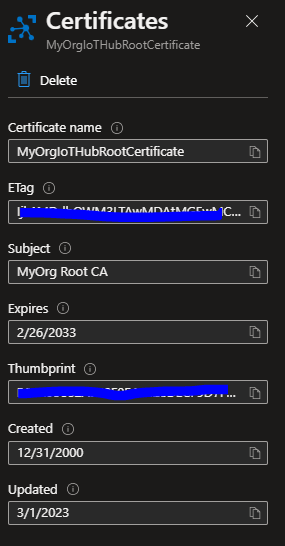
Click Save.
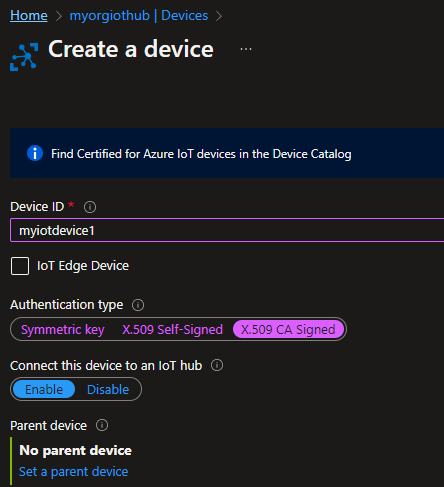
Create Logical Device myiotdevice1
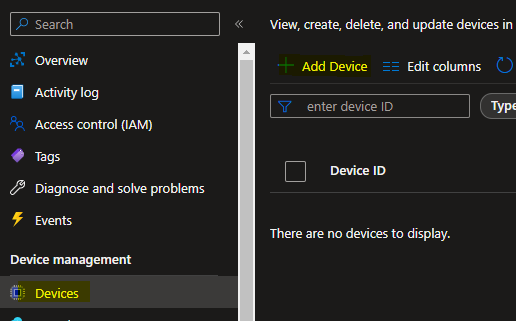
On the resource Overview page, click “Devices” menu on the left blade, and click “Add Device” button.
In the “Create a device” page that appears, give myiotdevice1 as the Device Id.
Select Authentication type X.509 CA Signed. Keep “Connect this device to an IoT Hub” as Enabled.
 it
it
Click Save.