![]()
Contents
Cirrus Link Resources
Cirrus Link Website![]()
Contact Us (Sales/Support)![]()
Forum![]()
Cirrus Link Modules Docs for Ignition 7.9.x![]()
Inductive Resources
Ignition User Manual![]()
Knowledge Base Articles![]()
Inductive University![]()
Forum![]()
![]()
Cirrus Link Website![]()
Contact Us (Sales/Support)![]()
Forum![]()
Cirrus Link Modules Docs for Ignition 7.9.x![]()
Ignition User Manual![]()
Knowledge Base Articles![]()
Inductive University![]()
Forum![]()
See step-by-step instructions for generating certificates to be used for certificate based authentication here.
The certificate-based authentication for Azure IoT works like this:
This document details how to create a certificate authority, a root certificate, and the client certificate(s).
| Tip |
|---|
The command line tools openssl and keytool are used. Install the OpenSSL command line tool and add the OpenSSL PATH in the Windows environment variables if necessary. Keytool is part of the standard java distribution and is located in the bin sub-directory of your jdk installation directory. Chariot includes a java distribution under the <chariot_install_dir>/lib/runtime/jdk11.0.12_7/bin folder. Add the keytool PATH in the Windows environment variables if necessary. You will need to restart your any open command window to pick up this configuration change. |
As a first step, we need to generate the certificate hierarchy.
Create the following folder structure on your local drive to hold the various certificates in the hierarchy that we will be generating:
iotcerts/
├── ca/
└── certs/
    ├── device/
These are the steps that need to be completed for the certificate hierarchy:
Generate Client certificate signed with the Root CA’s private key
Generate a private key file (ca.key) for the Root CA using the command below. You may choose to enter a passphrase to be associated with the ca.key file as well.
| Tip |
|---|
| Make note of this passphrase if you set one for the Root CA private key file (ca.key) as it will be used multiple times. |
| Code Block |
|---|
openssl genrsa -des3 -out ca/ca.key 4096 |
Generate a self-signed certificate (ca.crt) for the Root CA using the command below. This command generates a new self-signed X.509 certificate named "ca.crt" valid for 3650 days (10 years) using the RSA private key "ca.key". You will be required to enter the pass phrase associated with the private key file "ca.key".
|
There are a number of fields associated with the creation of the certificate. Fill them out with your relevant details.
Example CA Creation
|
You should have the following files created:
chariotcerts/
├── ca/
   ├── ca.crt
   ├── ca.key
...
...
...
...
...
...
...
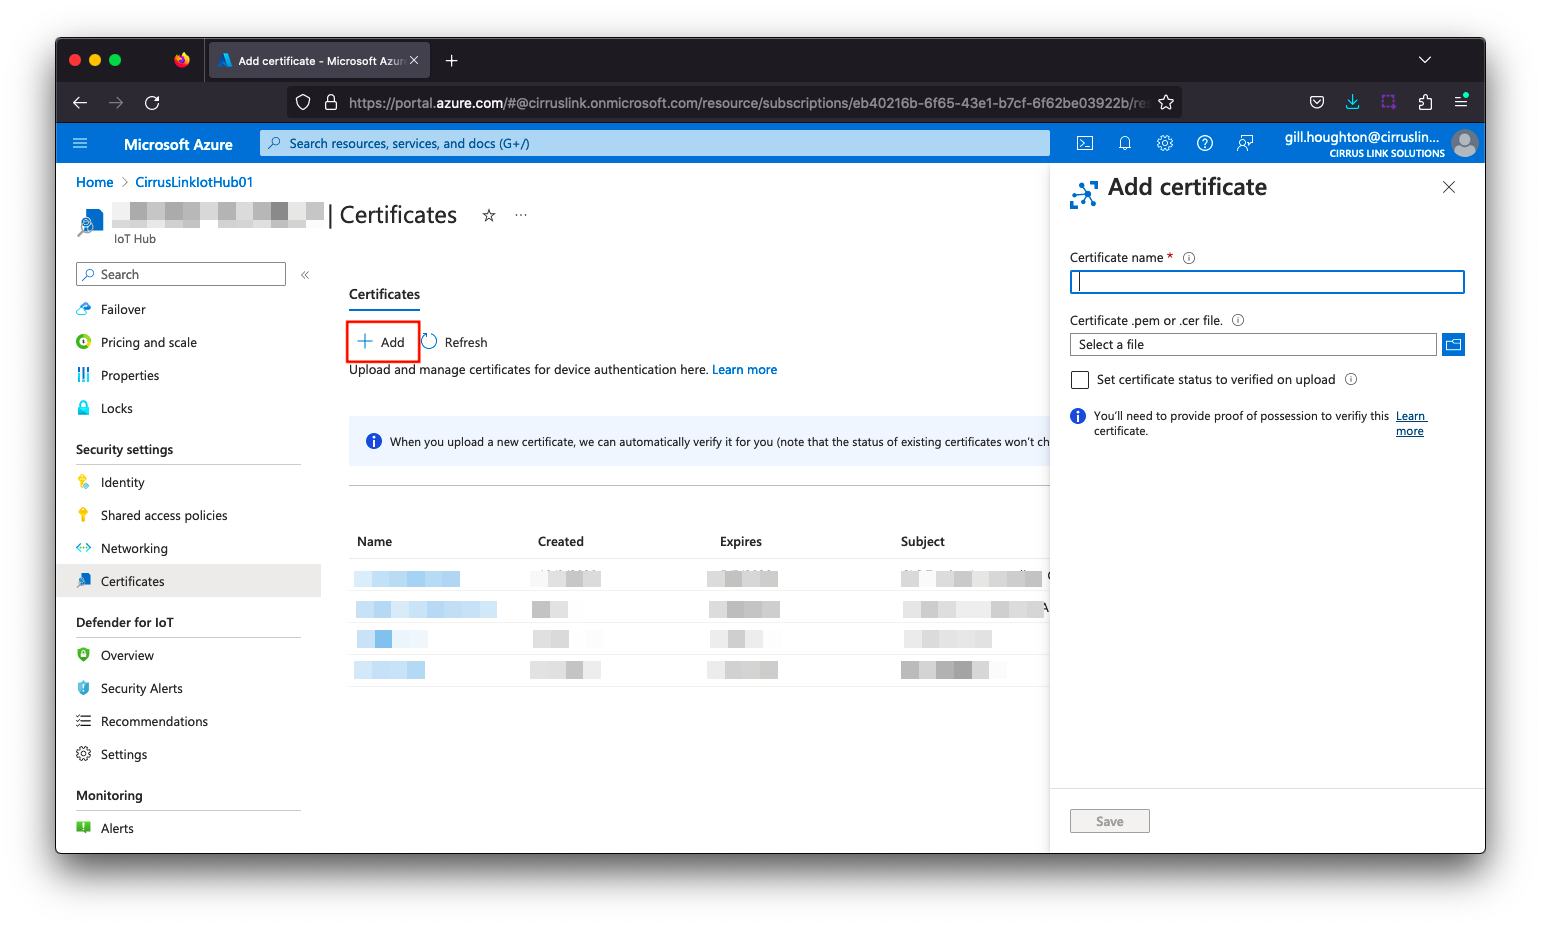
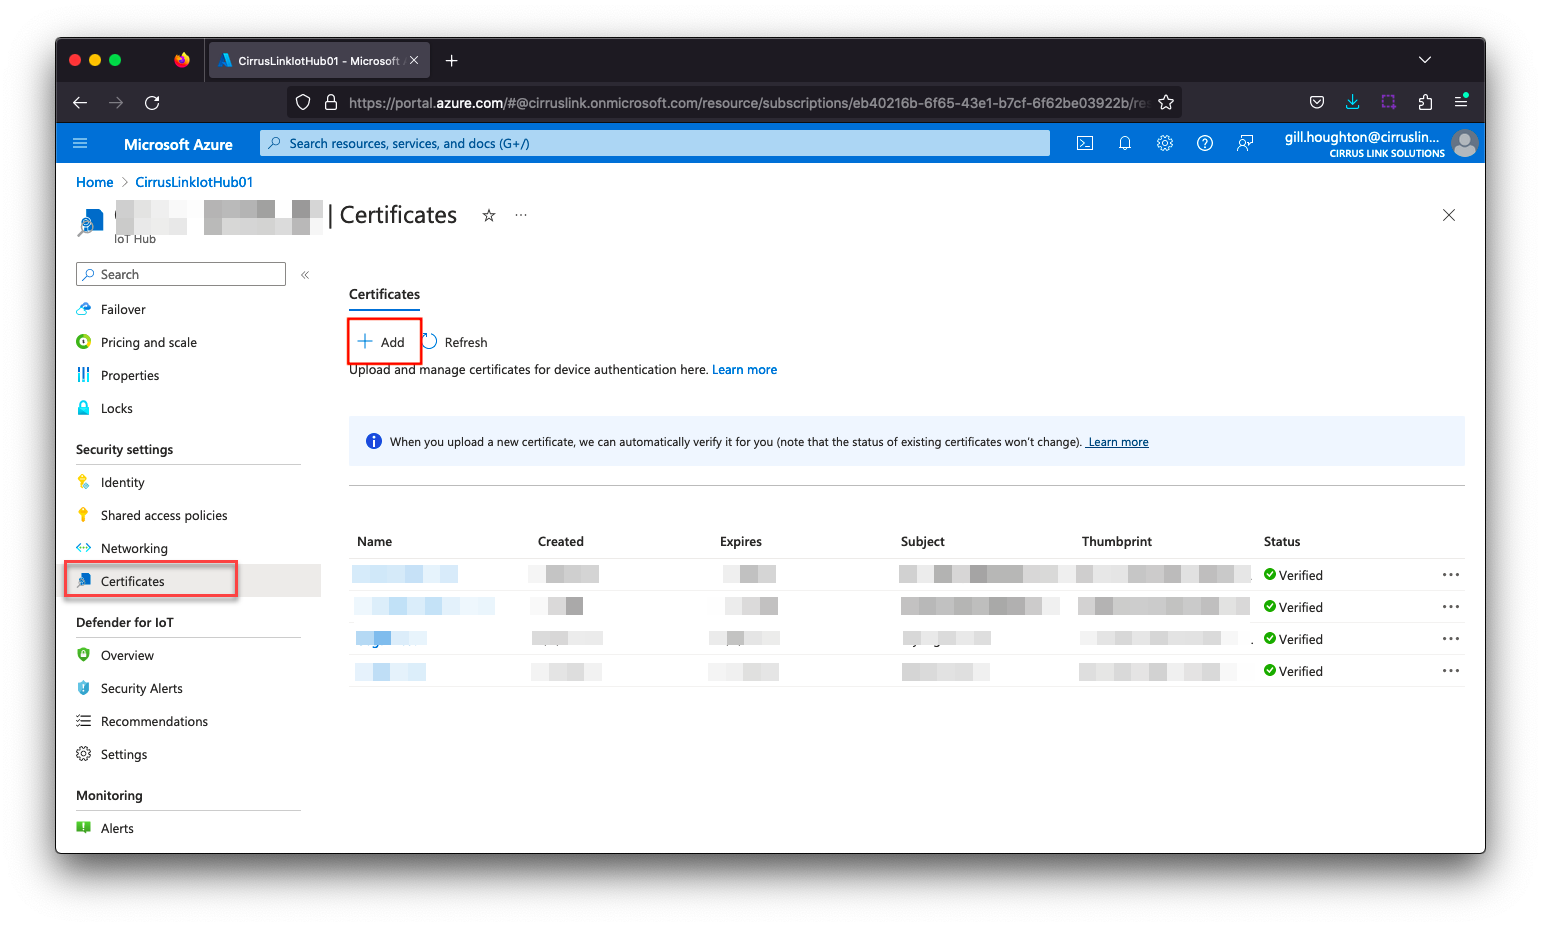
Navigate to the Azure Injector > Settings > Azure IoT Hubs > Certificates and add the certificates as shown below:
| Friendly Name | Certificate Filename | File Description | File Location |
|---|---|---|---|
| CACertificate | |||
| DeviceCertificate | CertDevice.pem | Device Certificate | iotcerts/certs/device/CertDevice.pem |
| DeviceKey | CertDevice.key | Device Private Key | iotcerts/certs/device/CertDevice.key |

Update the Azure Injector > Settings > Azure IoT Hubs > Settings configuration to use the certificates as shown below. Note : the certificates created do not use a Password

Verify the connection is established as shown by the Status on the Azure Injector > Settings > Azure IoT Hubs view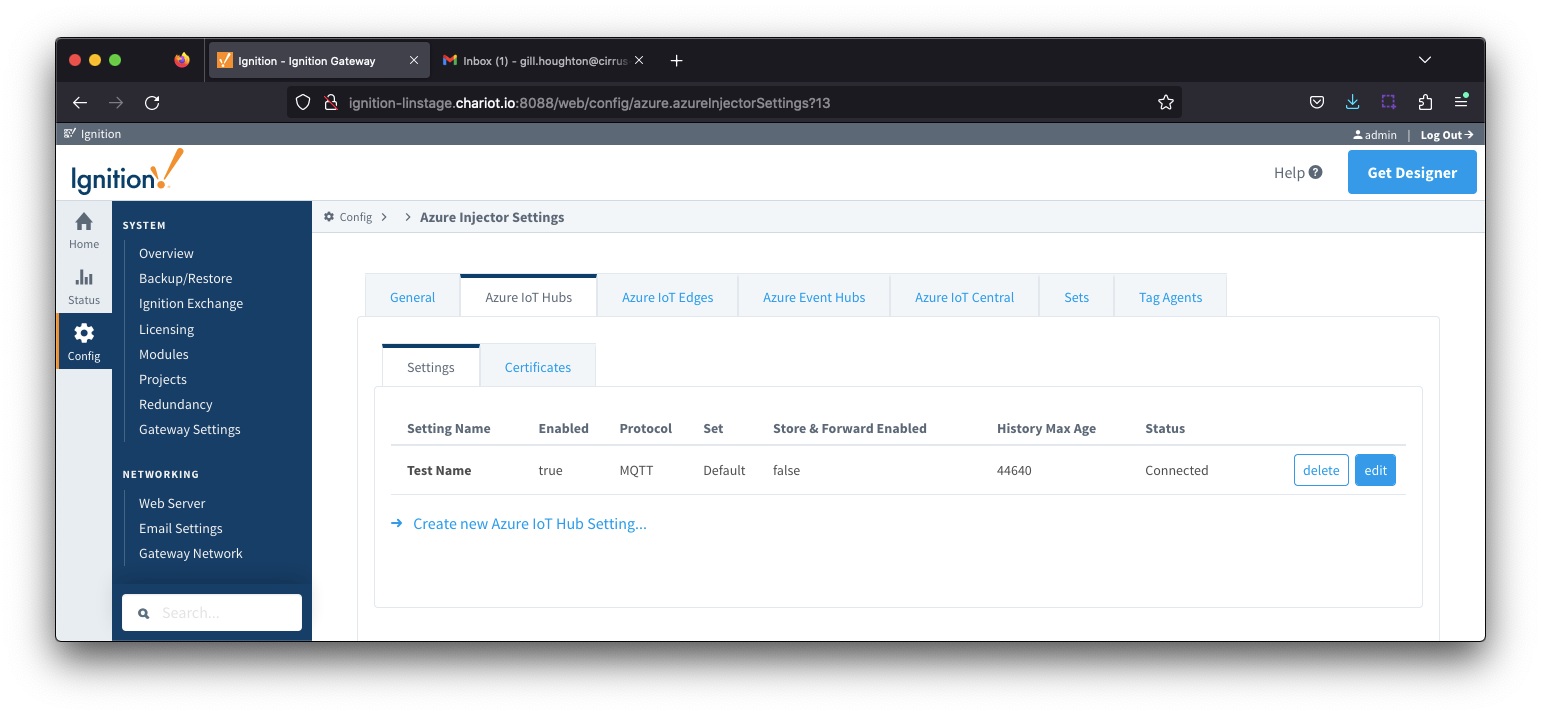
...
Click Save.
Create Logical Device myiotdevice1
On the resource Overview page, click “Devices” menu on the left blade, and click “Add Device” button.
...
In the “Create a device” page that appears, give myiotdevice1 as the Device Id.
| Note |
|---|
| Note that this name must match the commonName/FQDN we used when generating the client (device) certificate above. |
Select Authentication type X.509 CA Signed. Keep “Connect this device to an IoT Hub” as Enabled.
...