Prerequisites
Summary
The tutorial will provide step by step instructions for the following:
- Configuring Azure IoT Hub to allow client connections to a deployed IoT Edge Hub
- Connecting Azure Injector to the IoT Edge Hub
- Publishing data from Azure Injector to Azure IoT Edge Hub and viewing the data
Tutorial
There are two primary ways to connect to an Azure Edge Hub via MQTT from an MQTT client. These are 'module' or 'device' connections. A module connection typically involves an application deployed as a docker container that runs in Azure Edge. This is the preferred way of connecting the Azure Injector module to Azure Edge Hub. This tutorial will use this method for connecting to Azure IoT Edge.
After completing the prerequisites, you should have an IoT Edge Device as shown below. In this example, it has a name of 'My-IoT-Edge' and is listed under the IoT Edge devices.
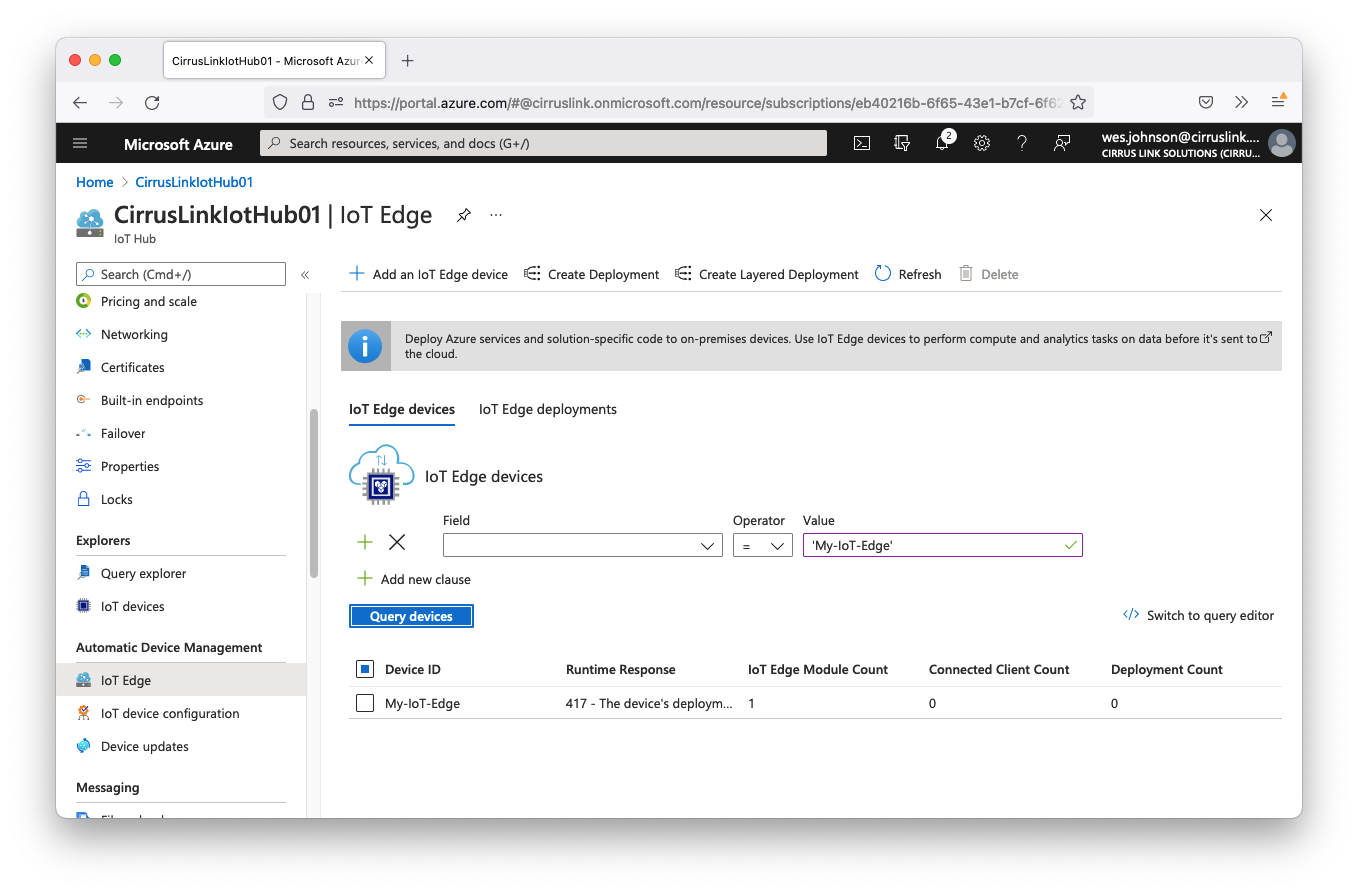
Note this shows an error that the '417 - The device's deployment configuration is not set'. This can be fixed by creating a deployment configuration for this Azure Edge Device.
Step 1: Create Deployment Configuration
Begin by clicking the Device in the Azure Portal. After doing so, you should see something similar to what is shown below.
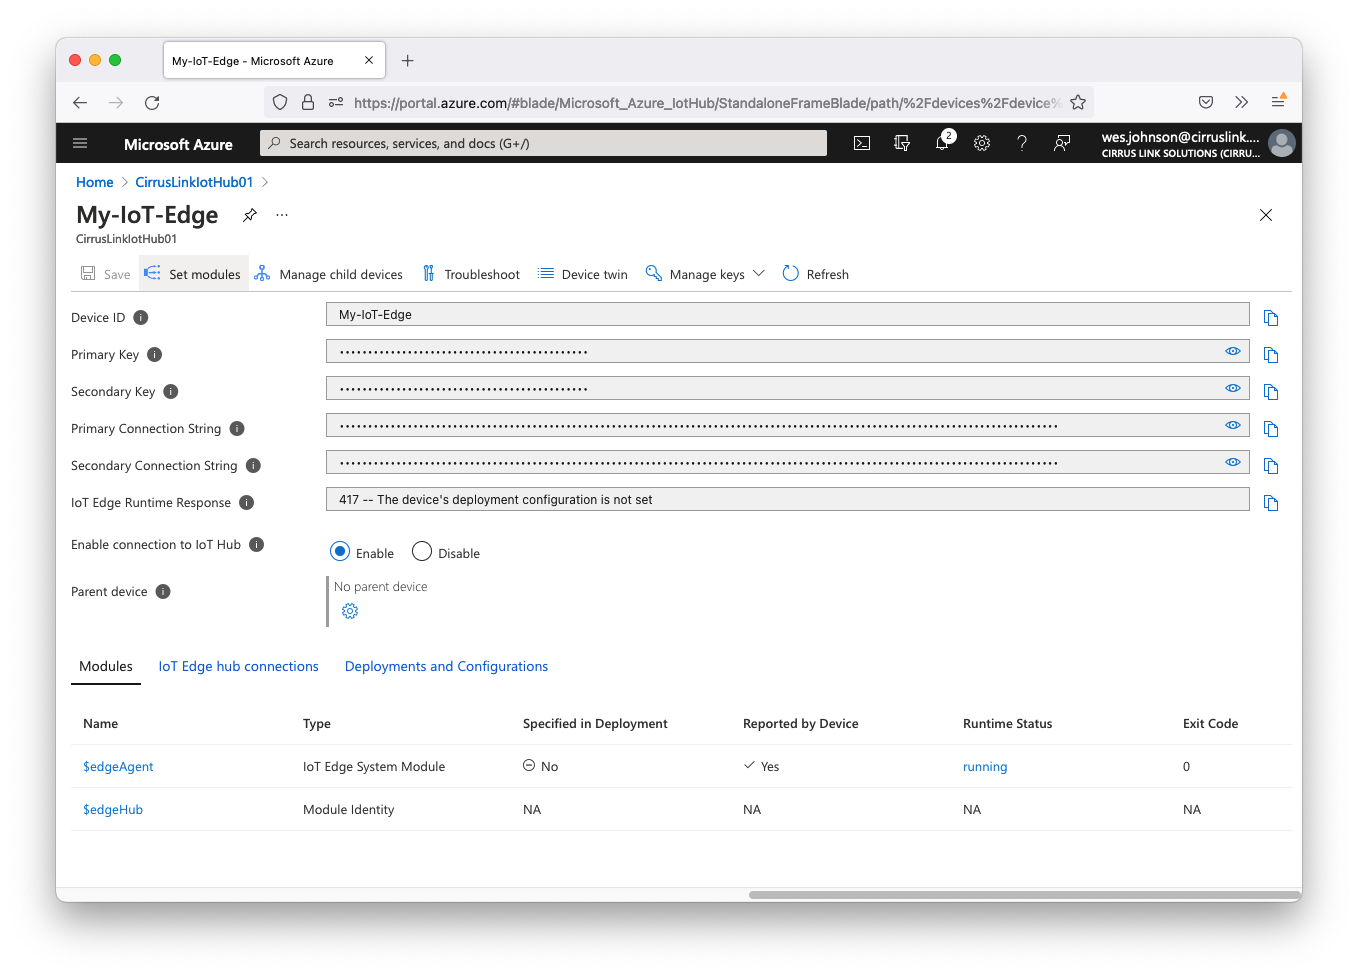
Now click 'Set modules' in the upper left corner. That will open the following page.
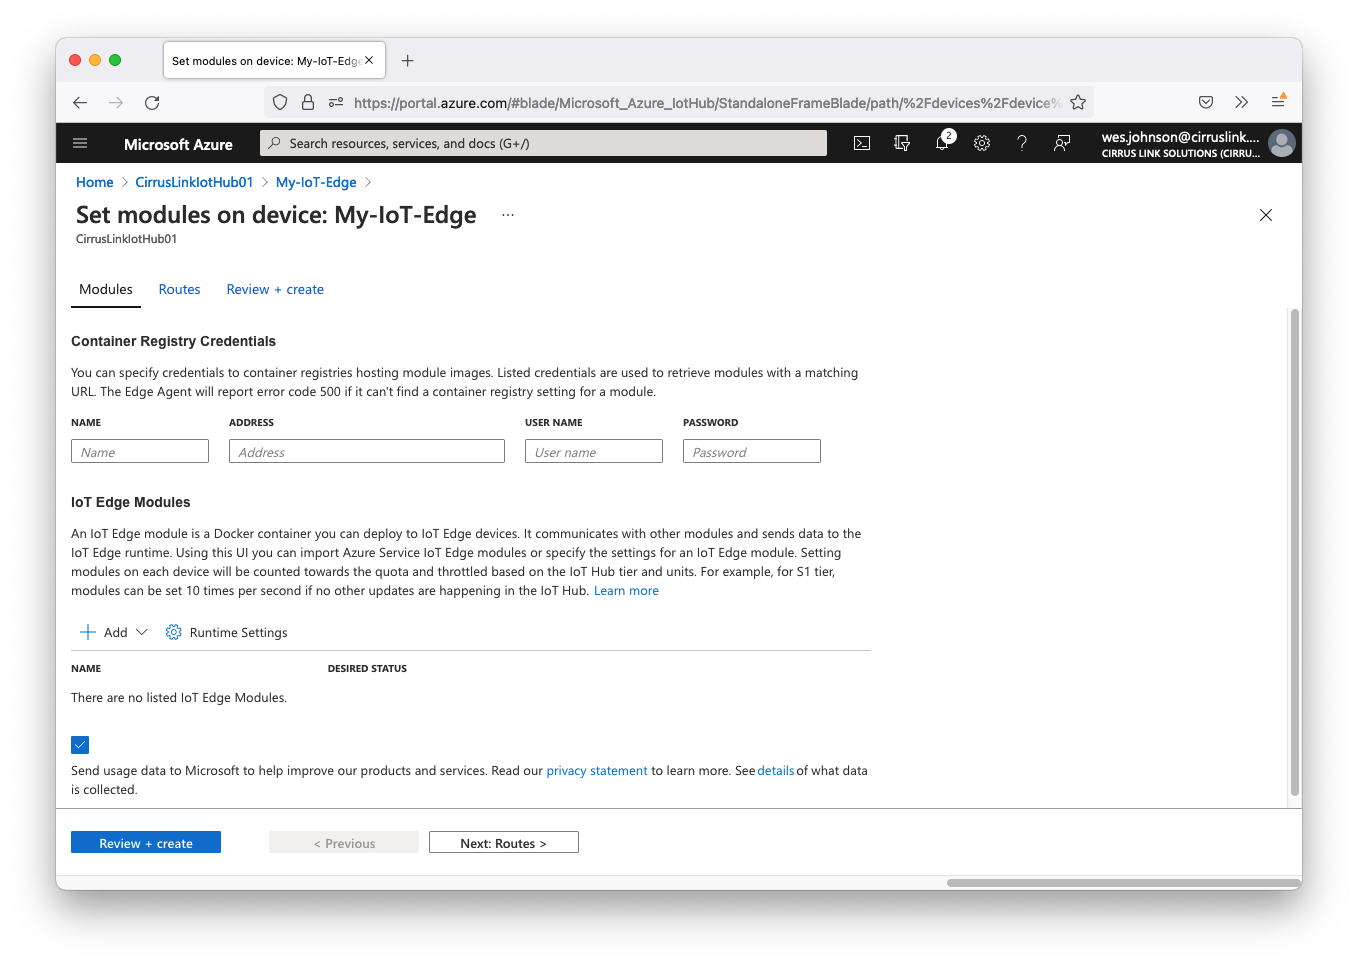
Add a new 'Container Registry Credentials' with the following parameters.
- Name: DockerHub
- Address: https://registry.hub.docker.com/
- User Name: username
- Note the Ignition image is public and doesn't require a username and password to access. However, this field must be non-empty and can be set to any non-empty value.
- Password: password
- Note the Ignition image is public and doesn't require a username and password to access. However, this field must be non-empty and can be set to any non-empty value.
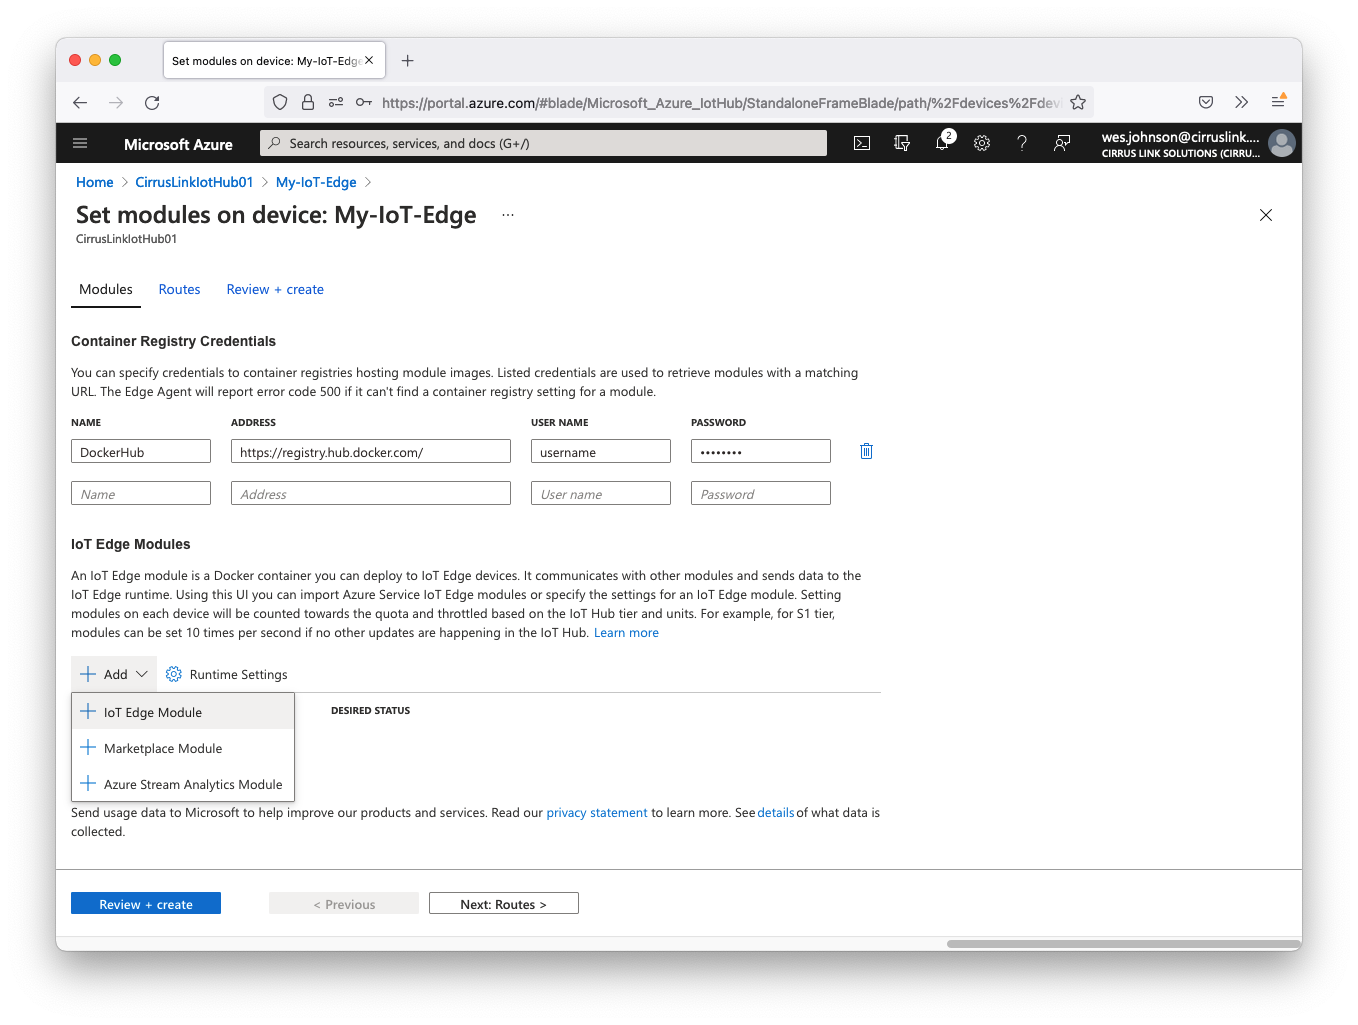
Now click the '+ Add' drop down under 'IoT Edge Modules' and select 'IoT Edge Module' as shown below.
This will open the following page.
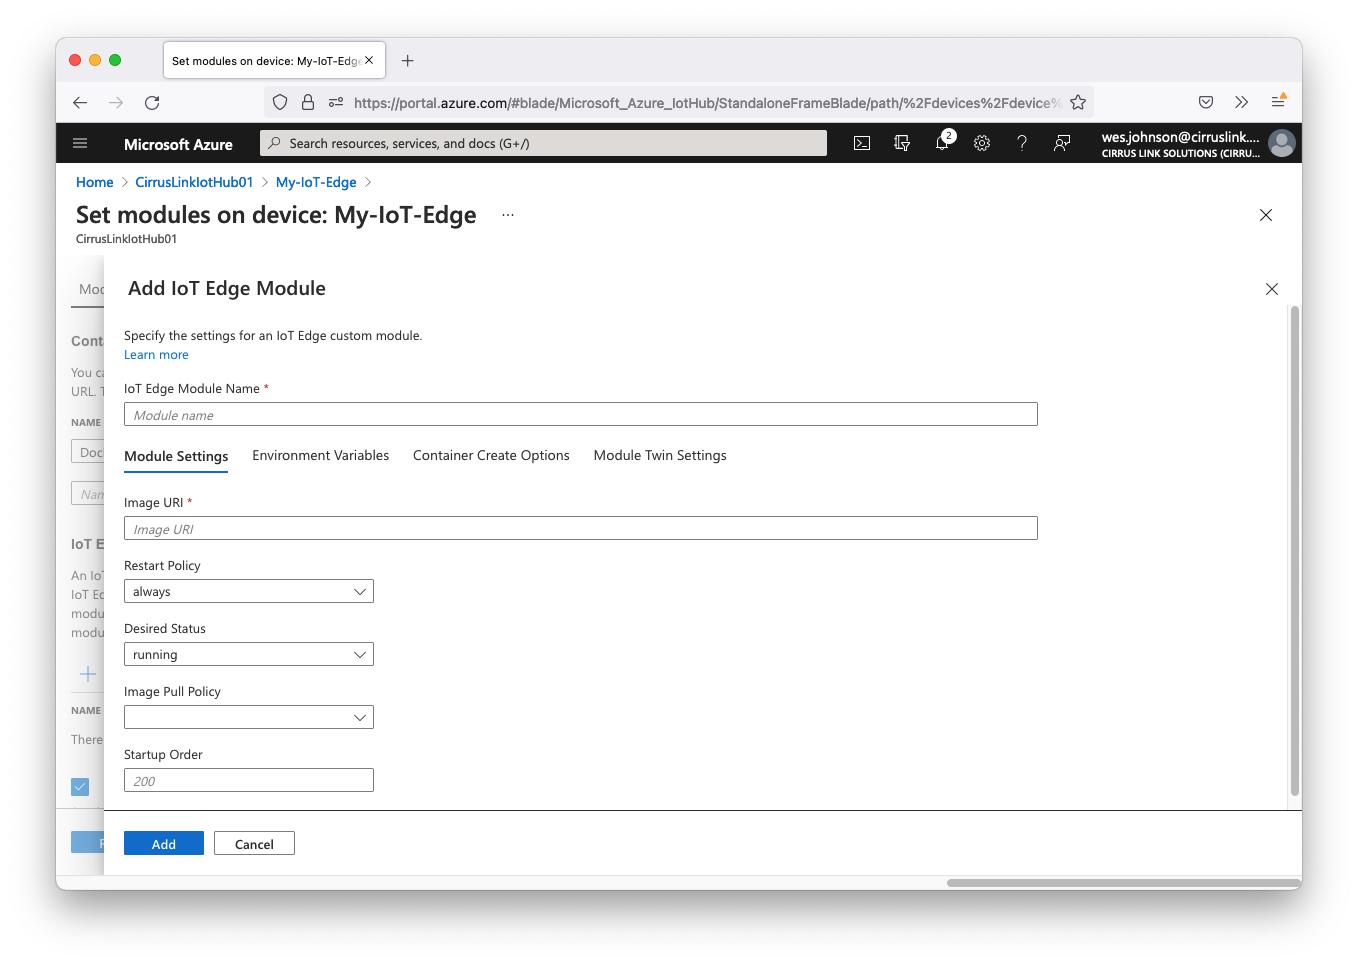
Finally, click 'Add'. After doing so you should see the following.

Now click 'Next: Routes'. This will open the following page.
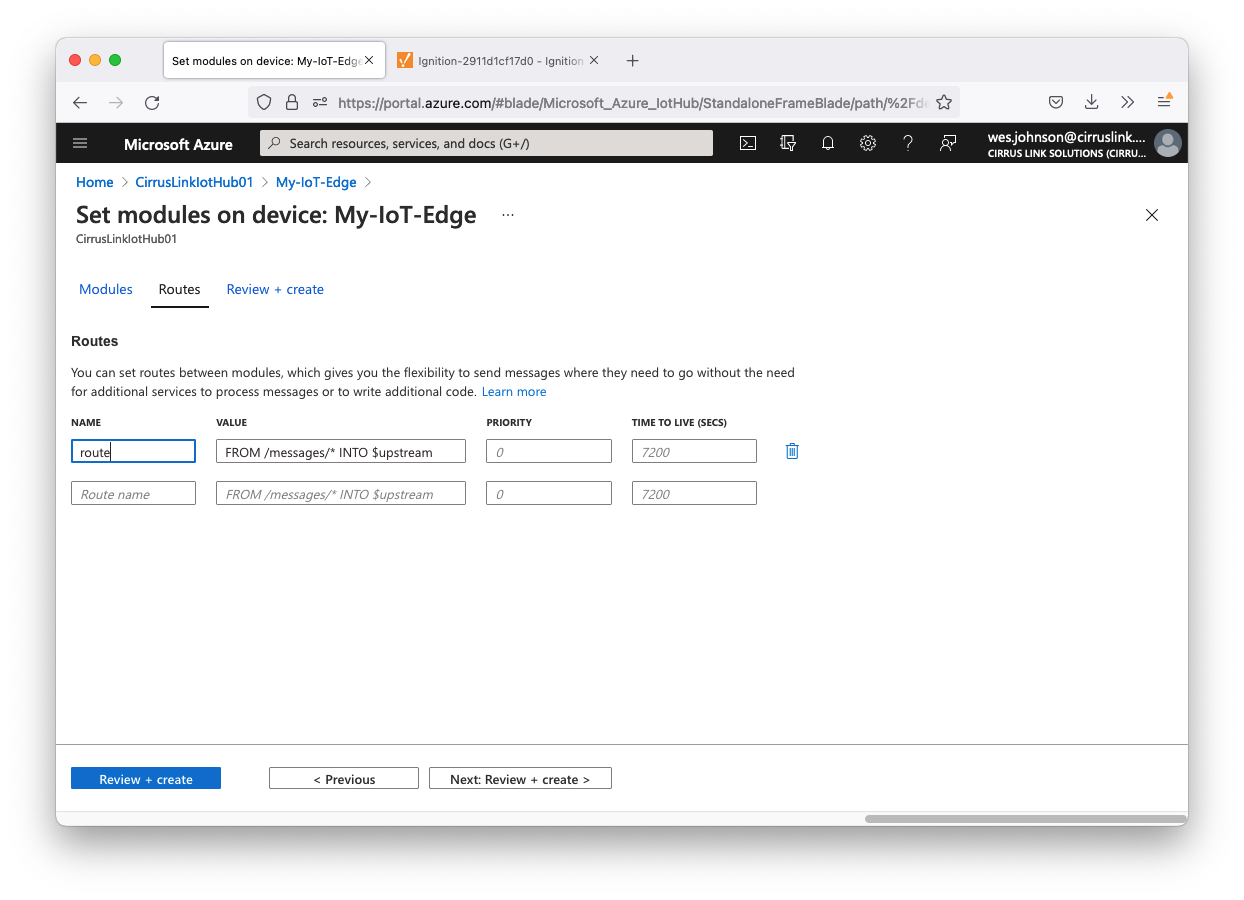
Leave the default route in place. This will allow messages to flow from Azure IoT Edge Hub to Azure IoT Hub. This feature will be used later in this tutorial.
Now click 'Review + create' in the lower left corner. This will bring up the following page.
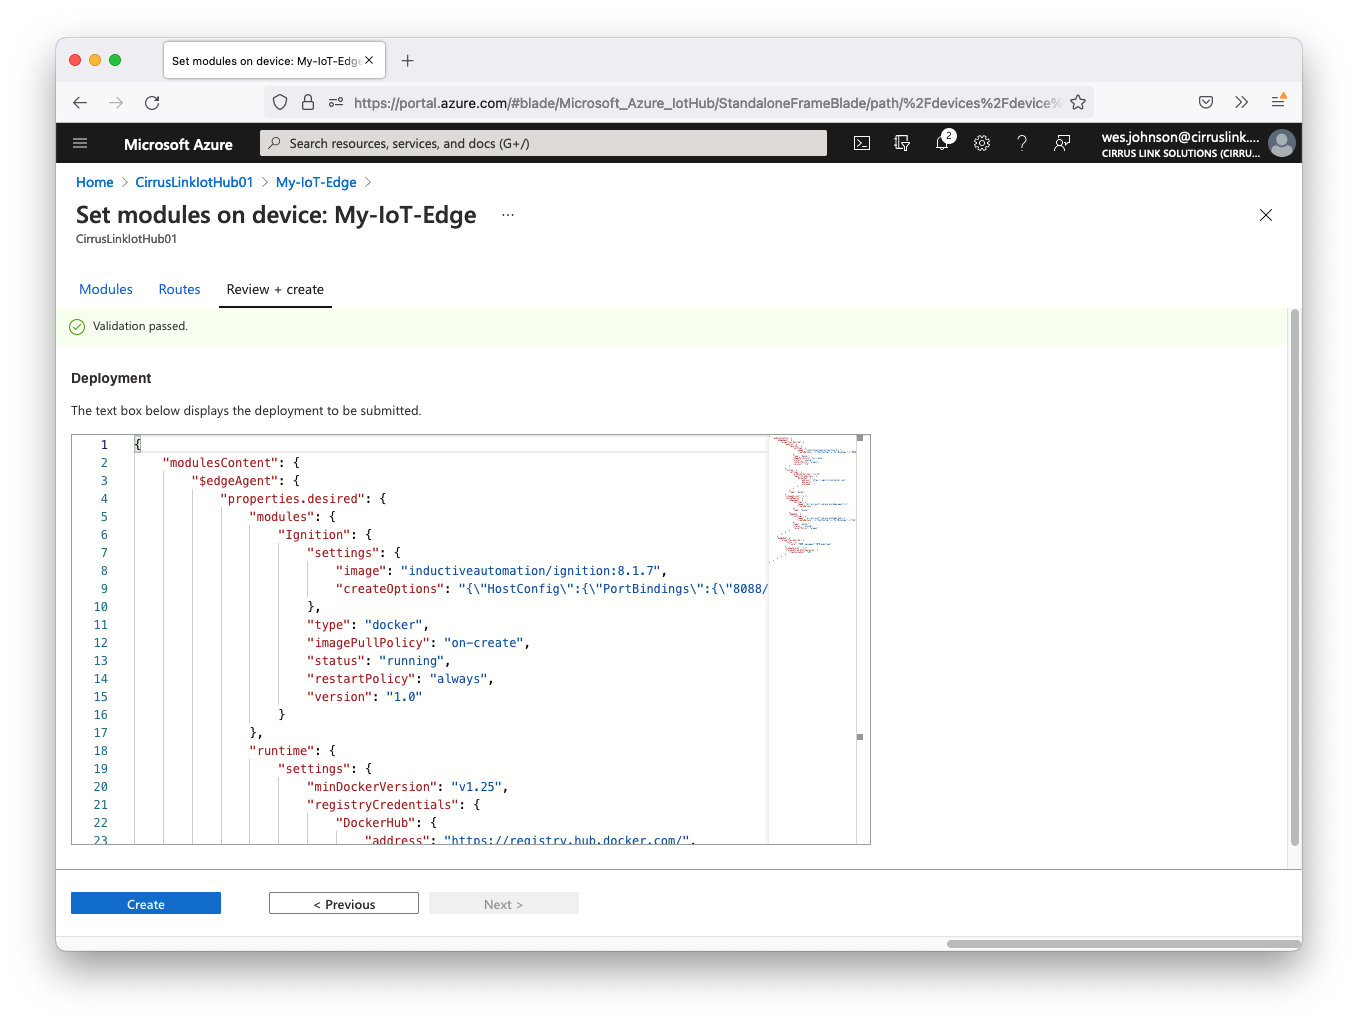
Finally, click 'Create' in the lower left corner. This will deploy the Ignition module to Azure Edge. It takes a few minutes. You can use the 'Refresh' button on the Device page to check the status of the deployment. Once Ignition has successfully deployed, you should see the following. Specifically note that $edgeHub and 'Ignition' now show a 'Runtime Status' of 'running'.
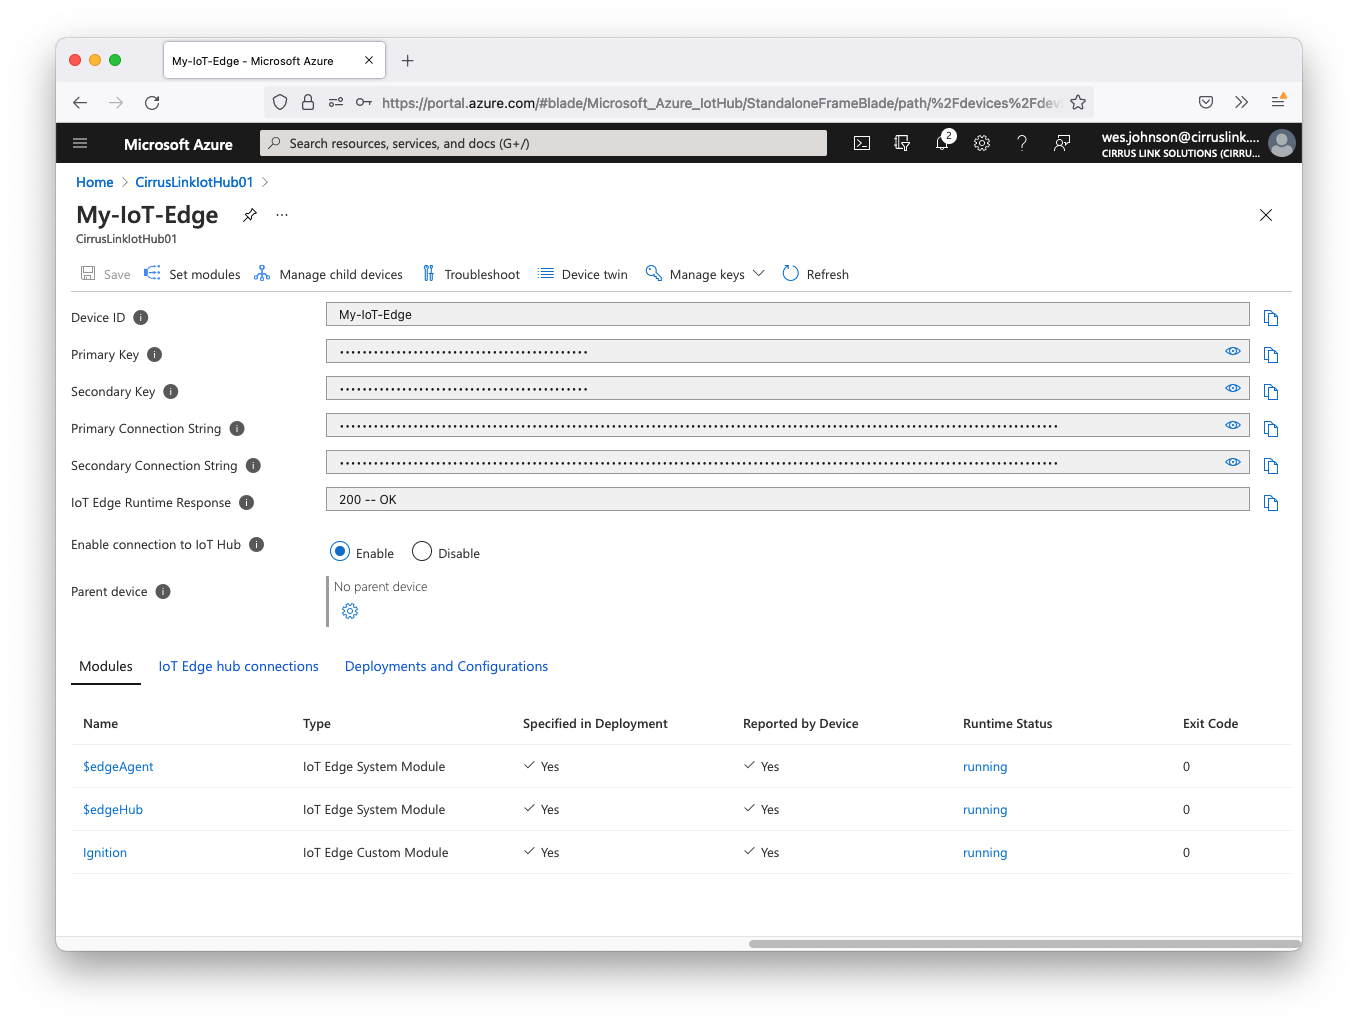
Now click the 'Ignition' module link near the bottom of the page. This will open the following page.
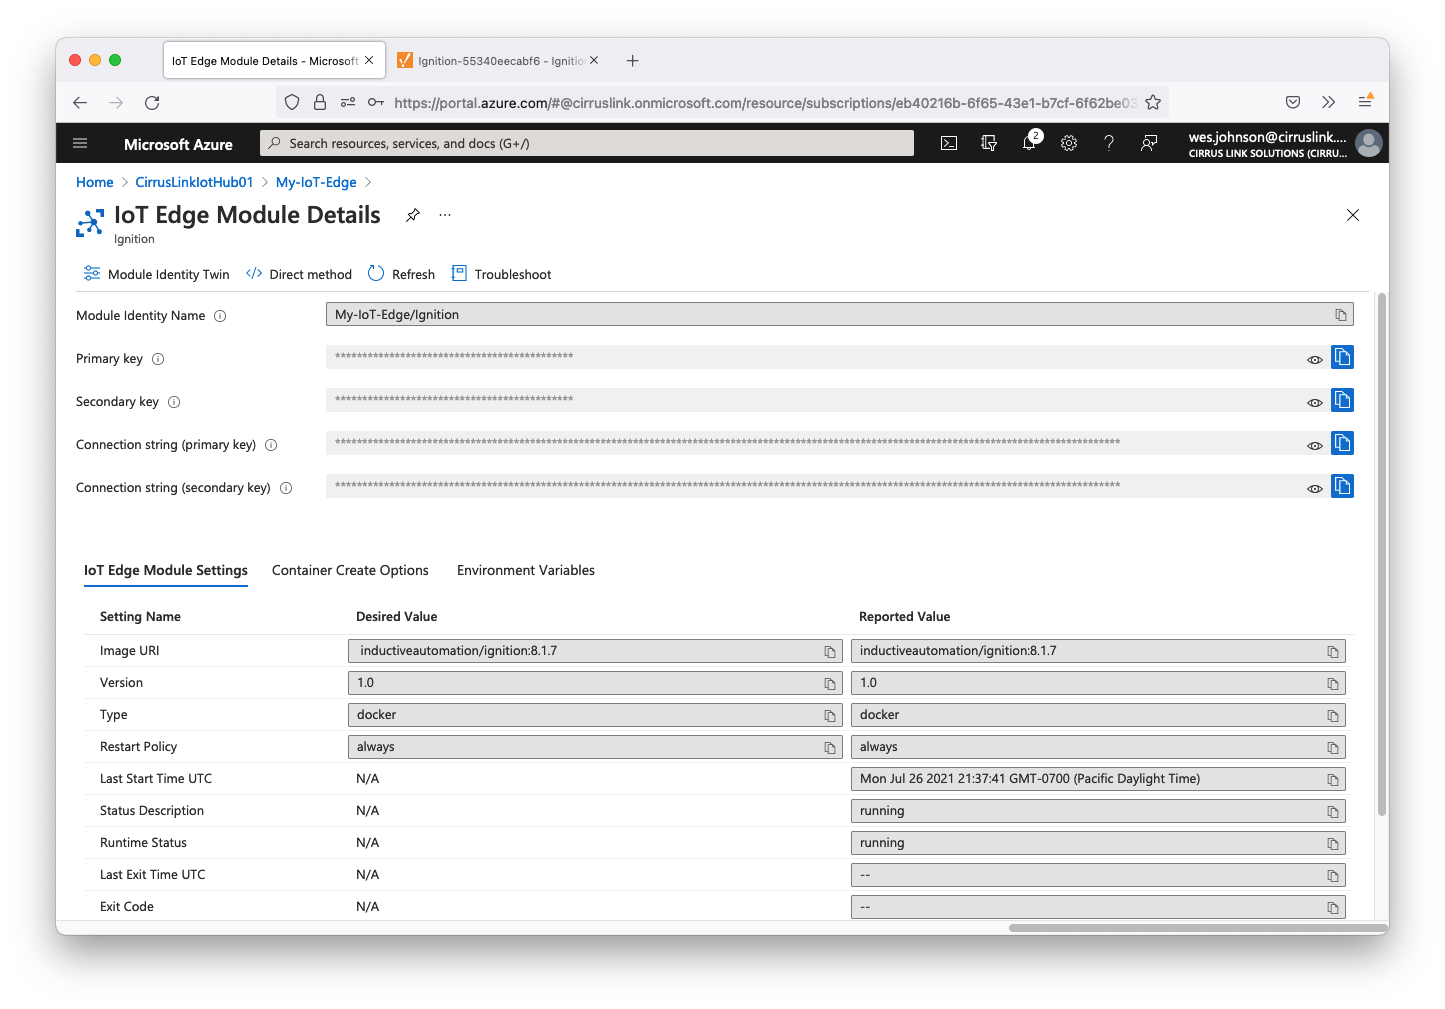
Copy the 'Connection string (primary key)' and save it for later use. This will be used in the Ignition configuration to establish an MQTT Connection from Ignition's Azure Injector module to Azure IoT Edge Hub.
Step 2: Install Ignition
At this point, Ignition is running as a Docker container in Azure Edge. You should be able to browse to http://[ip_address_of_azure_edge]:8088. Replace [ip_address_of_azure_edge] with the IP address of your Azure Edge system. You should see something similar to the following.
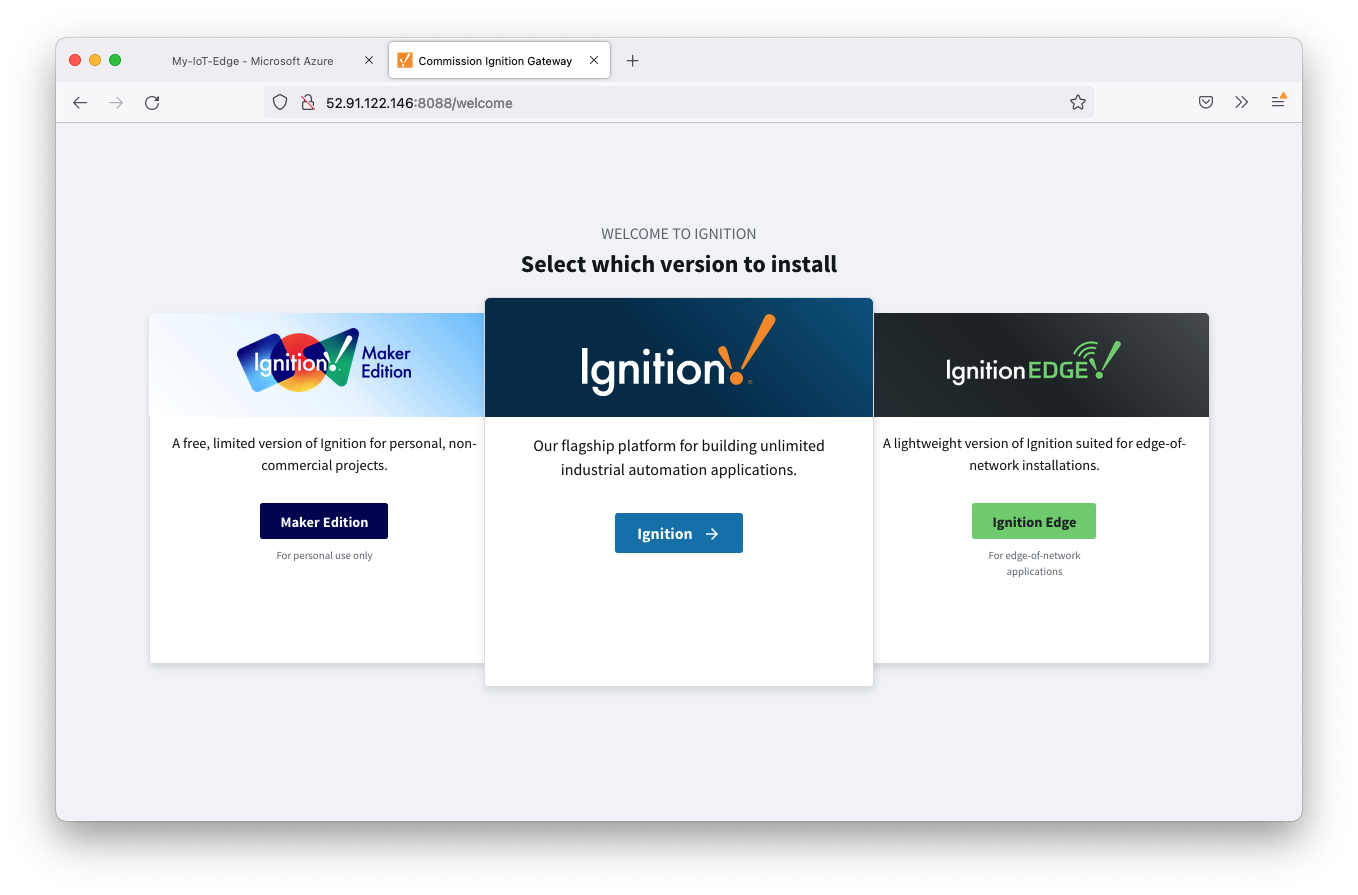
Follow the steps in the Installing Ignition documentation and select either Ignition or Ignition Edge for this tutorial.
Follow the steps in the Module Installation guide to install the latest Azure Injector Module.
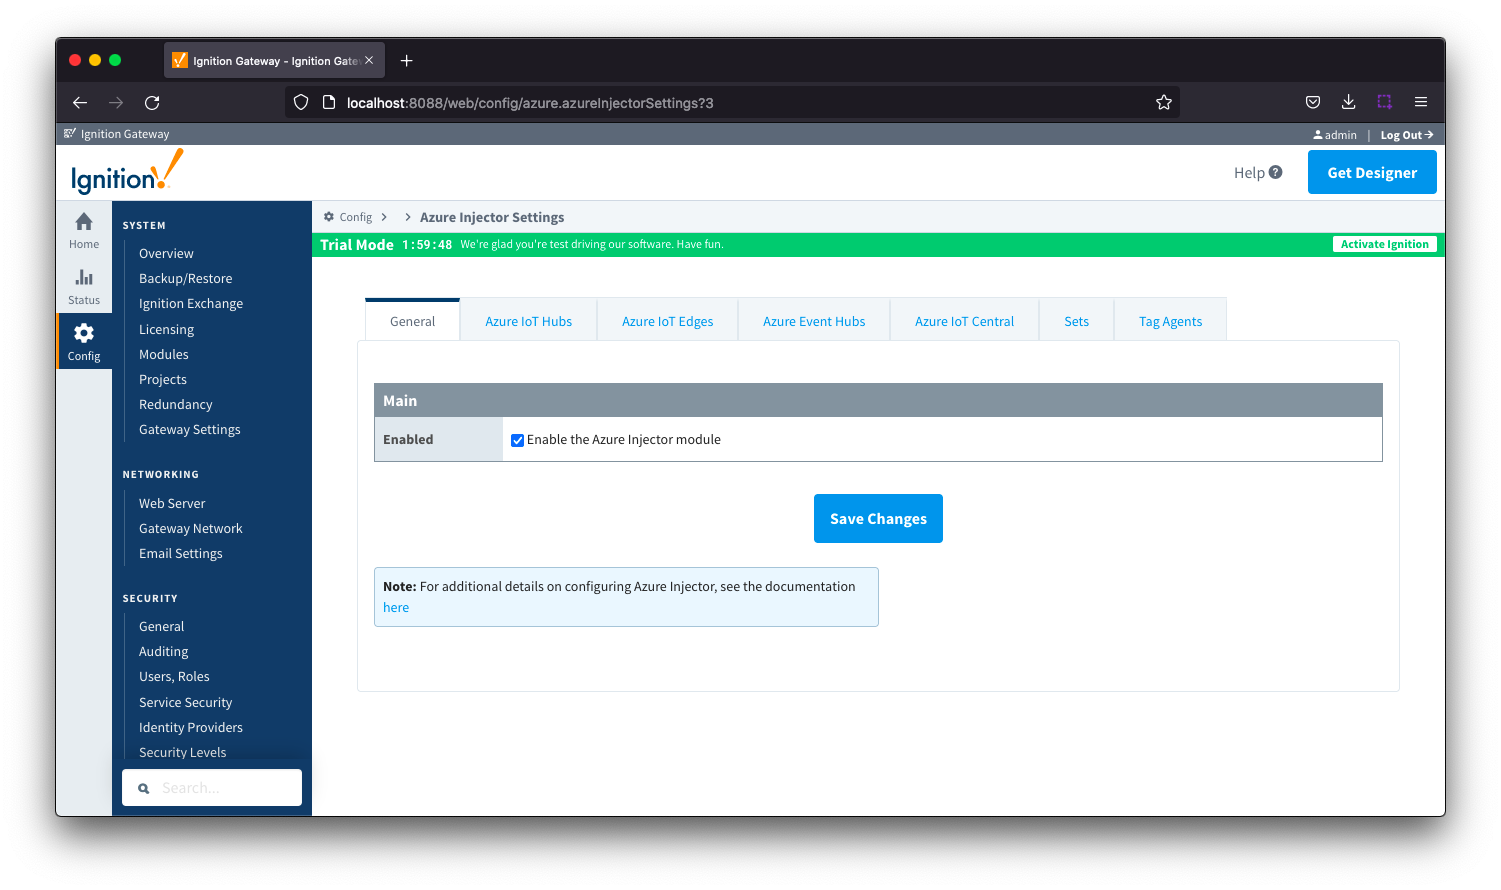
Now select 'Settings' under the Azure Injector section in the left navigation panel near the bottom. After doing so, you should see the following page.
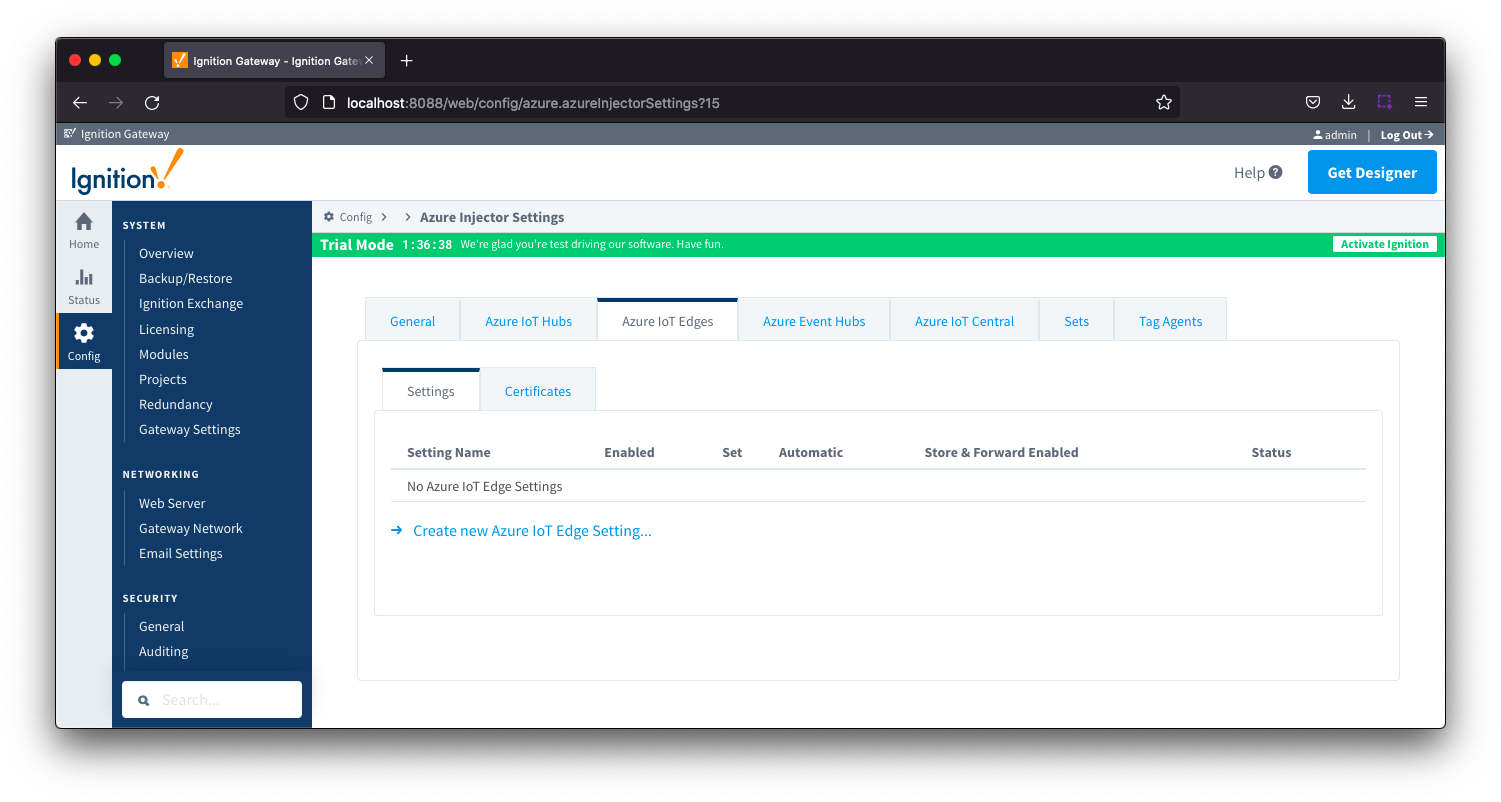
Now select 'Azure IoT Edges' from the tabs near the top of the page. This will open the following page.
Now select the 'Certificates' tab next to 'Settings'. This will show the following page.
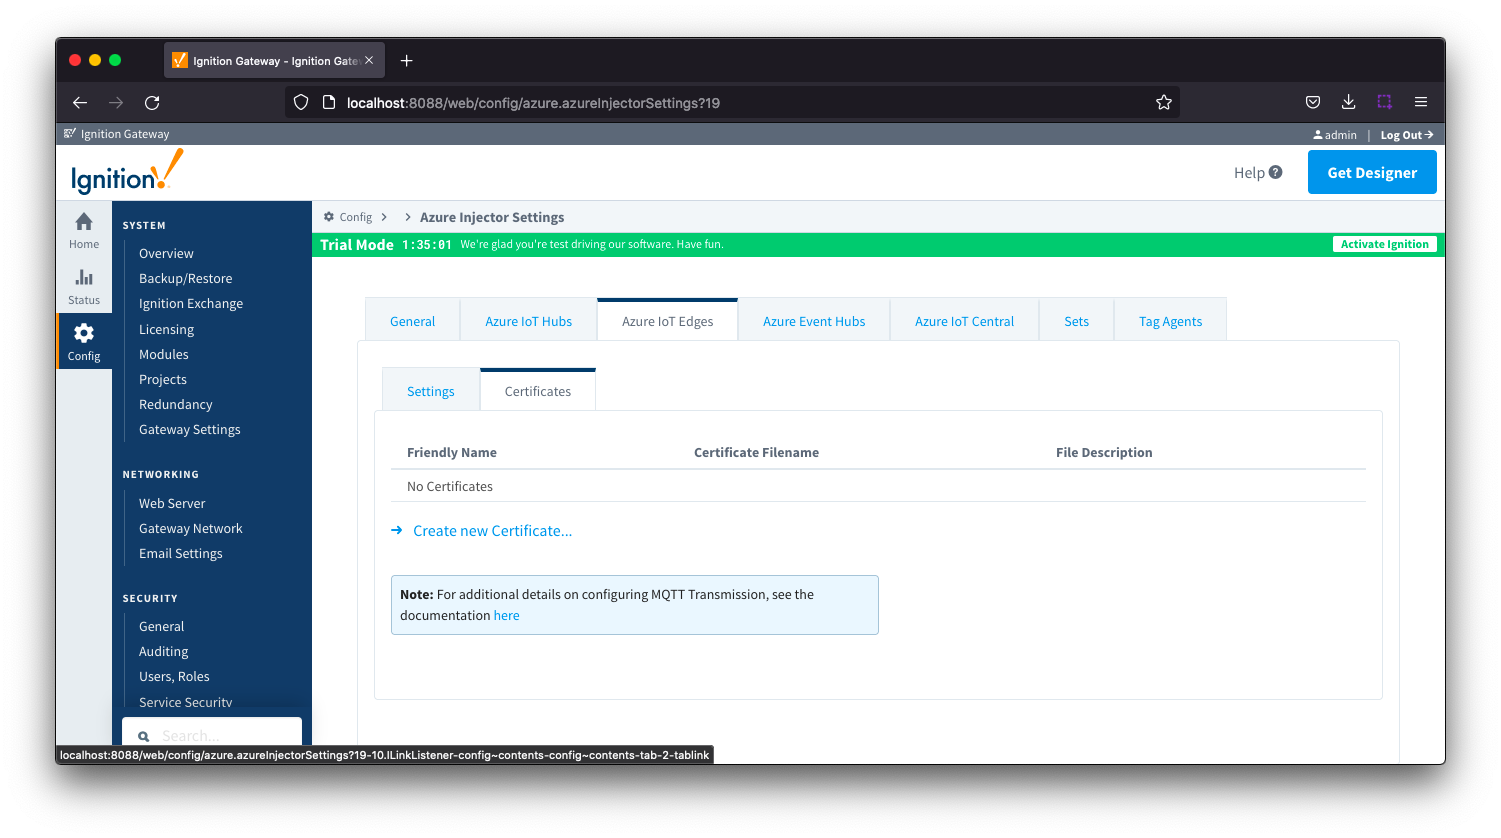
Click 'Create new Certificate'. Then browse to the Azure IoT Edge Device Root CA that you provisioned during the installation and configuration of the Azure IoT Edge Device. Give it a friendly name as shown below.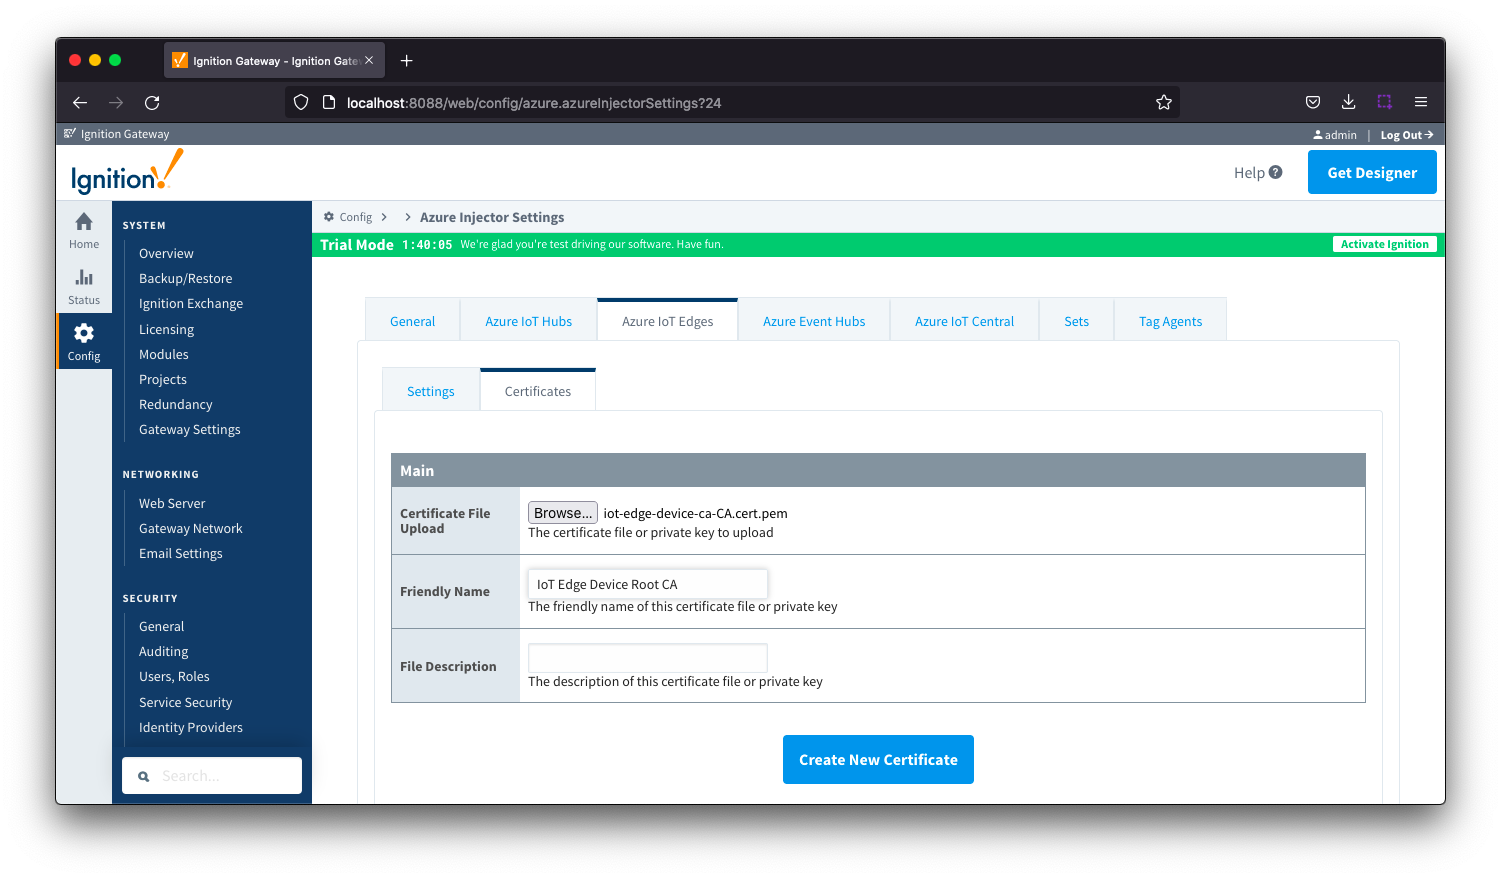
Now click 'Create New Certificate'. After doing so you should see something similar to the following.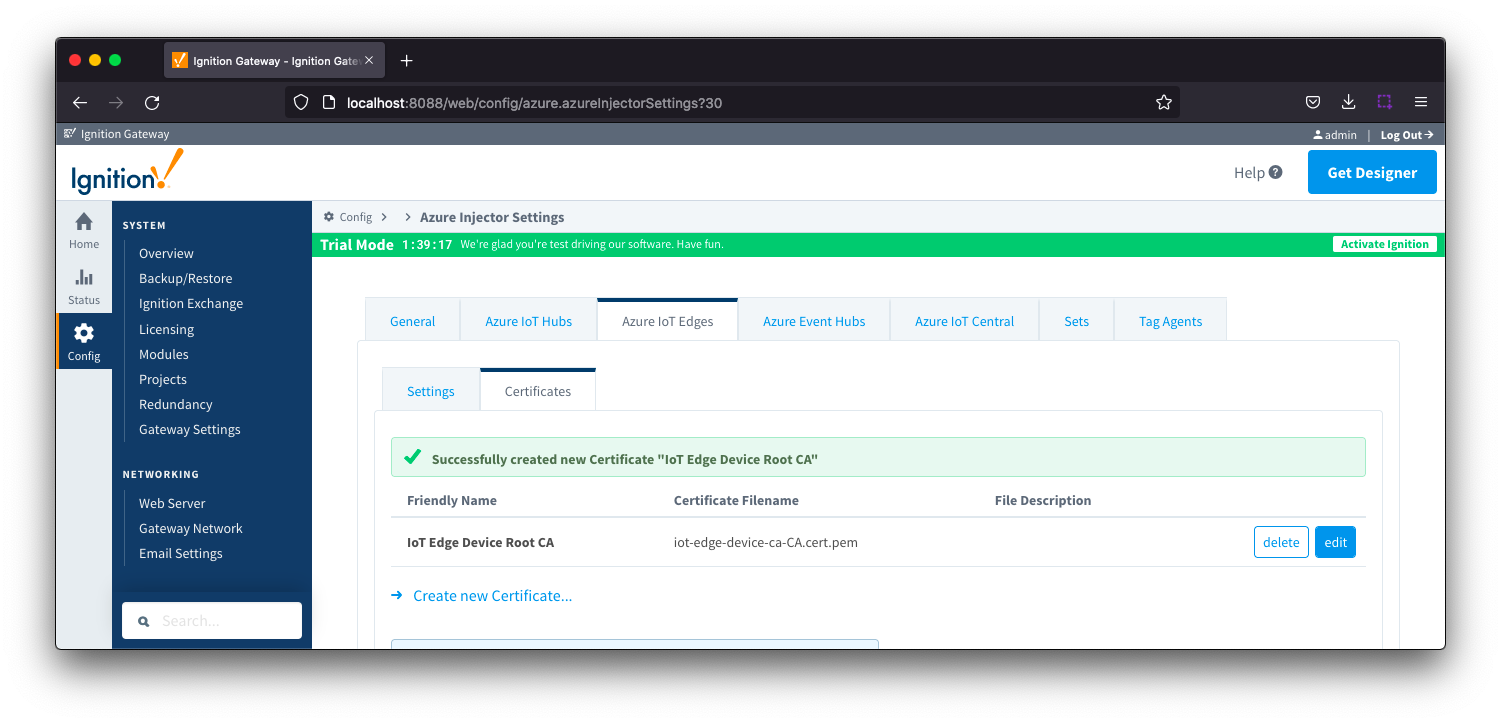
Now select the 'Settings' tab directly to the left of the 'Certificates' tab. Then click the 'Create new Azure IoT Edge Setting...' link. This will open the following page.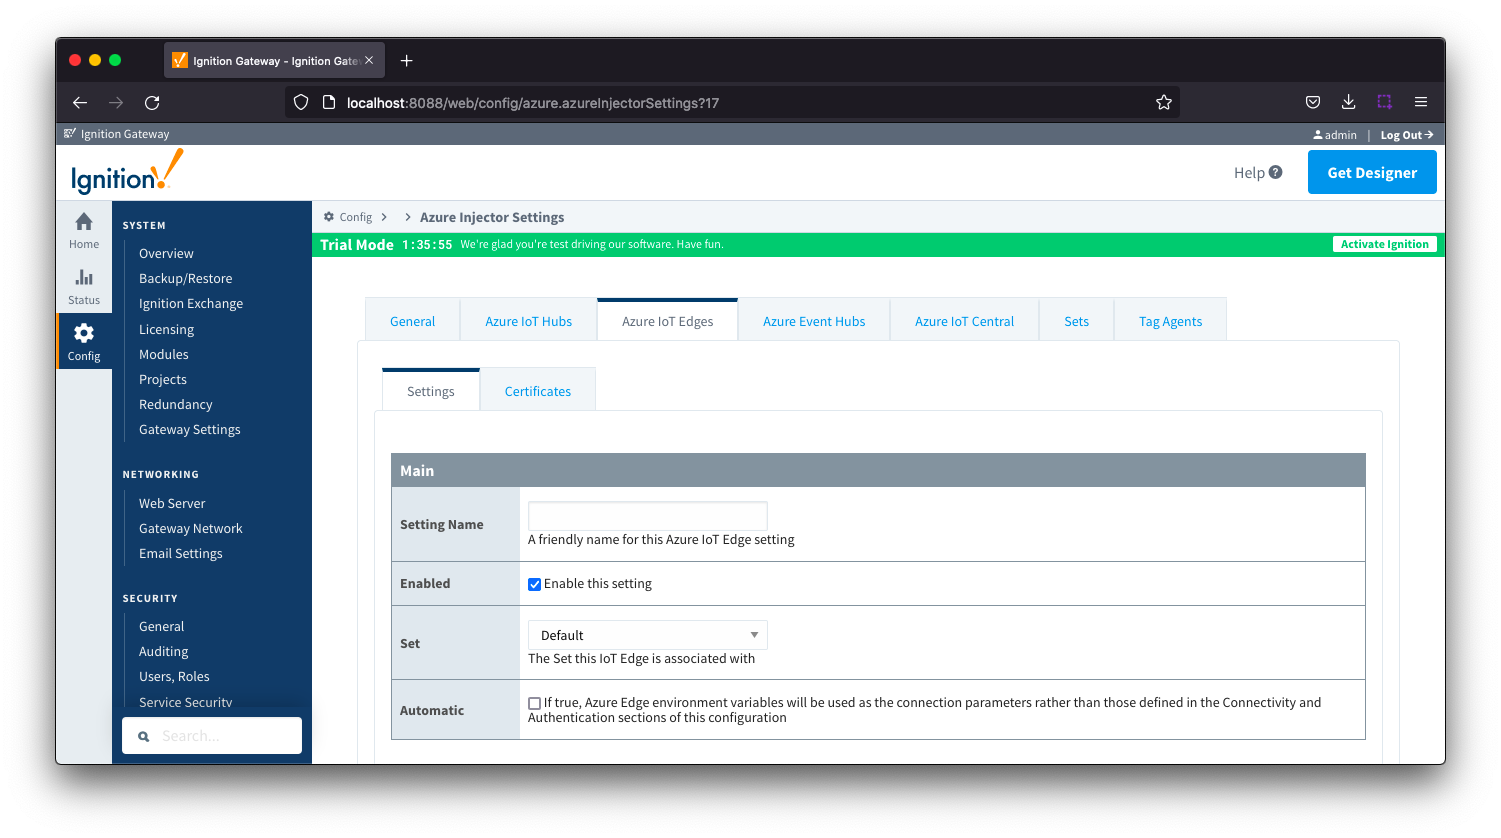
Set the following parameters in the form (leave all others in their default state)
- Main Section
- Setting Name: Azure IoT Edge
- Authentication Section
- Password: The Connection String associated with the 'Ignition' module you captured earlier in this tutorial.
- CA Certificate File: The 'IoT Edge Device Root CA' created in the previous step
After the parameters are set, click the 'Save Changes' button at the bottom of the page. After doing so, you should see the following.
If everything went well, you should also see 'Connected' under the Status column.
Once the system is showing connected, tags can be created in Ignition Designer. Review the Inductive Automation documentation for Launching Designer against the Ignition gateway
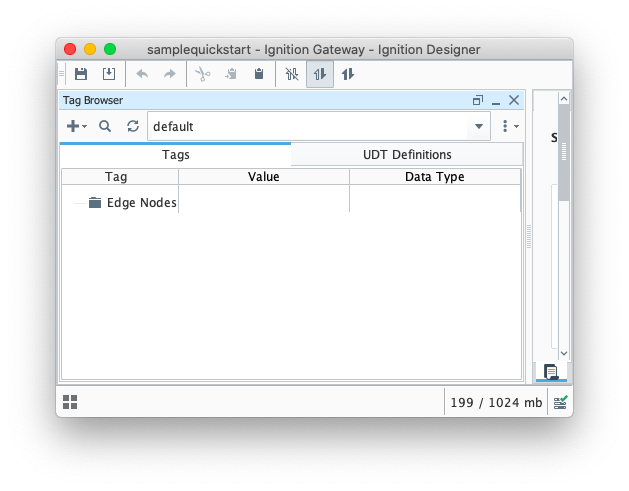
When the Azure Injector modules is installed in Ignition, an Edge Node folder is automatically created in the 'default' Ignition tag provider.
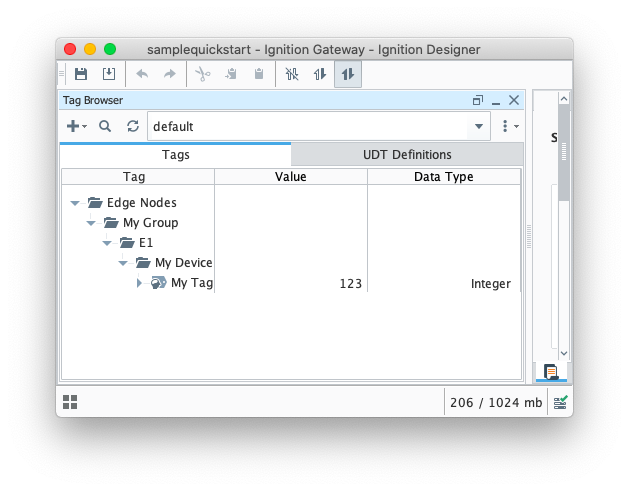
Create a tree structure under this folder as shown below with a memory tags - this folder structure creates the same hierarchy that is described in the Sparkplug B specification of Group ID, Edge ID, and Device ID.
Step 5: Publishing data
Using the Azure Command Line tools you previously installed on a development machine (from the prereqs here), run the following command
az iot hub monitor-events --hub-name YOUR_HUB_NAME --consumer-group YOUR_CONSUMER_GROUP --timeout 0
You should see a message denoting the monitor is running as follows
Starting event monitor, use ctrl-c to stop...
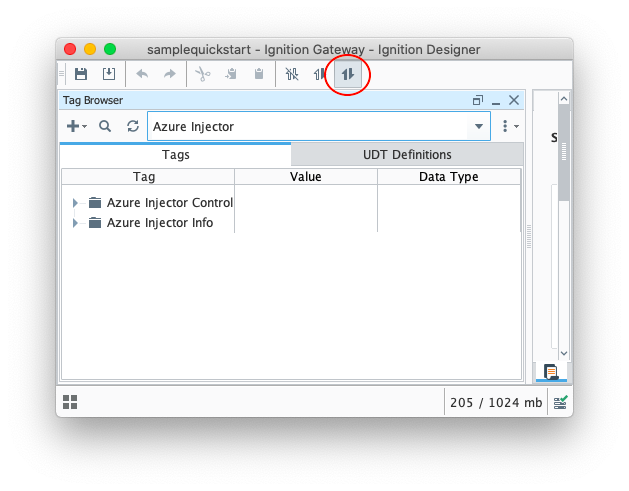
When the Azure Injector module is installed in Ignition, an Azure Injector tag provider is automatically created. This folder will contain both information tags about the module's version and state, as well as control tags for refreshing the module and Tag Agents.
Make sure that the Ignition Designer has read/write communications turned on by selecting the Project/Comm Read/Write button highlighted in the image below.
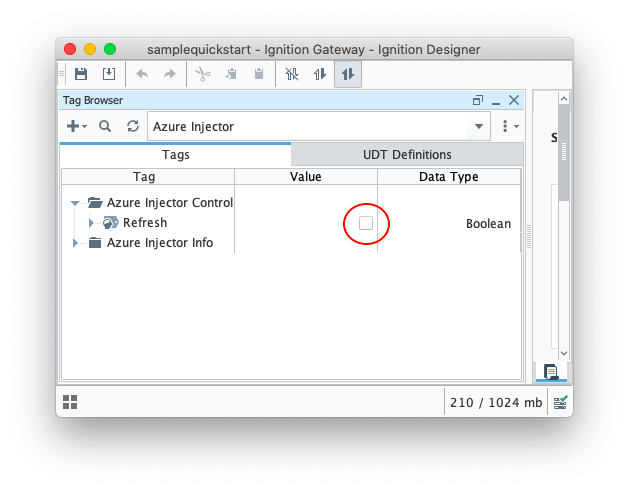
To refresh the default Tag Agent, open the folder "Azure Injector Control" and click on the Refresh Boolean. When this happens, the Tag Agent will scan the "Edge Nodes" folder and publish the Sparkplug BIRTH sequence to the Azure IoT Edge Hub.
In the Azure CLI event monitor output you should see the following:
{
    "event": {
        "origin": "My-IoT-Edge",
        "payload": "{\"topic\":{\"namespace\":\"spBv1.0\",\"edgeNodeDescriptor\":\"My Group/My Edge Node\",\"groupId\":\"My Group\",\"edgeNodeId\":\"My Edge Node\",\"type\":\"NBIRTH\"},\"payload\":{\"timestamp\":1627401528598,\"metrics\":[{\"name\":\"bdSeq\",\"timestamp\":1627401528573,\"dataType\":\"Int64\",\"value\":0}],\"seq\":0}}"
    }
}
{
    "event": {
        "origin": "My-IoT-Edge",
        "payload": "{\"topic\":{\"namespace\":\"spBv1.0\",\"edgeNodeDescriptor\":\"My Group/My Edge Node\",\"groupId\":\"My Group\",\"edgeNodeId\":\"My Edge Node\",\"deviceId\":\"My Device\",\"type\":\"DBIRTH\"},\"payload\":{\"timestamp\":1627401528604,\"metrics\":[{\"name\":\"My Tag\",\"timestamp\":1627401528604,\"dataType\":\"Int32\",\"metaData\":{},\"properties\":{\"Quality\":{\"type\":\"Int32\",\"value\":192}},\"value\":123}],\"seq\":1}}"
    }
}
The messages flowing into Azure IoT Edge Hub are also automatically routed to Azure IoT Hub because of the module deployment that was specified in the Azure IoT Edge.
Step 6: Force a data change
At this point you can also change the value of the tag that was created in Designer. The messages coming out of Azure Injector are 'event driven' meaning that a tag must change for data to flow. Changing the tag value to 122 results in the following message going to Azure Event Hub.
{
    "event": {
        "origin": "My-IoT-Edge",
        "payload": "{\"topic\":{\"namespace\":\"spBv1.0\",\"edgeNodeDescriptor\":\"My Group/My Edge Node\",\"groupId\":\"My Group\",\"edgeNodeId\":\"My Edge Node\",\"deviceId\":\"My Device\",\"type\":\"DDATA\"},\"payload\":{\"timestamp\":1627403950739,\"metrics\":[{\"name\":\"My Tag\",\"timestamp\":1627403949486,\"dataType\":\"Int32\",\"value\":122}],\"seq\":2}}"
    }
}
Additional Resources
- Inductive Automation's Ignition download with free trial
- Cirrus Link Solutions Modules for Ignition
- Support questions
- Sales questions
- About Cirrus Link