![]()
Contents
Cirrus Link Resources
Cirrus Link Website![]()
Contact Us (Sales/Support)![]()
Forum![]()
Cirrus Link Modules Docs for Ignition 7.9.x![]()
Inductive Resources
Ignition User Manual![]()
Knowledge Base Articles![]()
Inductive University![]()
Forum![]()
![]()
Cirrus Link Website![]()
Contact Us (Sales/Support)![]()
Forum![]()
Cirrus Link Modules Docs for Ignition 7.9.x![]()
Ignition User Manual![]()
Knowledge Base Articles![]()
Inductive University![]()
Forum![]()
IoT Bridge for Snowflake (IBSNOW) is an application that connects to an MQTT Server (such as Chariot MQTT Server) and consumes MQTT Sparkplug messages from Edge devices. These messages must be formatted as Sparkplug Templates. Sparkplug Templates are defined in the Sparkplug Specification. These Templates are used to create the data in Snowflake automatically with no additional coding or configuration. Then multiple instances of these Templates generate the Assets and start to populate with real time data sent on change only, thus significantly reducing the amount of data being sent to the cloud. For further details on Snowflake, refer to the documentation here. For further details on Eclipse Sparkplug, refer to the Eclipse Sparkplug resources.
This Quickstart document covers how IoT Bridge can be used to consume MQTT Sparkplug data and create and update data in Snowflake. This will show how to configure IoT Bridge as well as show how to use Inductive Automation's Ignition platform along with Cirrus Link's MQTT modules to publish device data to an MQTT Server. This data will ultimately be consumed by IoT Bridge to create and update the Snowflake components. This tutorial will use the Cirrus Link Chariot MQTT Server implementation. However, IBSNOW does work with any MQTT v3.1.1 compliant MQTT Server including Cirrus Link's MQTT Servers.
It is also important to note that Ignition in conjunction with Cirrus Link's MQTT Transmission module converts Ignition User Defined Types (UDTs) to Sparkplug Templates. This is done automatically by the MQTT Transmission module. So, much of this document will refer to UDTs rather than Sparkplug Templates since that is what they are in Ignition. More information on Inductive Automation's Ignition platform can be found here. Additional information on Cirrus Link's MQTT Transmission module can be found here.
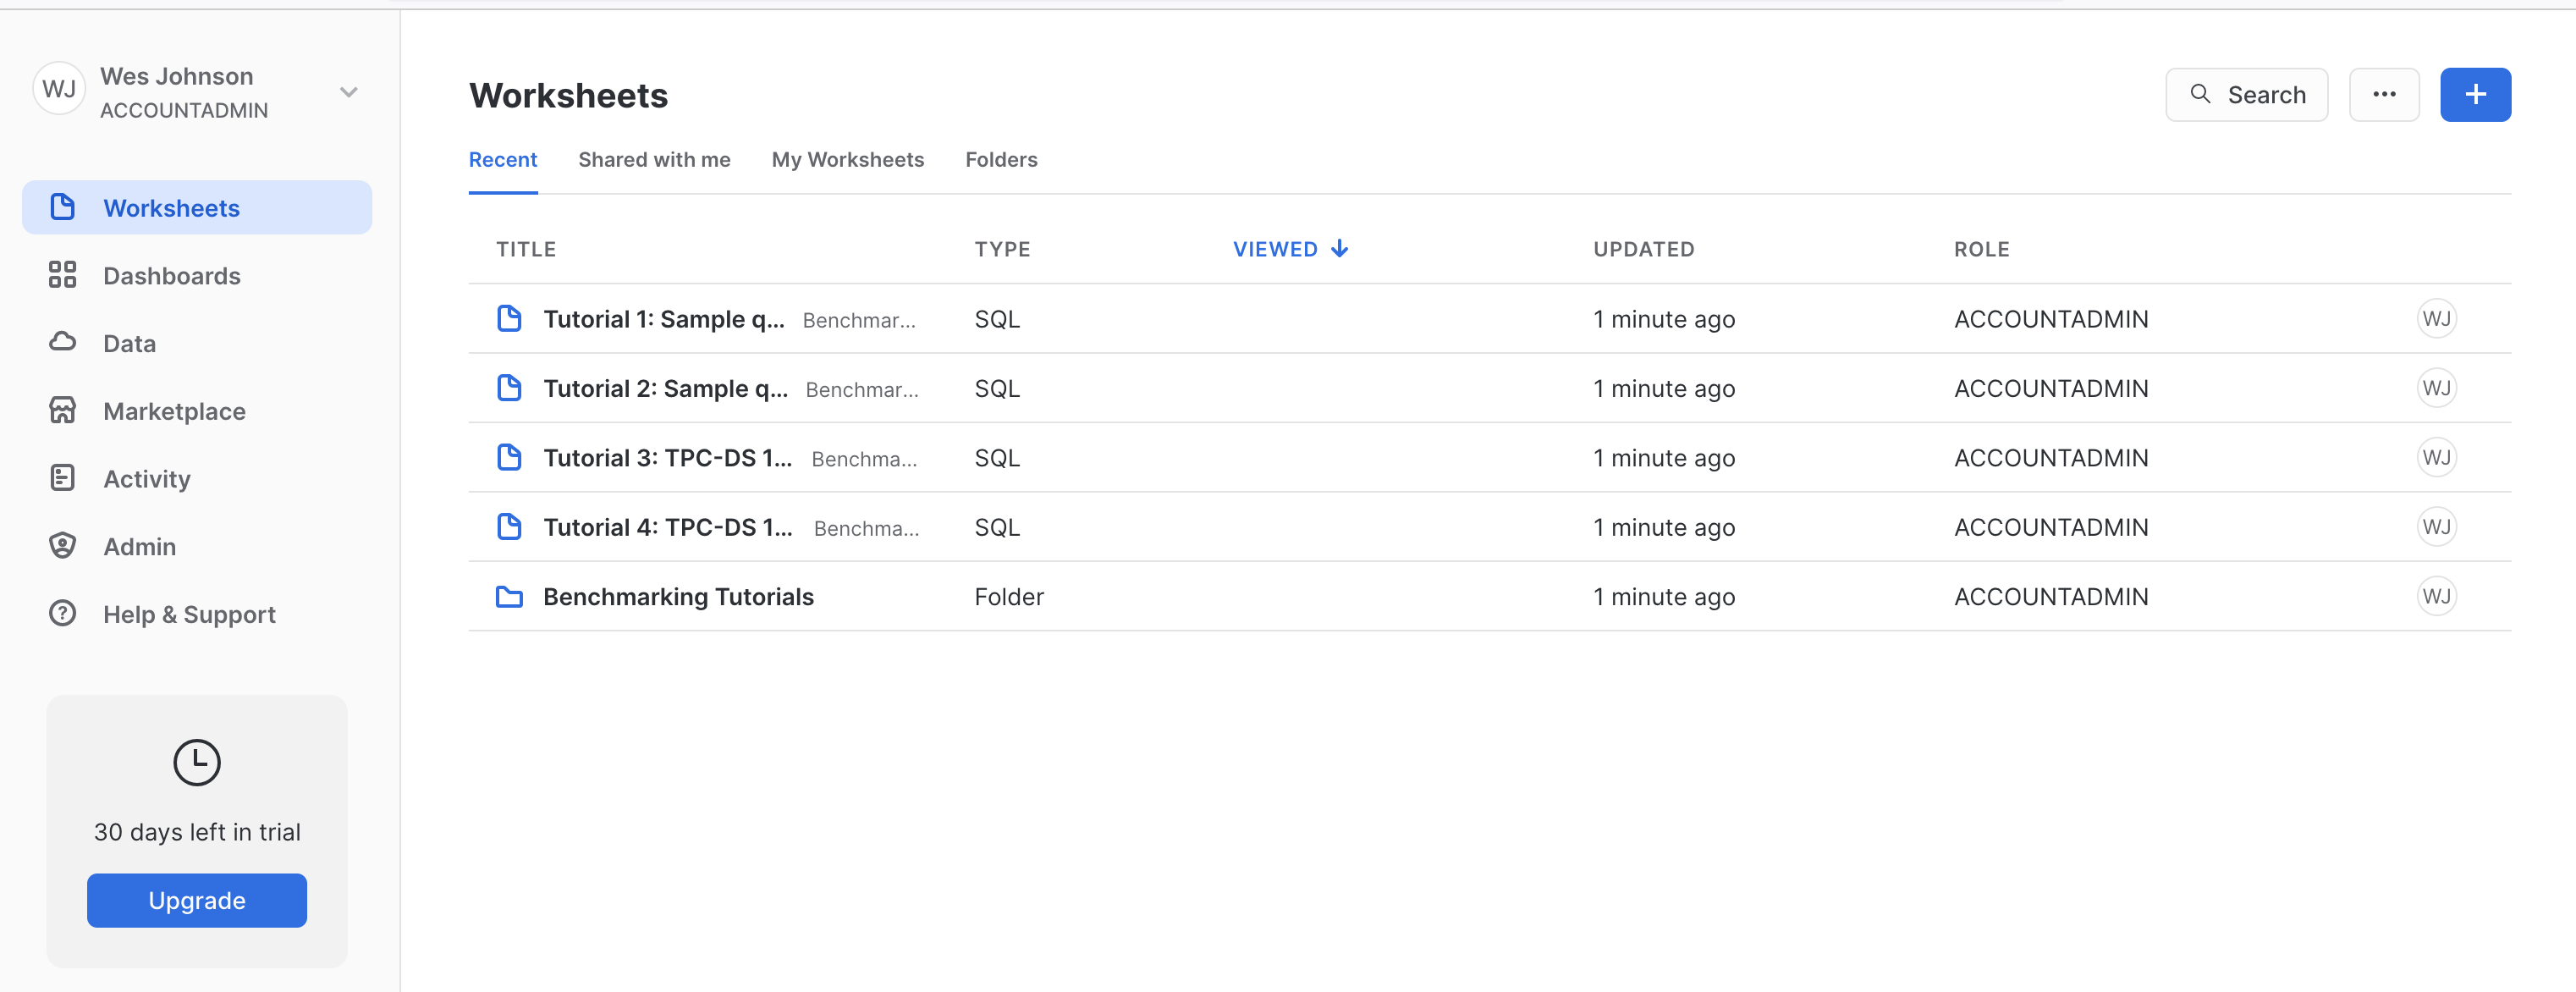
If you don't have a Snowflake account, open a Web Browser and go to https://www.snowflake.com. Follow the instructions there to start a free trial. After creating an account, log in to Snowflake via the Web Console. You should see something like what is shown below.
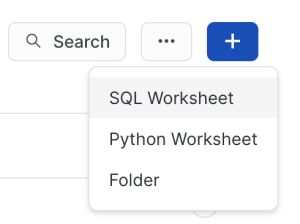
Create a new 'SQL Worksheet' by clicking the blue + button in the upper right hand corner of the window as shown below.
Copy and paste the following SQL script into the center pane. Click the 'Expand source' button on the right to copy the script source code
SQL Script 01
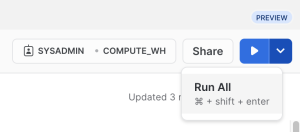
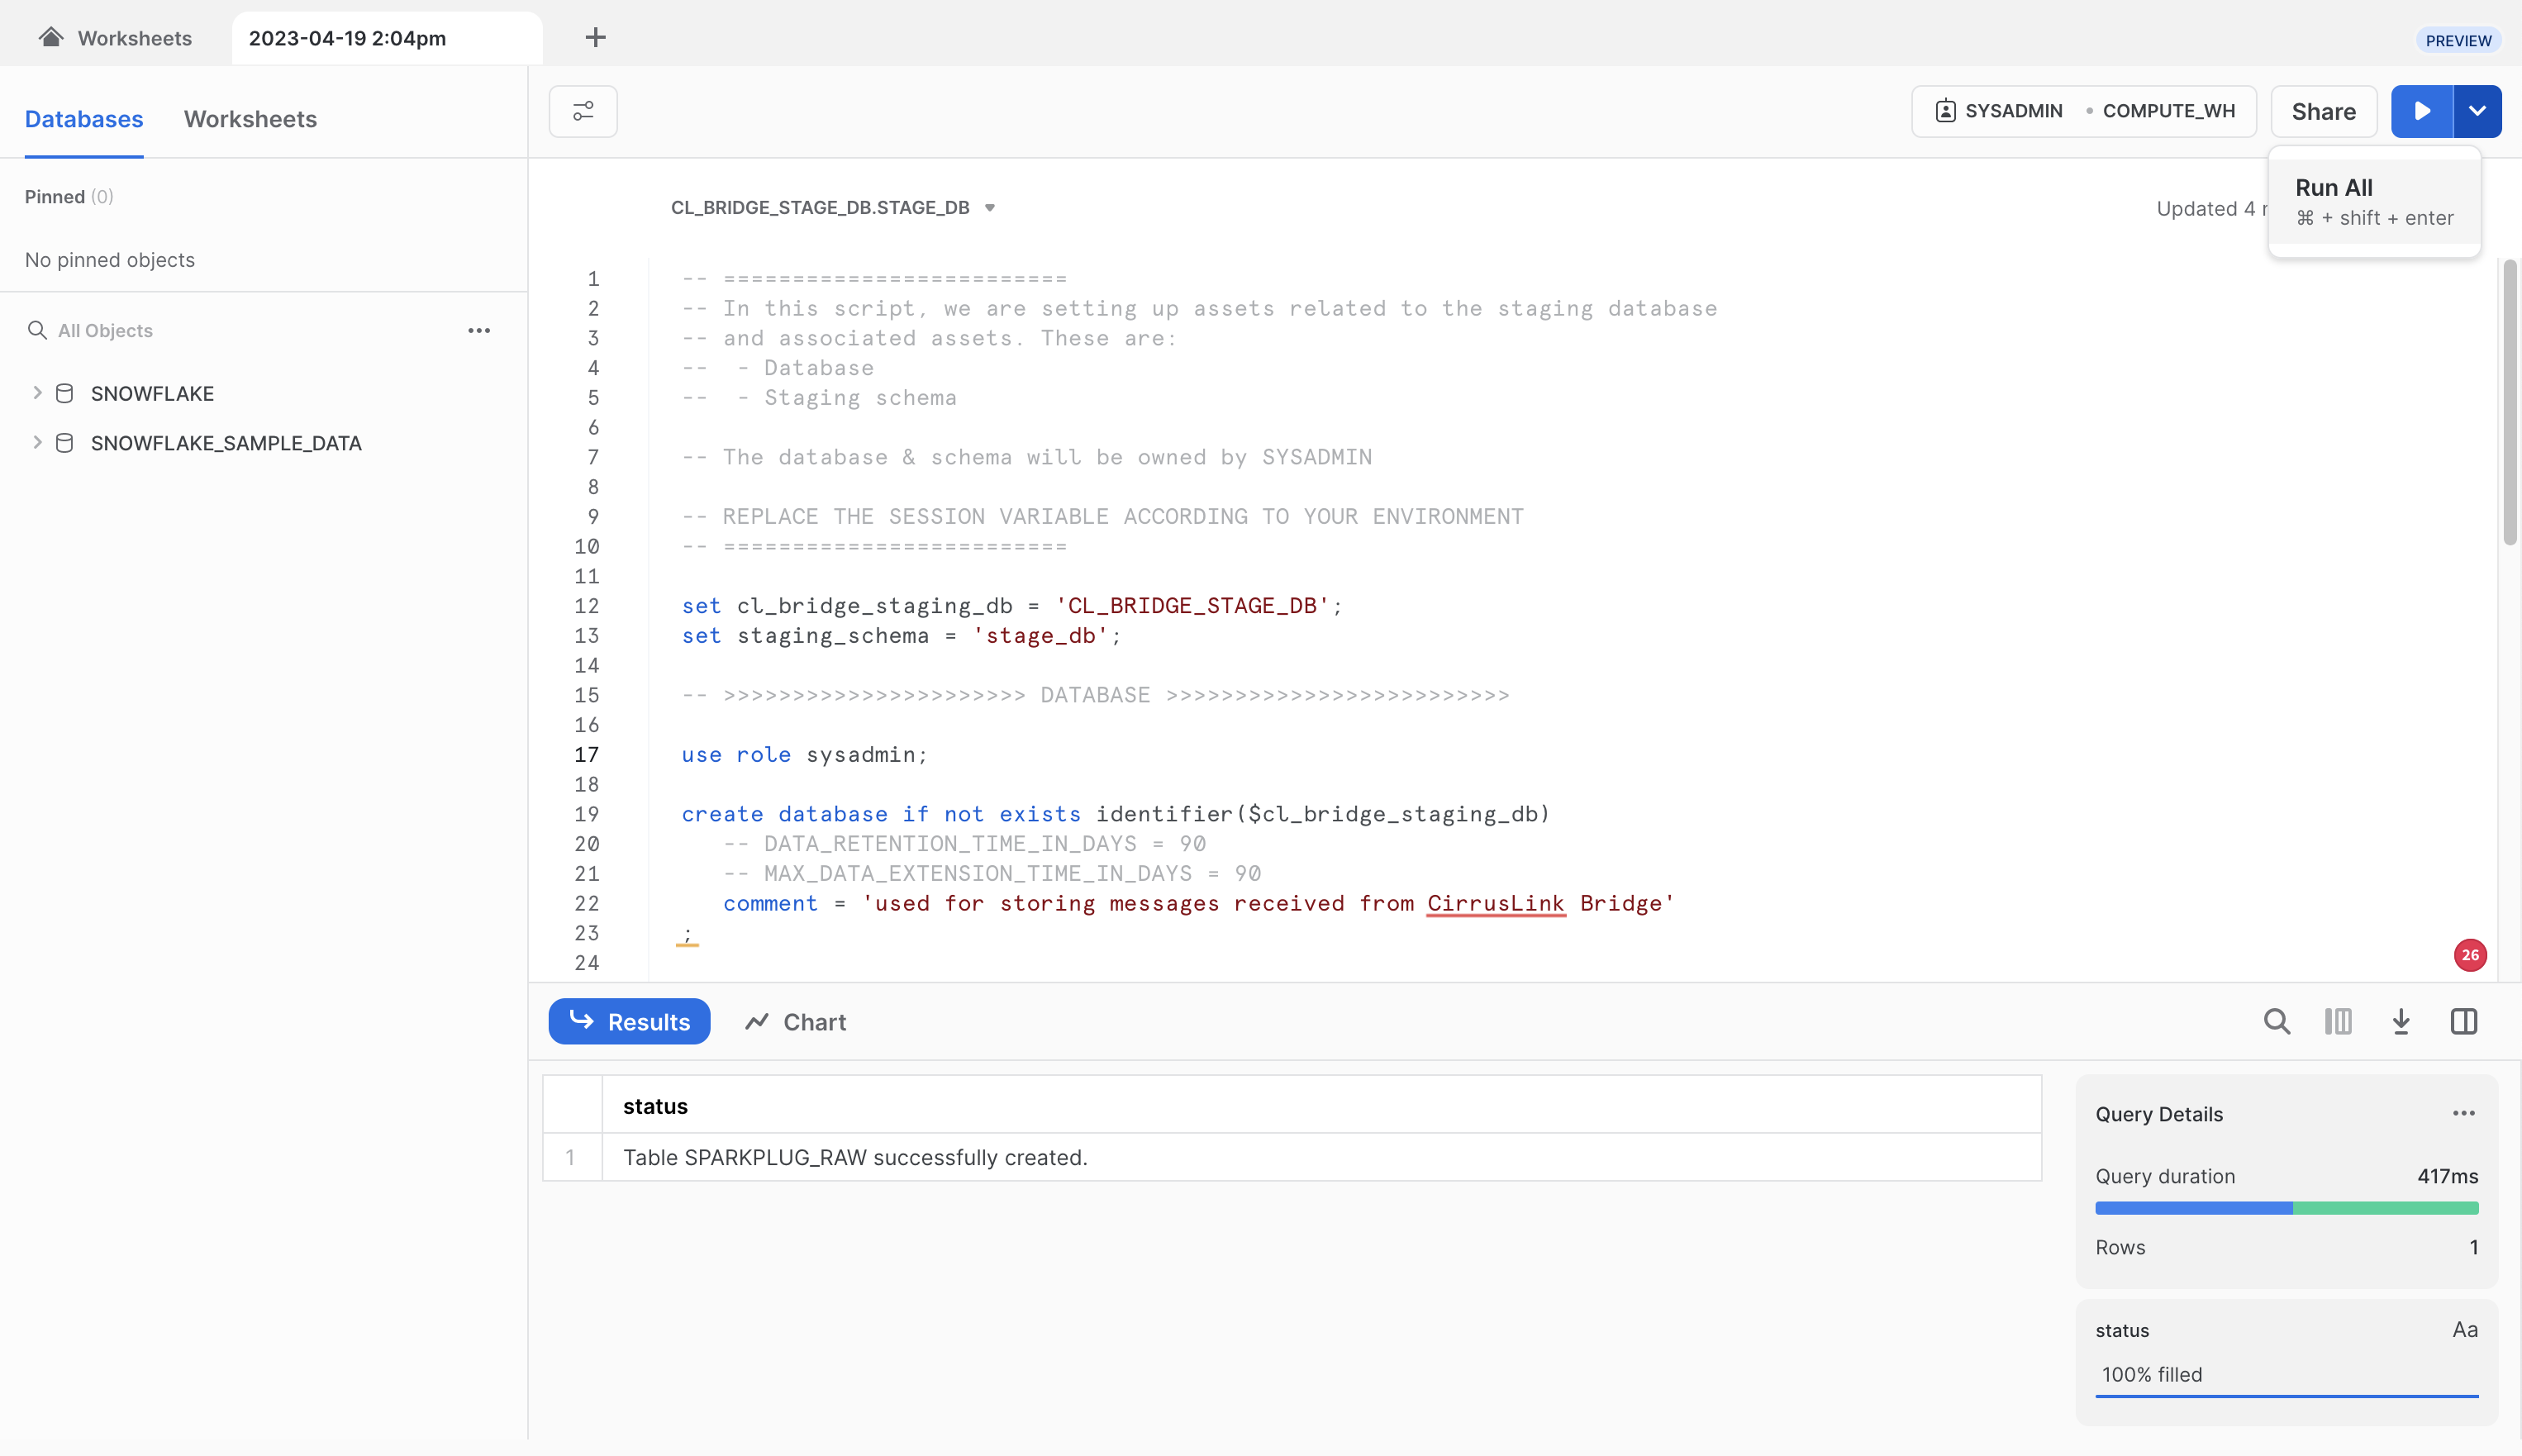
After pasting the code into the center pane of the SQL Worksheet, click the drop down arrow next to the blue play button in the upper right corner of the window and click 'Run All' as shown below.
After doing so, you should see a message in the 'Results' pane denoting the SPARKPLUG_RAW table was created successfully as shown below.
Now, repeat the process for each of the following scripts in order. Each time, fully replace the contents of the SQL script with the new script and click the 'Run All' button after pasting each script. Make sure no errors are displayed in the Results window after running each script.
Script 02
-- =========================
-- In this script, we are setting up assets related to the node database
-- ,which would eventually contain all the device specific views and tables.
-- At the very core, the following assets are created:
--  - Node Database
--  - Staging schema

-- The database & schema will be owned by SYSADMIN

-- REPLACE THE SESSION VARIABLE ACCORDING TO YOUR ENVIRONMENT
-- =========================

set staged_sparkplug_raw_table = 'cl_bridge_stage_db.stage_db.sparkplug_raw';
set cl_bridge_node_db = 'cl_bridge_node_db';
set staging_schema = 'stage_db';

-- >>>>>>>>>>>>>>>>>>>>>> DATABASE >>>>>>>>>>>>>>>>>>>>>>>>>

use role sysadmin;

create database if not exists identifier($cl_bridge_node_db)
   -- DATA_RETENTION_TIME_IN_DAYS = 90
   -- MAX_DATA_EXTENSION_TIME_IN_DAYS = 90
   comment = 'used for storing flattened messages processed from the staging database'
;

-- >>>>>>>>>>>>>>>>>>>>>> STAGING SCHEMA >>>>>>>>>>>>>>>>>>>>>>>>>

use database identifier($cl_bridge_node_db);

create schema if not exists identifier($staging_schema)
  with managed access
  -- data_retention_time_in_days = 90
  -- max_data_extension_time_in_days = 90
  comment = 'used for storing flattened messages processed from the staging database';

-- >>>>>>>>>>>>>>>>>>>>>> STAGING SCHEMA ASSETS >>>>>>>>>>>>>>>>>>>>>>>>>

use schema identifier($staging_schema);

-- =========================
-- Define tables
-- =========================

-- NOTE THE 'cl_bridge_stage_db.stage_db.sparkplug_raw' is hardcoded here; as the identifier
-- staged_sparkplug_raw_table replacement does not work.

create or replace view sparkplug_messages_vw
    change_tracking = true
    comment = 'parses out the core attributes from the message and topic.'
    as
    select
        msg_id
        ,namespace
        ,group_id
        ,message_type
        ,edge_node_id
        ,device_id
        ,parse_json(msg) as message
        ,message:seq::int as message_sequence
        ,message:timestamp::number as message_timestamp
        ,inserted_at
    from cl_bridge_stage_db.stage_db.sparkplug_raw
    ;

-- --  >>>>>>>>>>>>>>>>>>>>>>

create or replace view nbirth_vw
    change_tracking = true
    comment = 'filtered to nbirth messages. This is a mirror'
    as
    select
       group_id ,edge_node_id
    from sparkplug_messages_vw
    where message_type = 'NBIRTH'

    ;

create or replace view node_machine_registry_vw
    comment = 'Used to retreive the latest template definitions for a given group and edge_node'
    as
    with base as (
        select
            group_id ,edge_node_id
            ,max_by(message ,message_timestamp) as message
            ,max(message_timestamp) as latest_message_timestamp
        from sparkplug_messages_vw
        where message_type = 'NBIRTH'
        group by group_id ,edge_node_id
    )
    select
        group_id ,edge_node_id
        ,f.value as template_definition
        ,template_definition:name::varchar as machine
        ,template_definition:reference::varchar as reference
        ,template_definition:version::varchar as version
        ,template_definition:timestamp::int as timestamp
    from base as b
        ,lateral flatten (input => b.message:metrics) f
    where template_definition:dataType::varchar = 'Template'
    ;

-- --  >>>>>>>>>>>>>>>>>>>>>>

create or replace view node_birth_death_vw
    comment = 'shows the latest node birth & death messages for each device'
    as
    select
        b.* exclude(namespace)
        ,message_type as nbirth_or_ndeath_raw
        ,iff((message_type = 'NBIRTH') ,f.value:value ,null)::number as nbirth_bdSeq_raw
        ,iff((message_type = 'NDEATH') ,f.value:value ,null)::number as ndeath_bdSeq_raw
        ,inserted_at as nbirth_ndeath_inserted_at_raw
    from sparkplug_messages_vw as b
        ,lateral flatten (input => b.message:metrics) as f
    where message_type in ('NBIRTH' ,'NDEATH')
     and f.value:name::varchar = 'bdSeq'
     ;

create or replace view device_records_vw
    change_tracking = true
    as
    select
        b.* exclude(namespace)
    	,null as nbirth_or_ndeath_raw
    	,null as nbirth_bdSeq_raw
        ,null as ndeath_bdSeq_raw
        ,null as nbirth_ndeath_inserted_at_raw
    from sparkplug_messages_vw as b
    where message_type in ('DBIRTH' ,'DDATA')
    ;

create or replace stream device_records_stream
    on view device_records_vw

    show_initial_rows = true
    comment = 'used for monitoring latest device messages'
    ;

create or replace view sparkplug_msgs_nodebirth_contextualized_vw
    as
    with device_node_unioned as (
        select *
        from node_birth_death_vw
        union all
        select * exclude(METADATA$ROW_ID ,METADATA$ACTION ,METADATA$ISUPDATE)
        from device_records_stream
    )
    select
        -- group_id ,message_type ,edge_node_id ,device_id
        -- ,message ,message_sequence ,inserted_at
        * exclude(nbirth_or_ndeath_raw ,nbirth_bdSeq_raw ,ndeath_bdSeq_raw ,nbirth_ndeath_inserted_at_raw)
        ,nvl(nbirth_or_ndeath_raw
                ,lag(nbirth_or_ndeath_raw) ignore nulls over (order by inserted_at ,message_sequence)
            ) as nbirth_or_ndeath

        ,nvl(nbirth_bdSeq_raw
                ,lag(nbirth_bdSeq_raw) ignore nulls over (order by inserted_at ,message_sequence)
            ) as nbirth_bdSeq

        ,nvl(ndeath_bdSeq_raw
                ,lag(ndeath_bdSeq_raw) ignore nulls over (order by inserted_at ,message_sequence)
            ) as ndeath_bdSeq

        ,nvl(nbirth_ndeath_inserted_at_raw
                ,lag(nbirth_ndeath_inserted_at_raw) ignore nulls over (order by inserted_at ,message_sequence)
            ) as nbirth_ndeath_inserted_at

        ,case true
            when (nbirth_or_ndeath = 'NBIRTH') then false
            when ( (nbirth_or_ndeath = 'NDEATH') and (nbirth_bdSeq != ndeath_bdSeq) ) then false
            when ( (nbirth_or_ndeath = 'NDEATH') and (nbirth_bdSeq = ndeath_bdSeq) ) then true
            else true
        end as is_last_known_good_reading

        ,case lower(message_type)
                when lower('NBIRTH') then 1
                when lower('DBIRTH') then 2
                when lower('DDATA') then 3
                when lower('DDEATH') then 4
                when lower('NDEATH') then 5
                else 99
            end as message_type_order

        ,(nbirth_or_ndeath = 'NBIRTH') as is_node_alive

    from device_node_unioned
    ;

create or replace view sparkplug_messages_flattened_vw
    as
    with base as (
        select
            -- sparkplugb message level
            msg_id ,group_id, edge_node_id ,device_id ,message_type
            ,message_sequence ,inserted_at
            ,nbirth_or_ndeath ,nbirth_bdseq ,ndeath_bdseq
            ,nbirth_ndeath_inserted_at ,is_last_known_good_reading
            ,message_type_order ,is_node_alive
            ,message_timestamp as root_message_timestamp

            -- attributes related to device data (ddata / dbirth)
            ,f.value:name::varchar as device_name
            ,f.value:value:reference::varchar as template_reference
            ,f.value:value:version::varchar as template_version
            ,f.value:timestamp::number as device_metric_timestamp
            ,f.value as ddata_msg

            -- attributes related to device level metrics
            ,concat(msg_id ,'^' ,f.index ,'::',d.index) as device_measure_uuid
            ,d.value:name::varchar as measure_name
            ,d.value:value as measure_value
            ,d.value:timestamp::number as measure_timestamp

        from sparkplug_msgs_nodebirth_contextualized_vw as b
            ,lateral flatten(input => b.message:metrics) as f
            ,lateral flatten(input => f.value:value:metrics) as d
        where message_type in ('DBIRTH' ,'DDATA')
            and template_reference is not null
    )
    select
        group_id, edge_node_id ,device_id ,message_type
        ,message_sequence ,inserted_at
        ,nbirth_or_ndeath ,nbirth_bdseq ,ndeath_bdseq
        ,nbirth_ndeath_inserted_at ,is_last_known_good_reading
        ,message_type_order ,is_node_alive ,root_message_timestamp

        ,device_name ,template_reference ,template_version ,device_metric_timestamp ,ddata_msg
        ,null as is_historical

        ,device_measure_uuid
        ,object_agg(distinct measure_name ,measure_value) as measures_info
        ,measure_timestamp

        ,to_timestamp(measure_timestamp/1000) as measure_ts
        ,to_date(measure_ts) as measure_date
        ,hour(measure_ts) as measure_hour
    from base
    group by group_id, edge_node_id ,device_id ,message_type
            ,message_sequence ,inserted_at
            ,nbirth_or_ndeath ,nbirth_bdseq ,ndeath_bdseq
            ,nbirth_ndeath_inserted_at ,is_last_known_good_reading
            ,message_type_order ,is_node_alive ,root_message_timestamp

            ,device_name ,template_reference ,template_version ,device_metric_timestamp ,ddata_msg
            ,is_historical ,device_measure_uuid
            ,measure_timestamp

    ;

create or replace transient table sparkplug_device_messages (
        group_id varchar
        ,edge_node_id varchar
        ,device_id varchar
        ,message_type varchar
        ,message_sequence number

        ,inserted_at number
        ,nbirth_or_ndeath varchar
        ,nbirth_bdseq number
        ,ndeath_bdseq number
        ,nbirth_ndeath_inserted_at number
        ,is_last_known_good_reading boolean
        ,message_type_order number
        ,is_node_alive boolean

    	,root_message_timestamp number
        ,device_name varchar
        ,template_reference varchar
        ,template_version varchar
        ,device_metric_timestamp number
        ,ddata_msg variant
        ,is_historical boolean

        ,device_measure_uuid varchar
        ,measures_info variant
        ,measure_timestamp number

        ,measure_ts timestamp
        ,measure_date date
        ,measure_hour number
    )
    cluster by ( group_id ,edge_node_id ,device_id
        ,template_reference ,template_version ,device_name
        ,measure_date ,measure_hour)
    comment = 'materialized version of the sparkplug_messages_flattened_vw for easier downstream pipelines.'
    ;


-- --  >>>>>>>>>>>>>>>>>>>>>>
-- ================
--  NODE BIRTH related assets
-- ================

create or replace stream nbirth_stream
    on view nbirth_vw

    show_initial_rows = true
    comment = 'stream to monitor for nbirth messages, so that assets are created automatically'
    ;
Script 03
SQL Script 03
Script 04
SQL Script 04
Script 05
SQL Script 05
Script 10
SQL Script 10
Script 11
SQL Script 11
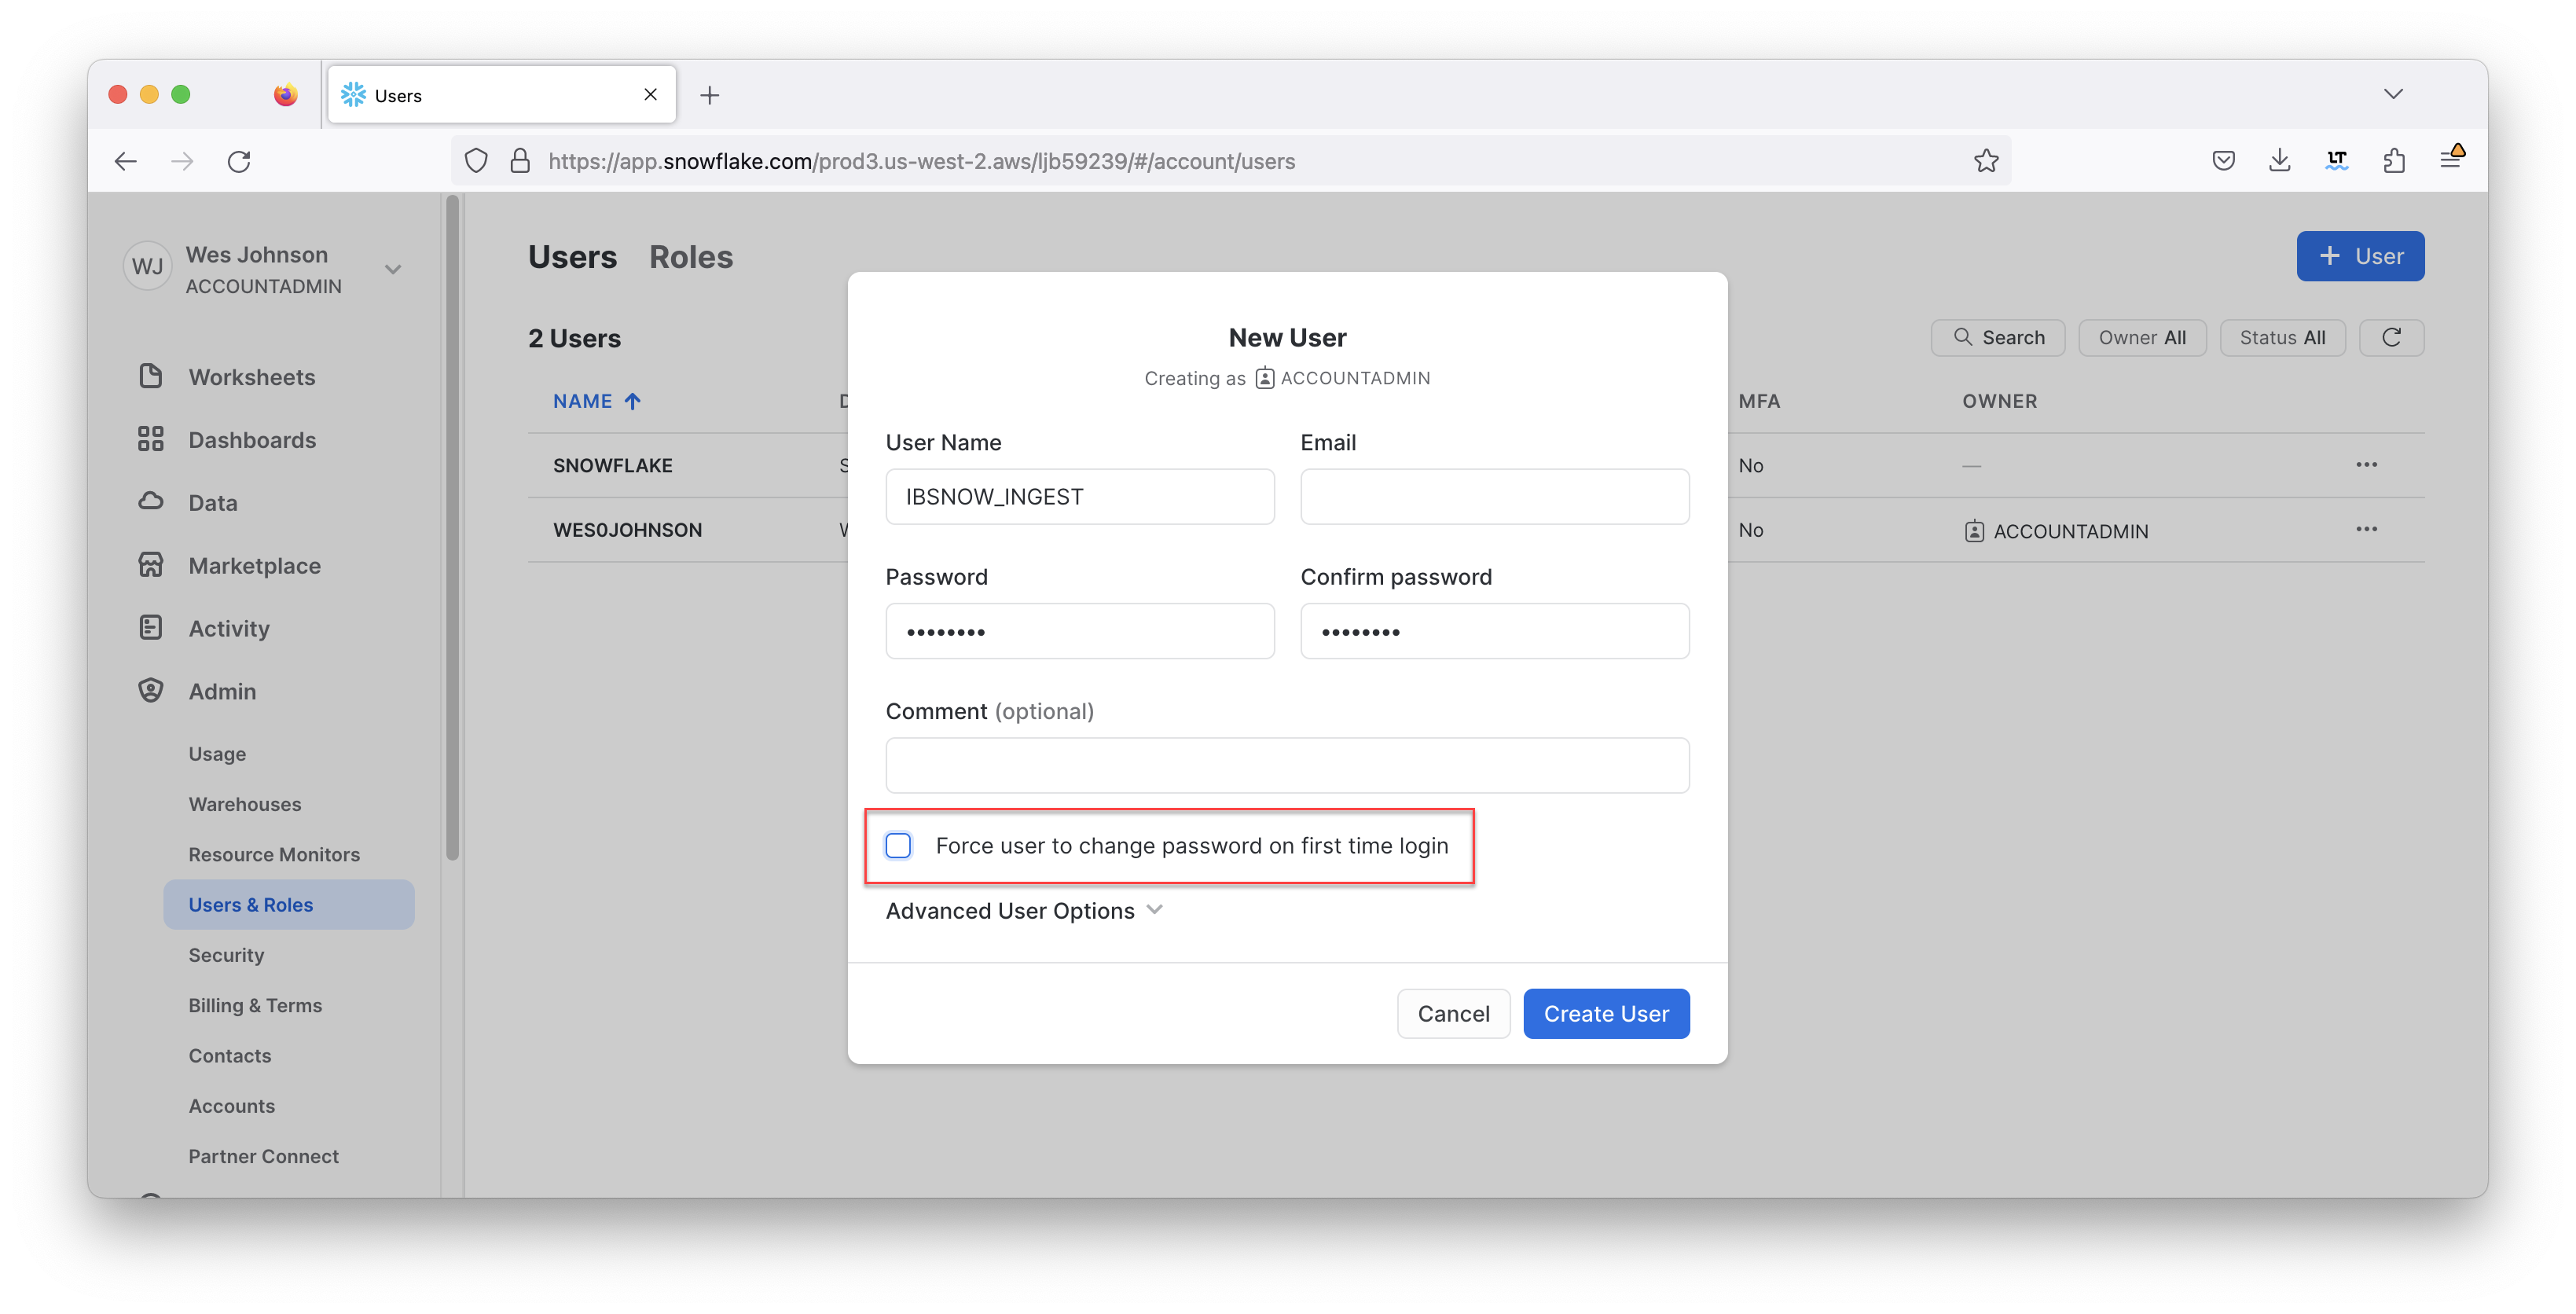
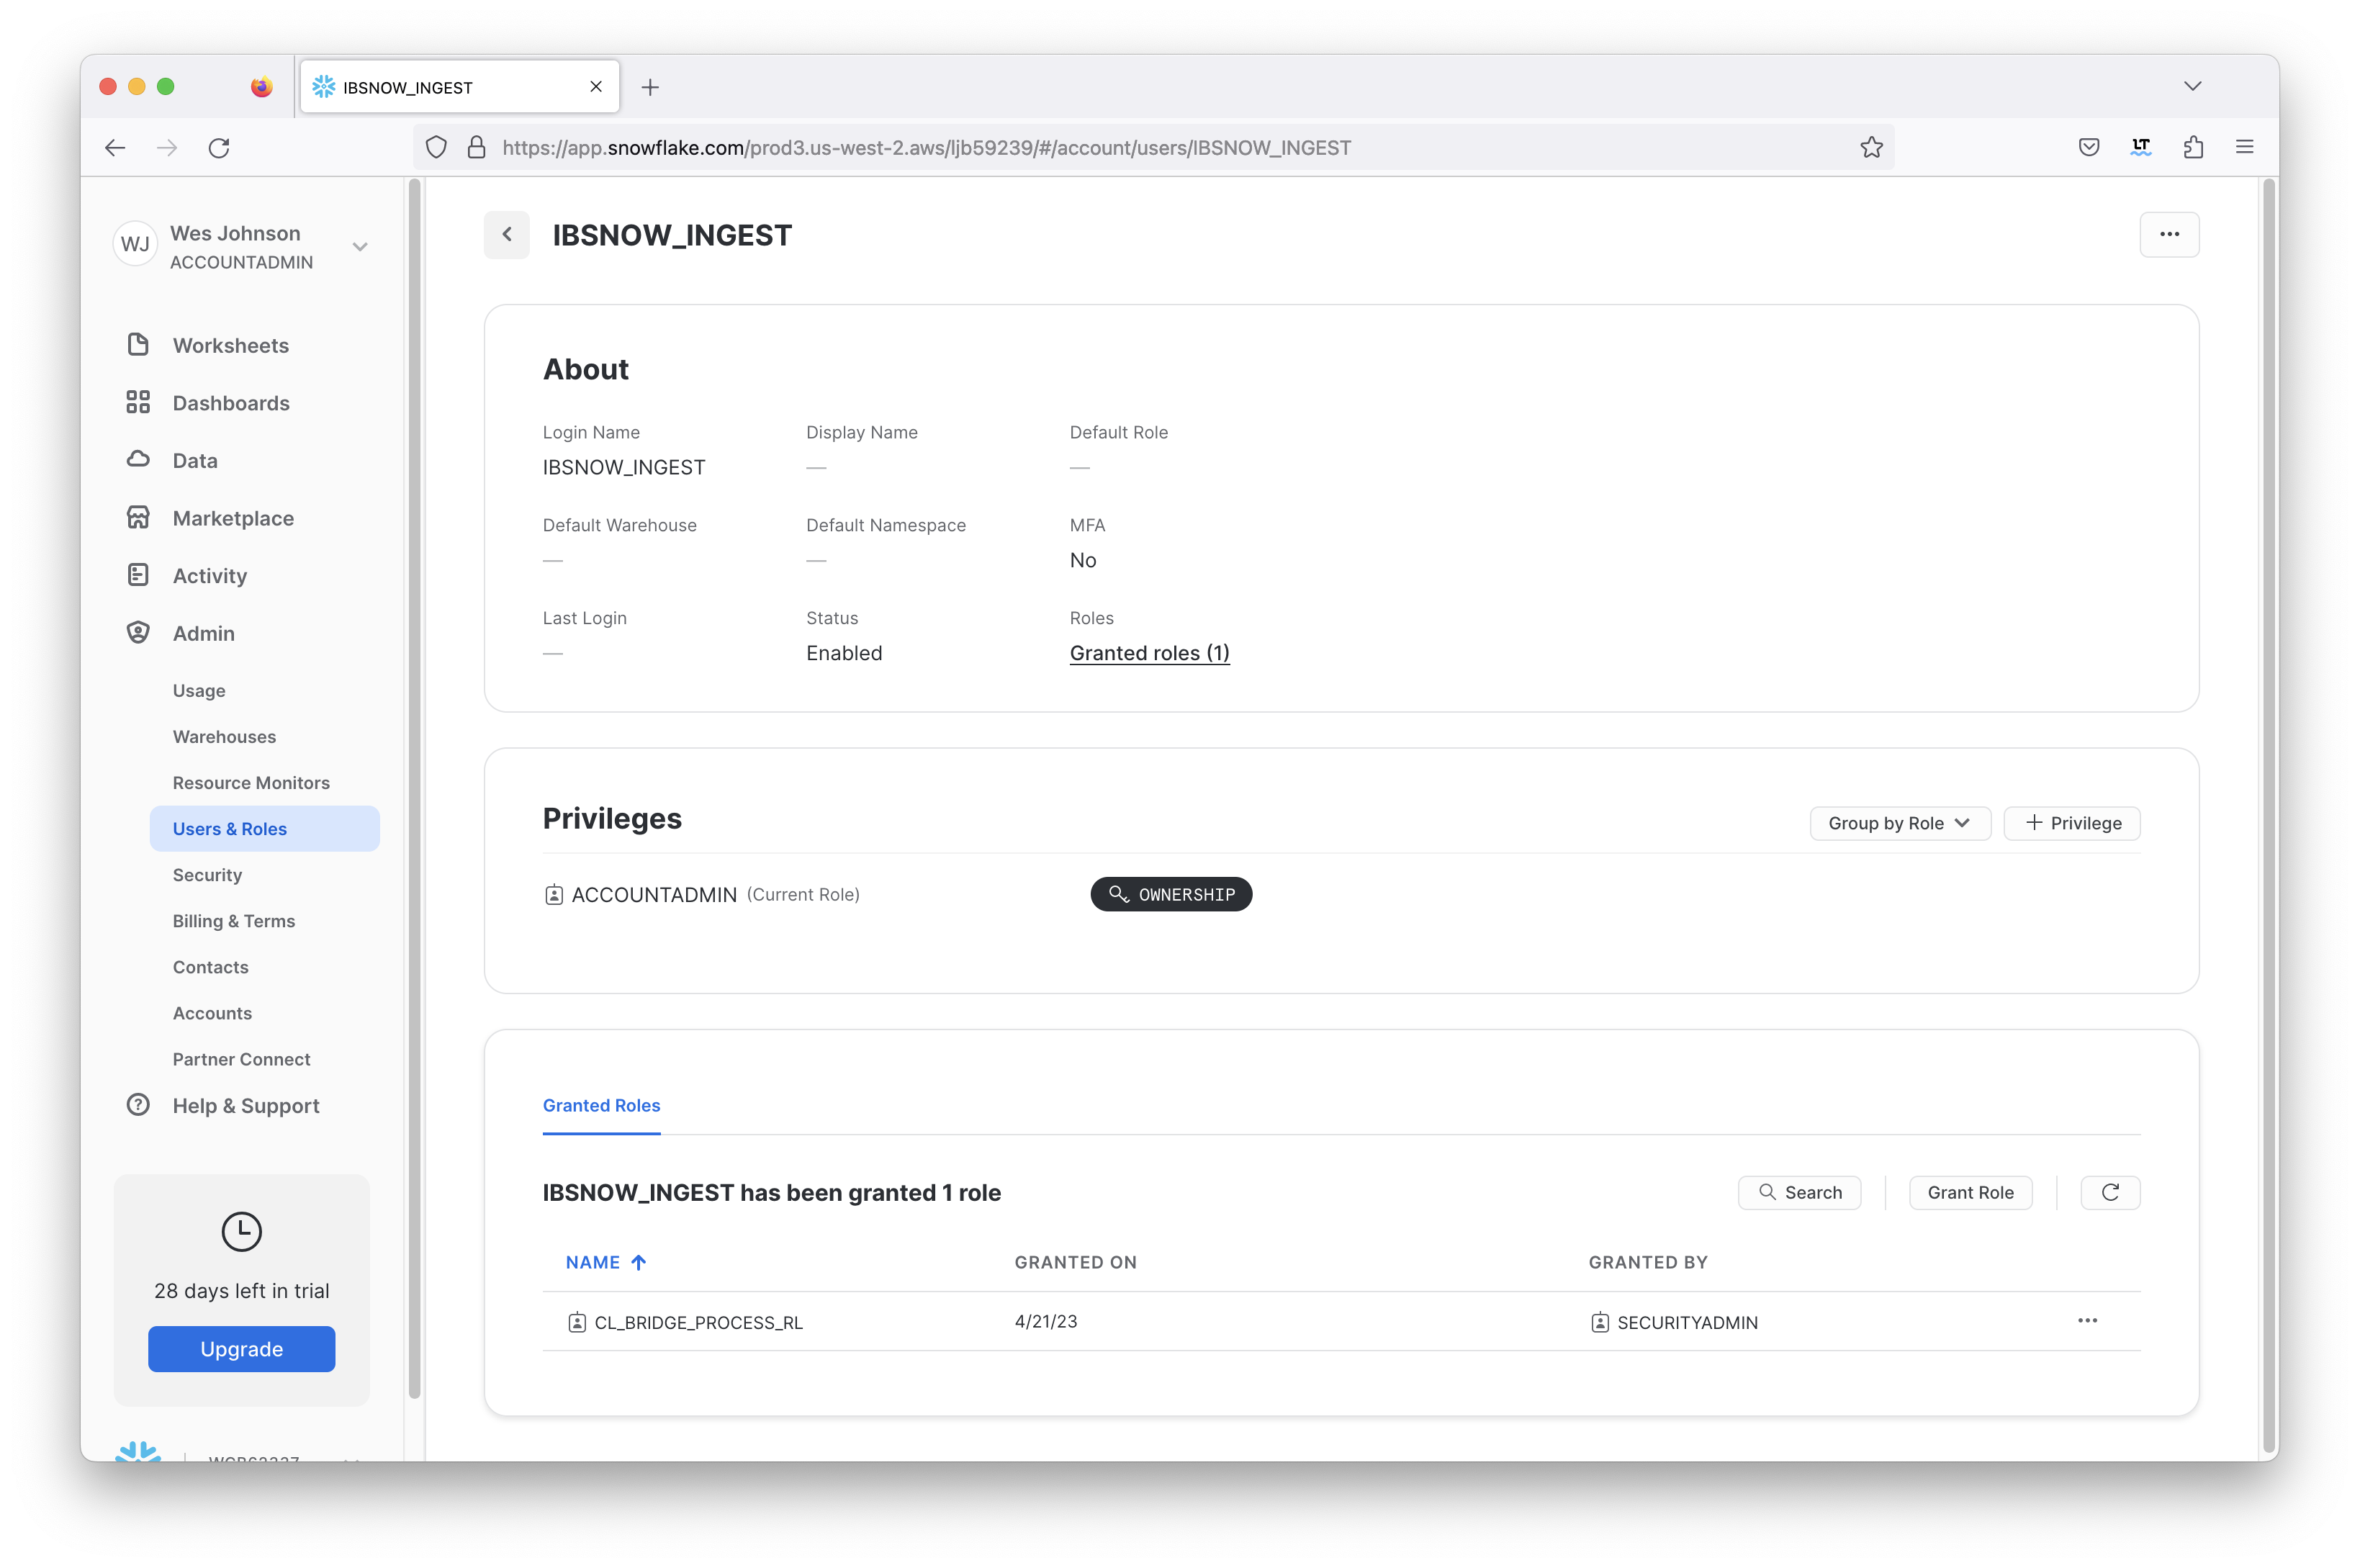
After all of the scripts have successfully executed, create a new user in Snowflake. This user will be used by IoT Bridge for Snowflake to push data into Snowflake. In the Snowflake Web UI, go to Admin → Users & Roles and then click '+ User' in the upper right hand corner. Give it a username of your choice and a secure password as shown below. For this example we're calling the user IBSNOW_INGEST so we know this user is for ingest purposes. See below for an example and then click 'Create User'.
In addition, the user must have a specific role to be able to stream data into Snowflake. Click the newly created user to see the following.
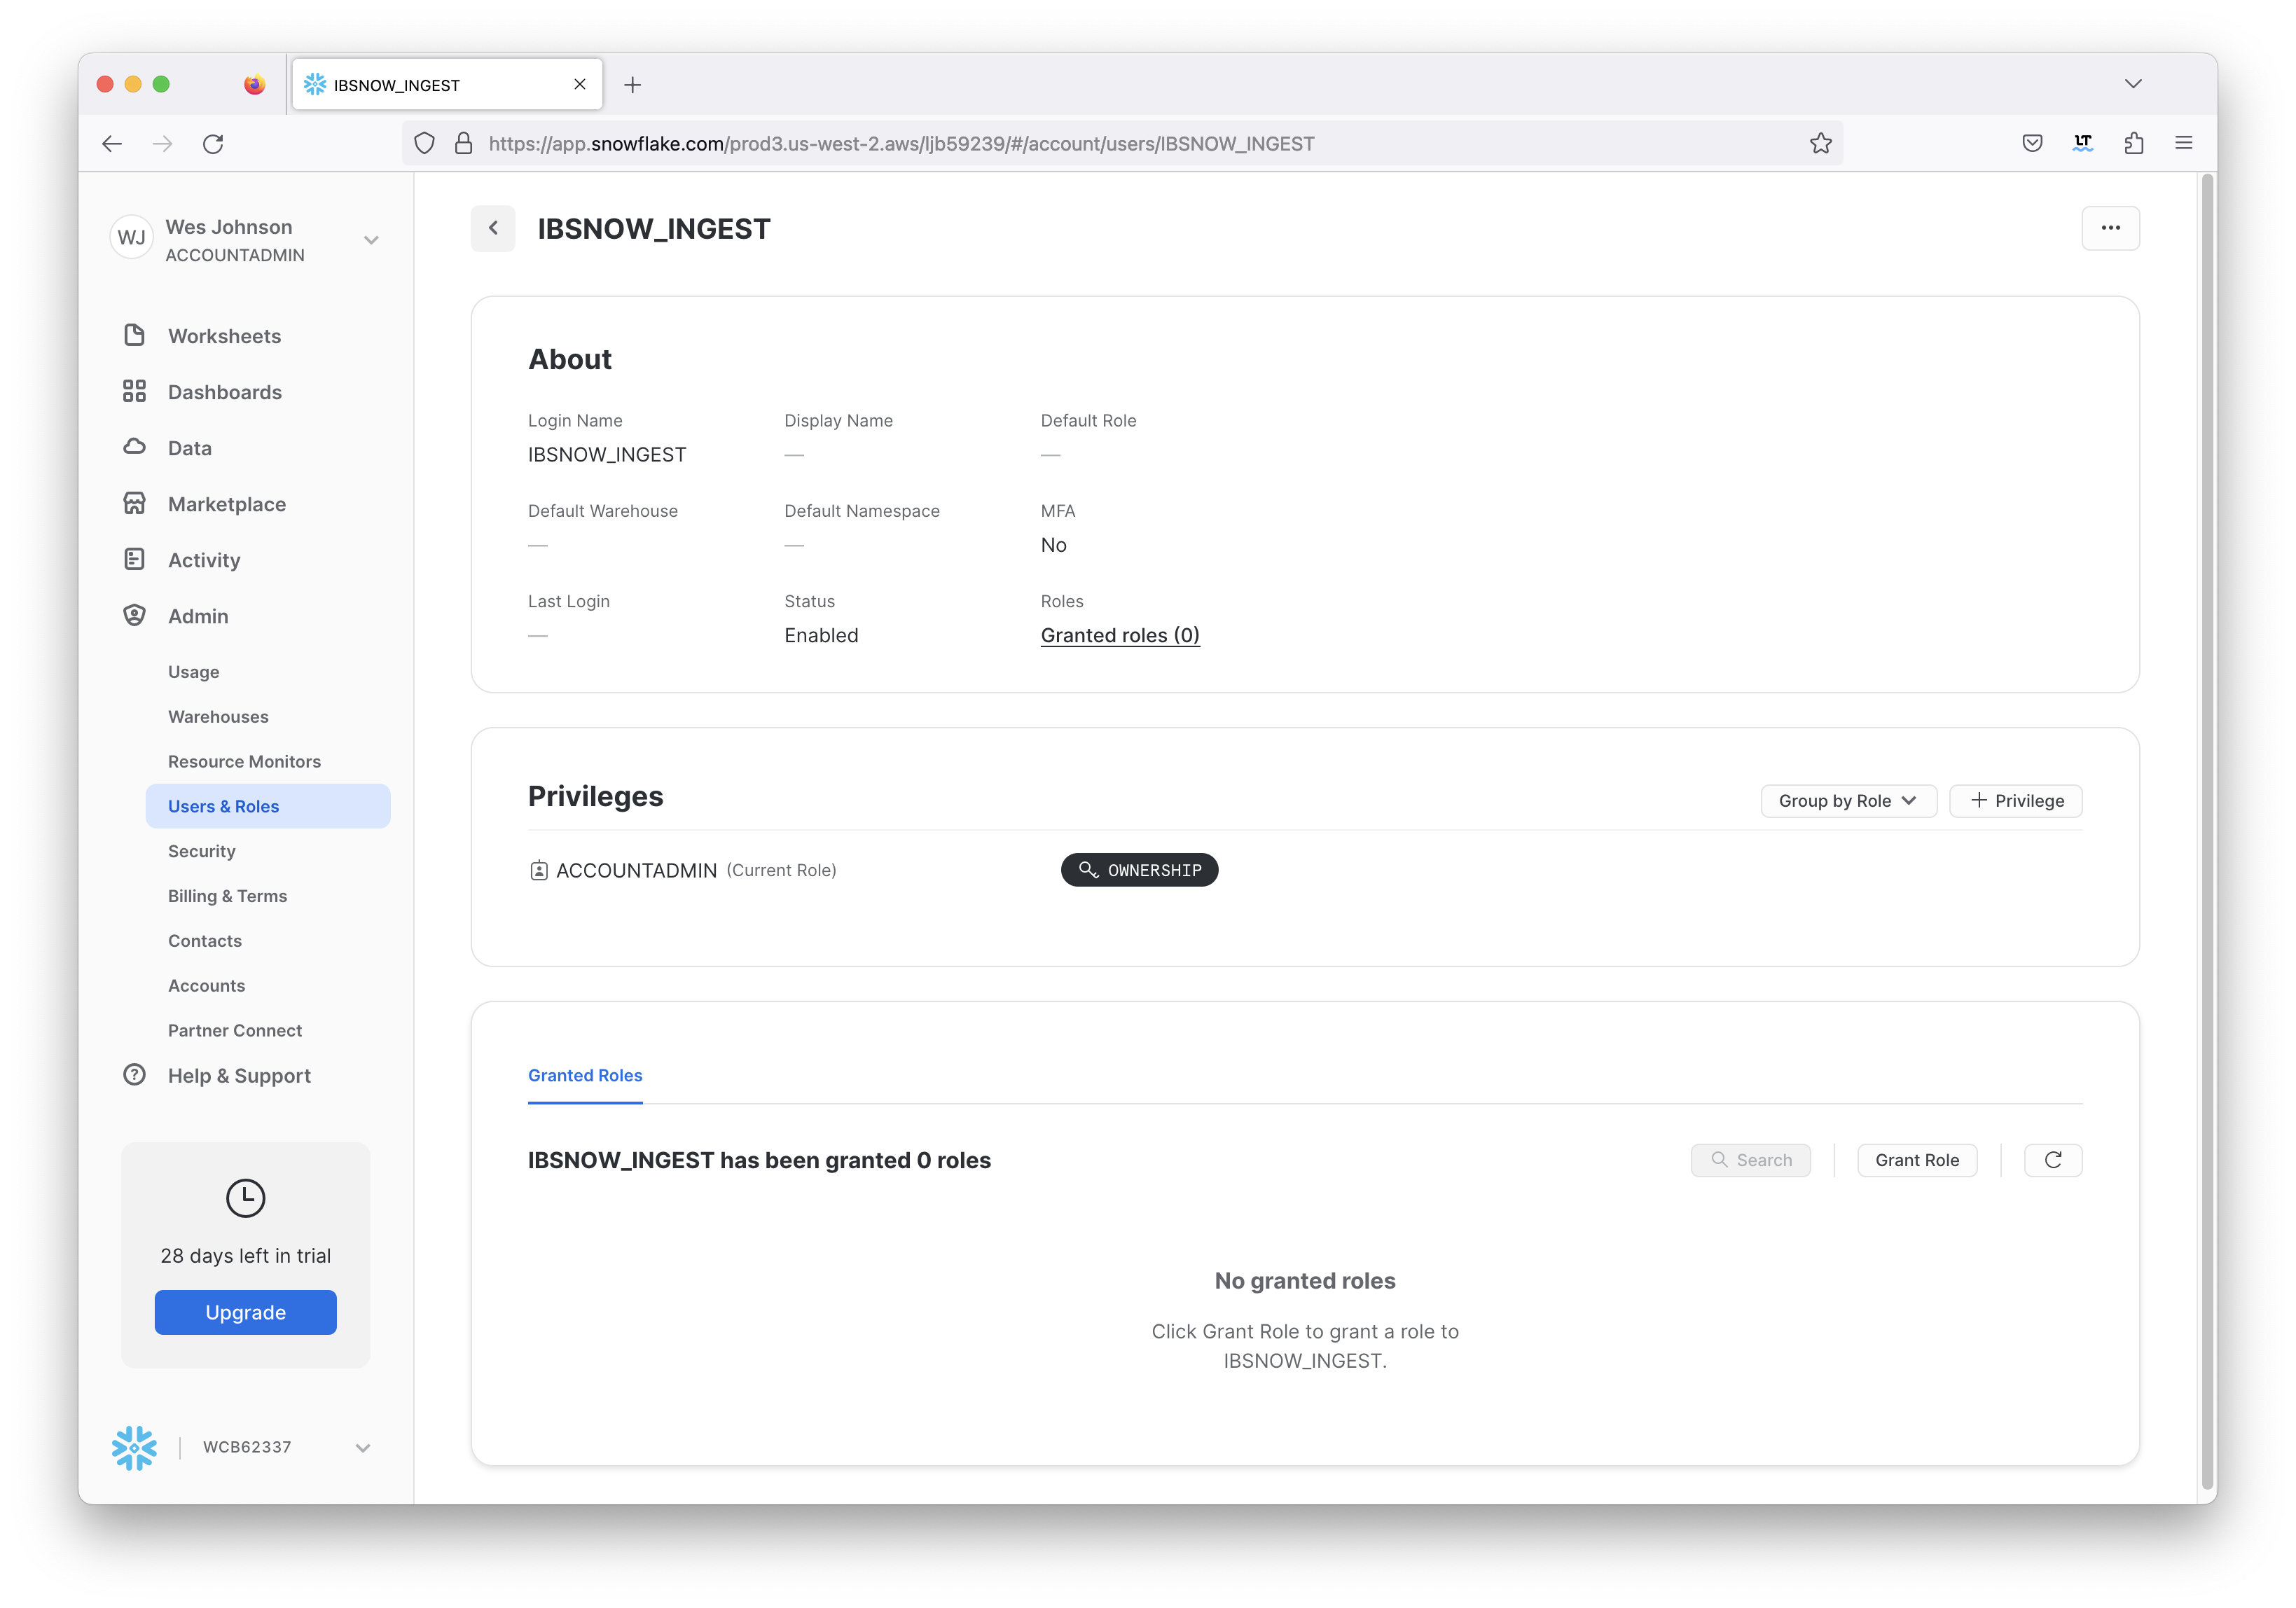
In the bottom of the center 'Granted Roles' pane you will see this user has no roles. Click 'Grant Role' to set up a new role. Then, select the 'CL_BRIDGE_PROCESS_RL' role and click 'Grant' as shown below.
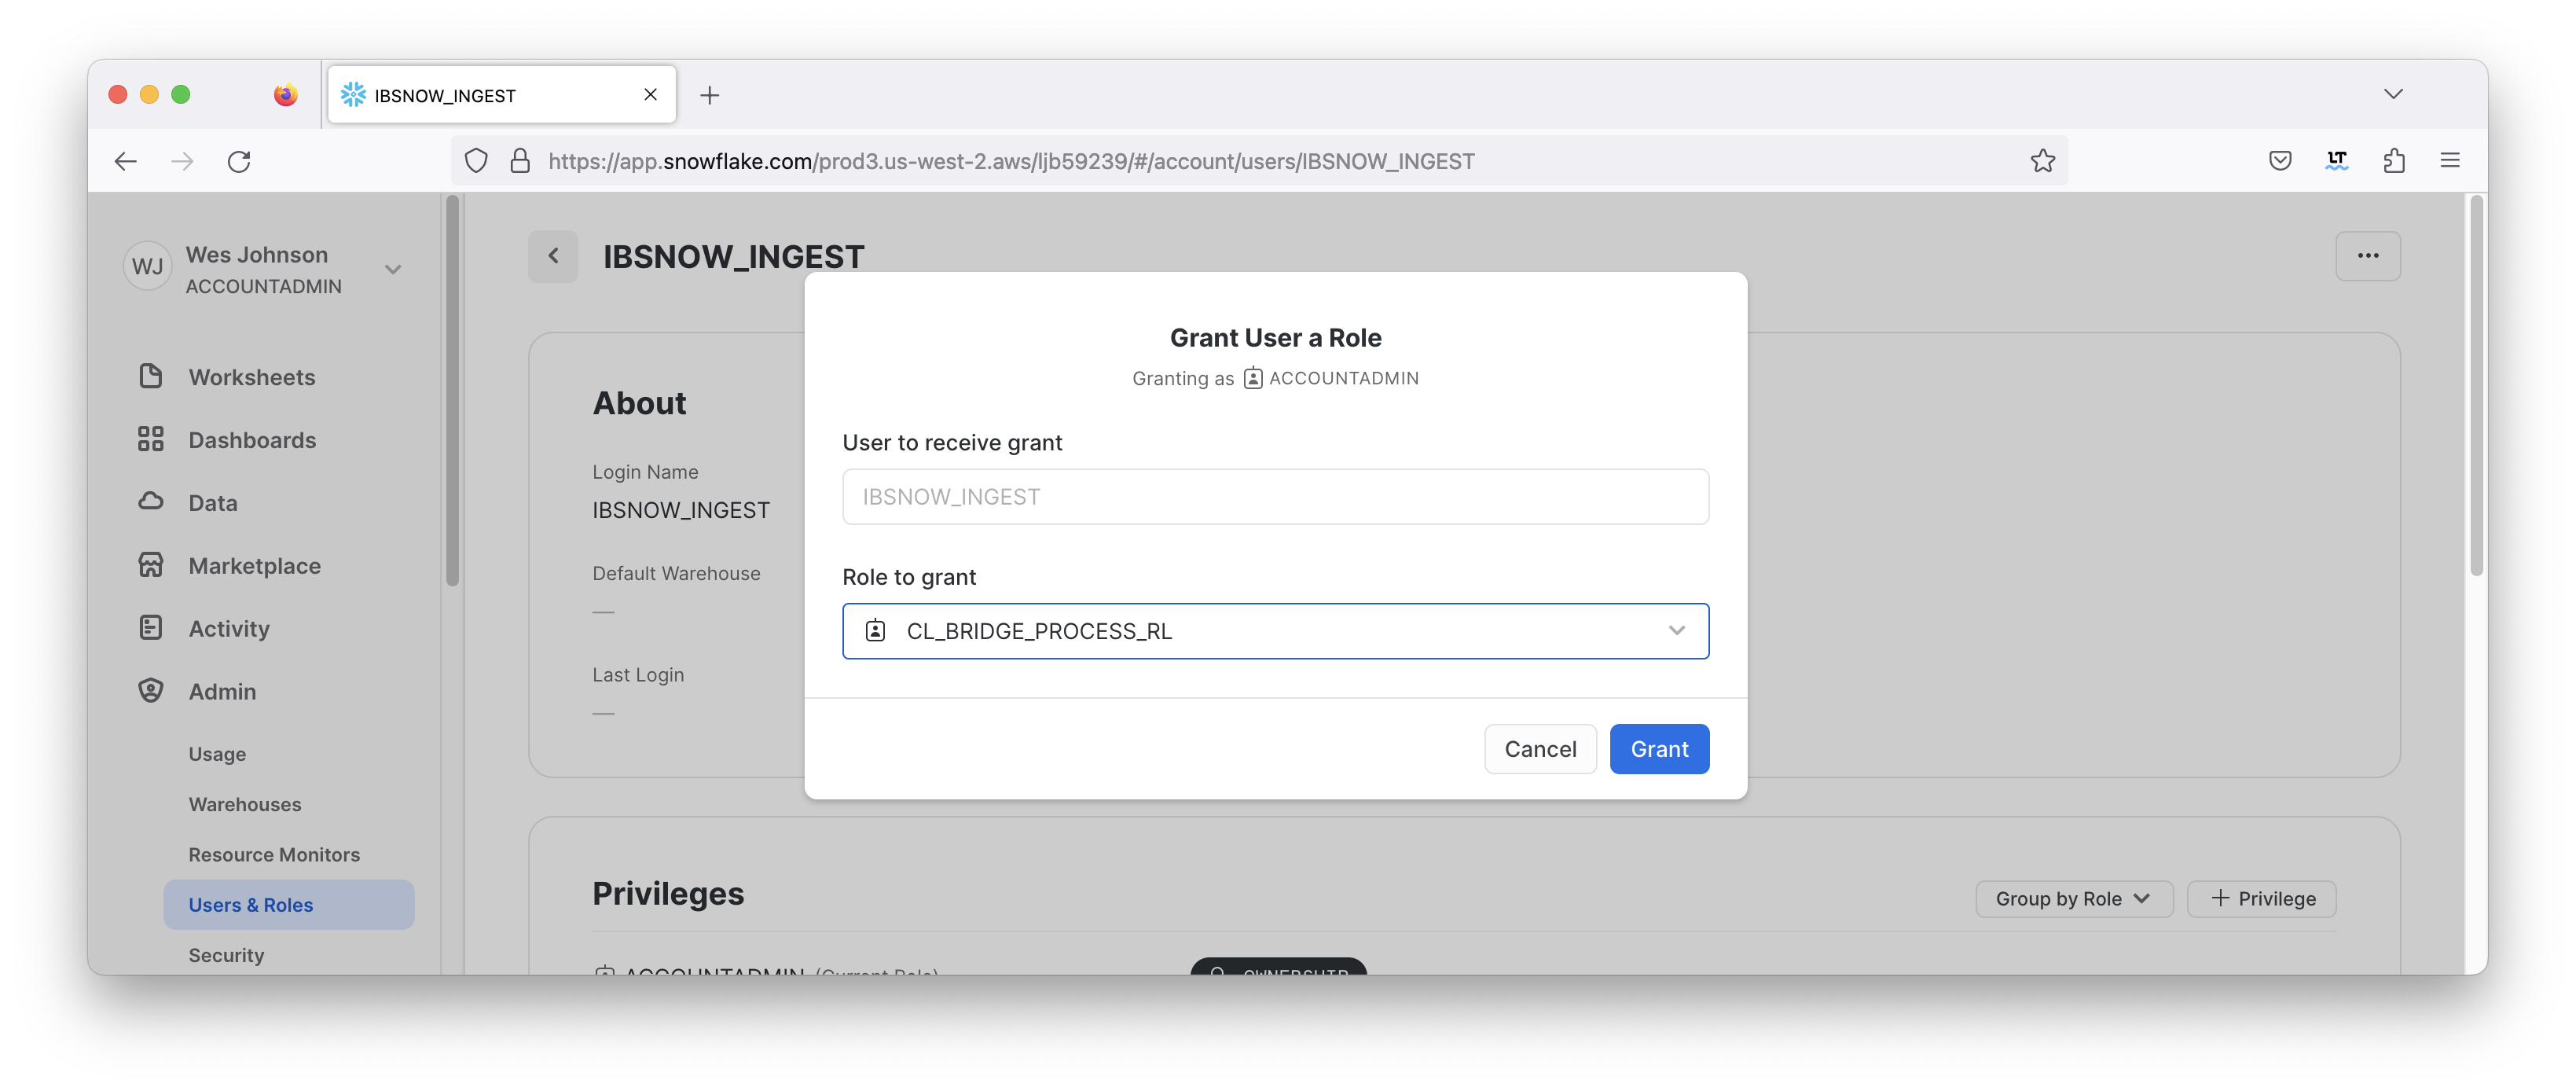
After this has been done successfully you will see the role now associated with the new user as shown below.
Now a key pair must be generated and uploaded to Snowflake. This will be used for authentication by the IoT Bridge for Snowflake application to push data to Snowflake via the Snowflake Streaming API. See this document for details on how to generate this and assign this to a user in your snowflake account: https://docs.snowflake.com/en/user-guide/key-pair-auth. Step 6 (Configuring the Snowflake Client to User Key Pair Authentication) in the linked tutorial can be skipped. This tutorial will cover configuring IoT Bridge for Snowflake with the generated key. Attach the public key to the user that we just created for Snowflake ingest purposes.
The generated key MUST NOT be encrypted
Modify the file /opt/ibsnow/conf/ibsnow.properties file. Set the following:
When complete, it should look similar to what is shown below.
ibsnow.properties
|
Now, modify the file /opt/ibsnow/conf/snowflake_streaming_profile.json file. Set the following:
When complete, it should look similar to what is shown below.
snowflake_streaming_profile.json
|
Now the service can be restarted to pick up the new configuration. Do so by running the following command.
|
At this point, IBSNOW should connect to the MQTT Server and be ready to receive MQTT Sparkplug messages. Verify by running the following command.
|
After doing so, you should see something similar to what is shown below. Note the last line is 'MQTT Client connected to ...'. That denotes we have successfully configured IBSNOW and properly provisioned MQTT Server.
INFO|7263/0||23-06-29 20:19:32|20:19:32.932 [Thread-2] INFO org.eclipse.tahu.mqtt.TahuClient - IBSNOW-8bc00095-9265-41: Creating the MQTT Client to tcp://54.236.16.39:1883 on thread Thread-2 |
At this point IoT Bridge is configured and ready to receive data. To get data flowing into IBSNOW we'll set up Inductive Automation's Ignition platform along with the MQTT Transmission module from Cirrus Link. Begin by downloading Ignition here.
https://inductiveautomation.com/downloads
Installation of Ignition is very straightforward and fast. There is a guide to do so here.
https://docs.inductiveautomation.com/display/DOC80/Installing+and+Upgrading+Ignition
With Ignition installed, MQTT Transmission must be installed as well as a plugin to Ignition. Get MQTT Transmission for your version of Ignition here.
https://inductiveautomation.com/downloads/third-party-modules
Now use the procedure below to install the MQTT Transmission module.
https://docs.inductiveautomation.com/display/DOC80/Installing+or+Upgrading+a+Module
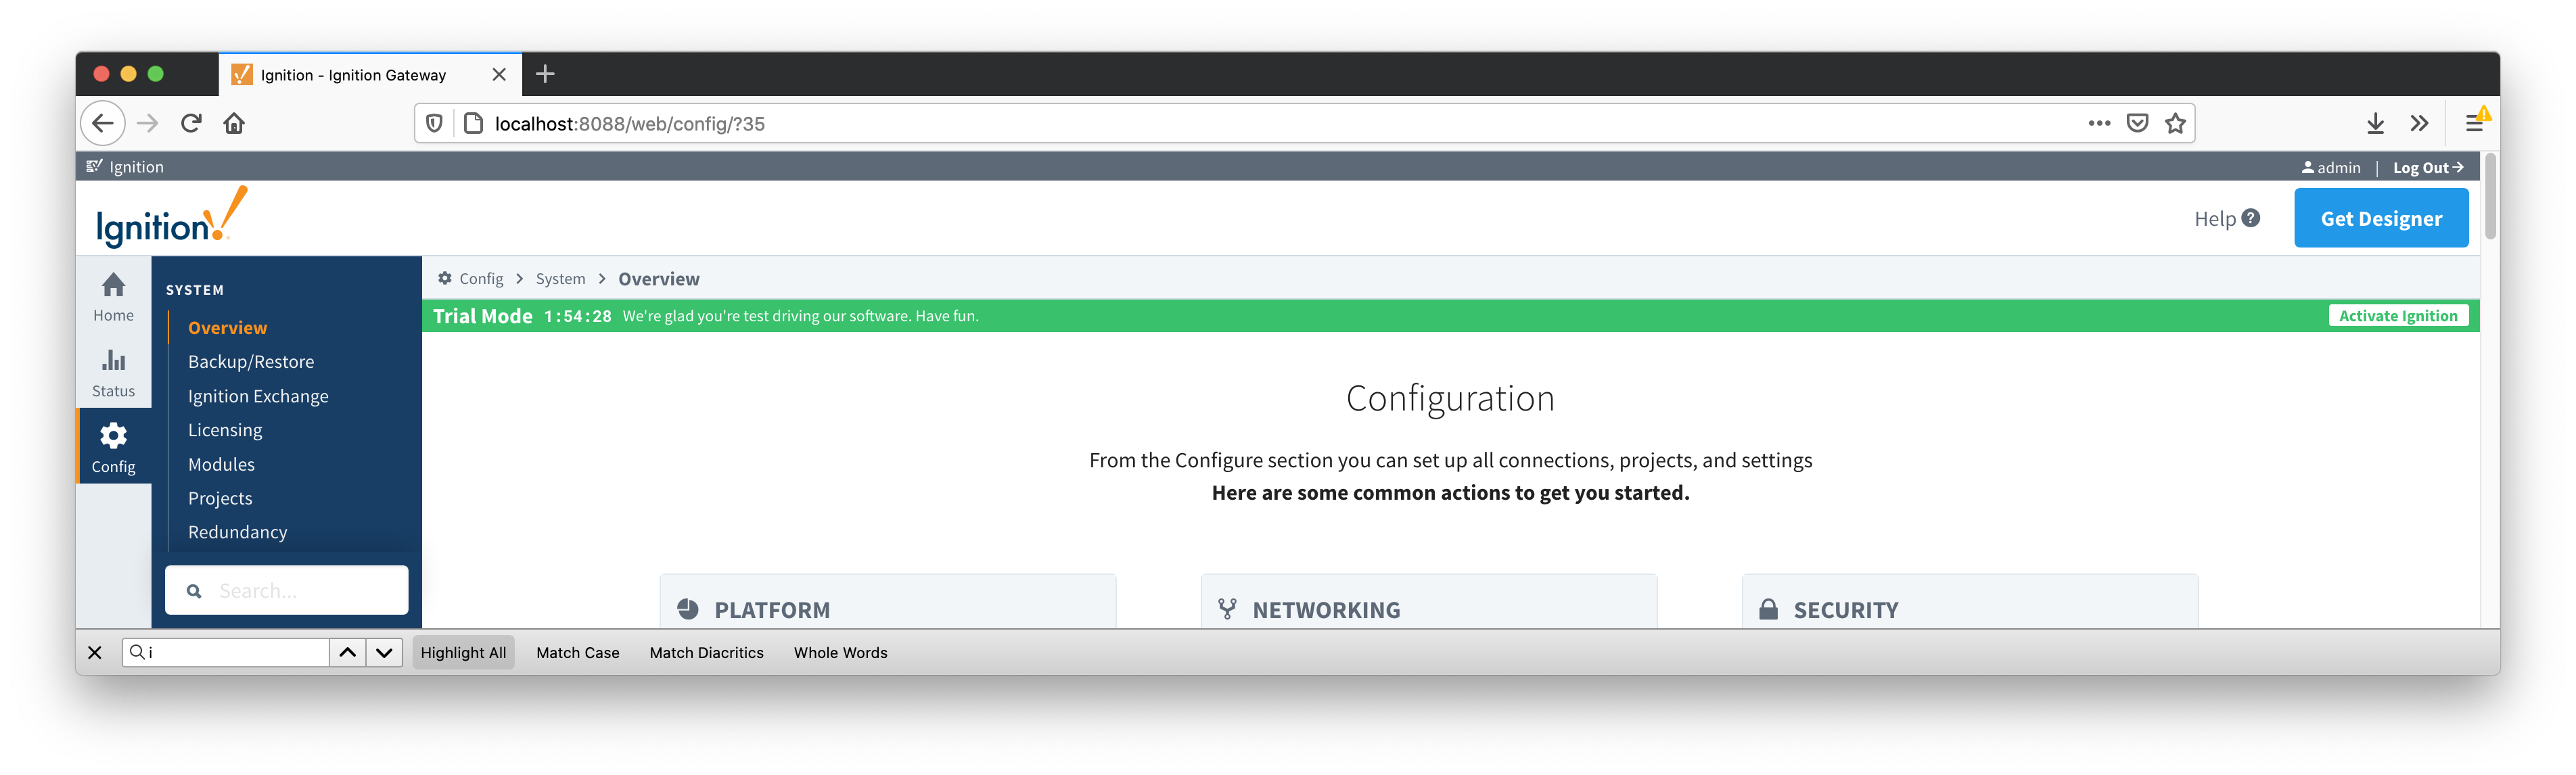
With Ignition and MQTT Transmission installed, we can configure the MQTT Transmission module to connect to Chariot MQTT Server that we provisioned earlier. Begin by clicking 'Get Desginer' in the upper right hand corner of the Ignition Gateway Web UI as shown below.
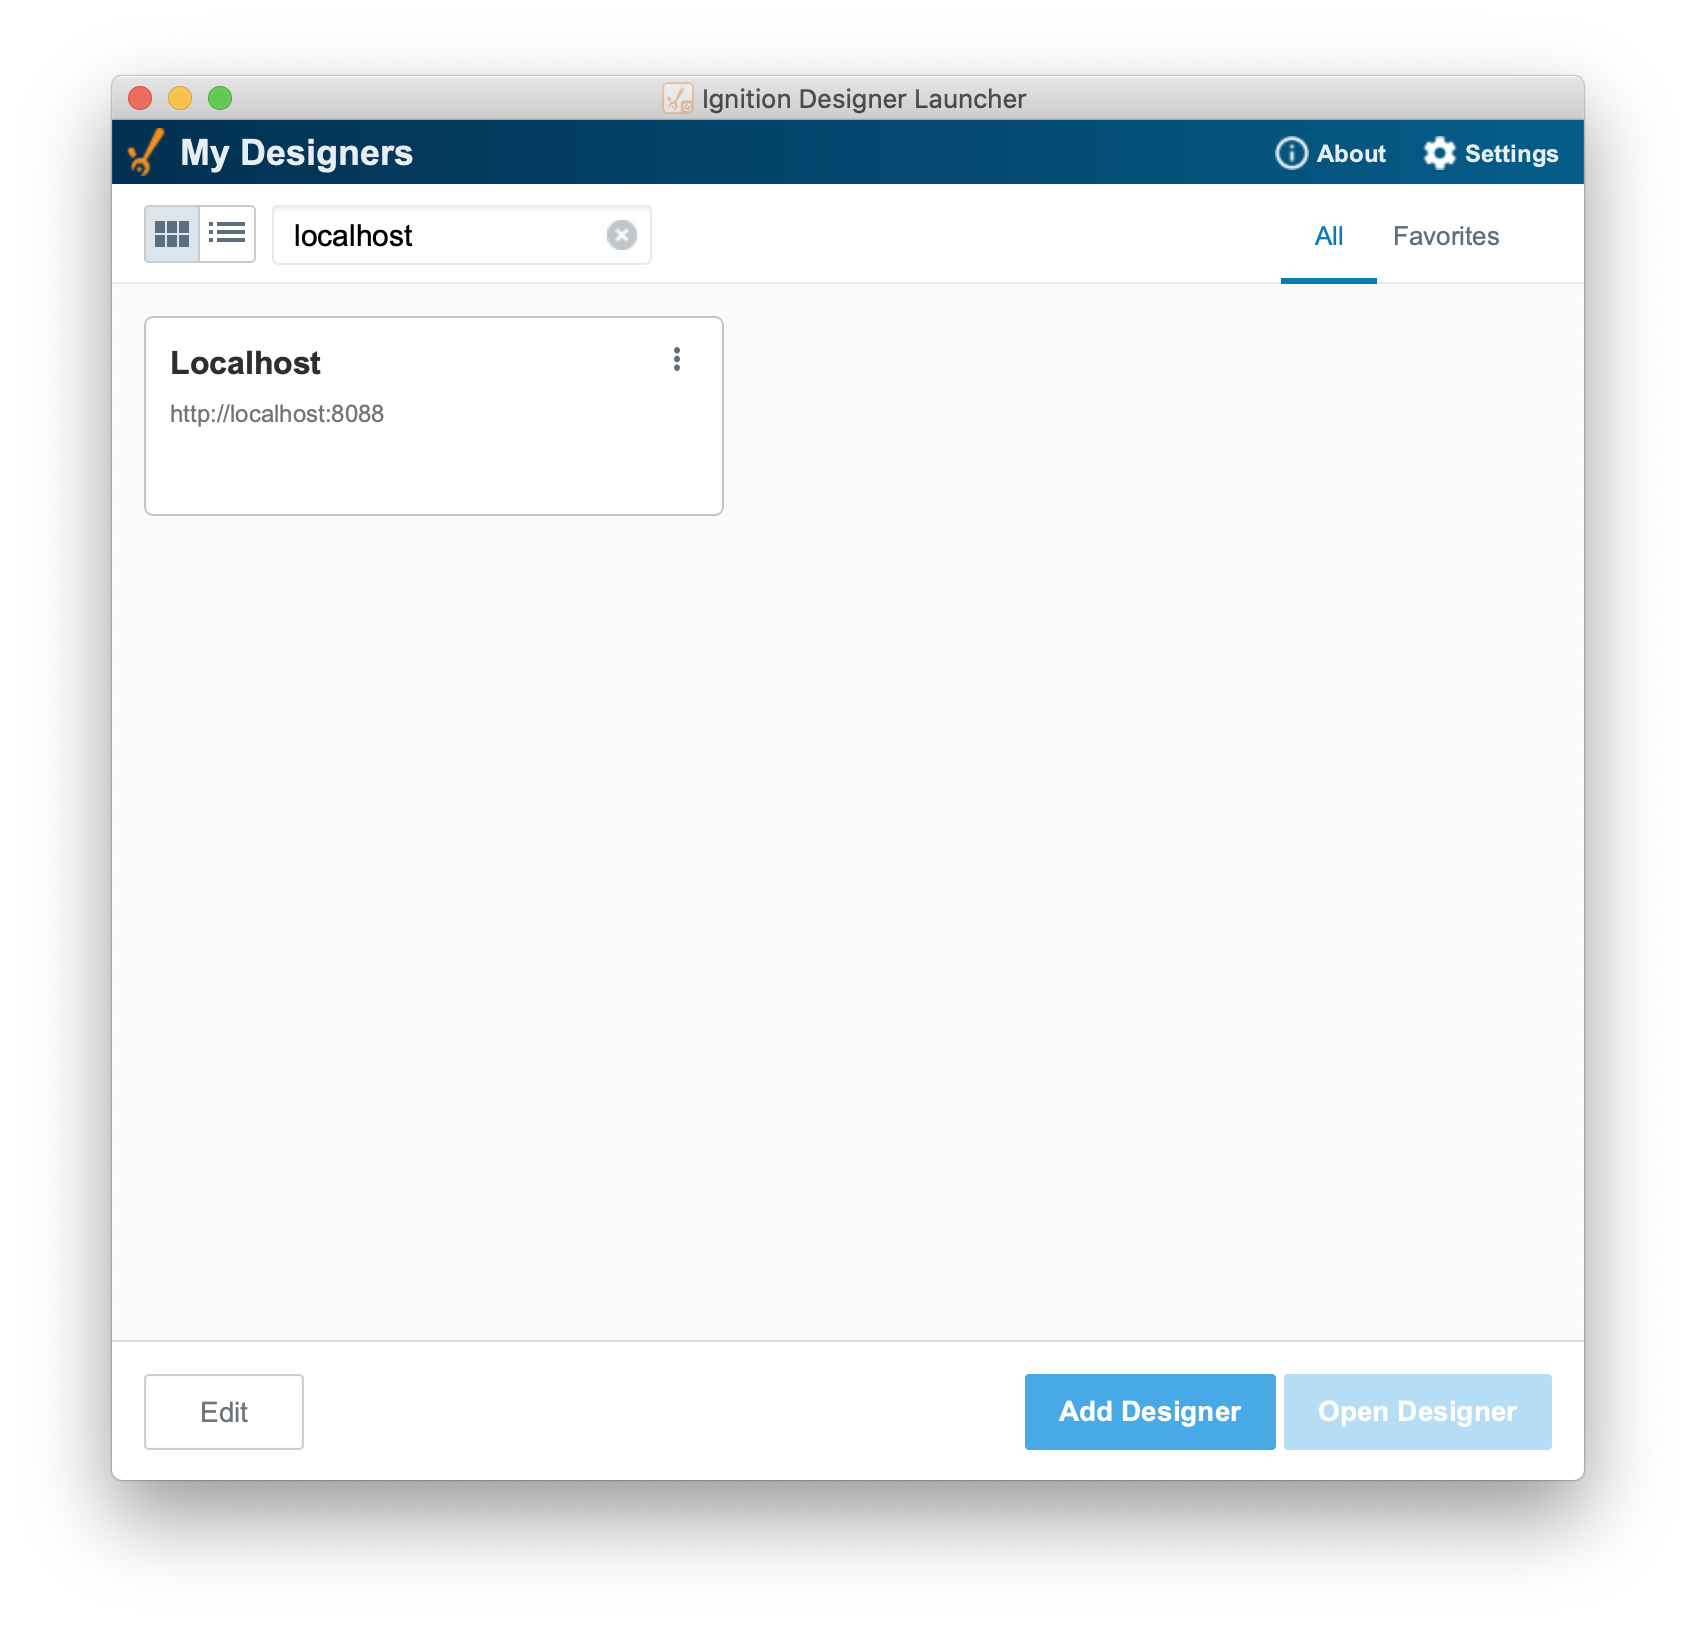
Now launch the Ignition Designer using the Designer Launcher as shown below.
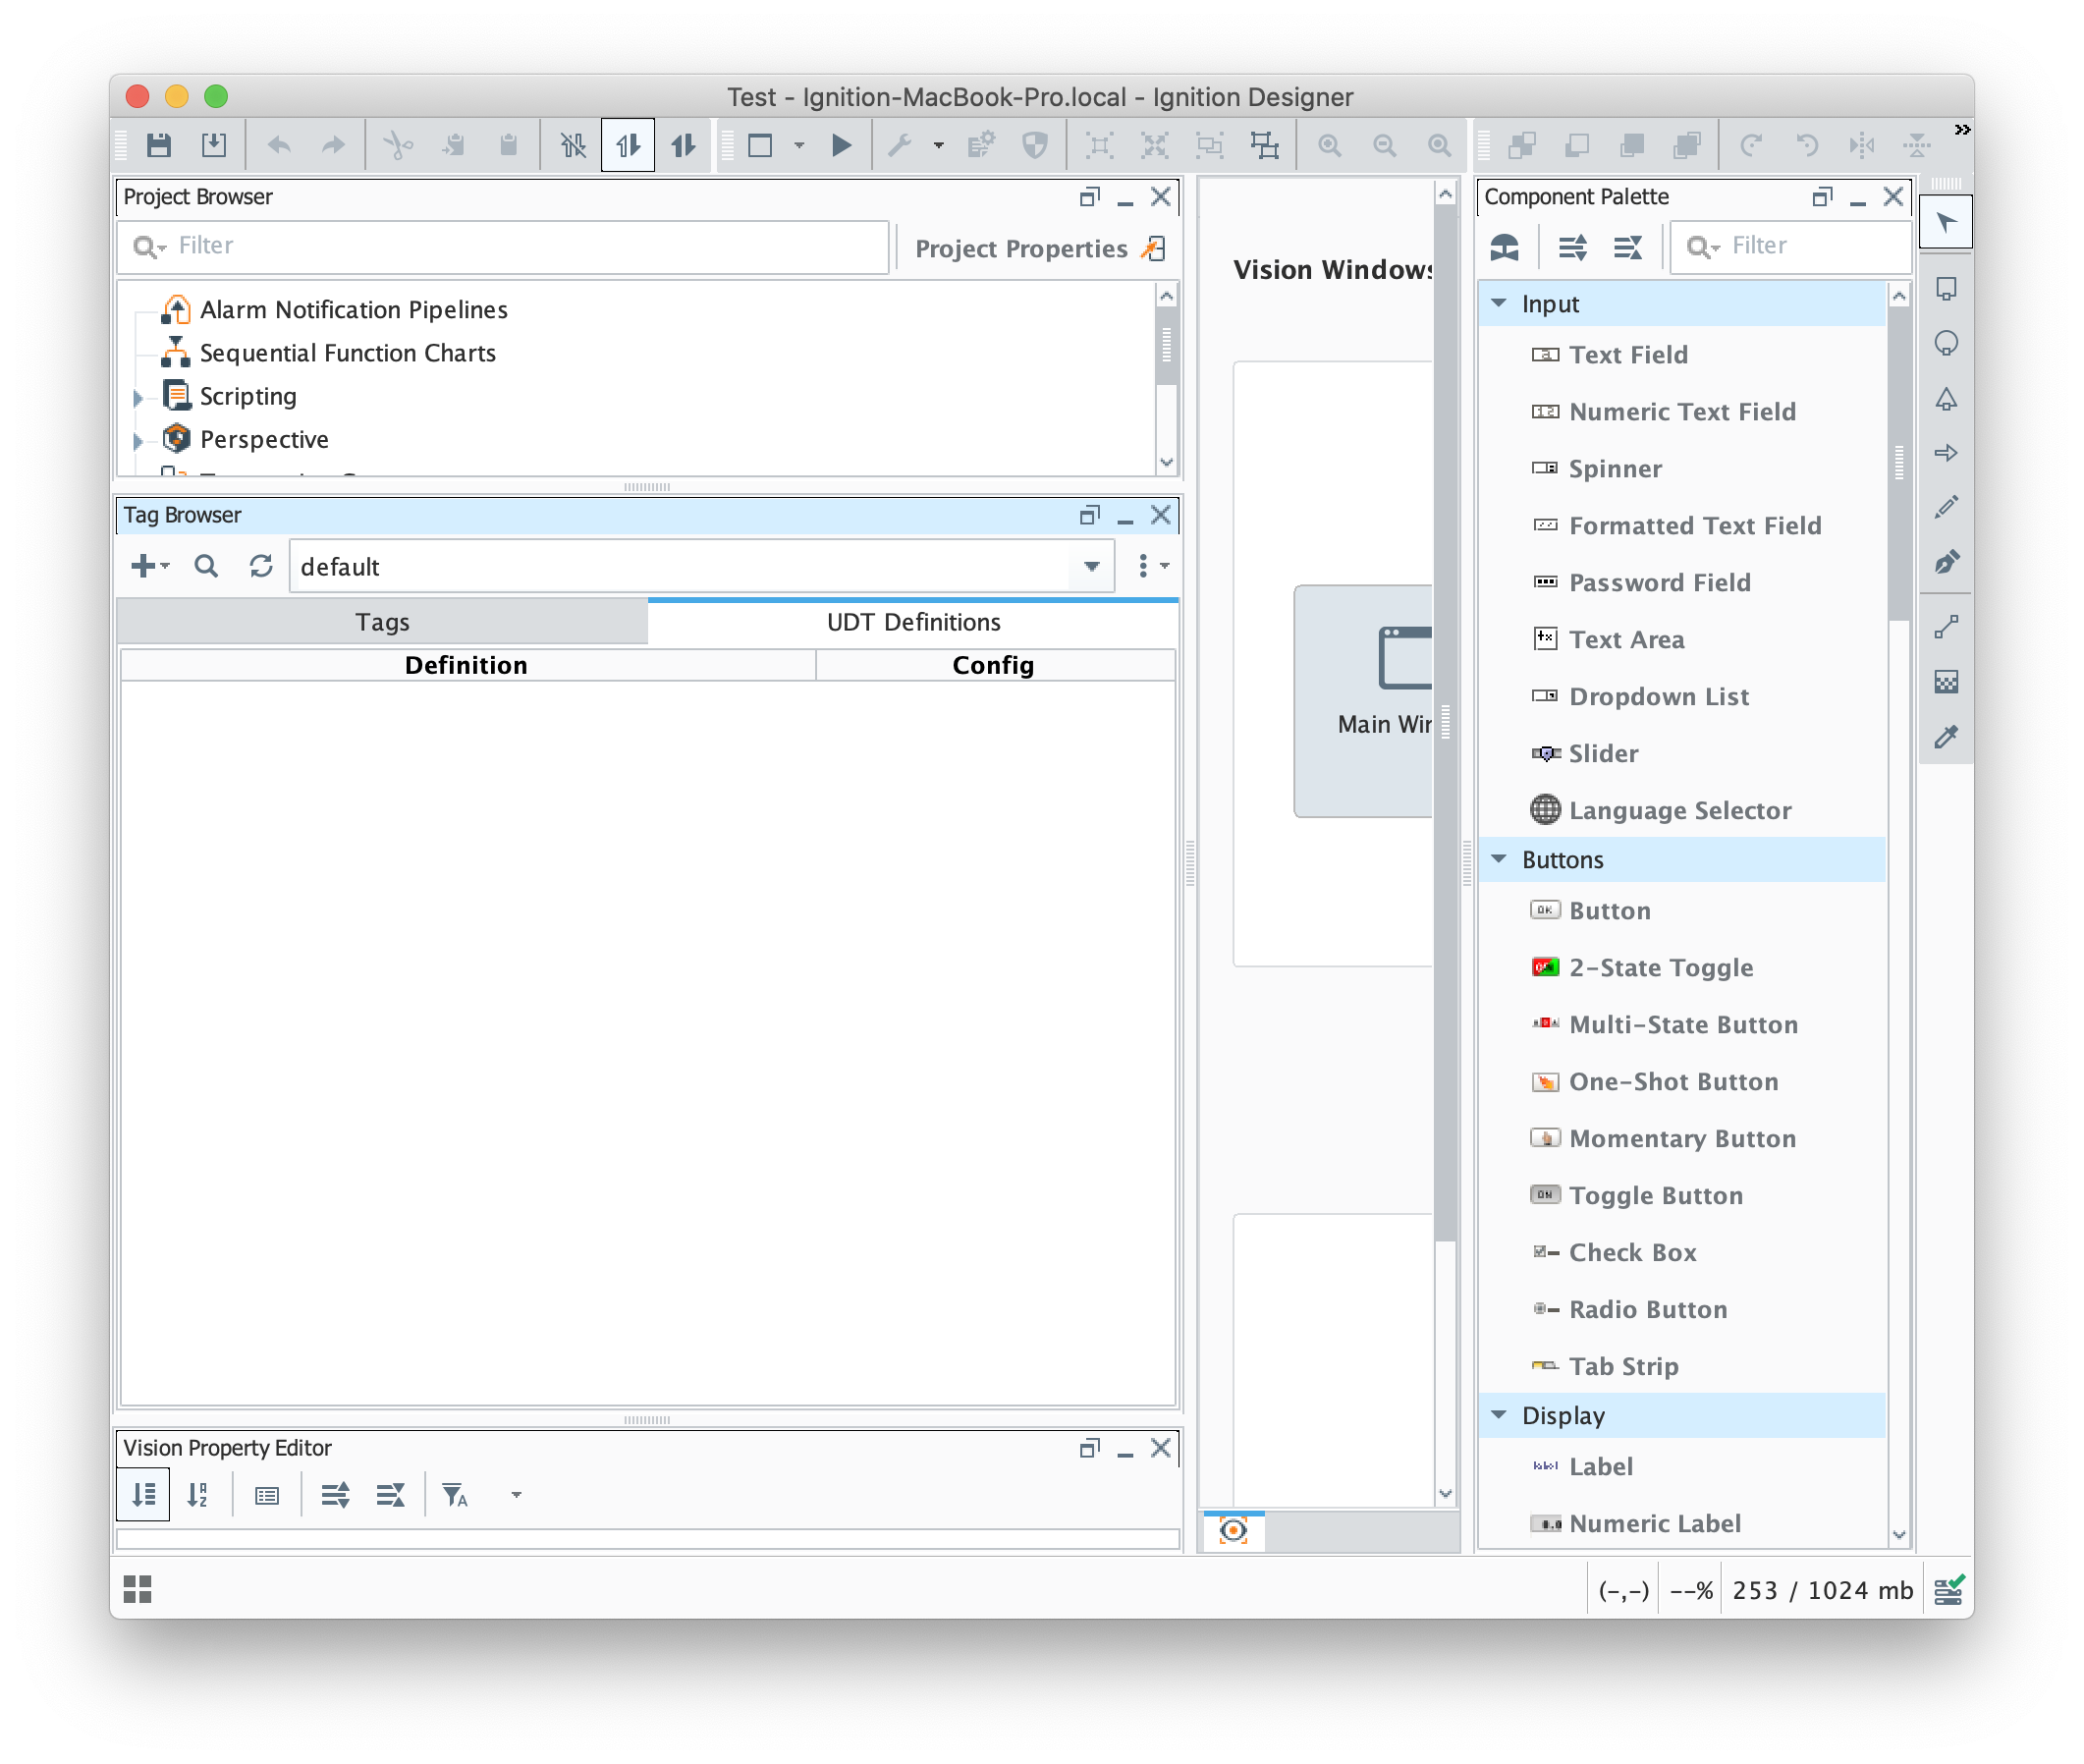
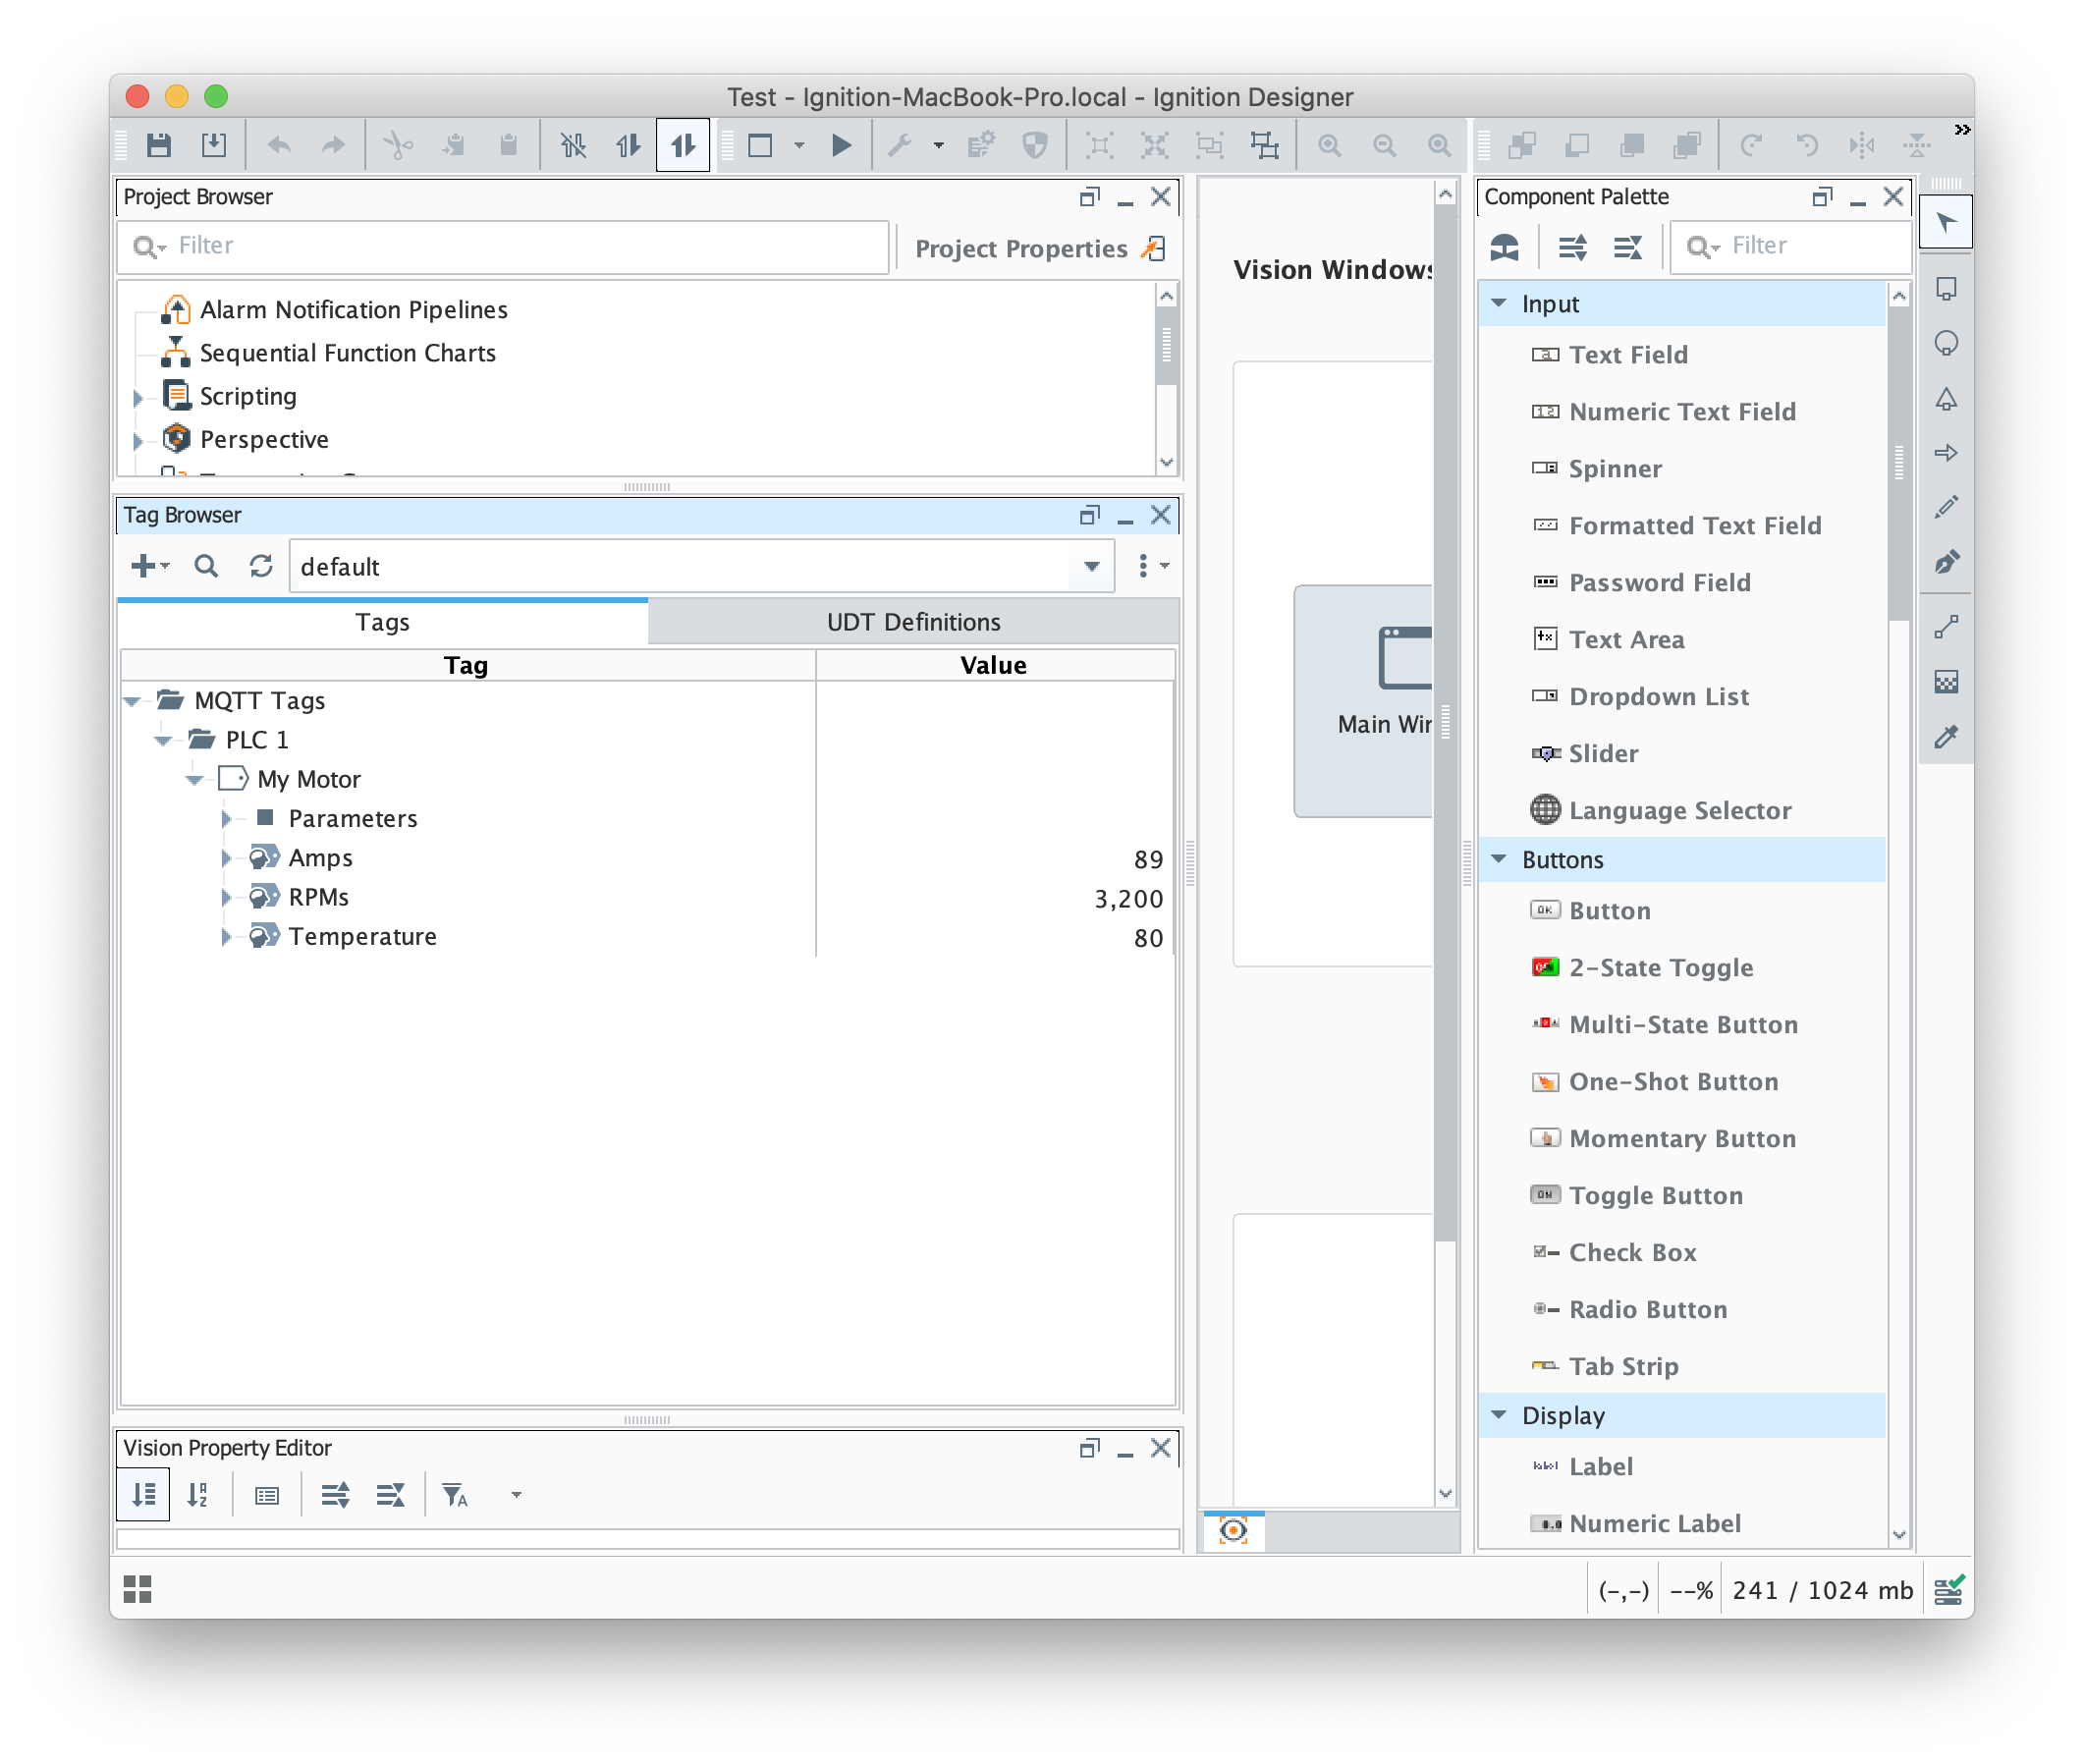
Once it is launched, you should see something similar to what is shown below. Note the Tag Browser has been expanded and the automatically created example tags have been highlighted.
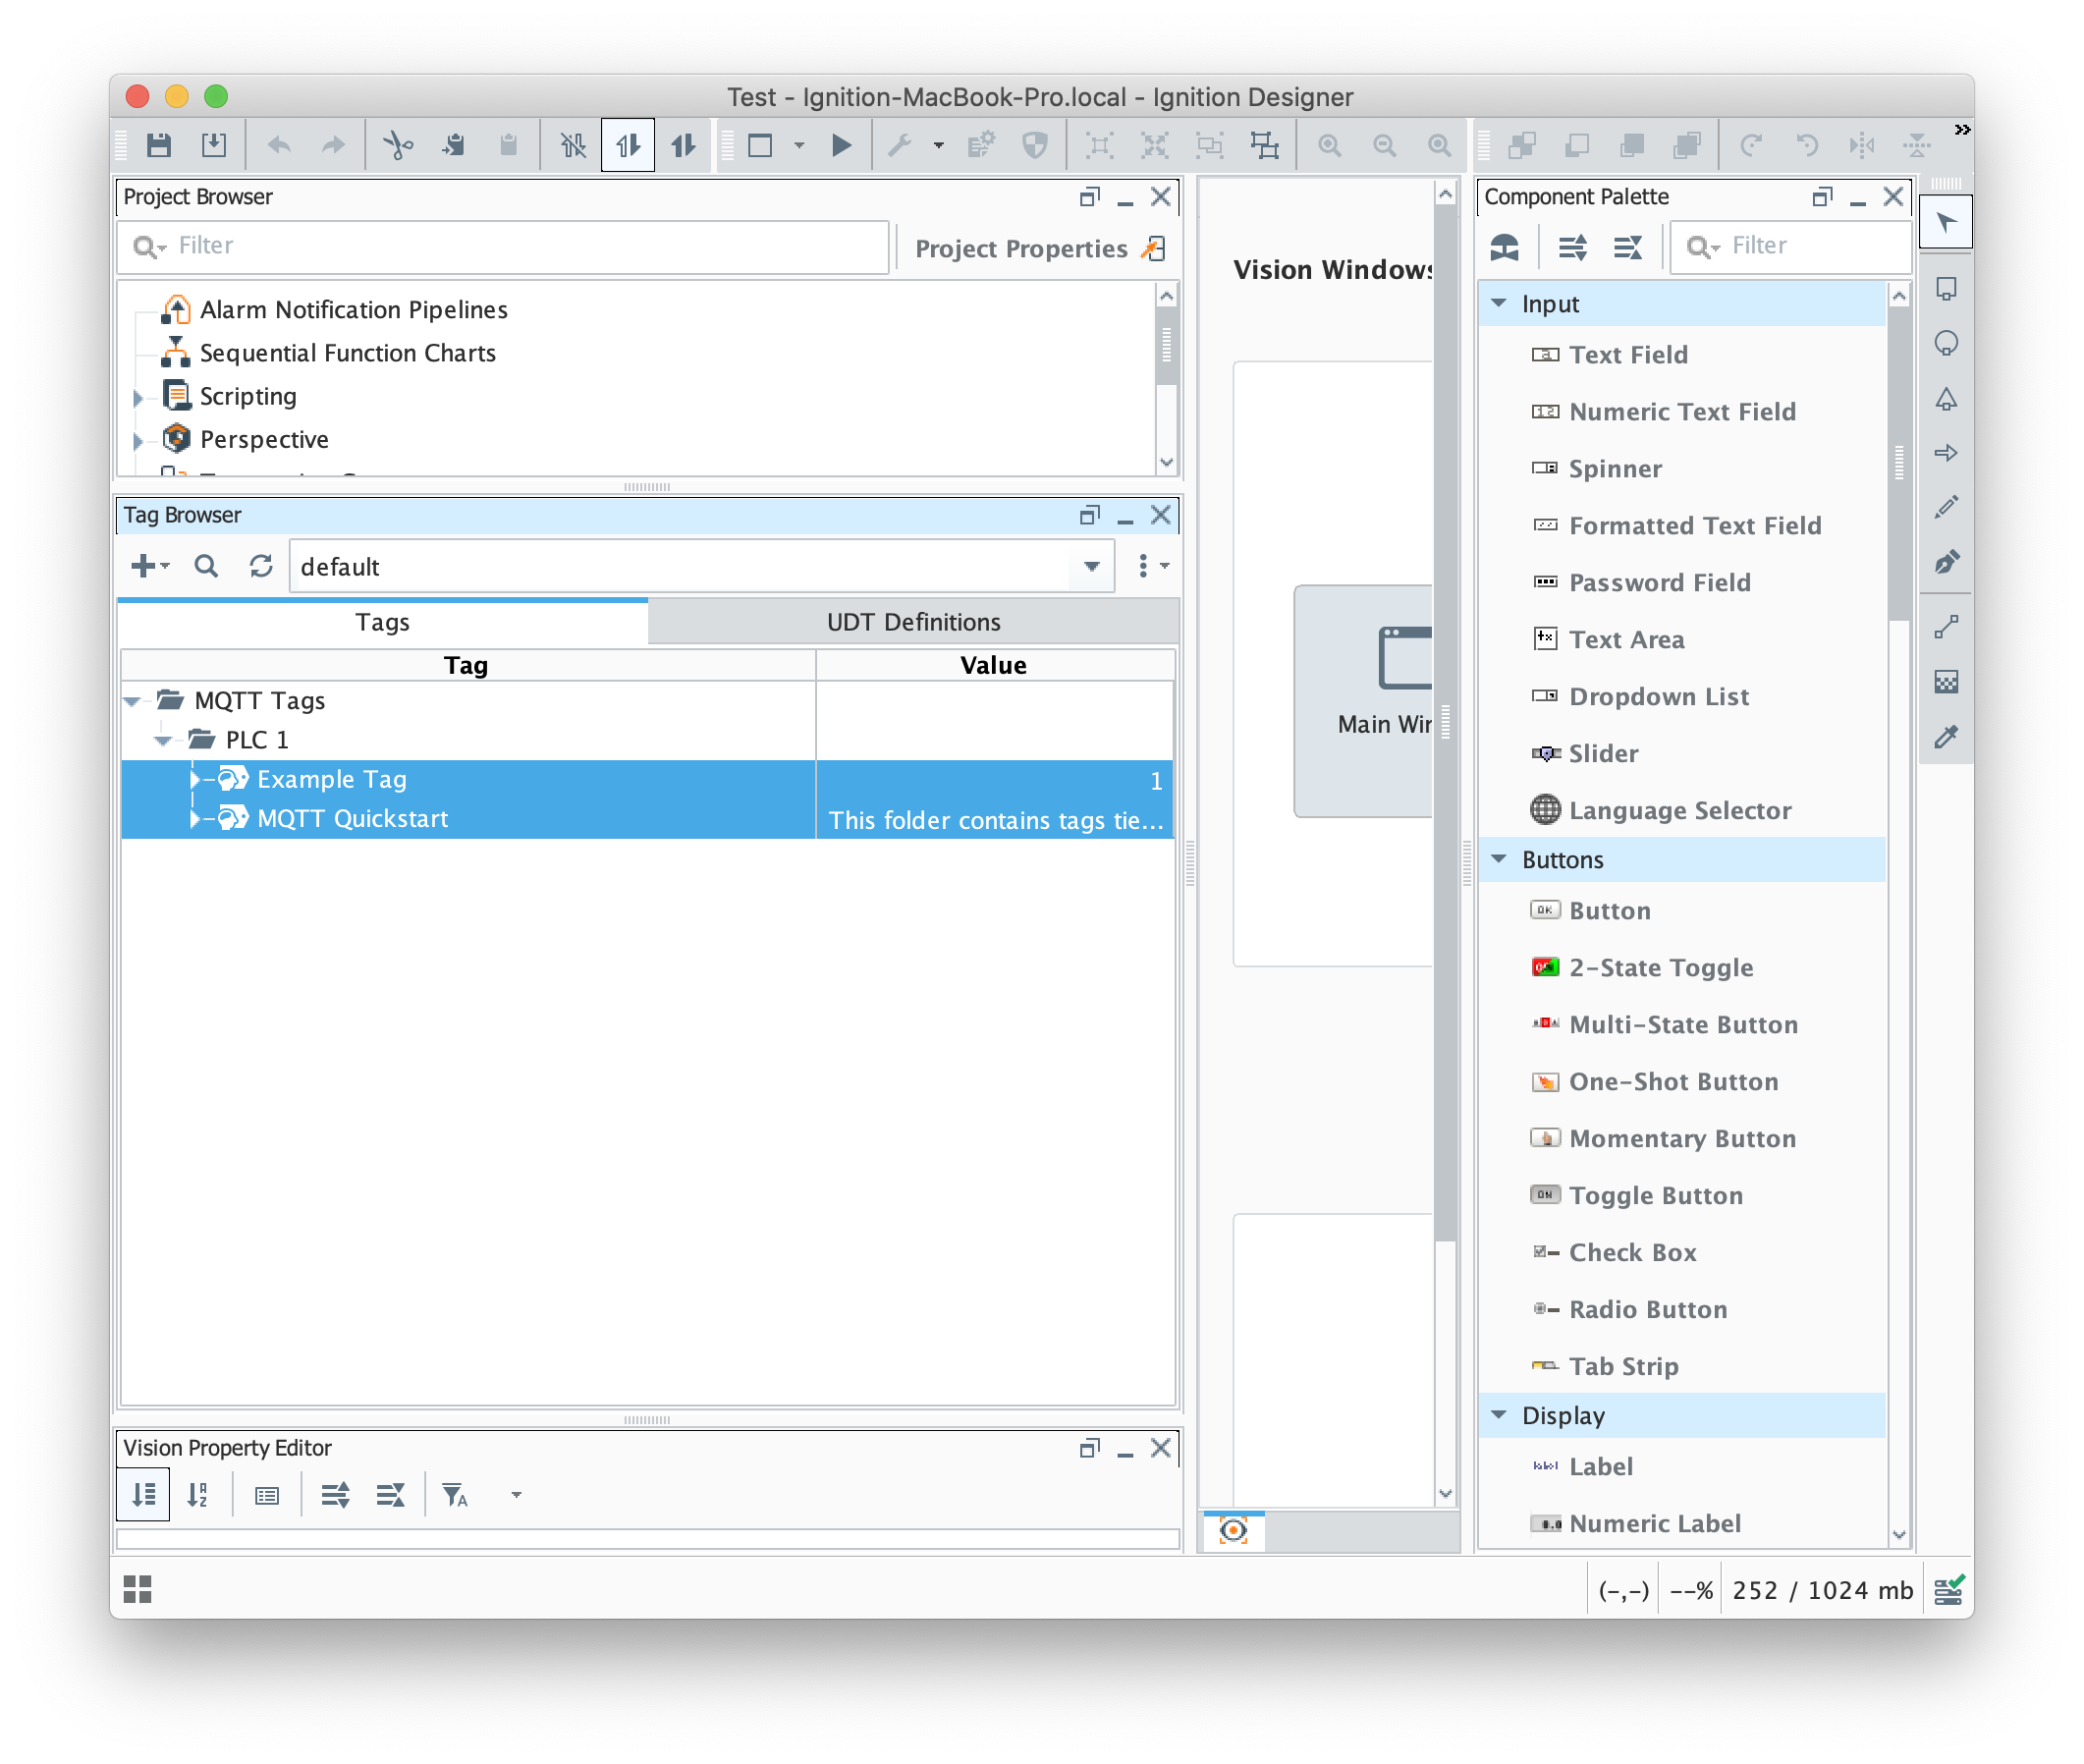
Begin by deleting these two tags (Example Tag and MQTT Quickstart). Then click the 'UDT Definitions' tab as shown below. We will use this view to create a very simple UDT definition.
Now, click the '+' icon in the upper left corner of the tag browser as shown below and select 'New Data Type'
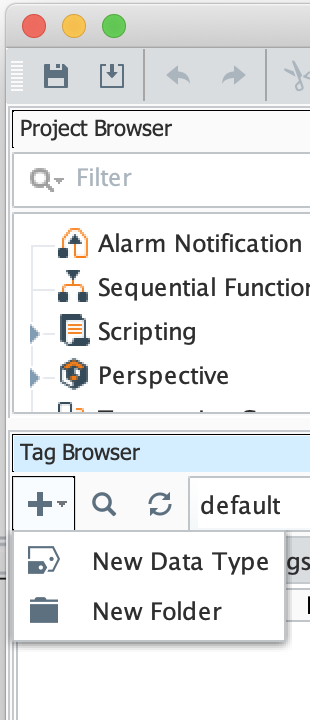
This will open the following dialog box.
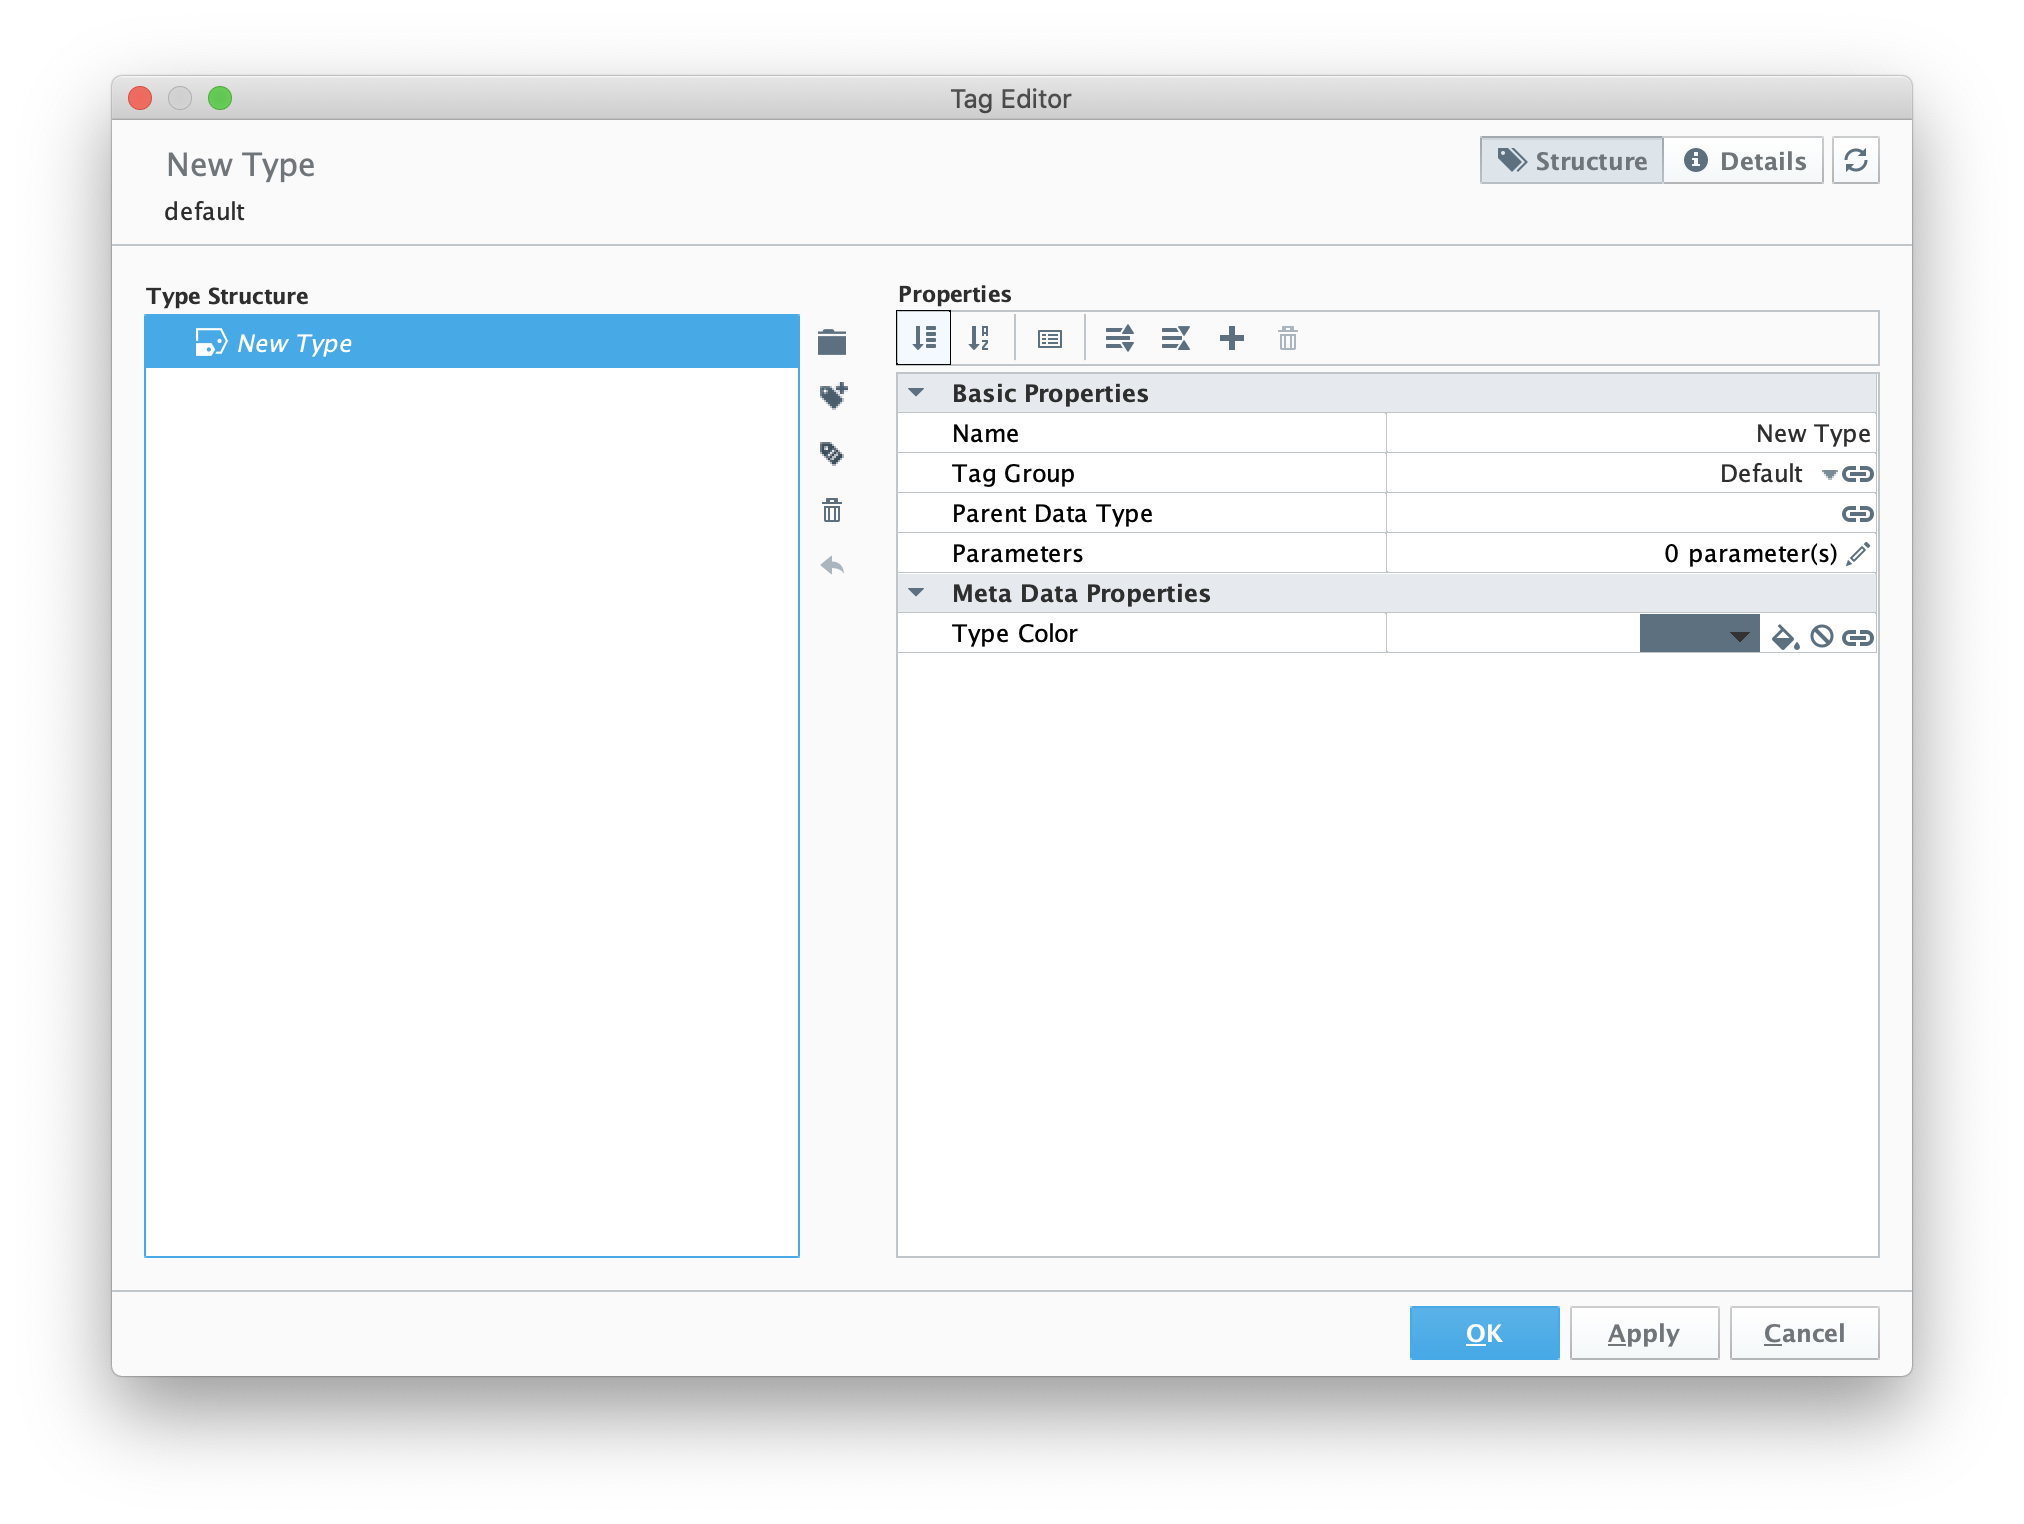
Change the name of the tag to Motor as shown below. Also, note the highlighted 'new member tag' icon in the middle of the dialog. We'll use this to create some member tags.
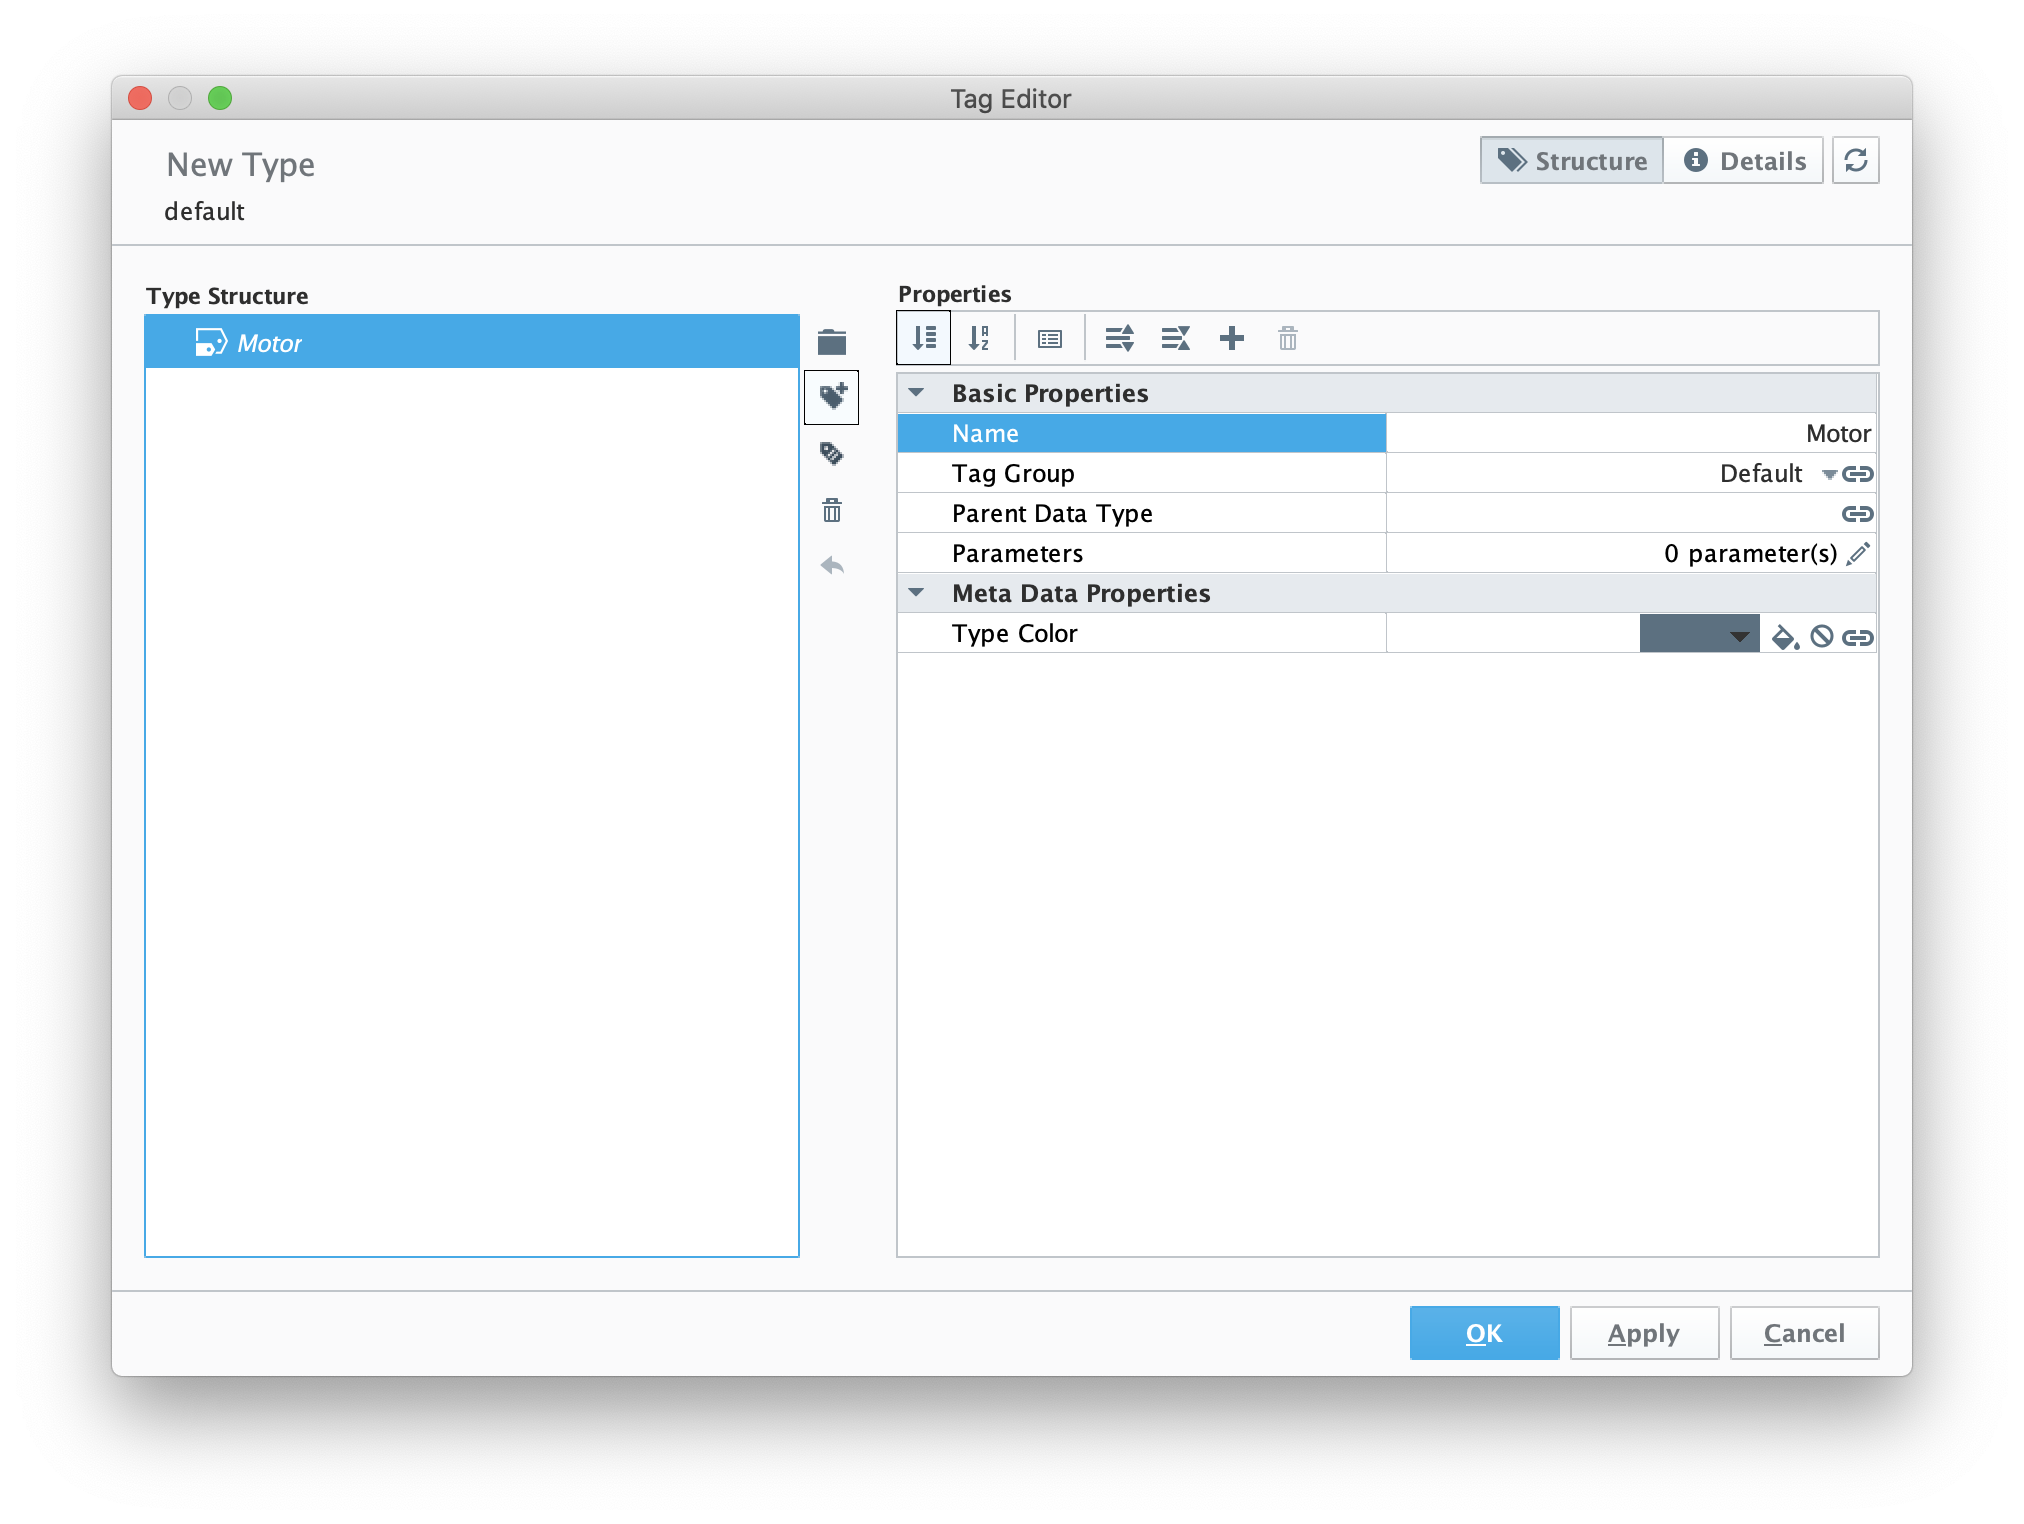
Now use the 'new member tag' button to create a new 'memory tag' as shown below.
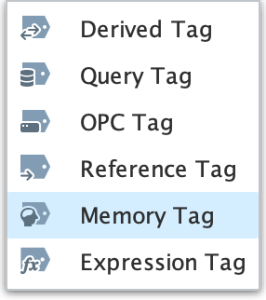
Then, set the following parameters for the new memory tag.
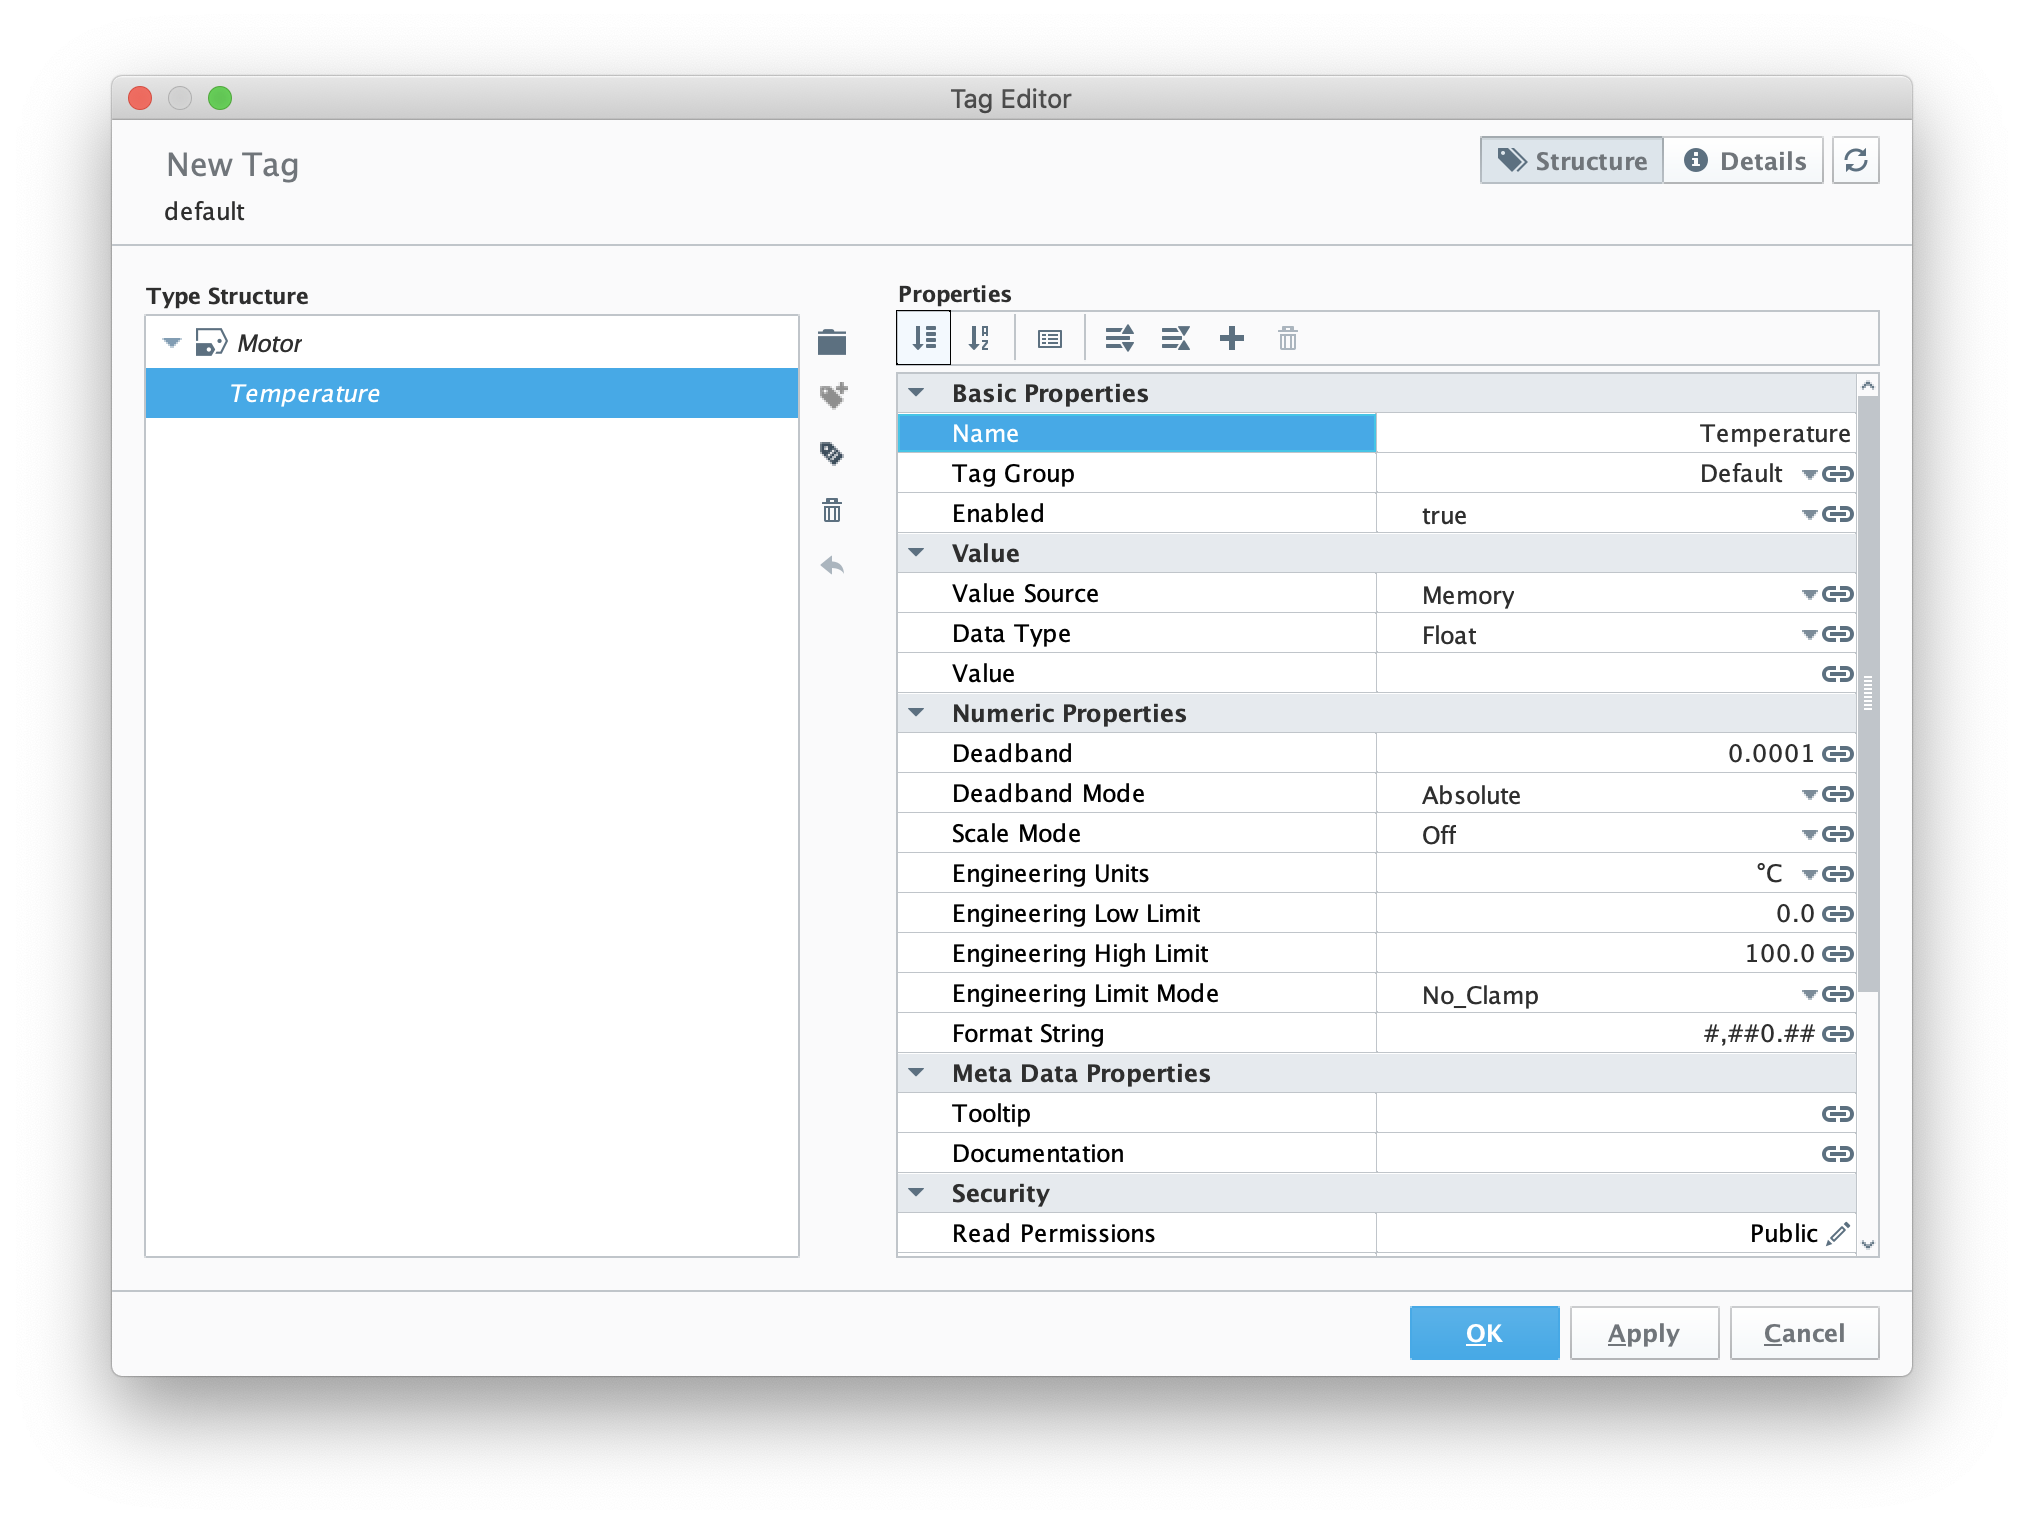
Now create two additional member tags with the following configuration.
When complete, the UDT definition should look as follows.
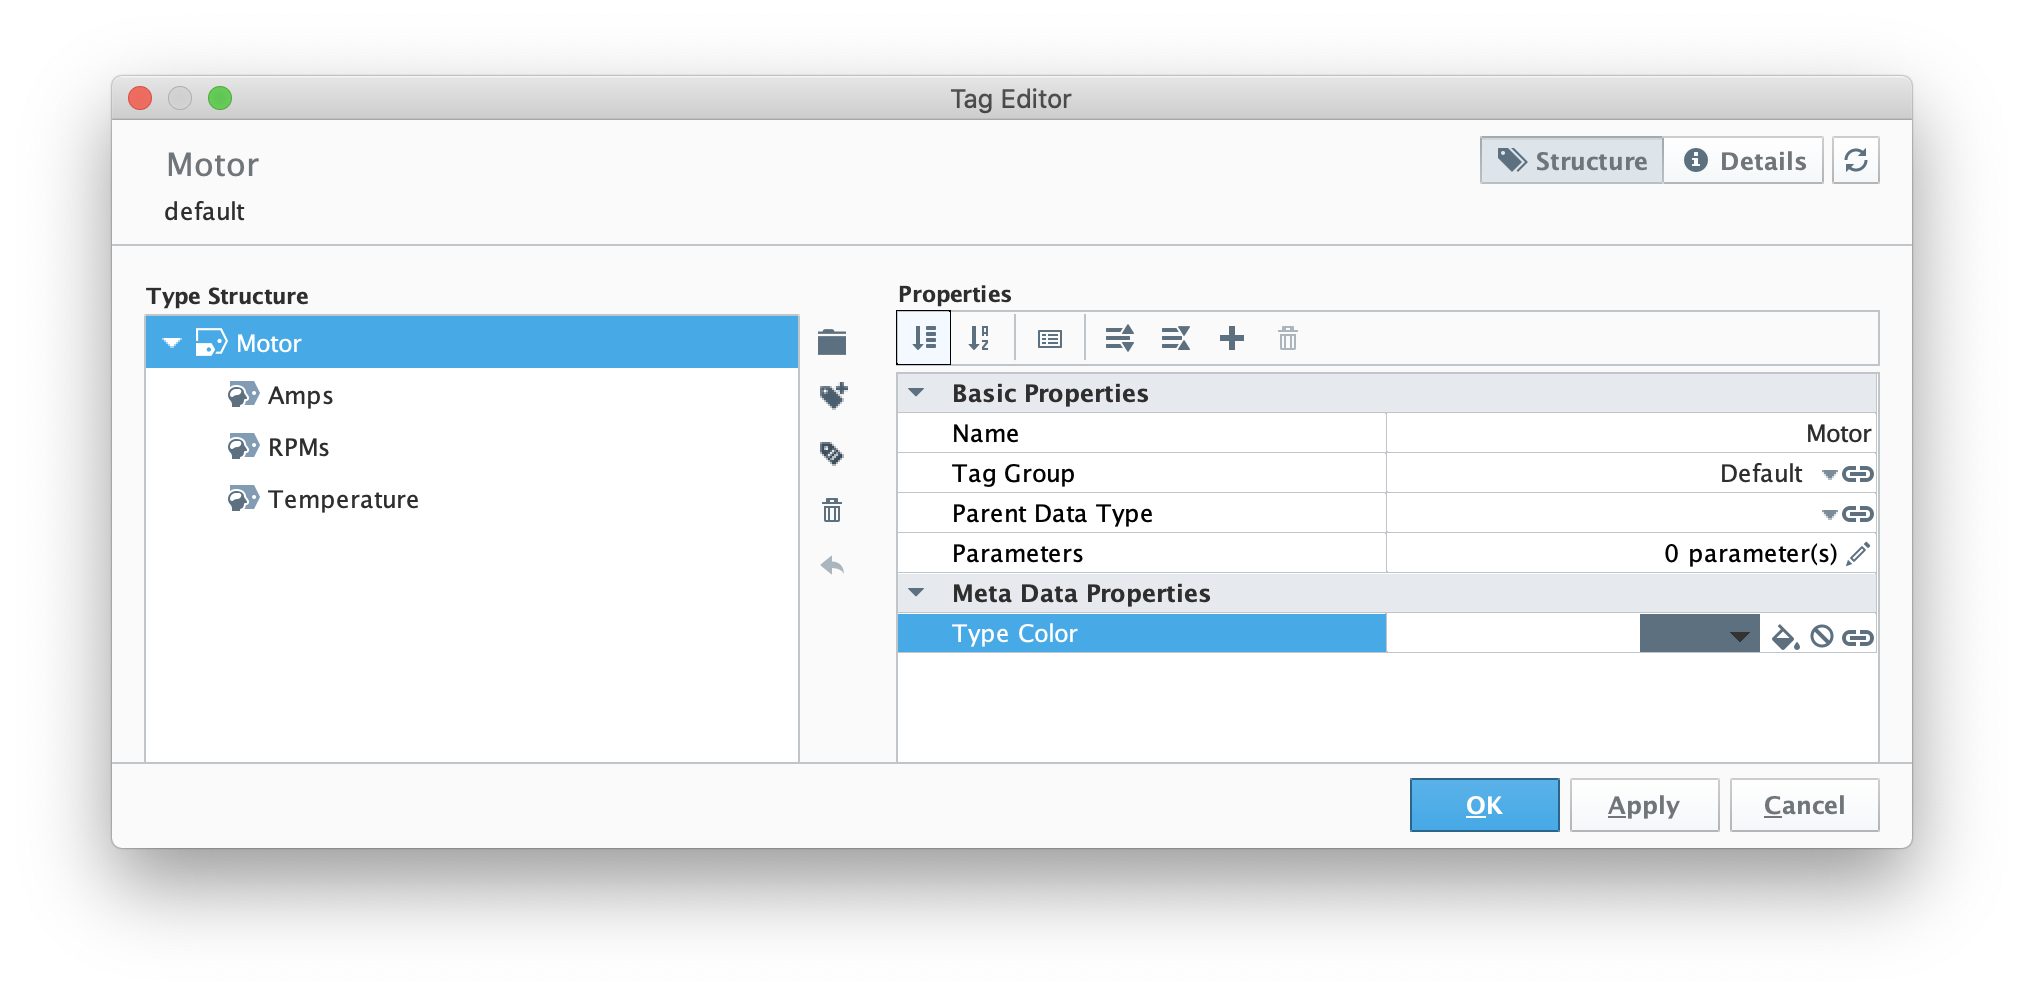
Now switch back to the 'Tags' tab of the Tag Browser. Right click on the 'PLC 1' folder and select 'New Tag → Data Type Instance → Motor' as shown below.
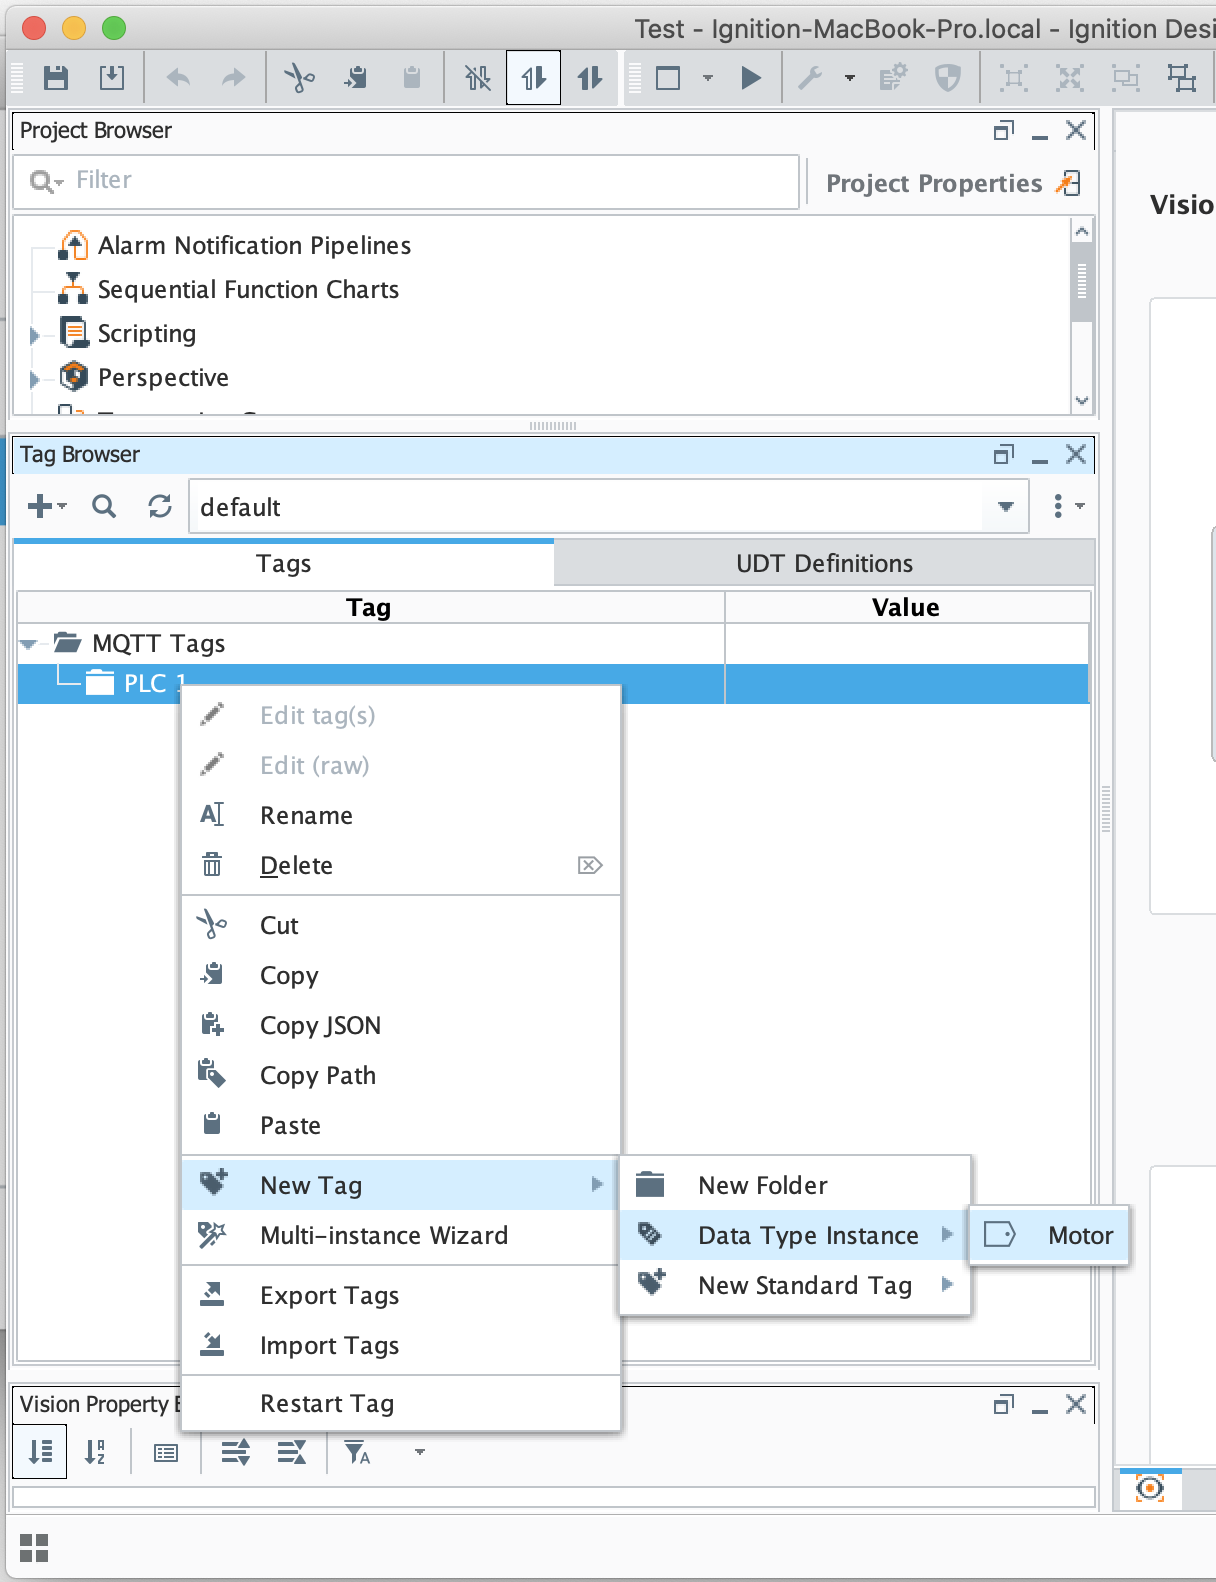
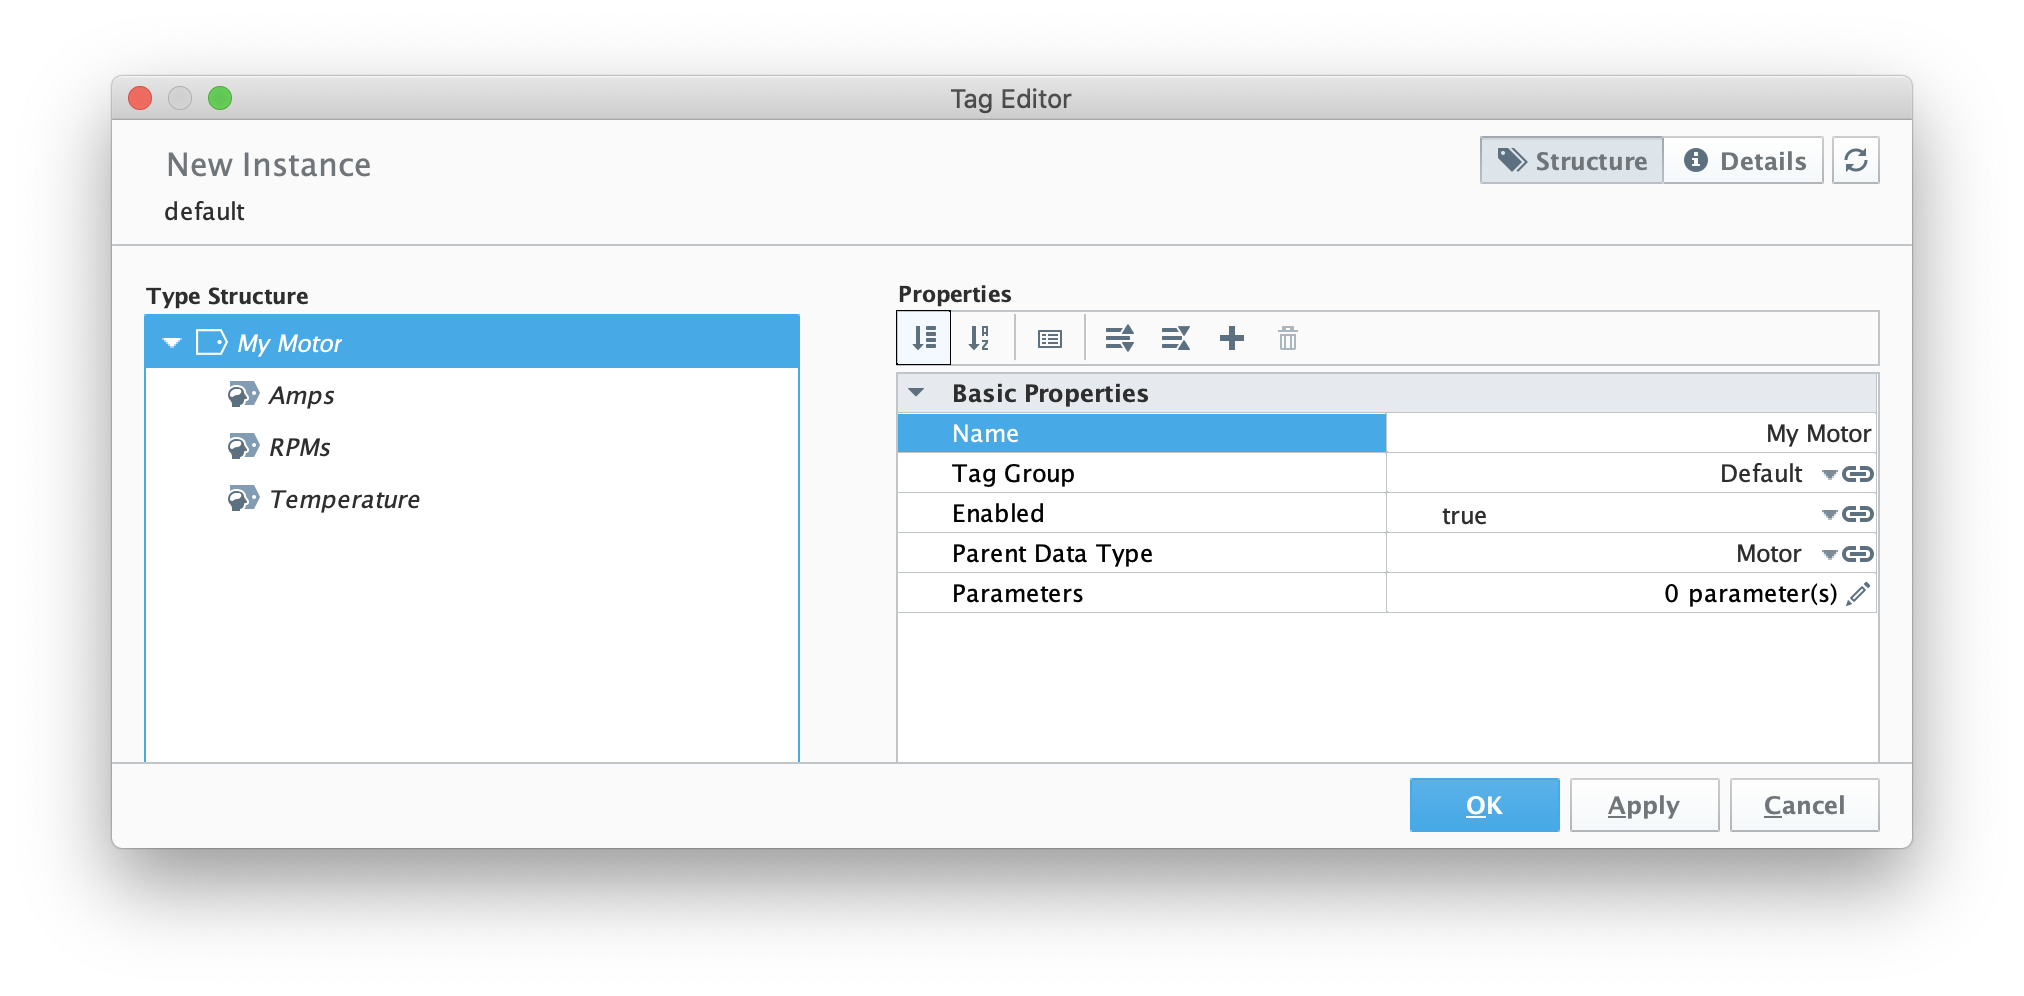
Now set the name to 'My Motor' as shown below and click OK.
Now, set some values under the instance as shown below.
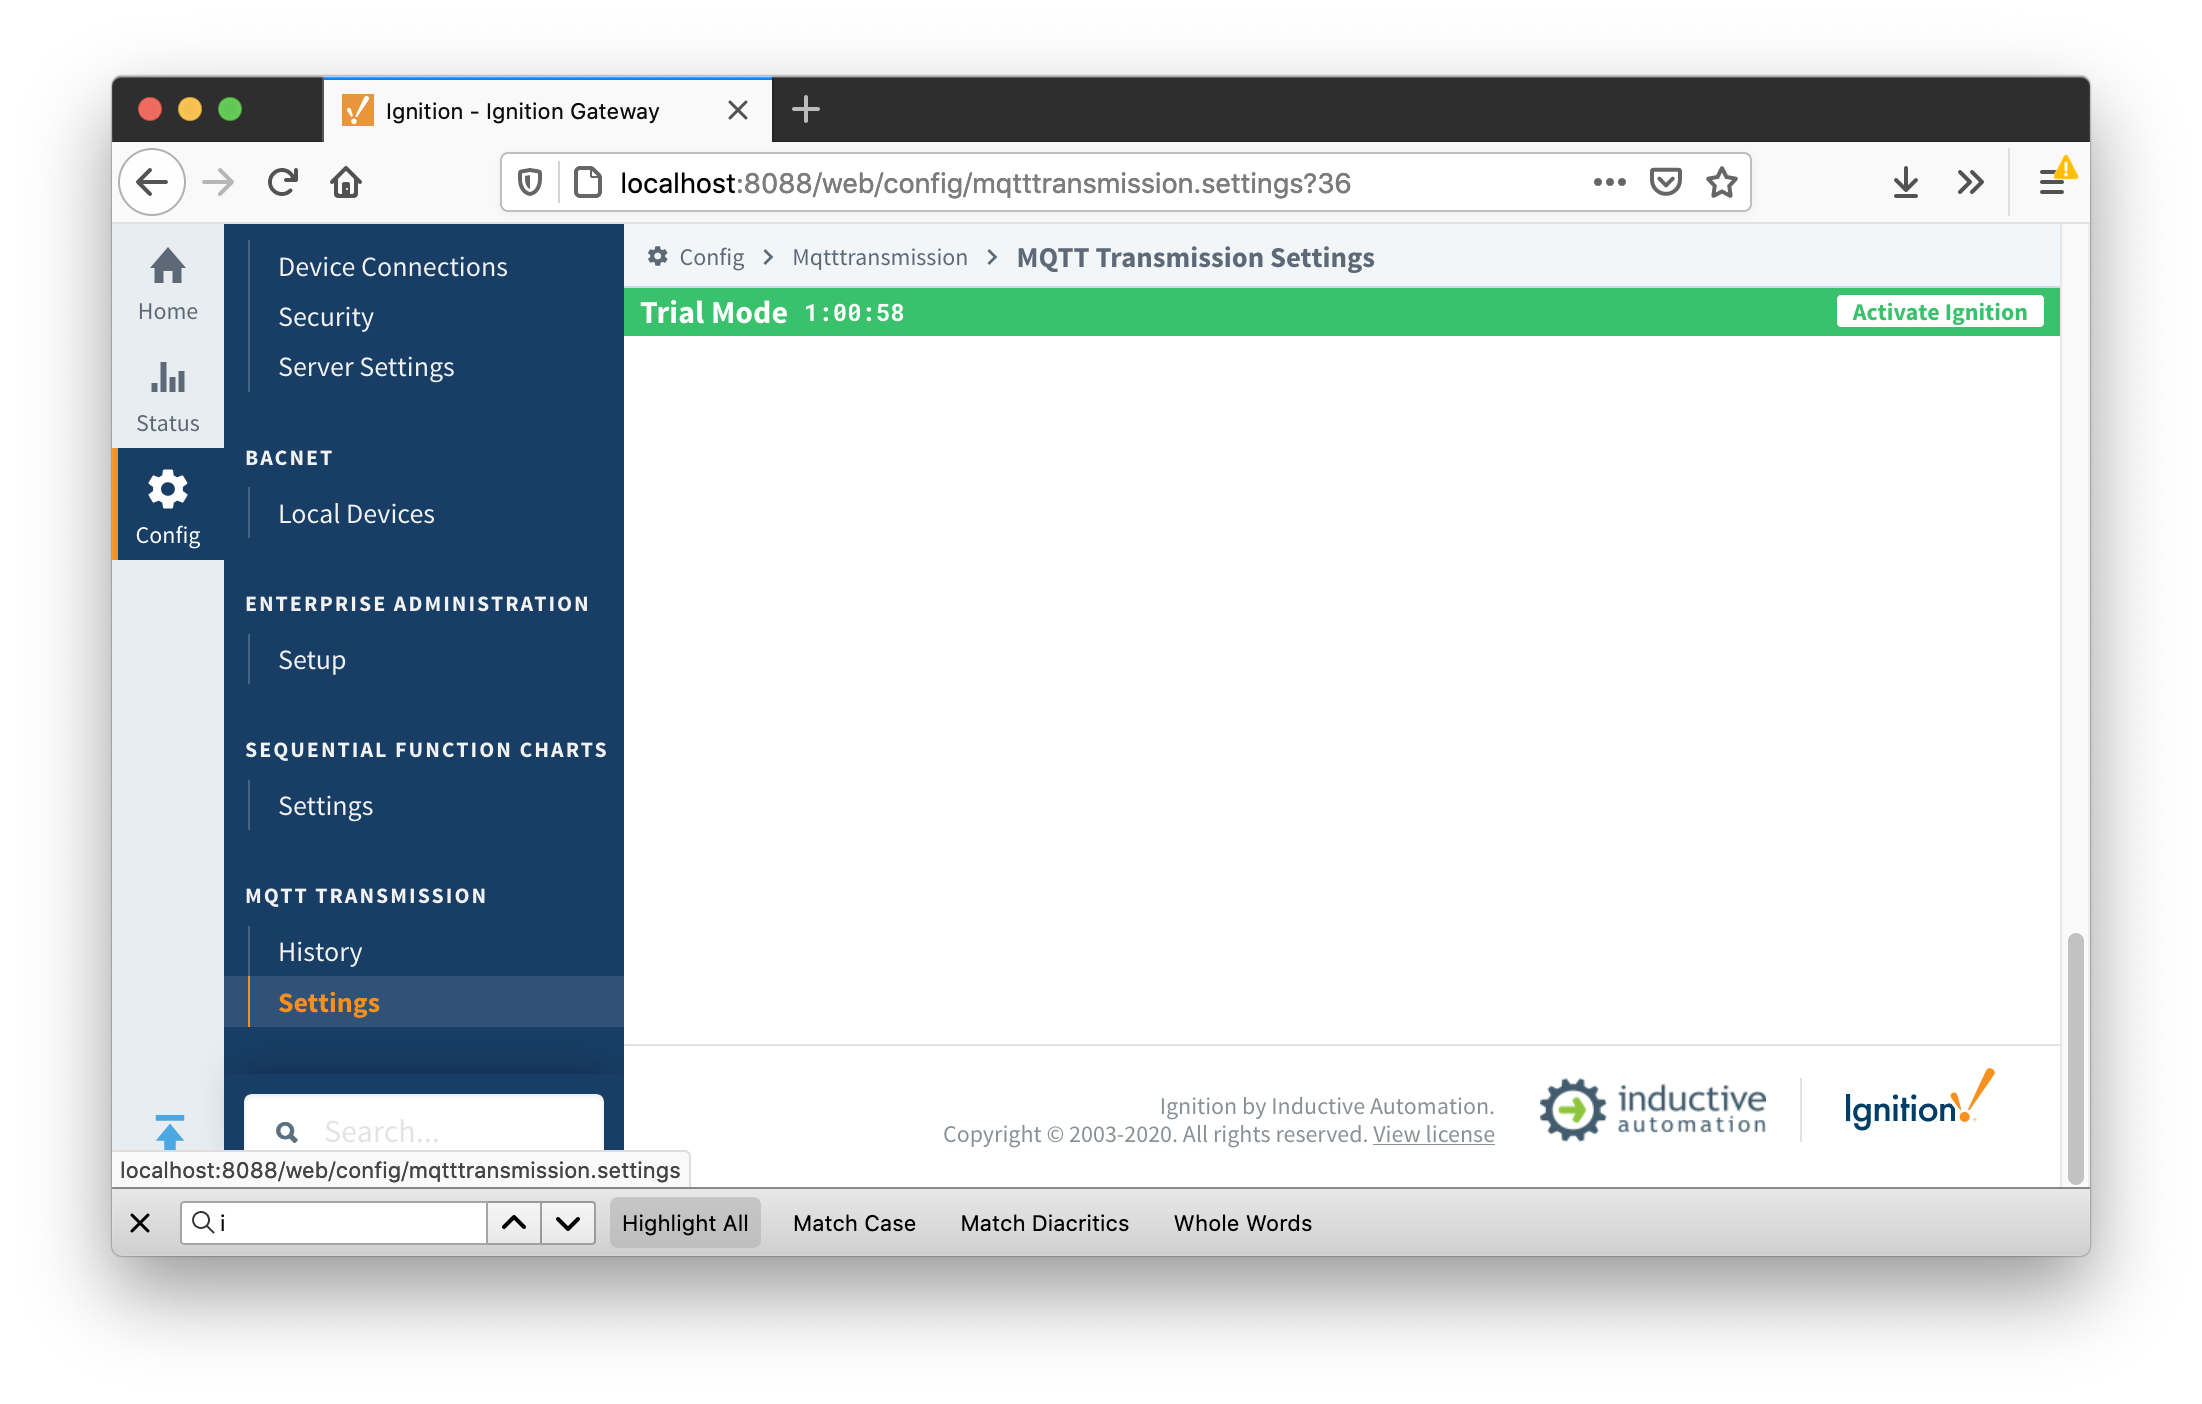
At this point, our tags are configured. A UDT definition will map to a model in Snowflake and UDT instances in Ignition will map to Snowflake. But, before this will happen we need to point MQTT Transmission to the Chariot MQTT Server. To do so, browse back to the Ignition Gateway Web UI and select MQTT Transmission → Settings from the left navigation panel as shown below.
Now select the 'Transmitters' tab as shown below.
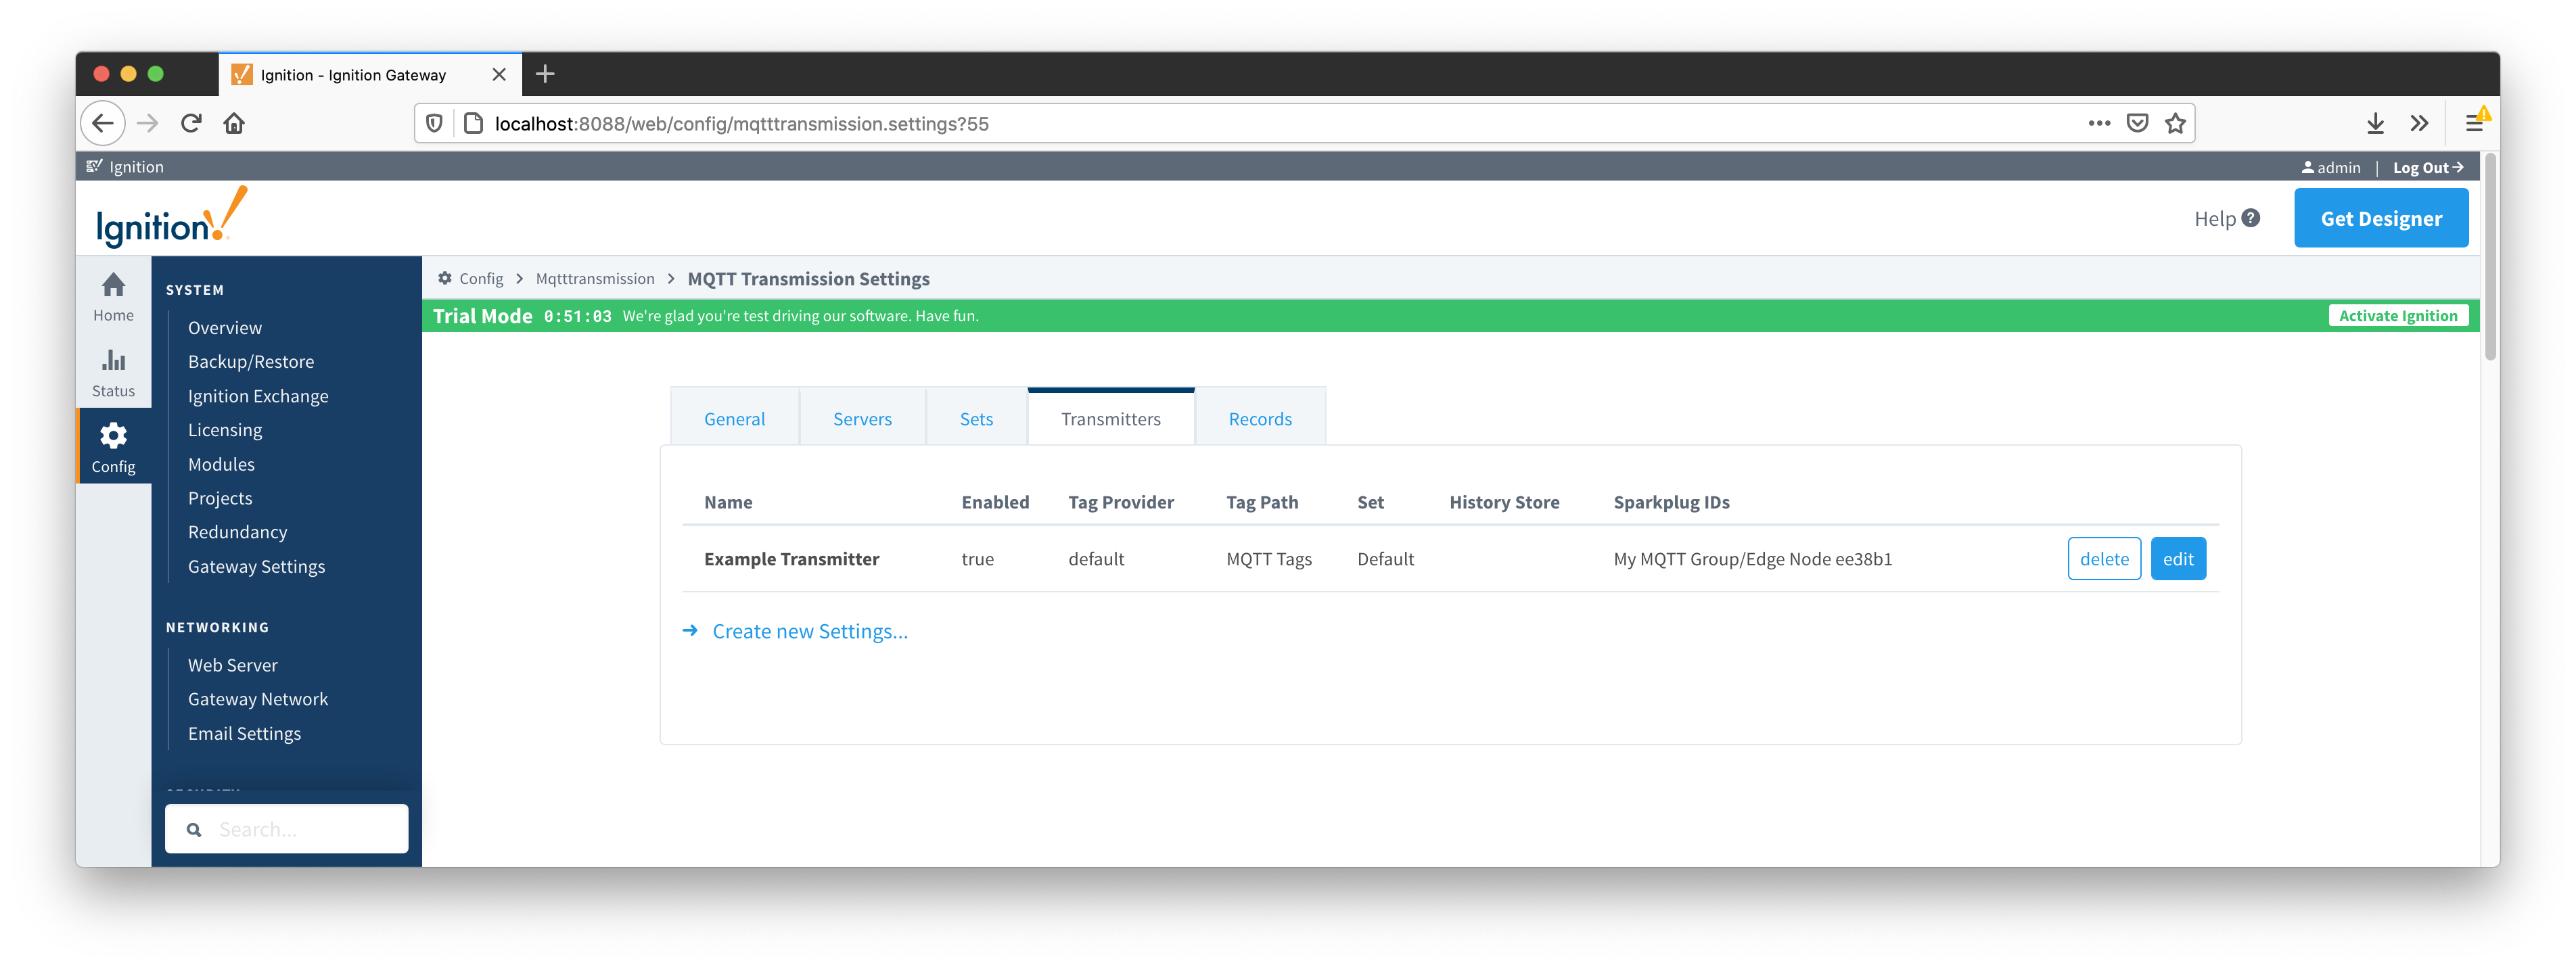
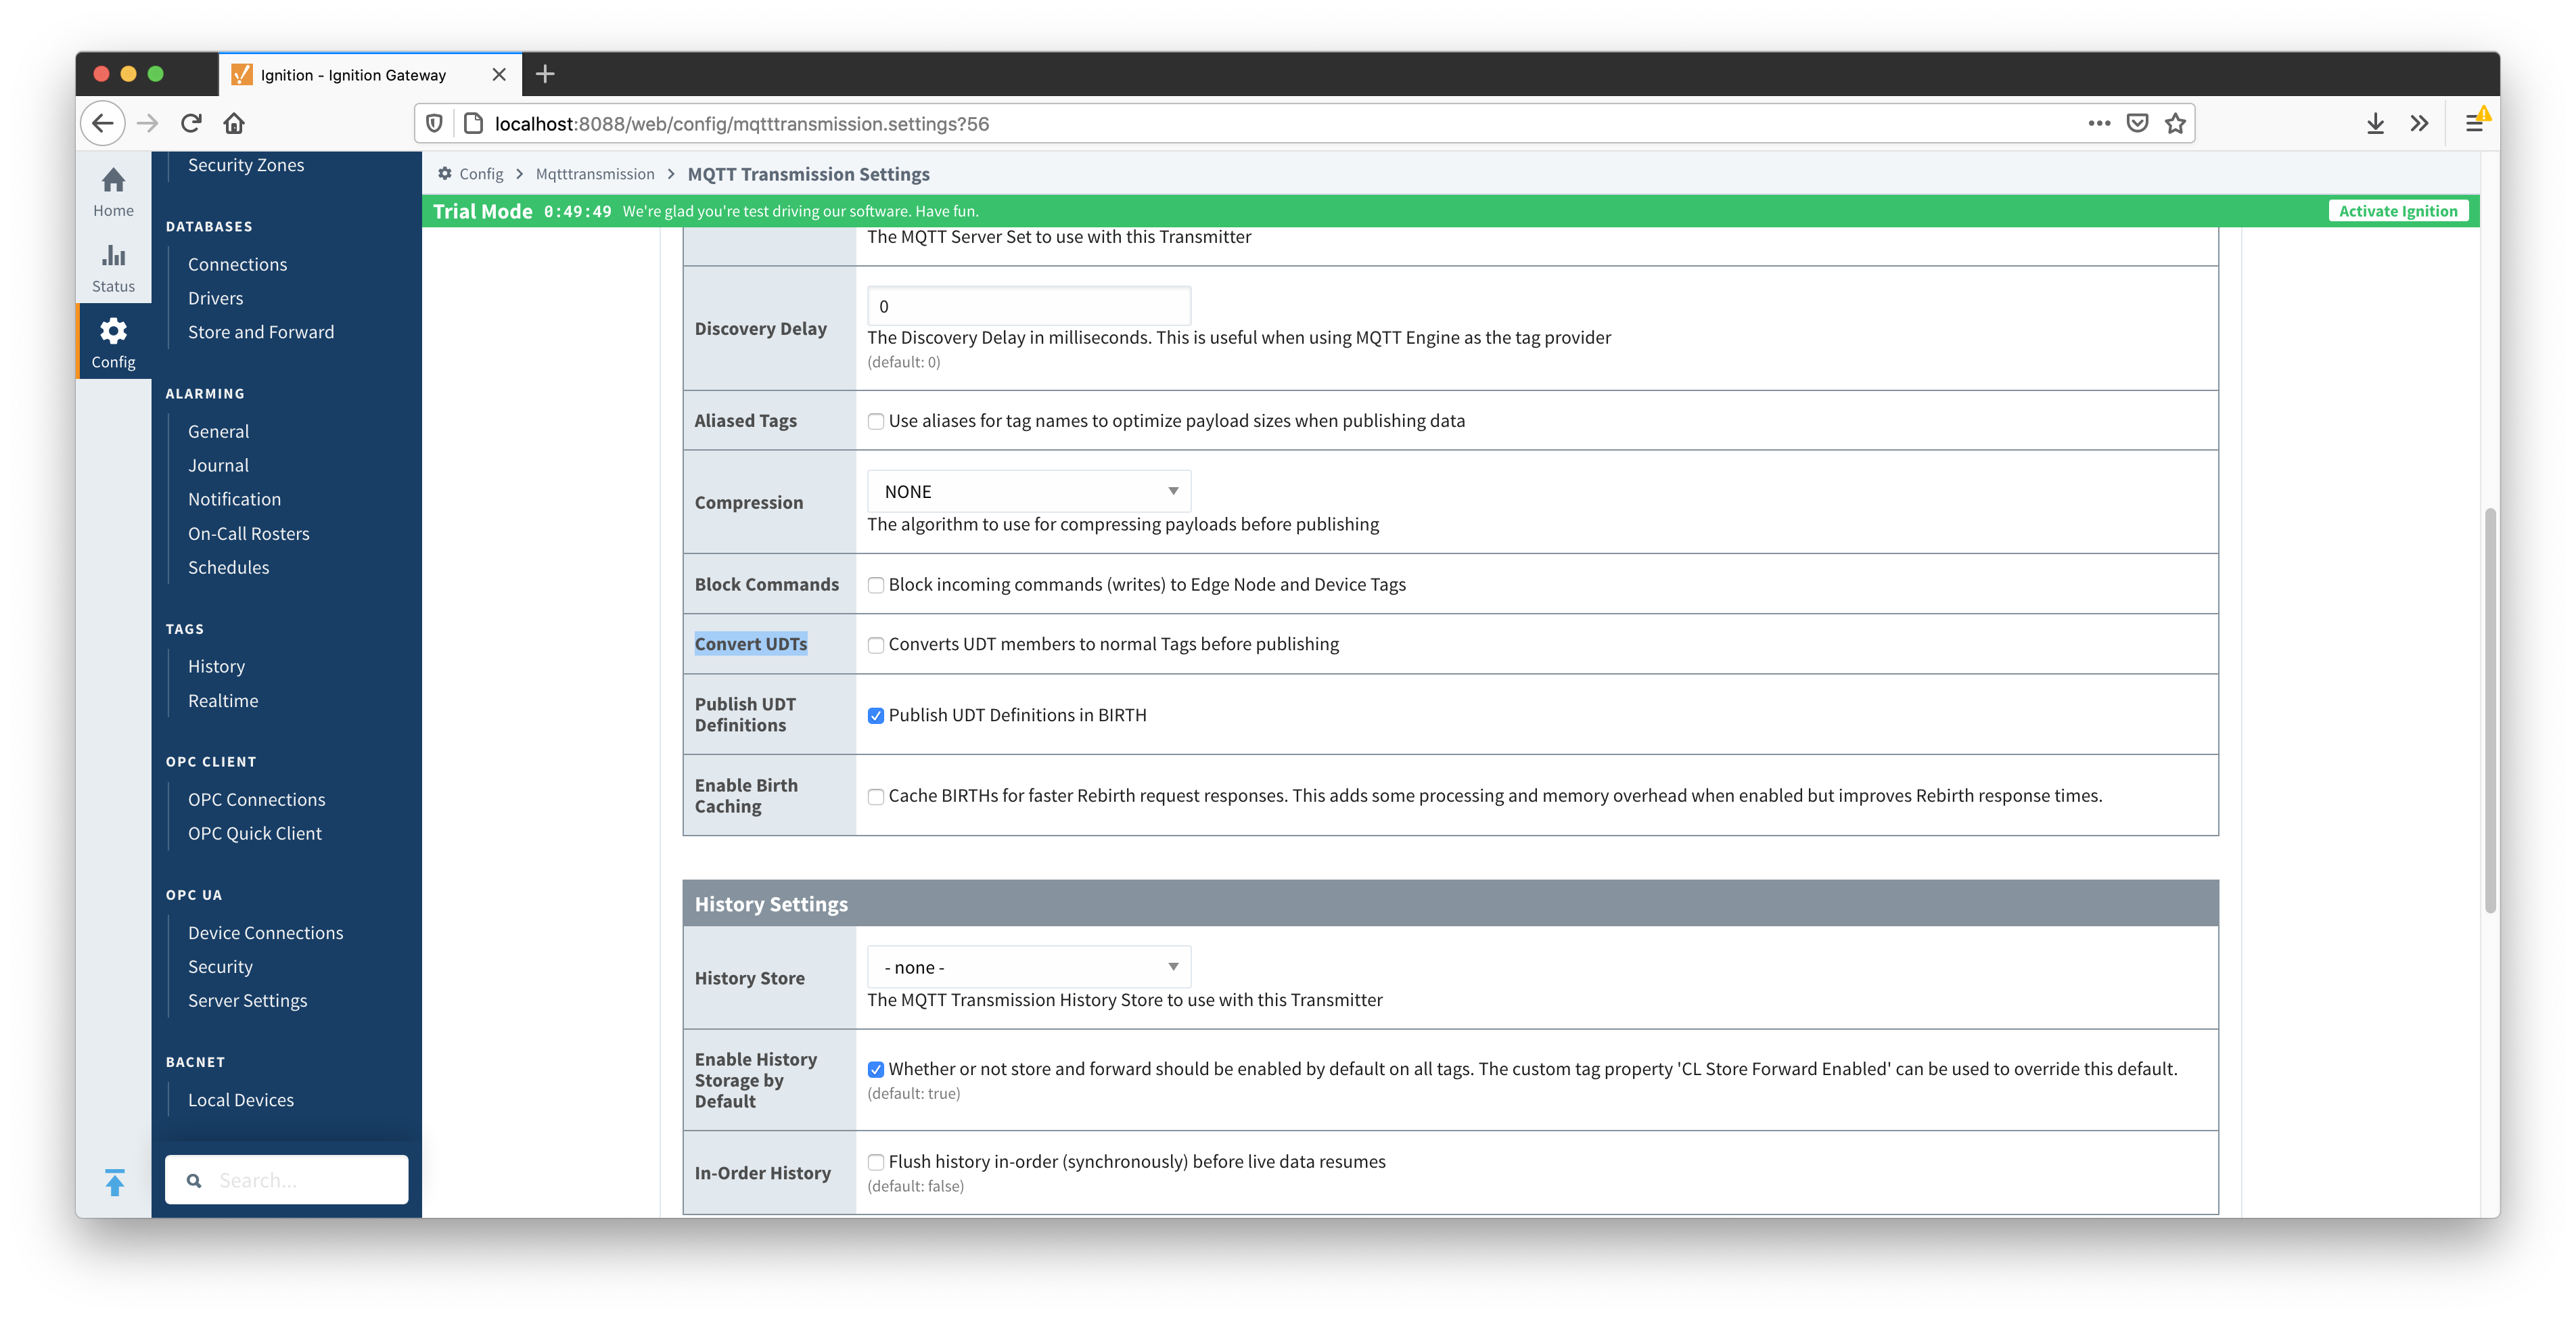
Now click the 'edit' button to the right of the 'Example Transmitter'. Scroll down to the 'Convert UDTs' option and uncheck it as shown below. This will also un-grey the 'Publish UDT Defintions' option. Leave it selected as shown below.
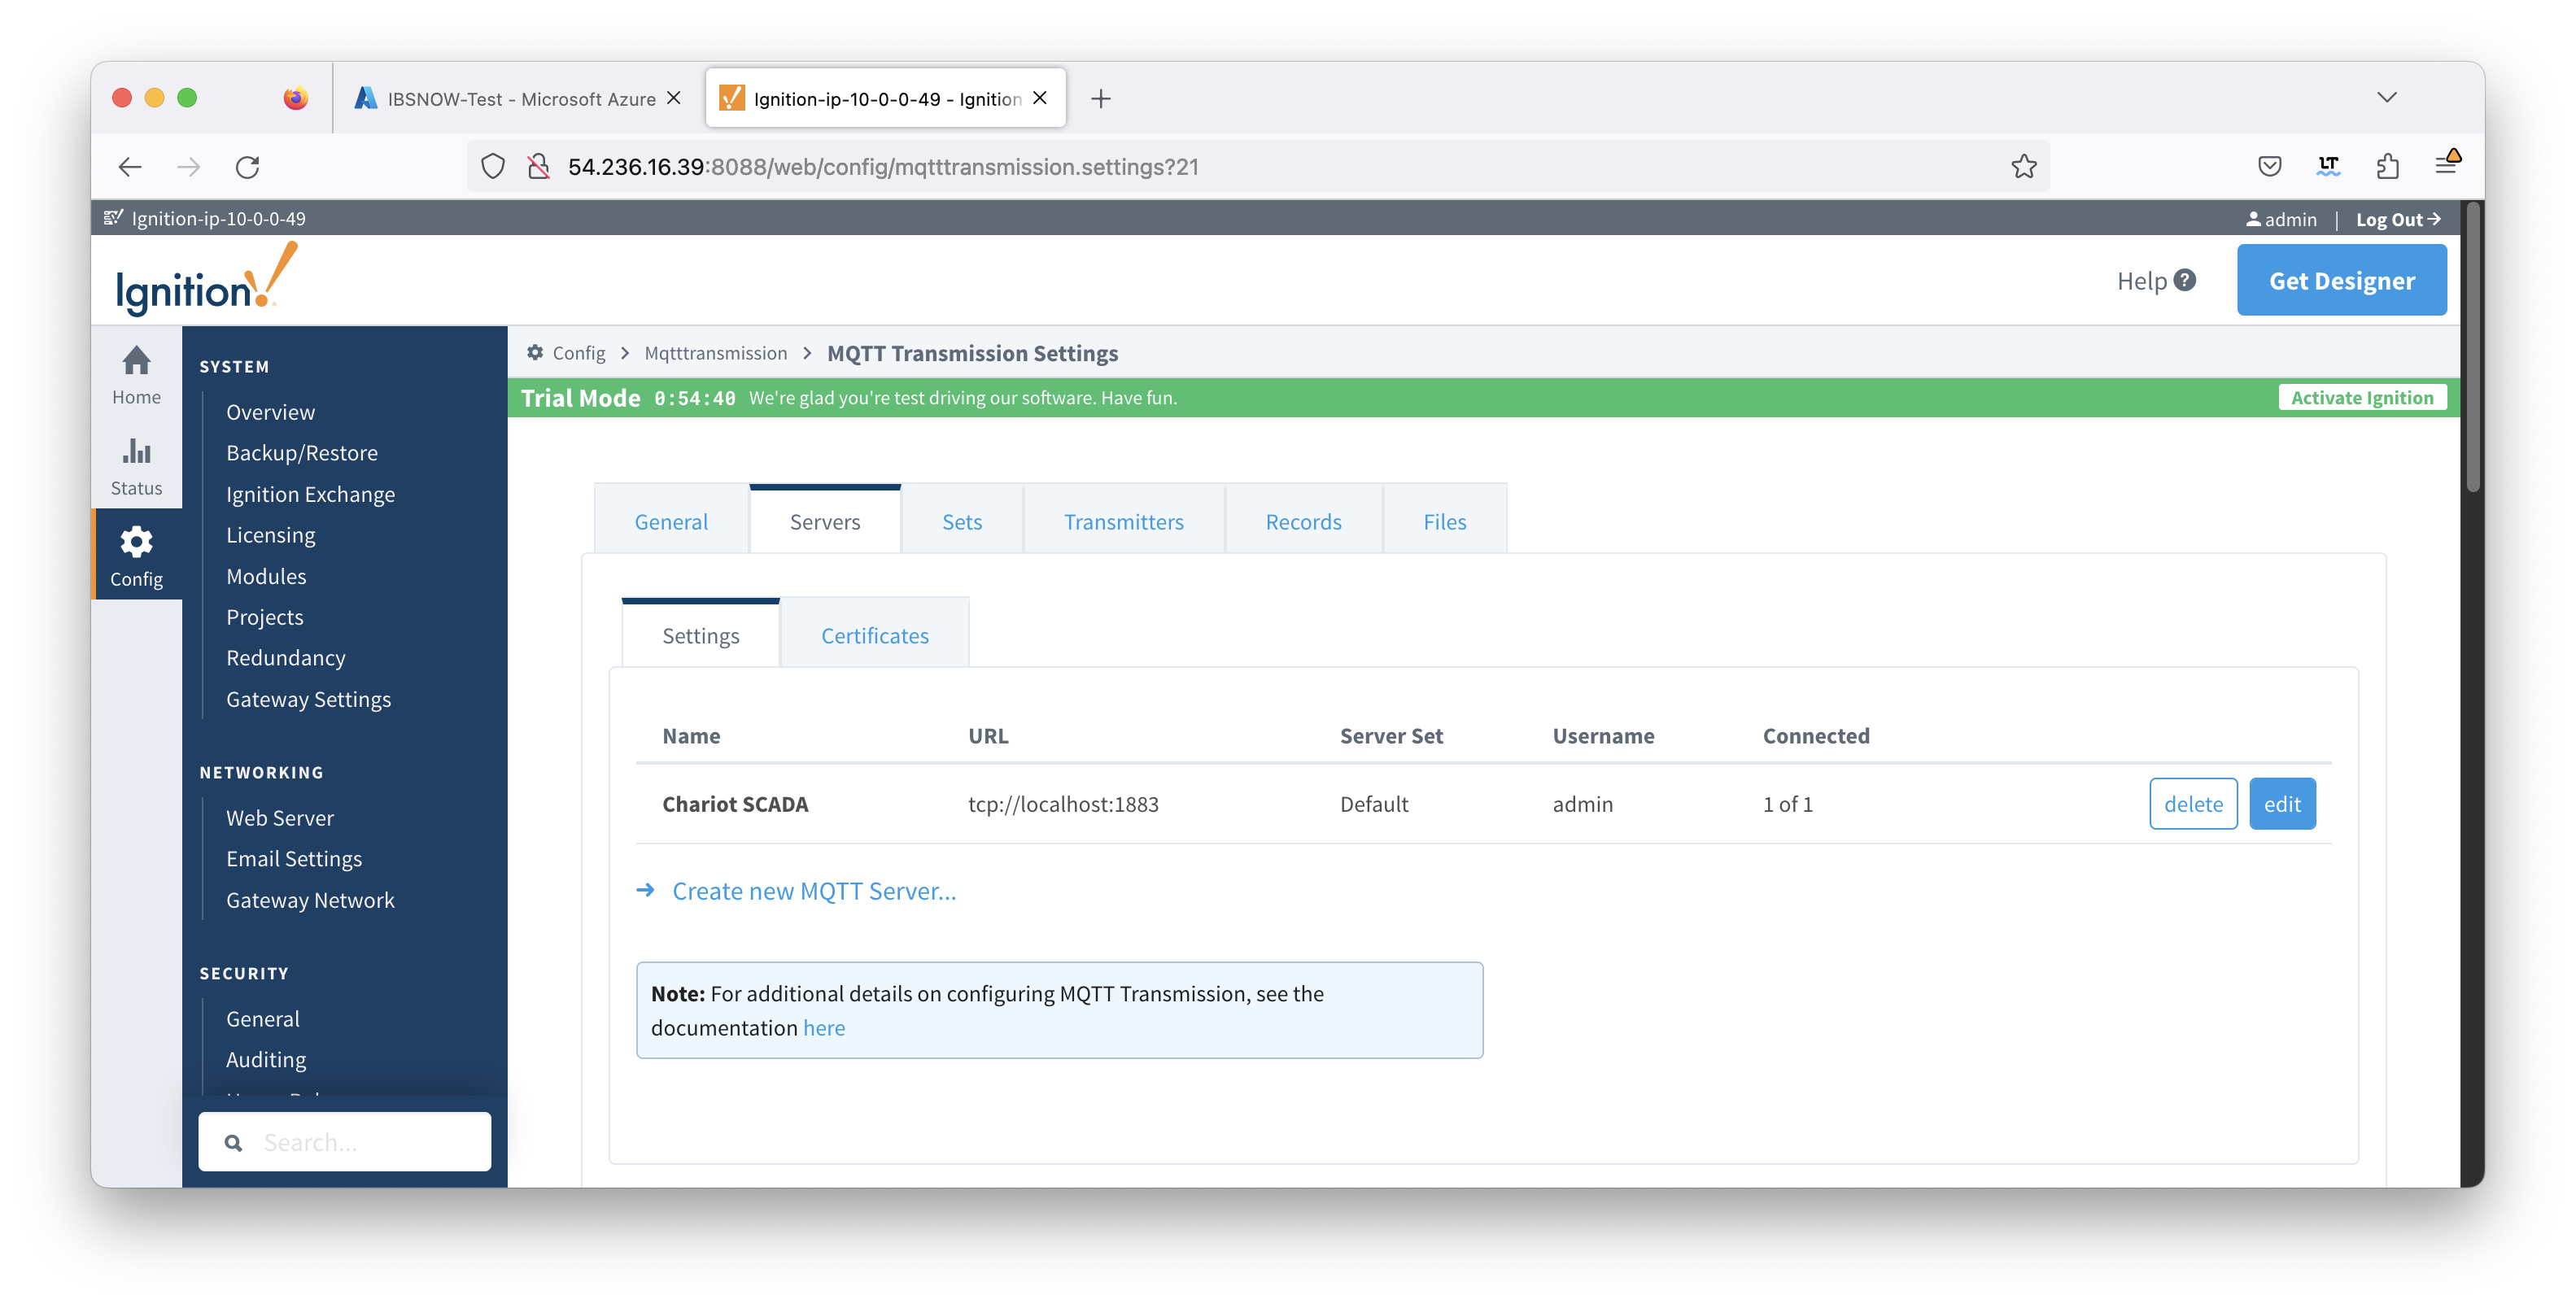
Now switch to the 'Servers' and 'Settings' tab. Delete the existing 'Chariot SCADA' pre-seeded MQTT Server Definition. Then create a new one with the following configuration.
When complete, you should see something similar to the following. However, the 'Connected' state should show '1 of 1' if everything was configured properly.
At this point, data should be flowing into Snowflake. By tailing the log in IBSNOW you should see something similar to what is shown below. This shows IBSNOW receiving the messages published from Ignition/MQTT Transmission. When IBSNOW receives the Sparkplug MQTT messages, it creates and updates asset models and assets in Snowflake. The log below is also a useful debugging tool if things don't appear to work as they should.
Successful Insert
|
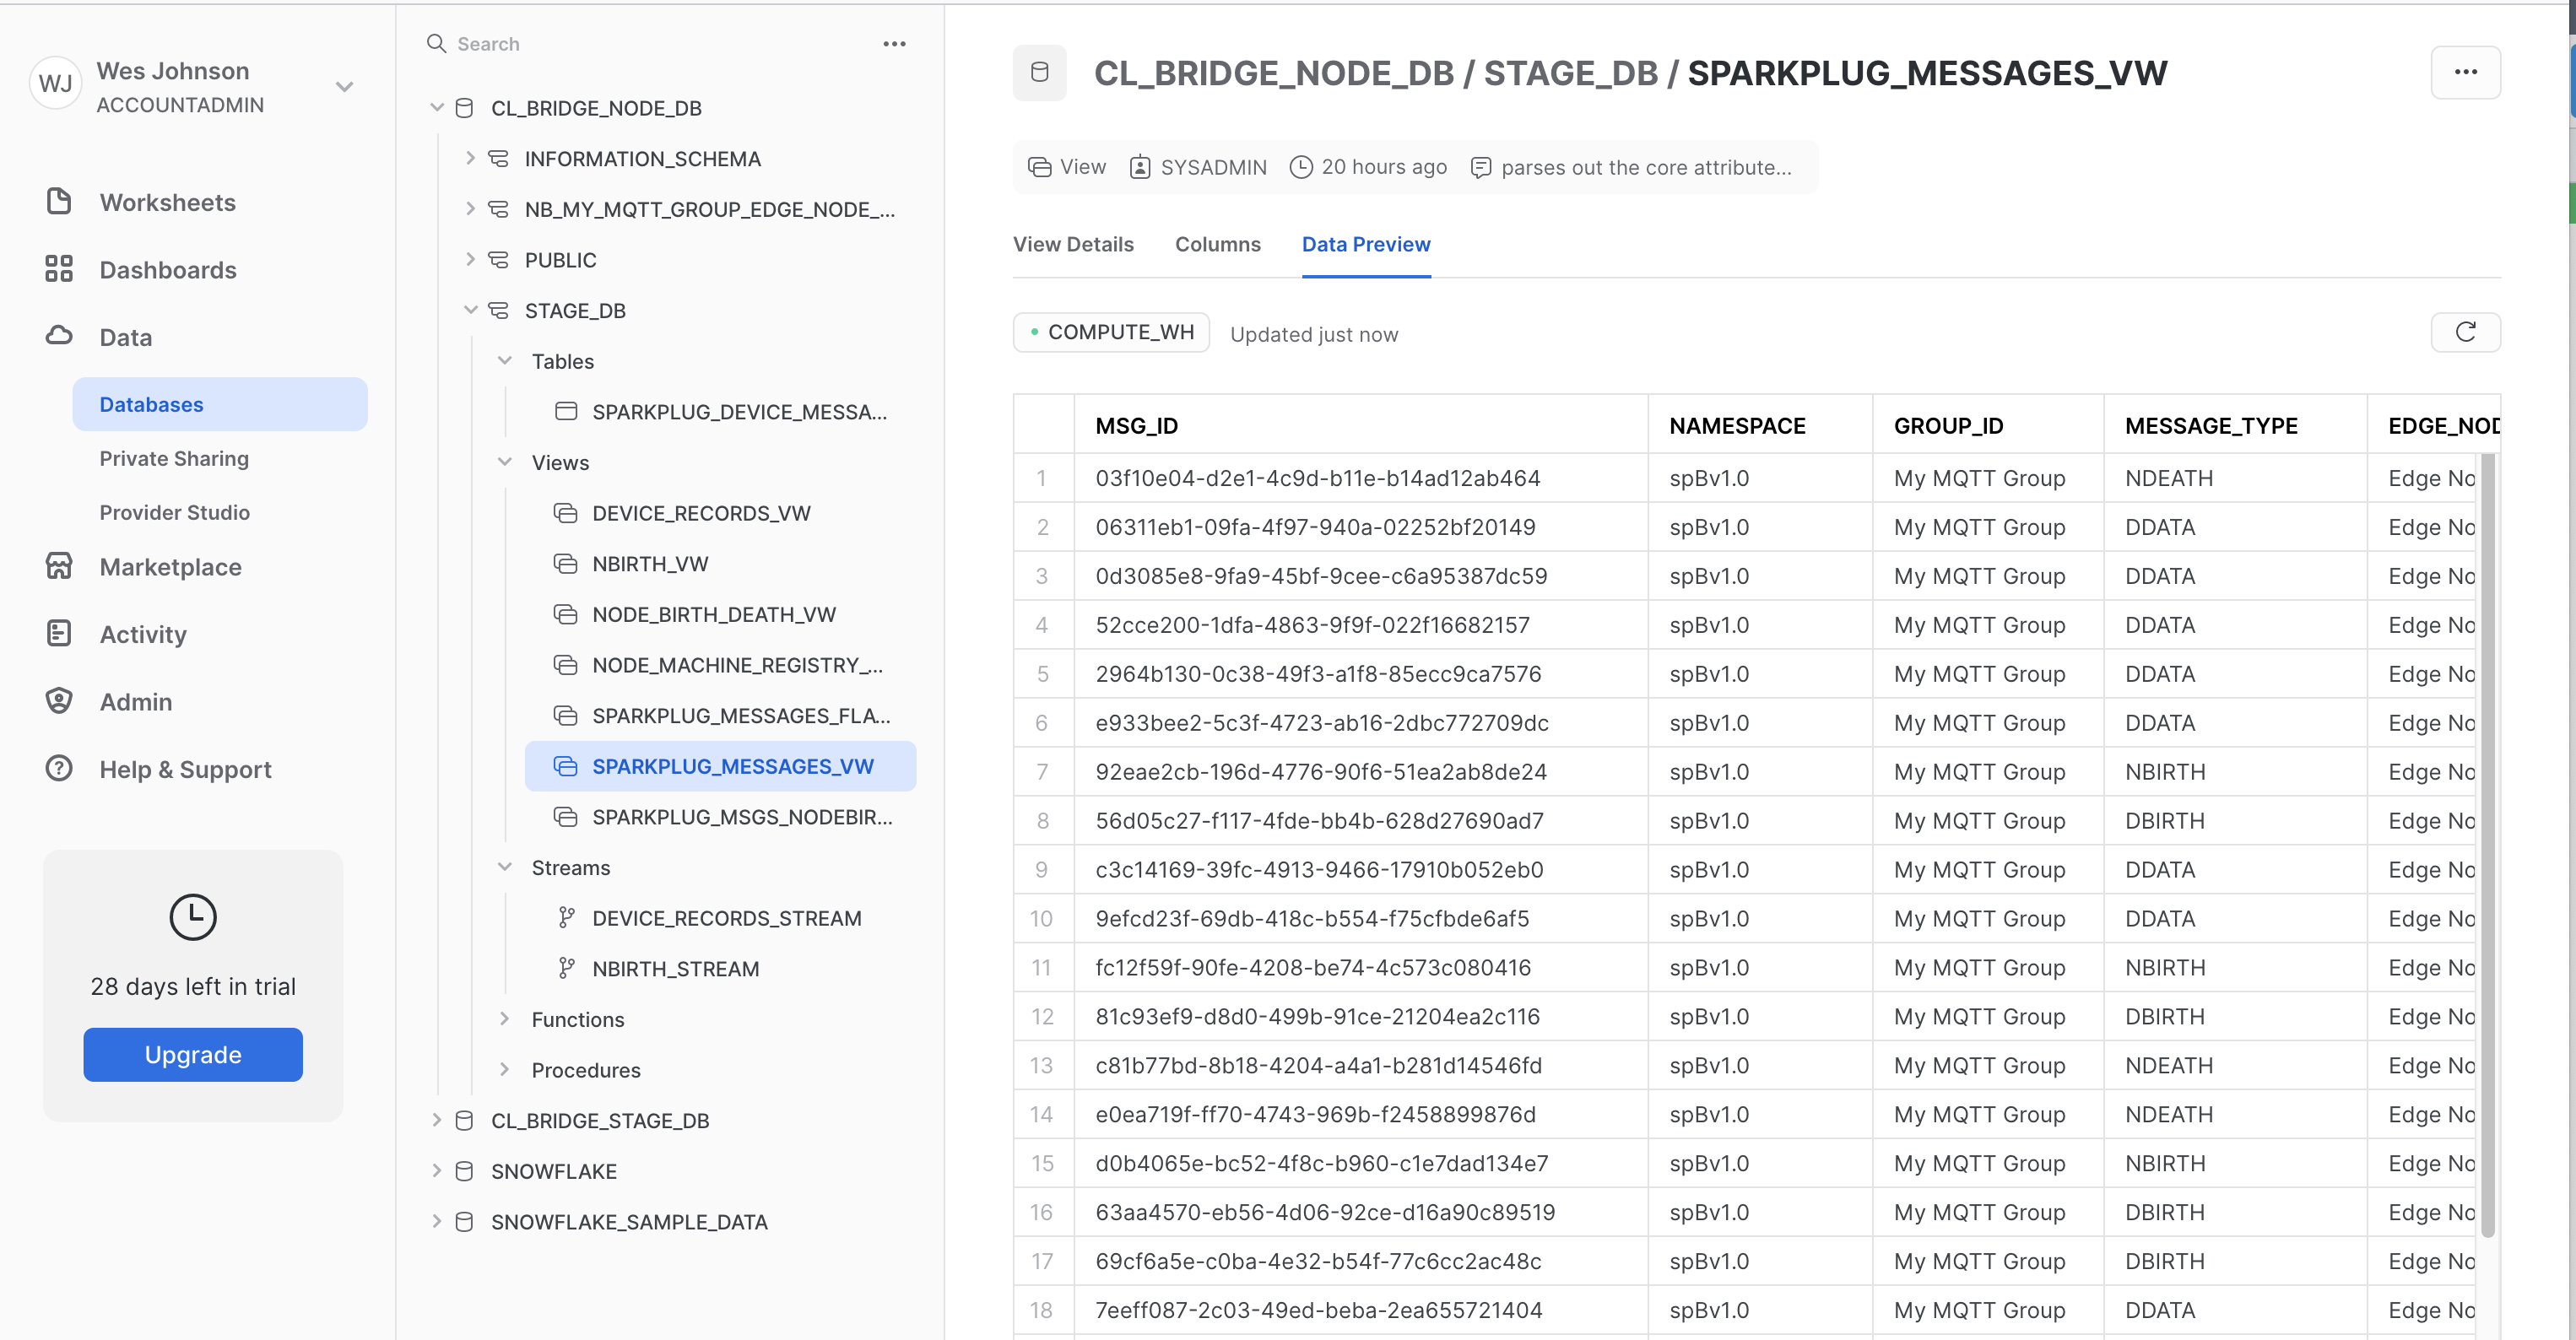
Data will also be visible in Snowflake at this point. See below for an example. By changing data values in the UDT tags in Ignition DDATA Sparkplug messages will be produced. Every time the Edge Node connects, it will produce NBIRTH and DBIRTH messages. All of these will now appear in Snowflake with their values, timestamps, and qualities