![]()
Contents
Cirrus Link Resources
Cirrus Link Website![]()
Contact Us (Sales/Support)![]()
Forum![]()
Cirrus Link Modules Docs for Ignition 7.9.x![]()
Inductive Resources
Ignition User Manual![]()
Knowledge Base Articles![]()
Inductive University![]()
Forum![]()
![]()
Cirrus Link Website![]()
Contact Us (Sales/Support)![]()
Forum![]()
Cirrus Link Modules Docs for Ignition 7.9.x![]()
Ignition User Manual![]()
Knowledge Base Articles![]()
Inductive University![]()
Forum![]()
...
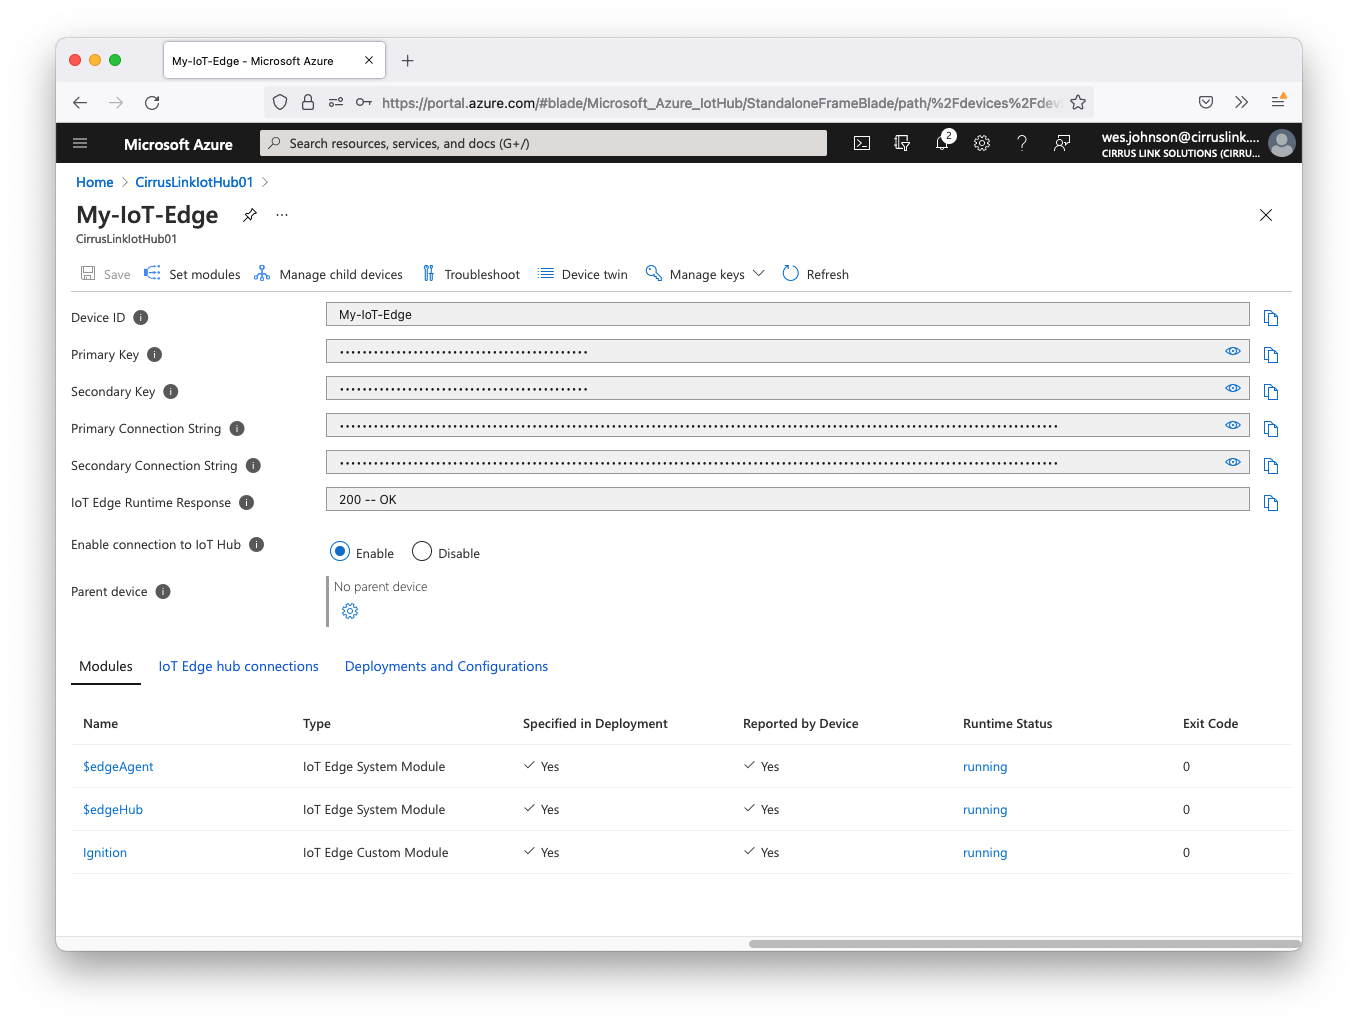
Finally, click 'Create' in the lower left corner. This will deploy the Ignition module to Azure Edge. It takes a few minutes. You can use the 'Refresh' button on the Device page to check the status of the deployment. Once Ignition has successfully deployed, you should see the following. Specifically note that $edgeHub and 'Ignition' now show a 'Runtime Status' of running.
Now click the 'Ignition' module link near the bottom of the page. This will open the following page.
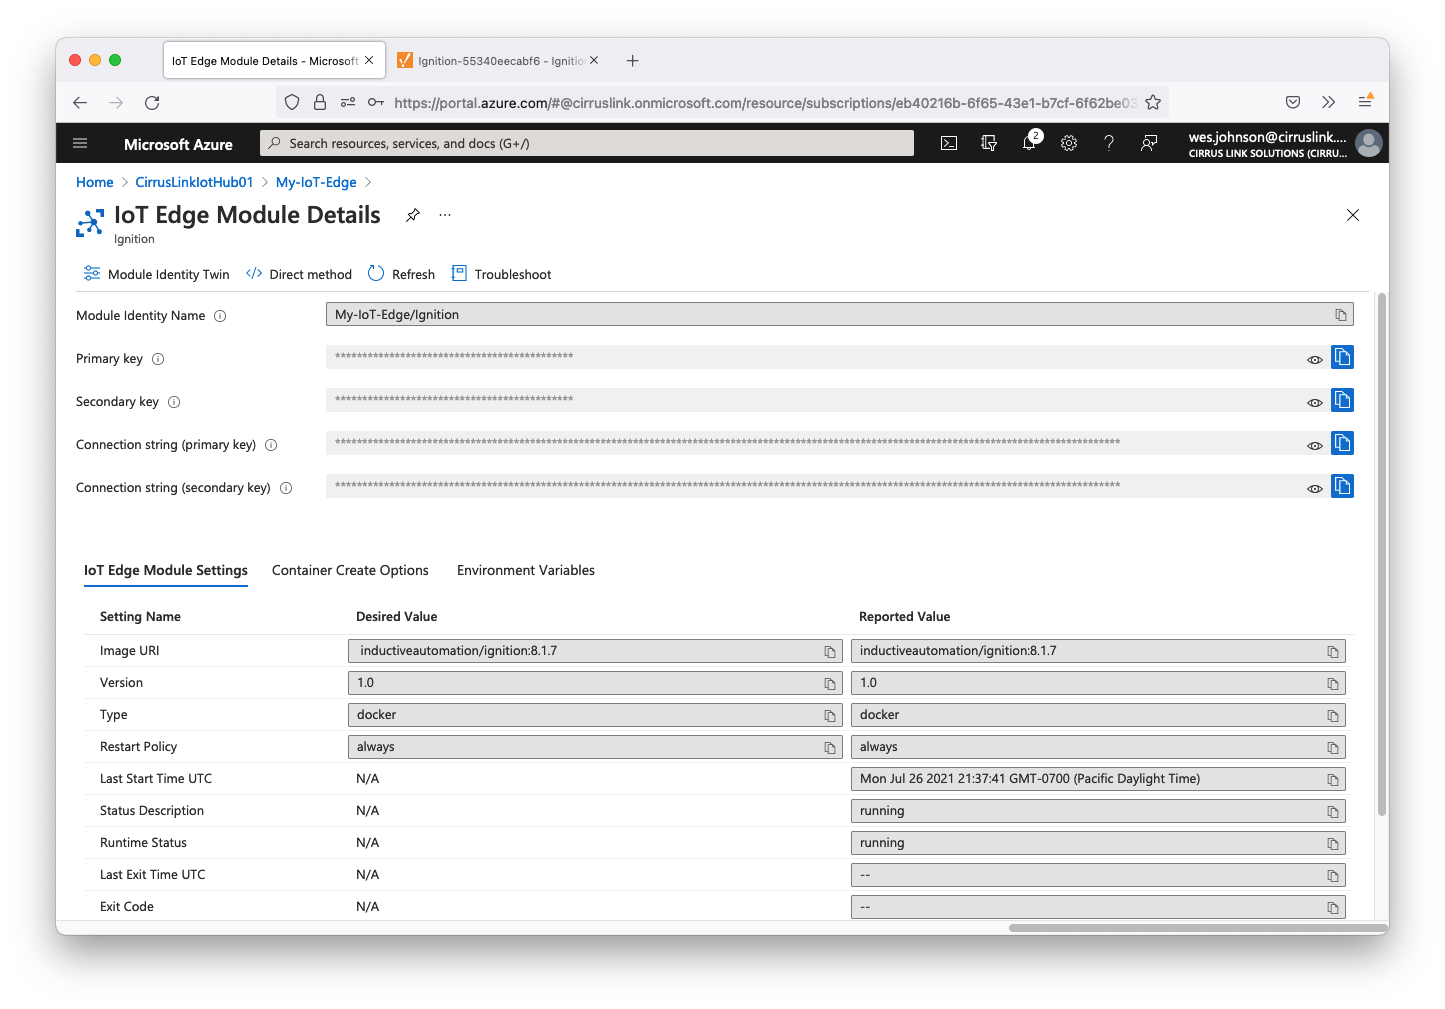
Copy the 'Connection string (primary key)' and save it for later use. This will be used in the Ignition configuration to establish an MQTT Connection from Ignition's Azure Injector module to Azure IoT Edge Hub.
At this point, Ignition is running as a Docker container in Azure Edge. You should be able to browse to http://[ip_address_of_azure_edge]:8088. Replace [ip_address_of_azure_edge] with the IP address of your Azure Edge system. You should see something similar to the following.
...
Now click 'Create New Certificate'. After doing so you should see something similar to the following.

Now select the 'Settings' tab directly to the left of the 'Certificates' tab. Then click the 'Create new Azure IoT Edge Hub Setting...' link. This will open the following page.

Before configuring the Connection Settings in Ignition's Web UI, open the Azure Portal and browse to your IoT Edge Device (in this tutorial that is 'My-IoT-Edge'). You should see this page.
Now click the 'Ignition' module link under the 'Modules' section near the bottom of the page. This will open the following page.