![]()
Contents
Cirrus Link Resources
Cirrus Link Website![]()
Contact Us (Sales/Support)![]()
Forum![]()
Cirrus Link Modules Docs for Ignition 7.9.x![]()
Inductive Resources
Ignition User Manual![]()
Knowledge Base Articles![]()
Inductive University![]()
Forum![]()
![]()
Cirrus Link Website![]()
Contact Us (Sales/Support)![]()
Forum![]()
Cirrus Link Modules Docs for Ignition 7.9.x![]()
Ignition User Manual![]()
Knowledge Base Articles![]()
Inductive University![]()
Forum![]()
...
...
...
...
...
| Friendly Name | Certificate Filename | File Description | File Location | CACertificate | Root Certificate|
|---|---|---|---|---|---|
| DeviceCertificate | device.pem | Device Certificate | iotcerts/certs/device/device.pem | ||
| DeviceKey | device.key | Device Private Key | iotcerts/certs/device/device.key |
...
Update the Azure Injector > Settings > Azure IoT Hubs > Settings configuration to use the certificates as shown below. Note : the certificates created do not use a Password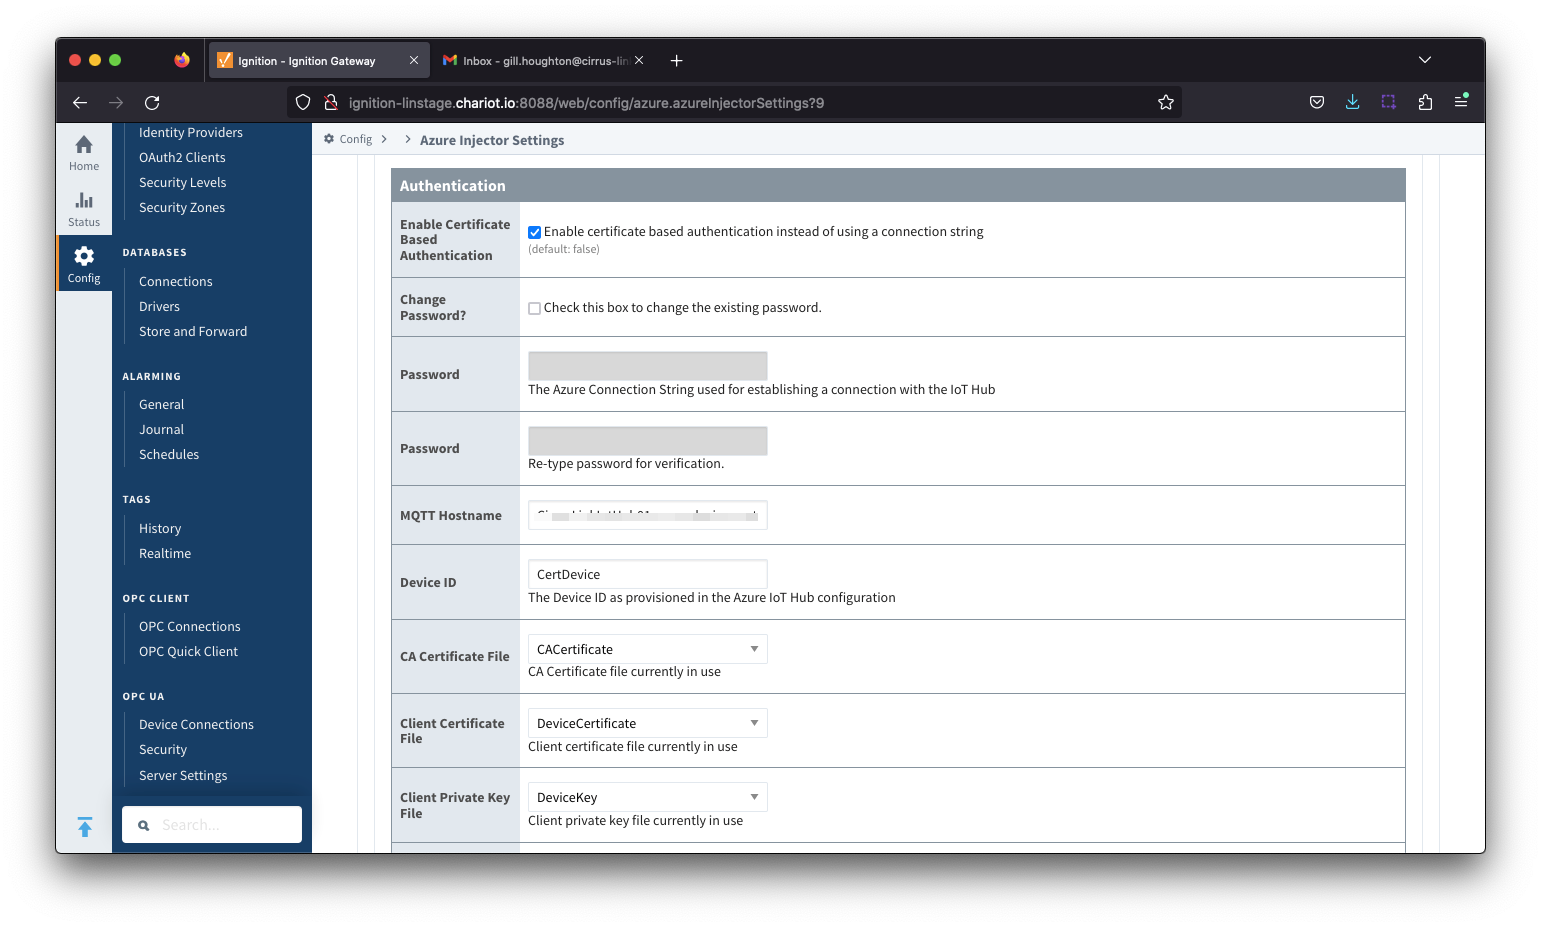
Verify the connection is established as shown by the Status on the Azure Injector > Settings > Azure IoT Hubs view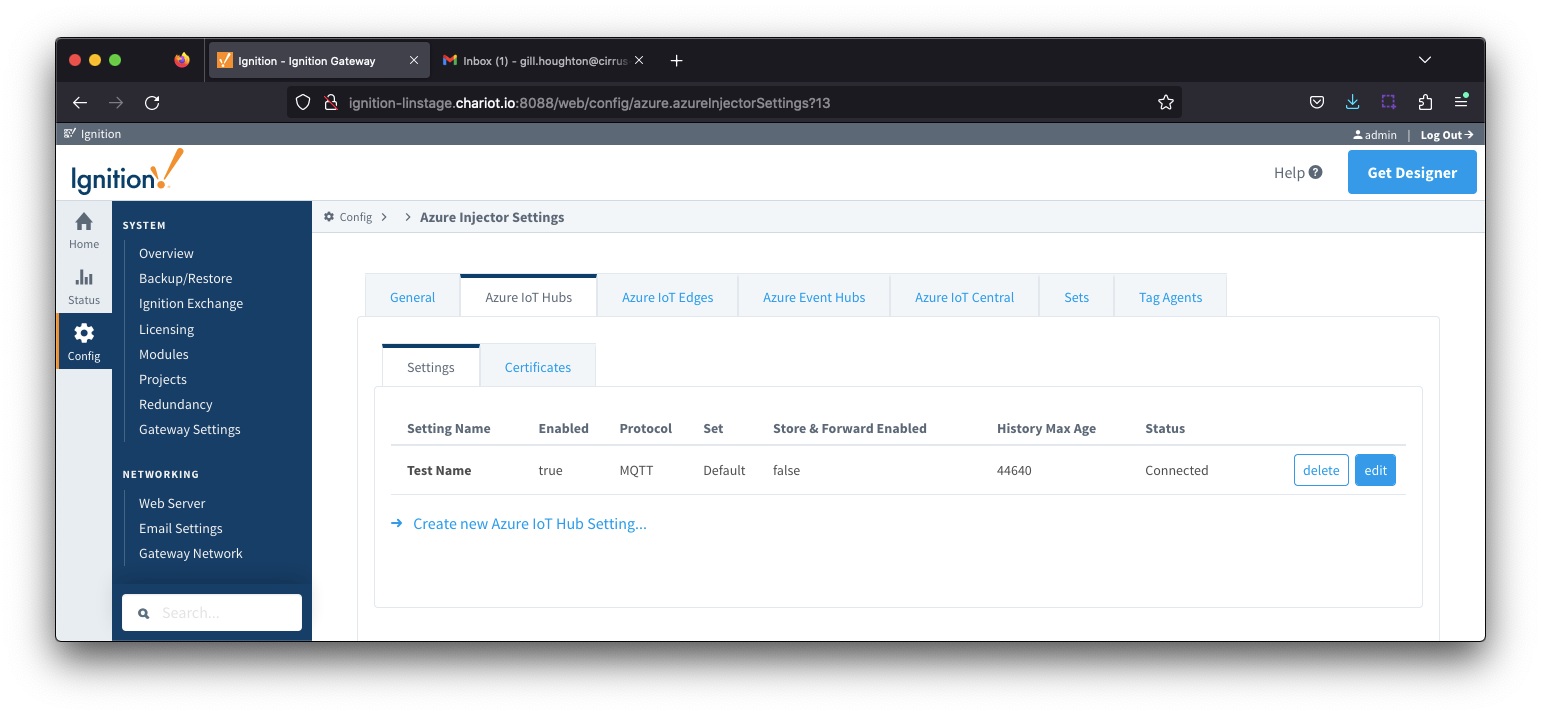
...