![]()
Contents
Cirrus Link Resources
Cirrus Link Website![]()
Contact Us (Sales/Support)![]()
Forum![]()
Cirrus Link Modules Docs for Ignition 7.9.x![]()
Inductive Resources
Ignition User Manual![]()
Knowledge Base Articles![]()
Inductive University![]()
Forum![]()
![]()
Cirrus Link Website![]()
Contact Us (Sales/Support)![]()
Forum![]()
Cirrus Link Modules Docs for Ignition 7.9.x![]()
Ignition User Manual![]()
Knowledge Base Articles![]()
Inductive University![]()
Forum![]()
...
iotcerts/
├── ca/
│   ├── ca.crt
│   ├── ca.pem
│   ├── ca.key
└── certs/
    ├── device/
       ├── device.crt
       ├── device.pem
       ├── device.csr
       └── device.key
...
...
...
...
...
Click Save.
Create Logical Device myiotdevice1
On the resource Overview page, click “Devices” menu on the left blade, and click “Add Device” button.
...
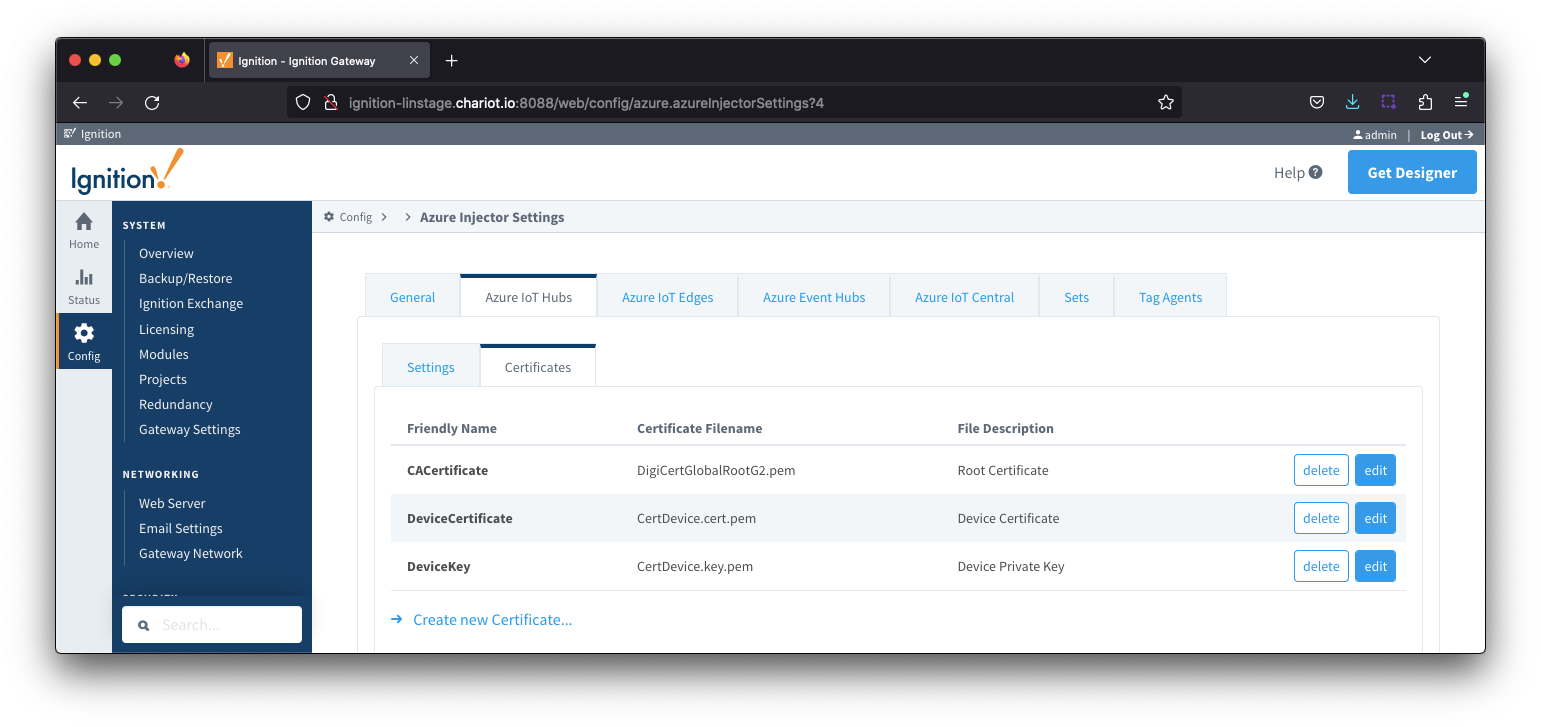
Navigate to the Azure Injector > Settings > Azure IoT Hubs > Certificates and add the certificates as shown below:
| Friendly Name | Certificate Filename | File Description | File Location |
|---|---|---|---|
| CACertificate | ca.pem | Root Certificate | iotcerts/ca/ca.pem |
| DeviceCertificate | device.pem | Device Certificate | iotcerts/certs/device/device.pem |
| DeviceKey | device.key | Device Private Key | iotcerts/certs/device/device.key |
...
In the “Create a device” page that appears, give myiotdevice1 as the Device Id.
| Note |
|---|
| Note that this name must match the commonName/FQDN we used when generating the client (device) certificate above. |
Select Authentication type X.509 CA Signed. Keep “Connect this device to an IoT Hub” as Enabled.
...