Prerequisites
- Ensure you have a platform that supports either Linux 64-bit Docker images or ARM HF images
- Hilscher provides a number of gateways that support 64-bit Linux containers and ARM HF containers
- This tutorial will use Portainer to set up and configure the container. However, this could all be done via the command line if you prefer.
Summary
This tutorial will cover the downloading, configuration, and starting of Ignition Edge MQTT as a Docker container using Portainer.
Upon completion of this tutorial you will have Ignition Edge MQTT installed as a Docker container which will be ready to configure and use.
Tutorial
Step 1: Start Portainer
Begin by ensure Portainer is running and you are set up to manager the target Docker environment. Information on Portainer can be found here. If using a Hilscher Edge device consult the Hilscher documentation for access to the Portainer Portal.
Step 2: Download the Ignition Edge MQTT image
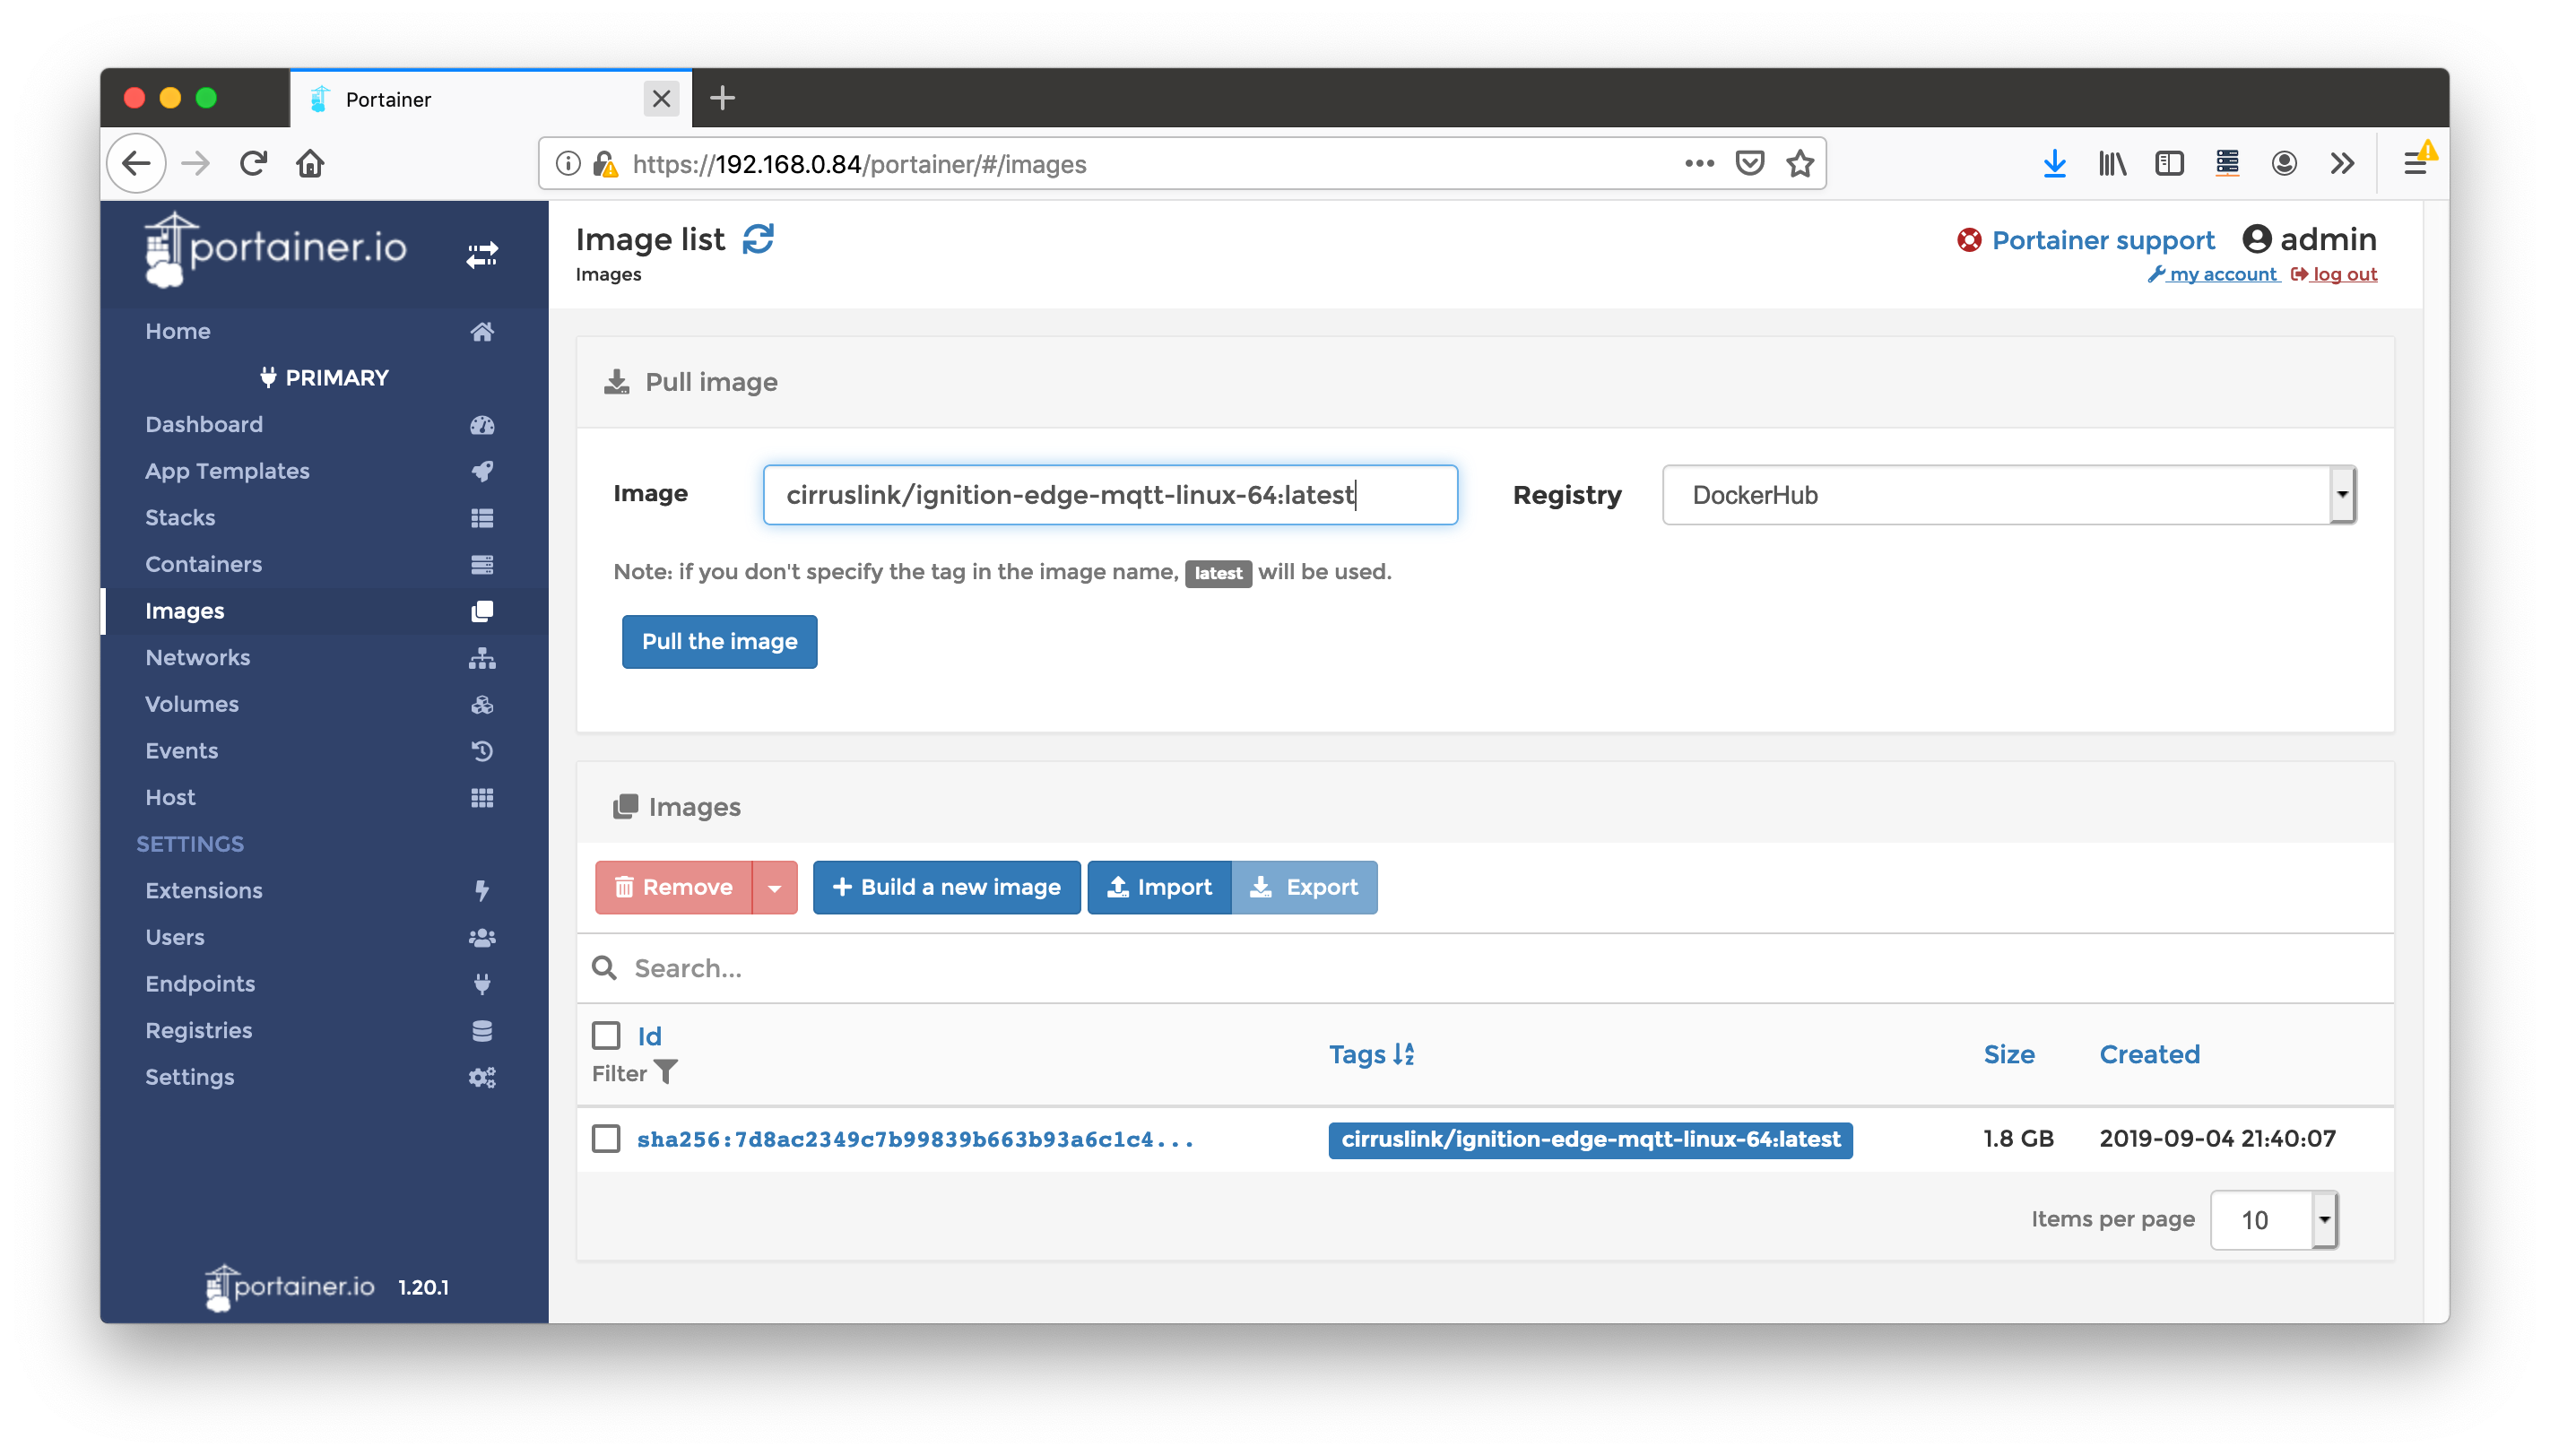
Open a Web Browser to your Portainer instance and select 'Images' on the left. In the name section enter one of the two following strings depending on your platform architecture:
- If Linux 64-bit is supported: cirruslink/ignition-edge-mqtt-linux-64:latest
- If Linux ARM HF is supported: cirruslink/ignition-edge-mqtt-linux-arm32v7:latest
The repositories can be viewed here:
Shown below is an example for 64-bit Linux. After entering the target image into the name field, click the 'Pull the Image' button to download it. You must have internet connectivity for this to succeed. Once the download is complete, you should see something similar to the following.
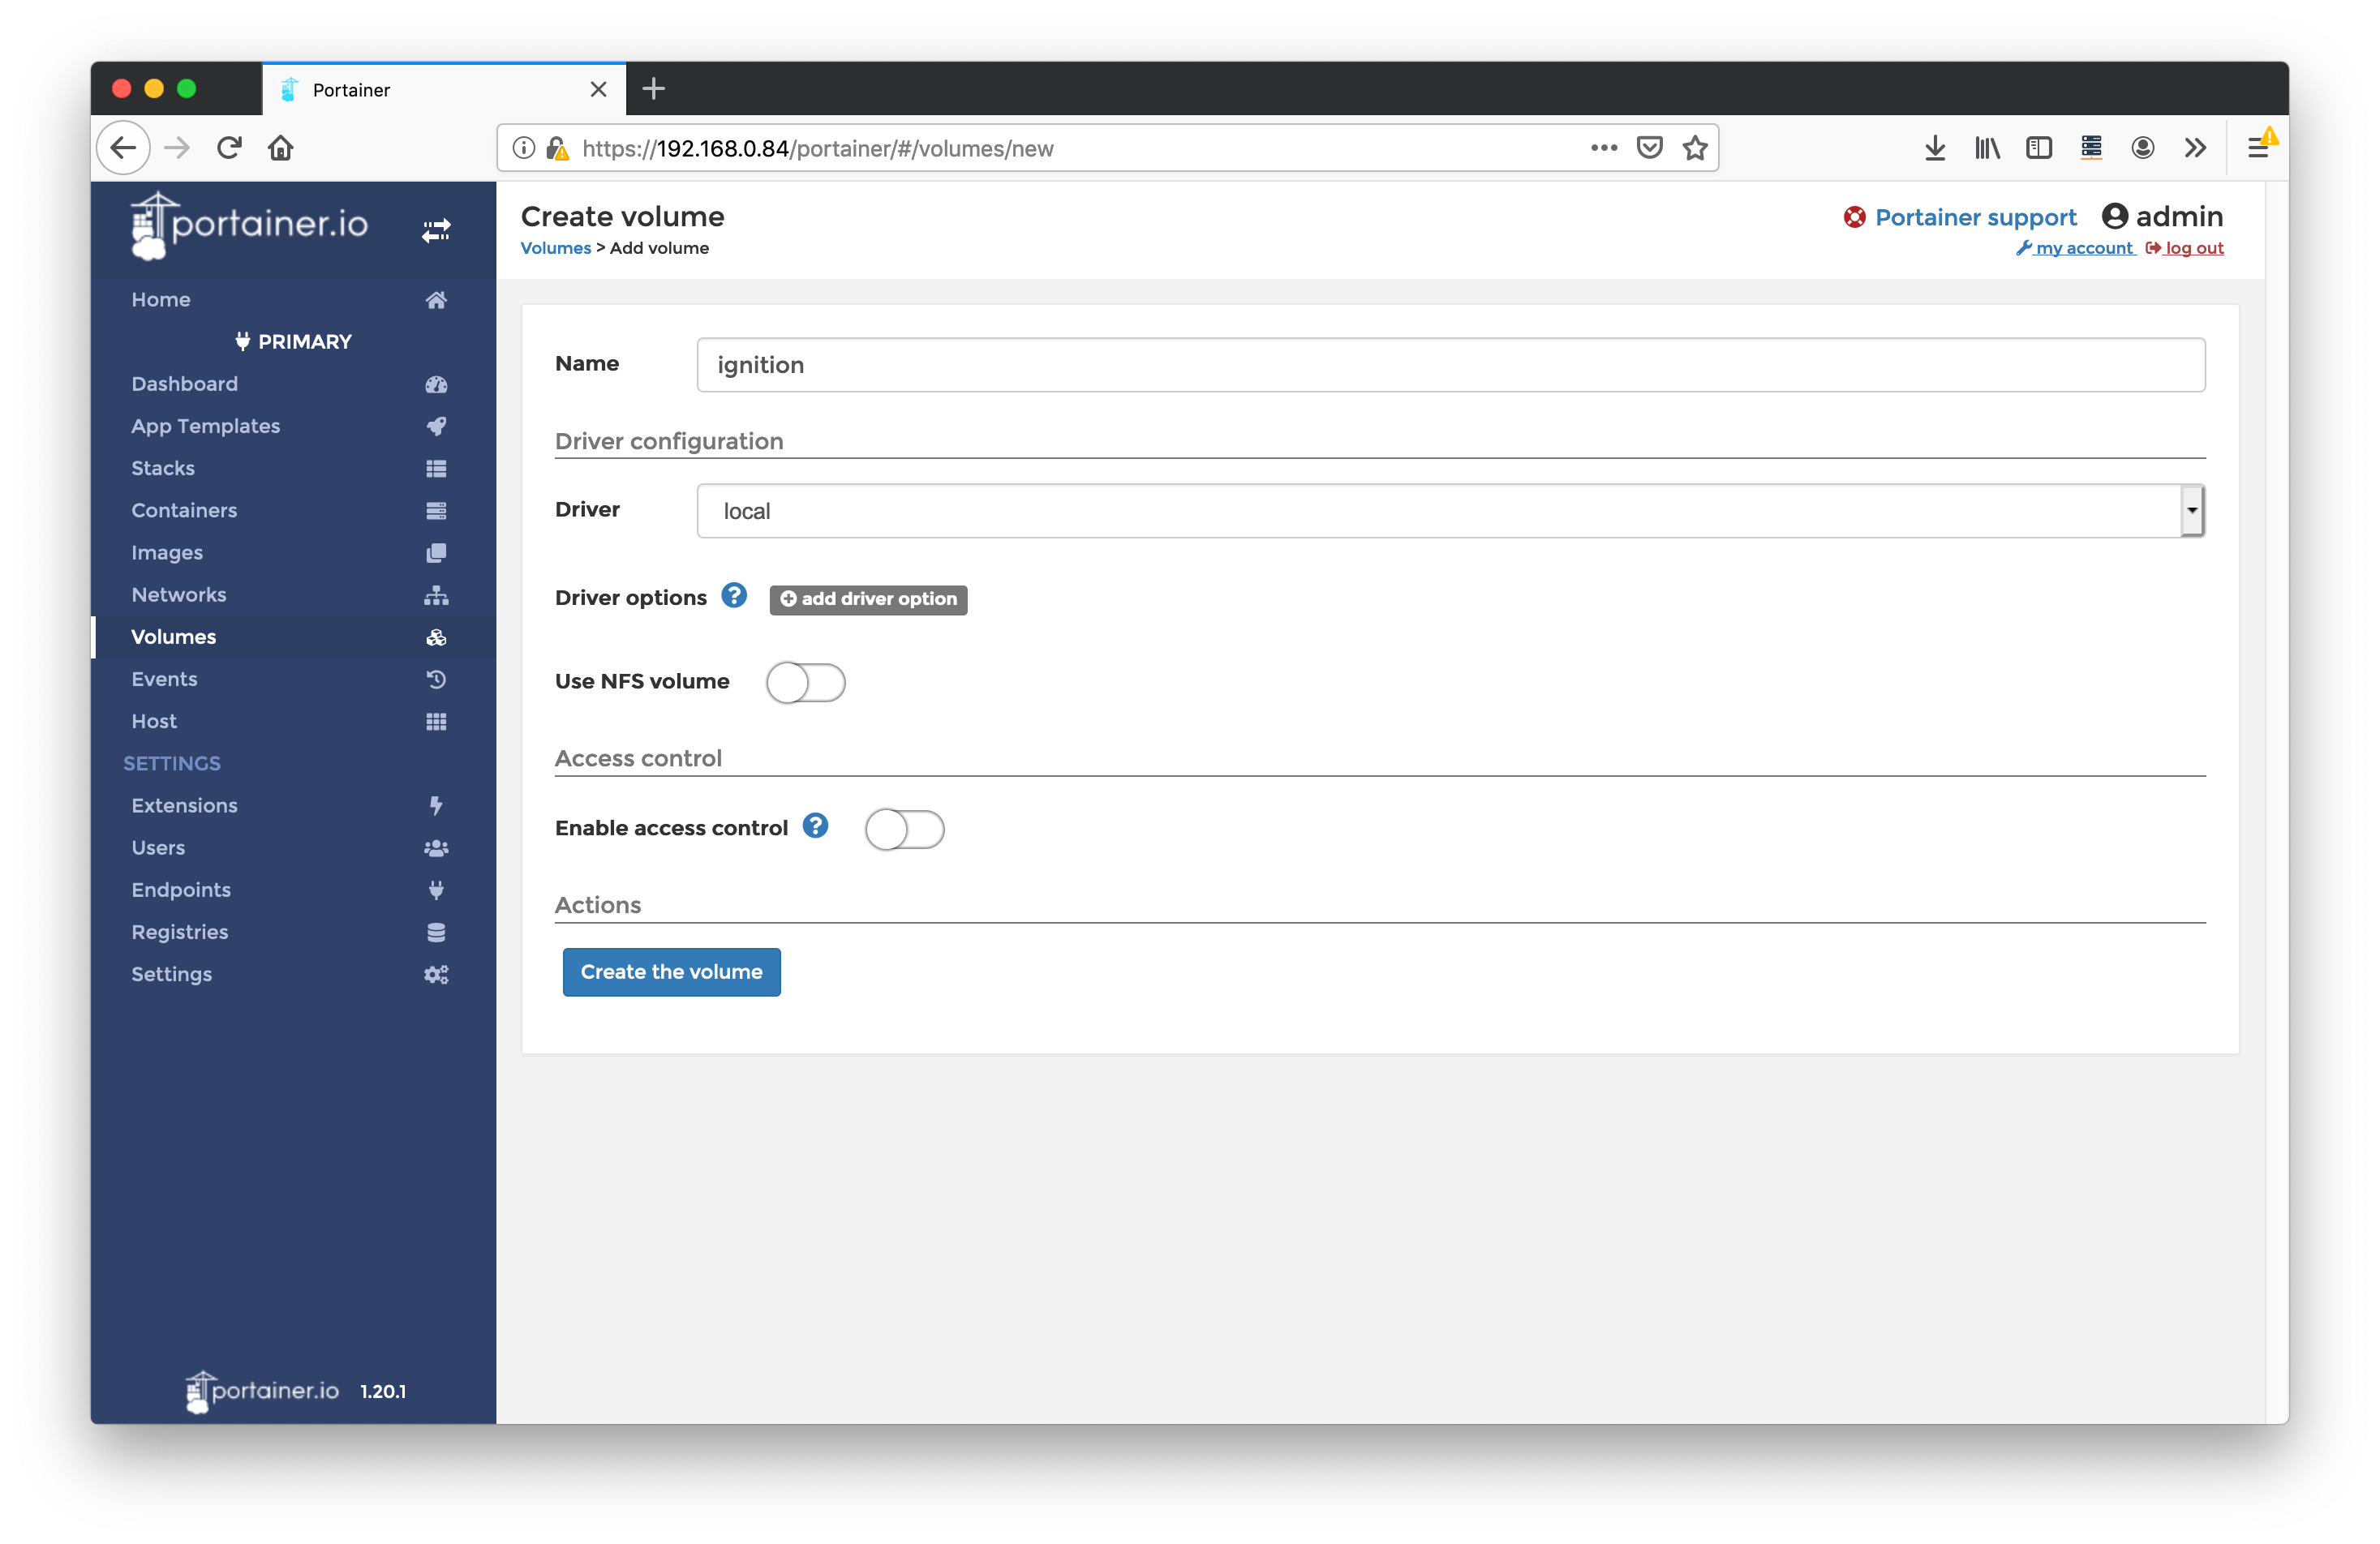
Step 3: Create the Volumes
Select 'Volumes' on the left and add two new ones by clicking the 'Add Volume' button. Then type the name of the first volume as 'ignition' as shown below and click 'Create the volume'. Ensure 'Use NFS volume" and 'Enable access control' are both disabled.
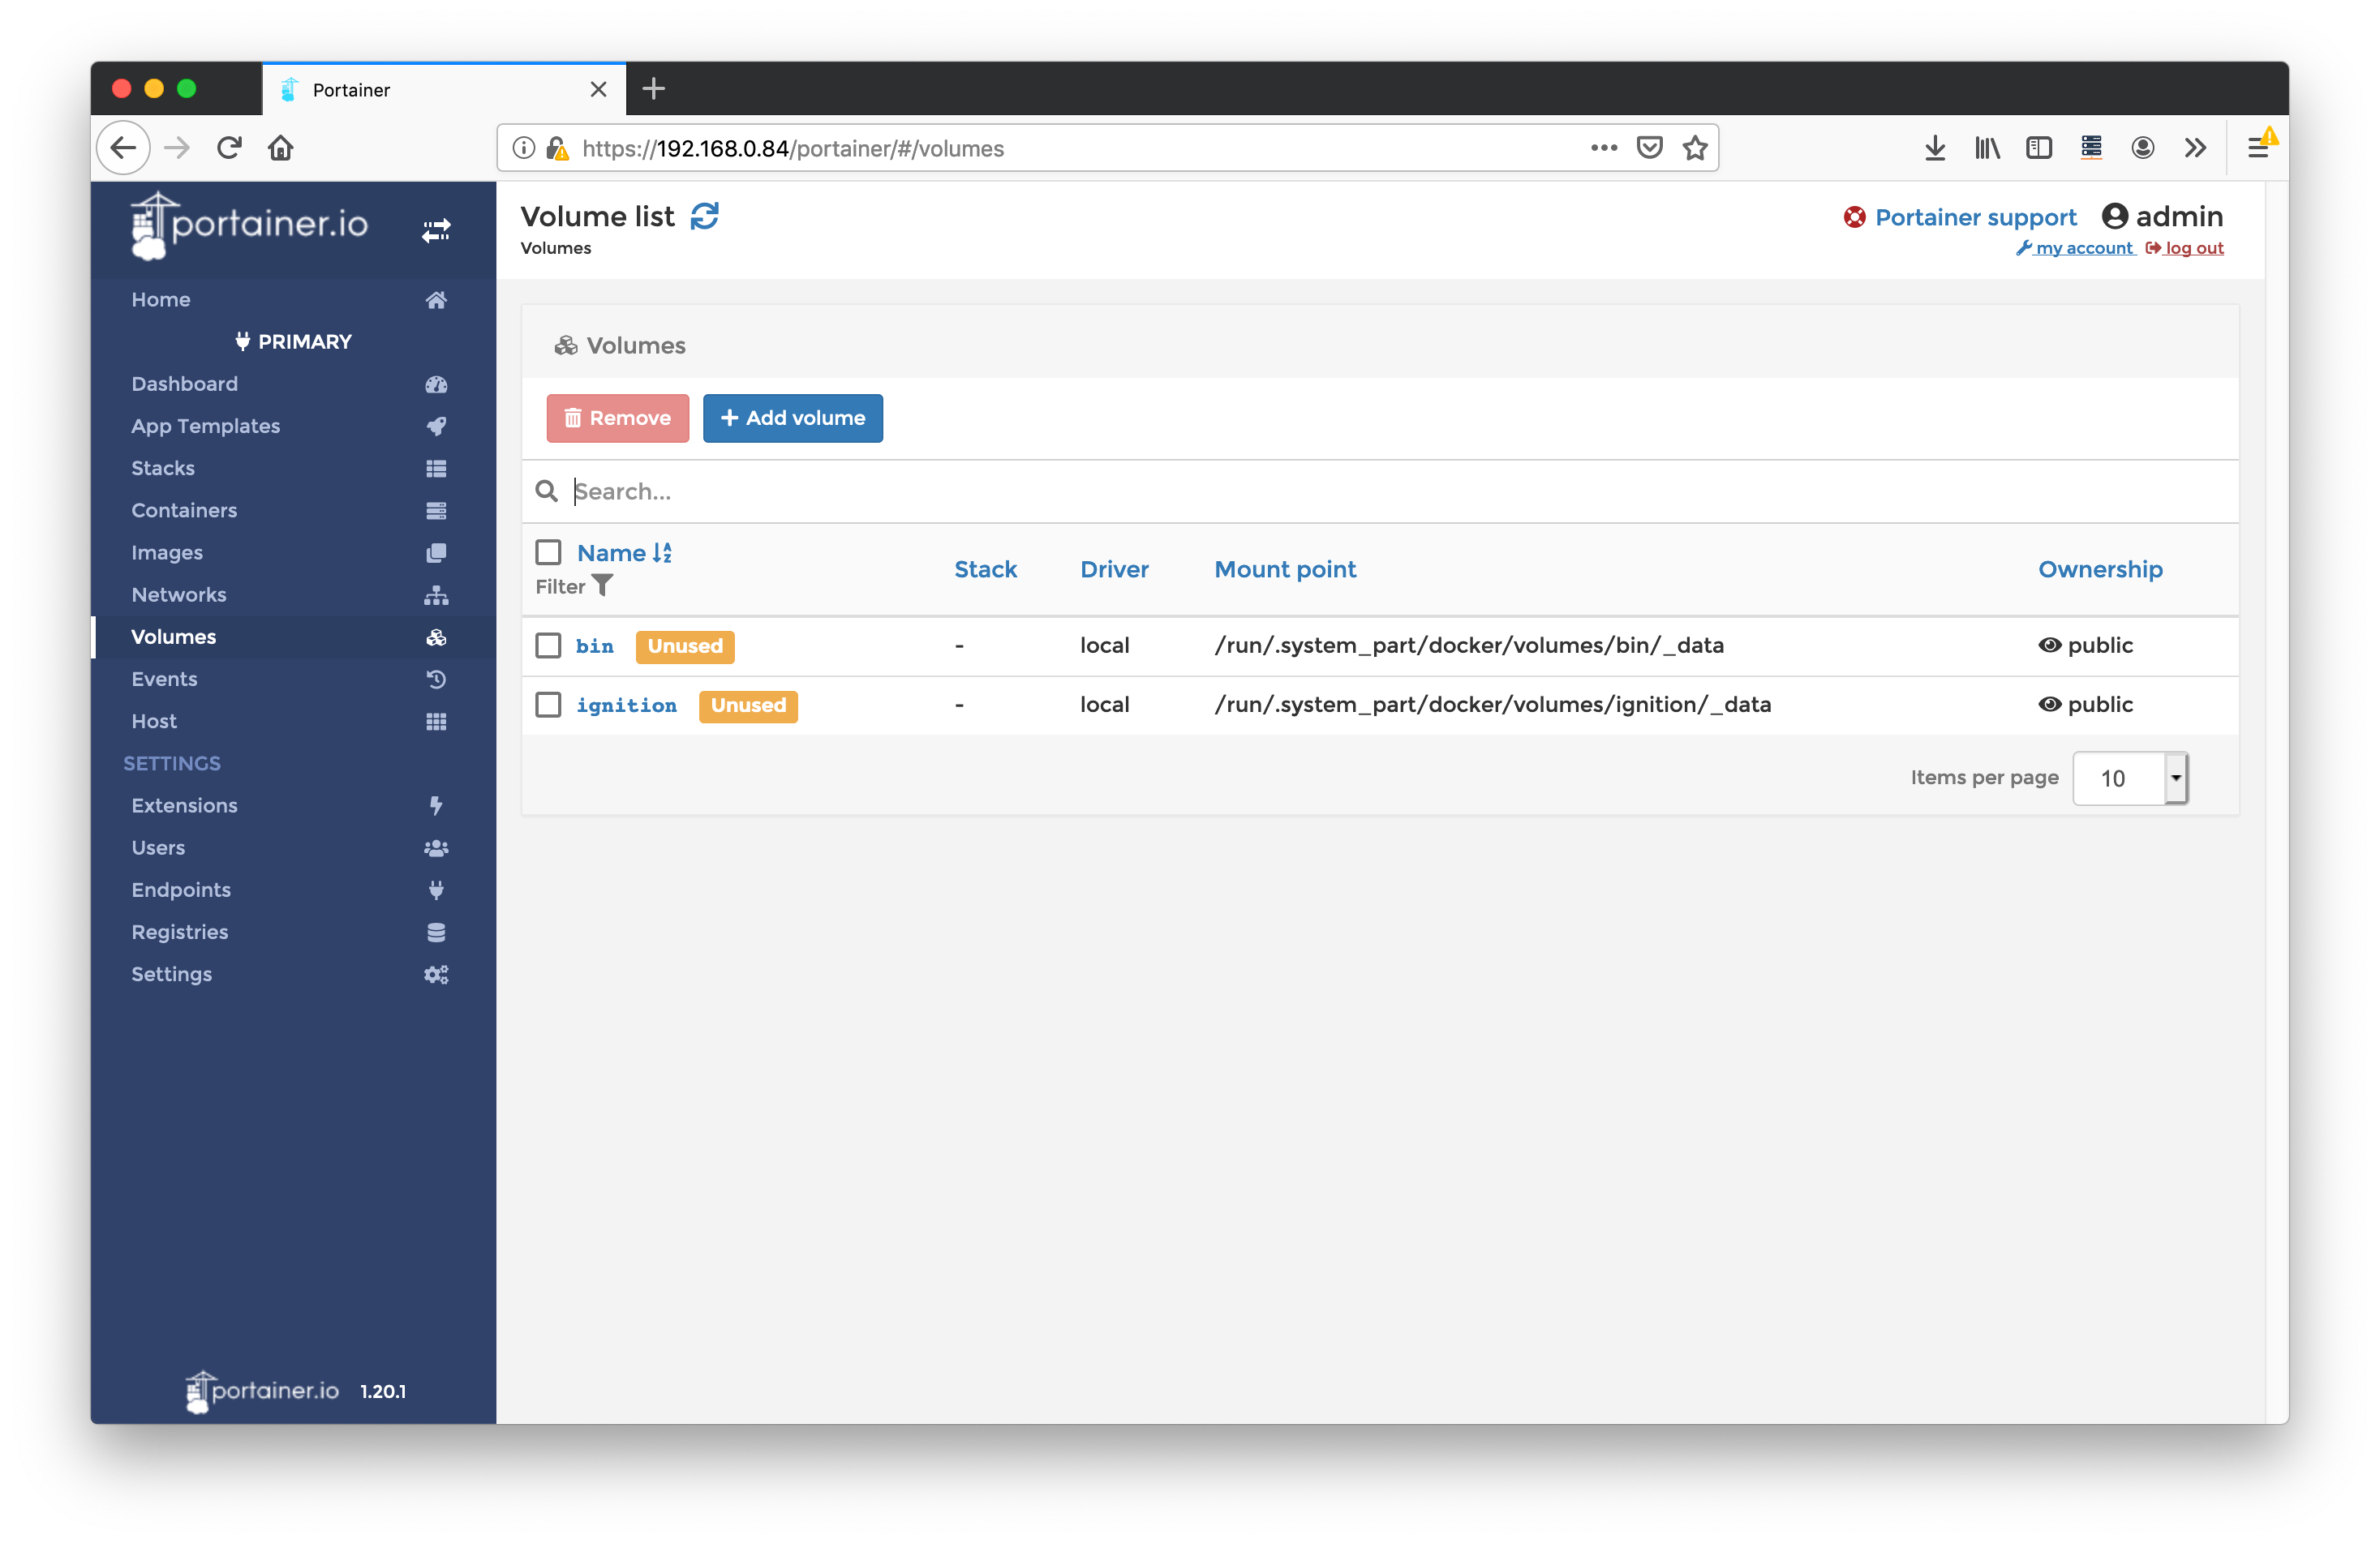
Repeat the volume creation process described above to create a second volume called 'bin'. When complete, the volumes should look as follows:
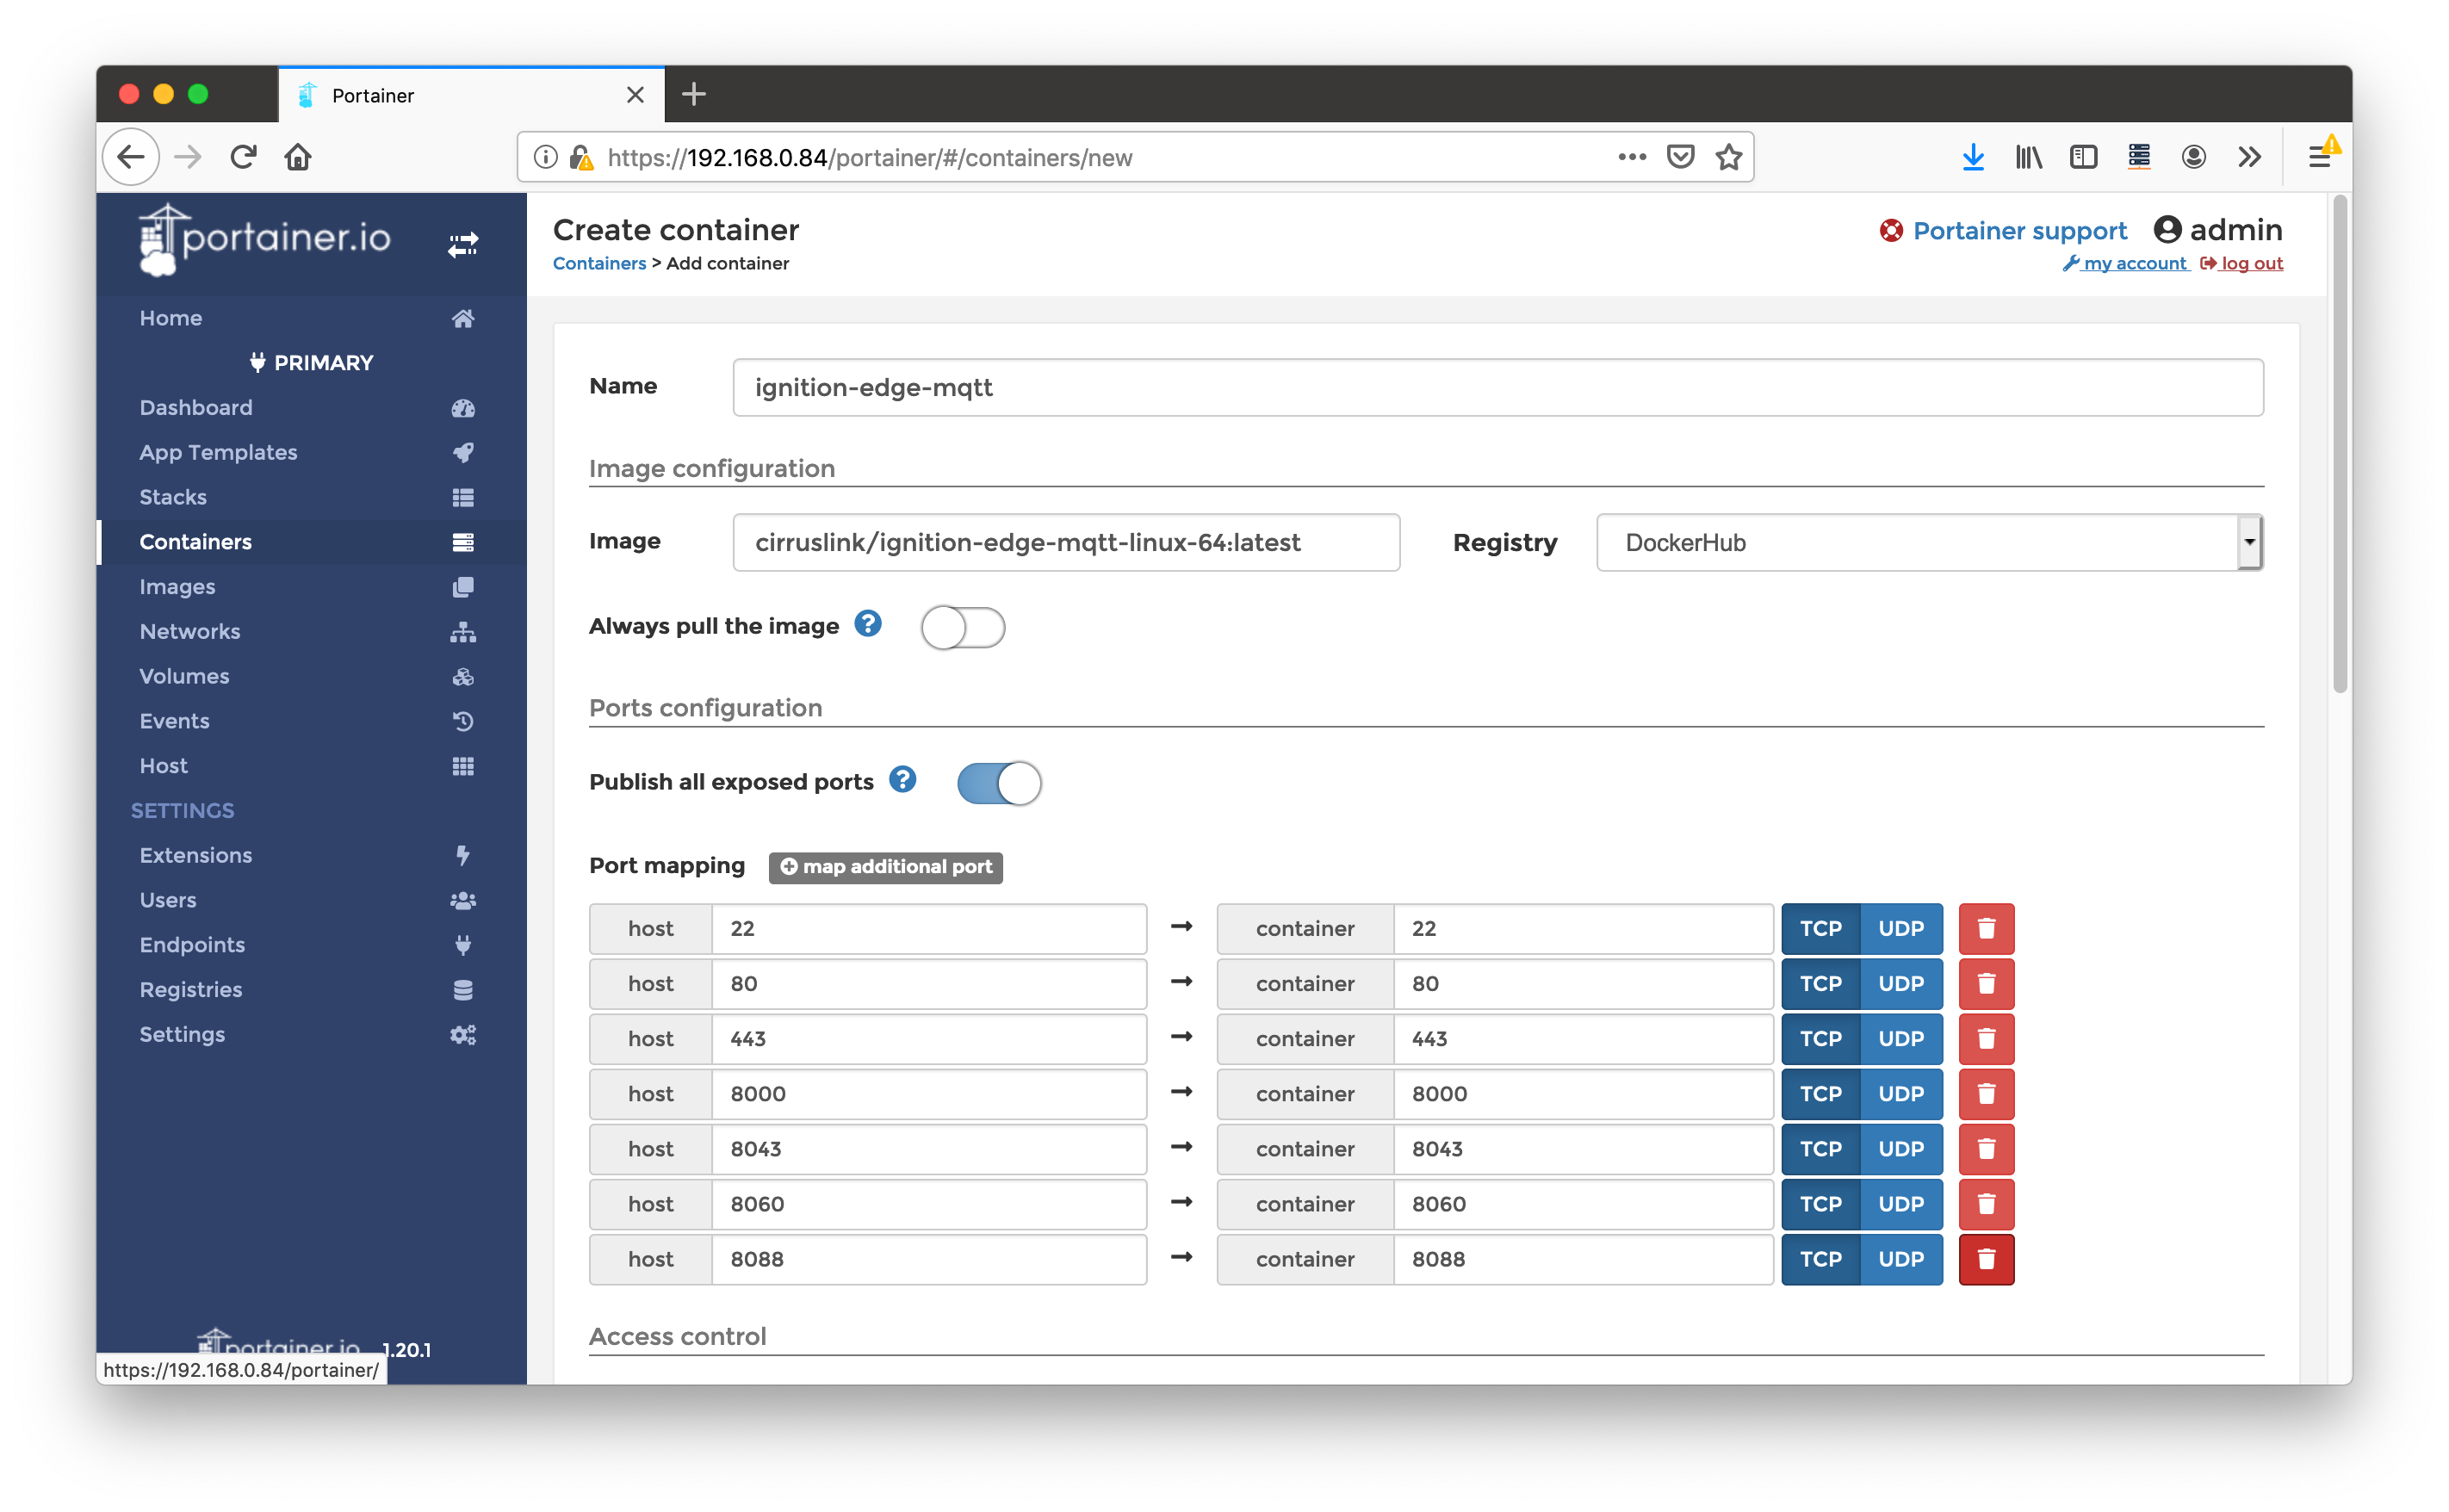
Step 4: Define and Start the Container
Now select 'Containers' on the left and click the 'Add Container' button. Set the following parameters:
- Name = ignition-edge-mqtt
- Image Name = (the image downloaded dependent on your hardware platform architecture)
- If Linux 64-bit is supported: cirruslink/ignition-edge-mqtt-linux-64:latest
- If Linux ARM HF is supported: cirruslink/ignition-edge-mqtt-linux-arm32v7:latest
- Always pull the image = not selected
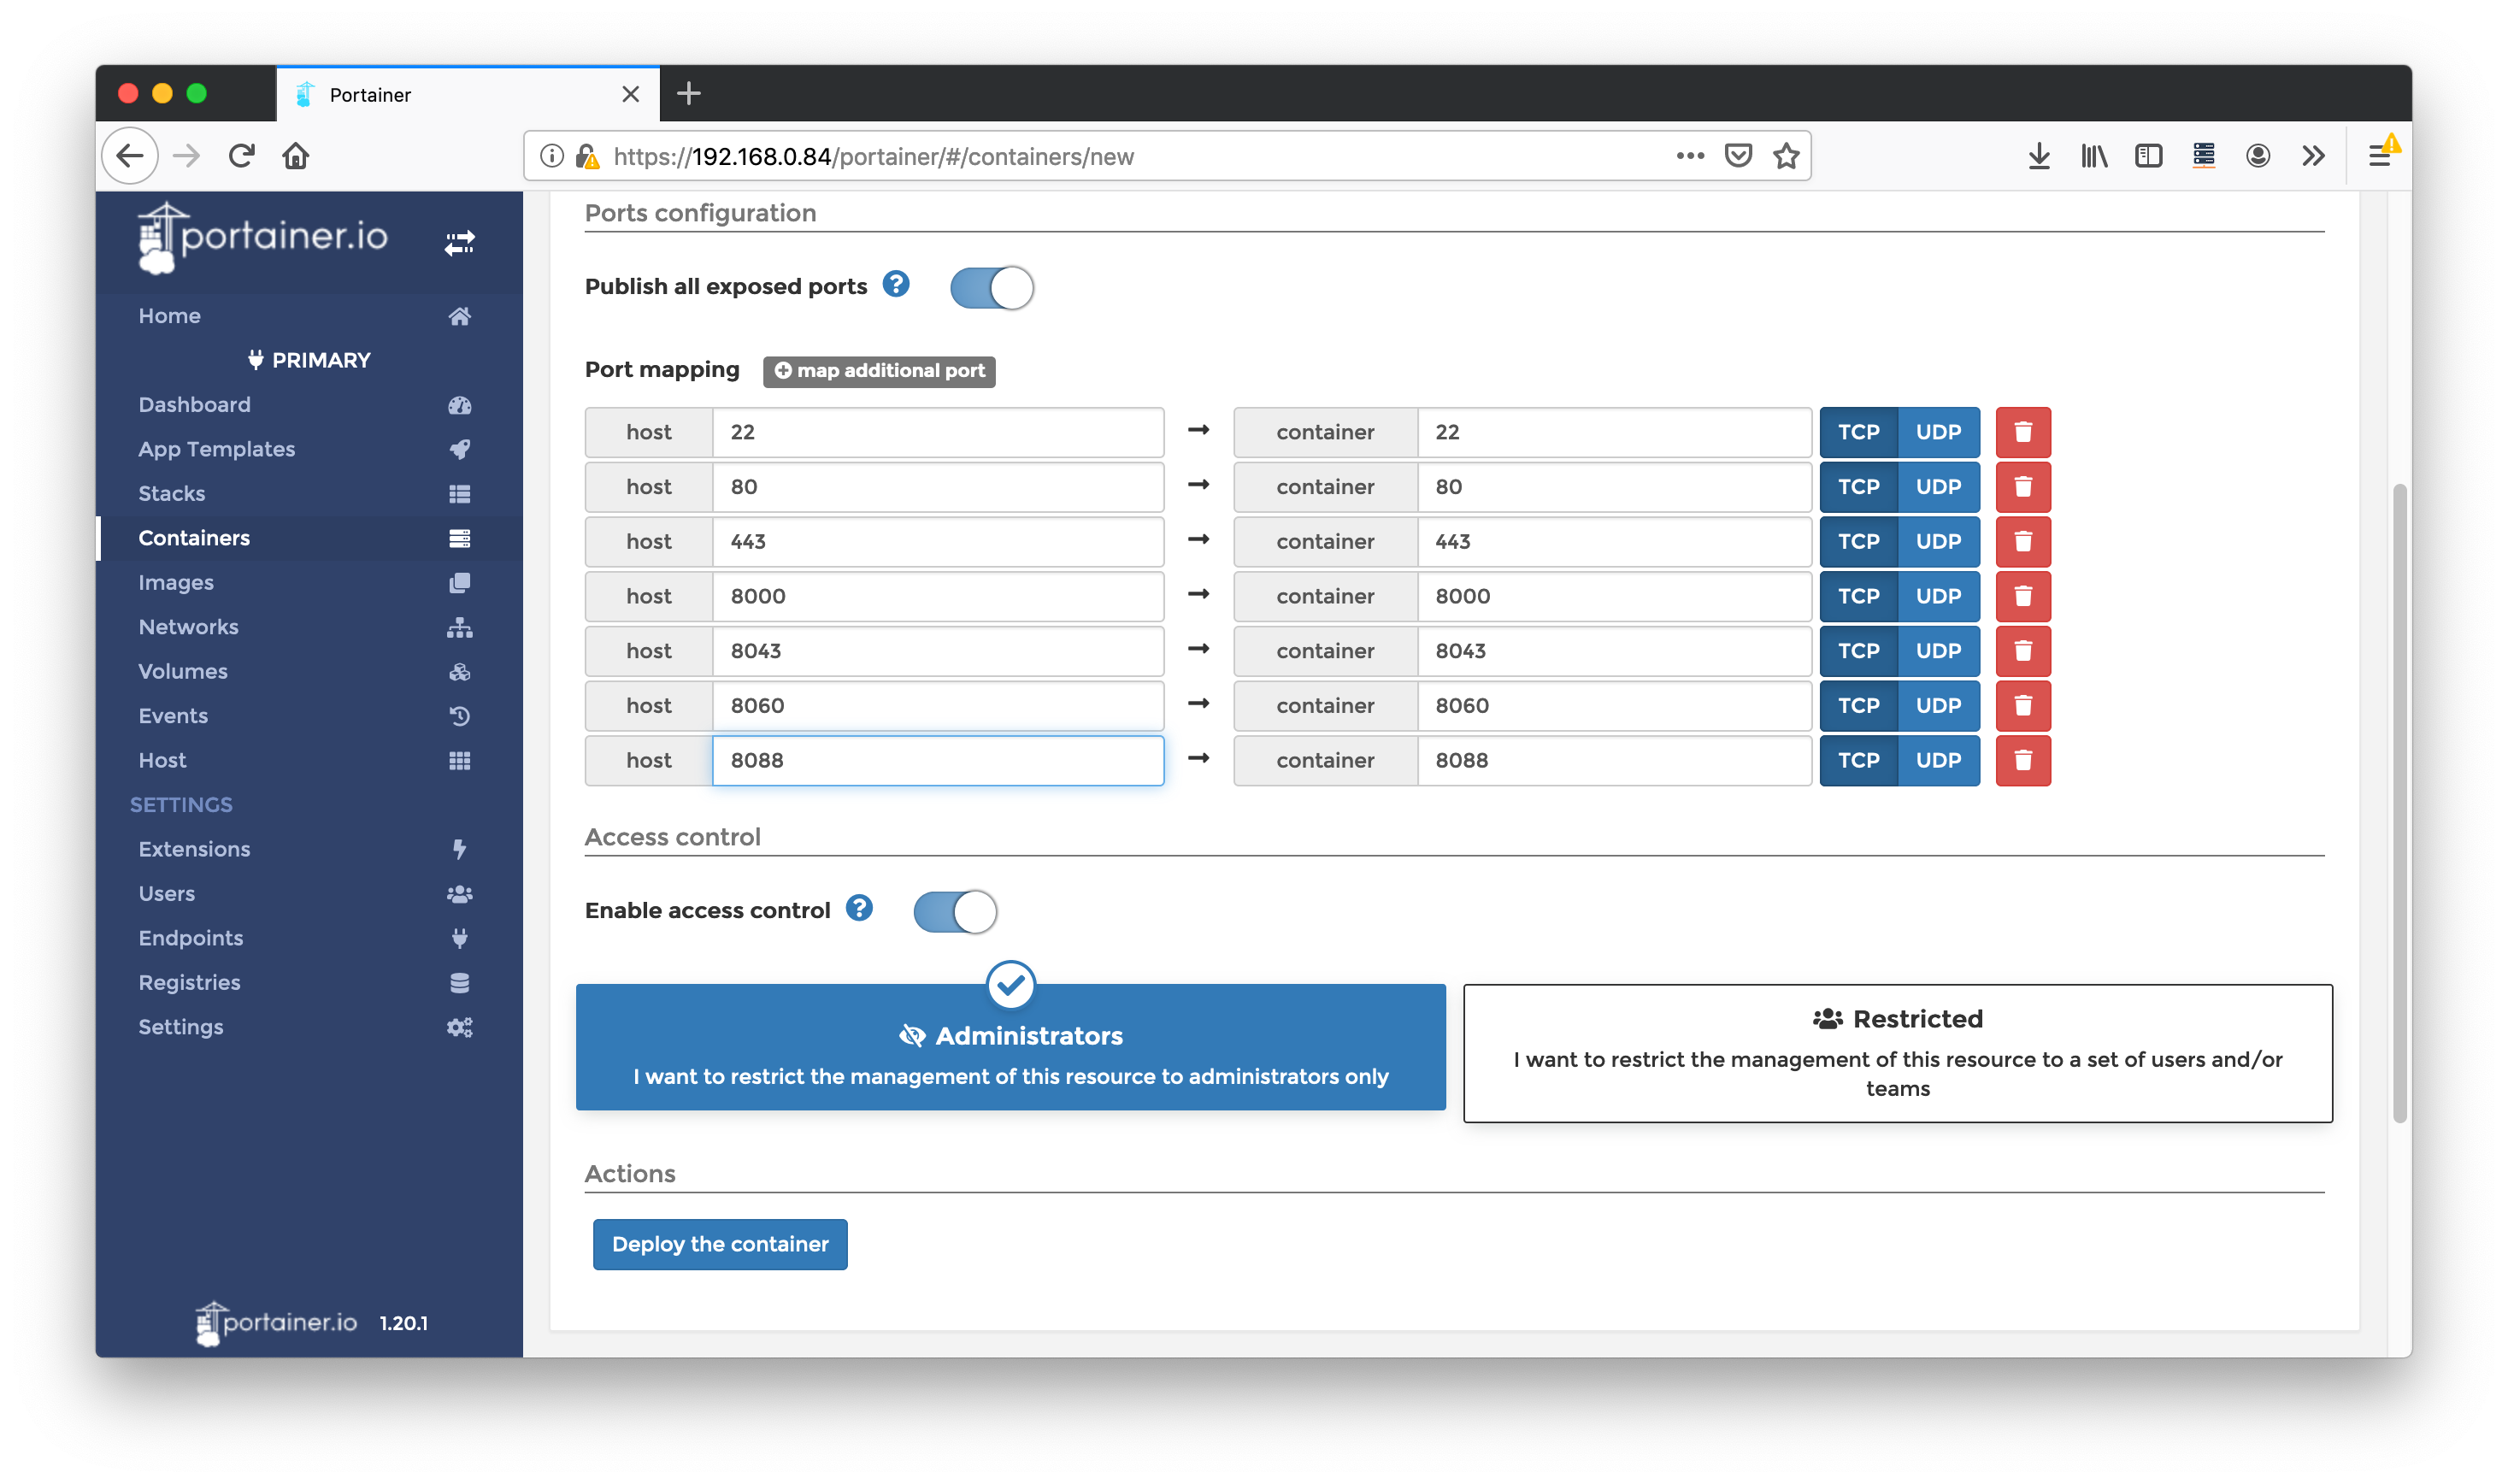
- Publish all exposed ports = selected
- Map the following additional ports. Note you may need or want to change the first parameter (host port) depending on your platform
- 22 → 22 (TCP)
- 80 → 80 (TCP)
- 443 → 443 (TCP)
- 8000 → 8000 (TCP)
- 8043 → 8043 (TCP)
- 8060 → 8060 (TCP)
- 8088 → 8088 (TCP)
- Enable access control = not enabled
This is all shown below in the 64-bit Linux example.
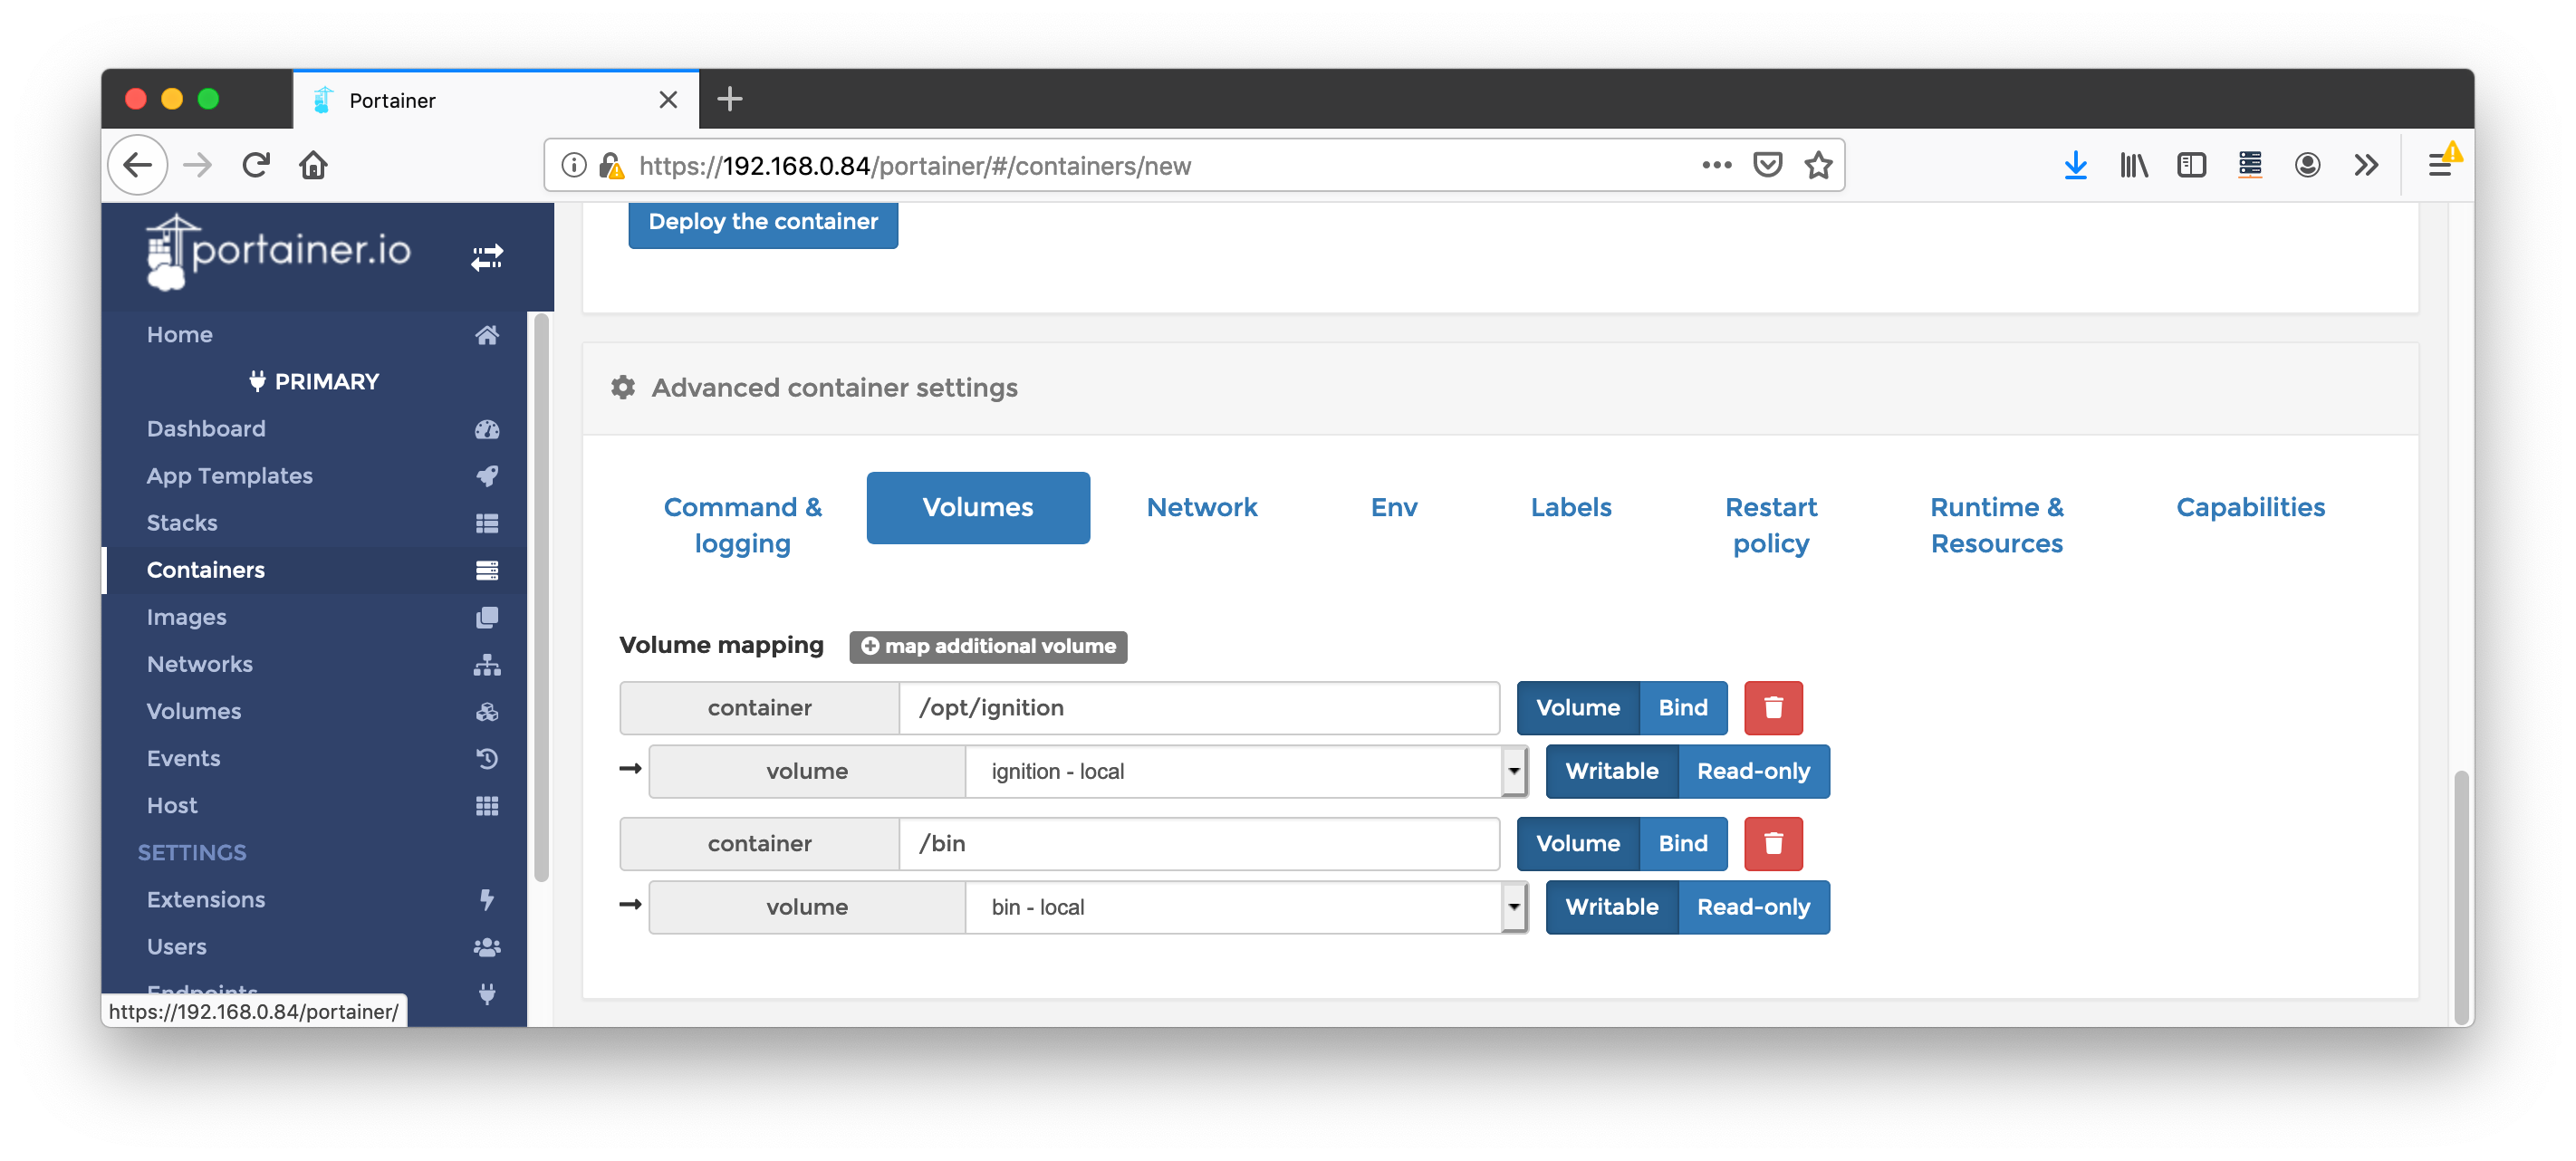
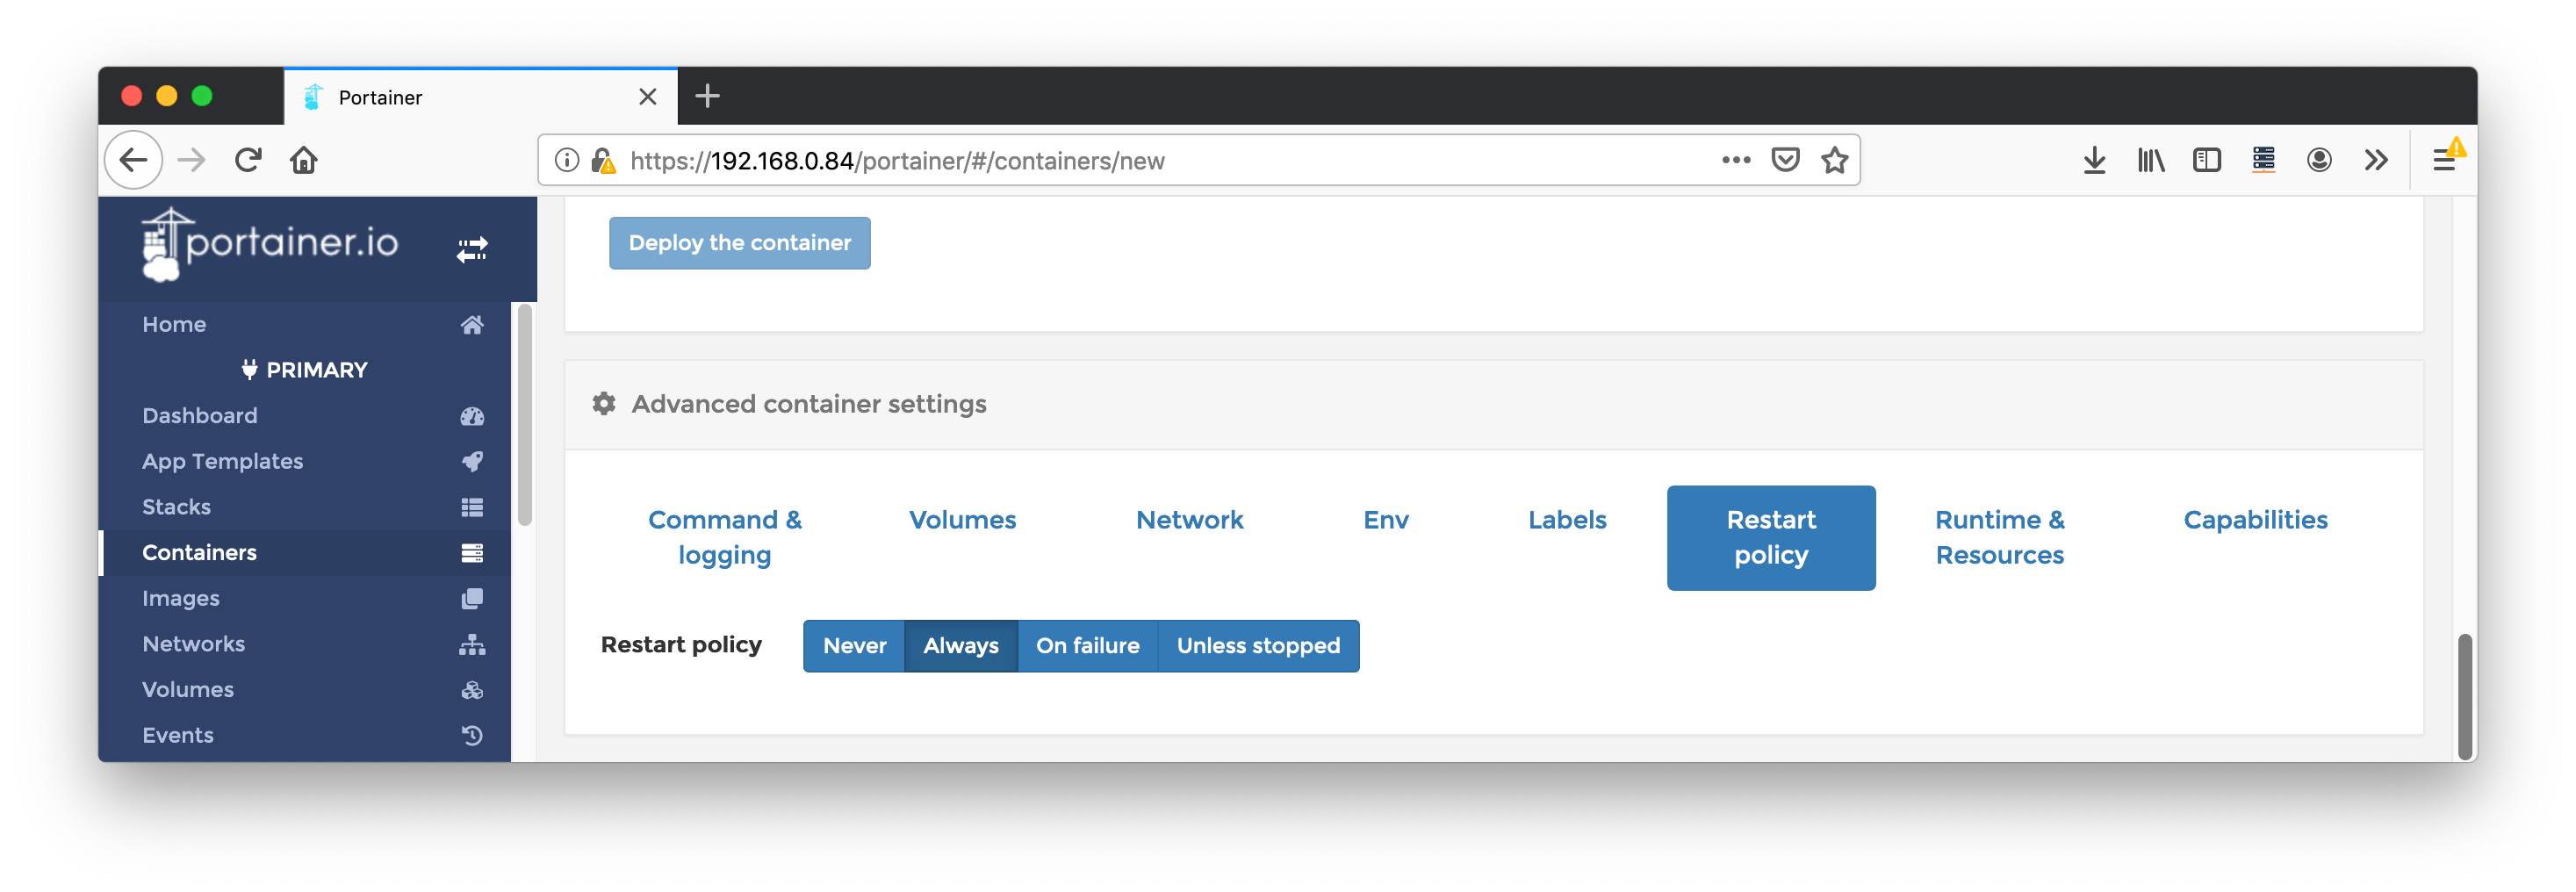
In addition set the following advanced properties via the bottom tabs.
- Map the Volumes as shown below.
- Set the Restart policy as shown below.
- Leave all other 'Advanced container settings' default.
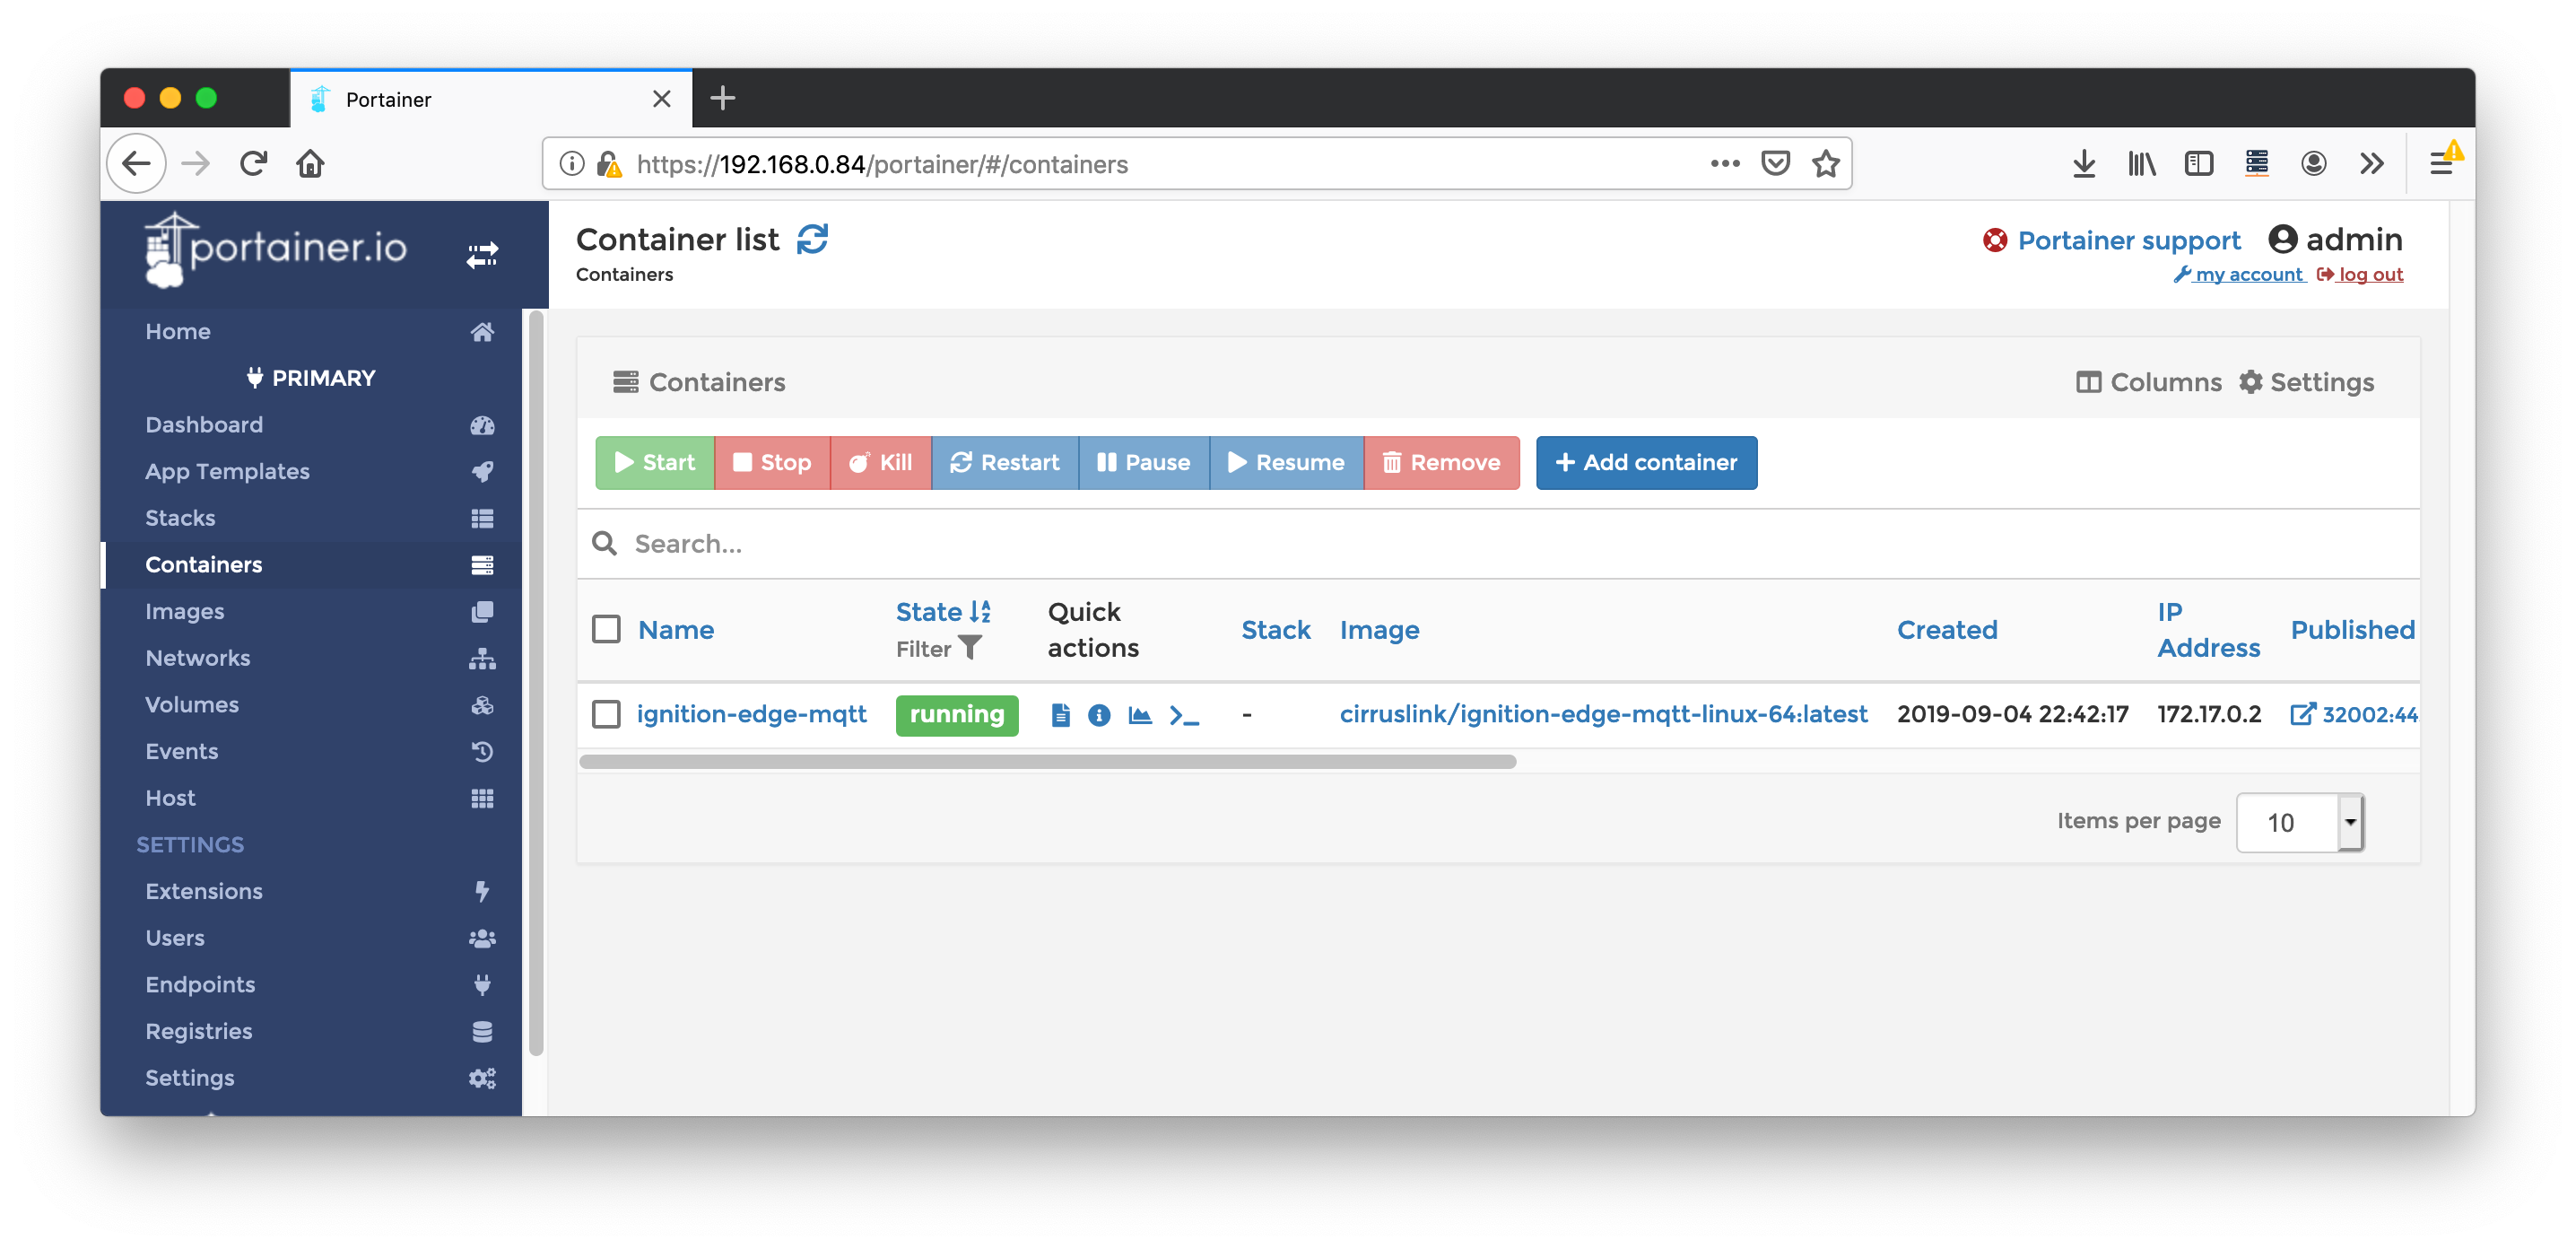
Finally, deploy the container by clicking the 'Deploy the container' under the 'Actions' section as shown below.
After deploying you should see the new container now running as shown below.
Step 5: Connect to the Ignition Edge Web UI and start using Ignition Edge MQTT
At this point you are ready to configure and use Ignition Edge MQTT. The Ignition web UI is available on the docker port 8088. If you mapped 8088 → 8088, you can access the Ignition Web UI by browsing to http://[docker_host_ip]:8088.
See the following two links for information on how to configure and use Ignition Edge MQTT.
Notes
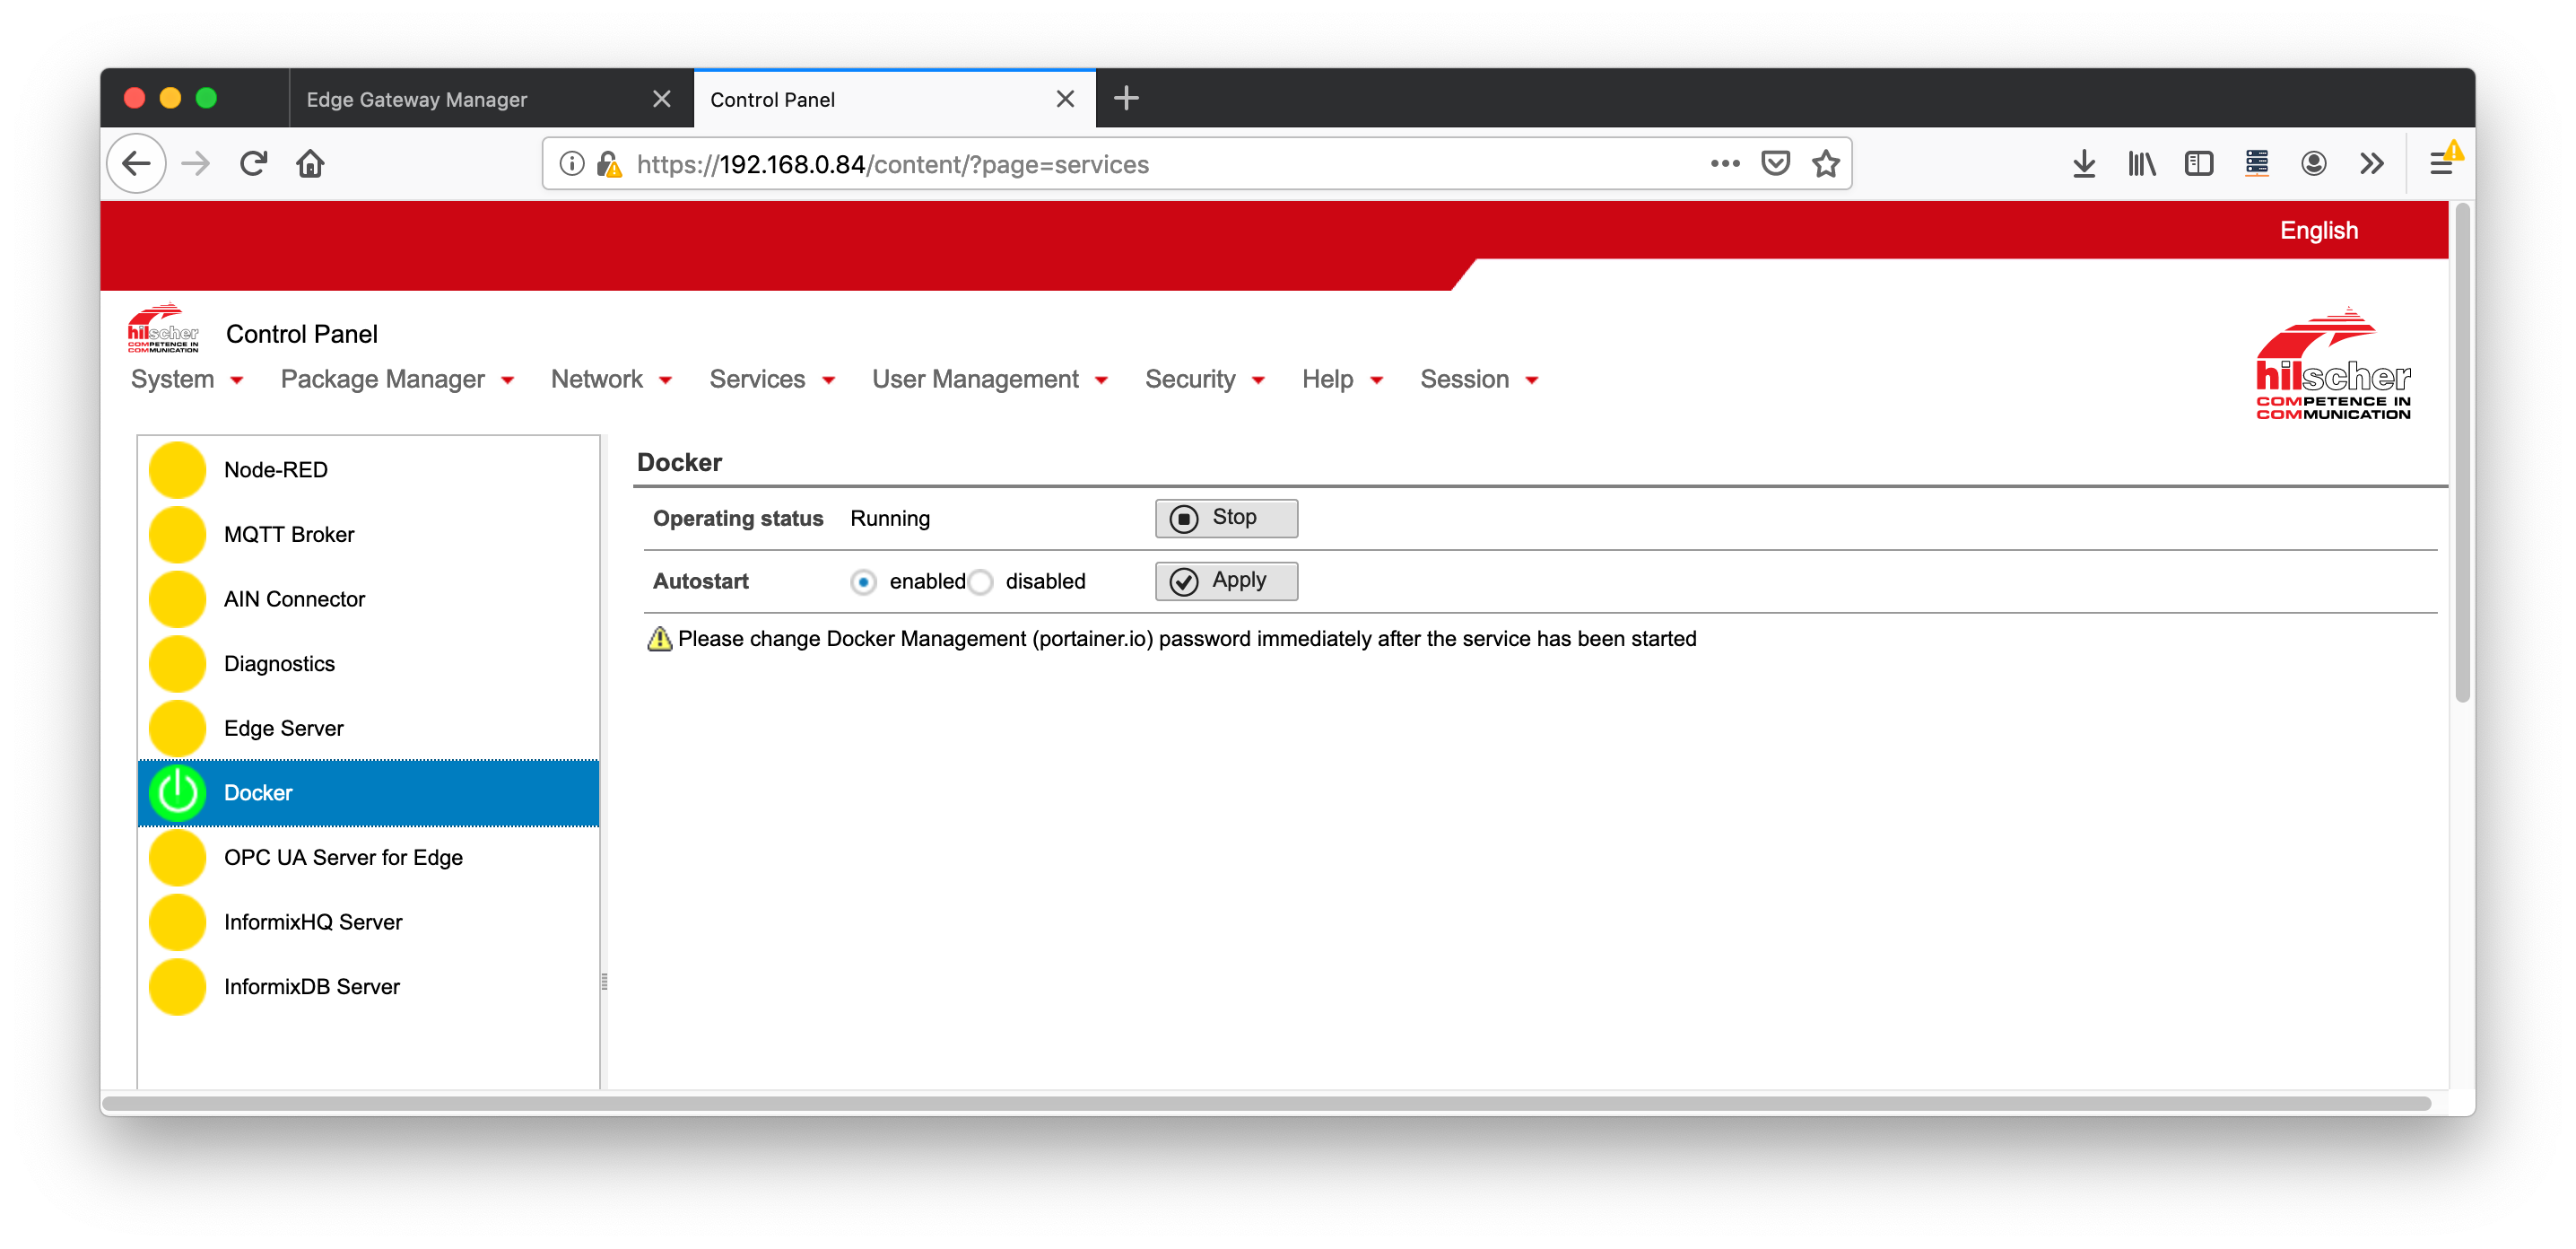
If using a Hilscher Gateway with Docker support, make sure you set 'Docker Autostart' to 'enabled' as shown below.
Additional Resources
- Inductive Automation's Ignition download with free trial
- Azure Injector download with free trial
- Questions about this tutorial?
- Sales questions
- About Cirrus Link