Prerequisites:
Overview:
This tutorial shows how to configure MQTT Transmission module to generate custom records and send them as MQTT messages via MQTT Distributor to be stored in MySQL database. The topology of this example shows MQTT Distributor, MQTT Engine, Record Store, and MQTT Transmission all running in the same Ignition instance. This is done for simplicity of the tutorial, but this isn't required or even intended to be a real use case. In a more realistic scenario MQTT Transmission and MQTT Engine would be located on separate machines.
Loading Cirrus Link Modules:
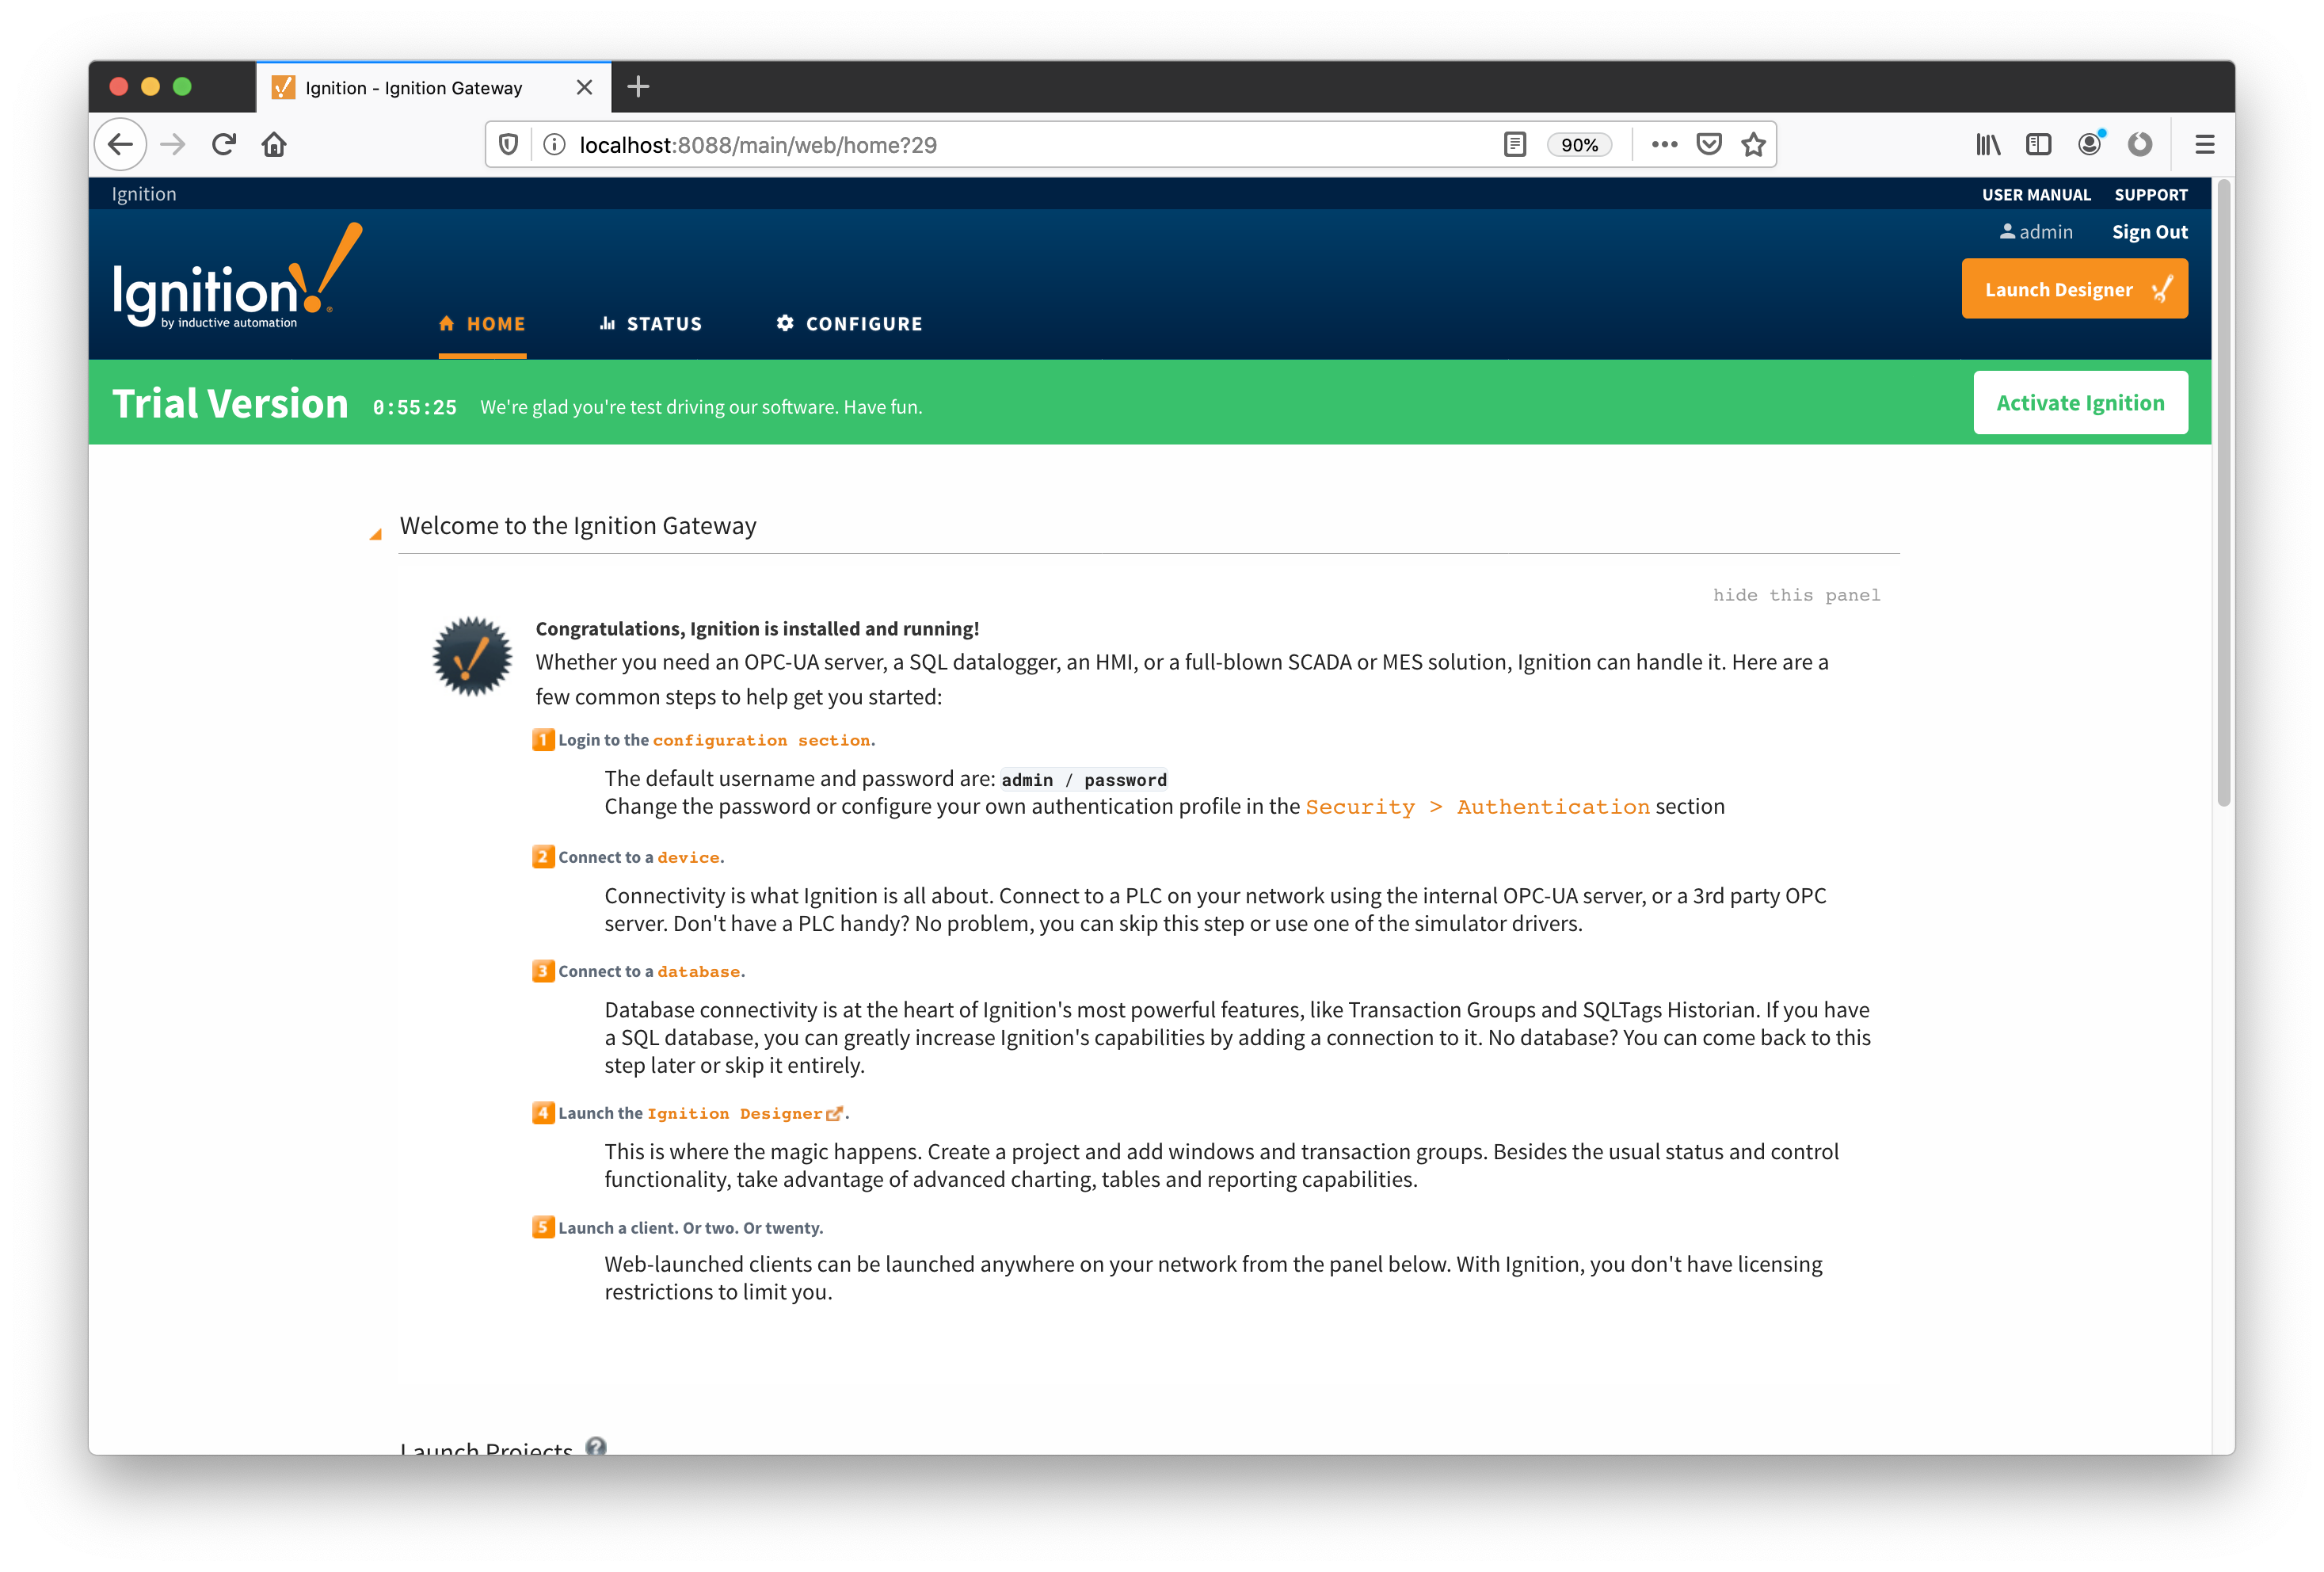
The first step is to load four Cirrus Link modules specified in the 'Prerequisites' section of this document. To load the modules, launch the Ignition Gateway and open HTTP connection to it. If Ignition Gateway is running on your development machine, use http://localhost:8088 to connect. You should see the 'Welcome to the Ignition Gateway' screen shown below:
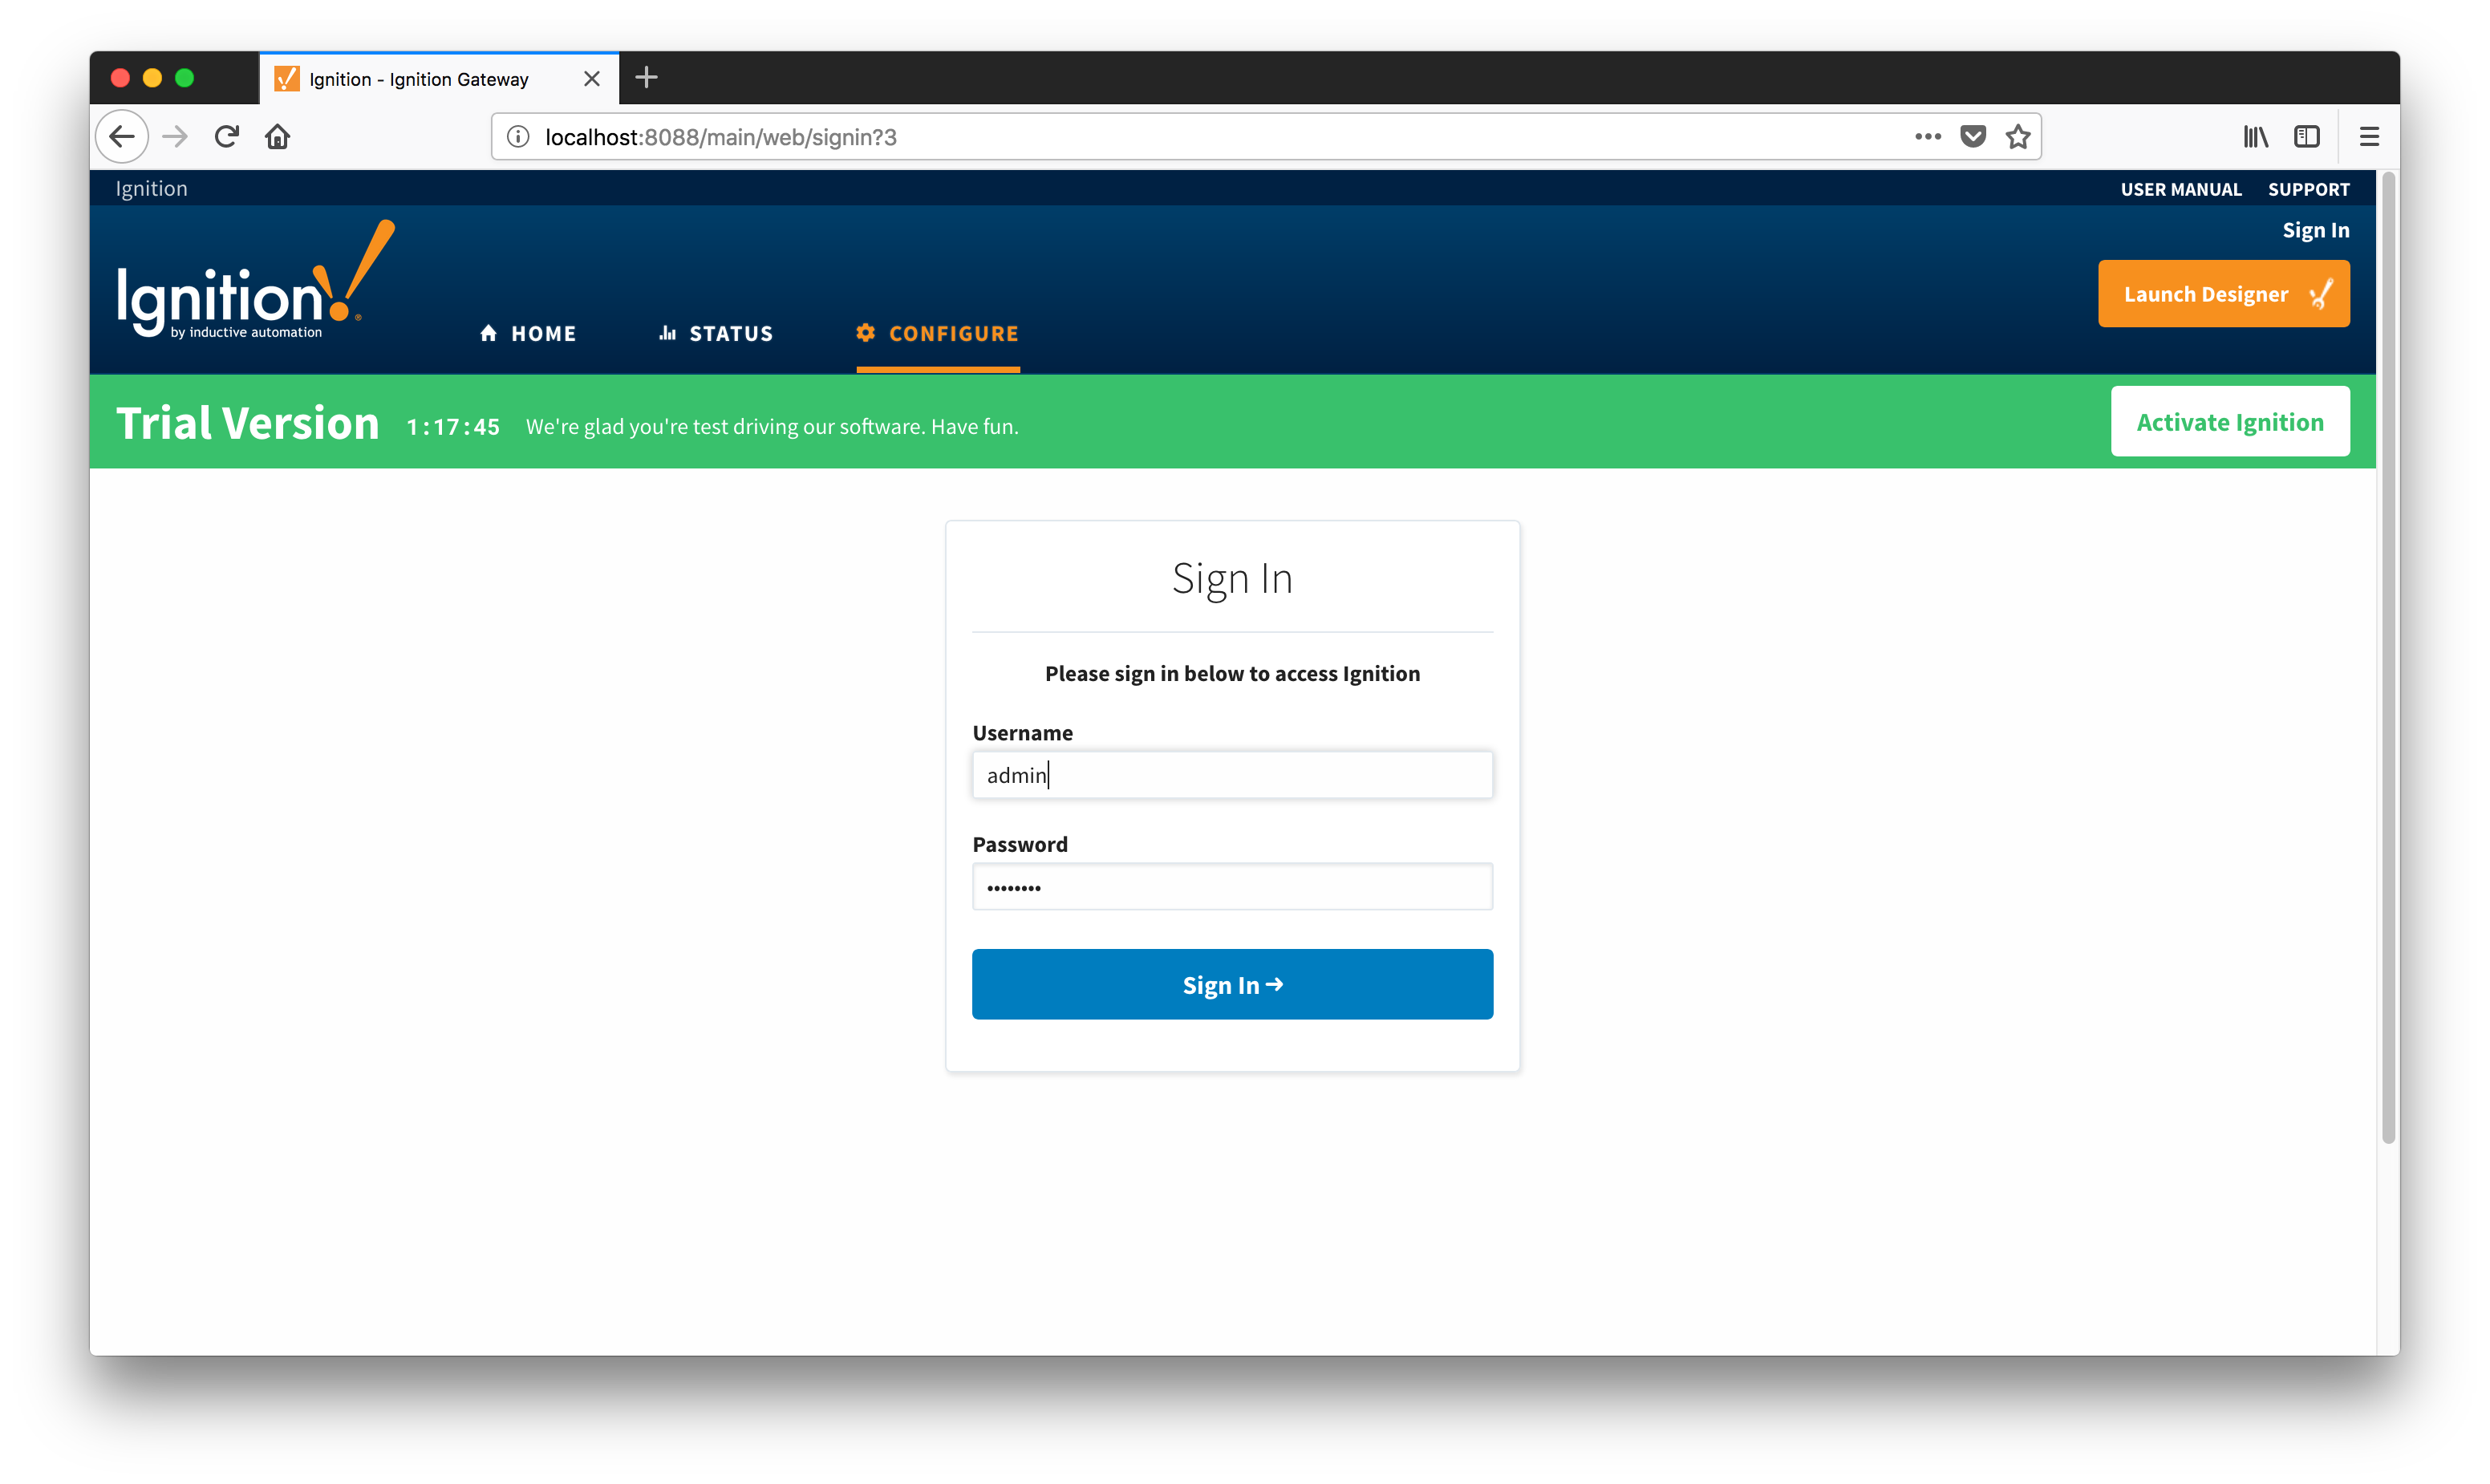
From here, click the "CONFIGURE" tab to go to the 'Configuration Section'. Ignition will ask you to sign in, so use the admin/password as your credentials.
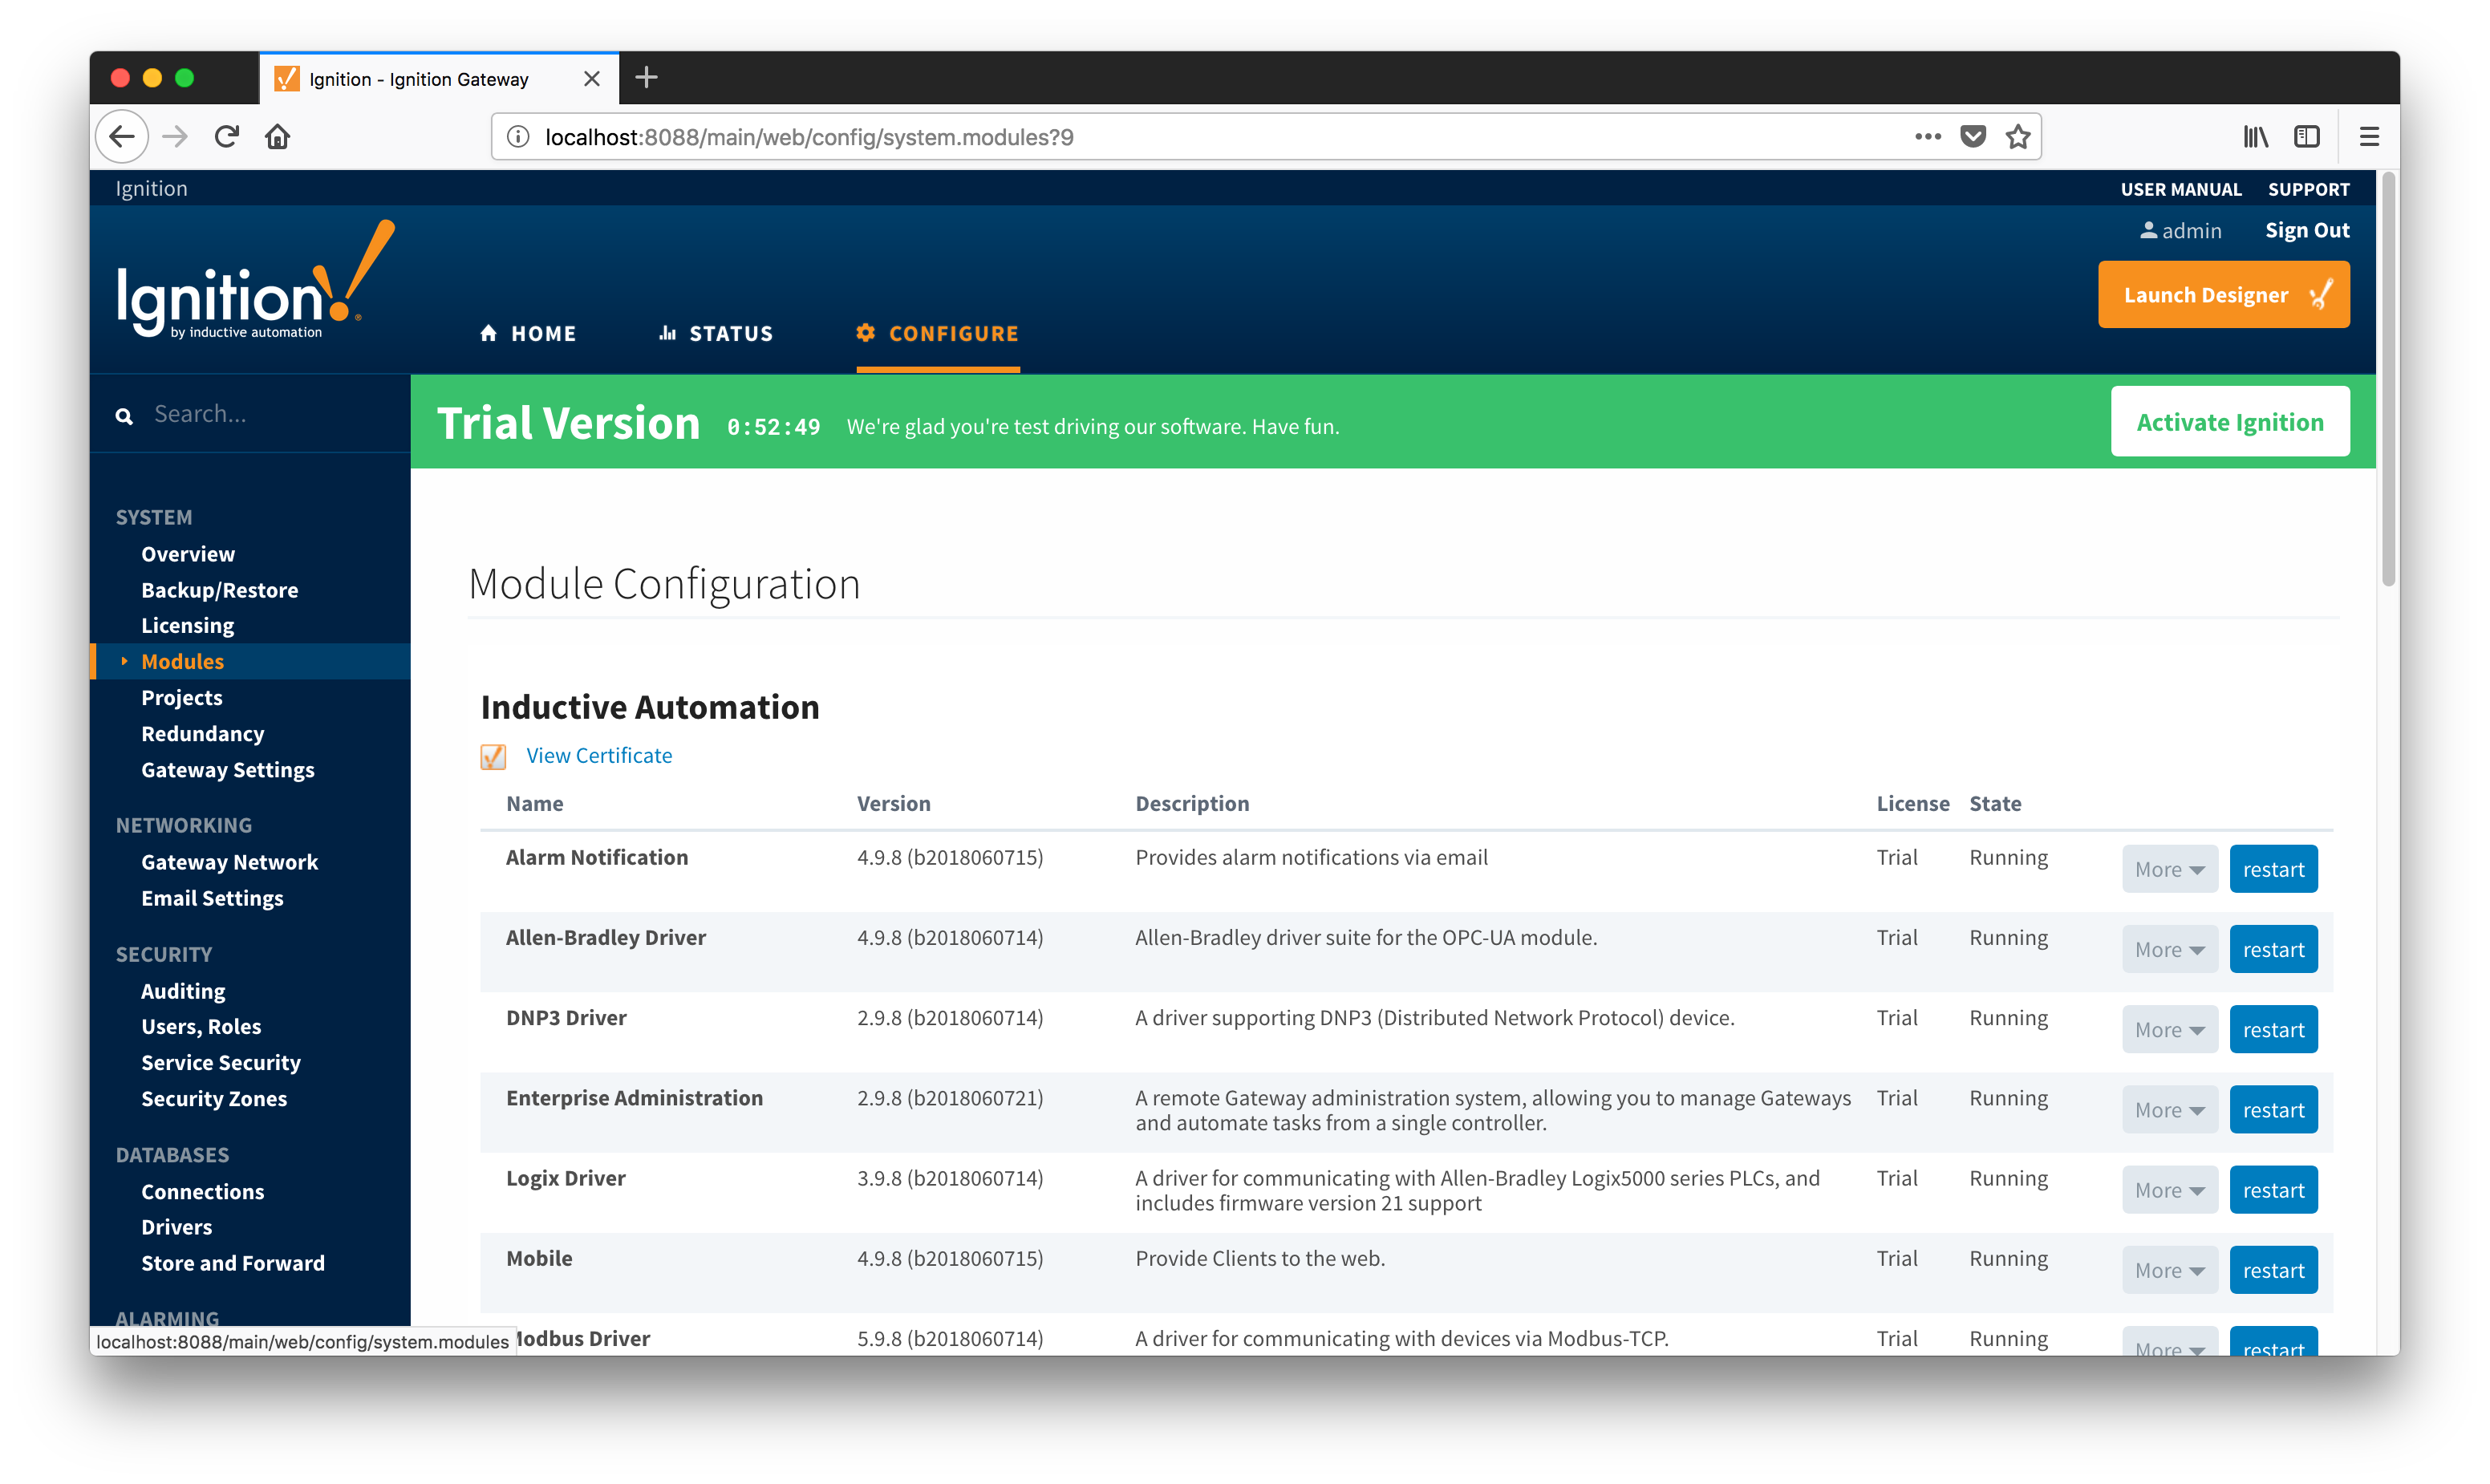
 After signing in, you will see the 'Configuration' page shown below. Go to 'SYSTEM' on the left hand side of the screen and select 'Modules'.

The following module configuration page will appear:
Scroll down and click the 'Install or Upgrade a Module' link to install four modules listed above. Here is what you should see at the end:
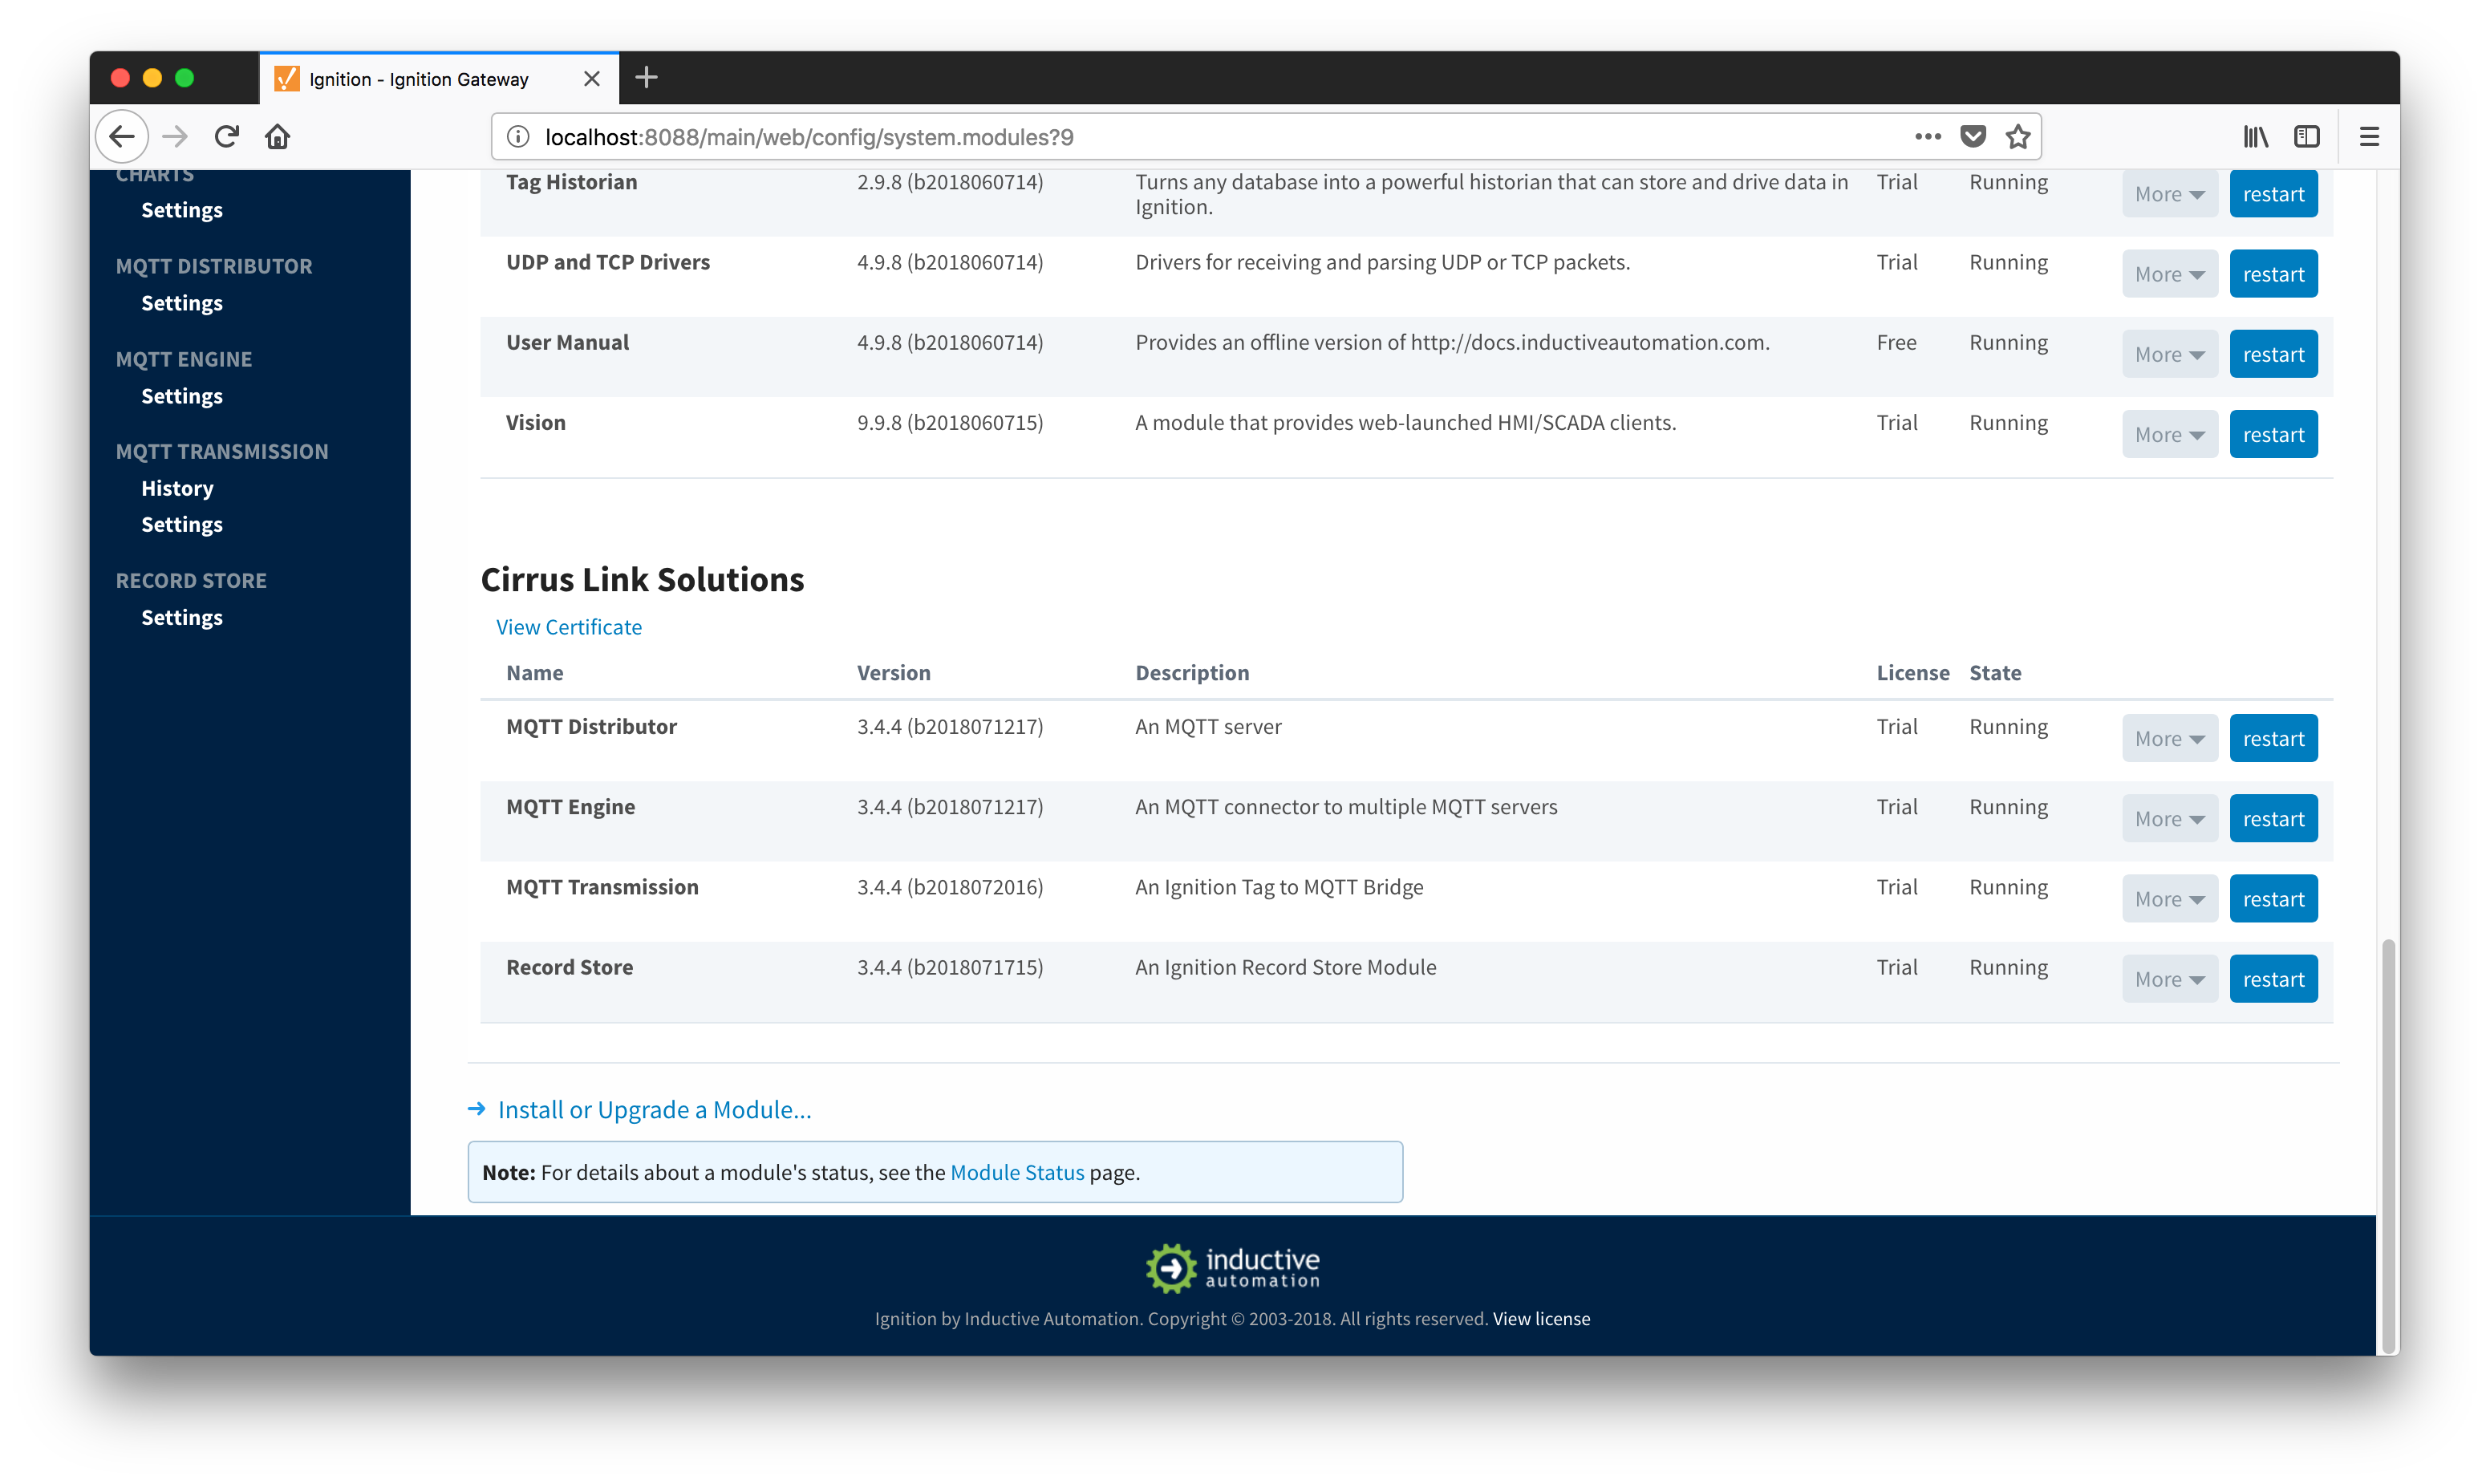
These modules can be configured by clicking 'Settings' on the left hand side below each module. Note that the 'MQTT Distributor' and MQTT Engine modules should not be touched; they will use default configuration. The 'Record Store' module should be configured to point to the datasource used for storage, but this needs be done after configuring database connections. Finally, the 'MQTT Transmission' module needs to be configured to define custom records to be published. This will be described in subsequent sections of this document.
Configure Database Connections:
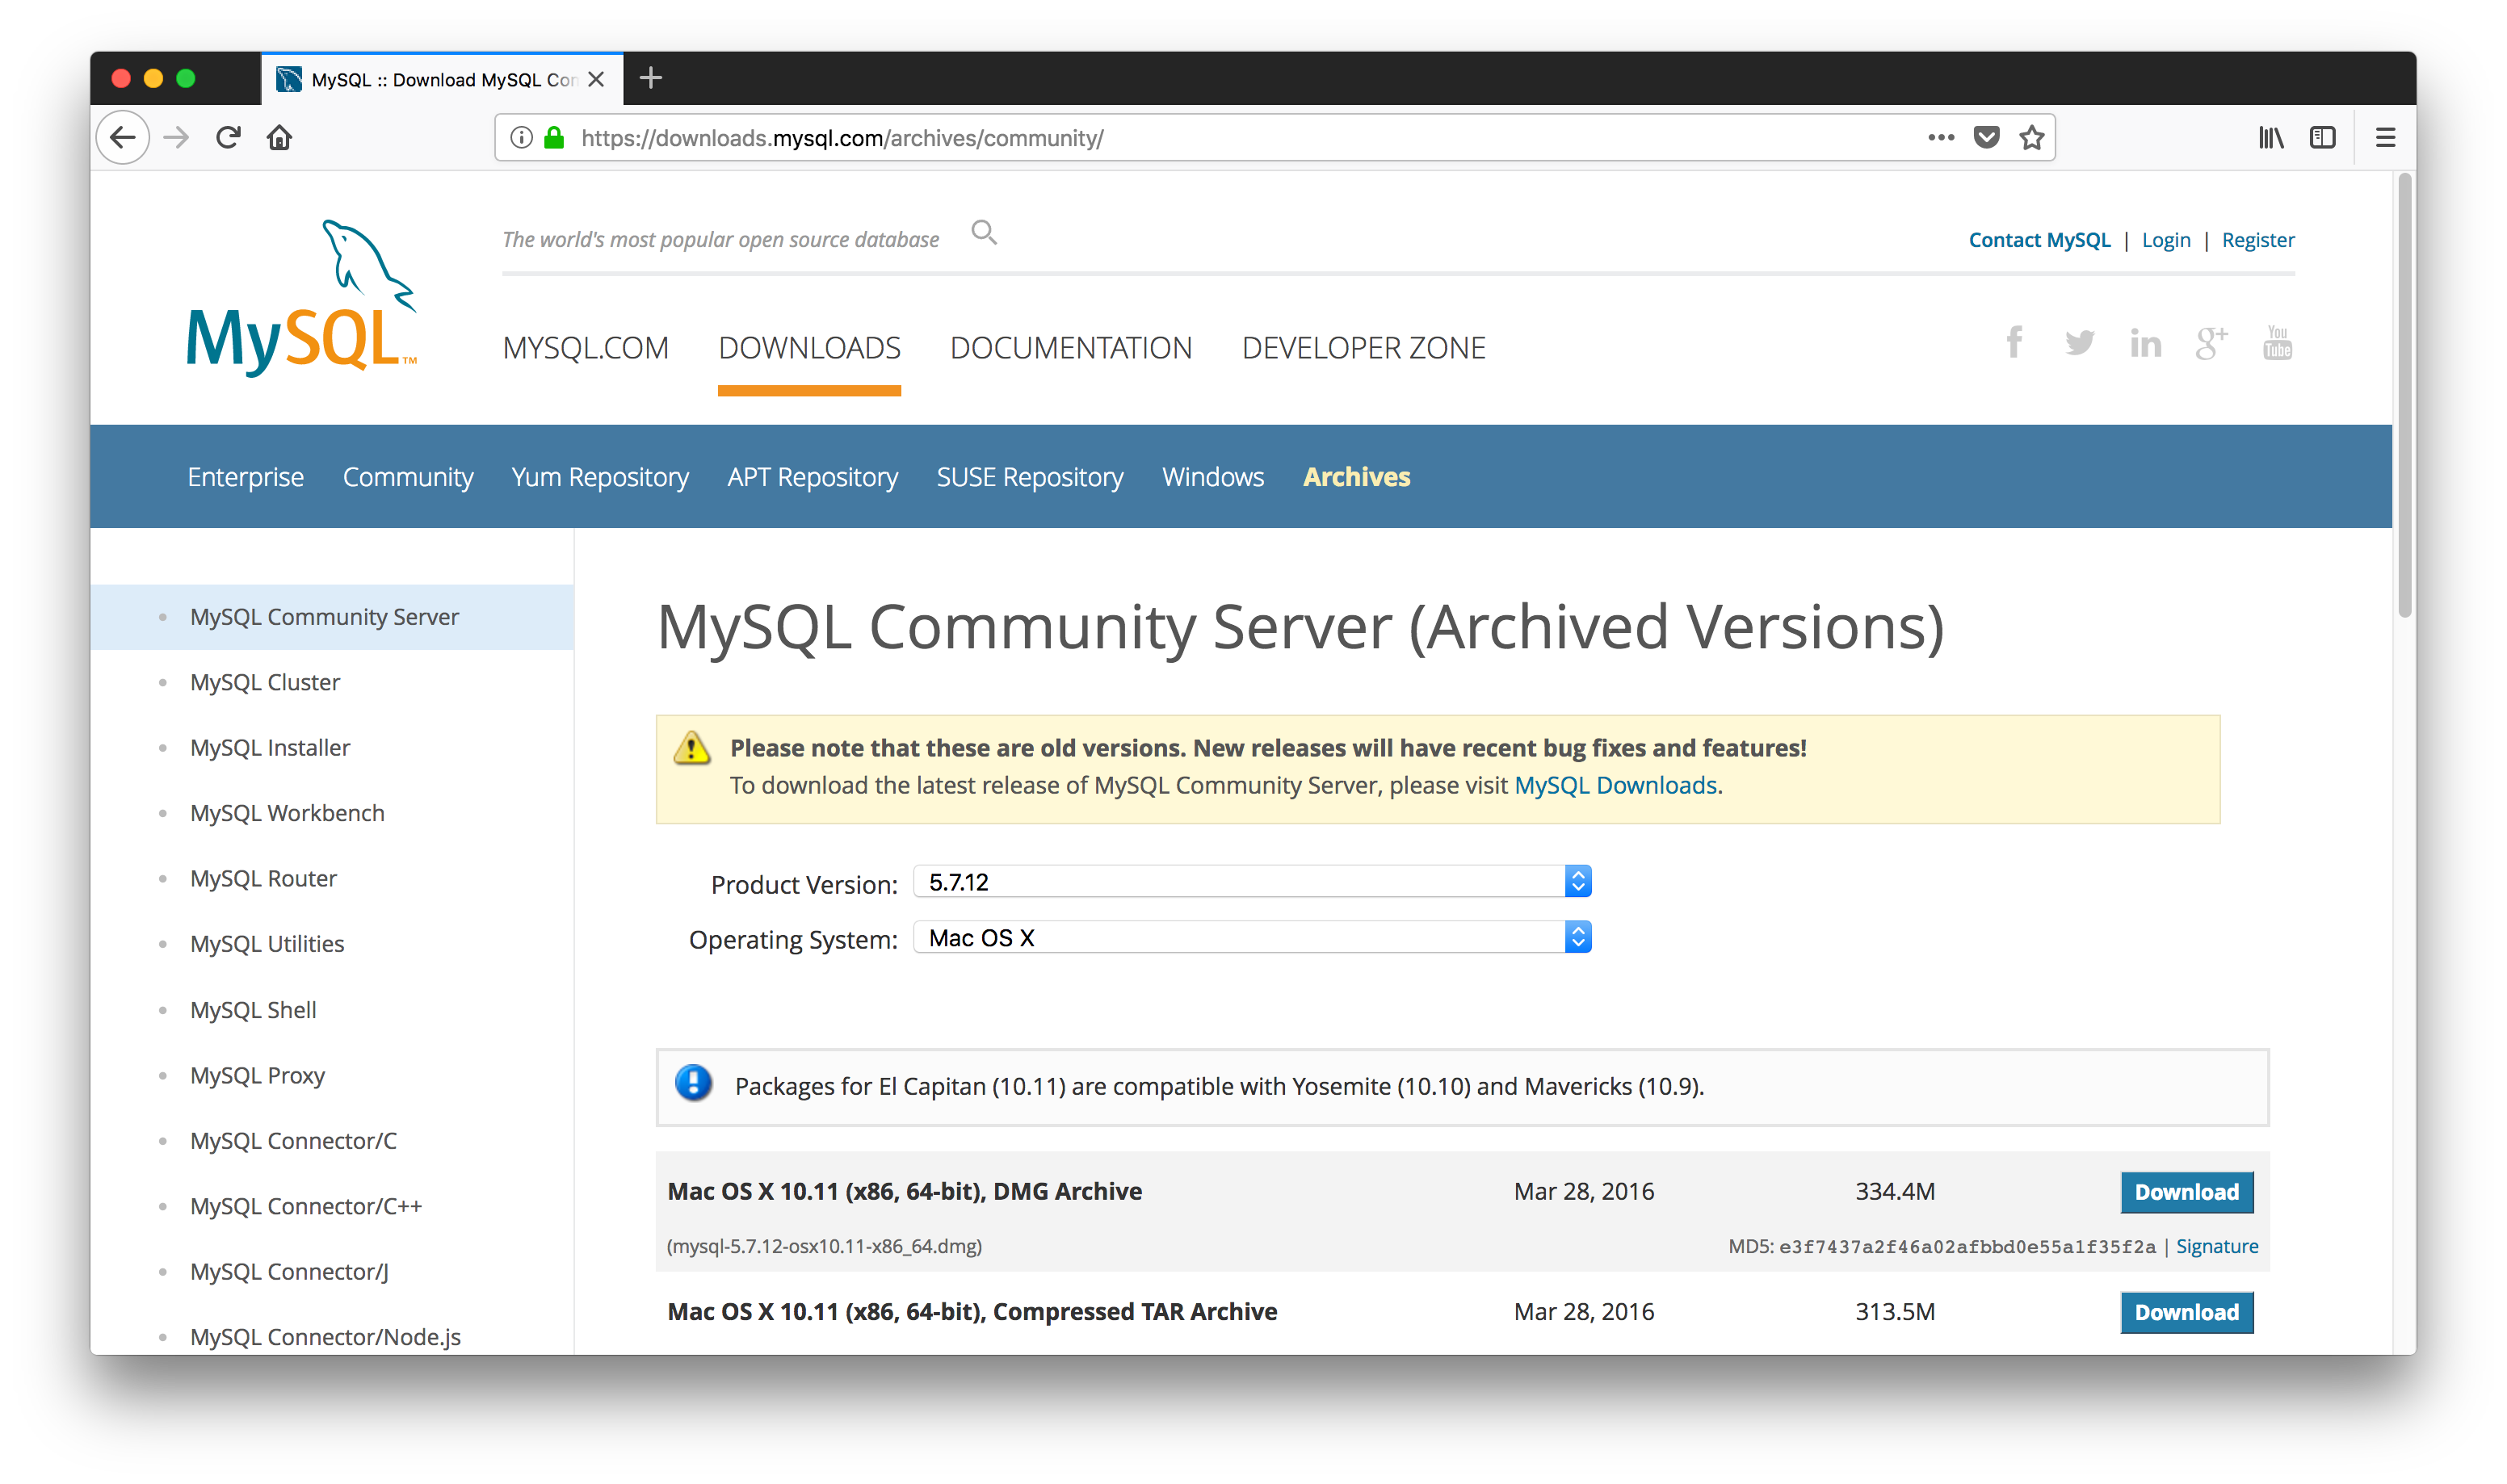
Before configuring Database Connections in Ignition, make sure that MySQL is installed and a test database is setup. If not, please install the following version of MySQL:
$ mysql --version
mysql Ver 14.14 Distrib 5.7.12, for osx10.11 (x86_64) using EditLine wrapper
 When MySQL is installed, login as root, then configure a user and setup a database as shown below:
$ mysql -u root -p
Enter password:
mysql> CREATE USER 'user'@'localhost' IDENTIFIED BY 'password';
Query OK, 0 rows affected (0.01 sec)
mysql> CREATE DATABASE testdb;
Query OK, 1 row affected (0.00 sec)
mysql> GRANT ALL PRIVILEGES ON testdb.* TO 'user'@'localhost';
Query OK, 0 rows affected (0.01 sec)
When database is created, login as user and switch to this database as shown below:
$ mysql -u user -p
Enter password:
mysql> USE testdb;
Database changed
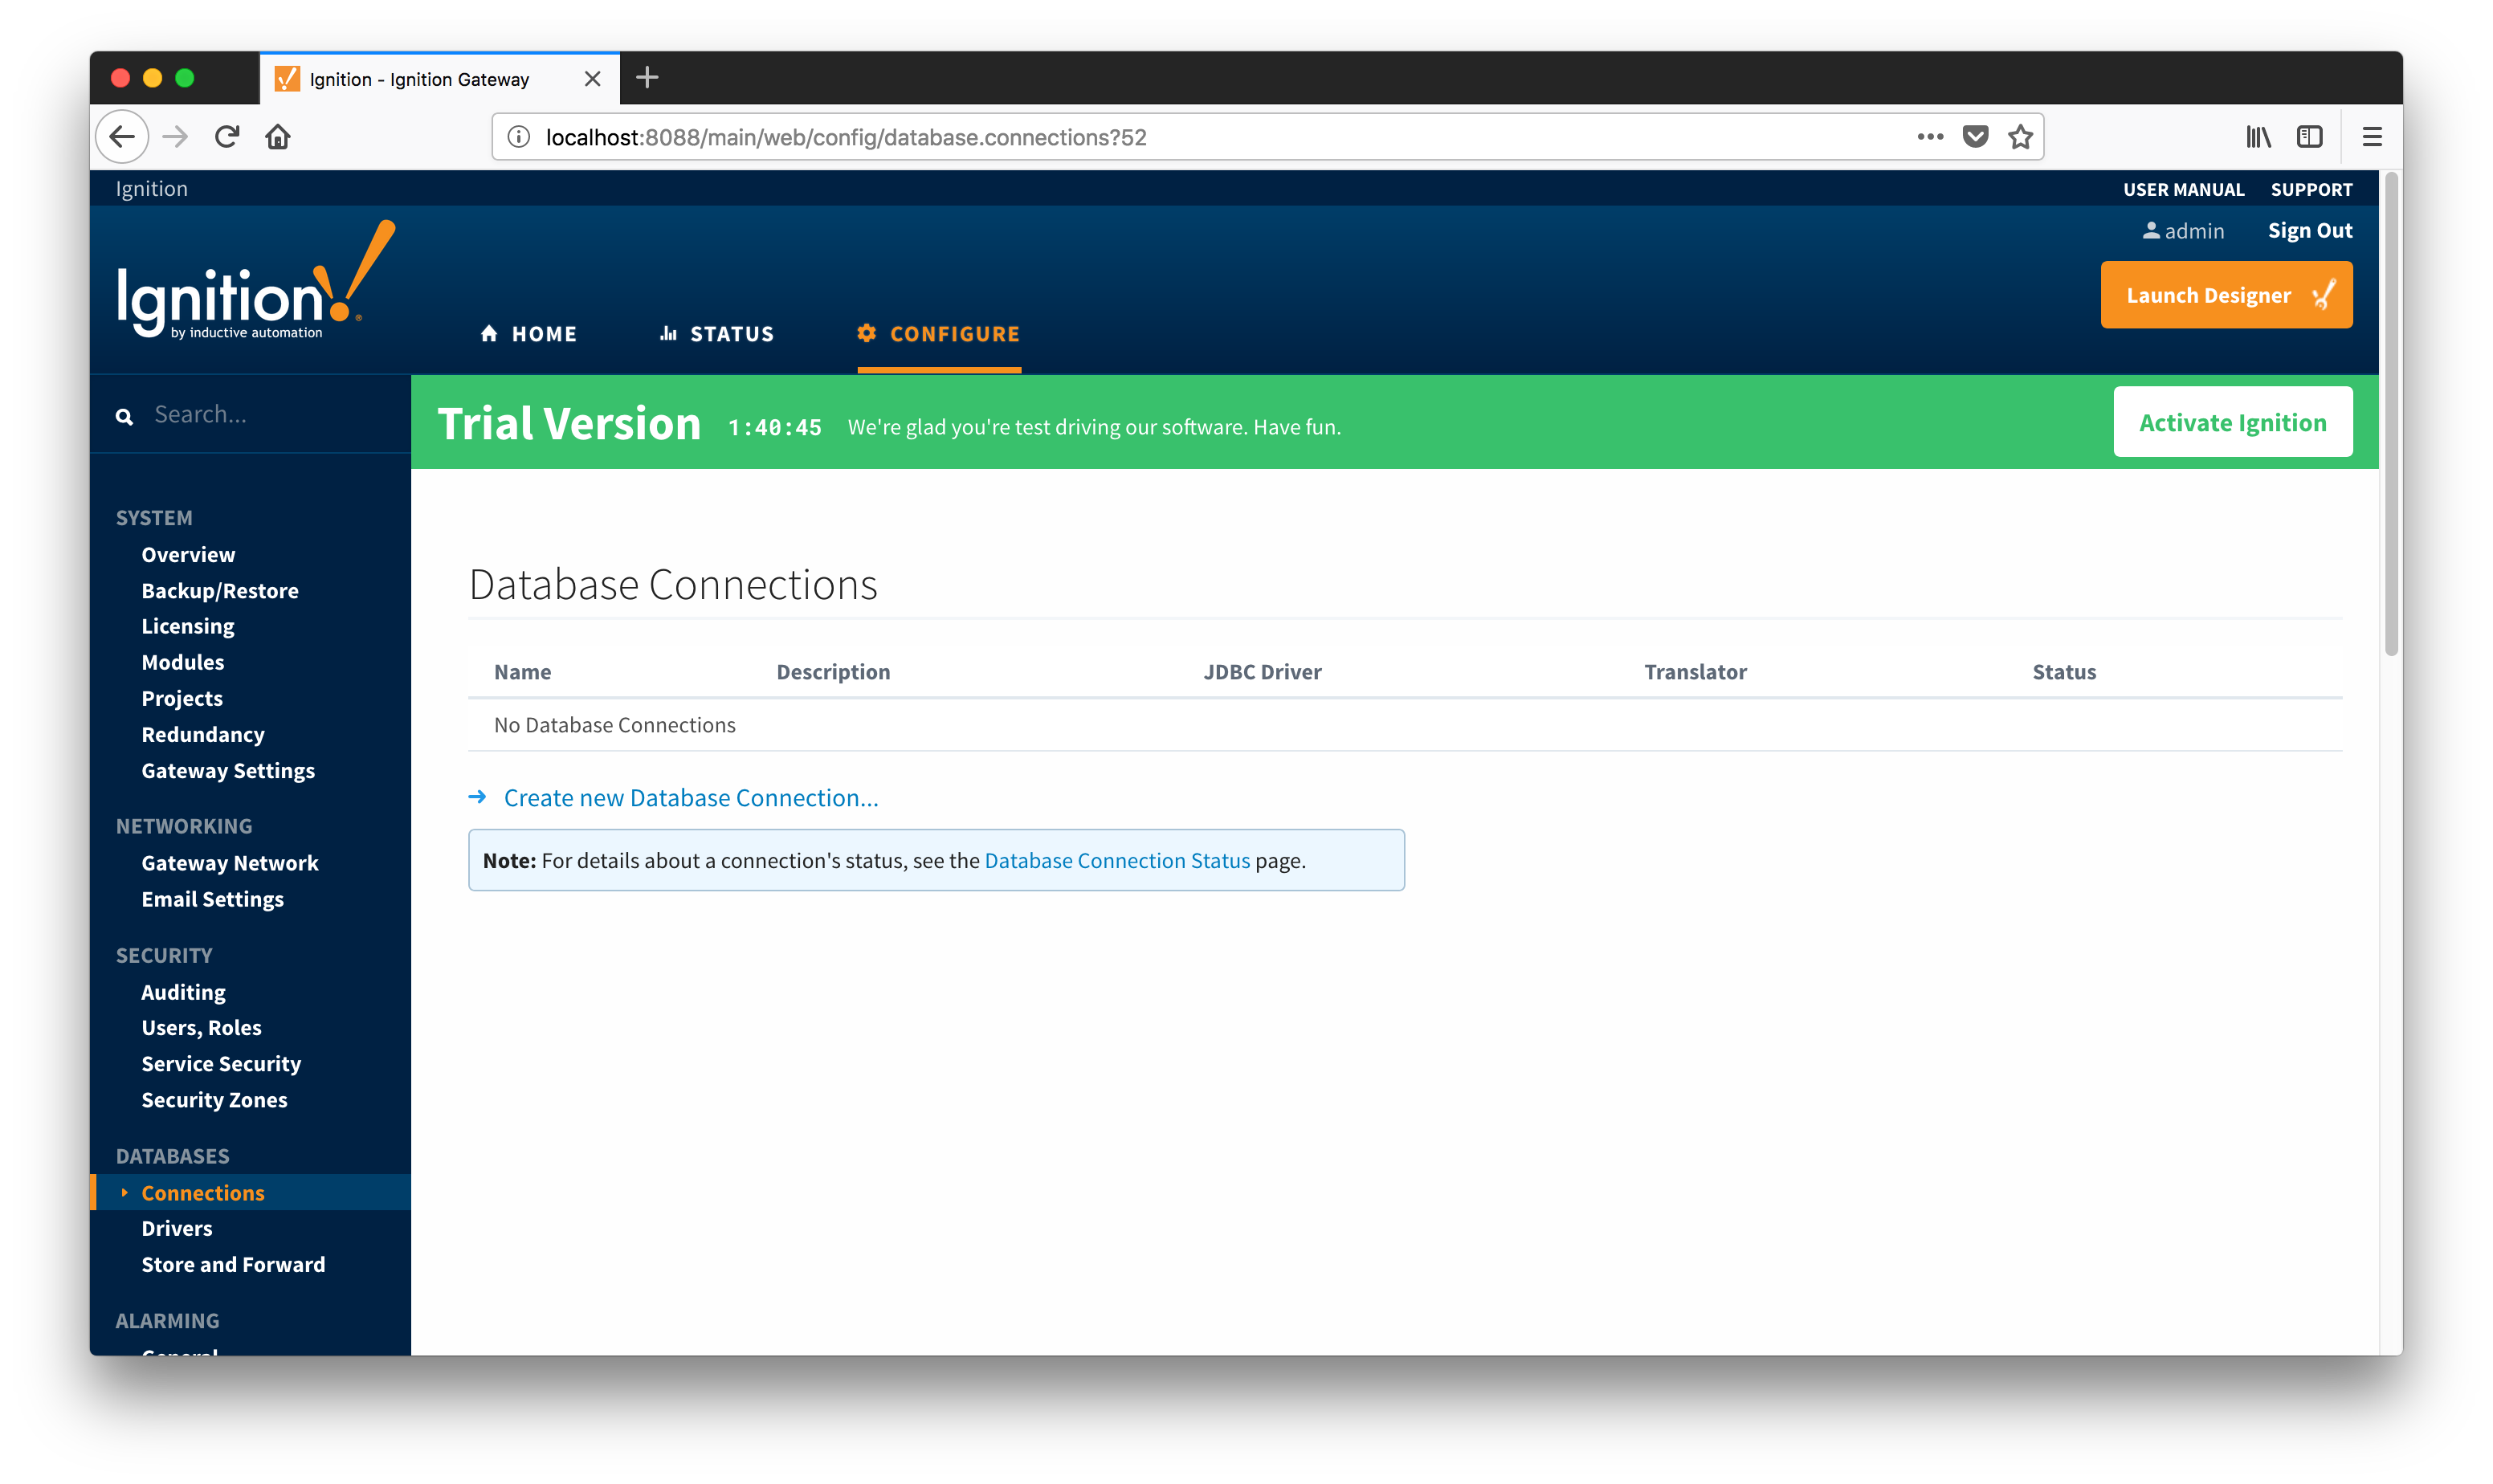
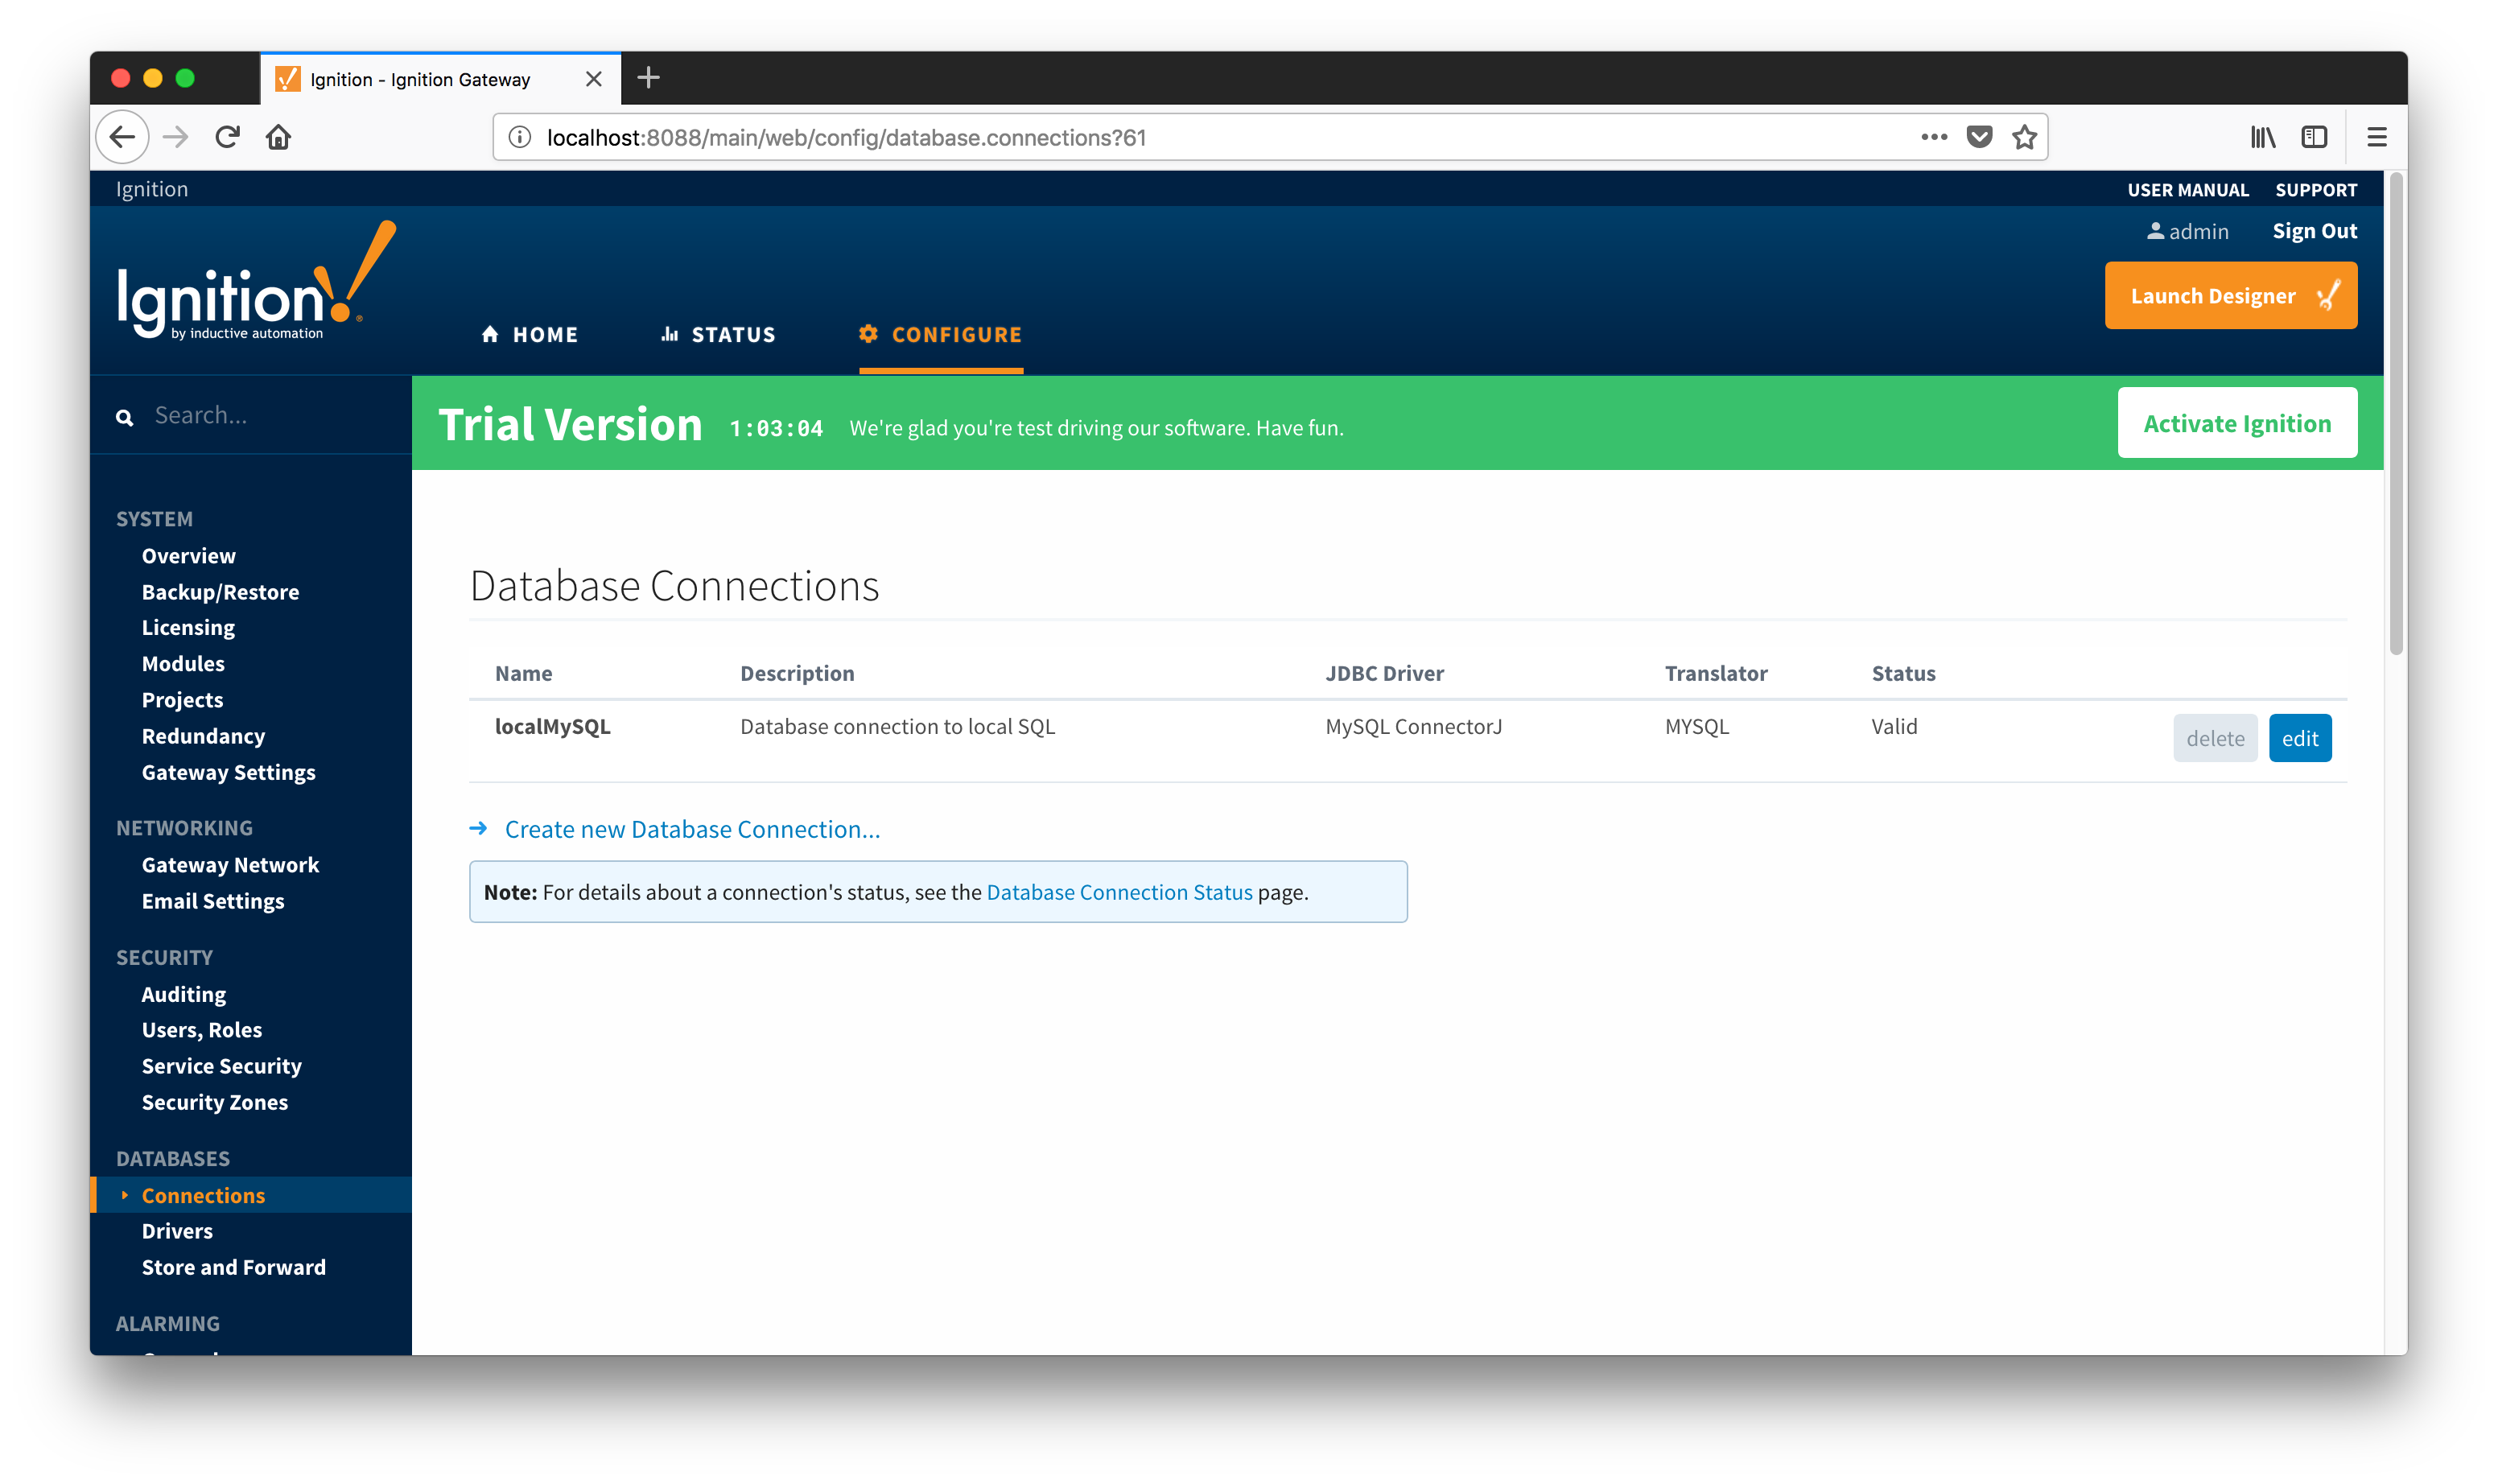
The database is now ready, and the next step is to configure Database Connection in Ignition. To do this, go to Ignition 'Configuration Section' and click 'Connections' under 'DATABASES' on the left hand side of the screen. This will bring you to the 'Database Connections' setup page shown below:
Now, click the "Create new Database Connection..." link and the following 'Choose Driver' page will appear:
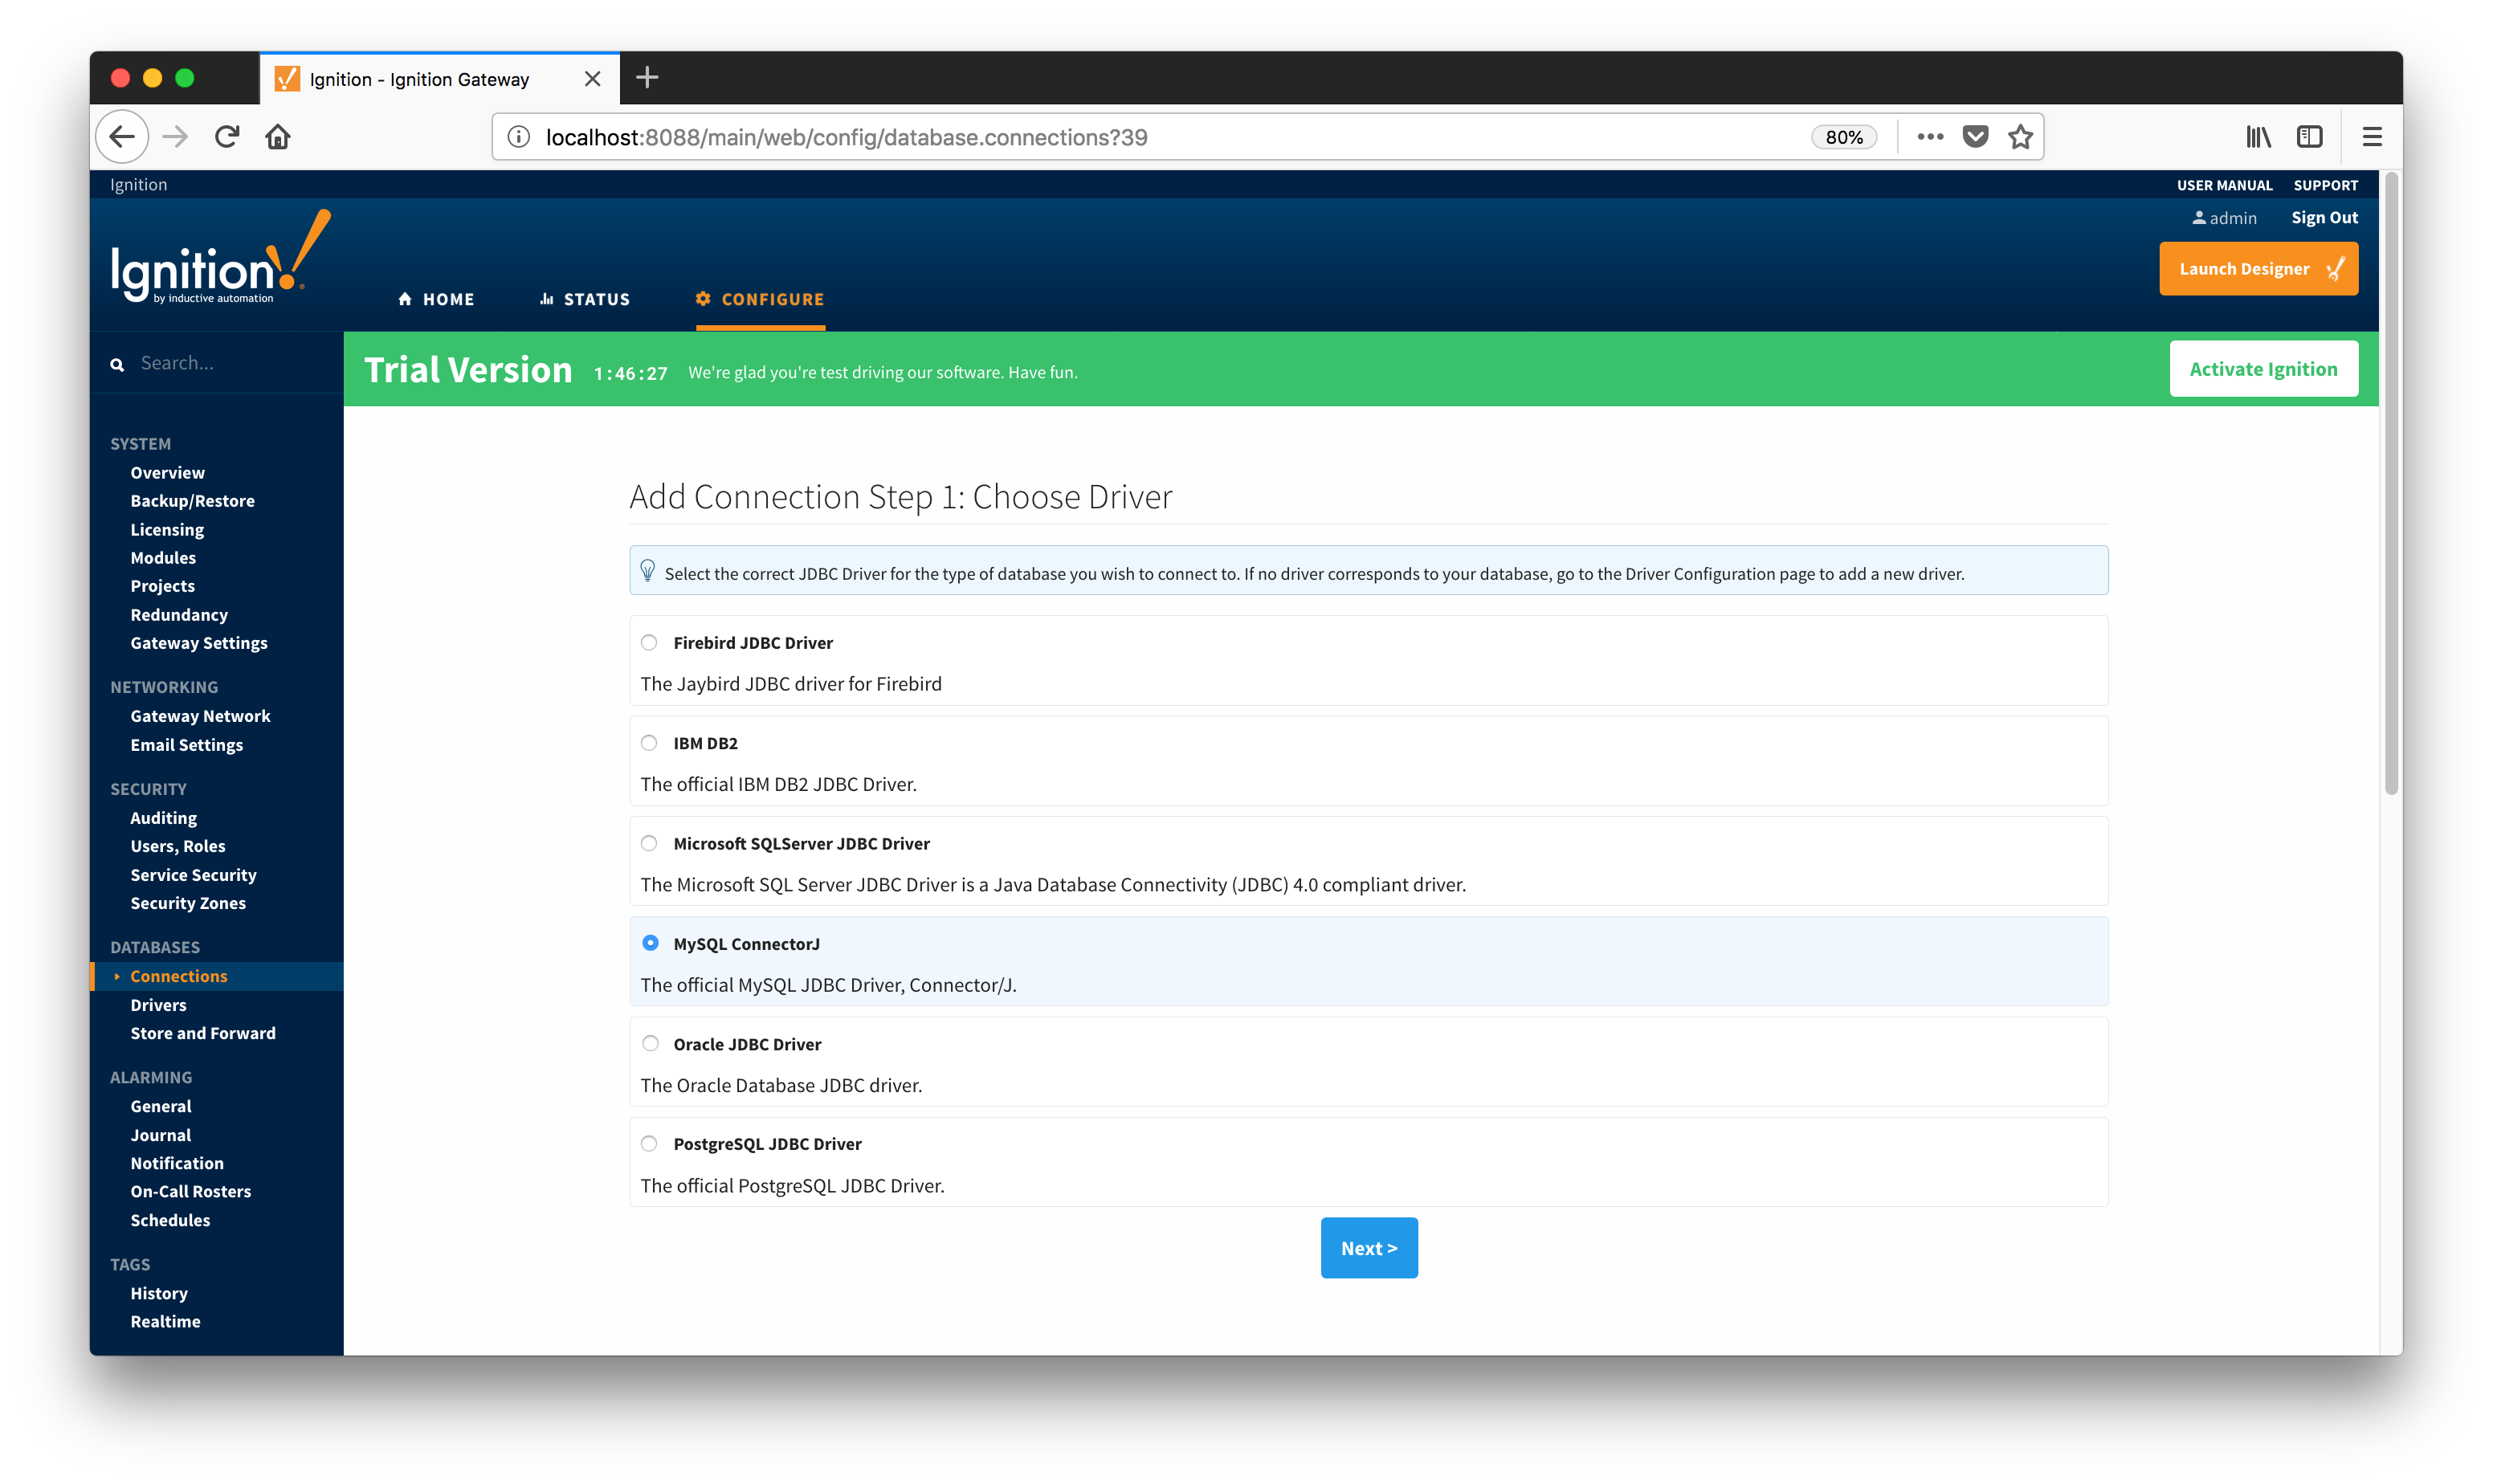
Select the 'MySQL ConnectorJ' option and click 'Next' to configure new database connection as shown below:
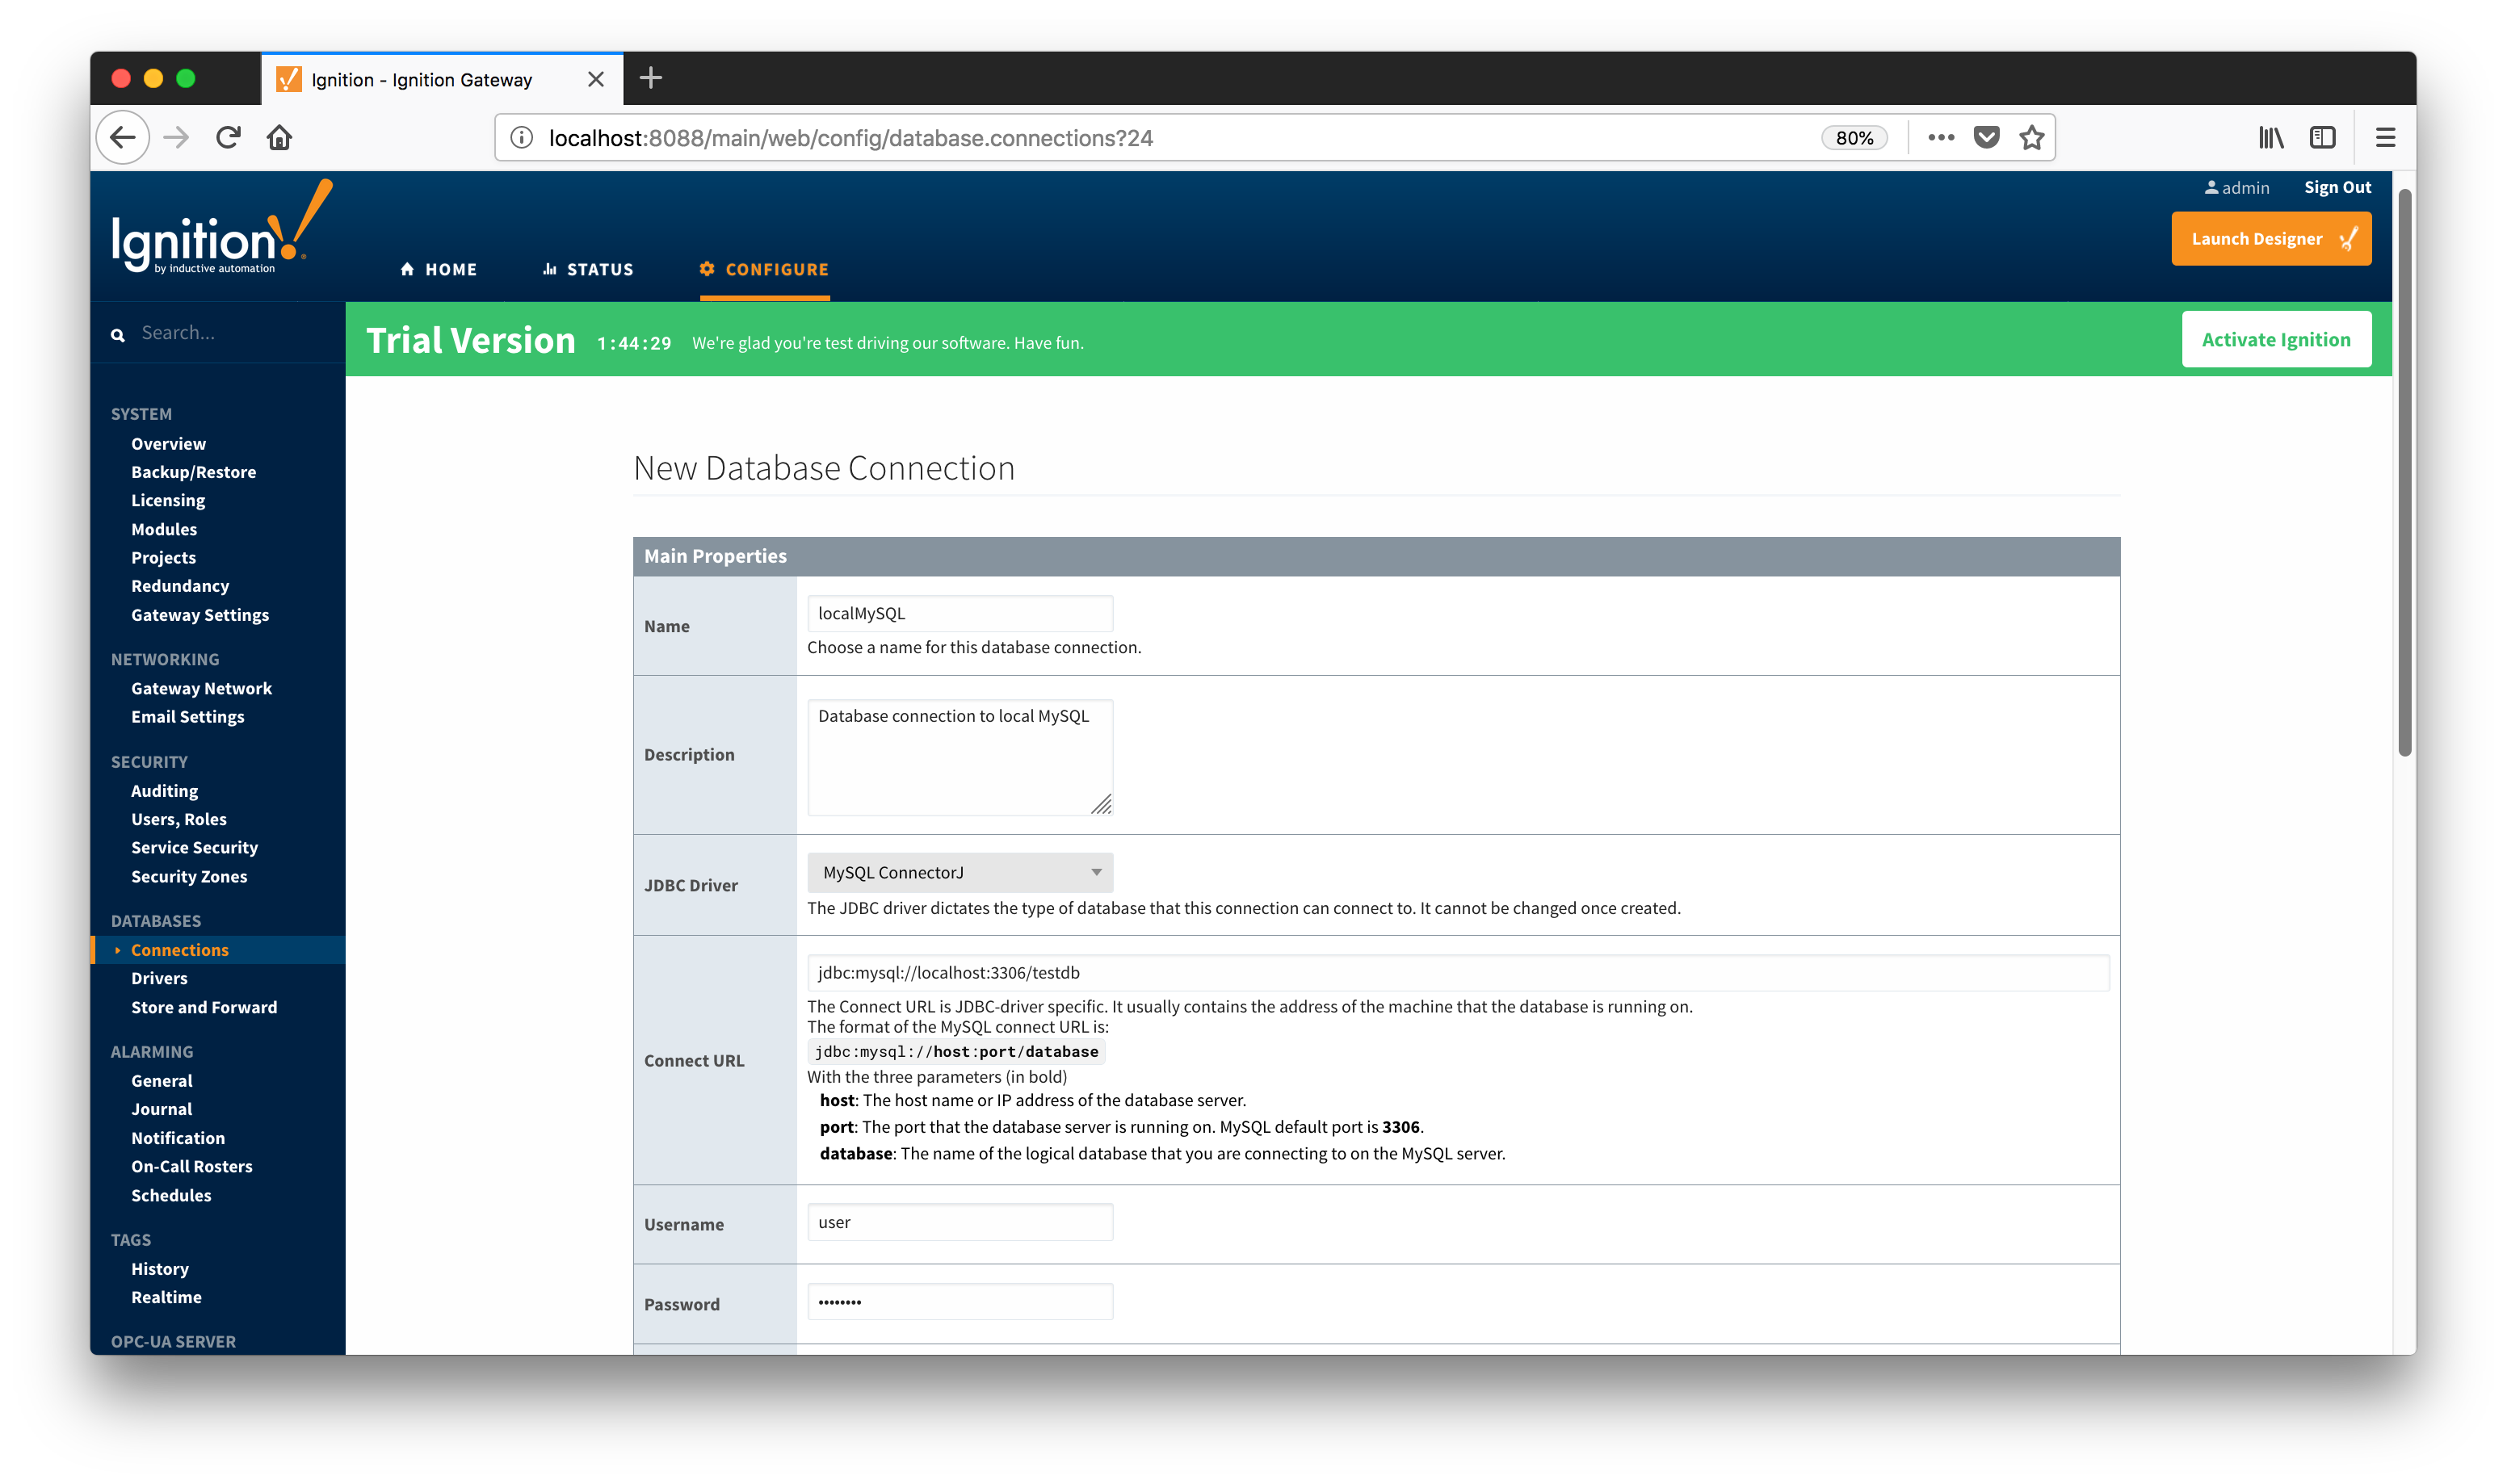
On the 'New Database Connection' configuration page shown above, configure the following fields:
- Name - localMySQL
Database connection name to be set in the 'Record Store' module.
- Description - Database connection to local MySQL
Description of this database connection - Connect URL - jdbc:mysql://localhost:3306/testdb
Connect URL to the 'testdb' database that was created earlier - Username - user
MySQL username - Password - password
MySQL user password
When the 'New Database Connection' configuration page is submitted, the localMySQL database connection will appear on the 'Database Connections' screen as shown below. Note that the status of this connection is set to 'Valid' which means that Ignition has established connection with the 'testdb' database.
Configure the 'Record Store' Module:
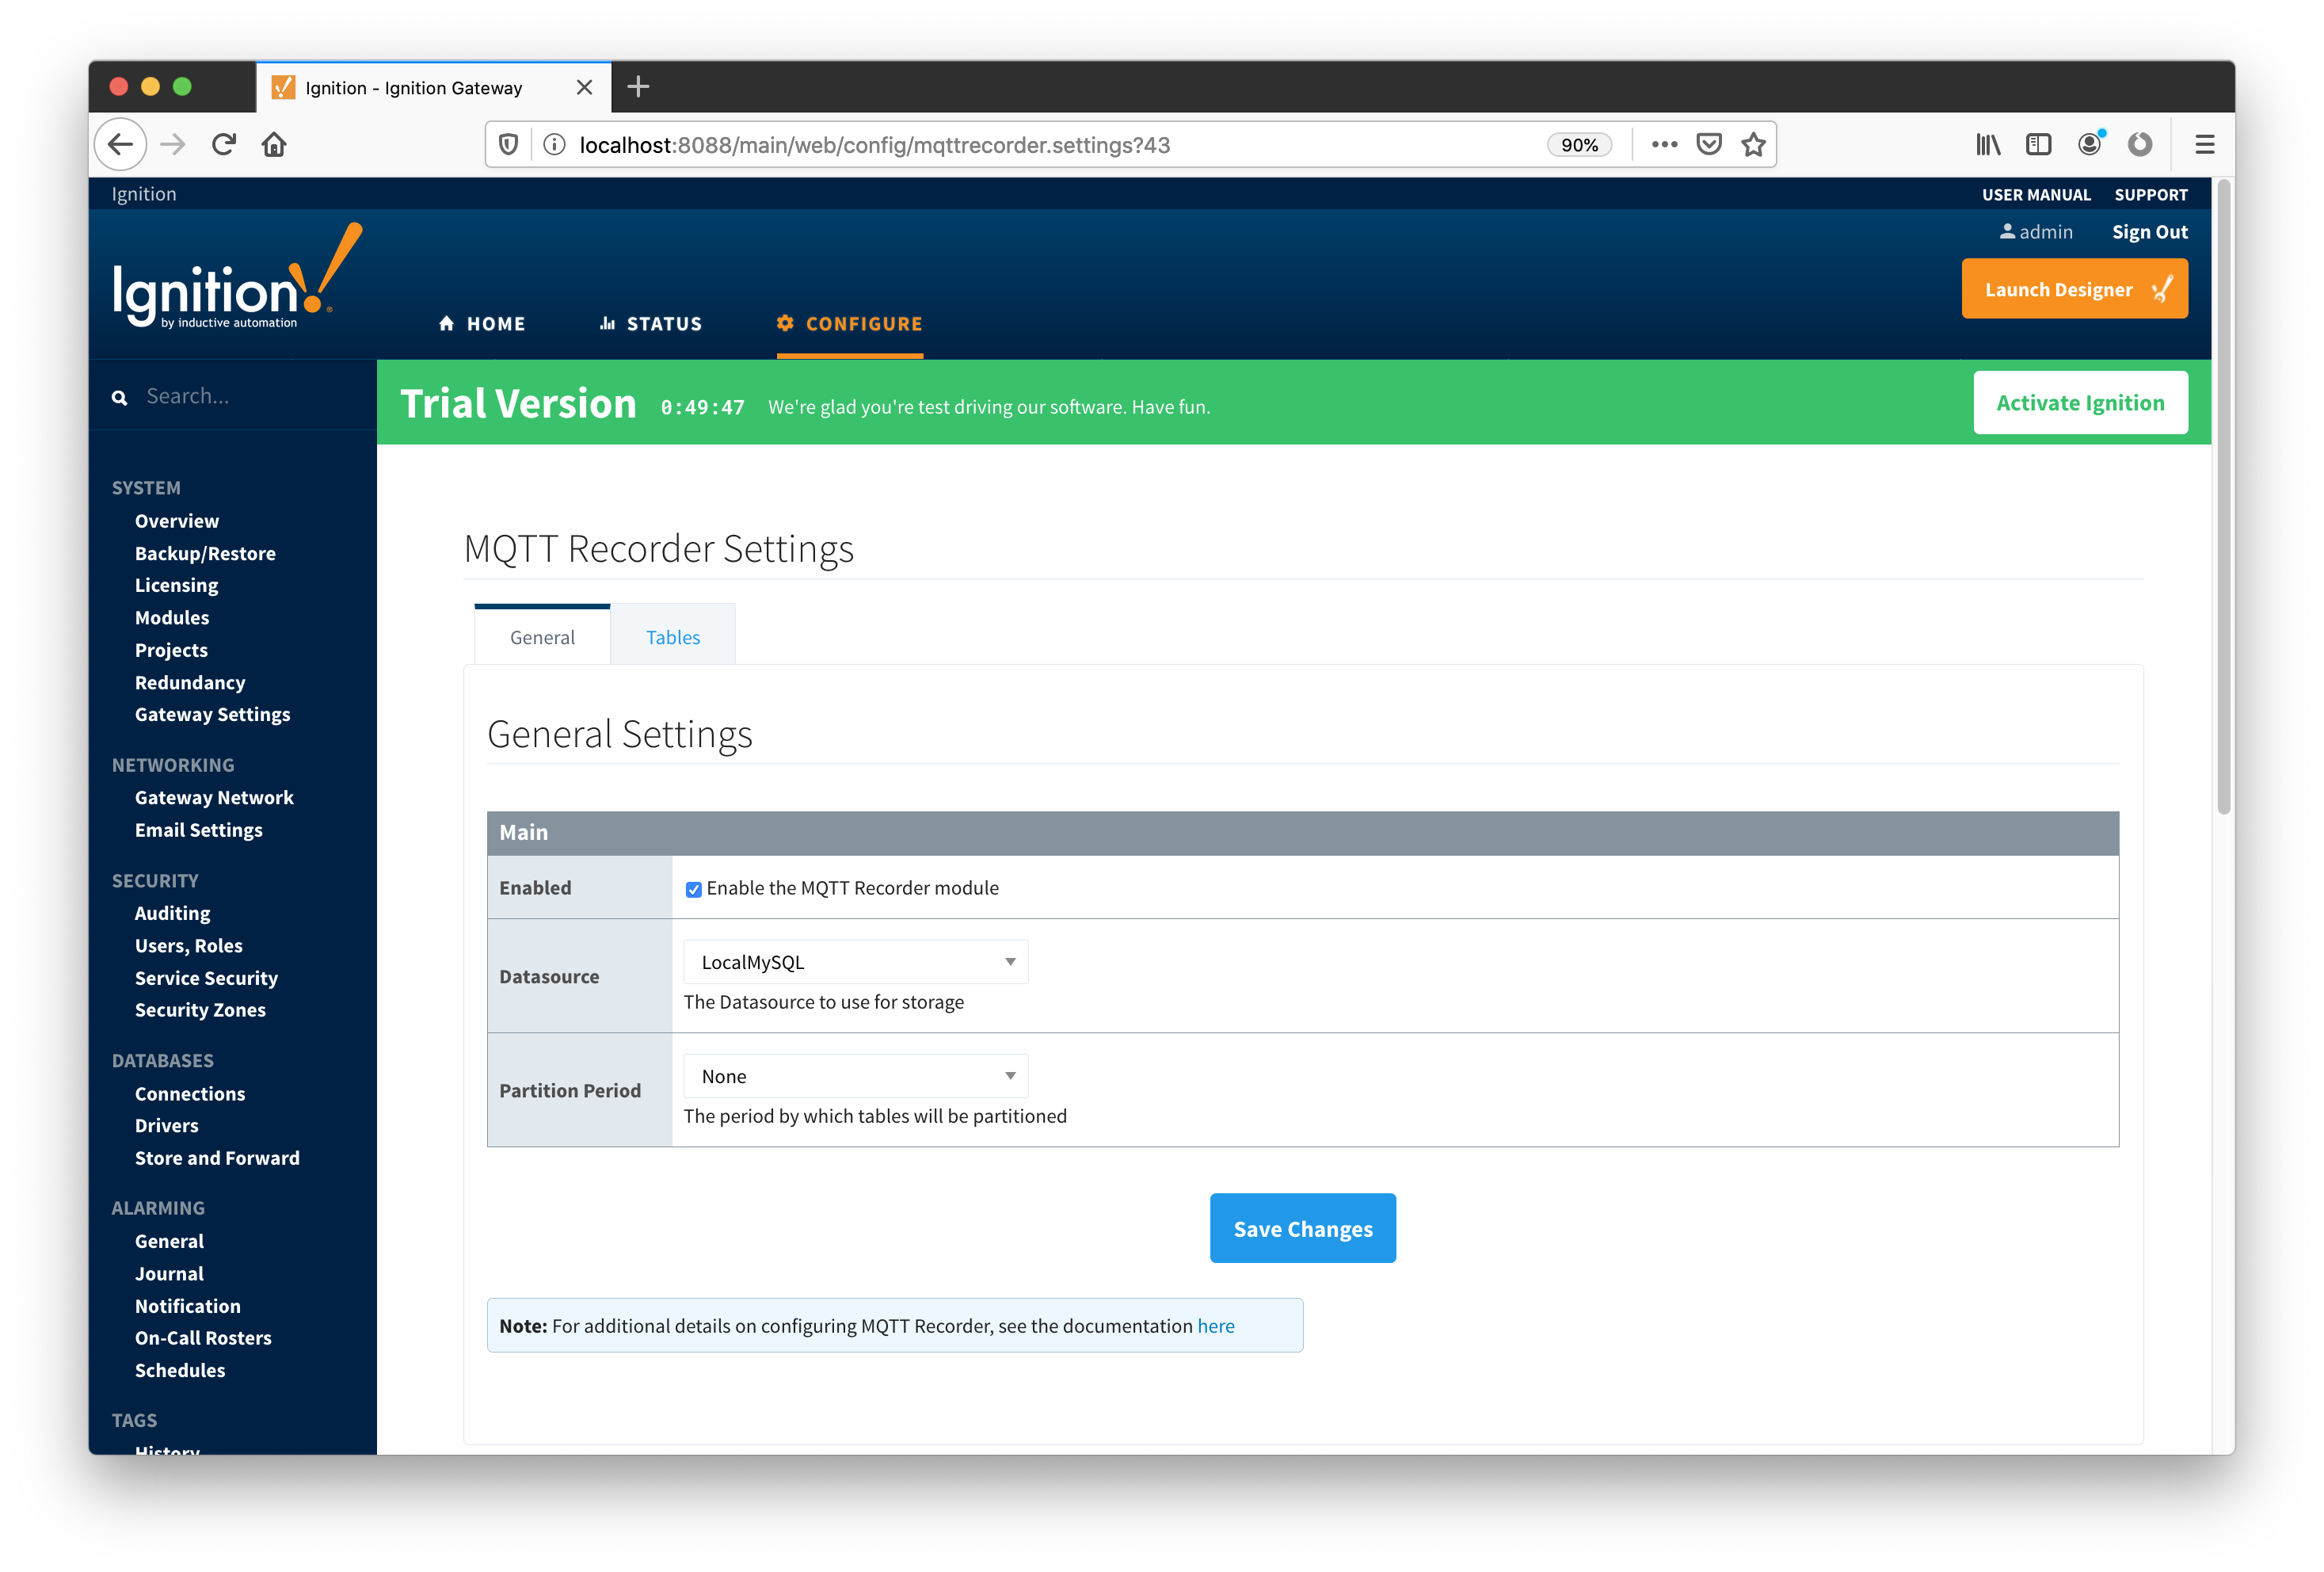
As was mentioned above, the 'Record Store' module needs to be configured to point to the database connection just created. To do this go to the 'Record Store' module configuration page and set the 'Datasource' field to 'localMySQL' as shown below:
Configure Ignition Tag Provider:
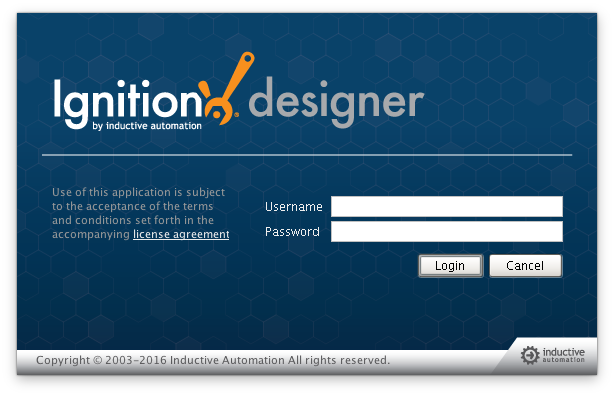
The next step is to configure the Tag Provider in Ignition in a way that MQTT Transmission understands. The Tag Provider needs to be set up in Ignition via the Ignition Designer. To launch it, click 'Launch Designer' near the upper right corner of Ignition page. This will open the following window after downloading the JNLP file and executing it. Note the default username/password is admin/password. Type those into the appropriate fields and click 'Login'.
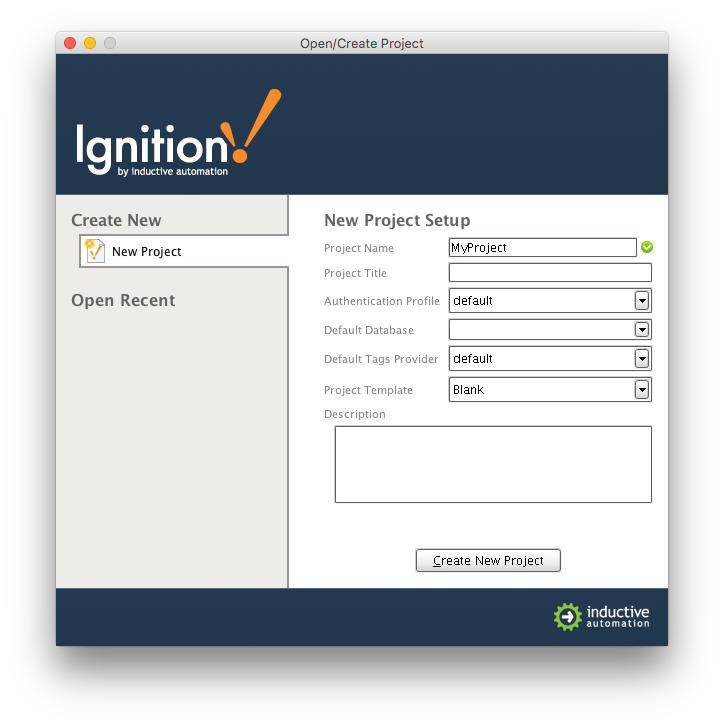
This brings you to a new Window where you can select an Ignition Project or create a new one. Create a new project by giving it a name and clicking 'Create New Project'.
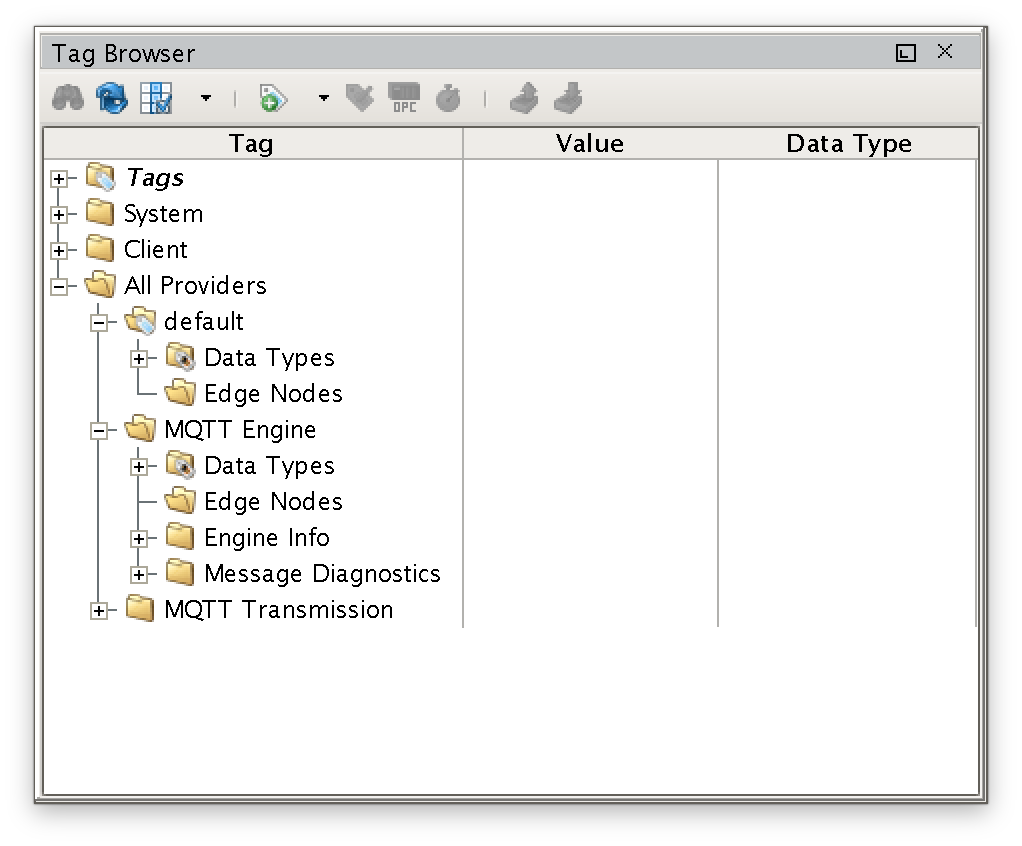
In this example we are going to use the "default" tag provider within Ignition Enterprise. Expand 'All Providers' in the Tag Browser and select 'default' as shown below.
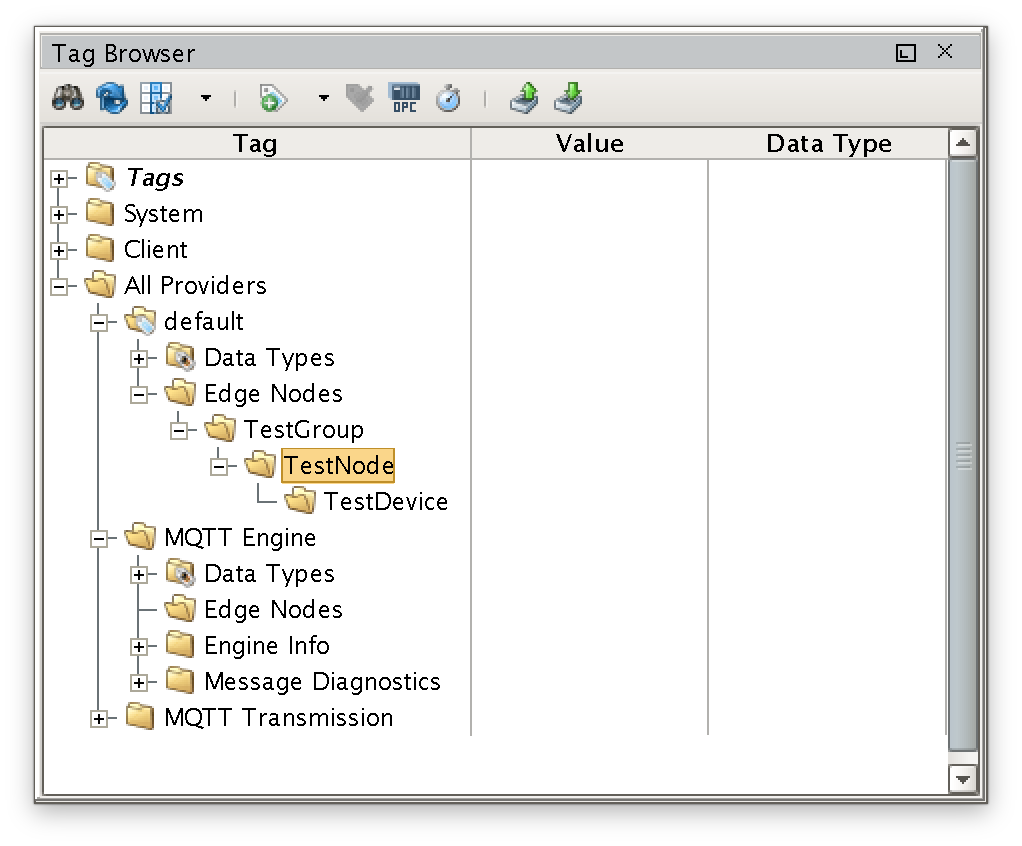
For the 'default' provider, create TestGroup/TestNode/TestDevice directory tree under 'Edge Nodes' and leave those folders empty as shown below:
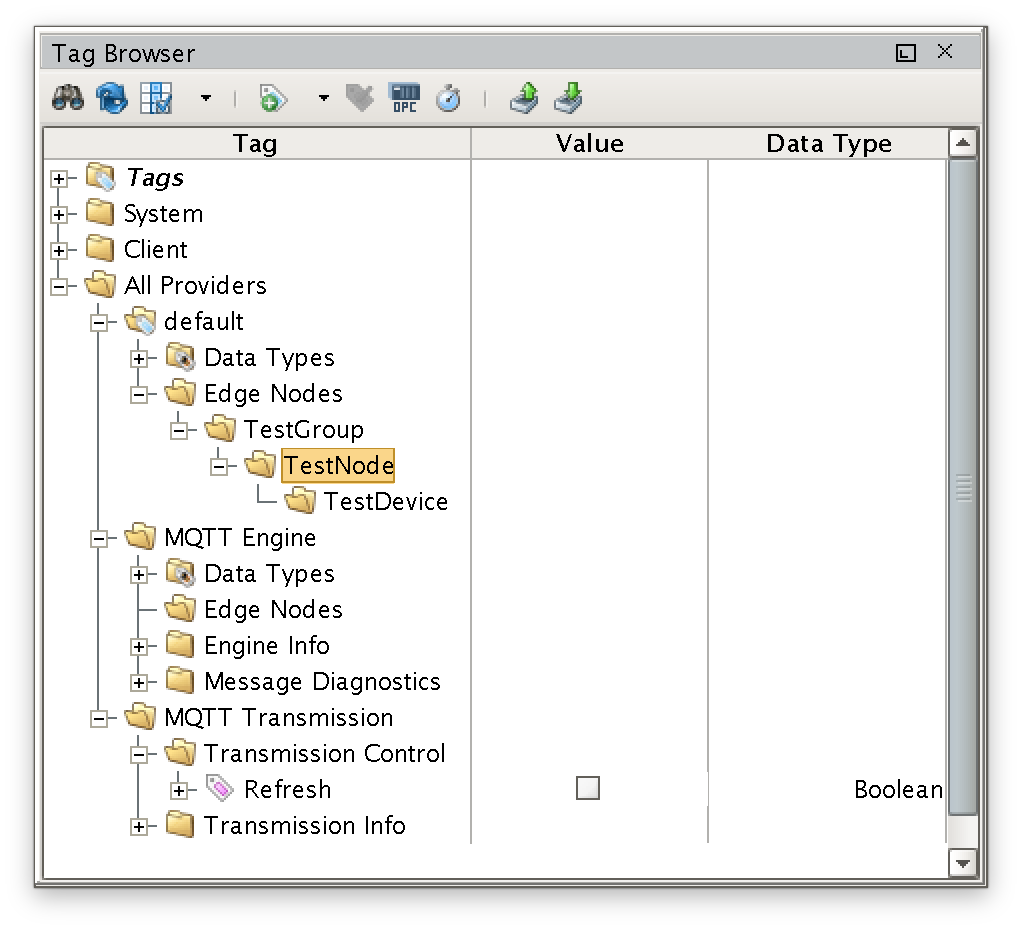
Now, expand the 'MQTT Transmission' folder as shown on the picture below and click the 'Refresh' checkbox.
Pressing the 'Refresh' checkbox causes the Transmitter to publish NBIRTH and DBIRTH certificates:
2018-07-20 16:46:11,438 INFO --- MqttFX ClientModel : messageArrived() with topic: spBv1.0/TestGroup/NBIRTH/TestNode
2018-07-20 16:46:11,439 INFO --- MqttFX ClientModel : messageArrived() added: message #9 to topic 'spBv1.0/TestGroup/NBIRTH/TestNode'
2018-07-20 16:46:11,443 INFO --- MqttFX ClientModel : messageArrived() with topic: spBv1.0/TestGroup/DBIRTH/TestNode/TestDevice
2018-07-20 16:46:11,443 INFO --- MqttFX ClientModel : messageArrived() added: message #10 to topic 'spBv1.0/TestGroup/DBIRTH/TestNode/TestDevice
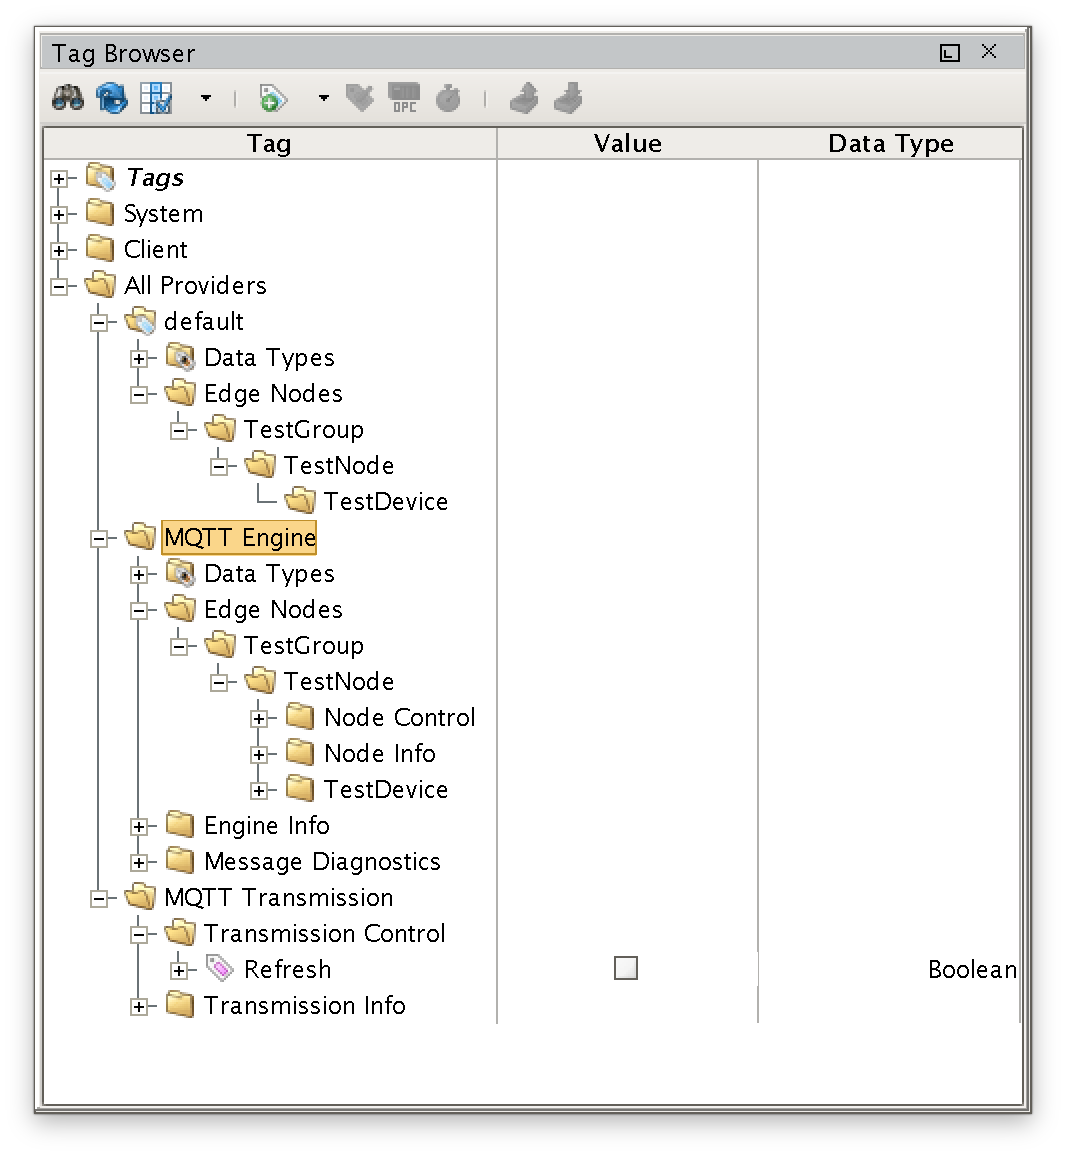
Note that the 'Engine Nodes' folder under 'MQTT Engine' is no longer empty; the TestGroup/TestNode/TestDevice directory tree was created there.
Setting Custom Records in 'MQTT Transmitter':
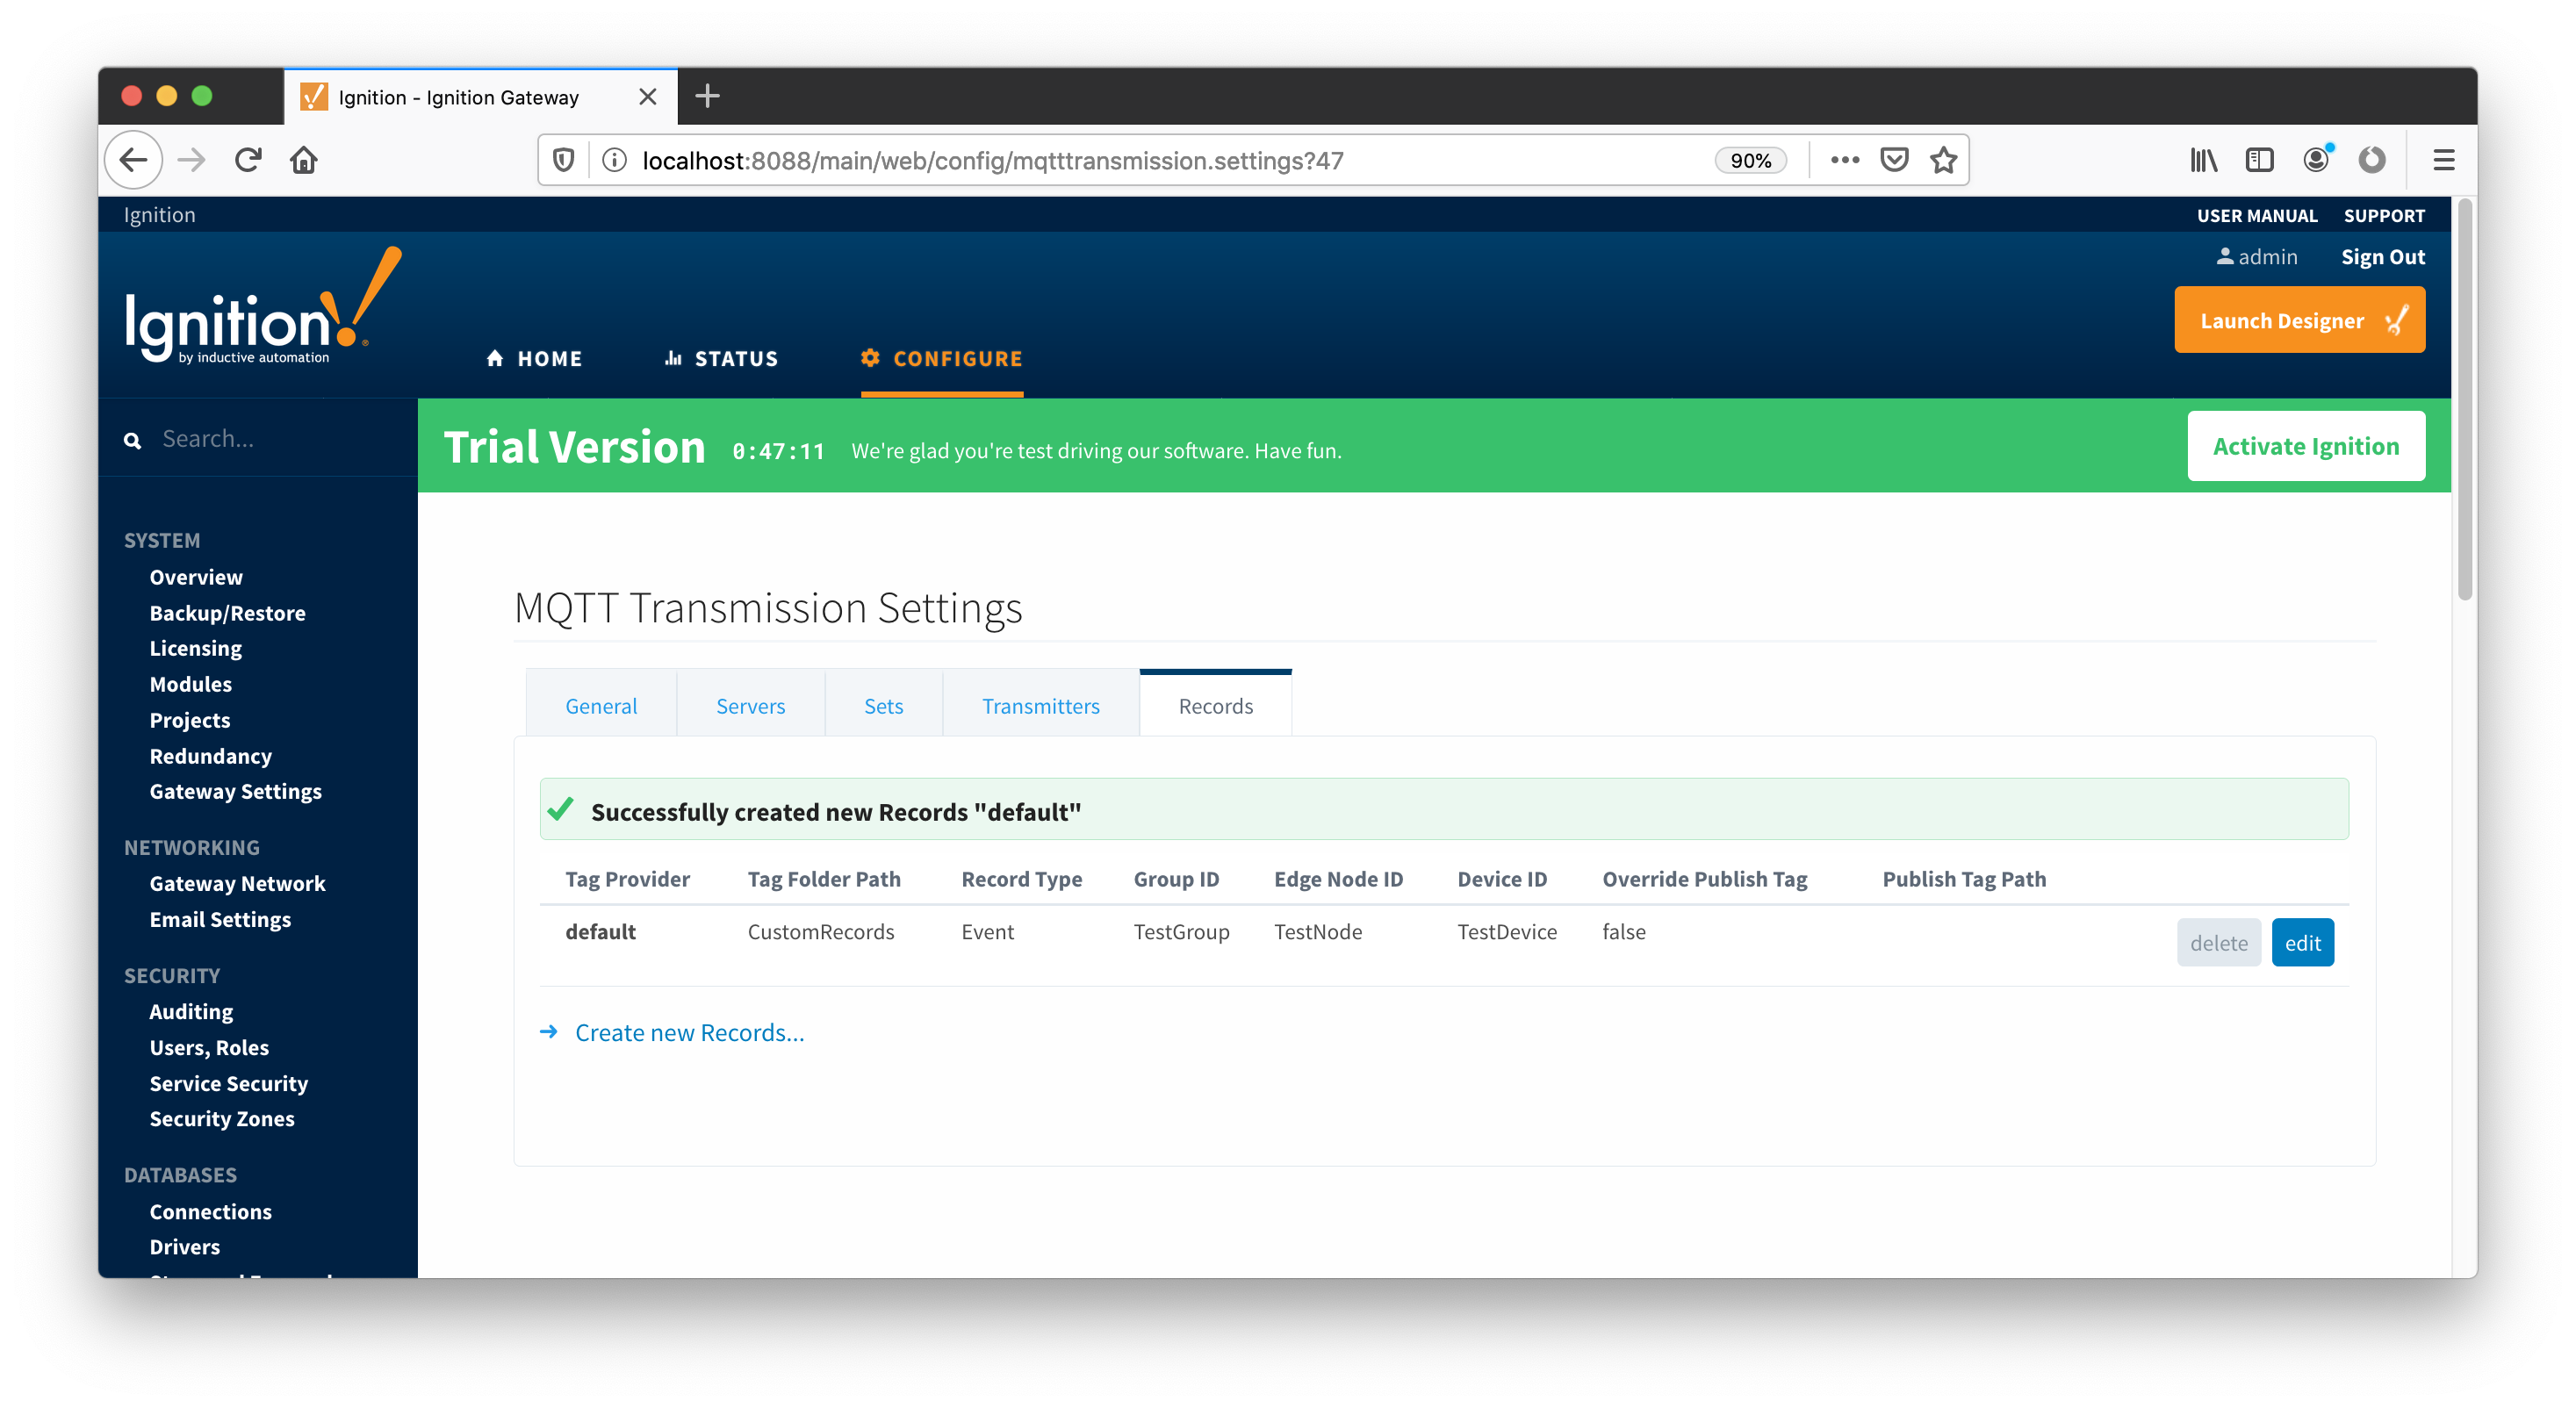
At this point, everything is ready to setup custom records. Go to the 'MQTT Transmitter' module configuration page and select the 'Records' tab as shown below:
 Click the 'Create new Records...' link and configure new custom record. Make sure that 'Tag Provider' is set to 'default' and 'Group ID', 'Edge Node ID', and 'Device ID' fields are set to match directory tree created in Ignition Designer.

When new record is submitted, it appears in the MQTT Transmission 'Records' table as shown below:
Note that when new record is created, the 'CustomRecords' folder with the 'Publish' checkbox is created under the 'default' tag provider as shown below. Note that the 'Tag Folder Path' field may contain a path to subdirectories as well (e.g. MyRecords/TestGroup/TestNode or MyRecords\TestGroup\TestNode). In this case respective subdirectories will be created under 'MyRecords' folder and the 'Publish' checkbox will be in the MyRecords/TestGroup/TestNode directory.
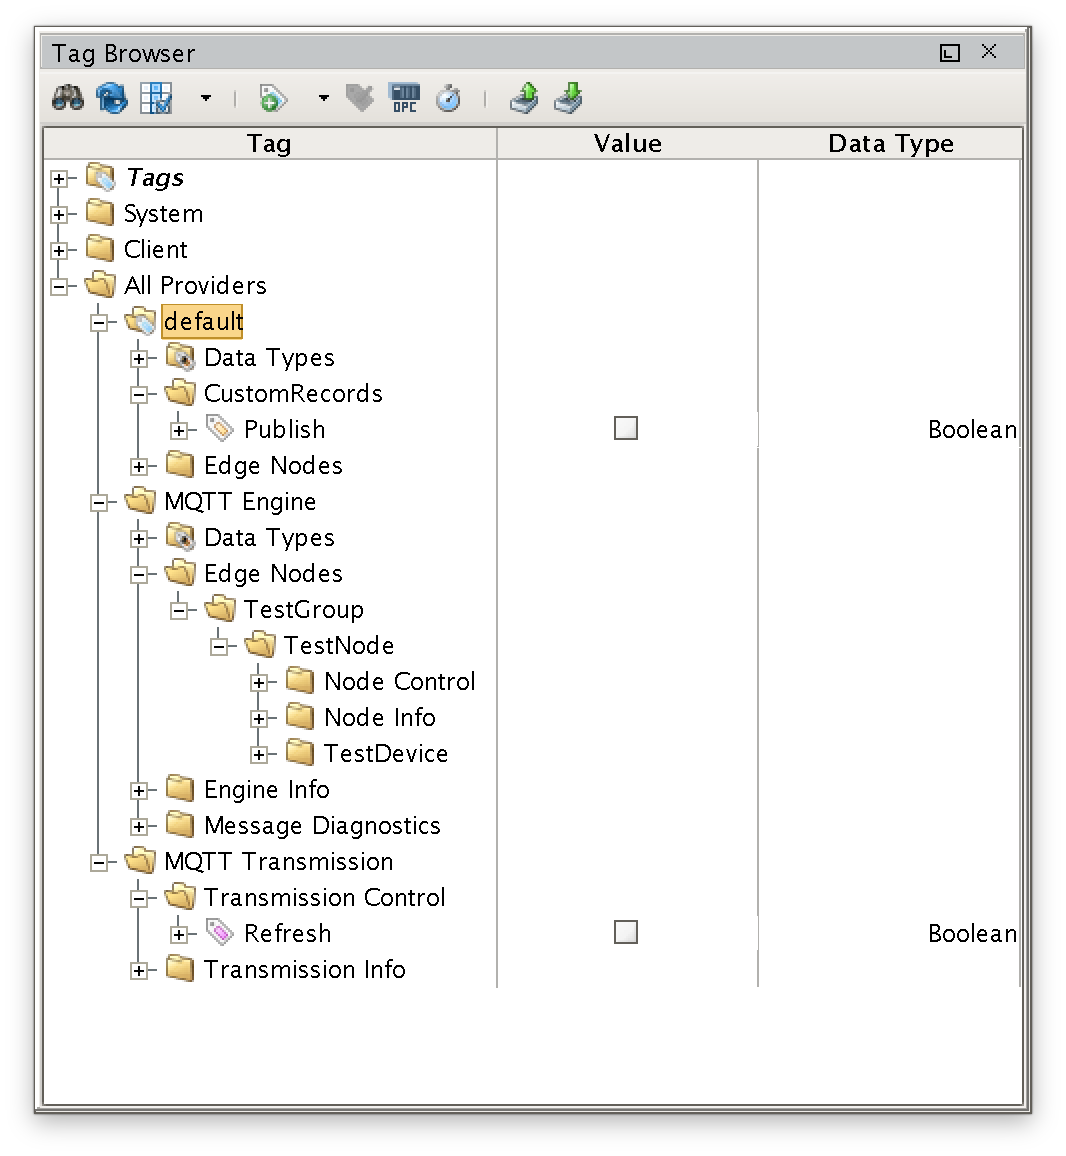
Now, let's create a few tags in this 'Custom Records' folder as shown below:
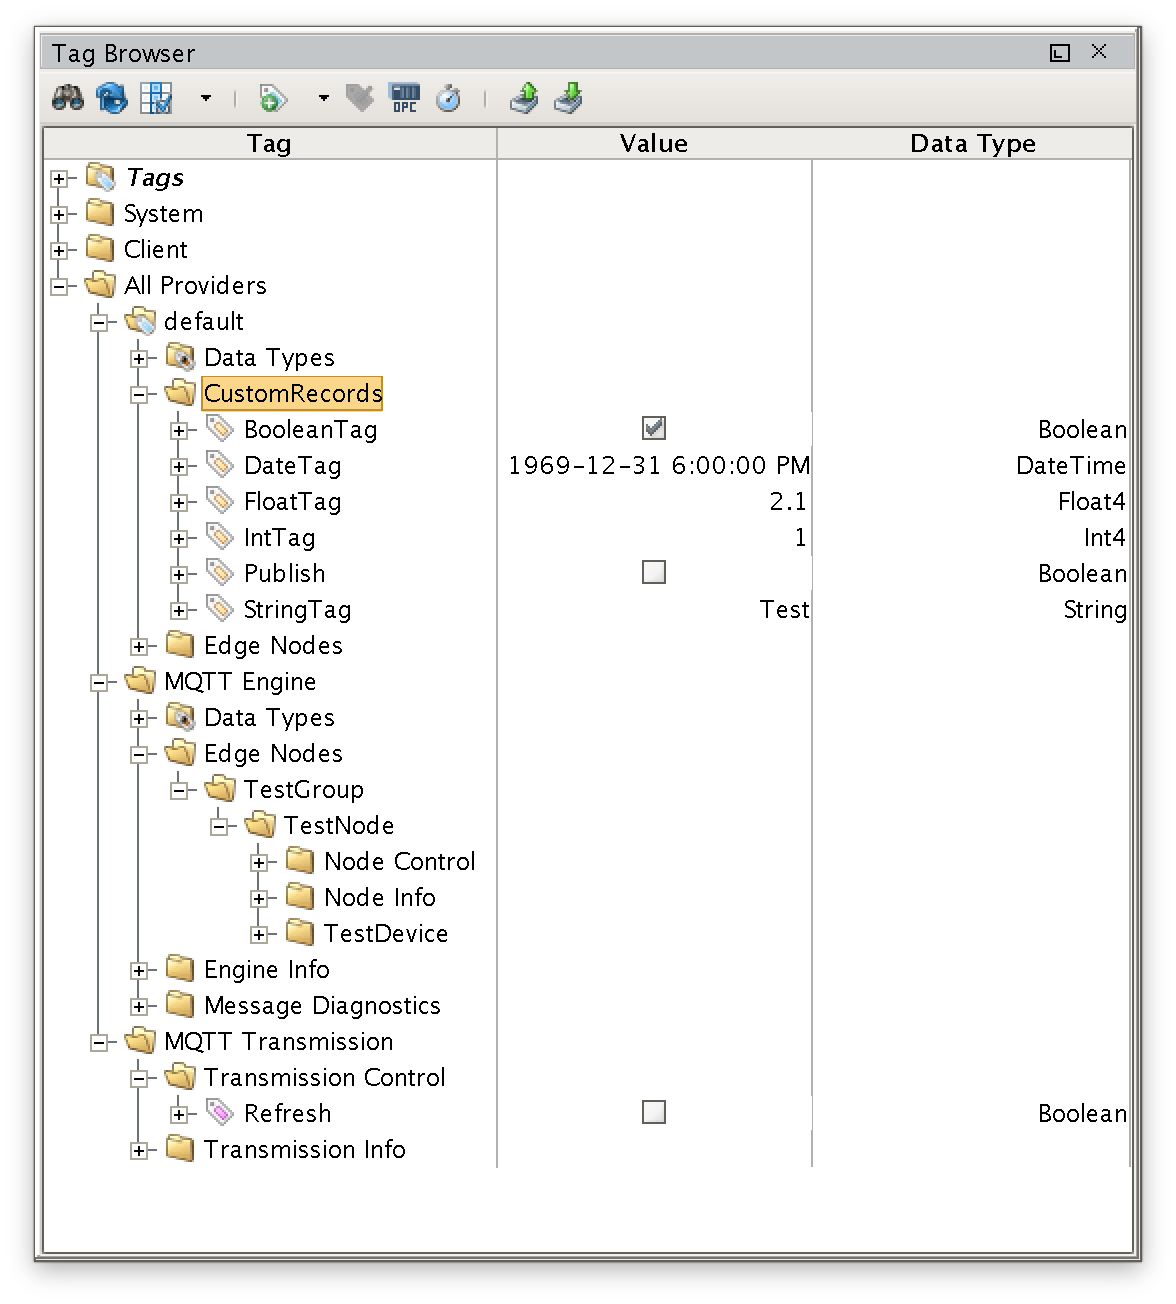
Publishing Custom Records:
We are now ready to publish tags we just created in the 'Customs Record' directory under 'default' tag provider. To do this click the 'Publish' check box, and it should automatically become unchecked in a second. This makes MQTT Transmitter publish tags on this topic:
topic: spBv1.0/TestGroup/DRECORD/TestNode/TestDevice
And with the SQL query shown below, we can verify that tags are stored in the 'testdb' database:
mysql> SELECT *, from_unixtime(`timestamp`/1000) FROM rs_event;
+----+-----------+----------+------------+---------------+-----------+------------+---------------------+----------+--------+---------------------------------+
| id | group | edgeNode | device | timestamp | StringTag | BooleanTag | DateTag | FloatTag | IntTag | from_unixtime(`timestamp`/1000) |
+----+-----------+----------+------------+---------------+-----------+------------+---------------------+----------+--------+---------------------------------+
| 1 | TestGroup | TestNode | TestDevice | 1532125999934 | Test | 1 | 1969-12-31 00:00:00 | 2.1 | 1 | 2018-07-20 17:33:19.9340 |
+----+-----------+----------+------------+---------------+-----------+------------+---------------------+----------+--------+---------------------------------+
1 row in set (0.00 sec)
Now let's edit the custom record we created earlier and remove the 'Device ID' from it. If we click the 'Publish' tag after modified record has been submitted, the MQTT Transmitter will publish on this topic:
topic: spBv1.0/TestGroup/NRECORD/TestNode
and the 'testdb' database will now have two entries as shown below:
mysql> mysql> SELECT *, from_unixtime(`timestamp`/1000) FROM rs_event;
+----+-----------+----------+------------+---------------+-----------+------------+---------------------+----------+--------+---------------------------------+
| id | group | edgeNode | device | timestamp | StringTag | BooleanTag | DateTag | FloatTag | IntTag | from_unixtime(`timestamp`/1000) |
+----+-----------+----------+------------+---------------+-----------+------------+---------------------+----------+--------+---------------------------------+
| 1 | TestGroup | TestNode | TestDevice | 1532125999934 | Test | 1 | 1969-12-31 00:00:00 | 2.1 | 1 | 2018-07-20 17:33:19.9340 |
| 2 | TestGroup | TestNode | NULL | 1532126467393 | Test | 1 | 1969-12-31 00:00:00 | 2.1 | 1 | 2018-07-20 17:41:07.3930 |
+----+-----------+----------+------------+---------------+-----------+------------+---------------------+----------+--------+---------------------------------+
2 rows in set (0.00 sec)
Additional Resources
- Inductive Automation's Ignition download with free trial
- Azure Injector download with free trial
- Questions about this tutorial?
- Sales questions
- About Cirrus Link