![]()
Contents
Cirrus Link Resources
Chariot MQTT Server v1 (previous version)![]()
Cirrus Link Modules for Ignition![]()
Contact Us (Sales/Support)![]()
Forum![]()
![]()
Chariot MQTT Server v1 (previous version)![]()
Cirrus Link Modules for Ignition![]()
Contact Us (Sales/Support)![]()
Forum![]()
The following guide will walk through the process of upgrading from a Chariot MQTT Server version 2.0.0 to a newer version.
Due to the updated method of system backup/restore released in 2.1.0.
...
, the process will first need to upgrade from 2.0.0
...
to 2.1.0
and then to the newer version.
The following upgrade instructions assumes for each of the supported platforms Linux and Windows requires the user has superuser/admin privileges and can execute any scripts at the command line in the directories where these servers are installed. The upgrade process itself consists of two main steps:
The scripts come packaged with the Chariot MQTT Server version 2.1.0 and can be found in the install directory.
| Warning |
|---|
| During this upgrade process your MQTT broker will be offline. Typical update time is less than 10 minutes. |
| Anchor | ||||
|---|---|---|---|---|
|
Stop the v2.0.0 Chariot service. From a command prompt, run the Chariot service stop script in the v2.0.0 directory.
| Code Block |
|---|
sudo /etc/init.d/chariot stop |
Install v2.1.0 following the Chariot MQTT Server Installation instructions. This instance should be installed ONLY and should not be started.
| Warning |
|---|
Do not overwrite the old version of Chariot when extracting the Chariot ZIP package, but instead create a new Chariot directory and extract the new Chariot package into that new directory. For example:
|
...
Copy the upgradeExport.sh
filefile from the v2.1.0
installdirectory to the
base directory wherev2.0.0
was installeddirectory. For example:
| Code Block |
|---|
sudo cp ./chariotv2.1.0/upgradeExport.sh ./chariotv2.0.0/upgradeExport.sh |
From a command prompt, run theupgradeExport script in the v2.0.0 directory
Run theupgradeExport.sh script to create the upgrade zip file containing the data from the old installation
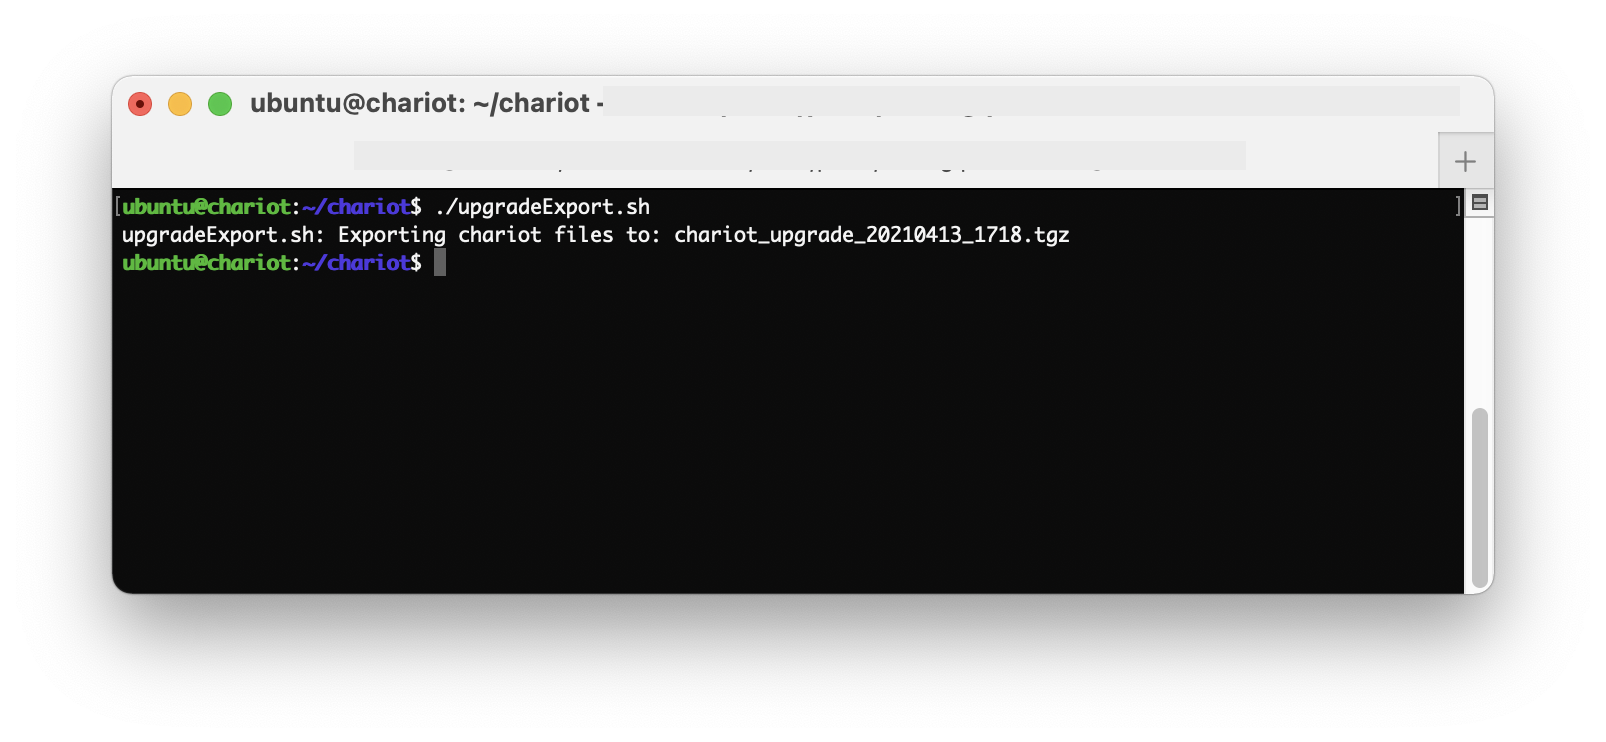
. The file naming convention will be chariot_upgrade_YYMMDD_HHMM.tgz.
| Code Block |
|---|
sudo ./upgradeExport.sh |
Copy the
exportedupgrade.tgz file from the v2.0.0
installdirectory to the
base directory wherev2.1.0 directory. For example:
| Code Block |
|---|
sudo mv ./chariotv2.0.0/chariot_upgrade_20220113_1612.tgz ./chariotv2.1.0/chariot_upgrade_20220113_1612.tgz |
From a command prompt, run theupgradeImport script in the v2.1.0
is installed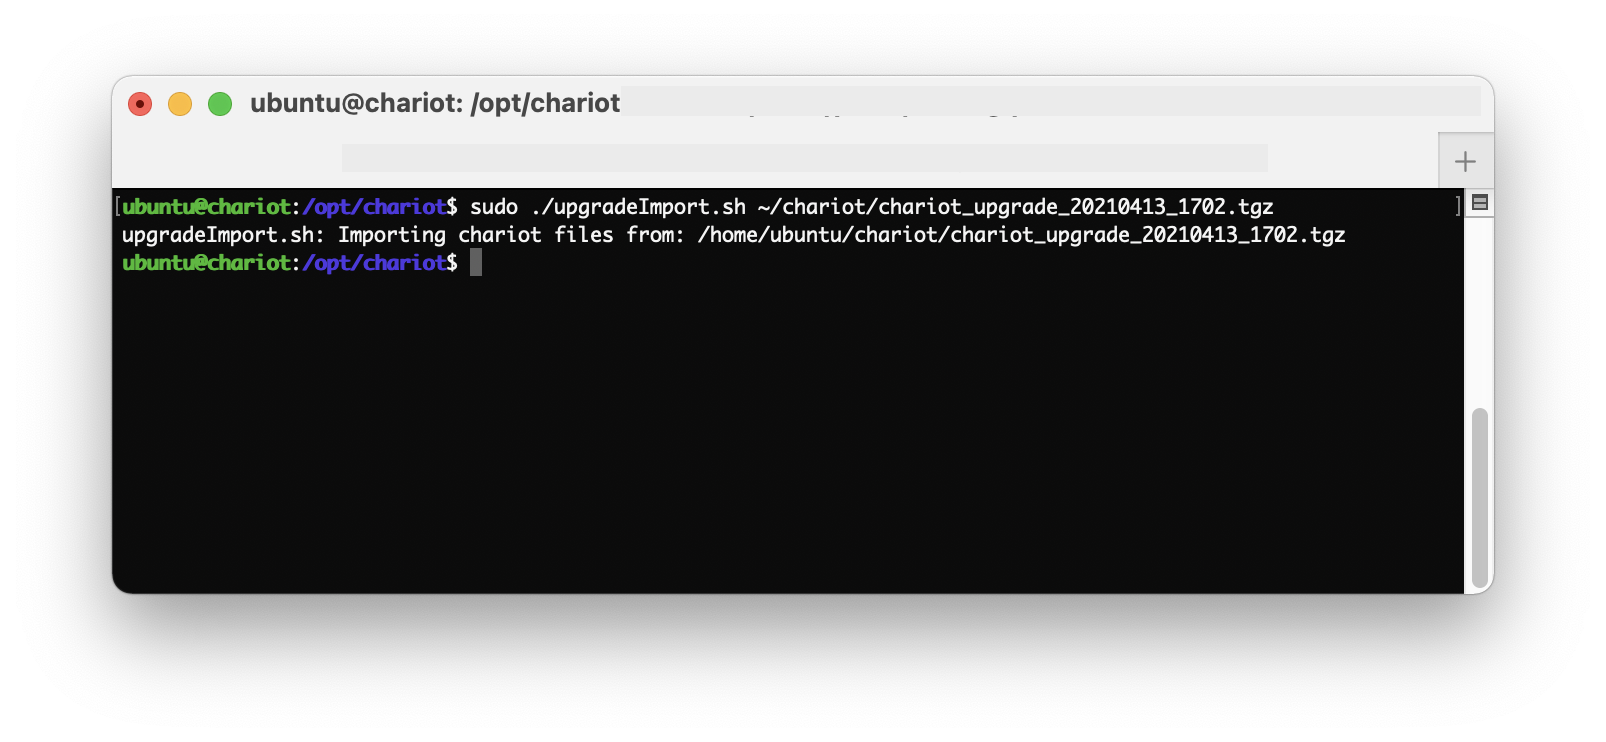
The new Chariot MQTT Server should be loaded with the Users, Roles, MQTT Credentials, and System & Server configurations from the old installation. However, the new Chariot MQTT Server will still need to be licensed and any SSL certificates/keys will need to be uploaded again.
Note: Remember to first deactivate the Chariot License on the old server before installing and activating on the new server.
The following instructions can be used with upgrading the Chariot MQTT Server on Windows.
directory referencing the upgrade.tgz file
| Code Block |
|---|
sudo ./upgradeImport.sh chariot_upgrade_20220113_1612.tgz |
Start the v2.1.0 Chariot service. From a command prompt, run the Chariot service startscript in the v2.1.0 directory
| Code Block |
|---|
sudo /etc/init.d/chariot start |
Backup your Chariot configuration using the Backup/Restore feature. To do this navigate to System in the left menu bar of the Chariot MQTT UI, select Backup/Restore and Export Backup
Stop the v2.1.0 Chariot service. From a command prompt, run the Chariot service stop script in the v2.1.0 directory
| Code Block |
|---|
sudo /etc/init.d/chariot stop |
Install the latest version of Chariot, following the Chariot MQTT Server Installation instructions in a new Chariot directory.
| Warning |
|---|
Do not overwrite the old version of Chariot when extracting the Chariot ZIP package, but instead create a new Chariot directory and extract the new Chariot package into that new directory. For example:
|
Start the new Chariot service. From a command prompt, run the Chariot service start script in the v2.*.* directory.
| Code Block |
|---|
sudo /etc/init.d/chariot start |
Restore your Chariot configuration using the Backup/Restore feature. To do this navigate to System in the left menu bar of the Chariot MQTT UI, select Backup/Restore and Restore from Backup. When prompted, navigate to the backup.tgz file created earlier and import.
Confirm that any configuration items have been imported correctly.
If configured for SSL, reload any SSL certificates.
Following the Licensing Procedure, activate your existing license on the new Chariot MQTT Server to complete the upgrade.
| Anchor | ||||
|---|---|---|---|---|
|
Stop the v2.0.0 Chariot service. From a command prompt, run the Chariot service stop script in the v2.0.0 directory.
| Code Block |
|---|
serviceStop.bat |
Install v2.1.0 following the Chariot MQTT Server Installation instructions. This instance should be installed ONLY and should not be started.
| Warning |
|---|
Do not overwrite the old version of Chariot when extracting the Chariot ZIP package, but instead create a new Chariot directory and extract the new Chariot package into that new directory. For example:
|
Copy the upgradeExport.vbs file
upgradeExport.vbs file from the v2.1.0
installdirectory to the
base directory where v2v2.0.0 directory. For example:
| Code Block |
|---|
copy D:\chariotv2.1.0\upgradeExport.vbs D:\chariotv2.0.0 |
\upgradeExport. |
vbs |
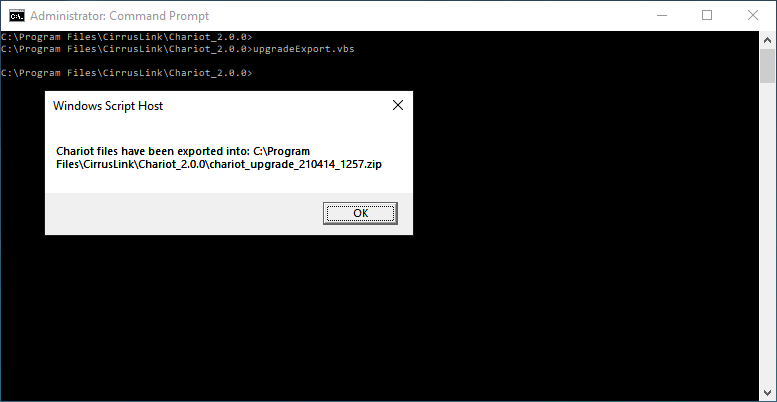
From a command prompt, run
Runthe upgradeExport.vbs
scriptscript in the v2.0.0 directory to create the upgrade zip file containing the data from the old installation.
 TODO
TODO
...
The file naming convention will be chariot_upgrade_YYMMDD_HHMM.zip
| Code Block |
|---|
upgradeExport.vbs |
Copy the upgrade.zip file from the v2.0.0 directory to the v2.1.0
...
5. If the upgradeImport.vbs script is invoked without specifying a full path to the ZIP upgrade archive, the 'Chose File to Upload' window will appear as shown below:
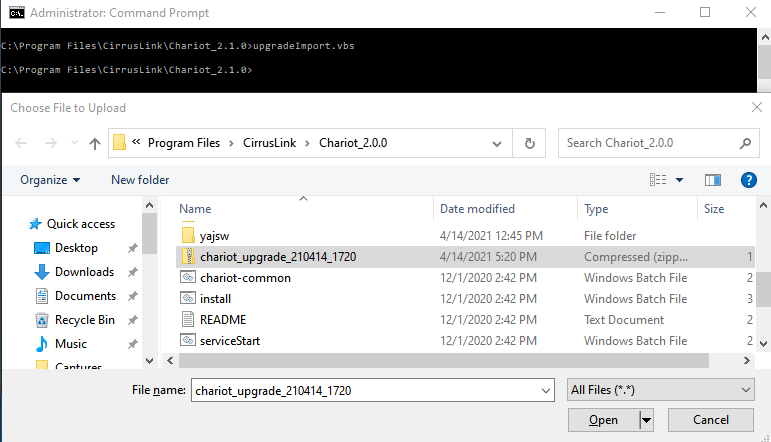
6. Navigate to the Chariot 2.0.0 directory and select the 'chariot_upgrade' ZIP archive created earlier.
7. Click the 'Open' button to import from selected ZIP archive.
8. Make sure Chariot files are imported as shown below:
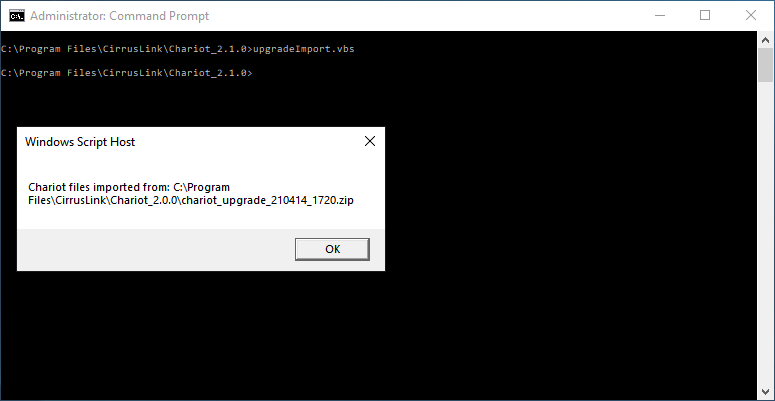
8. Start the new v2.1.0 Chariot MQTT Server.
The new Chariot MQTT Server should be loaded with the Users, Roles, MQTT Credentials, and System & Server configurations from the old installation. However, the new Chariot MQTT Server will still need to be licensed and any SSL certificates/keys will need to be uploaded again.
...
directory. For example:
| Code Block |
|---|
copy D:\chariotv2.0.0\chariot_upgrade_20220113_1612.zip D:\chariotv2.1.0\chariot_upgrade_20220113_1612.zip |
From a command prompt, run theupgradeImport script in the v2.1.0 directory
| Code Block |
|---|
ugradeImport.vbs |
Start the v2.1.0 Chariot service. From a command prompt, run the Chariot service start script in the v2.1.0 directory.
| Code Block |
|---|
serviceStart.bat |
Backup your Chariot configuration using the Backup/Restore feature. To do this navigate to System in the left menu bar of the Chariot MQTT UI, select Backup/Restore and Export Backup.
Stop the v2.1.0 Chariot service. From a command prompt, run the Chariot service stop script in the v2.1.0 directory.
| Code Block |
|---|
serviceStop.bat |
Install the latest version of Chariot, following the Chariot MQTT Server Installation instructions in a new Chariot directory.
| Warning |
|---|
Do not overwrite the old version of Chariot when extracting the Chariot ZIP package, but instead create a new Chariot directory and extract the new Chariot package into that new directory. For example:
|
Start the new Chariot service. From a command prompt, run the Chariot service start script in the v2.*.* directory.
| Code Block |
|---|
serviceStart.bat |
Restore your Chariot configuration using the Backup/Restore feature. To do this navigate to System in the left menu bar of the Chariot MQTT UI, select Backup/Restore and Restore from Backup. When prompted, navigate to the backup.zip file created earlier and import.