![]()
Page History
...
Anchor GenerateServerCACertificate GenerateServerCACertificate
Generate Server CA certificate signed with the Root CA
| GenerateServerCACertificate | |
| GenerateServerCACertificate |
- Generate a private key file (serverCA.key) for the Server CA using the command below. You will be required to enter a pass phrase to be associated with the serverCA.key file.
| Tip |
|---|
Make note of this pass phrase for the Server CA private key file (serverCA.key) as it will be used again whilst creating the certificate hierarchy. |
| Code Block | ||
|---|---|---|
| ||
openssl genrsa -des3 -out ca/server/serverCA.key 2048 |
Generate a Certificate Signing Request (CSR) for the server CA using the command below. This command generates a new CSR named "serverCA.csr’ using the RSA private key "serverCA.key" and you will be required to enter the pass phrase for the serverCA.key file created in the previous step.
Code Block language text openssl req -new -key ca/server/serverCA.key -out ca/server/serverCA.csr
Note There are a number of fields associated with the creation of the certificate. Fill them out with your relevant details where theCommon Name must be the Fully Qualified Domain Name (FQDN) of the Chariot server.
Sign the Server CA with the Root CA using the command below. This command will sign the CSR "serverCA.csr" with the Root CA certificate ‘ca.crt’ and RSA private key ‘ca.key’, creating a new X.509 certificate named ‘serverCA.crt’ valid for 3650 days (10 years). You will be required to enter the pass phrase associated with the Root CA private key file "ca.key".
Code Block language text openssl x509 -req -in ca/server/serverCA.csr -CA ca/ca.crt -CAkey ca/ca.key -CAcreateserial -out ca/server/serverCA.crt -days 3650
...
Generate private key in PKCS8 format (server.key) for the Chariot server using the command below.
Code Block language text openssl genrsa -out certs/server/server.key 2048
******* Convert from PKCS8 format to PCKS1 until Chariot supports PKCS8 format CS-612 *********
Code Block language text openssl rsa -in certs/server/server.key -traditional -out certs/server/server.keyGenerate a Certificate Signing Request (CSR) for the Chariot server using the command below. This command generates a new CSR named "server.csr’ using the RSA private key "server.key".
Code Block language text openssl req -new -key certs/server/server.key -out certs/server/server.csr
Note There are a number of fields associated with the creation of the certificate. Fill them out with your relevant details where the Common Name must be the Fully Qualified Domain Name (FQDN) of the Chariot server.
Sign the Server CSR with the Server CA using the command below. This command will sign the CSR "server.csr" with the Server CA certificate ‘serverCA.crt’ and RSA private key ‘serverCA.key’, creating a new X.509 certificate named ‘serverCA.crt’ valid for 3650 days (10 years). You will be required to enter the pass phrase associated with the private key file "serverCA.key".
Code Block language text openssl x509 -req -in certs/server/server.csr -CA ca/server/serverCA.crt -CAkey ca/server/serverCA.key -CAcreateserial -out certs/server/server.crt -days 3650
...
Navigate to CONFIGURATION > System > Certificates configuration and upload the files as shown below. Once uploaded, select the Setup SSL button.
| File Type | File Name | File Location |
|---|---|---|
| CA Chain | serverCA.crt | chariotcerts/ca/server |
| Private Key | server.key | chariotcerts/certs/server |
| Certificate | server.crt | chariotcerts/certs/server |


Navigate to CONFIGURATION > MQTT Server configuration and Enable Secure as shown below. Select the Update button to save the configuration.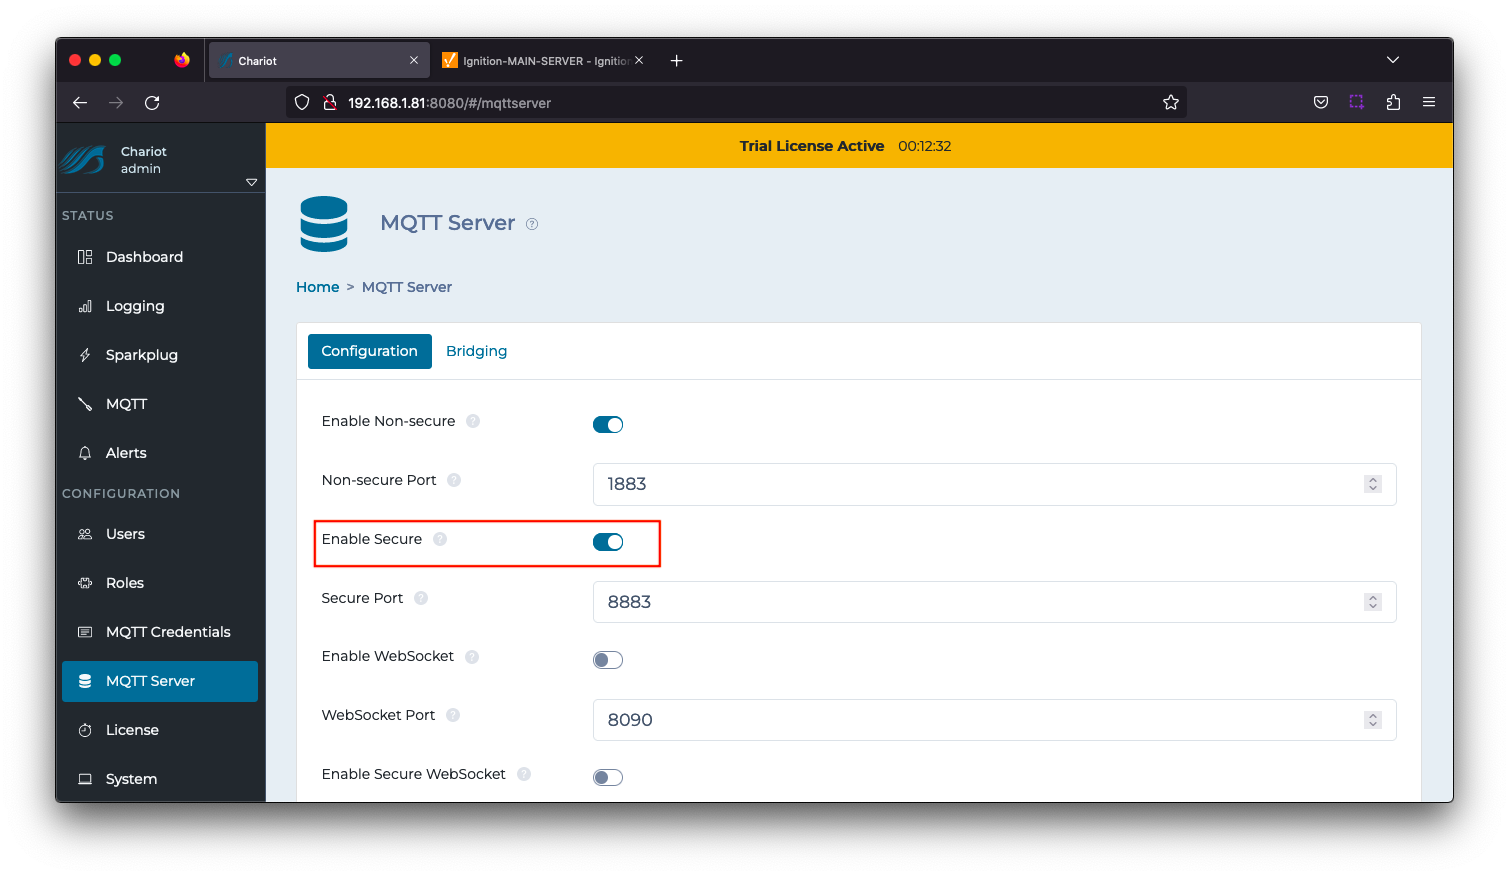
...
Add the certificates to the MQTT Engine > Servers > Certificates configuration as shown below:
Friendly Name | Certificate Filename | File Description | File Location |
ChariotCA_Certificate | serverCA.crt | Chariot CA Certificate | chariotcerts/ca/server |
EngineCertificate | engine.crt | MQTT Engine Certificate | chariotcerts/certs/engine |
EngineKey | engine.key | MQTT Engine Private Key | chariotcarts/certs/engine |

Update the MQTT Engine > Servers > Settings configuration to use the certificates as shown below and setting the URL to be ssl://FQDN:8883 with the FQDN of the Chariot Server. Click the Save Changes button to save the configuration.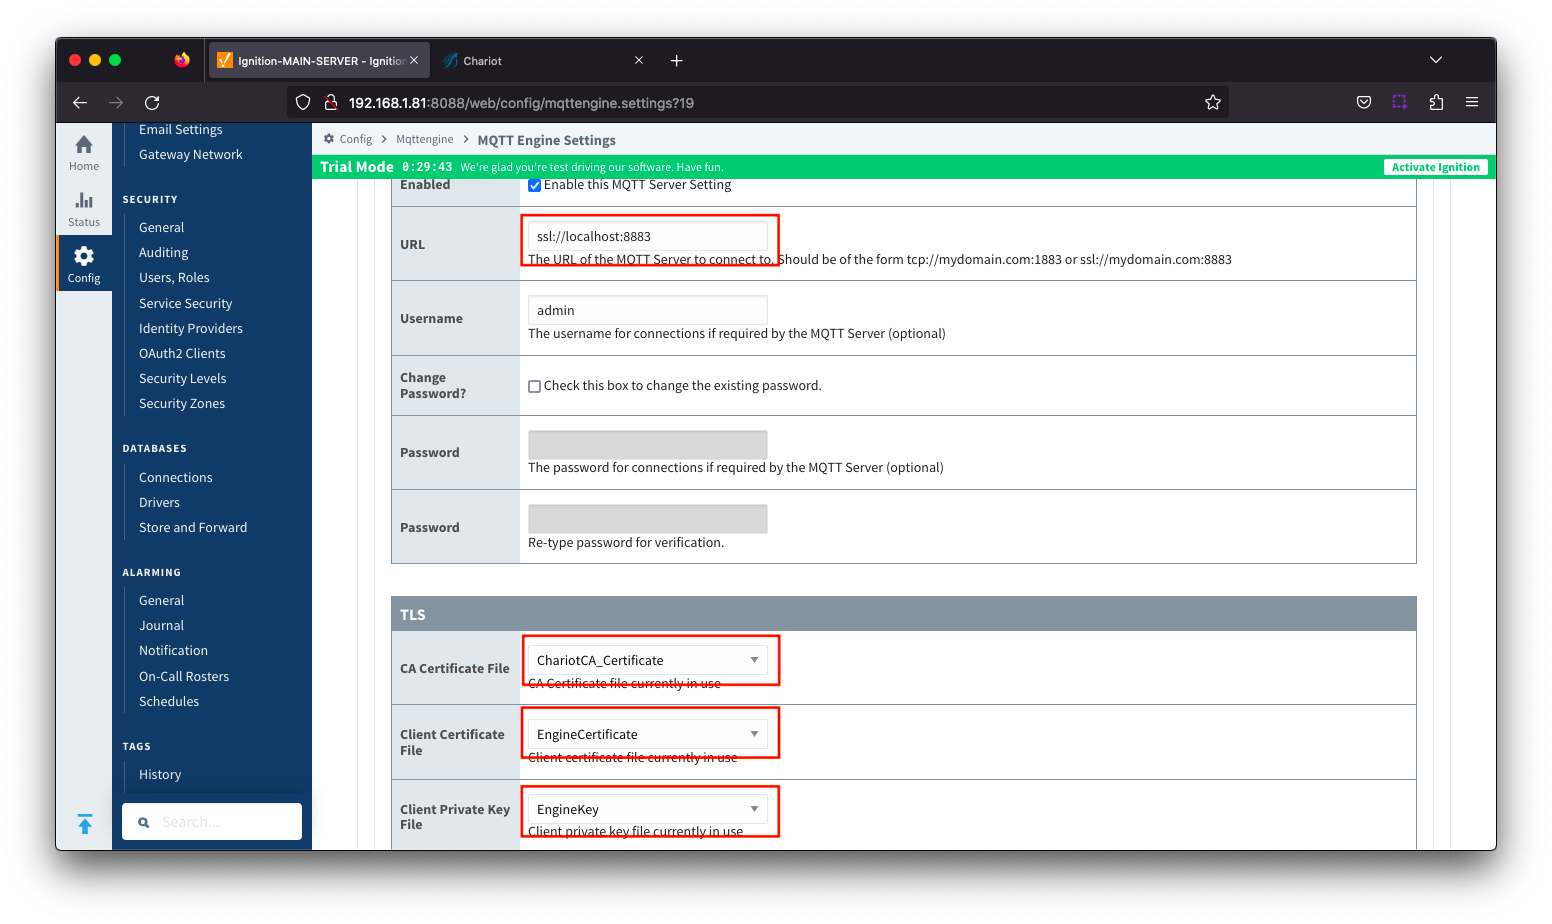
...
Add certificates to the MQTT Transmission > Servers > Certificates configuration as shown below:
| Friendly Name | Certificate Filename | File Description | File Location |
|---|---|---|---|
| ChariotCA_Certificate | serverCA.crt | Chariot CA Certificate | chariotcerts/ca/server |
| TransmissionCertificate | transmission.crt | MQTT Transmission Certificate | chariotcerts/certs/transmisson |
| TransmissionKey | transmission.key | MQTT Transmission Private Key | chariotcerts/certs/transmission |

Update the MQTT Transmission > Servers > Settings configuration to use the certificates as shown below. Click the Save Changes button to save the configuration.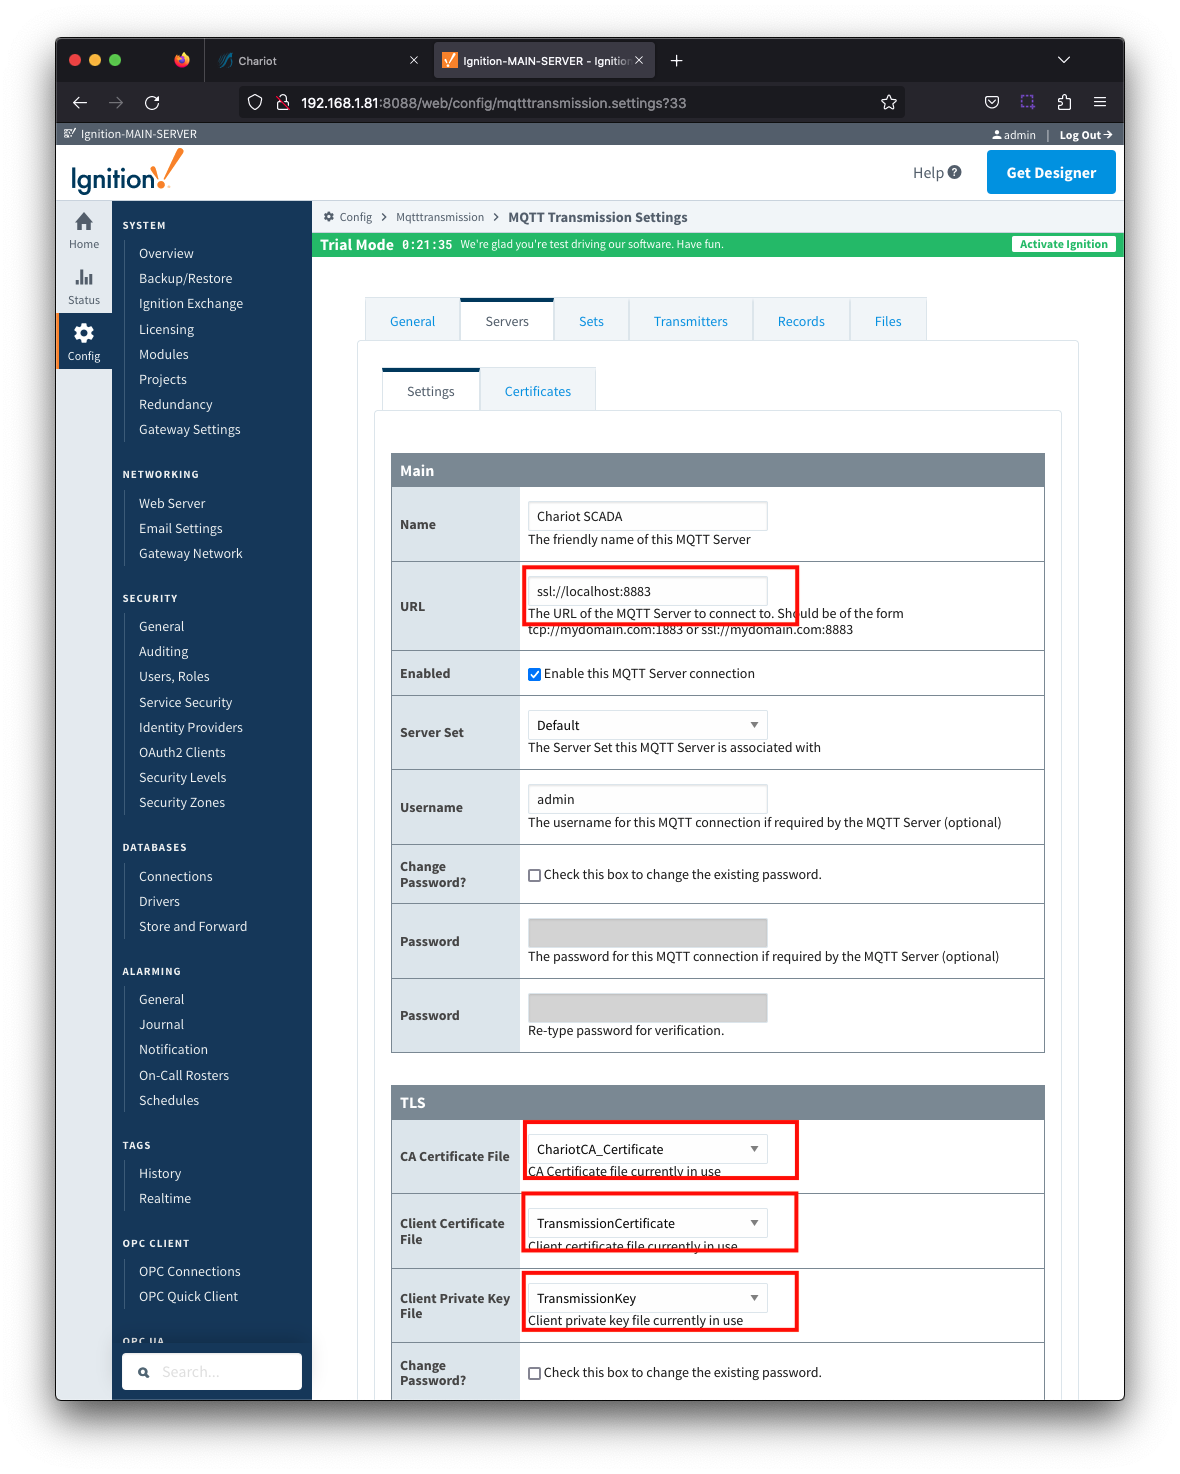
...
Overview
Content Tools