...
- Ignition with the Azure Injector Modules installed
- Ignition Designer installed
- Review the Inductive Automation documentation for Launching Designer against the Ignition gateway
- An existing Microsoft Azure account
...
Step 3: Record Security Permissions needed
From the left hand menu bar under Security > Permissions > Device connection groups, record the "ID scope" as this will be used later in the configuration of Azure Injector.
From the left hand menu bar under Security > Permissions > Device connection groups > SAS-IoT-Devices > Shared access signature (SAS), record either the "Primary key" or "Secondary key" as this will be used later in the configuration of Azure Injector.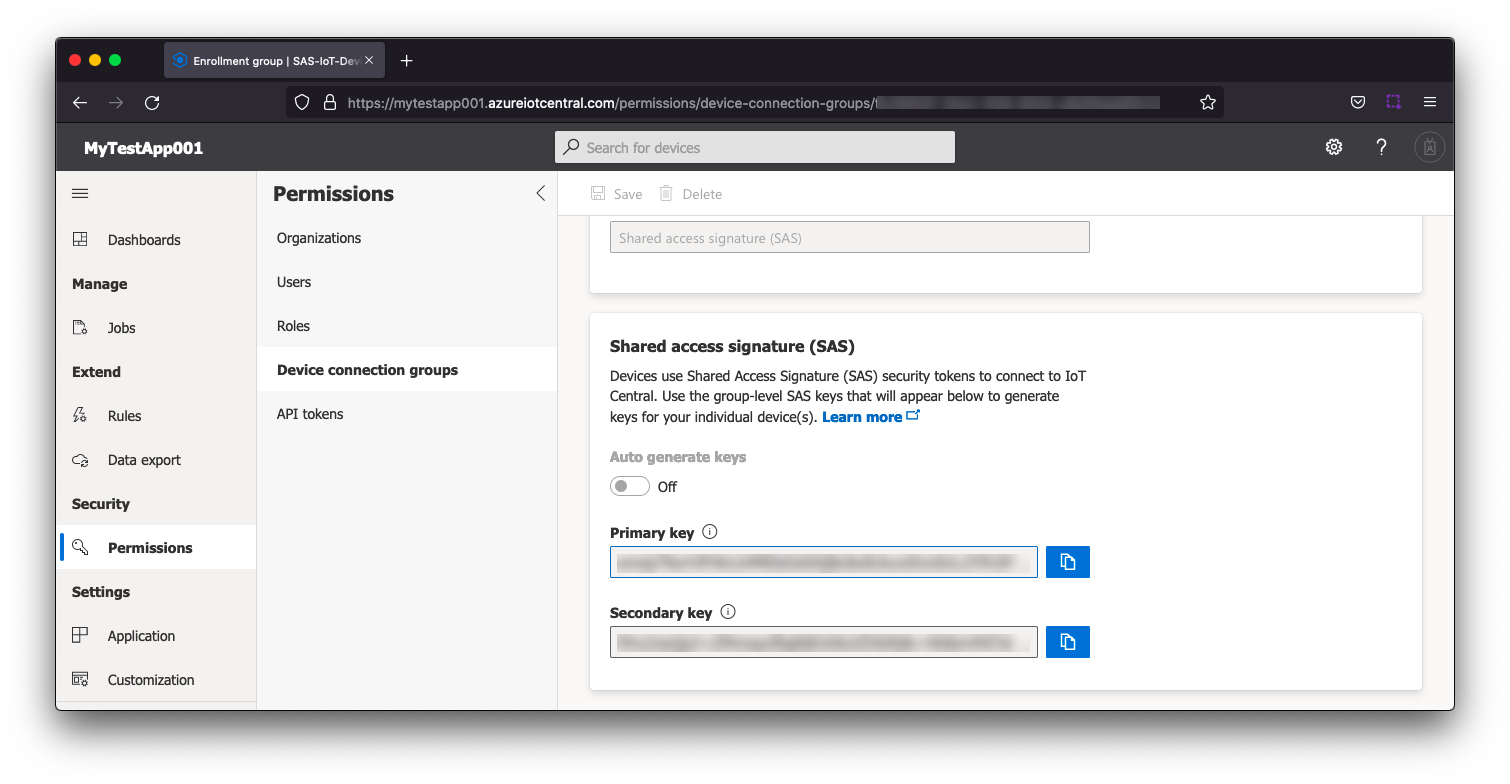
...
- Setting Name
- This can be any string that makes sense that represents this connection.
- Enabled
- Scope ID
- This is the ID scope recorded in Step 3
- Found under Security -> Permissions -> Device connection groups . It is and labeled 'ID scope'
- Password (Azure Enrollment Group Symmetric Key)
- This is the Primary key or Secondary key recorded in Step 3
- Found under Security -> Permissions -> Device connection groups -> [SAS-IoT-Devices] -> SAS -> Primary key or Secondary key. Either key can be used for the connection.
- Global Endpoint
- Provisioned Device ID
- This is the Device ID that was provisioned in Step 2 of this tutorial
...
Also, in the IoT Central Application portal under devices you should see the device is connected.
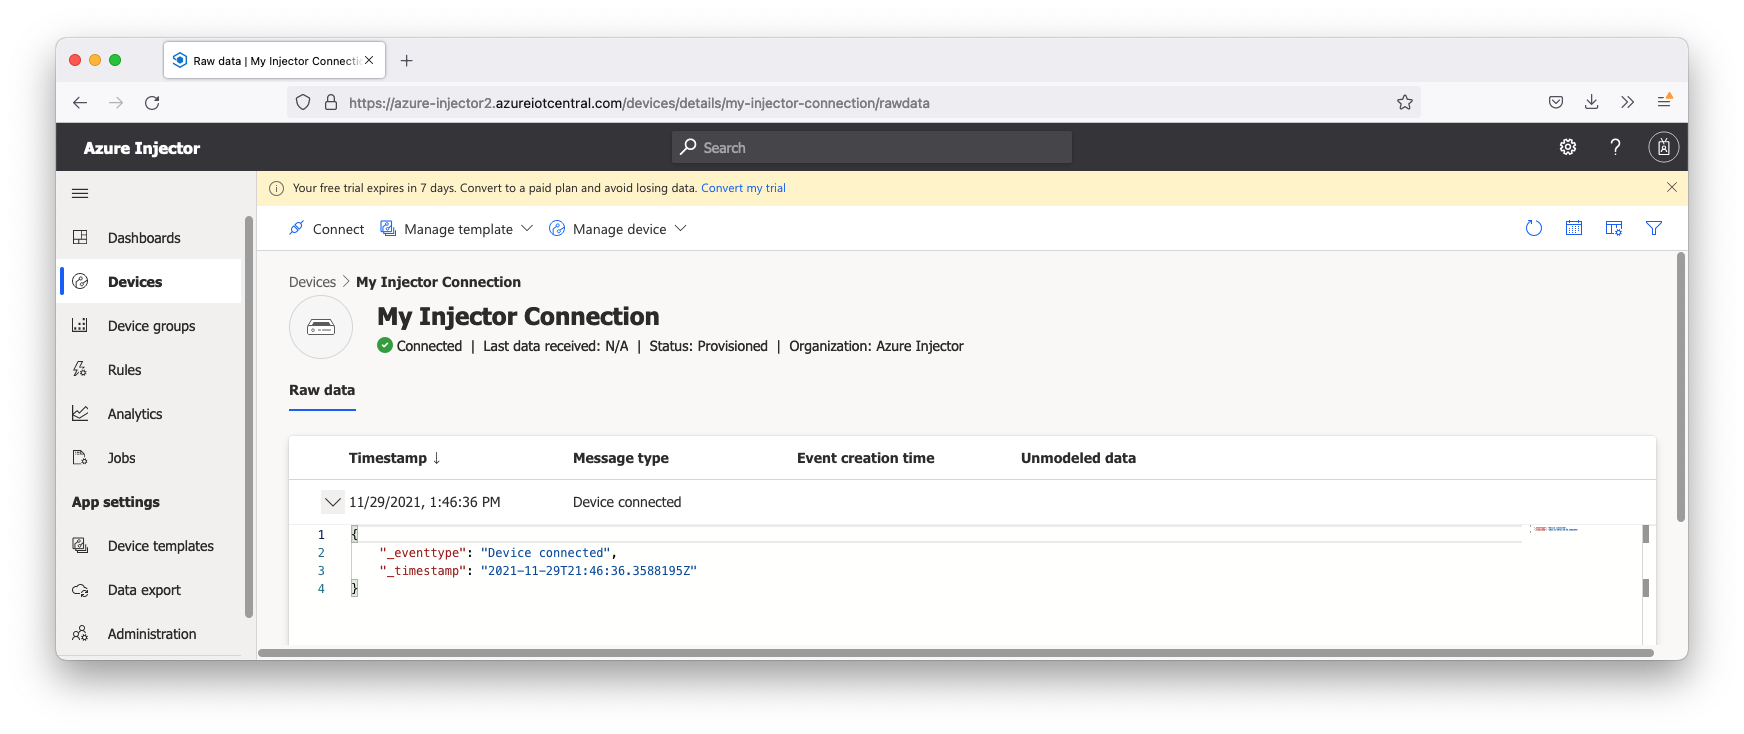 Image Removed
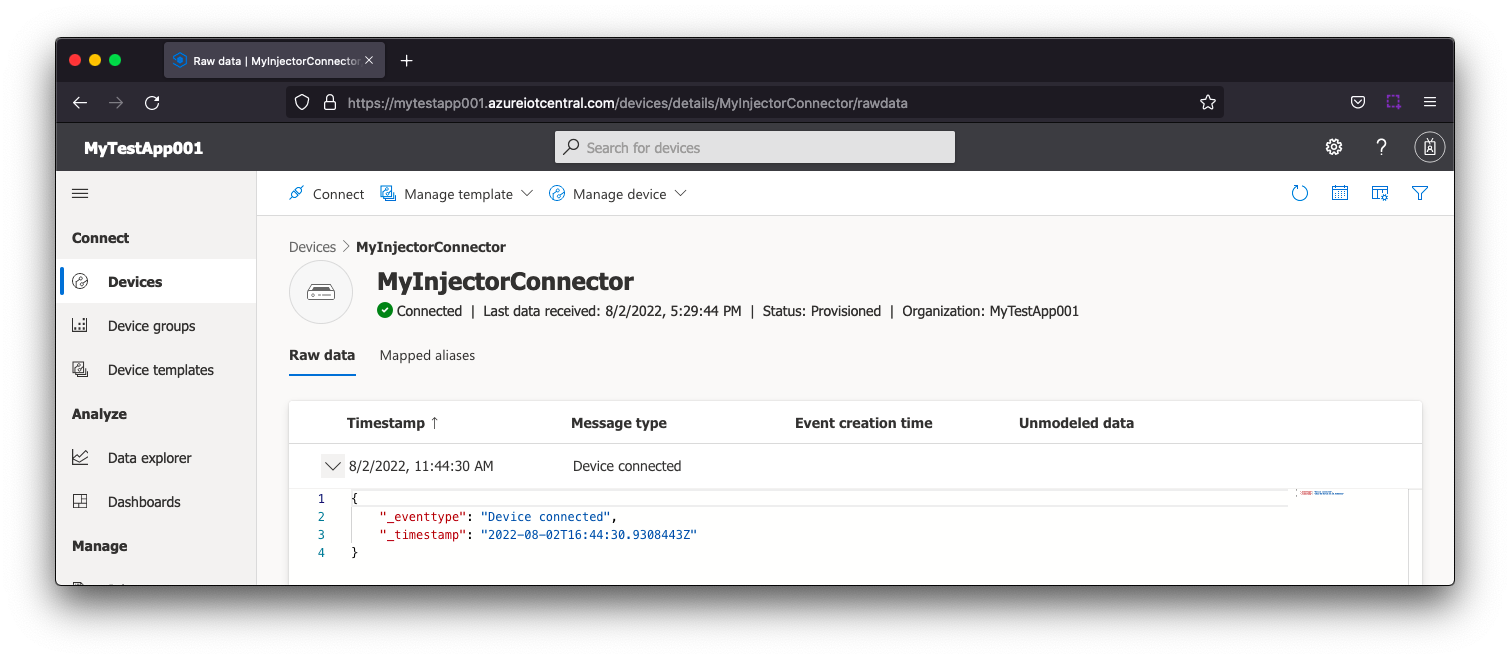 Image Added
Now the Azure Injector module is connected to the MQTT server in Azure IoT Central, we have to determine if there are are changes needed to the Tag Agent tab to be able to push data.
...
...
Make sure that the Ignition Designer has read/write communications turned on by selecting the Project/Comm Read/Write button highlighted in the image below.
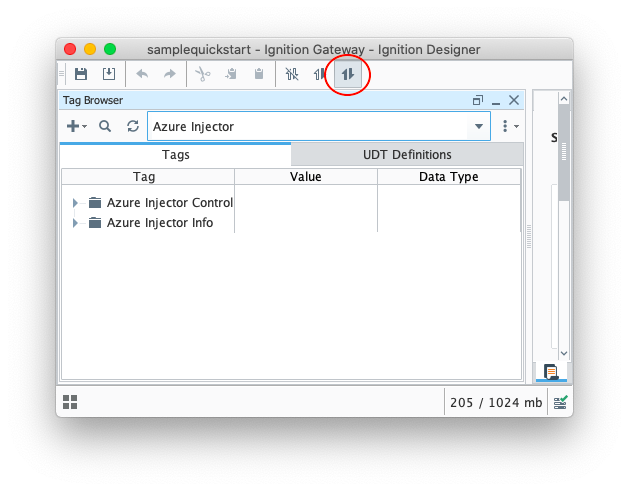 Image Modified
| Tip |
|---|
| Review the Inductive Automation Designer Interface documentation for additional assistance on setting the project communication mode |
...
The first message shows the 'NBIRTH' message which is an indication that the Sparkplug Edge Node has come online.
The second message is a Sparkplug DBIRTH message denoting that a Sparkplug Device has come online along with its 'metrics' or tags, tag metadata, and values. In this case only a single tag is included in the payload.
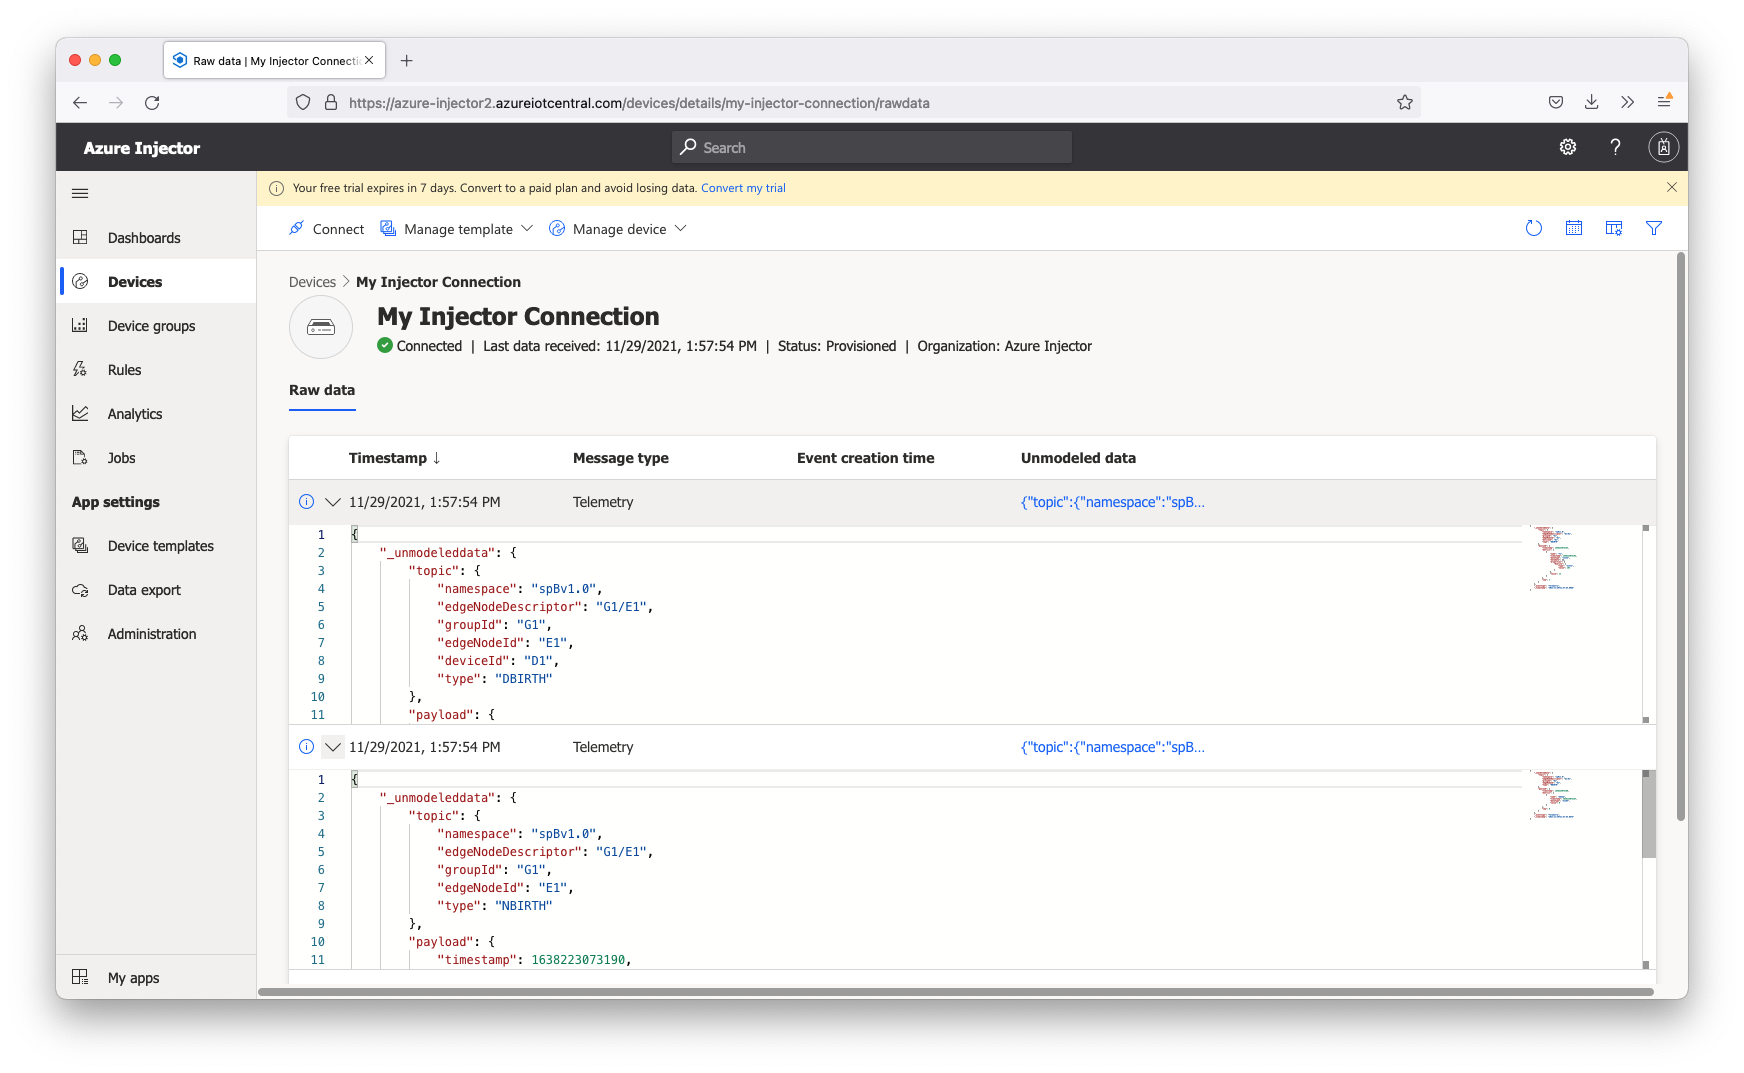 Image Removed
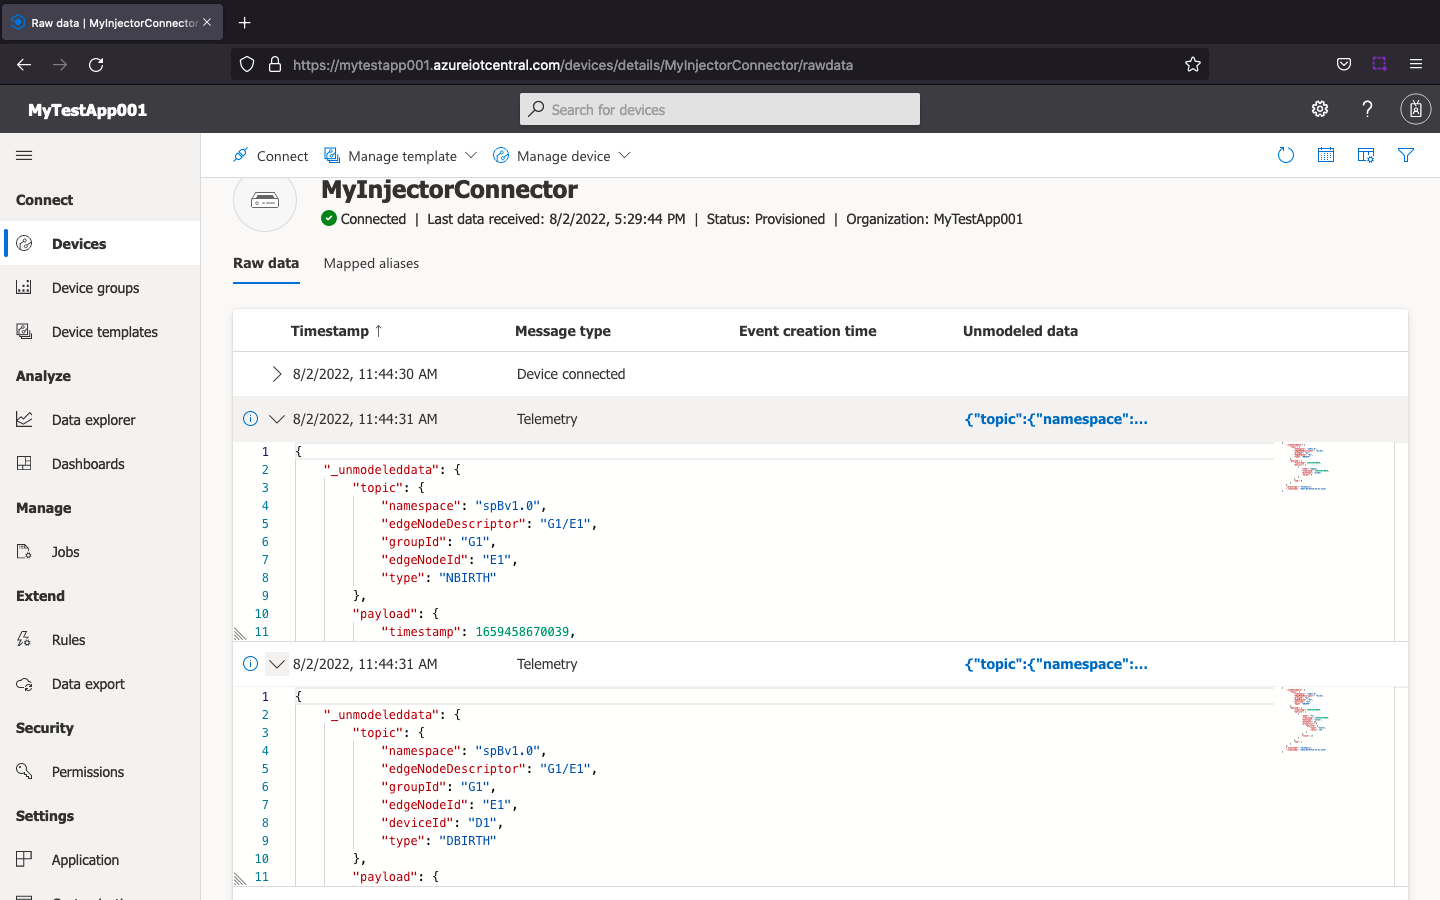 Image Added
This includes the following data messages.
| Code Block |
|---|
{
    "_unmodeleddata": {
        "topic": {
            "namespace": "spBv1.0",
            "edgeNodeDescriptor": "G1/E1",
            "groupId": "G1",
            "edgeNodeId": "E1",
            "type": "NBIRTH"
        },
        "payload": {
            "timestamp": 16382230731901659458670039,
            "metrics": [
                {
                    "name": "bdSeq",
                    "timestamp": 16382230731871659458670039,
                    "dataType": "Int64",
                    "value": 0
                }
            ],
            "seq": 0
        }
    },
    "_eventtype": "Telemetry",
    "_timestamp": "20212022-1108-29T2102T16:5744:5431.067Z511Z"
} |
| Code Block |
|---|
{
    "_unmodeleddata": {
        "topic": {
            "namespace": "spBv1.0",
            "edgeNodeDescriptor": "G1/E1",
            "groupId": "G1",
            "edgeNodeId": "E1",
            "deviceId": "D1",
            "type": "DBIRTH"
        },
        "payload": {
            "timestamp": 16382230731921659458670049,
            "metrics": [
                {
                    "name": "T1",
                    "timestamp": 16382230731921659458670049,
                    "dataType": "Int32",
                    "metaData": {},
                    "properties": {
                        "Quality": {
                            "type": "Int32",
                            "value": 192
                        }
                    },
                    "value": 12
                }
            ],
            "seq": 1
        }
    },
    "_eventtype": "Telemetry",
    "_timestamp": "20212022-1108-29T2102T16:5744:5431.098Z527Z"
} |
Step 7: Force a data change
...
| Code Block |
|---|
{
    "_unmodeleddata": {
        "topic": {
            "namespace": "spBv1.0",
            "edgeNodeDescriptor": "G1/E1",
            "groupId": "G1",
            "edgeNodeId": "E1",
            "deviceId": "D1",
            "type": "DDATA"
        },
        "payload": {
            "timestamp": 16382236638121659462601542,
            "metrics": [
                {
                    "name": "T1",
                    "timestamp": 16382236628001659462601542,
                    "dataType": "Int32",
                    "value": 10
                }
            ],
            "seq": 2
        }
    },
    "_eventtype": "Telemetry",
    "_timestamp": "20212022-1108-29T2202T17:0750:4302.998Z771Z"
} |
| Excerpt Include |
|---|
| CLD80:FAQ: Ignition Modules |
|---|
| CLD80:FAQ: Ignition Modules |
|---|
| nopanel | true |
|---|
|
...