...
- Ignition with the Azure Injector Modules installed
- Ignition Designer installed
- Review the Inductive Automation documentation for Launching Designer against the Ignition gateway
- An existing Microsoft Azure account
...
Step 2: Configure the Azure Injector Module
Once you have Ignition and the Azure Injector Module installed and running we can setup the configuration to connect to your existing Azure IoT Central endpoint.
| Tip |
|---|
| Review theAzure Injector Module configuration guide for more details on each tab |
Navigate to the Azure Injector Modules configuration section from the left side bar in the Ignition Gateway and select the Azure IoT Central tab.

Set the following fields.
...
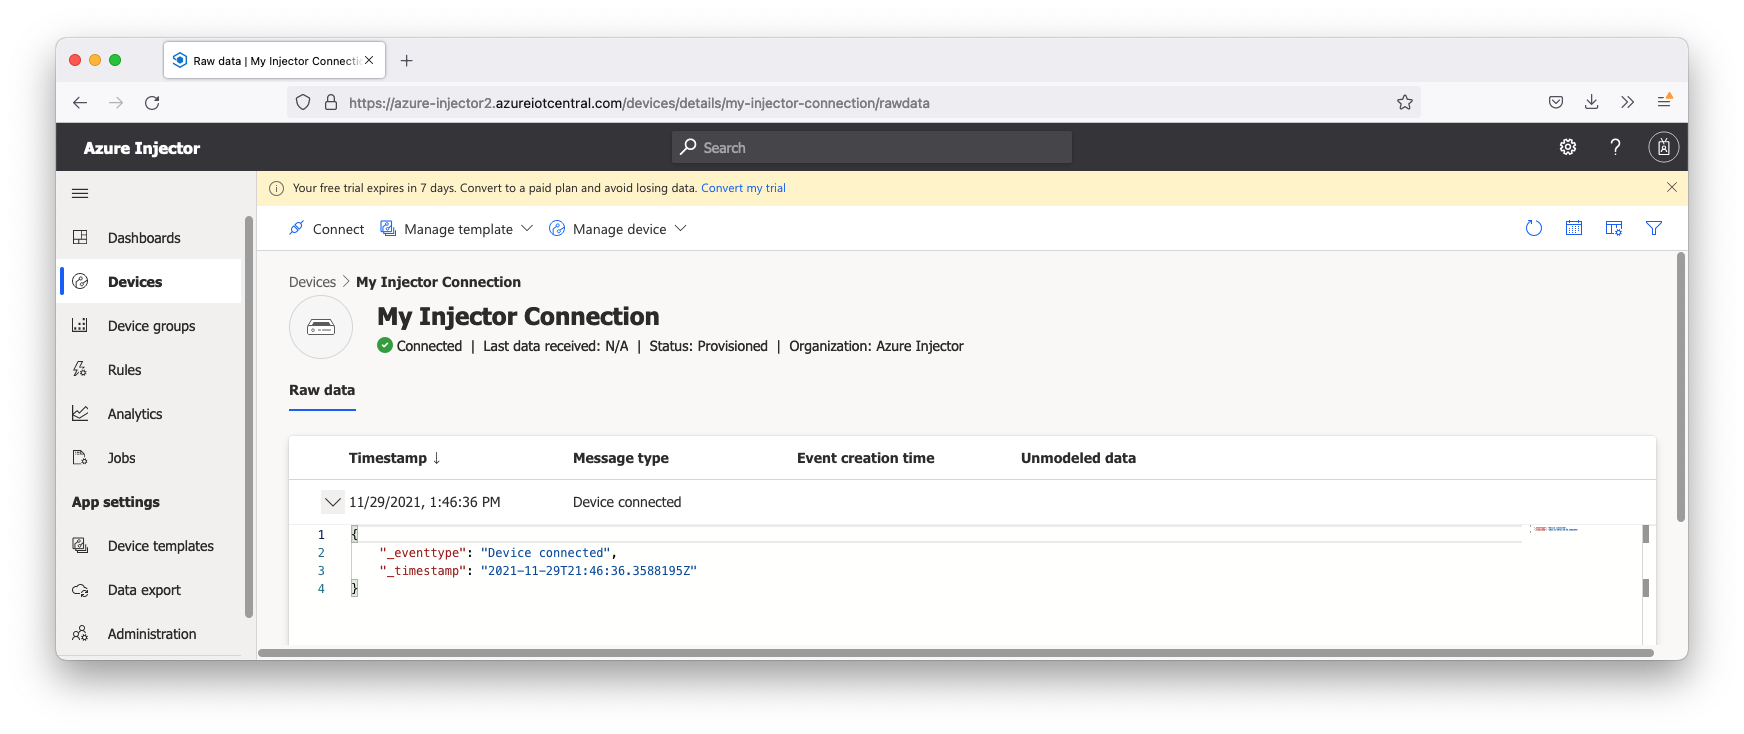
Also, in the IoT Central Application portal under devices you should see the device is connected.
Now the Azure Injector module is connected to the MQTT server in Azure IoT Central, we have to determine if there are are changes needed to the Tag Agent tab to be able to push data.
If you already have Ignition tags defined, for example from the Ignition OPC UA Server, then depending on the depth of your tag tree you may need to configure the Sparkplug Settings.
| Tip |
|---|
| Review the Cloud Injector Tag Agents and Tag Trees document which describes how Cloud Injector Agent configurations interact with Ignition tag trees to push messages and tag change events to the cloud service. It explains how tags get identified to be pushed as well as what specific 'topics' will be included with the messages. It also goes over some example configurations to show how the system will behave in different scenarios. |
Once the Tag Agent is setup as needed, you can jump to Step 4: Publishing data.
If you do not have Ignition tags defined we will do that in the next step with a tag tree depth that requires no additional Sparkplug settings.
...
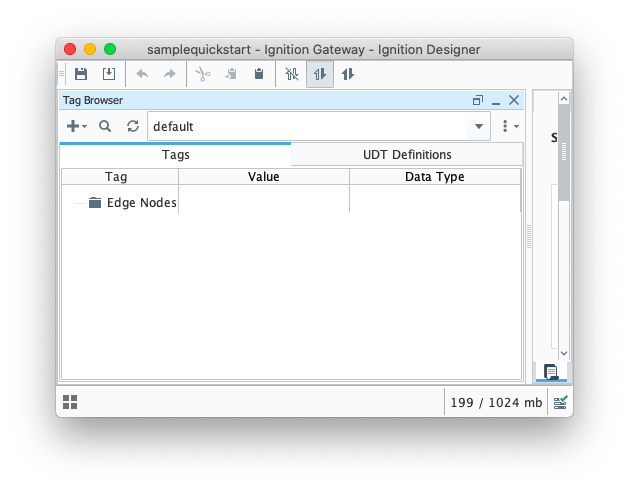
When the Azure Injector module is installed in Ignition, an Edge Node folder is automatically created in the 'default' Ignition tag provider.
Create a tree structure under this folder as shown below with some memory tags - this folder structure creates the same hierarchy that is described in the Sparkplug B specification of Group ID, Edge ID, and Device ID.
| Tip |
|---|
| Refer to the Ignition Tag Browser and Creating Tags documentation for assistance in configuring Ignition tags |
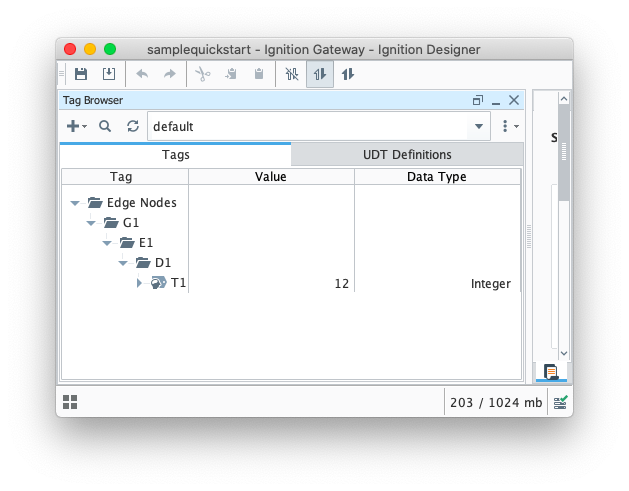 Image Modified
Step 4: Publishing data
When the Azure Injector module is installed in Ignition, an Azure Injector tag provider is automatically created. This folder will contain both information tags about the module's version and state, as well as control tags for refreshing the module and Tag Agents.
Make sure that the Ignition Designer has read/write communications turned on by selecting the Project/Comm Read/Write button highlighted in the image below. 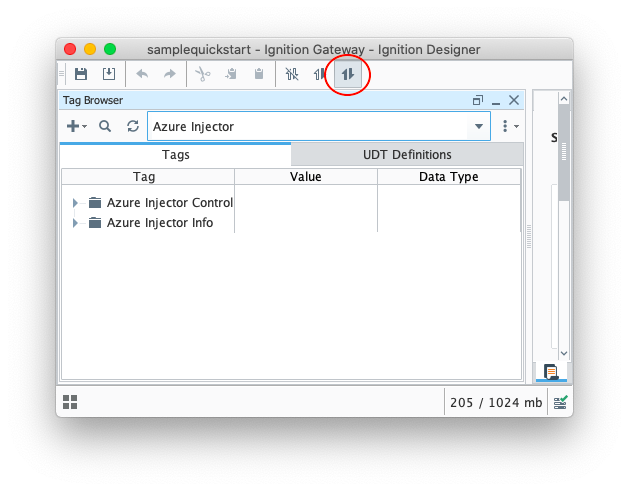 Image Modified
| Tip |
|---|
| Review the Inductive Automation Designer documentation for additional assistance on setting the project communication mode |
To refresh the default Tag Agent, open the folder "Azure Injector Control" and click on the Refresh Boolean. When this happens, the Tag Agent will scan the "Edge Nodes" folder and find the new Memory Tags that we have created, construct JSON payloads representing those tags with their current values and publish the payload to the Azure IoT Central endpoint that we have configured.

| Note |
|---|
| The Boolean tag will not change to true. This is really a one-shot and as a result, the tag will not change to true. |
...
| Code Block |
|---|
{
    "_unmodeleddata": {
        "topic": {
            "namespace": "spBv1.0",
            "edgeNodeDescriptor": "G1/E1",
            "groupId": "G1",
            "edgeNodeId": "E1",
            "deviceId": "D1",
            "type": "DBIRTH"
        },
        "payload": {
            "timestamp": 1638223073192,
            "metrics": [
                {
                    "name": "T1",
                    "timestamp": 1638223073192,
                    "dataType": "Int32",
                    "metaData": {},
                    "properties": {
                        "Quality": {
                            "type": "Int32",
                            "value": 192
                        }
                    },
                    "value": 12
                }
            ],
            "seq": 1
        }
    },
    "_eventtype": "Telemetry",
    "_timestamp": "2021-11-29T21:57:54.098Z"
} |
Step 5: Force a data change
Because Azure Injector is driven by tag change events, try writing a '10' to the T1 tag. This should Do this by double clicking teh T1 tag in Designer and updating the Value parameter.
This will result in a new DDATA message as shown below.
...