![]()
Contents
Cirrus Link Resources
Cirrus Link Website![]()
Contact Us (Sales/Support)![]()
Forum![]()
Cirrus Link Modules Docs for Ignition 7.9.x![]()
Inductive Resources
Ignition User Manual![]()
Knowledge Base Articles![]()
Inductive University![]()
Forum![]()
![]()
Cirrus Link Website![]()
Contact Us (Sales/Support)![]()
Forum![]()
Cirrus Link Modules Docs for Ignition 7.9.x![]()
Ignition User Manual![]()
Knowledge Base Articles![]()
Inductive University![]()
Forum![]()
In conjunction with the Sparkplug specificationSpecification, it is very useful to set up a working system that uses the MQTT in order to observe a simple and fully functional distributed system. This section of the This tutorial will provide step by step instructions for installing and configuring Ignition Edge MQTT and an Ignition Gateway a two Ignition architecture to show tags being published from a either an Ignition or Ignition Edge server running the MQTT Transmission module to a an Ignition Gateway server running the MQTT Distributor module and MQTT Engine module.
Ignition is an Industrial Application Platform that can be used to create SCADA and HMI solutions. A fully functional Ignition system can be downloaded and run in a trial mode running for two hours at a time with unlimited restarts. Using Ignition as a tool in this way allows us to install the Sparkplug MQTT Modules and observe everything working.
...
Ignition Edge is a leaner version of Ignition made specifically for use in on edge-of-network devices. Ignition comes with unlimited Tags, Clients, and database connections, while Ignition Edge comes with unlimited Tags, two Clients (one local and one remote) and no database connectivity.
Upon completion of this tutorial, you will have all of the required components to configure, deploy, and observe the Sparkplug MQTT specification in action.
Have two machines available to run the two instances of Ignition or Ignition and Ignition Edge.

...
Ignition is an Industrial Application Platform that can be used to create SCADA and HMI solutions. A fully functional Ignition system can be downloaded and run in trial mode. Using Ignition as a tool in this way, we can install the Sparkplug MQTT Modules and observe everything working.
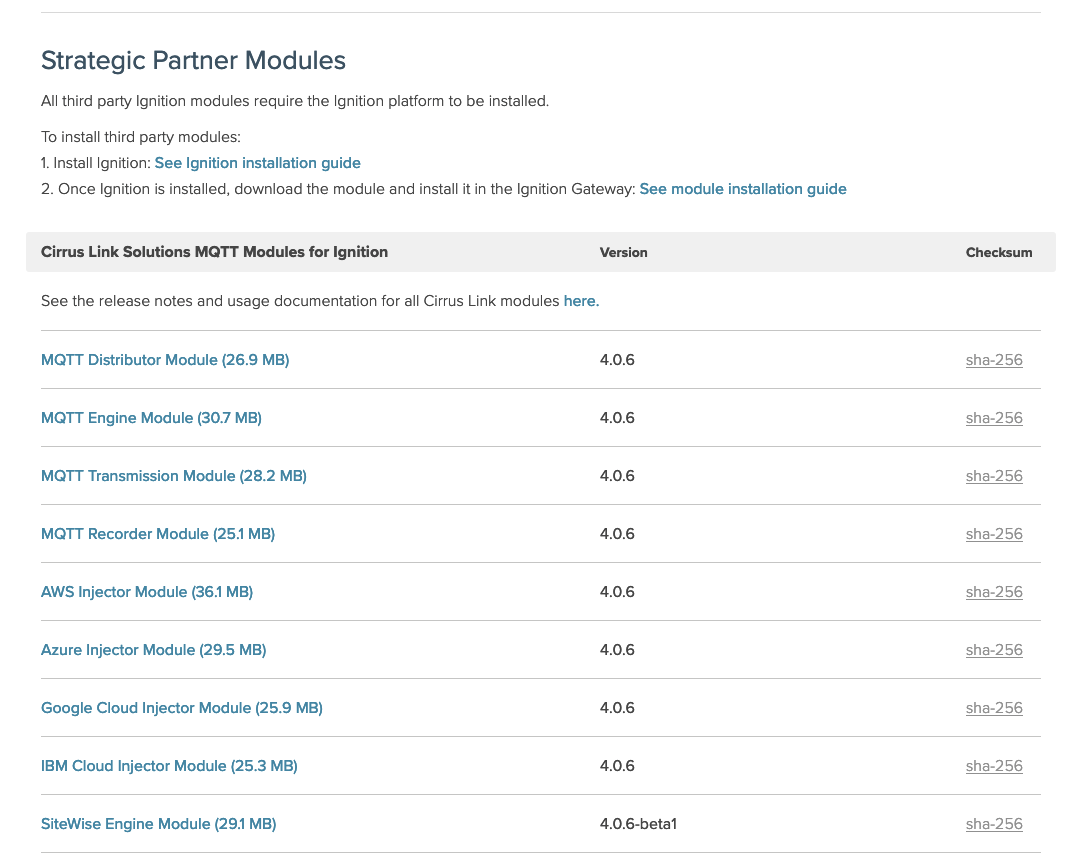
From the Ignition Strategic Partner Modules download page find the latest compatible Cirrus Link Solutions MQTT Modules for Ignition Version 8.1.xx using the Version dropdown.
The download links will look like those shown below:
On your primary machine, download the MQTT Distributor Module and MQTT Engine Module
On your secondary machine, download the MQTT Transmission Module
On your primary machine, from the Ignition Version Archive download page, select the latest Ignition Version with compatible modules from the dropdown Go to the Inductive Automation download page and download the desired Ignition installer for Windows, Linux or MacOS;
https://inductiveautomation.com/downloads/ignition. Take note of your user/password you create as you will need these credentials to load Modules and configure this device.
There are two system installers available on the Inductive Automation Site:
Once the Ignition installers have installer has been downloaded, follow the instructions provided by Inductive Automation to install and start Ignition.
Important Note:
...
...
...
Ignition Edge MQTT is a new stripped down version of Ignition that is specifically designed for use as an Edge of Network device.
On your secondary machine, from the Ignition Version Archive download page, select the latest Ignition Version with compatible modules from the dropdown and download the desired Ignition installer for Windows, Linux or MacOS.
Once the Ignition installer has been downloaded, follow the instructions provided by Inductive Automation to install and start either Ignition or Ignition Edge
Important Note:See the Ignition Edge installation guide here. Follow the sections for Ignition Edge MQTT and for your specific Operating System. Make sure Ignition Edge is being installed on a different machine than was used to install Ignition Gateway in step 1.
...
Go to the Inductive Automation download page again and select the Strategic Partner (Third Party) modules Tab and use pull-down for the intended version. Find the Cirrus Link modules section and download the MQTT Distributor, MQTT Engine, MQTT Transmission modules.
https://inductiveautomation.com/downloads/third-party-modules The download links should look similar to what is shown below but with updated versions.
...
Once you have Ignition installed and running, and the MQTT Distributor and MQTT Engine modules downloaded, browse to the Ignition Gateway console (e.g. http://localhost:8088 or http://<[CentralGateway_IPAddr]>:8088 ).
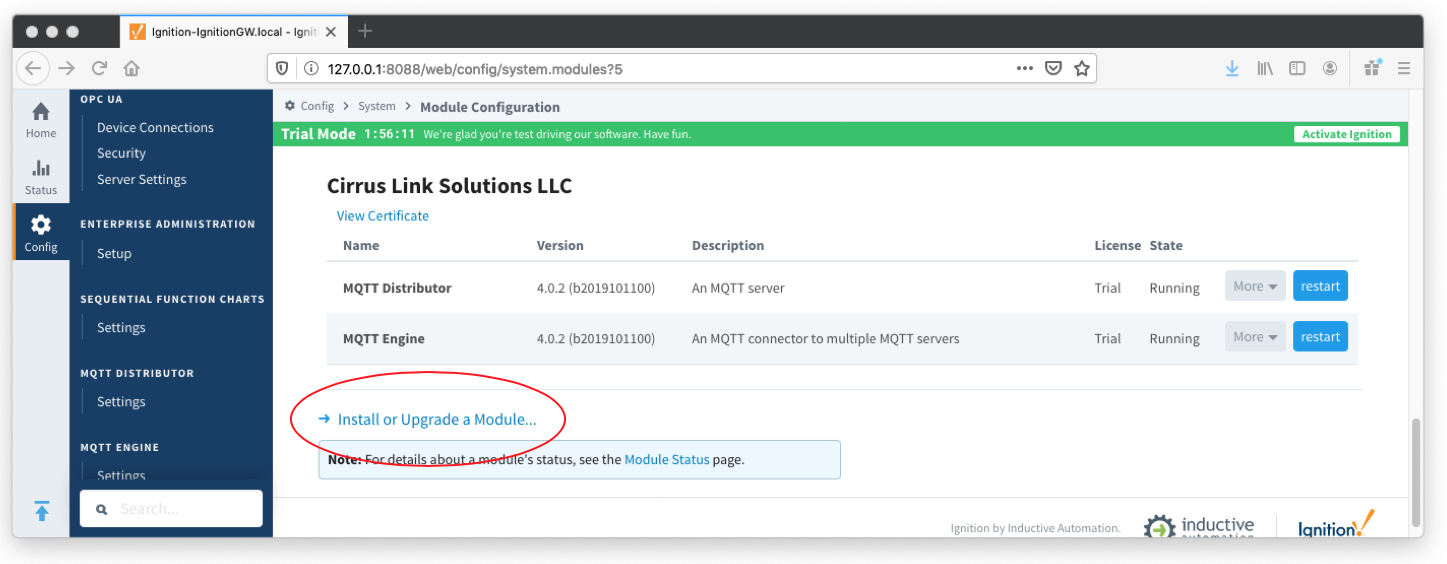
Log in to the Ignition Gateway installed in step 1 using your new credentials (username/password) just created during your installation. To the left of the side bar click on Configuration tab [ Home | Status | Config ] to configure your system. In the Side Bar, beneath From the Ignition left side bar, click on the Config tab and under the SYSTEM heading click on Modules to view or load Modules. Scroll to the bottom of the page and click on the "link → Install or Upgrade a Module..." text.
When prompted, select the MQTT Distributor module from the file browser and select Install. Accept the license agreement and certification and install it. Do the same the module. Repeat for the MQTT Engine module.
When complete, the Ignition Gateway Web UI module section should look similar to what is shown below.will show the current state of the installed modules:
...
...
No additional configuration is required for the MQTT Distributor or MQTT Engine modules.
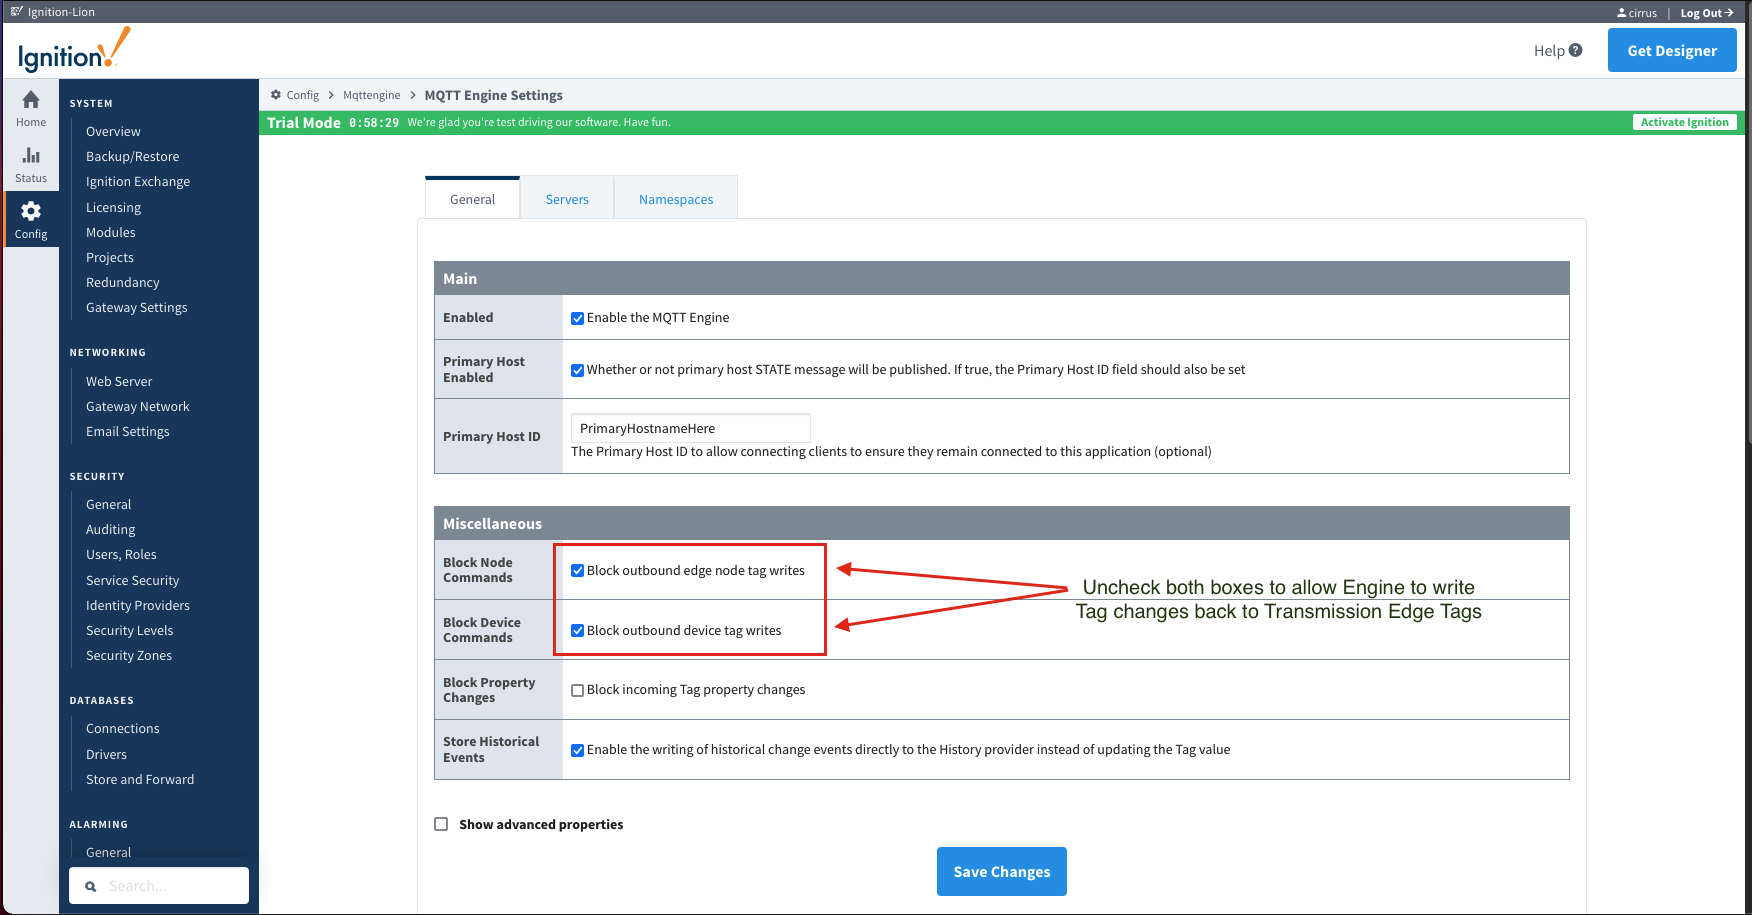
By default, MQTT Engine is already configured to point to an MQTT Server at tcp://localhost:1883. This and this means it will automatically connect to the MQTT Distributor which is installed with it. There are some other configuration parameters that could optionally be set. The first is the 'Primary Host ID'. This is a setting that is highly recommended and should be set on both MQTT Engine and any MQTT Transmission instances that are reporting in as well. The ASCII string should match exactly on MQTT Engine and all MQTT Transmission instances. The option to 'Block Node Commands' and 'Block Device Commands' could be unchecked if you want to allow tag writes at MQTT Engine to result in tag writes on the MQTT Transmission instances (i.e. remote tag writes). Save the settings (SAVE-button at bottom of page) after making these changes.
Example below showing MQTT Engine Settings and the Primary Host ID value (if used note the Host name and enter it in Transmission module configuration below in Step 5b.):
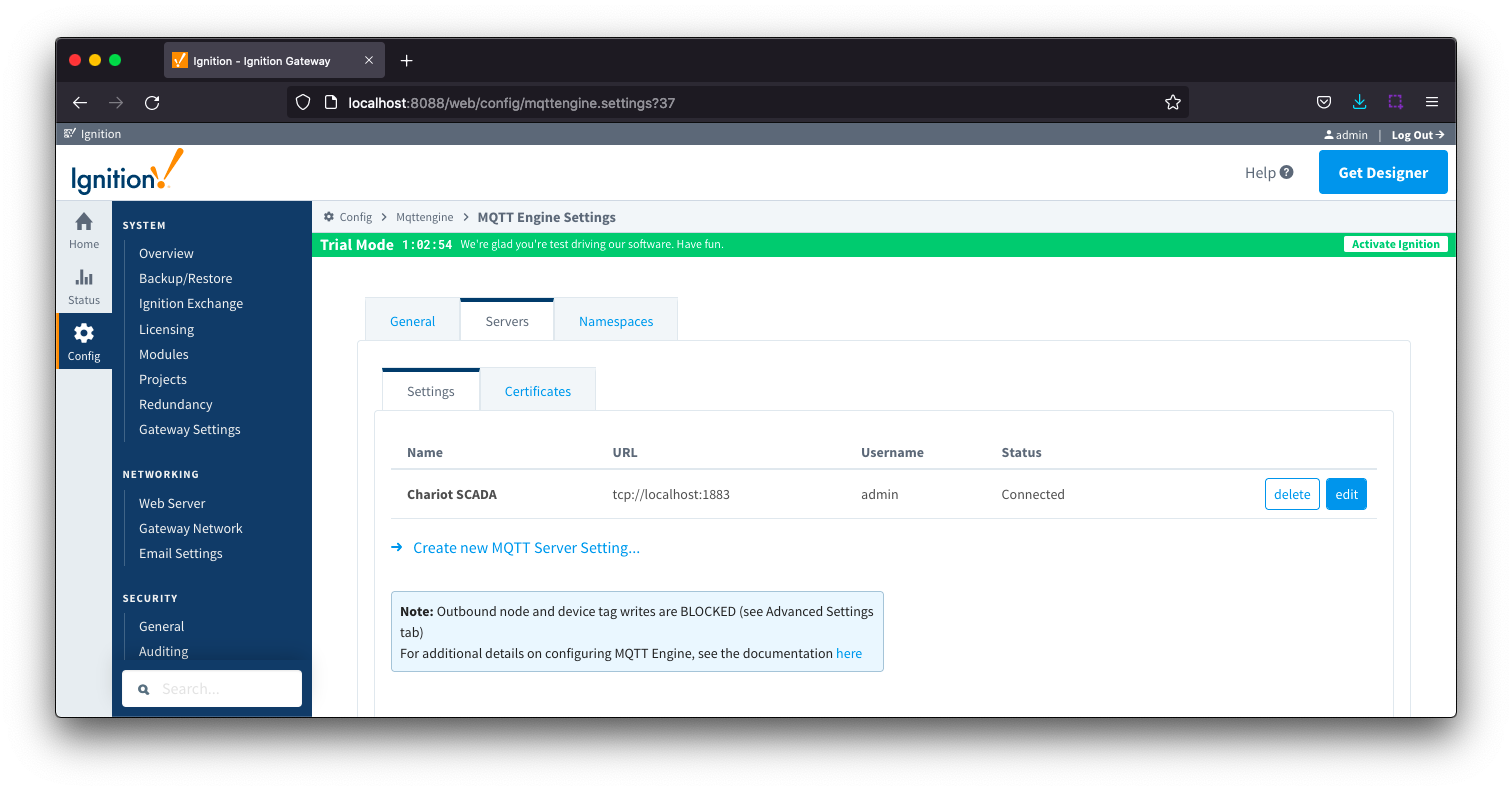
View the connection status, select the Config tab on the left side bar and scroll to the bottom of the page and click on the "MQTT ENGINE | Settings" link and then open the Servers tab.
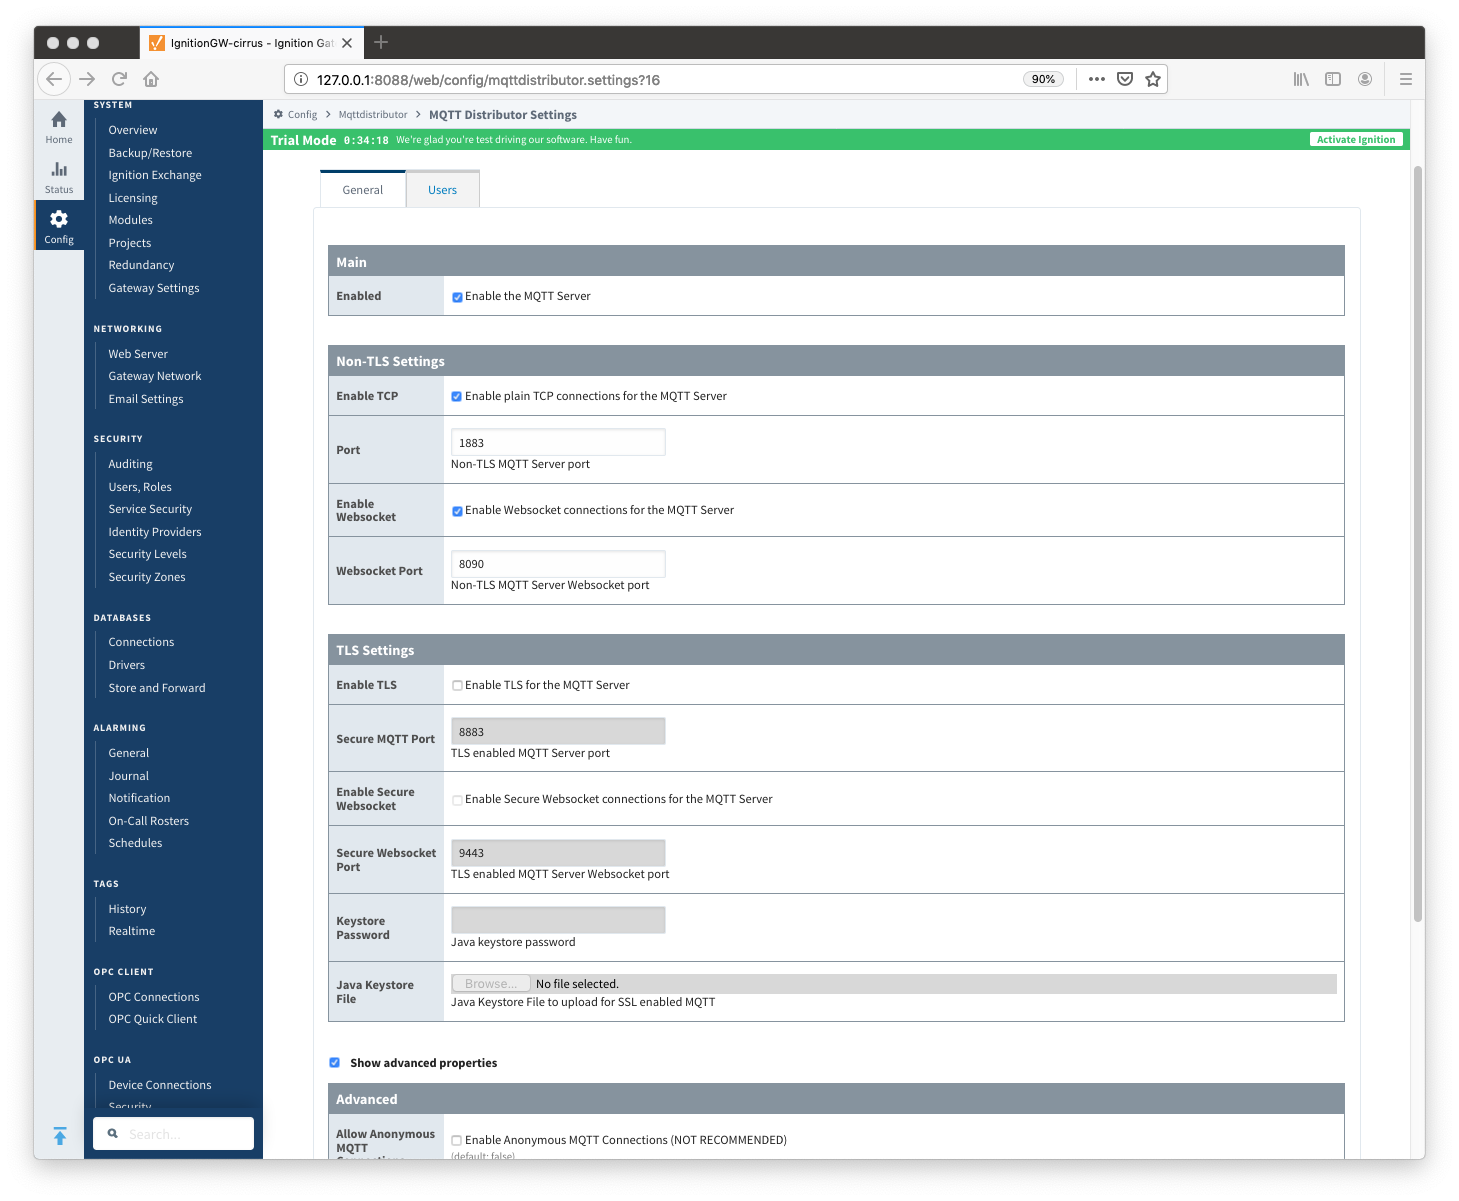
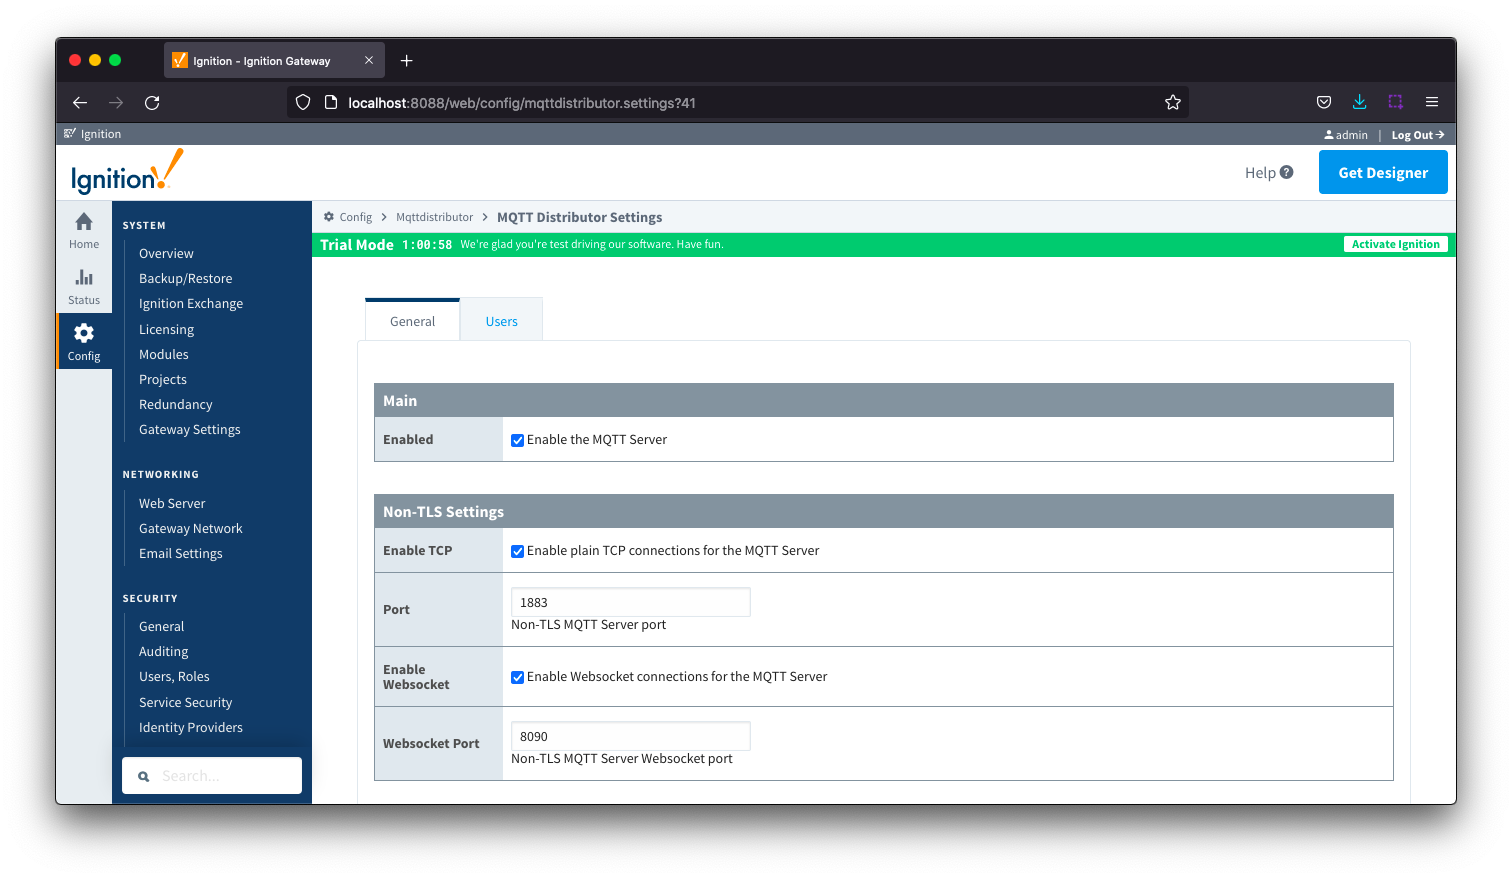
Example below showing default MQTT Distributor Settings:
Now that you have Ignition Edge installed and running, and the MQTT Transmission module downloaded, browse to the Ignition Edge-Gateway console (e.g. http://localhost:8088 or http://<[Edge-Gateway_IPAddr]>:8088 ).
Log in to the Edge-Gateway using your new credentials (username/password) created during your installation. To the left of the side bar click on Configuration tab [ Home | Status | Config ] to configure your system. In the Side Bar, beneath From the Ignition left side bar, click on the Config tab and under the SYSTEM heading click on Modules to view or load Modules. Scroll to the bottom of the page and click on the "link → Install or Upgrade a Module..." text.
When prompted, select the MQTT Transmission module from the file browser and install it. select Install. Accept the license agreement and certification and install the module.
When complete, the Ignition Edge-Gateway Web UI module section should look similar to what is shown below.Gateway will show the current state of the installed module:
![]()
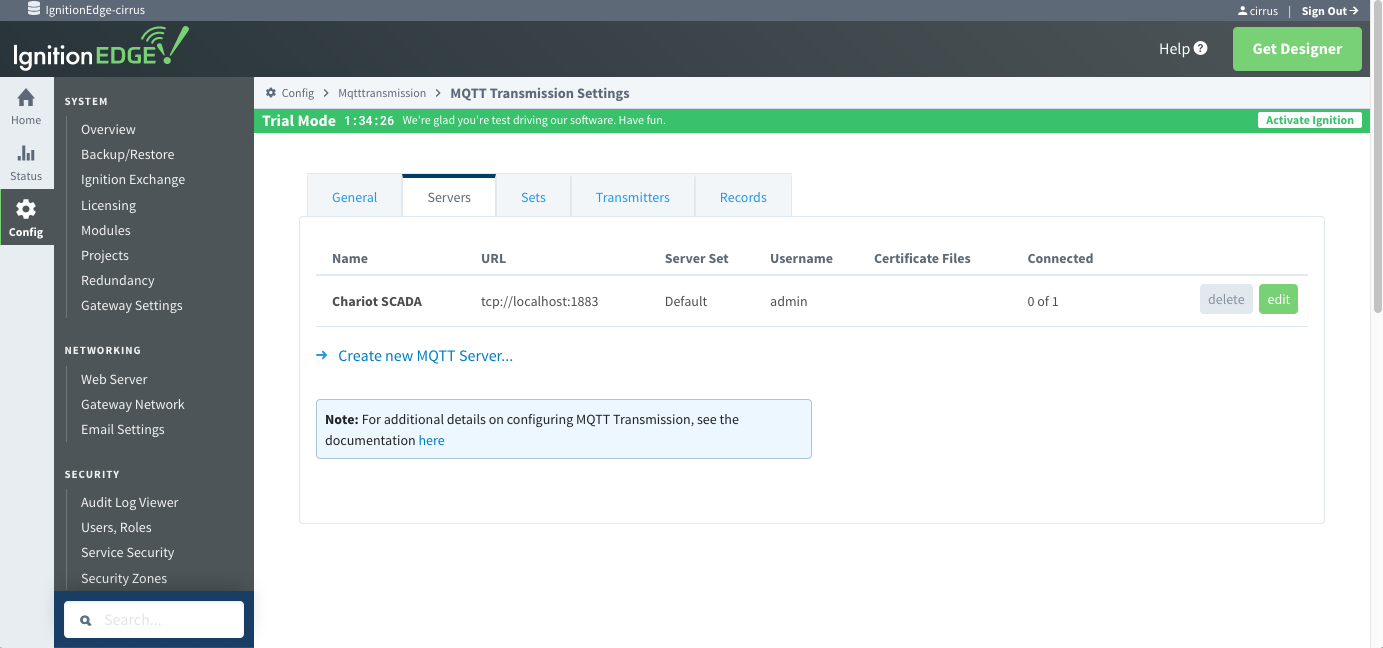
MQTT Transmission needs to be modified configured to point to the MQTT Server (MQTT Distributor) Distribution server in order to get publish data into MQTT Engine. To do so, browse to Ignition Edge MQTT with a web browser. In the Side Bar, beneath the SYSTEM heading towards the bottom underneath MQTT TRANSMISSION click Settings to view or modify. The default view is of the General status. Make certain this is set to 'Enabled' when finished with the configuration. When complete, the Ignition Edge-Gateway Web UI module section should look similar to what is shown below. Then click 'Configure' at the top, log in, and select MQTT Transmission 'Settings' on the left panel near the bottom, then select 'Servers' tab. Configure the URL to match your environment. Finally, click the 'edit' button to the right of the 'Chariot SCADA' definition as shown below.
Default view:
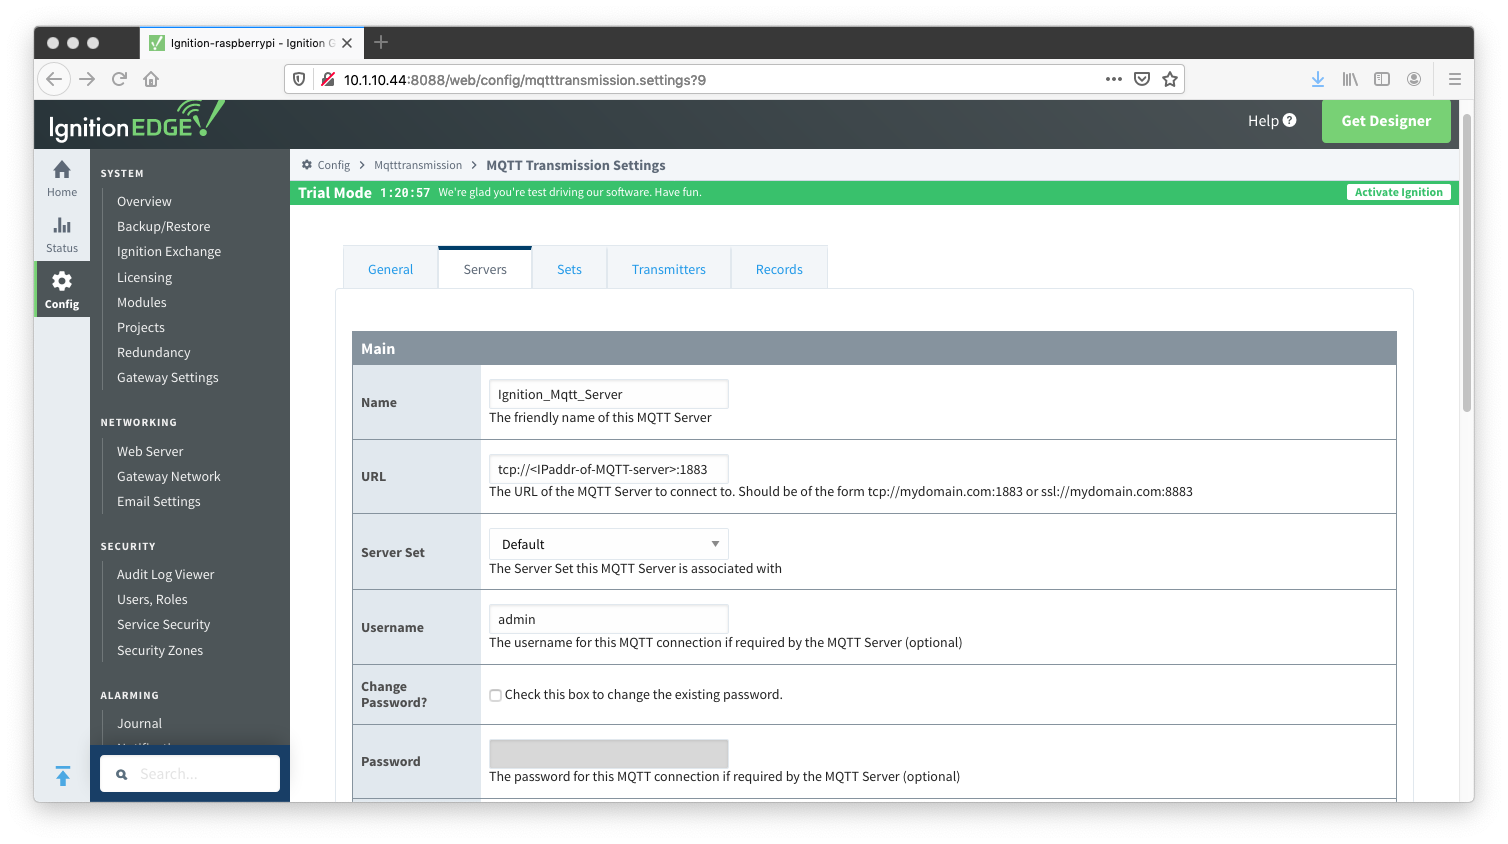
Edit Configuration pointing to your MQTT (Distributor) Server.......
this, select the Config tab on the left side bar and scroll to the bottom of the page and click on the "MQTT TRANSMISSION | Settings" link.
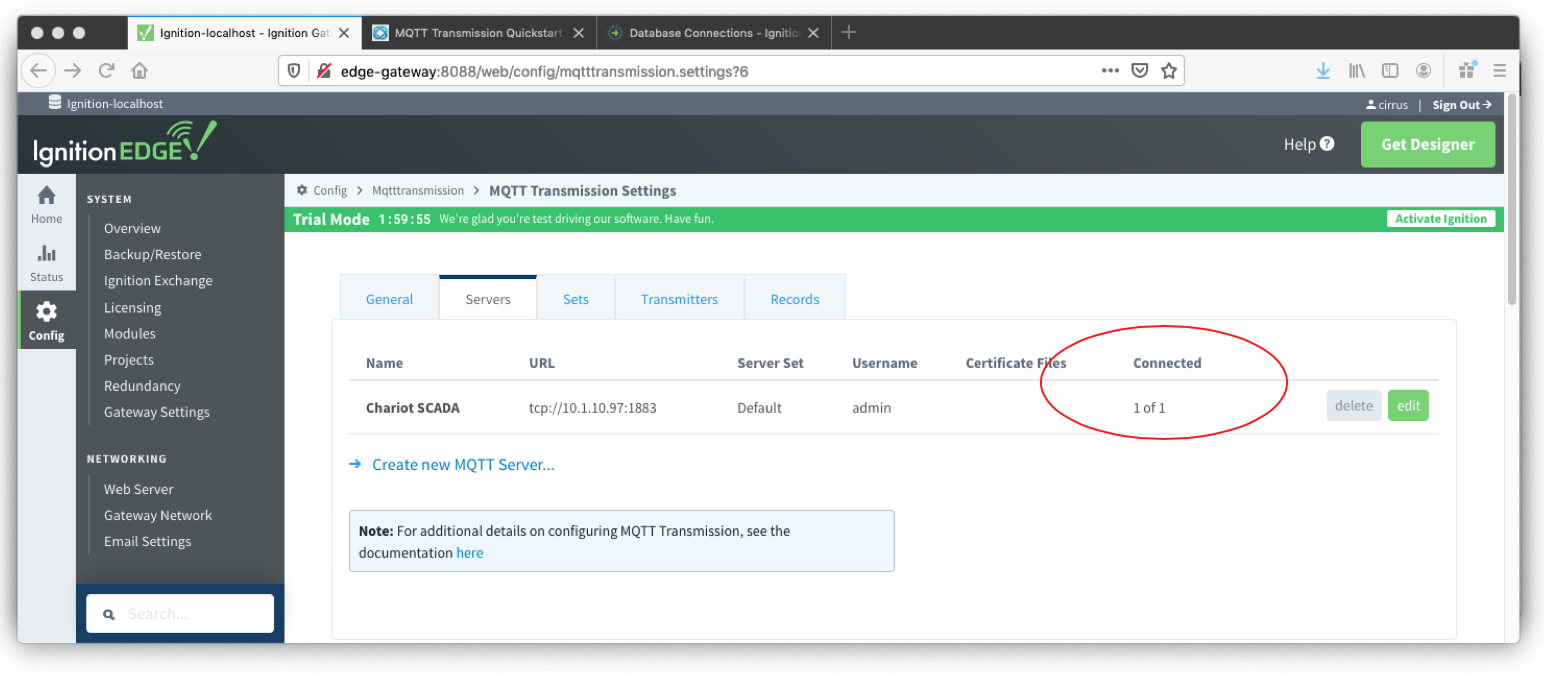
Click on the Servers tab and edit the MQTT Server named Chariot SCADA to and modify the URL to point to the Ignition Distributor gateway. Example: If your Gateway IP is 10.1.10.97 then set the URL to tcp://10.1.10.97:1883 and save your settings. Confirm your connectivity from Edge to Gateway (below are two possible examples):
Now select 'Sets' at the top and click the 'edit' button next to the 'Default' Server Set as shown below. (Note that Primary Host ID is modified here in the example.)
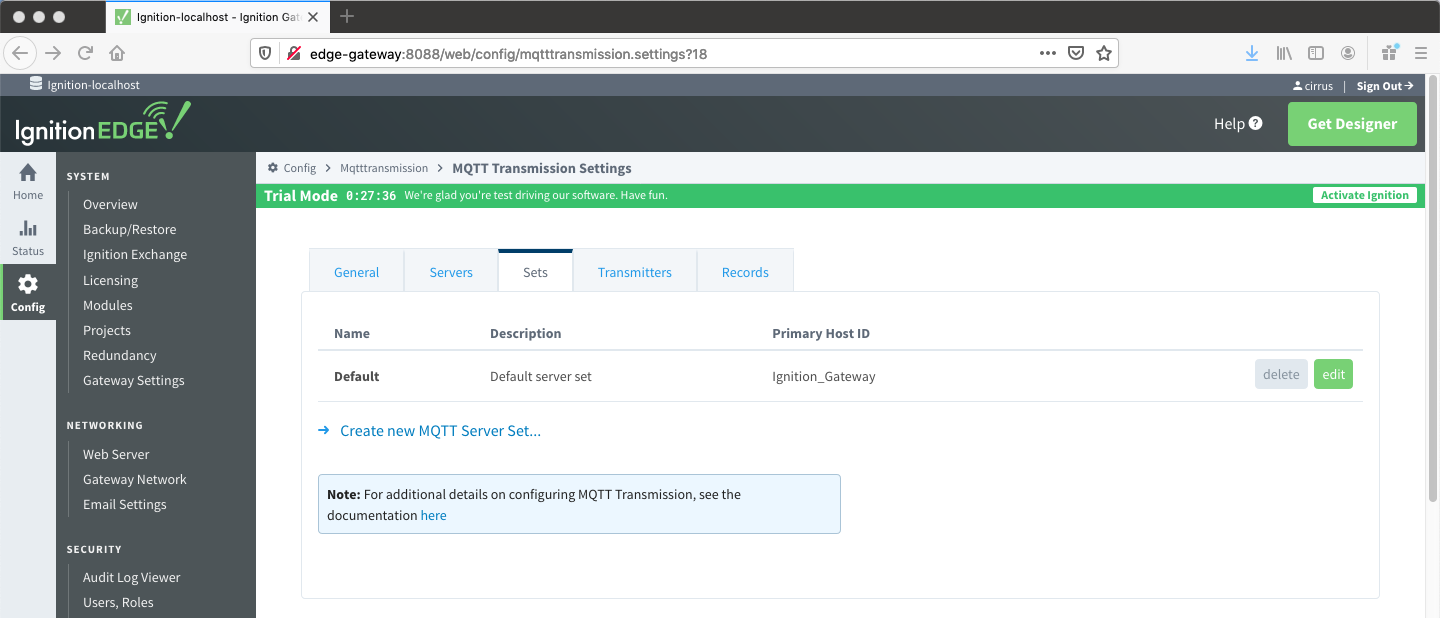
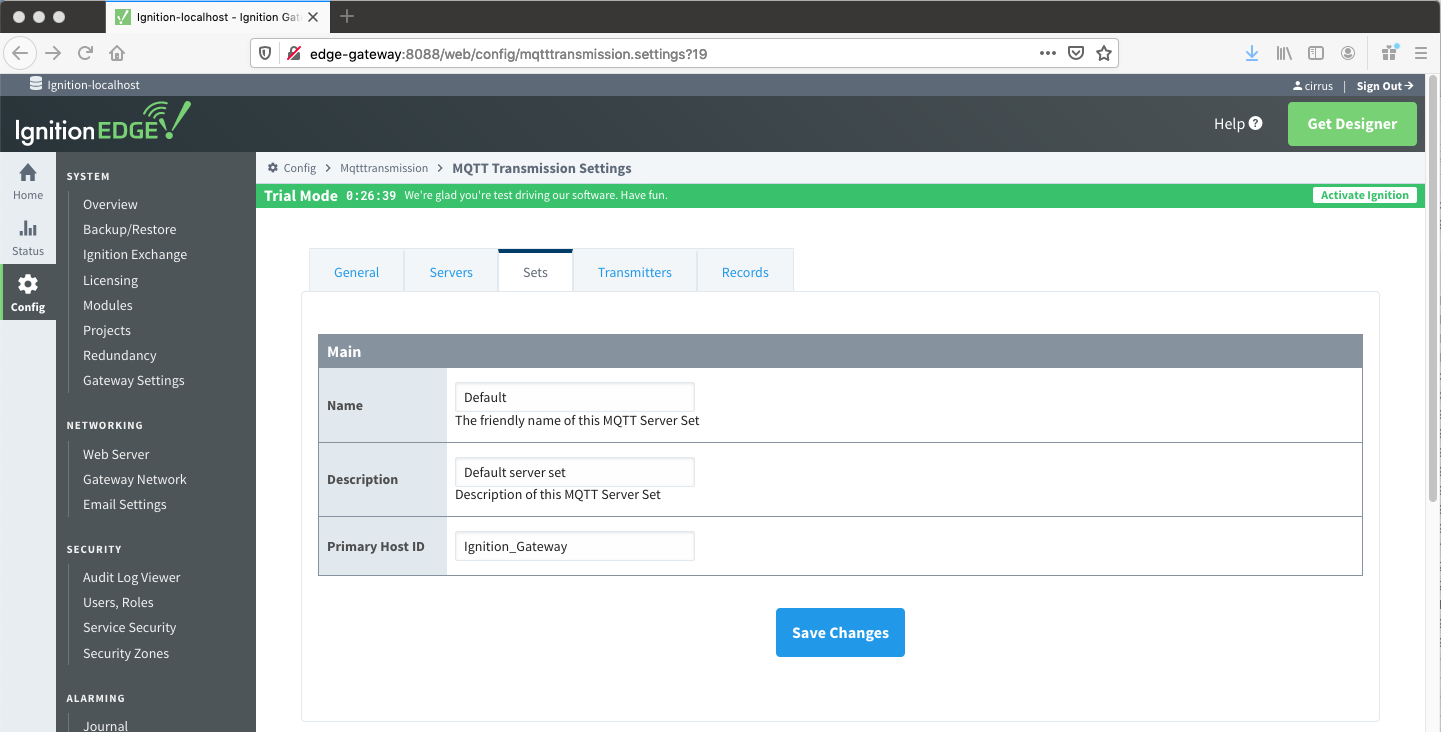
And as mentioned above if you are using the more robust method of specifying the host be sure to match Primary Host ID (eg. Ignition_Gateway) in Edge and Central Gateway settings. Edit the 'Default' Sets to enter and update the Primary Host ID.
Save Changes.
Once configured, MQTT Transmission will automatically connect, and you can confirm by checking the Connected status on the Servers tab.
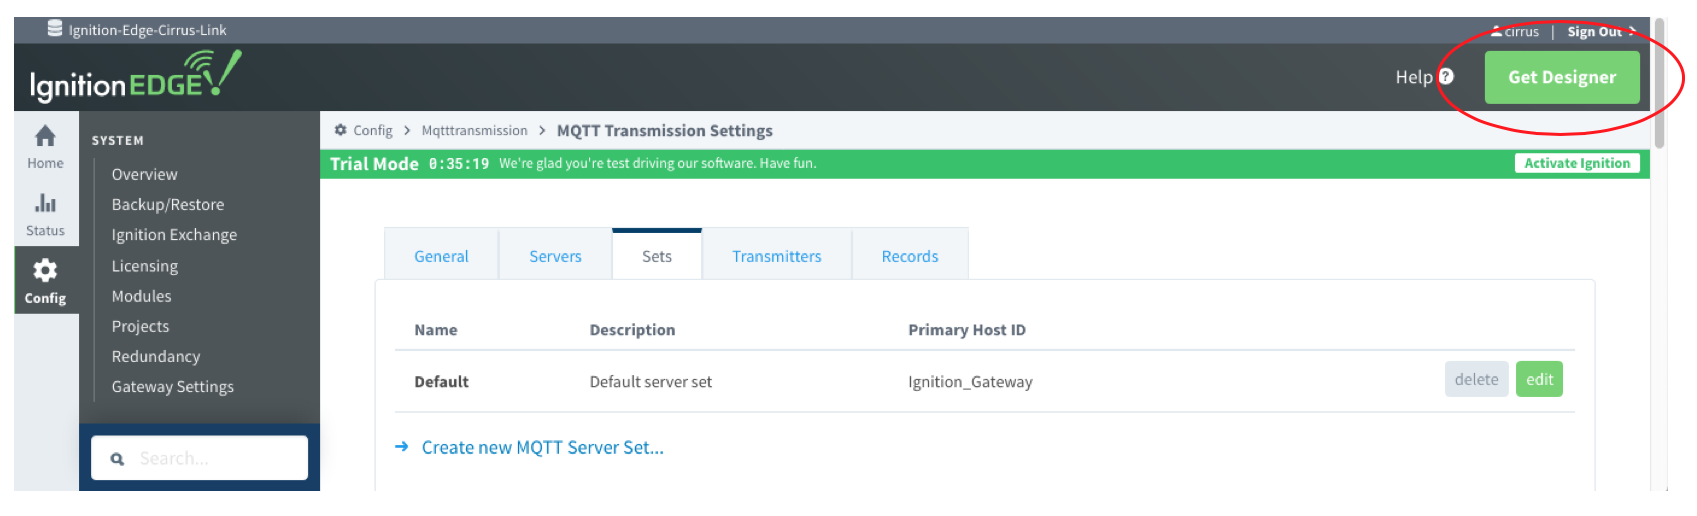
At this point we must download and launch the newest Ignition Designer tool to create or edit the default Tag(s) are ready to edit the default tag, created as part of the MQTT Transmission installation, to send to MQTT Engine using the MQTT protocol . and to do this we will use the Ignition Designer tool.
On each machine, select the Get Designer button from Ignition Edge web portal as shown below. Start and point the Designer tool at the same IP address, username and password as created on your Edge-Gateway to create your project.
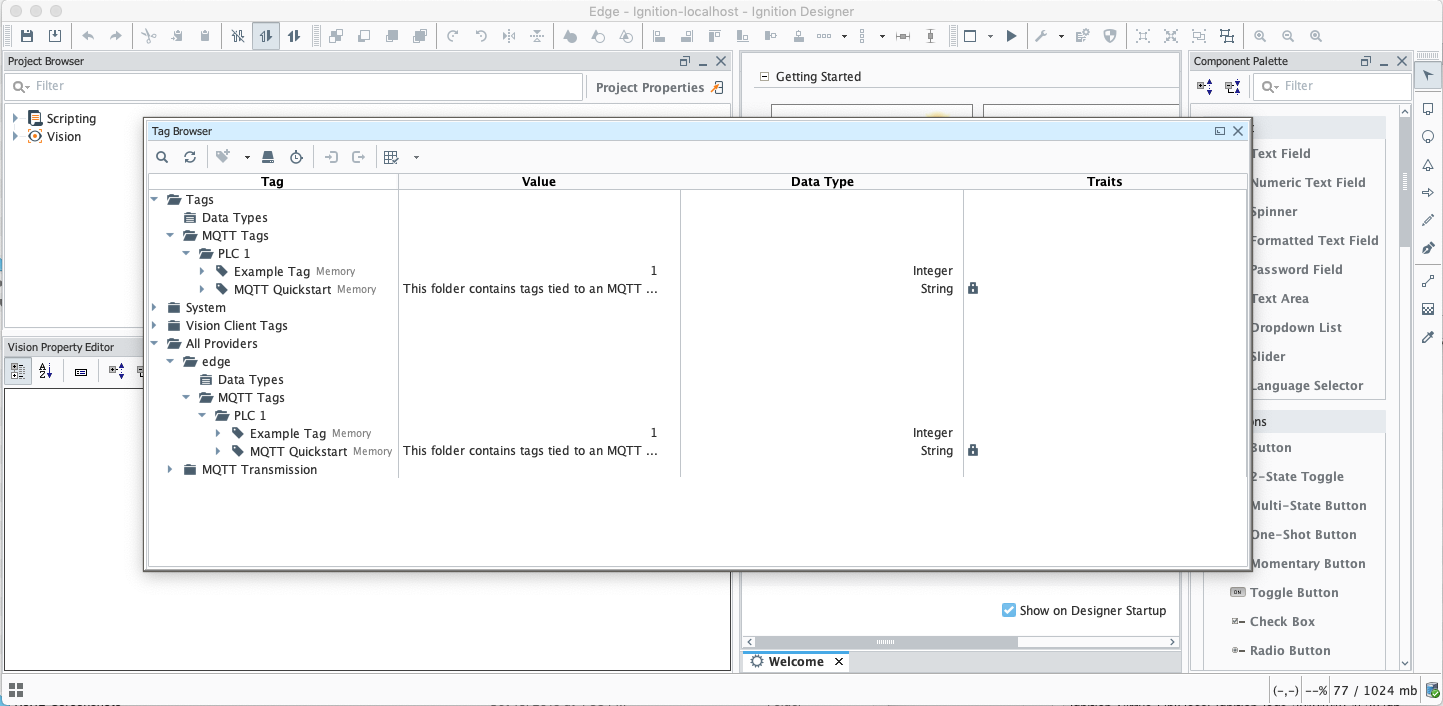
Ignition Designer view of Edge 'Tag Browser' pane (expanded) shown below. Note the "All Providers/edge/Edge 'MQTT Tags' " folder. This is where we will edit or add some specific folders and tags or change the values to work with the 'Default Transmitter' of MQTT Transmission. Making changes on the Edge side will result in new values displayed at the Central Gateway as viewed with Ignition Designer. Launch Designer and create two sessions, one to view into the Edge and modify Tags, the other to see your Central Gateway and view those changes, confirming the correct configuration settings from the tutorial examples above.
Ignition Designer's view into your Edge-Gateway (default values, Tag Browser expanded):
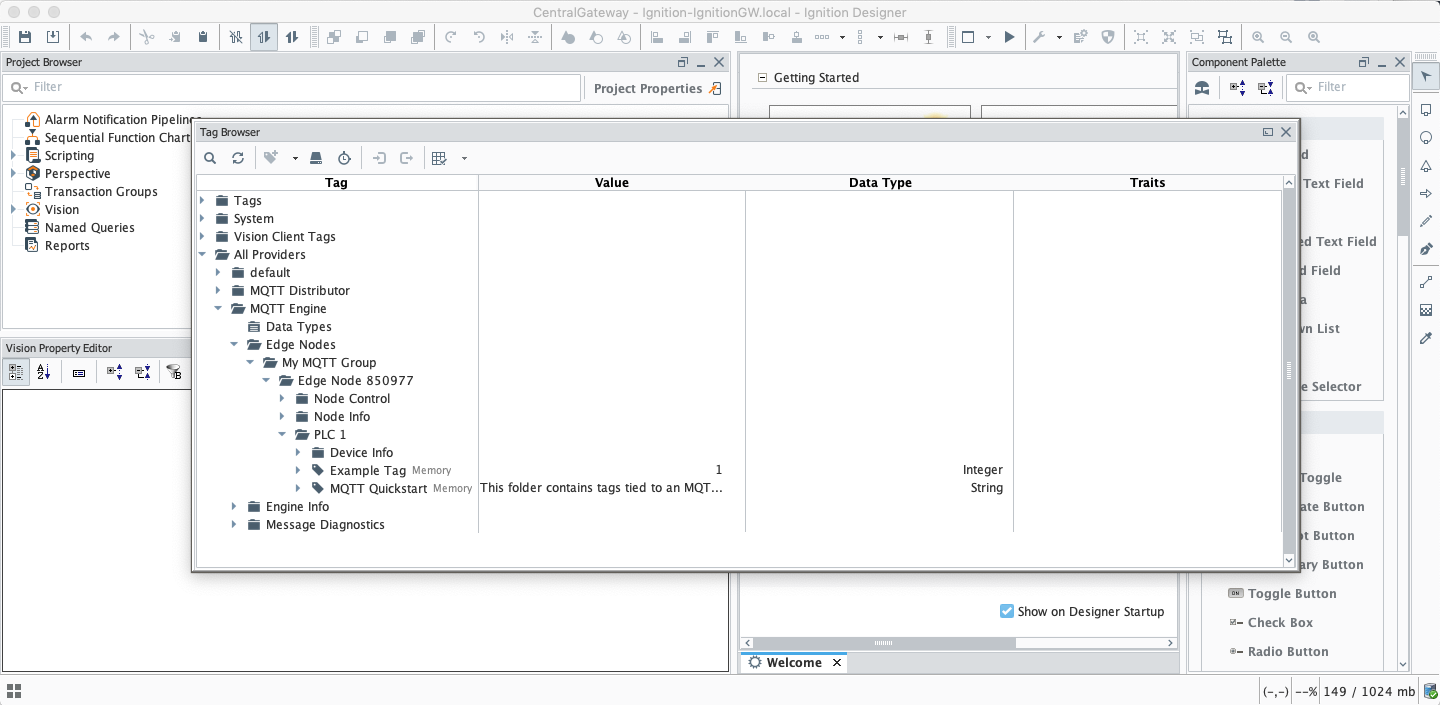
Ignition Designer's view into your Central-Gateway (Tag Browser expanded):
to download, install and launch the Design Launcher.
Once launched, double click the Ignition gateway in the Designer View and log in using the username and password created when installing Ignition on the machine.
Note: if you enabled the Quick Start option when starting Ignition, a samplequickstart project will have been created and you will need to open that project.
Initial Designer view if installed with Ignition showing open samplequickstart project:
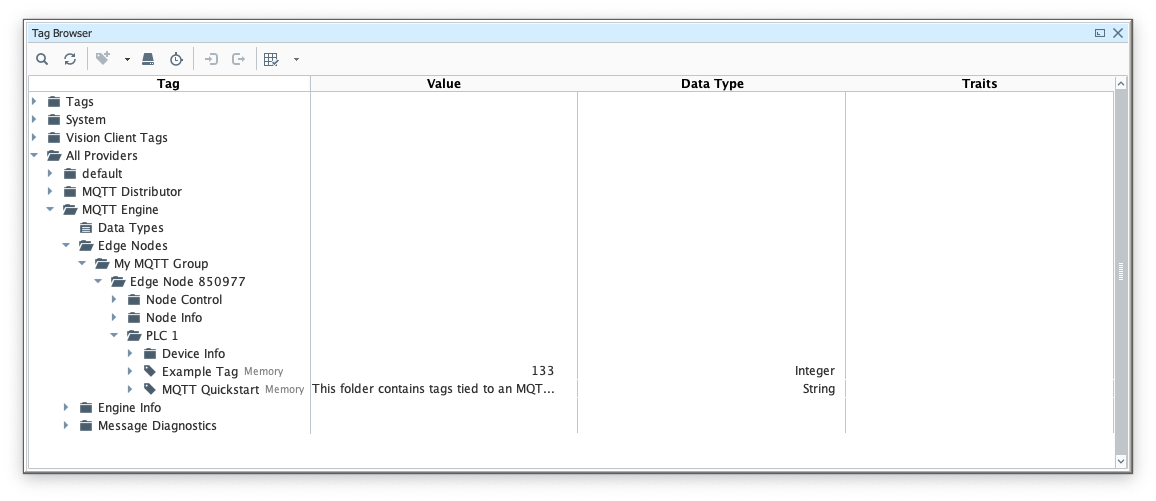
Deselect Sample_Tags and select MQTT Engine under the Tag Browser window. Expand the Edge Nodes folder tree until you have exposed the PLC 1 folder with the Example Tag.
Initial Designer View if installed with Ignition Edge
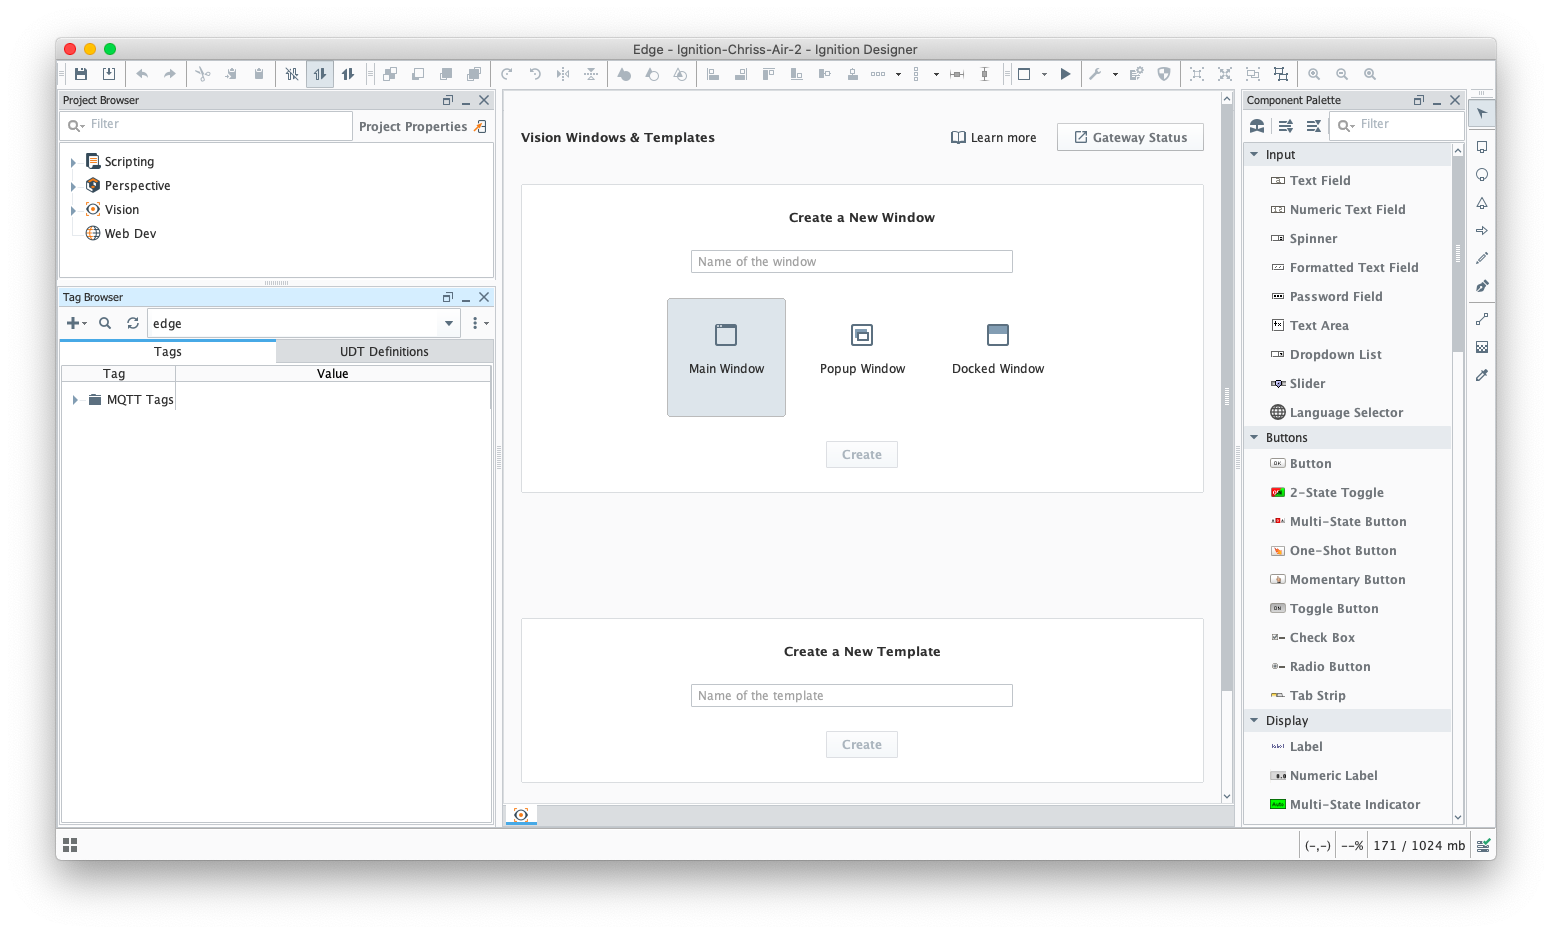
Expand the MQTT Tags folder in the Tag Browser window until you have exposed the PLC 1 folder with the Example Tag.
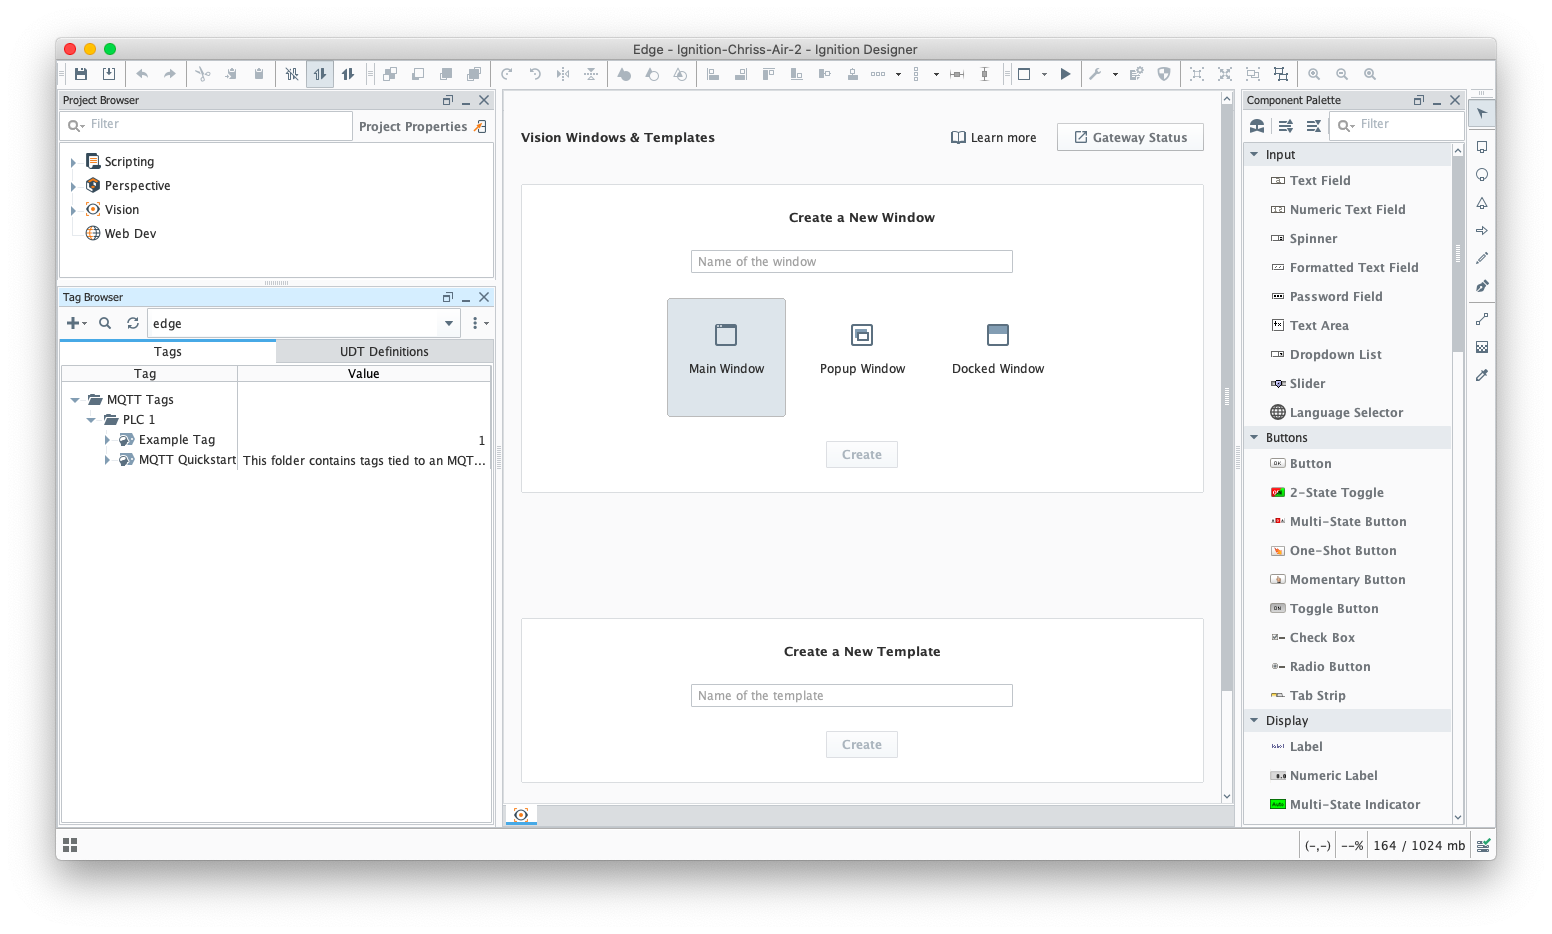
To test your connection, make a change to the tag value on the secondary machine with MQTT Transmission installed. Double click on the Example Tag value '1', change the value, and watch it update at the Ignition Designer connected to the MQTT Engine provider.
Note: To see values change at the Edge-Gateway and eventually have them show up at Ignition Gateway you will need to double click on the default '1' value. The Ignition Designer tool is not by default in Read&/Write mode so your first attempt to write a new value to the this Example Tag will ask you to select either Cancel | Enable Read/Write Mode | Write Once. Select Write Once or Read/Write to allow Tag value changes.
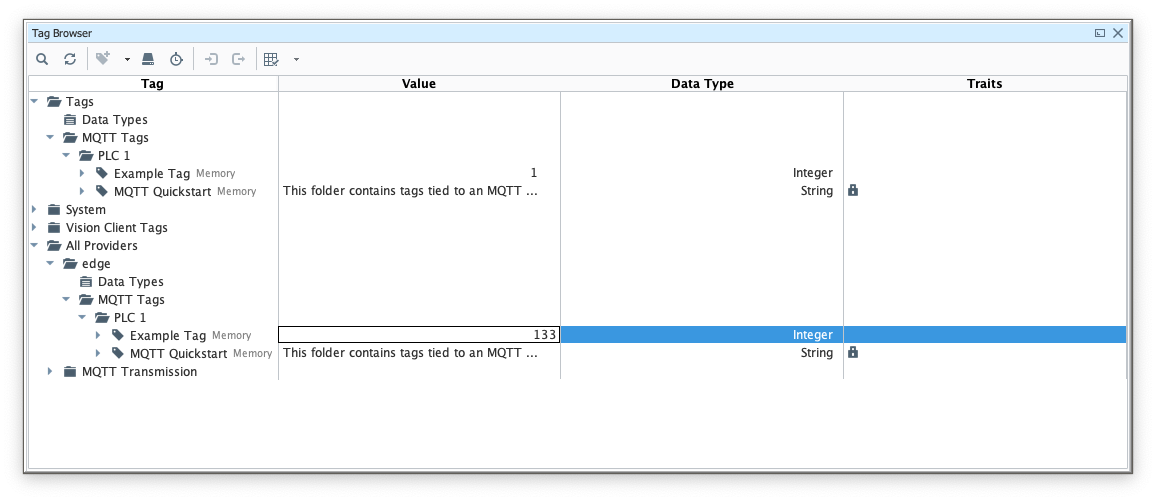 Central-Gateway Tags now update:
Ignition Designer Tag Browser views (below) of both Edge and Ignition Gateway showing the Tag Paths from both systems viewpoints. These Designer Tag Browser's are shown overlaying the web-browser view of the Edge Transmitter configuration page.For more detail on how the MQTT Transmission Transmitter configurations interact with the Ignition tag trees to publish MQTT messages and tags to an MQTT Server, see the MQTT Transmission Transmitters and Tag Trees tutorial.
At this point you have a fully functional system that can be expanded or modified as required. Below are some additional activities you may want to try on your own.
...