Prerequisites:
Overview:
Sparkplug is an open source project developed by Cirrus Link Solutions which shows how devices or projects can be enabled to communicate with MQTT Engine and Ignition. This example will show how data can be published via MQTT from an emulated Android device running on a development machine. In addition, it will show how Android applications can be controlled by writing to tags in Ignition. It will also show the caveats associated with establishing/ending an MQTT session and ensuring that the tag values in Ignition are valid.
Example Android Client:
This tutorial assumes:
- Ignition is running and in active trial mode or using a purchased license.
- MQTT Distributor is installed and running, using the default configuration, and in active trial mode or using a purchased license.
- MQTT Engine is installed and running, using the default configuration, and in active trial mode or using a purchased license.
- A Java Development Environment and Maven are installed
The steps to complete this tutorial are
- Get the code
- Install and configure the Android development environment
- Build and run the code
- Interact with the application
Get the code
Download the Android Sparkplug Demo Application and save it to your hard drive. You can use git to do this or download the zip file from Github and extract the contents to your hard drive.
Install and configure the Android development environment
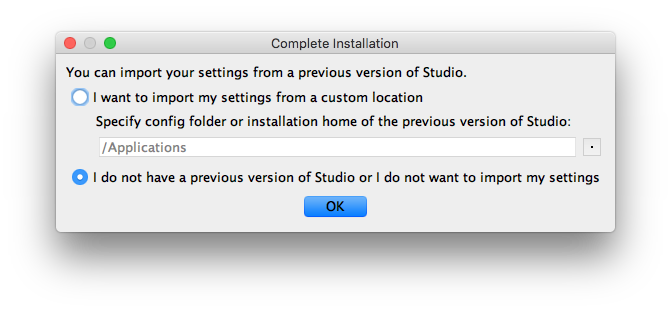
Android development can be done using Android Studio from Google. It can be downloaded here. It is supported on Linux, Mac, and Windows. Download and install per the instructions provided by Android Studio. During the Android Studio make sure to install the Android SDK and Android Virtual Device as well. These are optional installation components. These are required for this tutorial. Once installation is complete, start Android Studio. Select 'I do not have a previous version of Studio or I do not want to import my settings.' as shown below and select 'OK'.
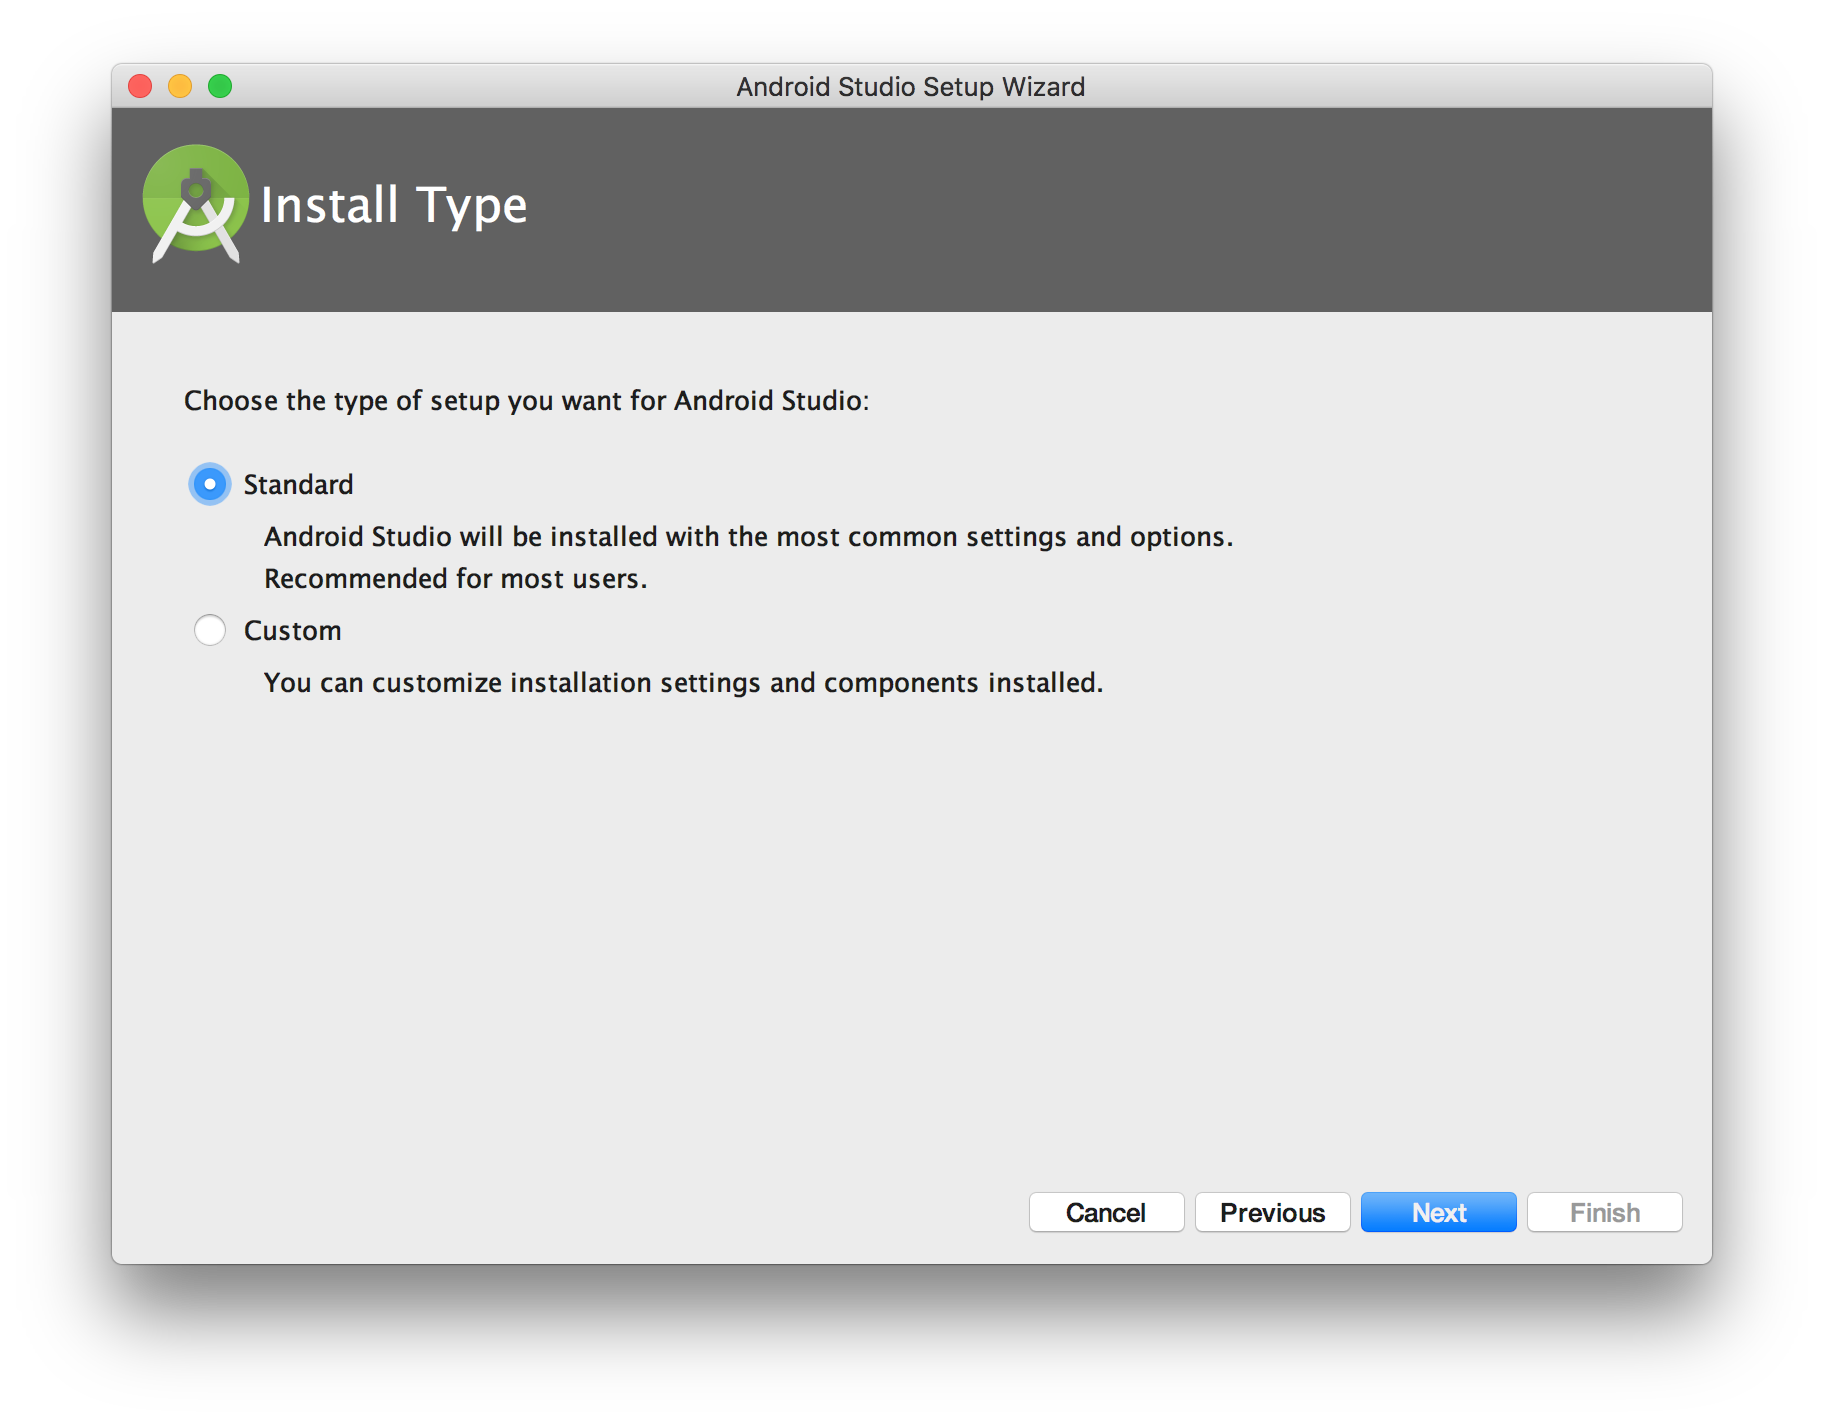
During configuration you will also be asked to do a 'Standard' or 'Custom' installation. Select 'Standard' and click 'Next' as shown below.
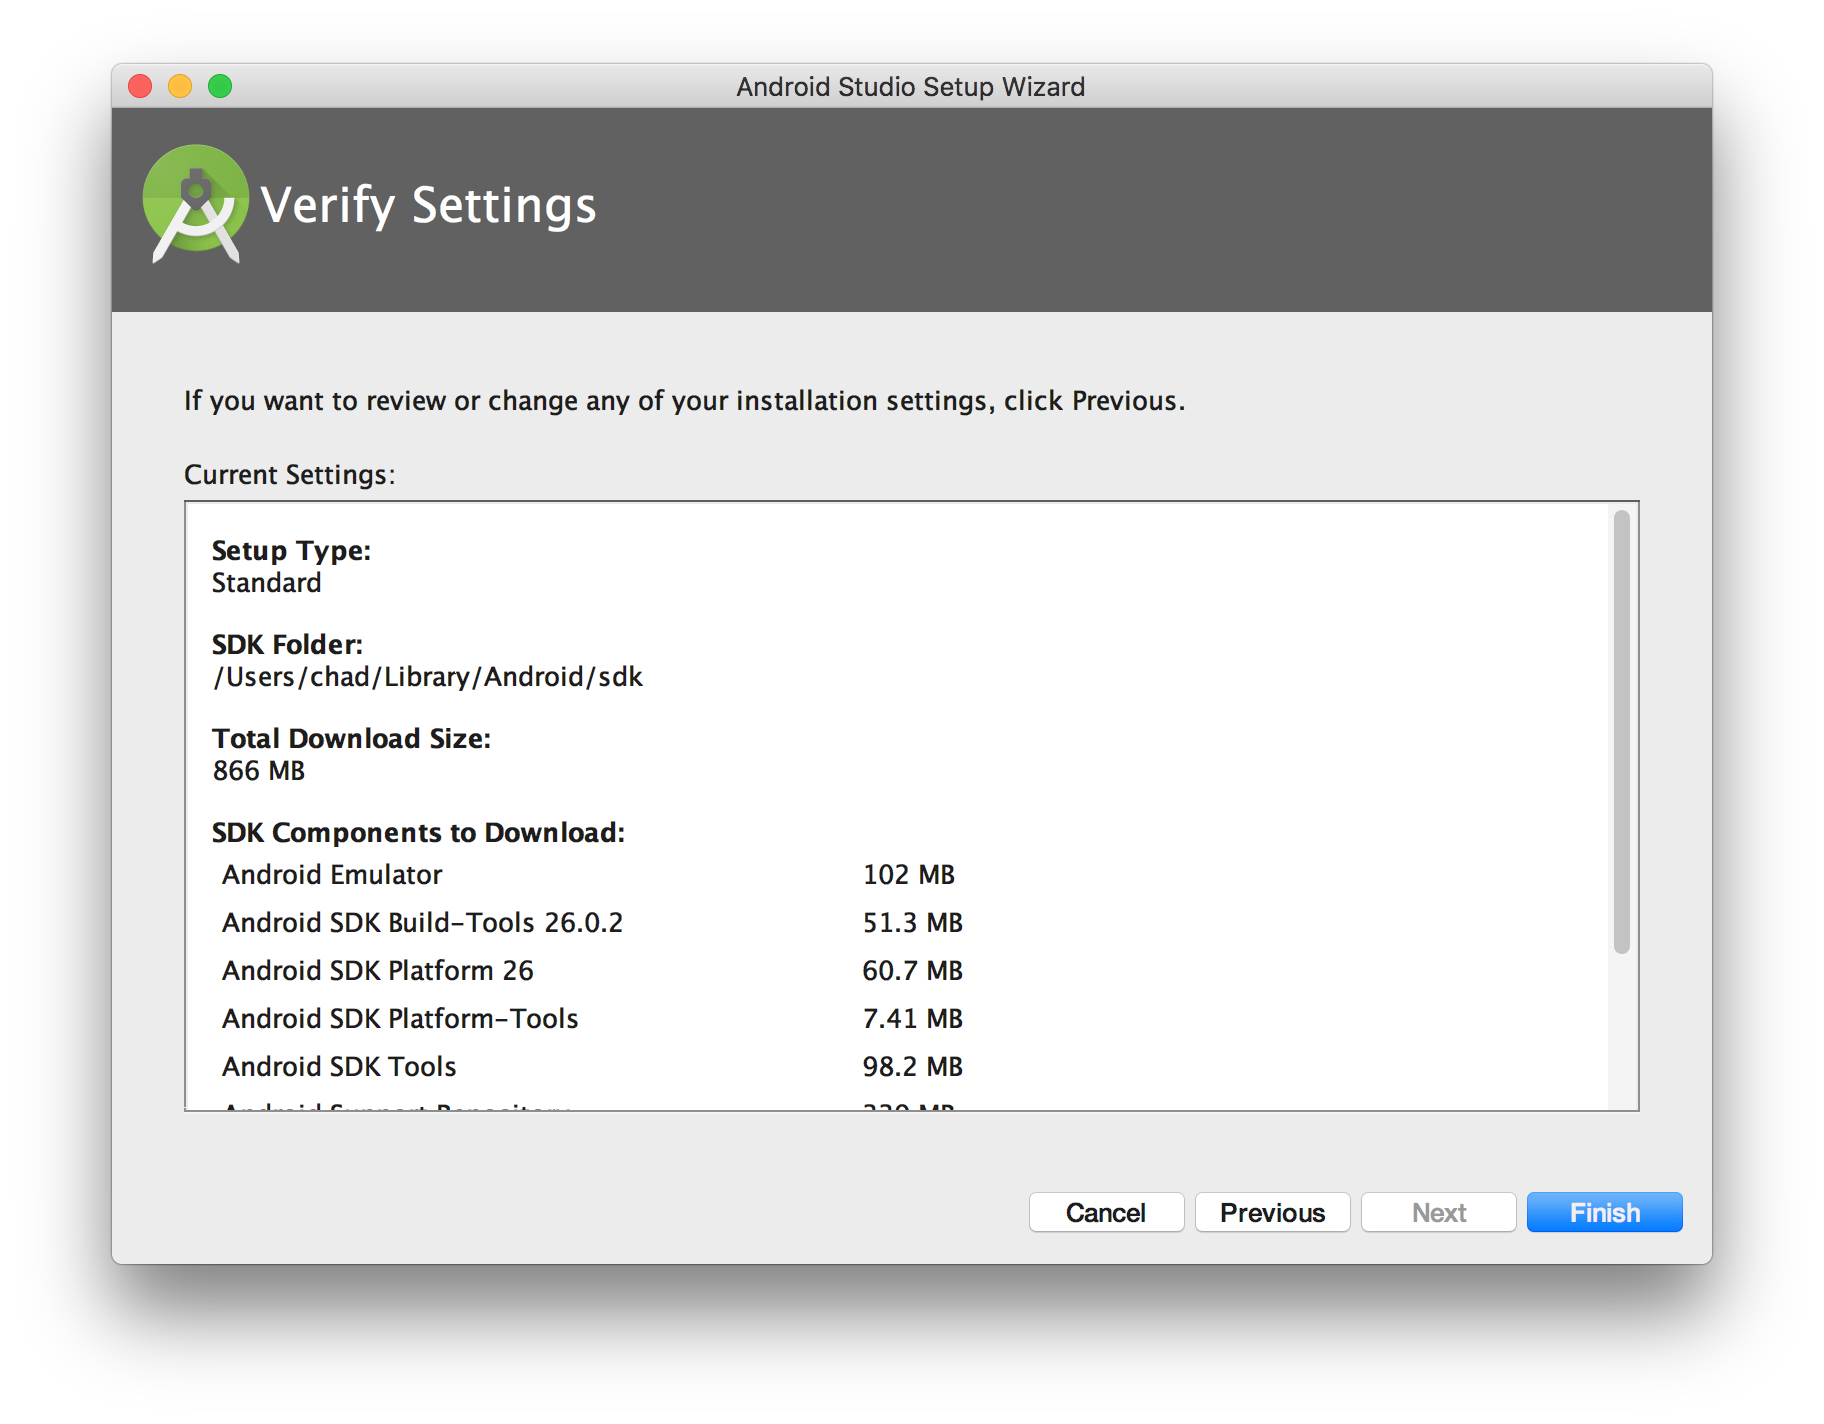
Finally,click 'Finish' to complete the setup as shown below.
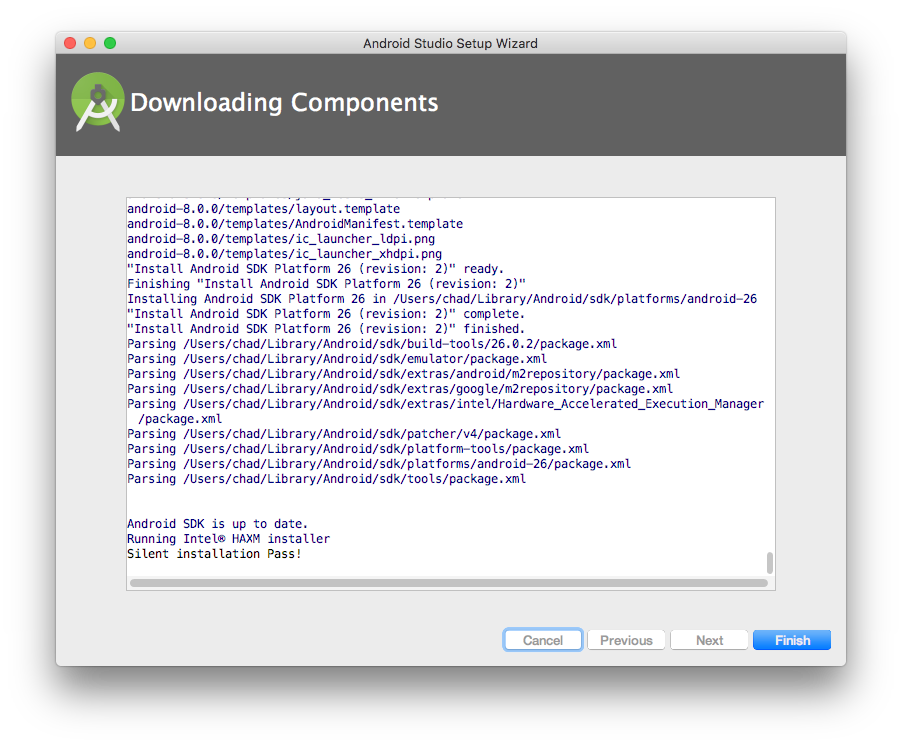
At this point, Android Studio will fetch additional installation components and display the following screen. Simply click 'Finish'
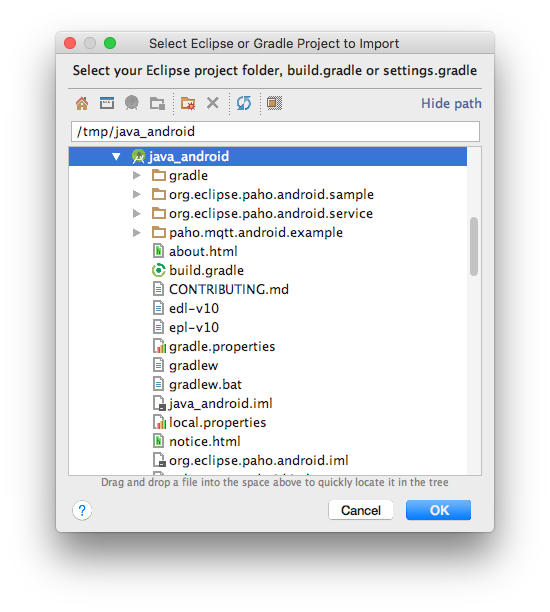
At this point you'll be given a number of options regarding the project to open. We're going to select 'Import project (Eclipse ADT, Gradle, etc)' as shown below.
Build and Run the Code
With Android Studio now running select the directory that you saved the Android Sparkplug Demo Application code in as shown below and click 'OK'.
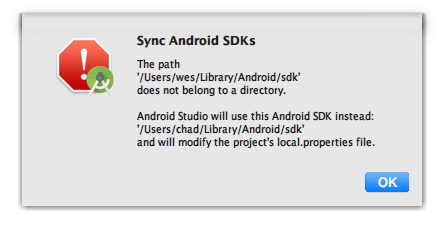
You should get some warnings regarding SDK paths due to a mismatches in development environments. This is fine since Android Studio will correct the paths, just click 'OK'.
At this point, Android Studio will build the project as shown below.

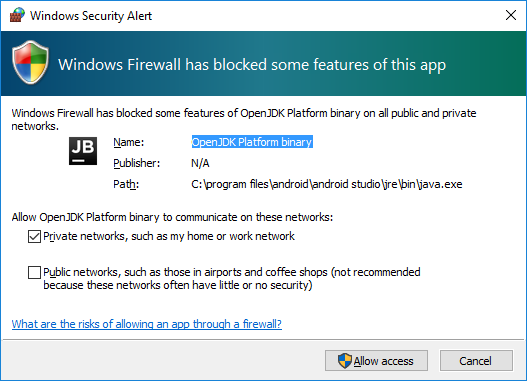
During the build process and depending on your OS, you may get some security warnings. Make sure to allow access as required.
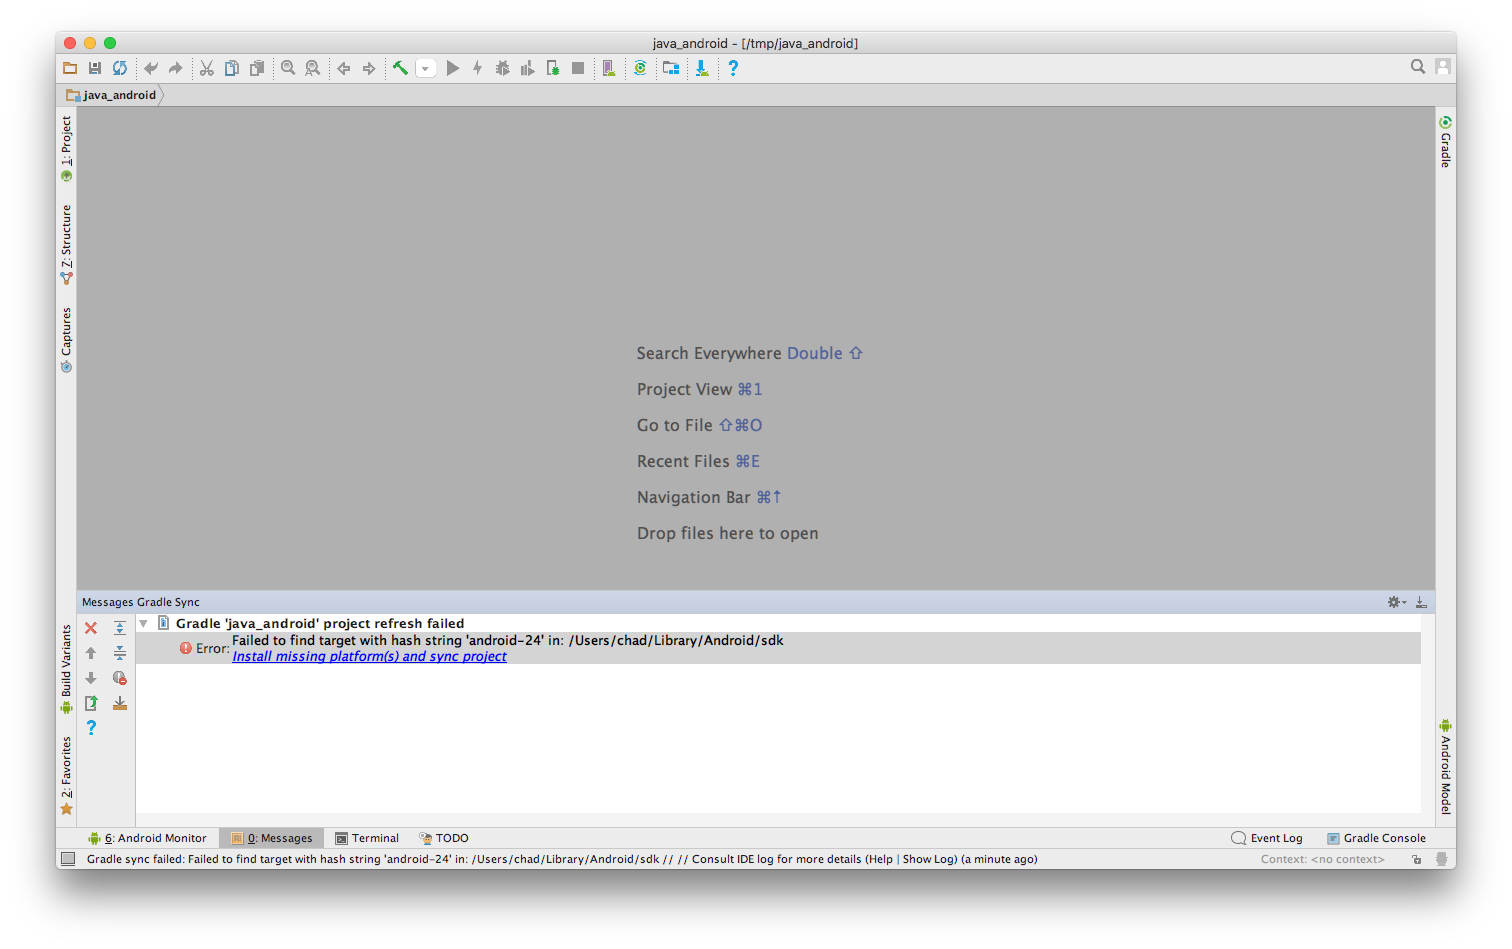
Finally, you should now see something similar to what is show below. Close the 'Tip of the Day' dialog box. Note the Gradle error for the missing target. Begin the process to correct this by clicking the link to 'Install missing platform(s) and sync project.'
After clicking the link, you should see a new dialog as shown below. Read and Accept the Terms and Conditions and click 'Next' as shown below.
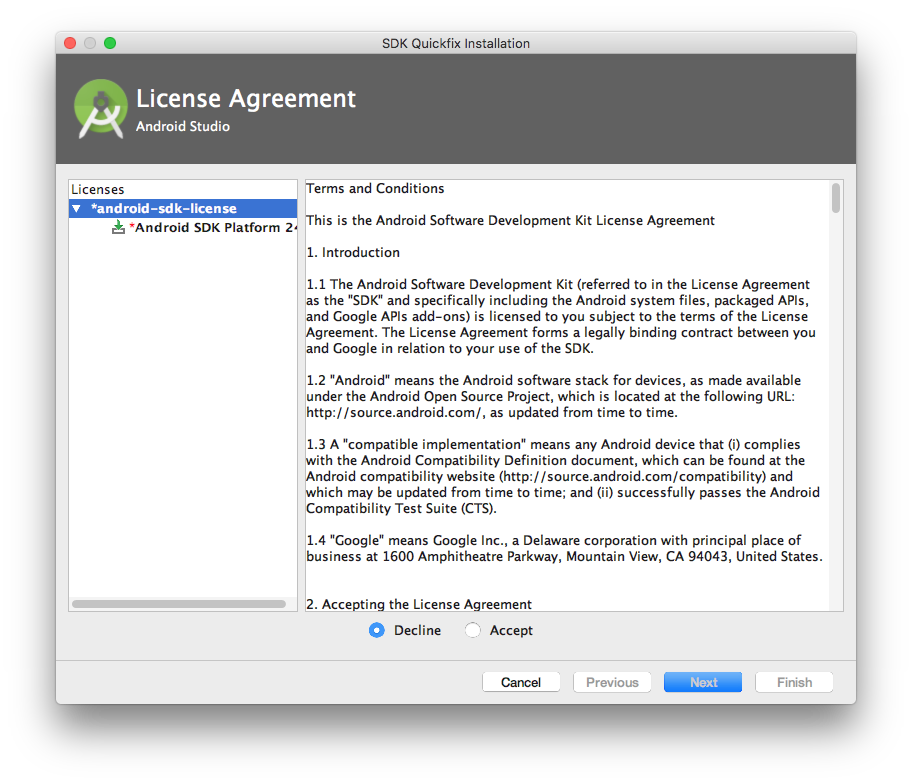
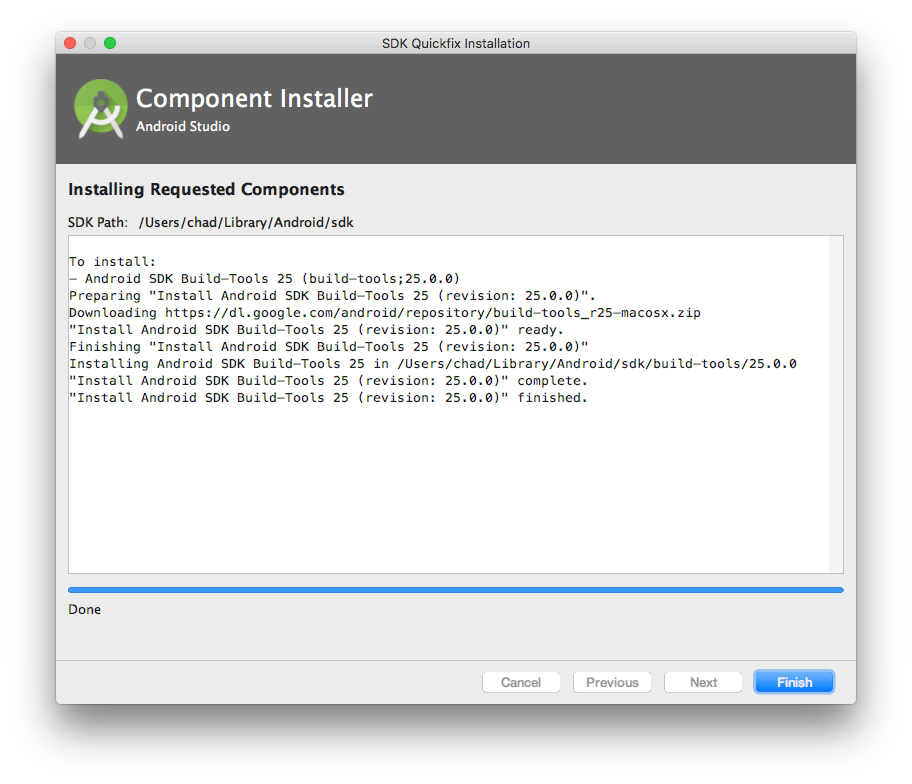
This will start the installation of the missing SDK components.
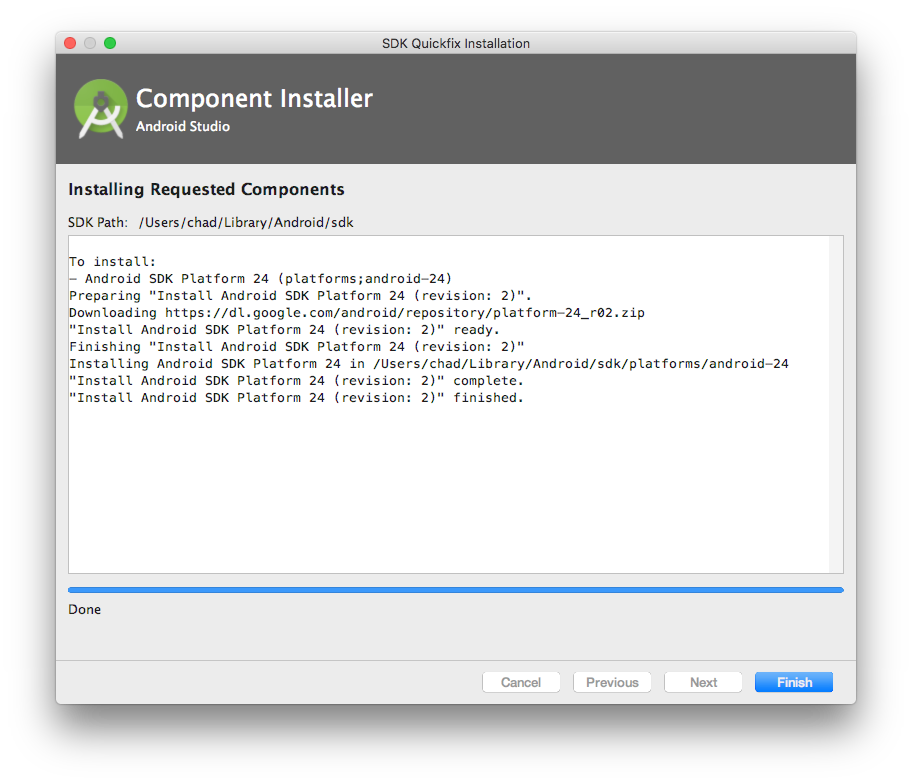
When the installation is complete, you should see something similar to the following. Finally, click 'Finish'.
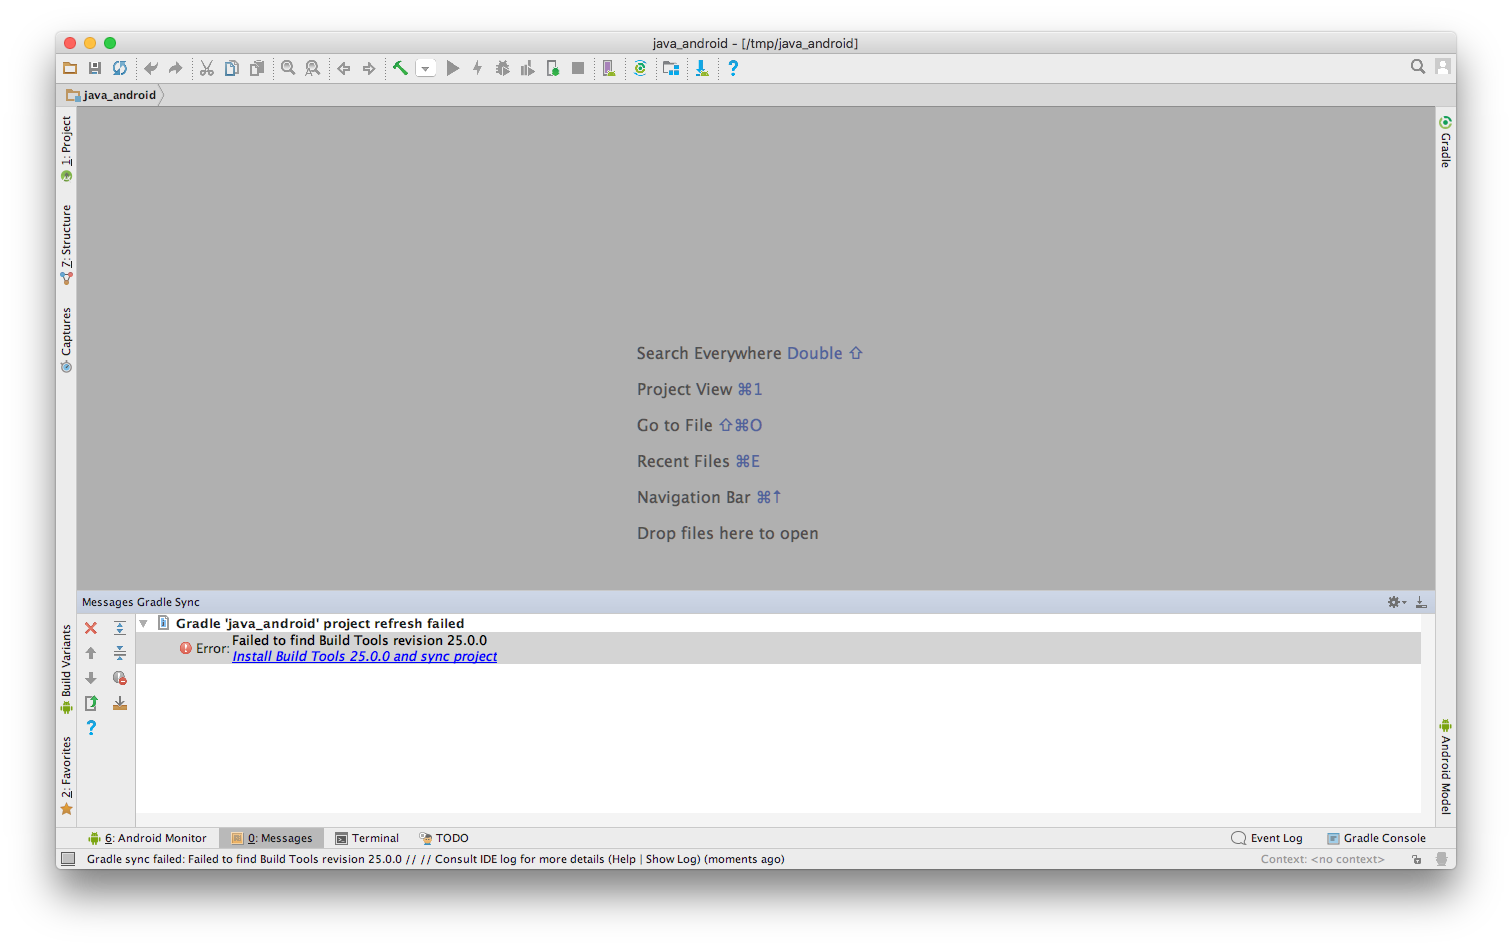
Upon finishing the installation, you will see another error regarding missing build tools as shown below. Begin installing these by clicking the 'Install Build Tools 25.0.0 and sync project' link.
At this point, Android Studio will begin installing the Build Tools v25.
When the Build Tools installation completes, it should look similar to what is shown below. Complete the installation by clicking 'Finish'.
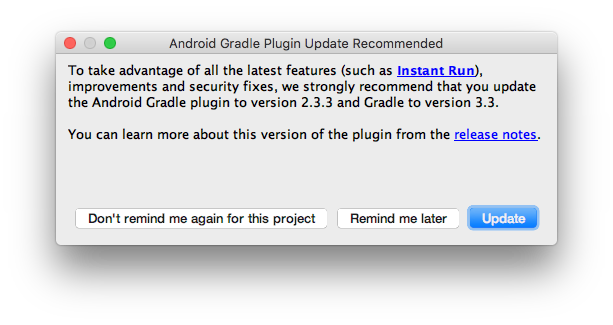
At this point you will likely get a recommended Gradle Plugin Update. Click 'Update' to install as shown below.
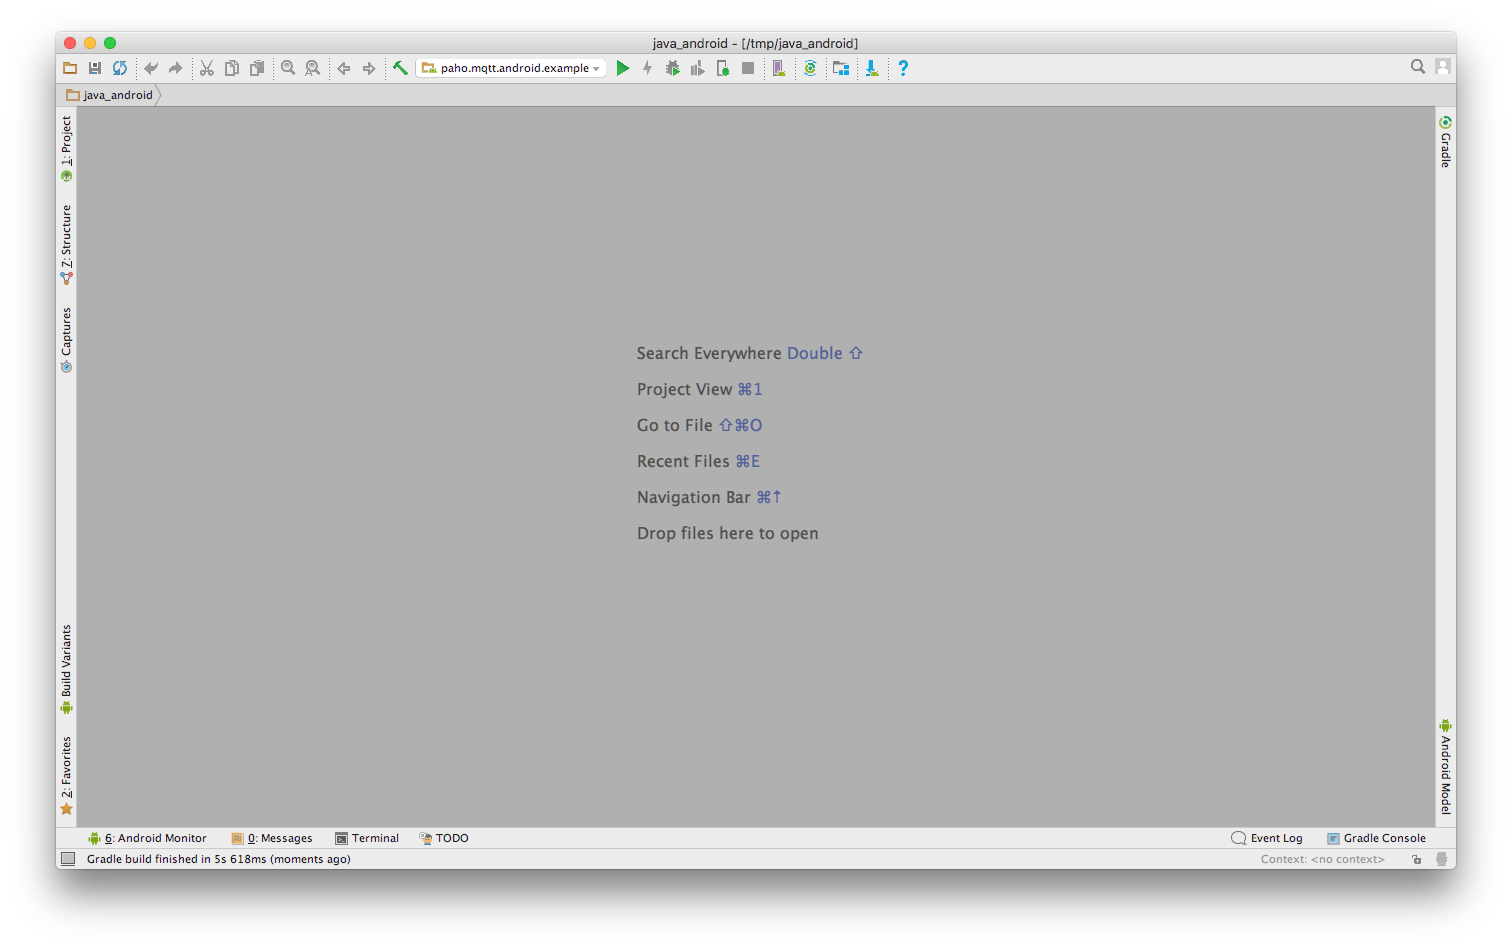
Finally, we should see the main Android Studio screen shown below. Note the message in the far lower left corner. This means the project is now building successfully.
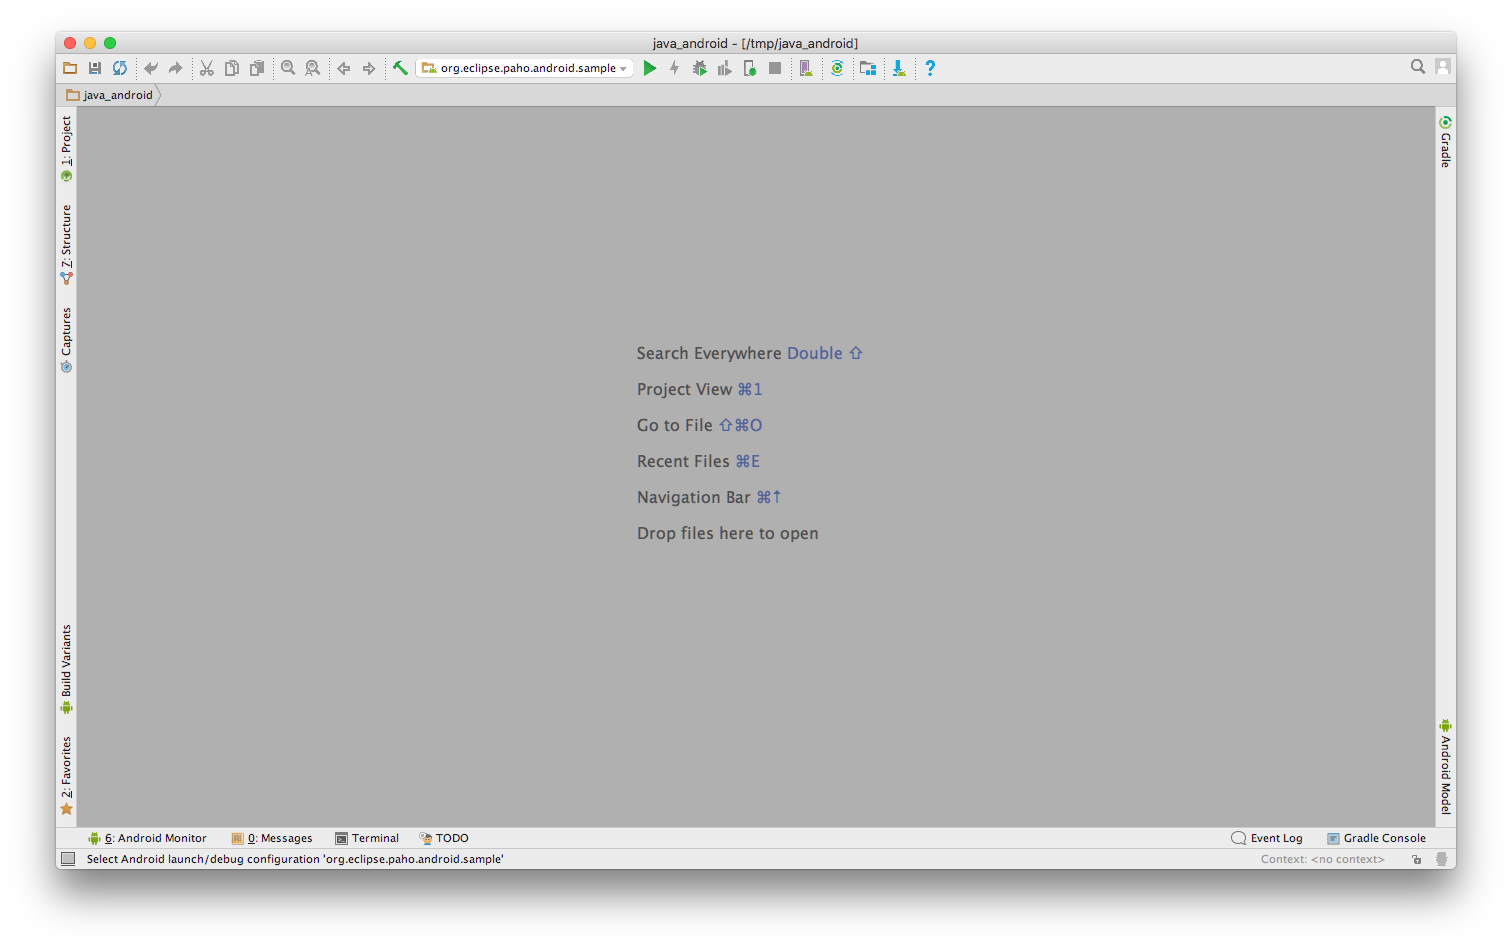
Now we can attempt to run the sample application. Note the drop down selector near the top center of main pane and select 'org.eclipse.paho.android.sample'. Then click the green 'play' button just to the right of the drop down selector.
After attempting the run the application, you will see a new popup.
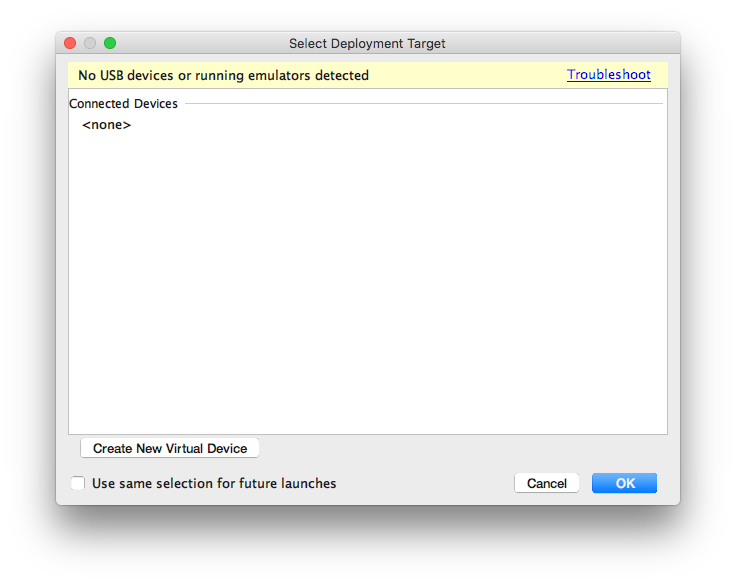
Once the Android Debug Bridge (ADB) has initialized you should see the following showing you don't have any emulators defined. Select the 'Create New Virtual Device' shown in the lower left corner.
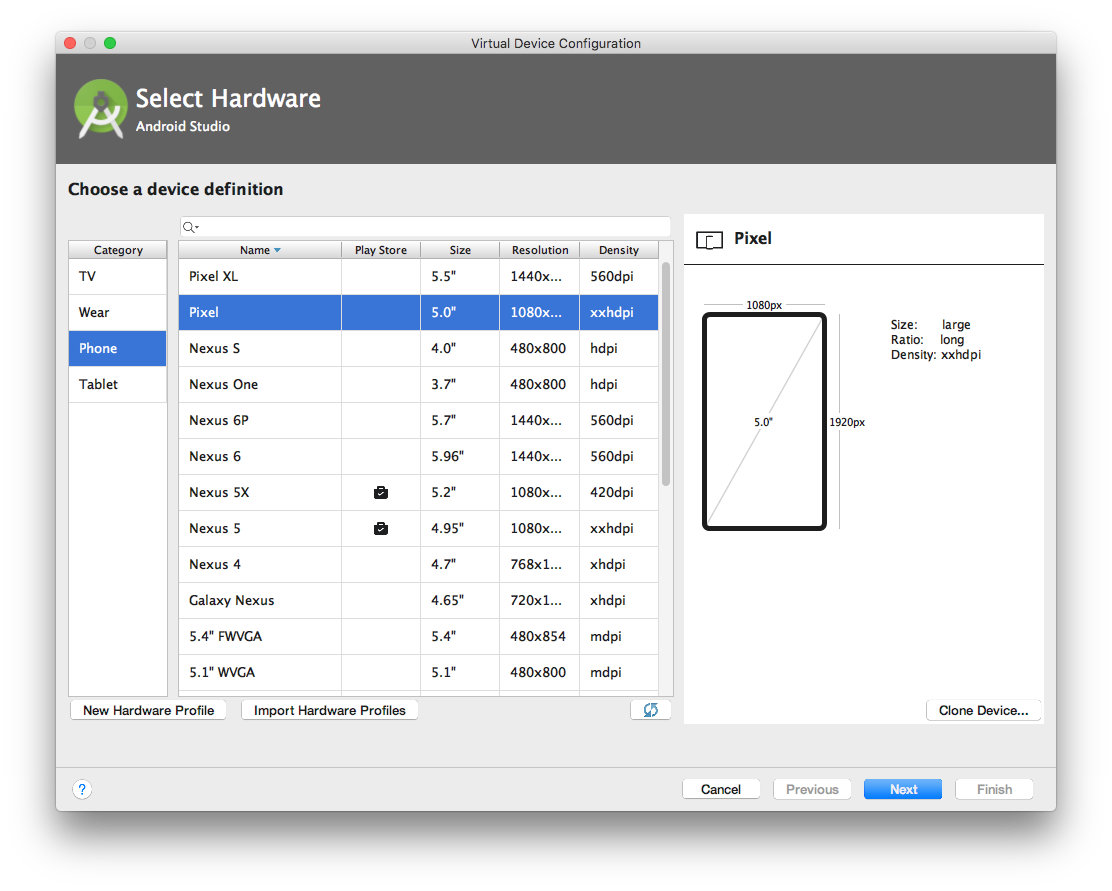
Select 'Phone' on the left and 'Pixel' in the center pane as shown below and click 'Next'.
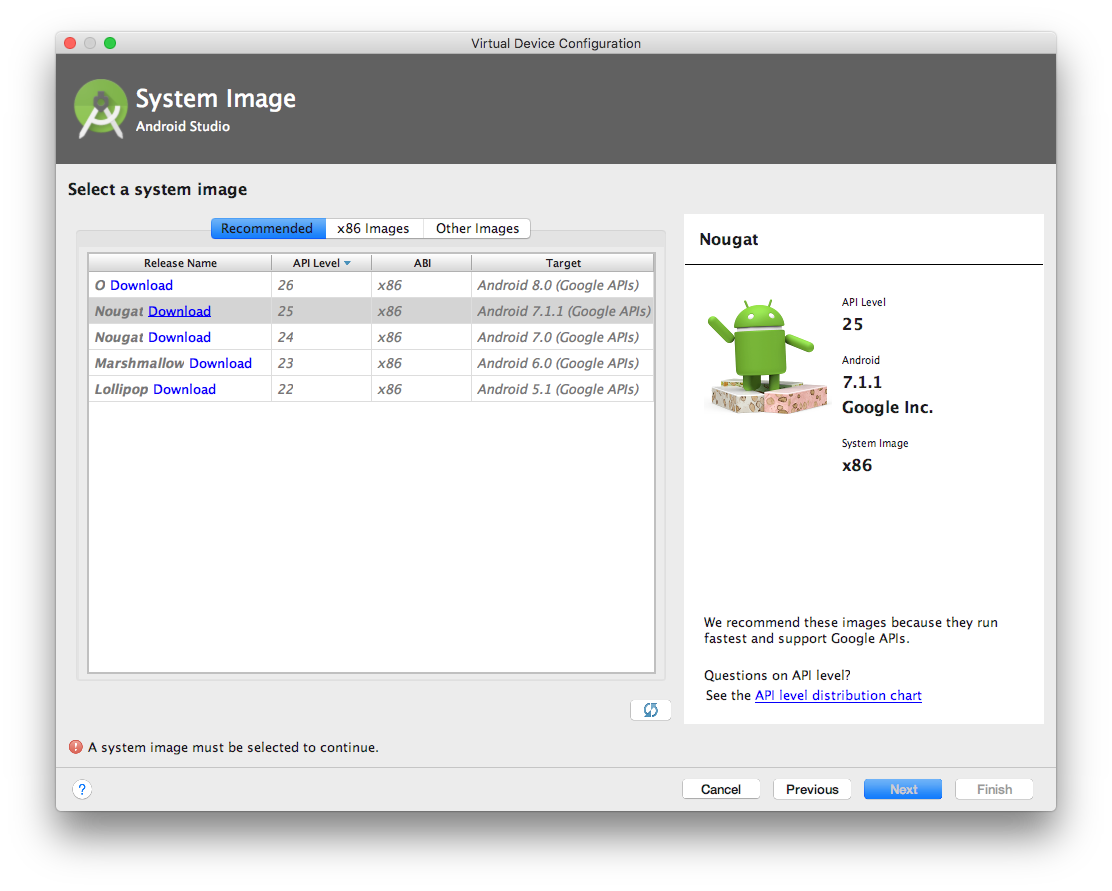
Select Nougat (API level 25) as shown below. You may need to first click on the 'Download' link next to the system image name to download it before it can be selected. Once it is downloaded click 'Next'.
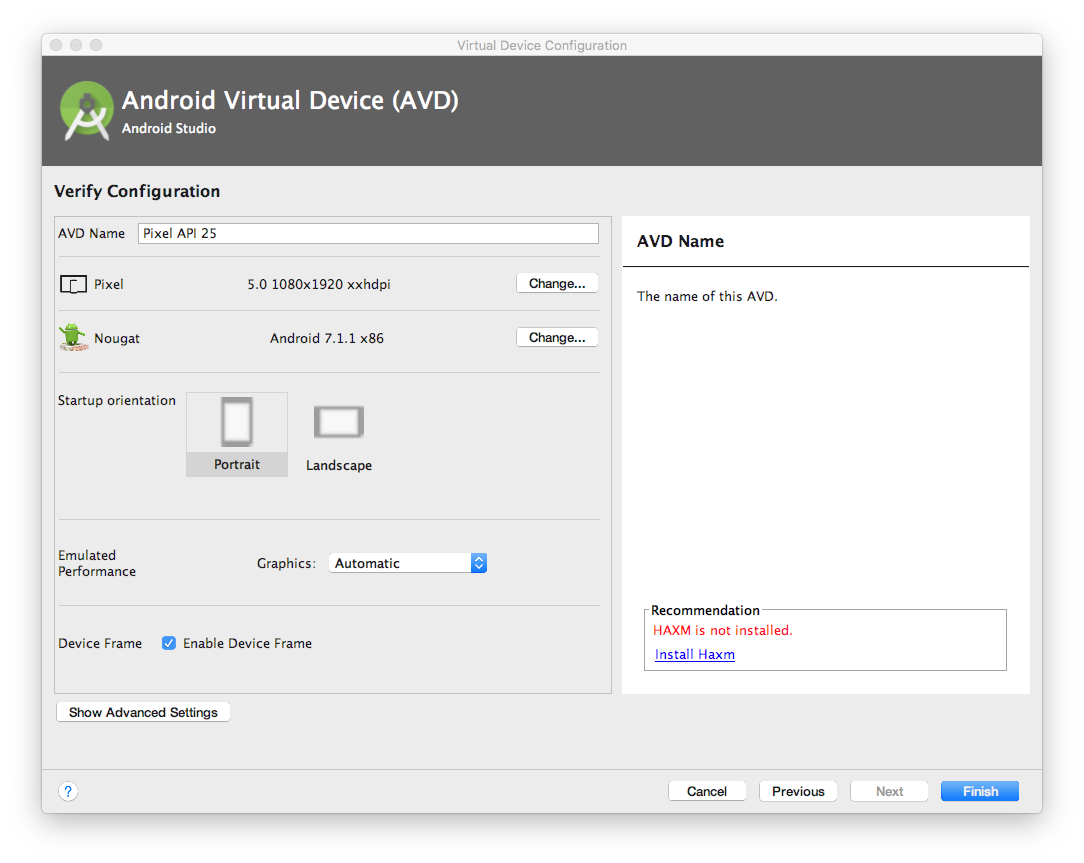
Give your Android Virtual Device (AVD) a name. Also, look for recommendations in the right pane. Note in this case HAXM is not installed. So, we'll install Haxm by clicking the 'Install Haxm' link.
Keep the defaults as shown below and click 'Next'.
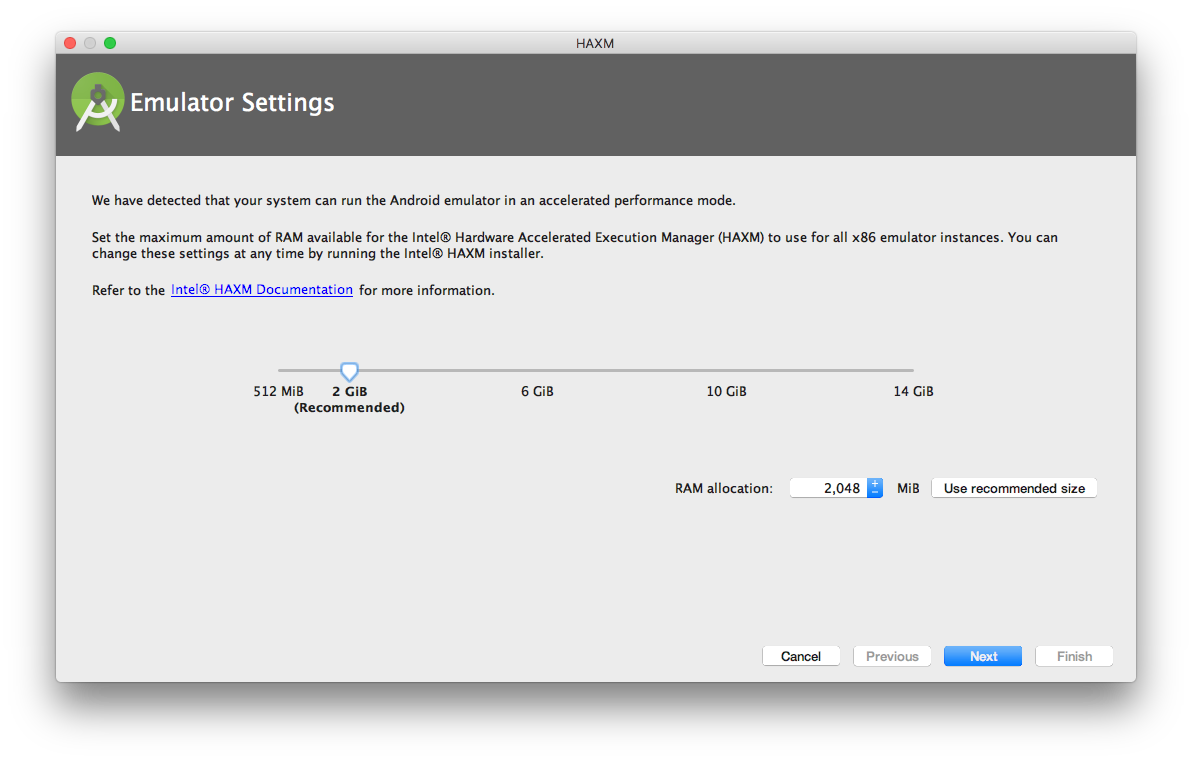
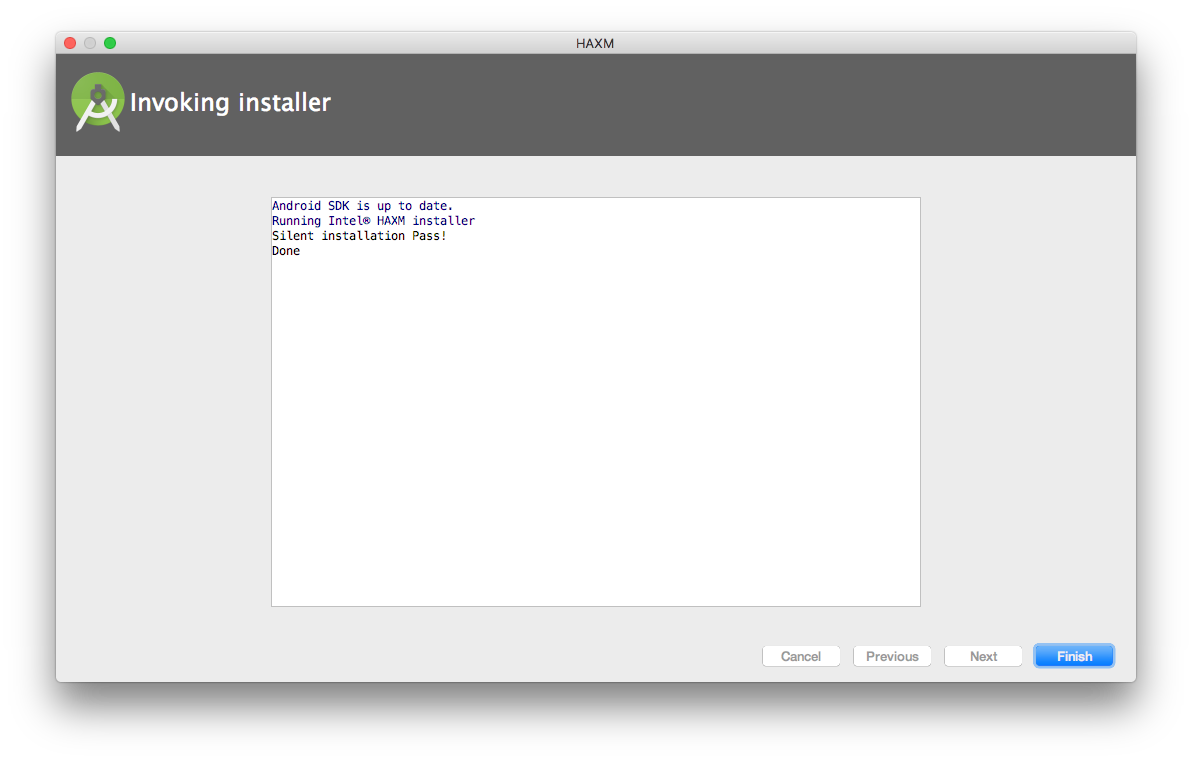
HAXM will install as shown below. Finally click 'Finish' in the lower right corner.
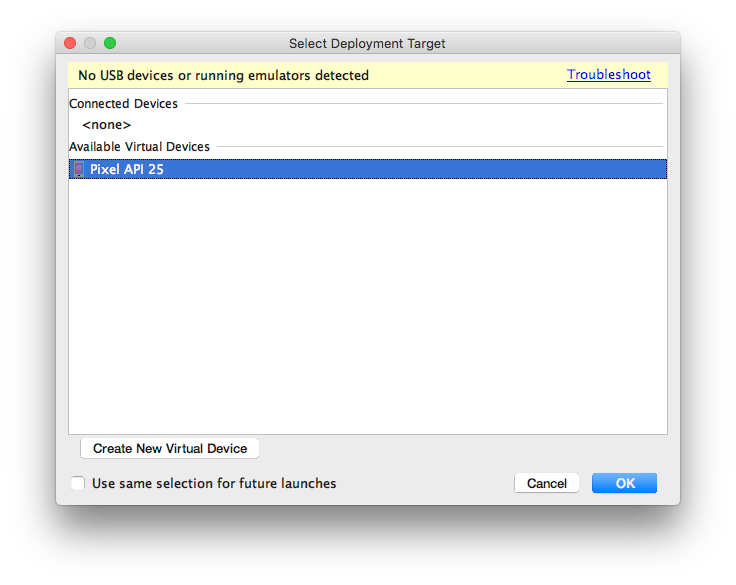
At this point, you should see your new AVD which you can select and click 'OK'.
Once selected, you should see a new AVD window appear and it should boot as shown below.
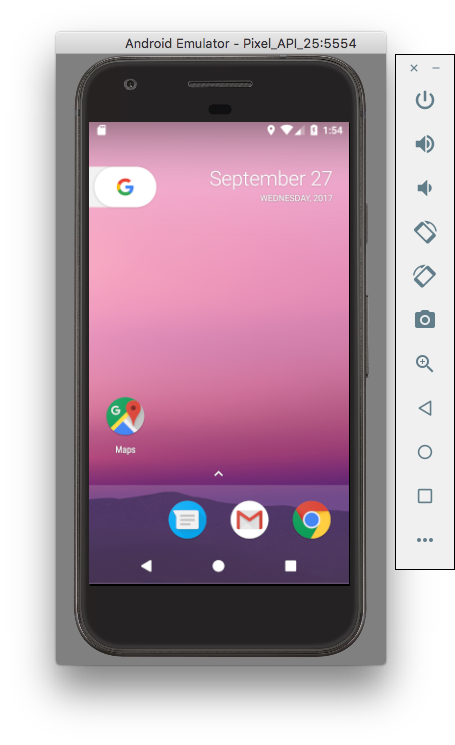
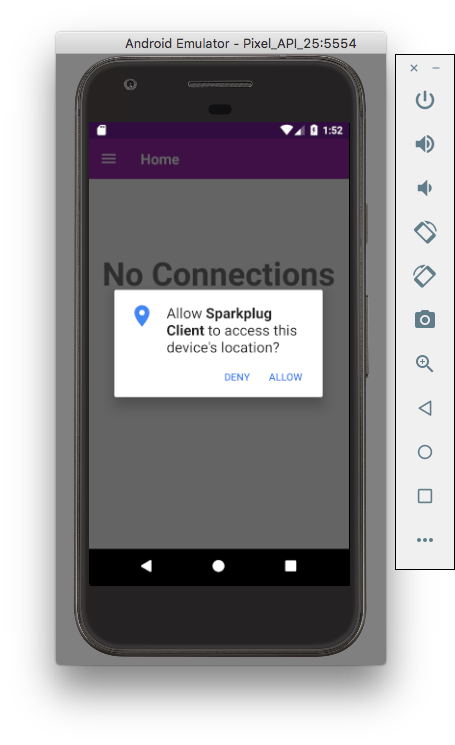
After booting, you should see the Android Sparkplug Demo Application start up and request access to the device's location. Select 'ALLOW'.
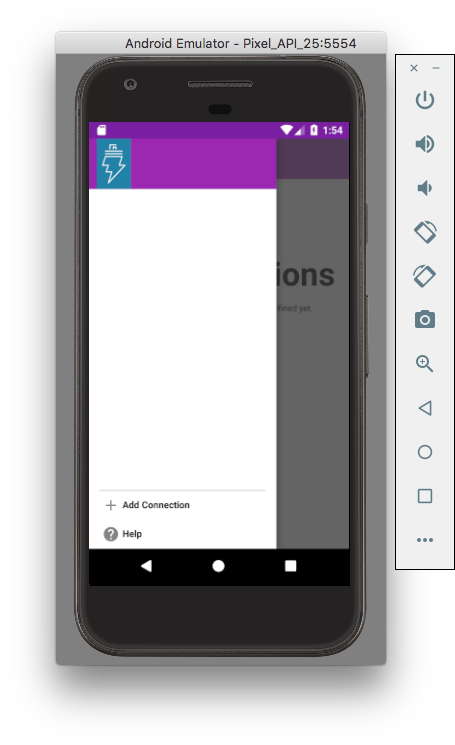
Finally you should see a screen showing 'No Connections'. This means everything is up and running and you are ready for the ICC Tutorial.

Interact with the Application
Click on the three horizontal bars in the top left of the application to bring up the list of connection. It will most likely be empty.
Click on the "+ Add Connection" link at the bottom to add a new connection.
Change the Server address to 10.0.2.2 as shown below:
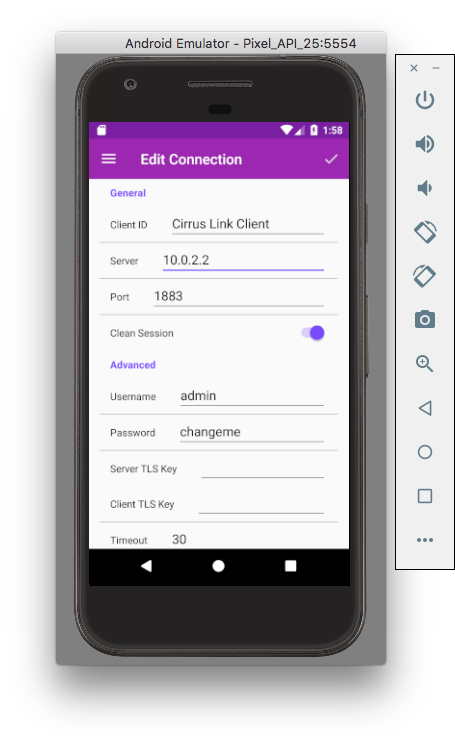
When finished, click the check mark in the top right. Your client should automatically connect to the local MQTT Server provided by the MQTT Distributor module running in Ignition.

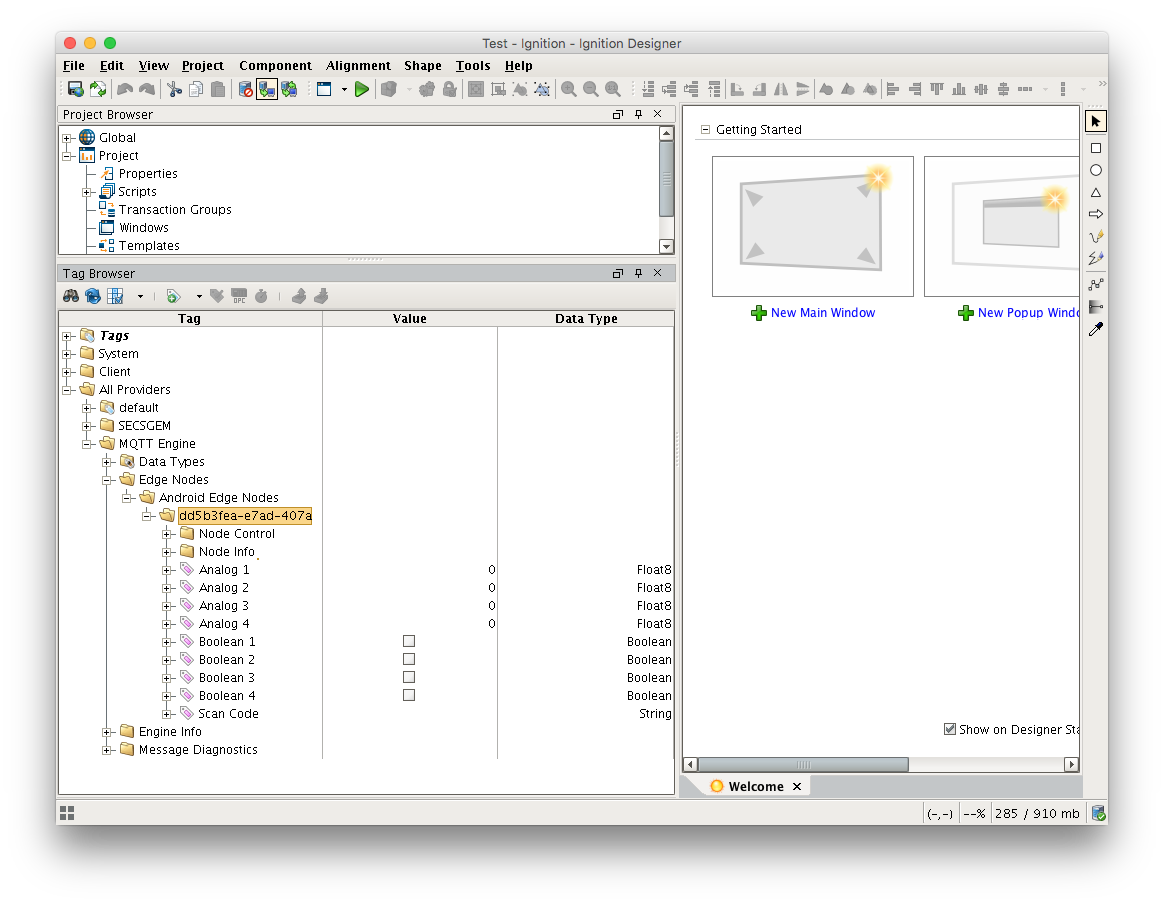
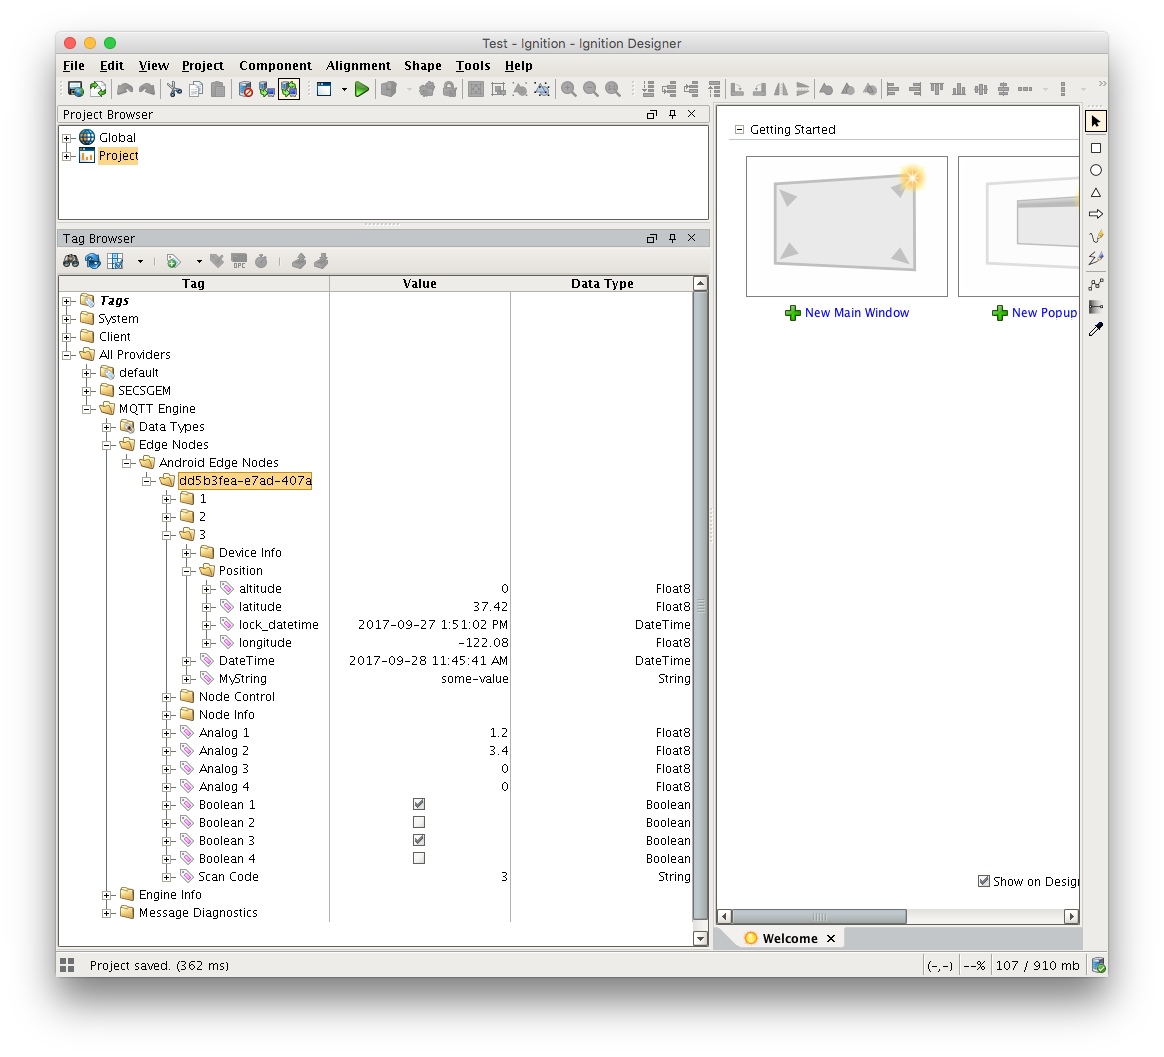
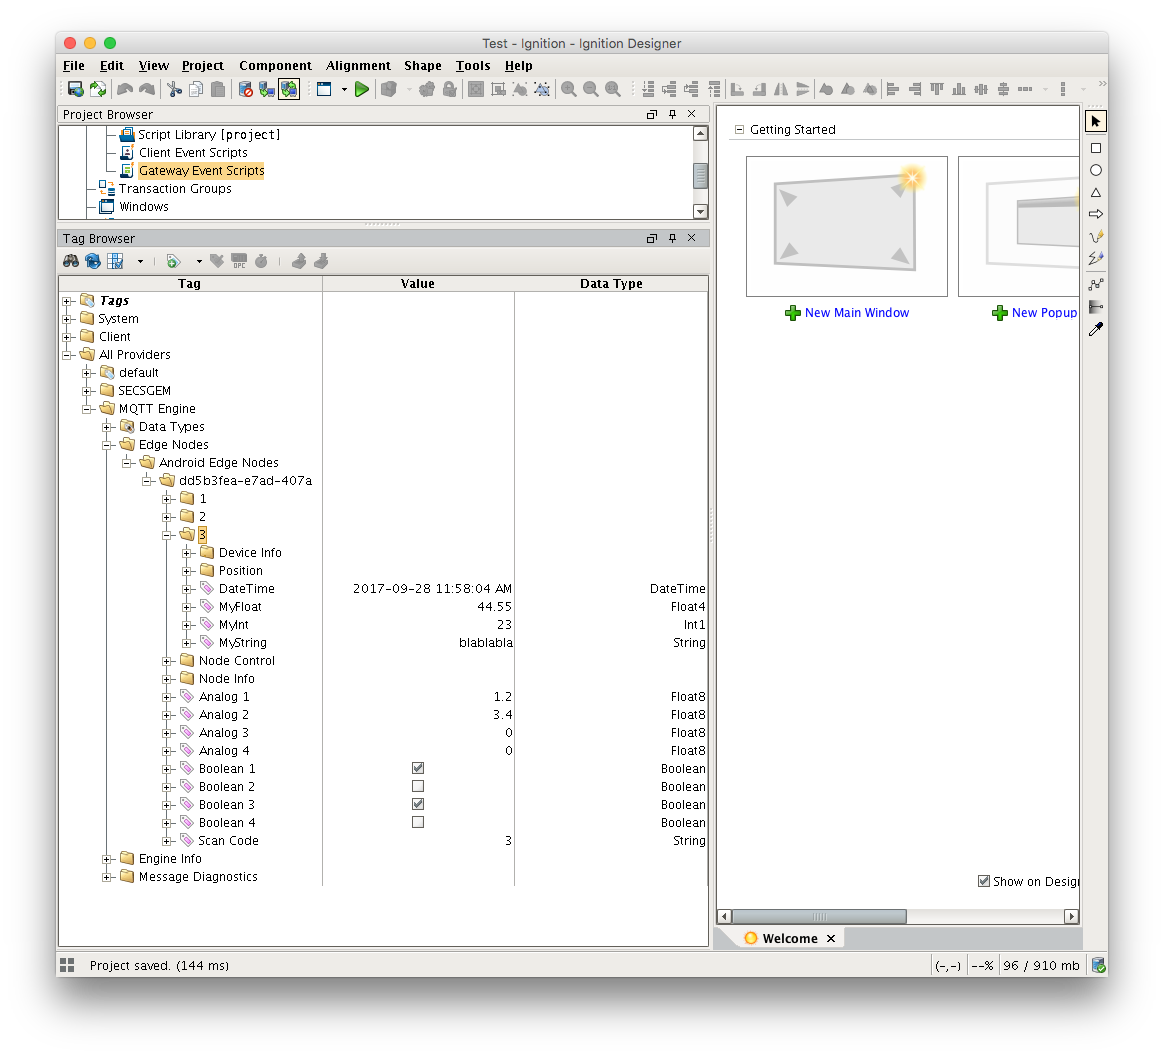
In the Ignition Designer's Tag Browser you will see the tag tree representing the Android Emulator appear in the "All Providers/MQTT Engine/Edge Nodes/Android Edge Nodes" folder as shown below.
The MESSAGES Tab
The first shows a history of the MQTT messages are are published from the Android application as well as any messages received from the MQTT server. This Tab is useful when debugging the MQTT communication to and from the MQTT Server.
The I/O Tab
The I/O tab in the Android application has four analog and four boolean fields corresponding the the Tags in the the Tag Browser. If you change the values of the field in the Android application and click SUBMIT, the corresponding tags will be updated in the Ignition Designer as shown below.
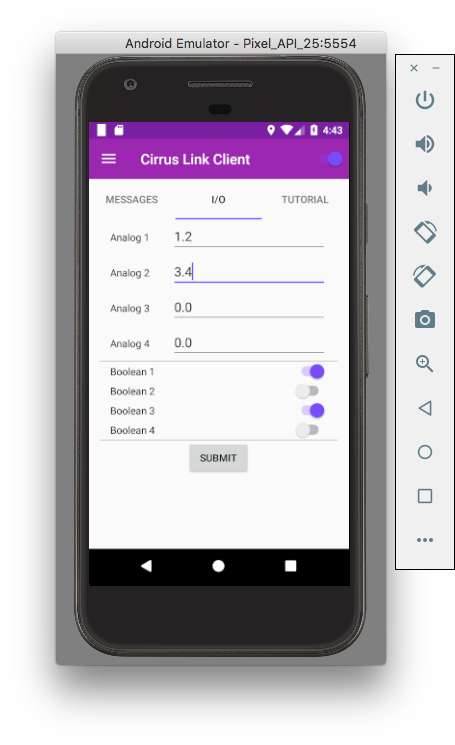
 Conversley, tags may also be written to in the Ignition Designer and their values will be updated in the corresponding fields on the Android device.
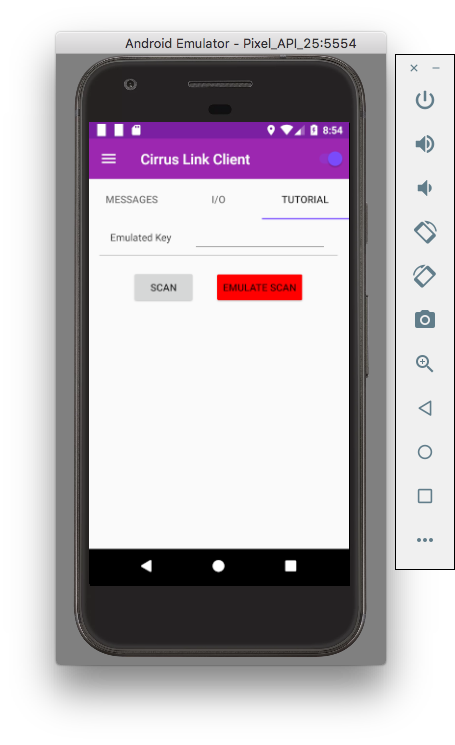
The TUTORIAL Tab
The third tab represents a scanner application. The scanner is used to publish a code to a Tag in Ignition. A script is used in Ignition to receive the new value of the Tag, perform some logic based on that value, and publish a new message back to the application. That application will then dynamically render fields in the third tab corresponding the Metrics contained in that message. The third tab is shown below.
Before we start publishing scans from the application, we need to set up the event script in Ignition. In order to create the script in Ingition, the Sparkplug Python client libraries will need to be added to the Ignition installation. The libraries can be found here: Sparkplug Python Libraries
Dowload and copy the the library folders into the following directory, found where your Ignition gateway is installed:
[Ignition_Install_Dir]/user-lib/pylib/
When complete, you should have the following two folders in that directory:
google/protobuf
sparkplug
Now go to the Ignition Designer's Project Browser and double-click on "Project/Scripts/Gateway Event Scripts" as shown below.
 This will bring up the Gateway Event Scripts Window. Select the "Tag Change" option on the left.
 To create a new Tag Change script click on the little tag icon (with the green plus) in the bottom left of the script window. This will create a New Script as shown below.
 Give the script a name and then click on the click "Insert Tag..." button to the right of the Tag Path(s) section as shown below.
 This will bring up a window to choose a Tag that the script will be applied to. Navigate to the "Scan Code" Tag as shown below, select it, and click OK.
 Copy down the UUID of the Android application (found in the Tag path) as shown below. This UUID will be needed in a few more steps.
 Now click on the on the "Script" tab.

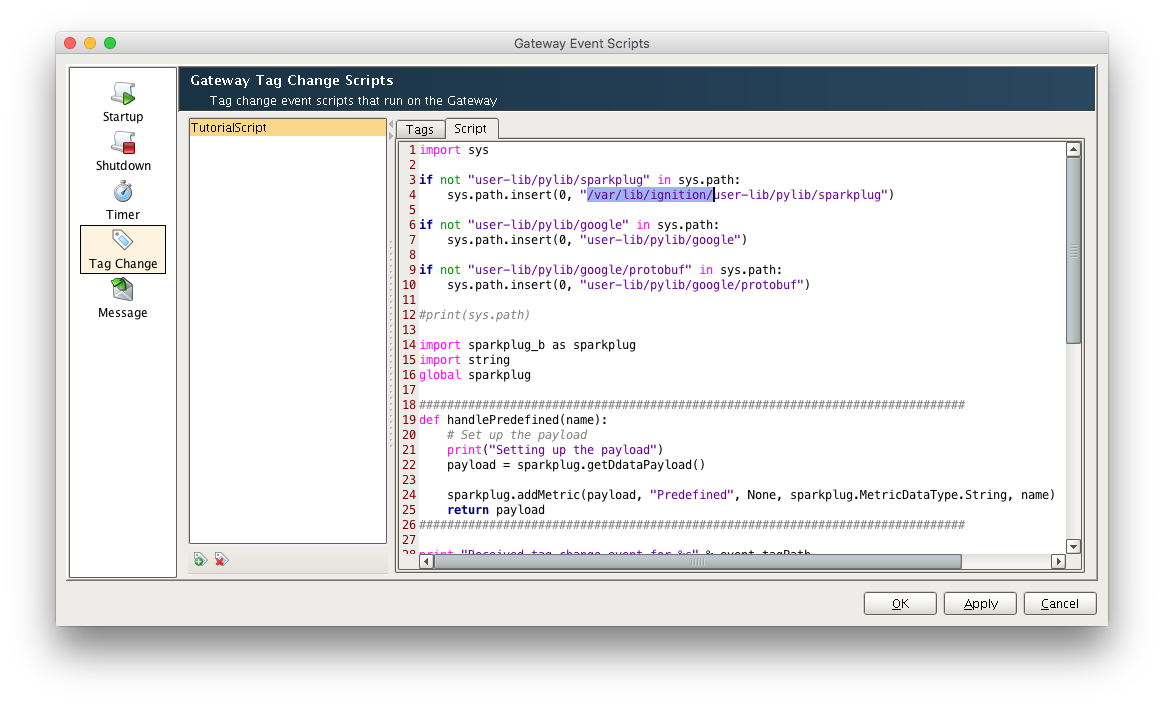
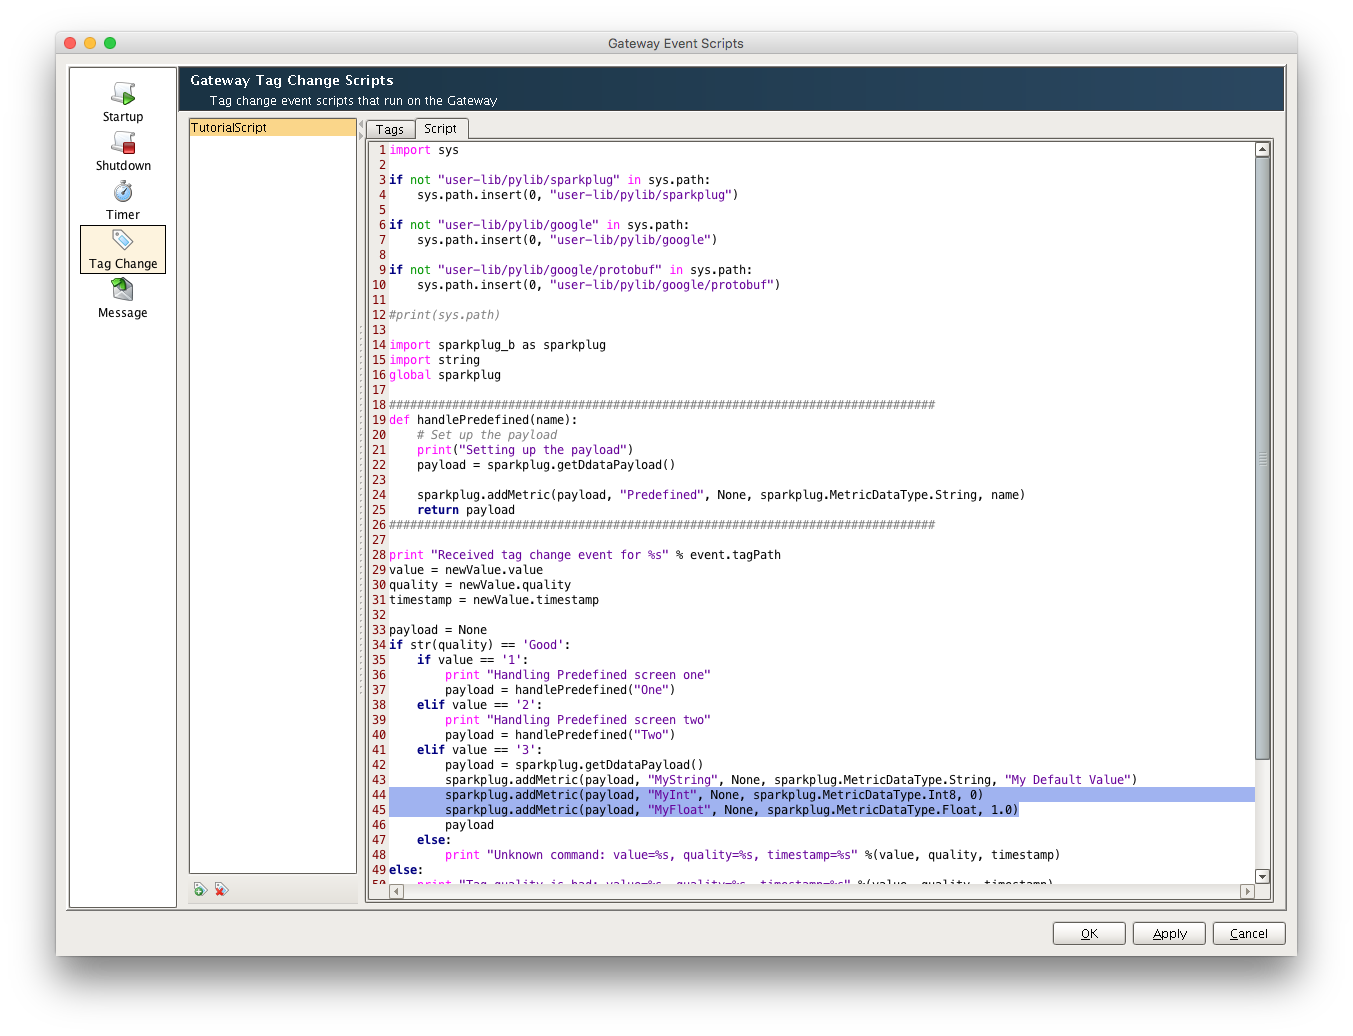
Copy the sample script provided below and paste it into the Script window.
import sys
if not "user-lib/pylib/sparkplug" in sys.path:
sys.path.insert(0, "user-lib/pylib/sparkplug")
if not "user-lib/pylib/google" in sys.path:
sys.path.insert(0, "user-lib/pylib/google")
if not "user-lib/pylib/google/protobuf" in sys.path:
sys.path.insert(0, "user-lib/pylib/google/protobuf")
#print(sys.path)
import sparkplug_b as sparkplug
import string
global sparkplug
##############################################################################
def handlePredefined(name):
# Set up the payload
print("Setting up the payload")
payload = sparkplug.getDdataPayload()
sparkplug.addMetric(payload, "Predefined", None, sparkplug.MetricDataType.String, name)
return payload
##############################################################################
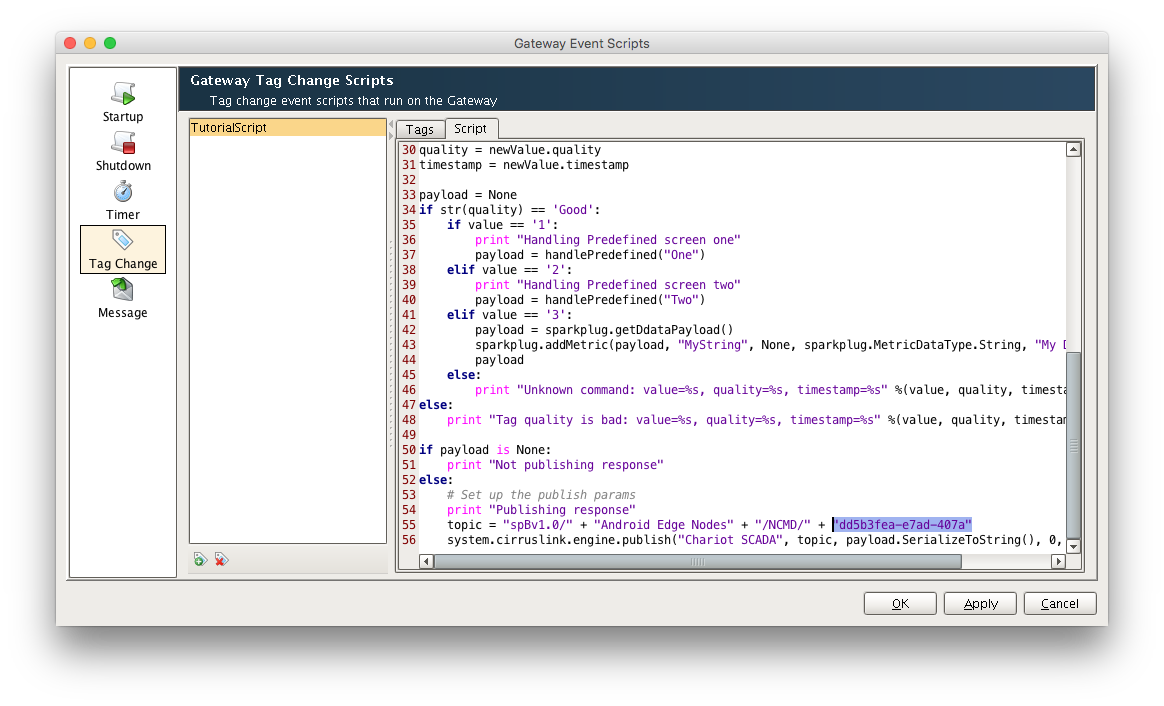
print "Received tag change event for %s" % event.tagPath
value = newValue.value
quality = newValue.quality
timestamp = newValue.timestamp
payload = None
if str(quality) == 'Good':
if value == '1':
print "Handling Predefined screen one"
payload = handlePredefined("One")
elif value == '2':
print "Handling Predefined screen two"
payload = handlePredefined("Two")
elif value == '3':
payload = sparkplug.getDdataPayload()
sparkplug.addMetric(payload, "MyString", None, sparkplug.MetricDataType.String, "My Default Value")
payload
else:
print "Unknown command: value=%s, quality=%s, timestamp=%s" %(value, quality, timestamp)
else:
print "Tag quality is bad: value=%s, quality=%s, timestamp=%s" %(value, quality, timestamp)
if payload is None:
print "Not publishing response"
else:
# Set up the publish params
print "Publishing response"
topic = "spBv1.0/" + "Android Edge Nodes" + "/NCMD/" + "be2b9f27-f133-4afe"
system.cirruslink.engine.publish("Chariot SCADA", topic, payload.SerializeToString(), 0, 0)
Optionally, depending on the OS that the Ignition Gateway is running on and the method of installation, lines 4, 7, and 10 of the script may need to be updated to include the full file system paths to the user-lib directory. This should not be necessary if Ignition is running on Windows or Mac OS, or has been installed from a zip file.
For example, if Ignition is running on Linux and installed using the Linux installer, the user-lib files are located in a different directory than the ignition runtime, so the full path will need to be used as shown below.
Next the UUID on line 55 will need to be replaces with the UUID that was copied earlier as shown below.
With the script finished click OK to save the new Tag Change script.
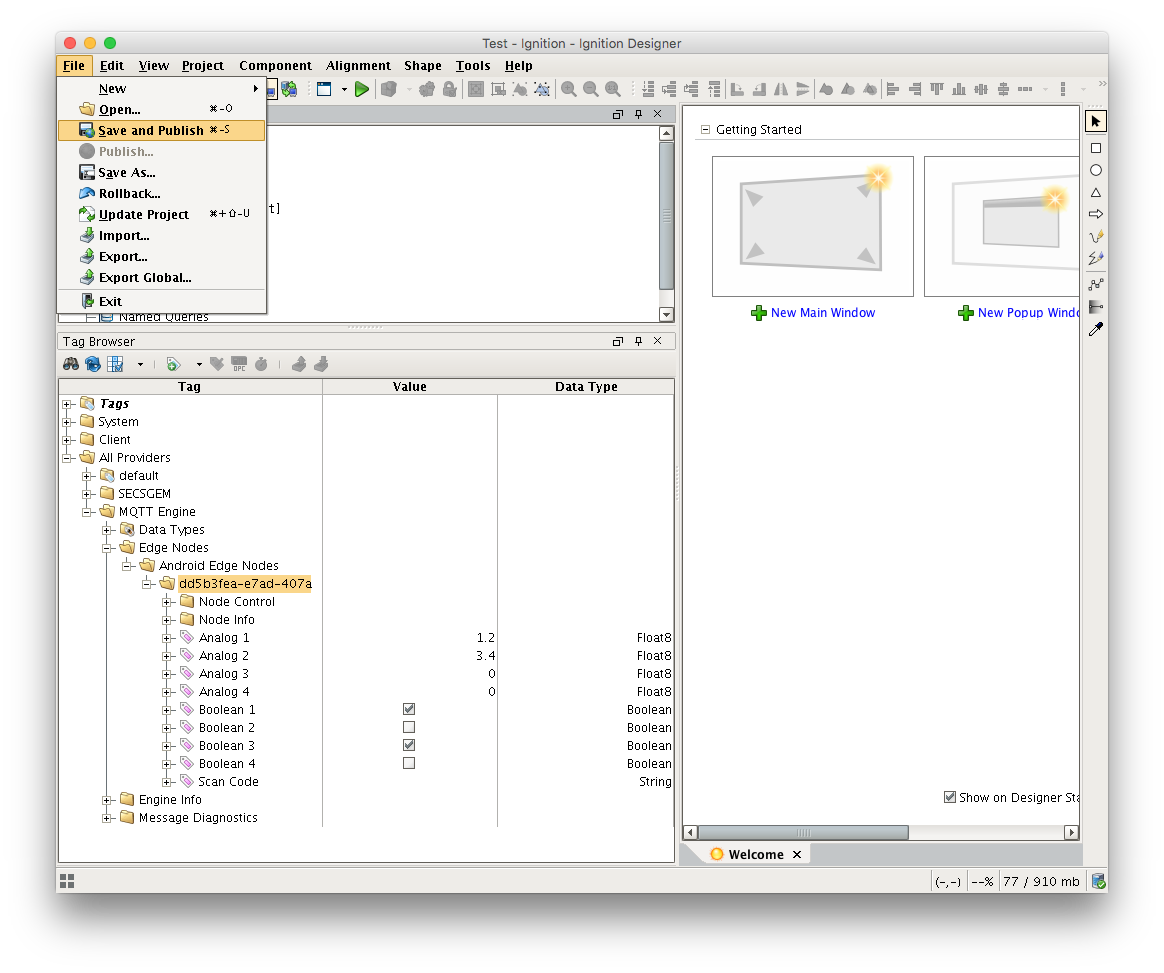
 Now click Save and Publish from the File menu as shown below.
Pre-defined Screens
We can now use the third tab of the Android application to publish a "scanned" key value to the "Scan Code" tag. On this tab there is one field and two buttons which provide the follow functionality:
- SCAN
- This button requires the use of the Barcode Scanner application to scan a barcode to use for the key value to publish (not part of this tutorial).
- EMULATE SCAN
- This is the button that will be used to "emulate" a scan by using the value of the Emulated Key field.
- Emulated Key
- A String field to use as a "scanned" key value.
The Android application has two pre-defined screens associated with two different keys: "1" and "2".
Enter the first key "1" into the Emulated Key field and click EMULATE SCAN. You will see two new field show up on the screen.
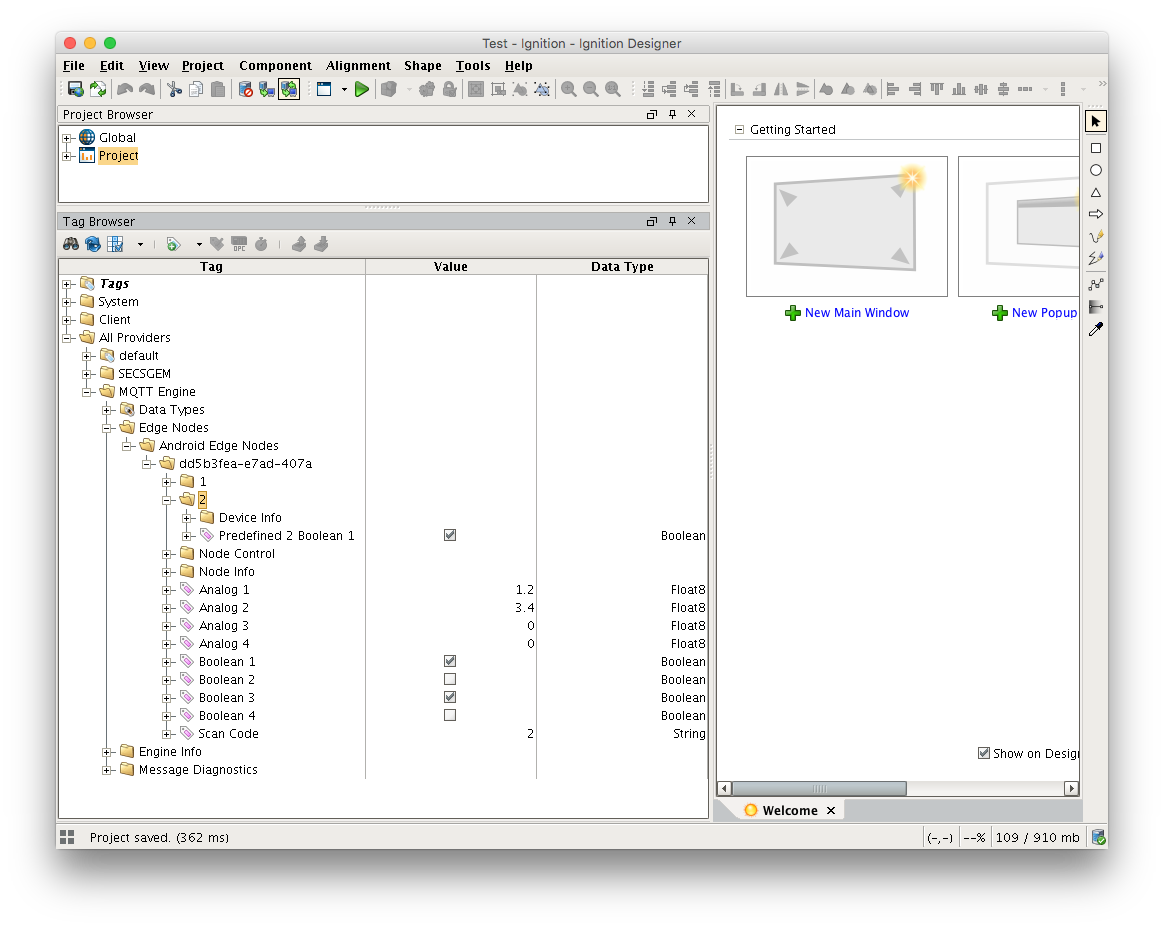
 These two fields, "Analog 1" and "Boolean 1", make up the first pre-defined screen. Enter values for these two fields and click SUBMIT. You will see a new folder appear in the Ignition Designer's Tag Browser representing the the scan code "1". There will be two tags under that folder representing the fields.
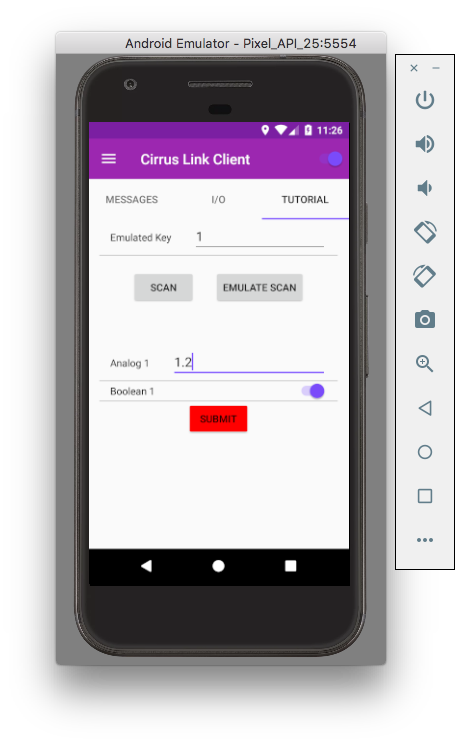
 Note: Unlike the I/O tab, these fields are only writeable from the Android application.
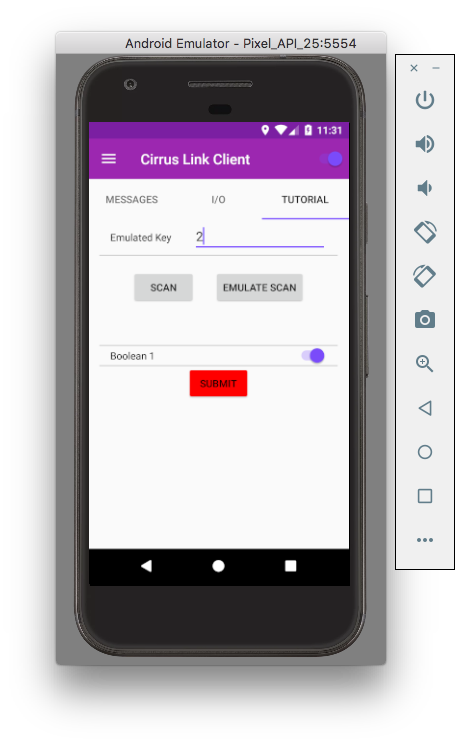
Enter the second key "2" into the Emulated Key field and click EMULATE SCAN. You will see a new form appear with a single Boolean field.

Toggle the Boolean field value and click SUBMIT. You will see a new folder appear in the Ignition Designer's Tag Browser representing the the scan code "2". There will be one tag under that folder representing the field.
Dynamic Screens
The third tab can be used to create dynamic screens based on the logic that is coded in the Tag Change script that we created in the Ignition Gateway.
Open the Gateway Event Scripts window in the Ignition Designer and navigate to the Script tab of the Tag Change script we created earlier.
 Lines 41-45 of this script contain the logic for processing a third scan code with value "3". In this section of code the script is constructing a Sparkplug payload and adding a single Metric to it. The Metric is of type String with the name "MyString" and a default value of "My Default Value". This Metric will be published back to the Andoid application. When the Android application receives the message it will dynamically build the screen, converting any Metrics containing in the payload to fields on the screen.
To see this code in action, enter the third key "3" into the Emulated Key field and click EMULATE SCAN. You will see the dynamic screen created, as shown below.
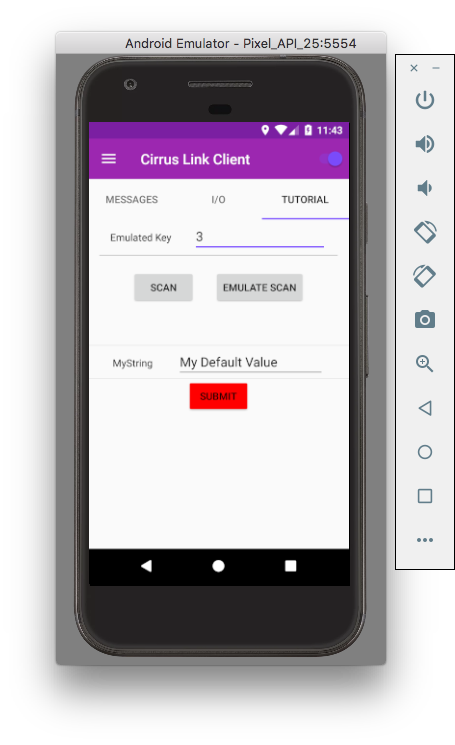
As with the previous screens, enter a new value for the field and click SUBMIT to see the tags appear in the Ignition Designer's Tag Browser. In addition to the dynamic field, the Android application will also publish the current date and time as well as a GPS position of the device. This additional data will appear as Tags under the new "3" folder as shown below.

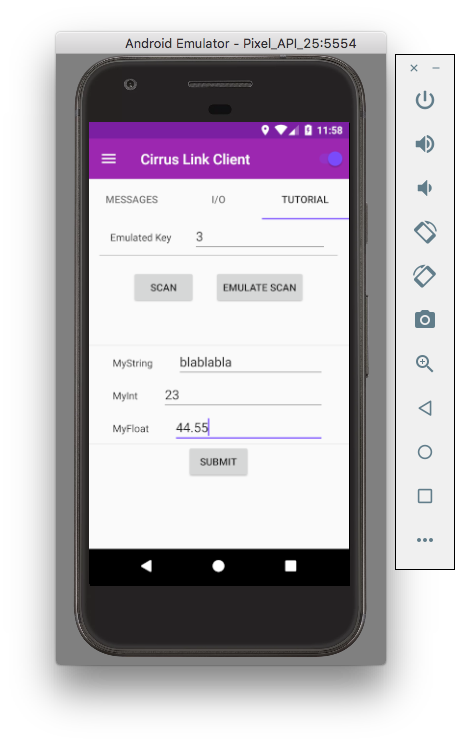
Modify the Tag Change script to include additional custom Metrics that will be dynamically created when the "3" key is scanned by the application. Be sure to click "Save and Publish" after each time the script is modified. Shown below is the addition of two more Metrics to the script.
Note that the Tag Change script will only be triggered when a different key is entered. In order to see the changes above you will first need to scan a different key ("1", "2", or something else) before scanning the dynamic screen key "3" again.
See the results of the newly updated script below.
Addional Metrics can be added to the script using the following types:
- Integers - Int8, Int16, Int32, Int64
- Unsigned Integers - UInt8, UInt16, UInt32, UInt64
- Others – Float, Double, Boolean, String
A full description of the capabilities of the Python script or Sparkplug client library is beyond the scope of this Tuturial.