![]()
Contents
Cirrus Link Resources
Cirrus Link Website![]()
Contact Us (Sales/Support)![]()
Inductive Resources
Ignition User Manual![]()
Knowledge Base Articles![]()
Inductive University![]()
Forum![]()
![]()
Cirrus Link Website![]()
Contact Us (Sales/Support)![]()
Ignition User Manual![]()
Knowledge Base Articles![]()
Inductive University![]()
Forum![]()
Prerequisites:
Overview:
Chariot MQTT Server is a MQTT 3.1.1 compliant MQTT server. It is capable of providing a functional replacement for MQTT Distributor in larger scale deployments. Like Inductive Automation's Ignition platform, it comes with a two hour re-settable trail period. It can also be set up with a license key from Cirrus Link to enable it permanently. Chariot MQTT Server provides a web based administration page for enabling and limiting user access to the MQTT server via an Access Control List (ACLs). Like MQTT Distributor it also supports TLS security and username/password authentication in addition to ACLs for user authorization.
Installation:
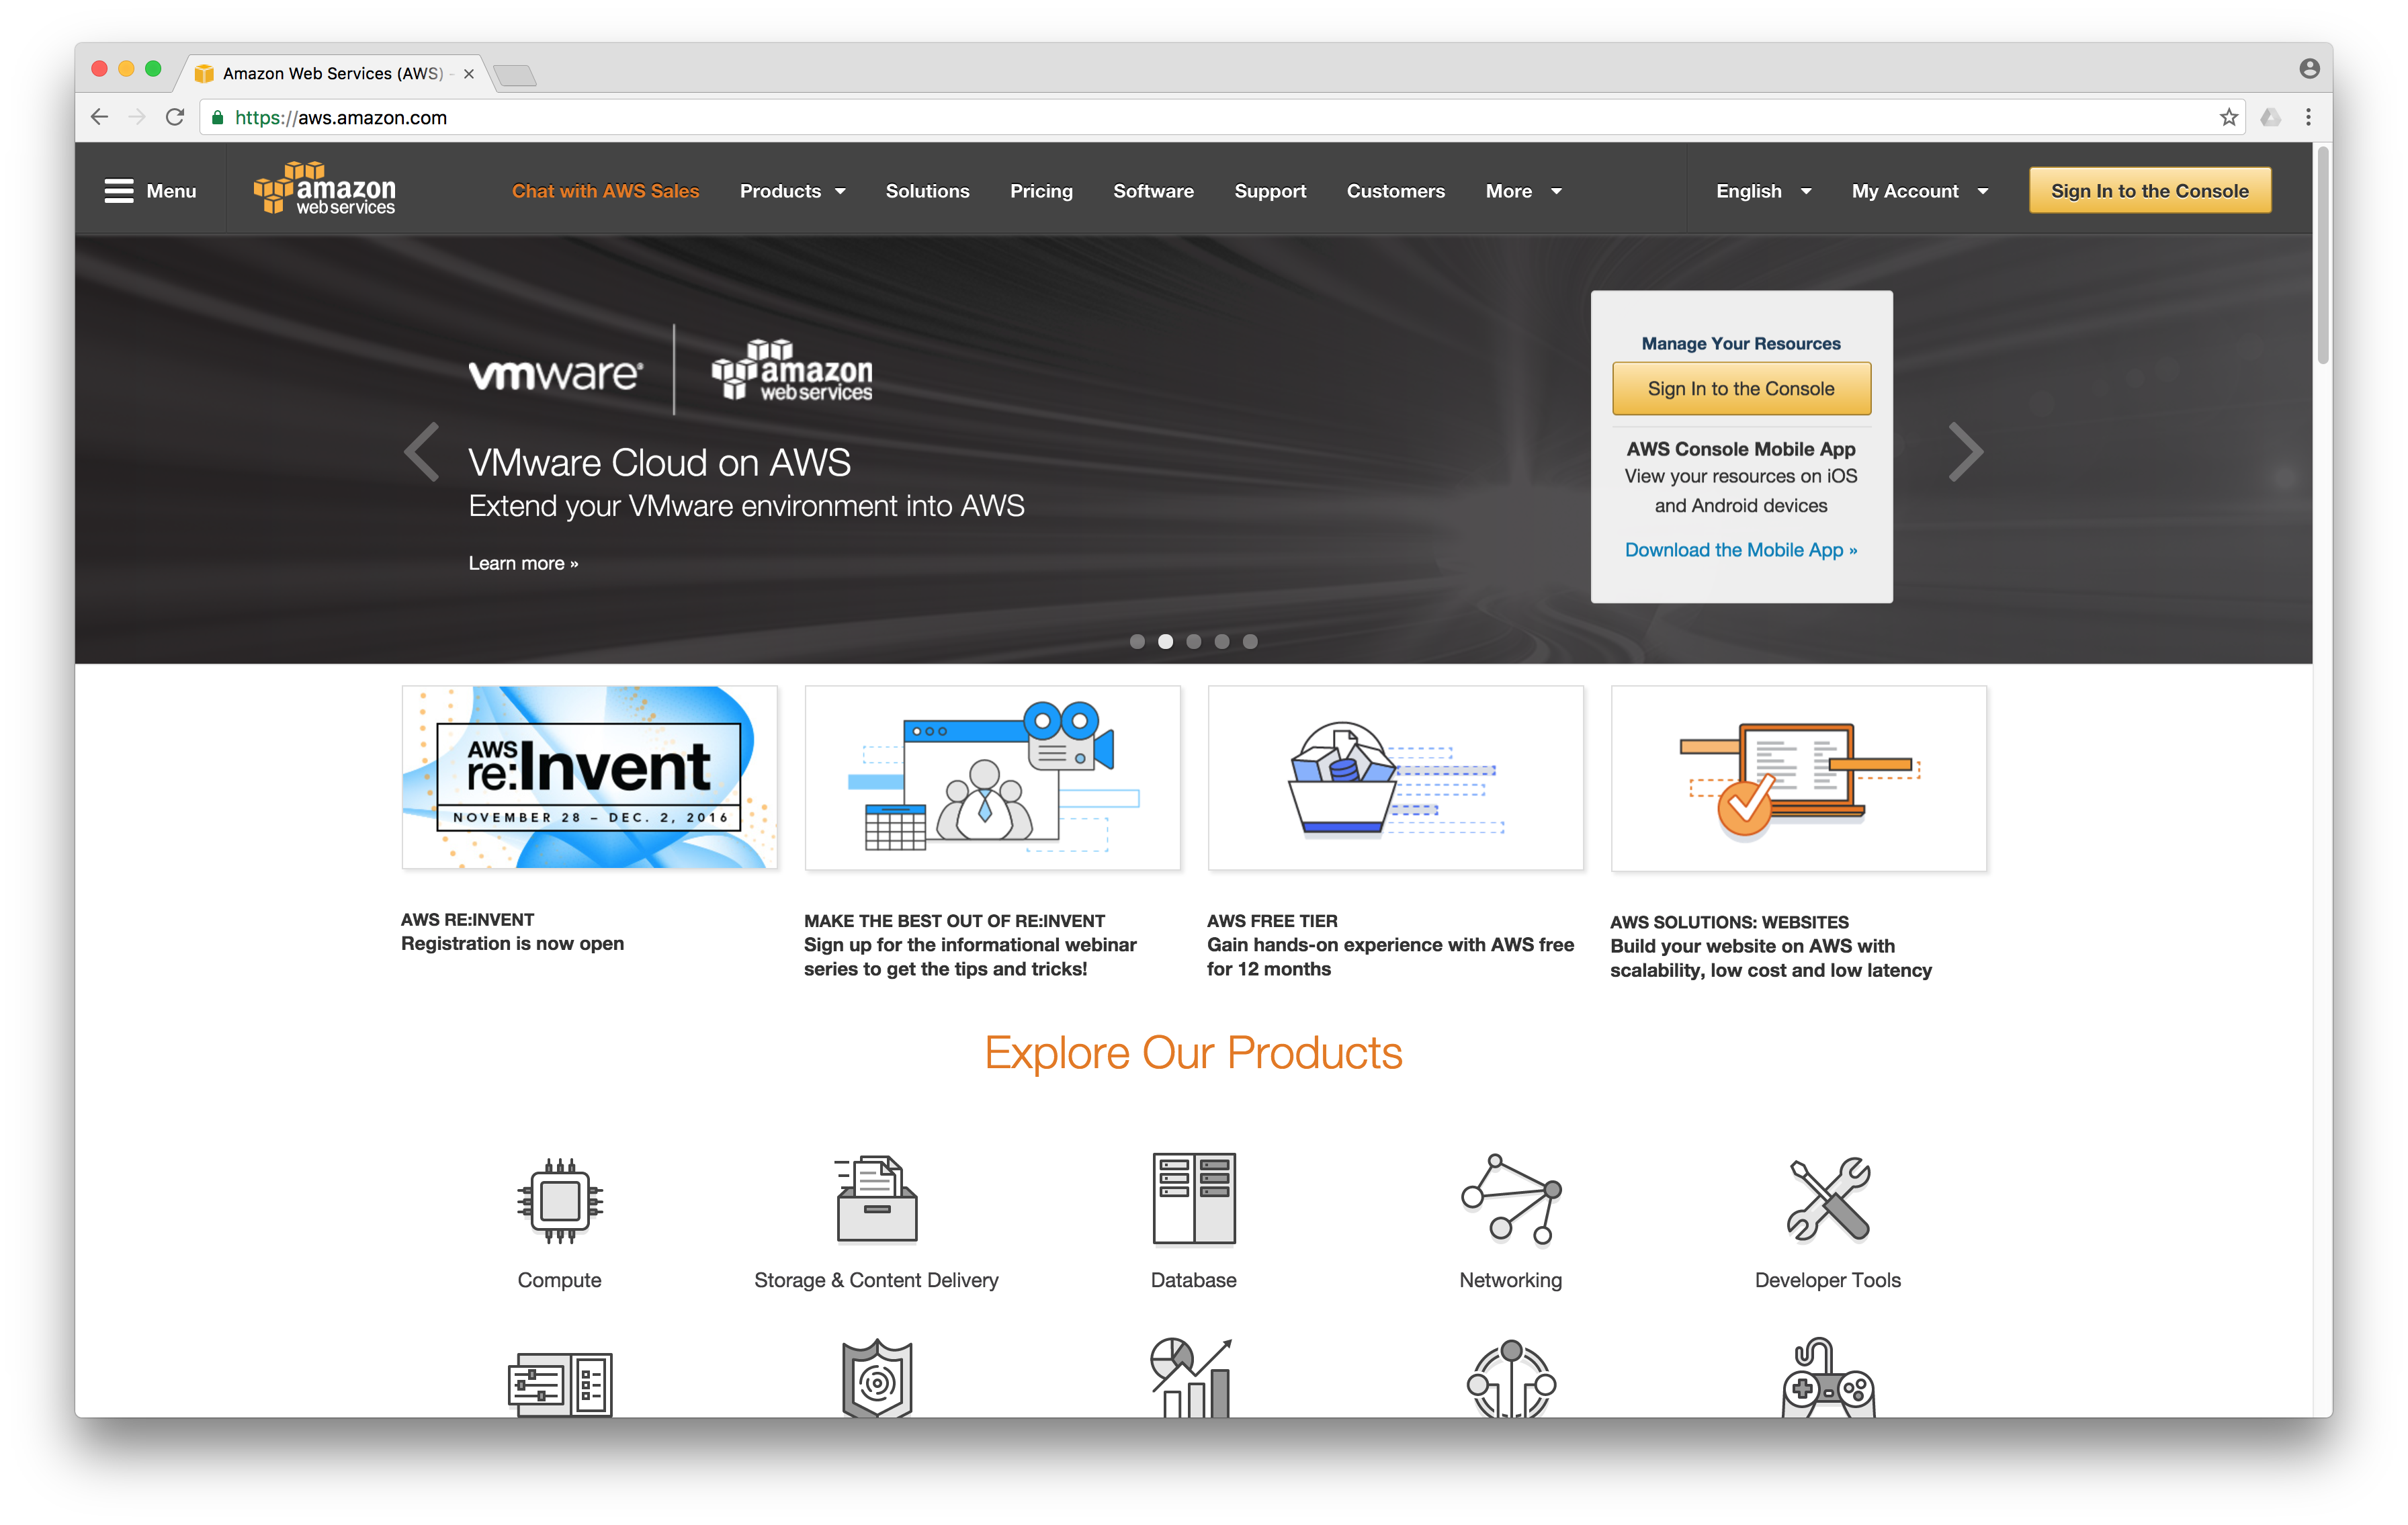
Browse to https://aws.console.com and click the 'Sign In to the Console' button in the upper right corner.
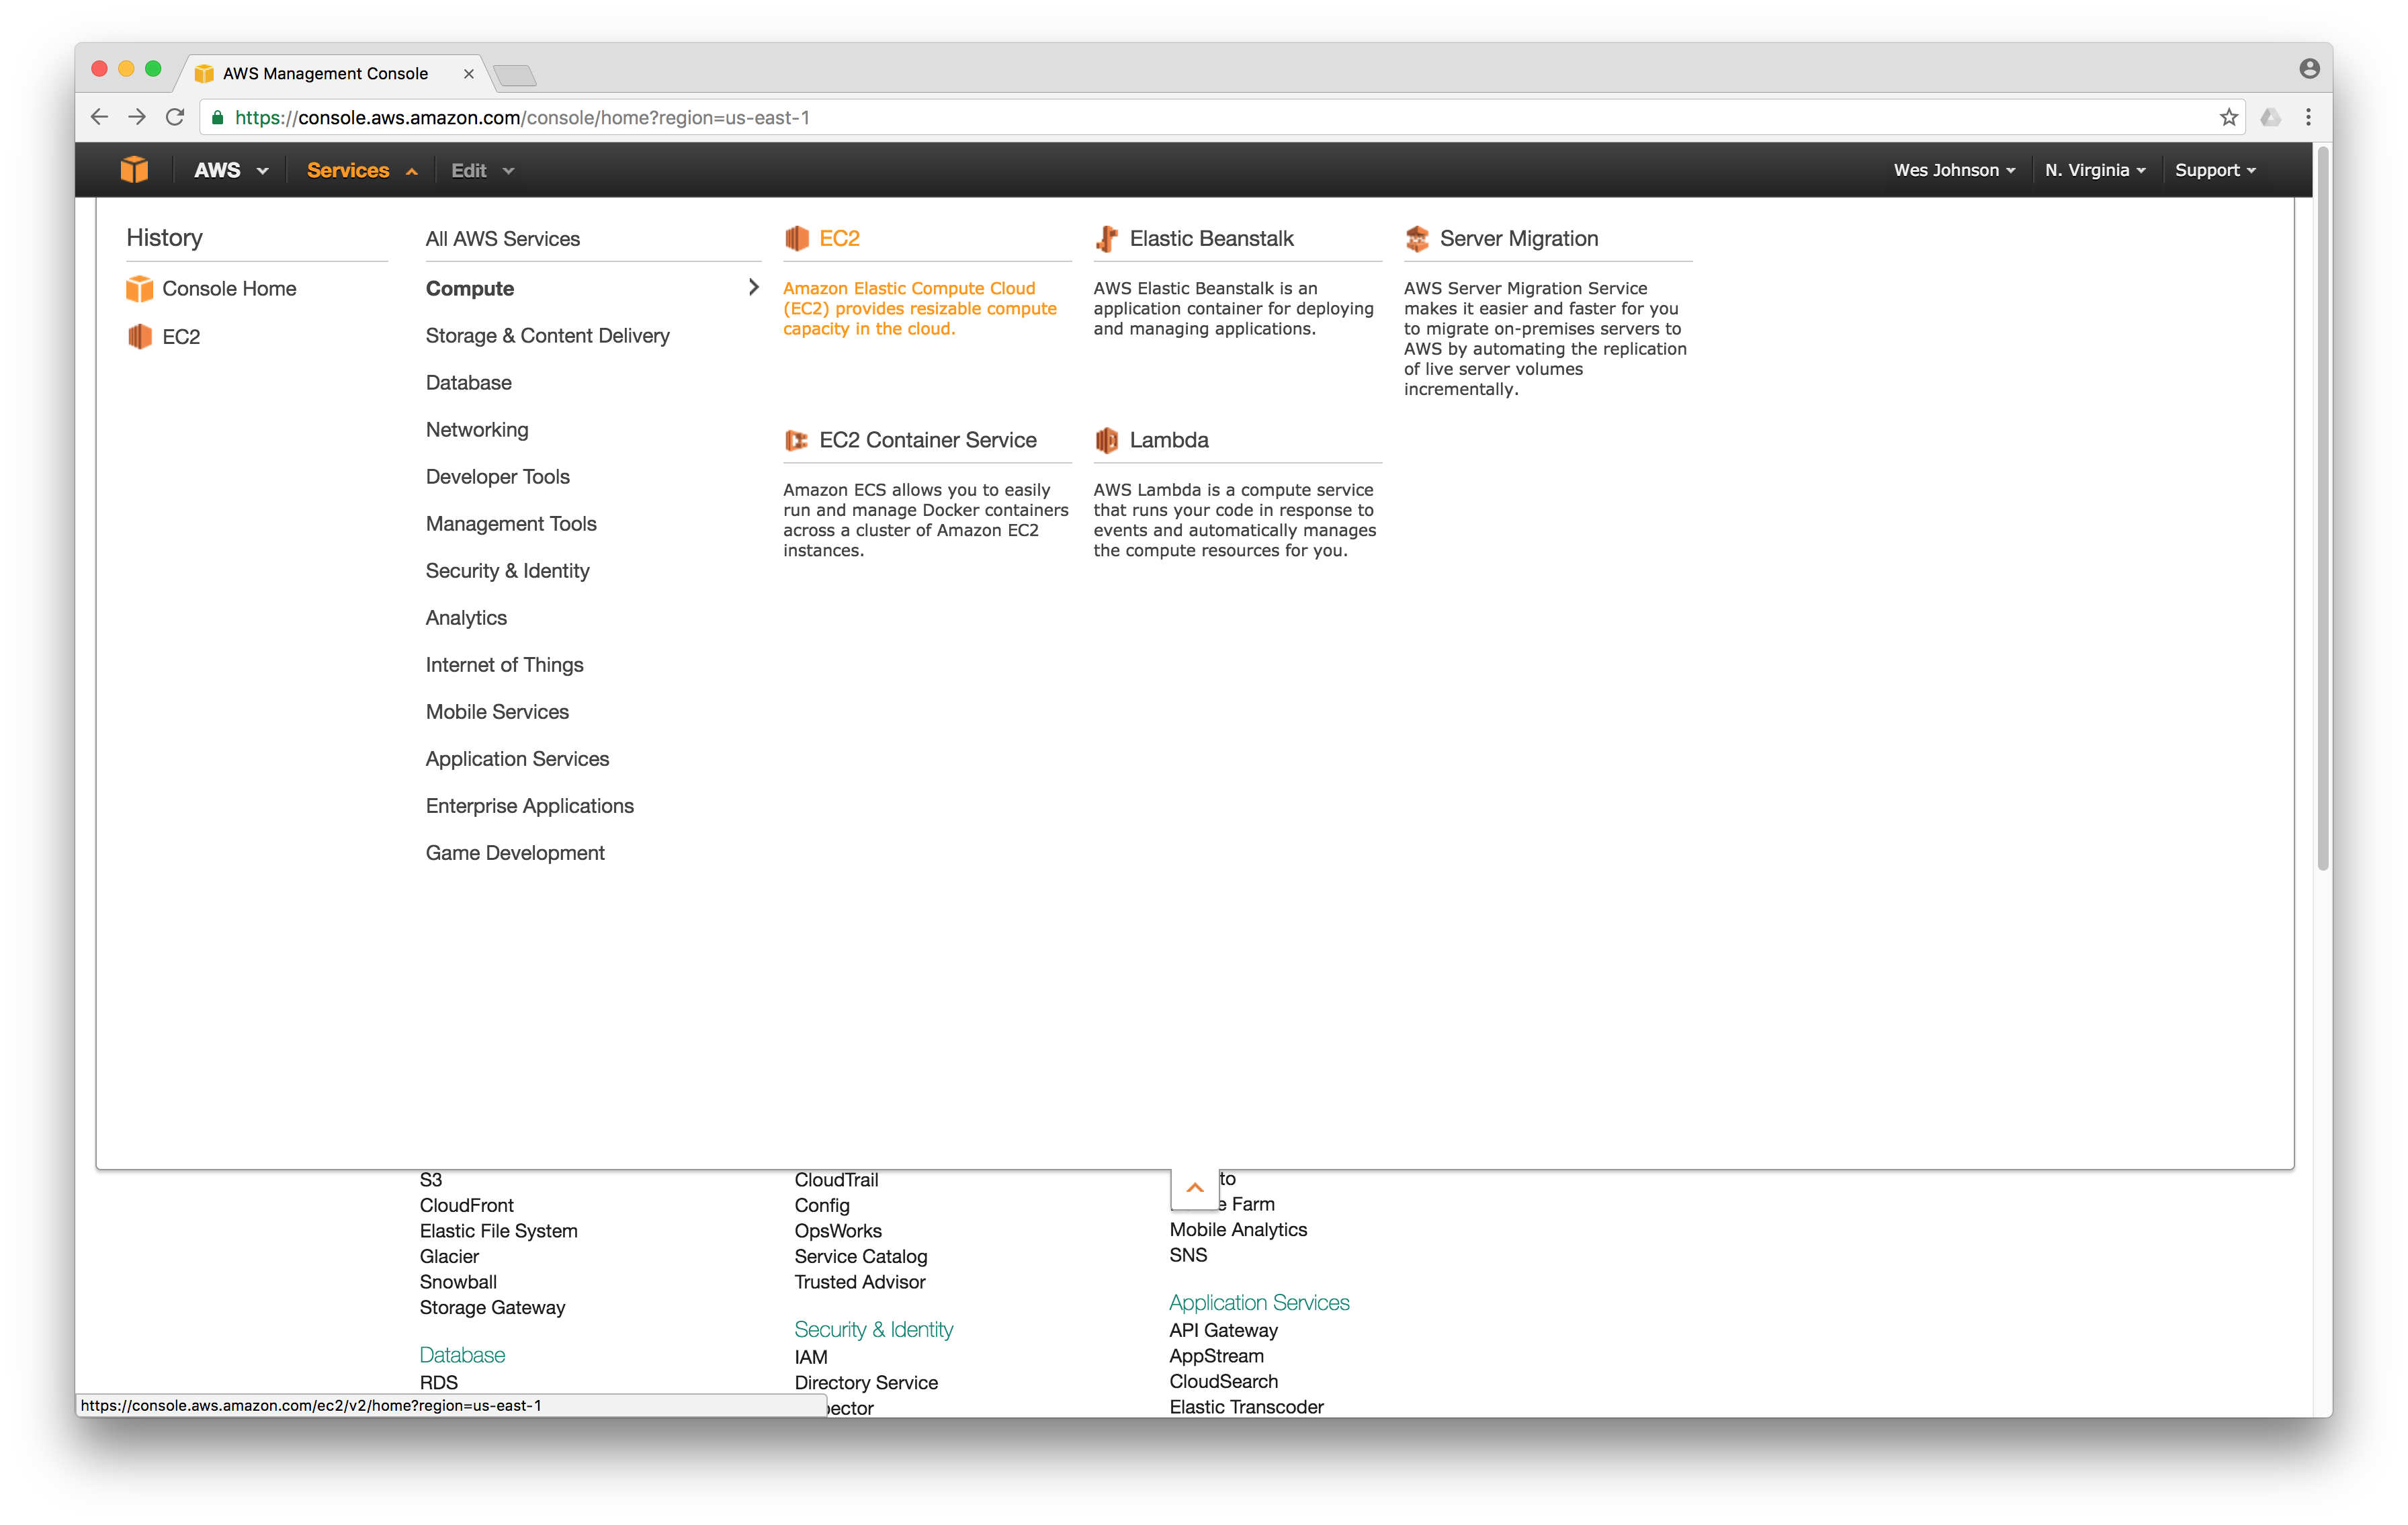
From the dropdown 'Services' menu in the upper left, select 'Compute' -> 'EC2' as shown below:
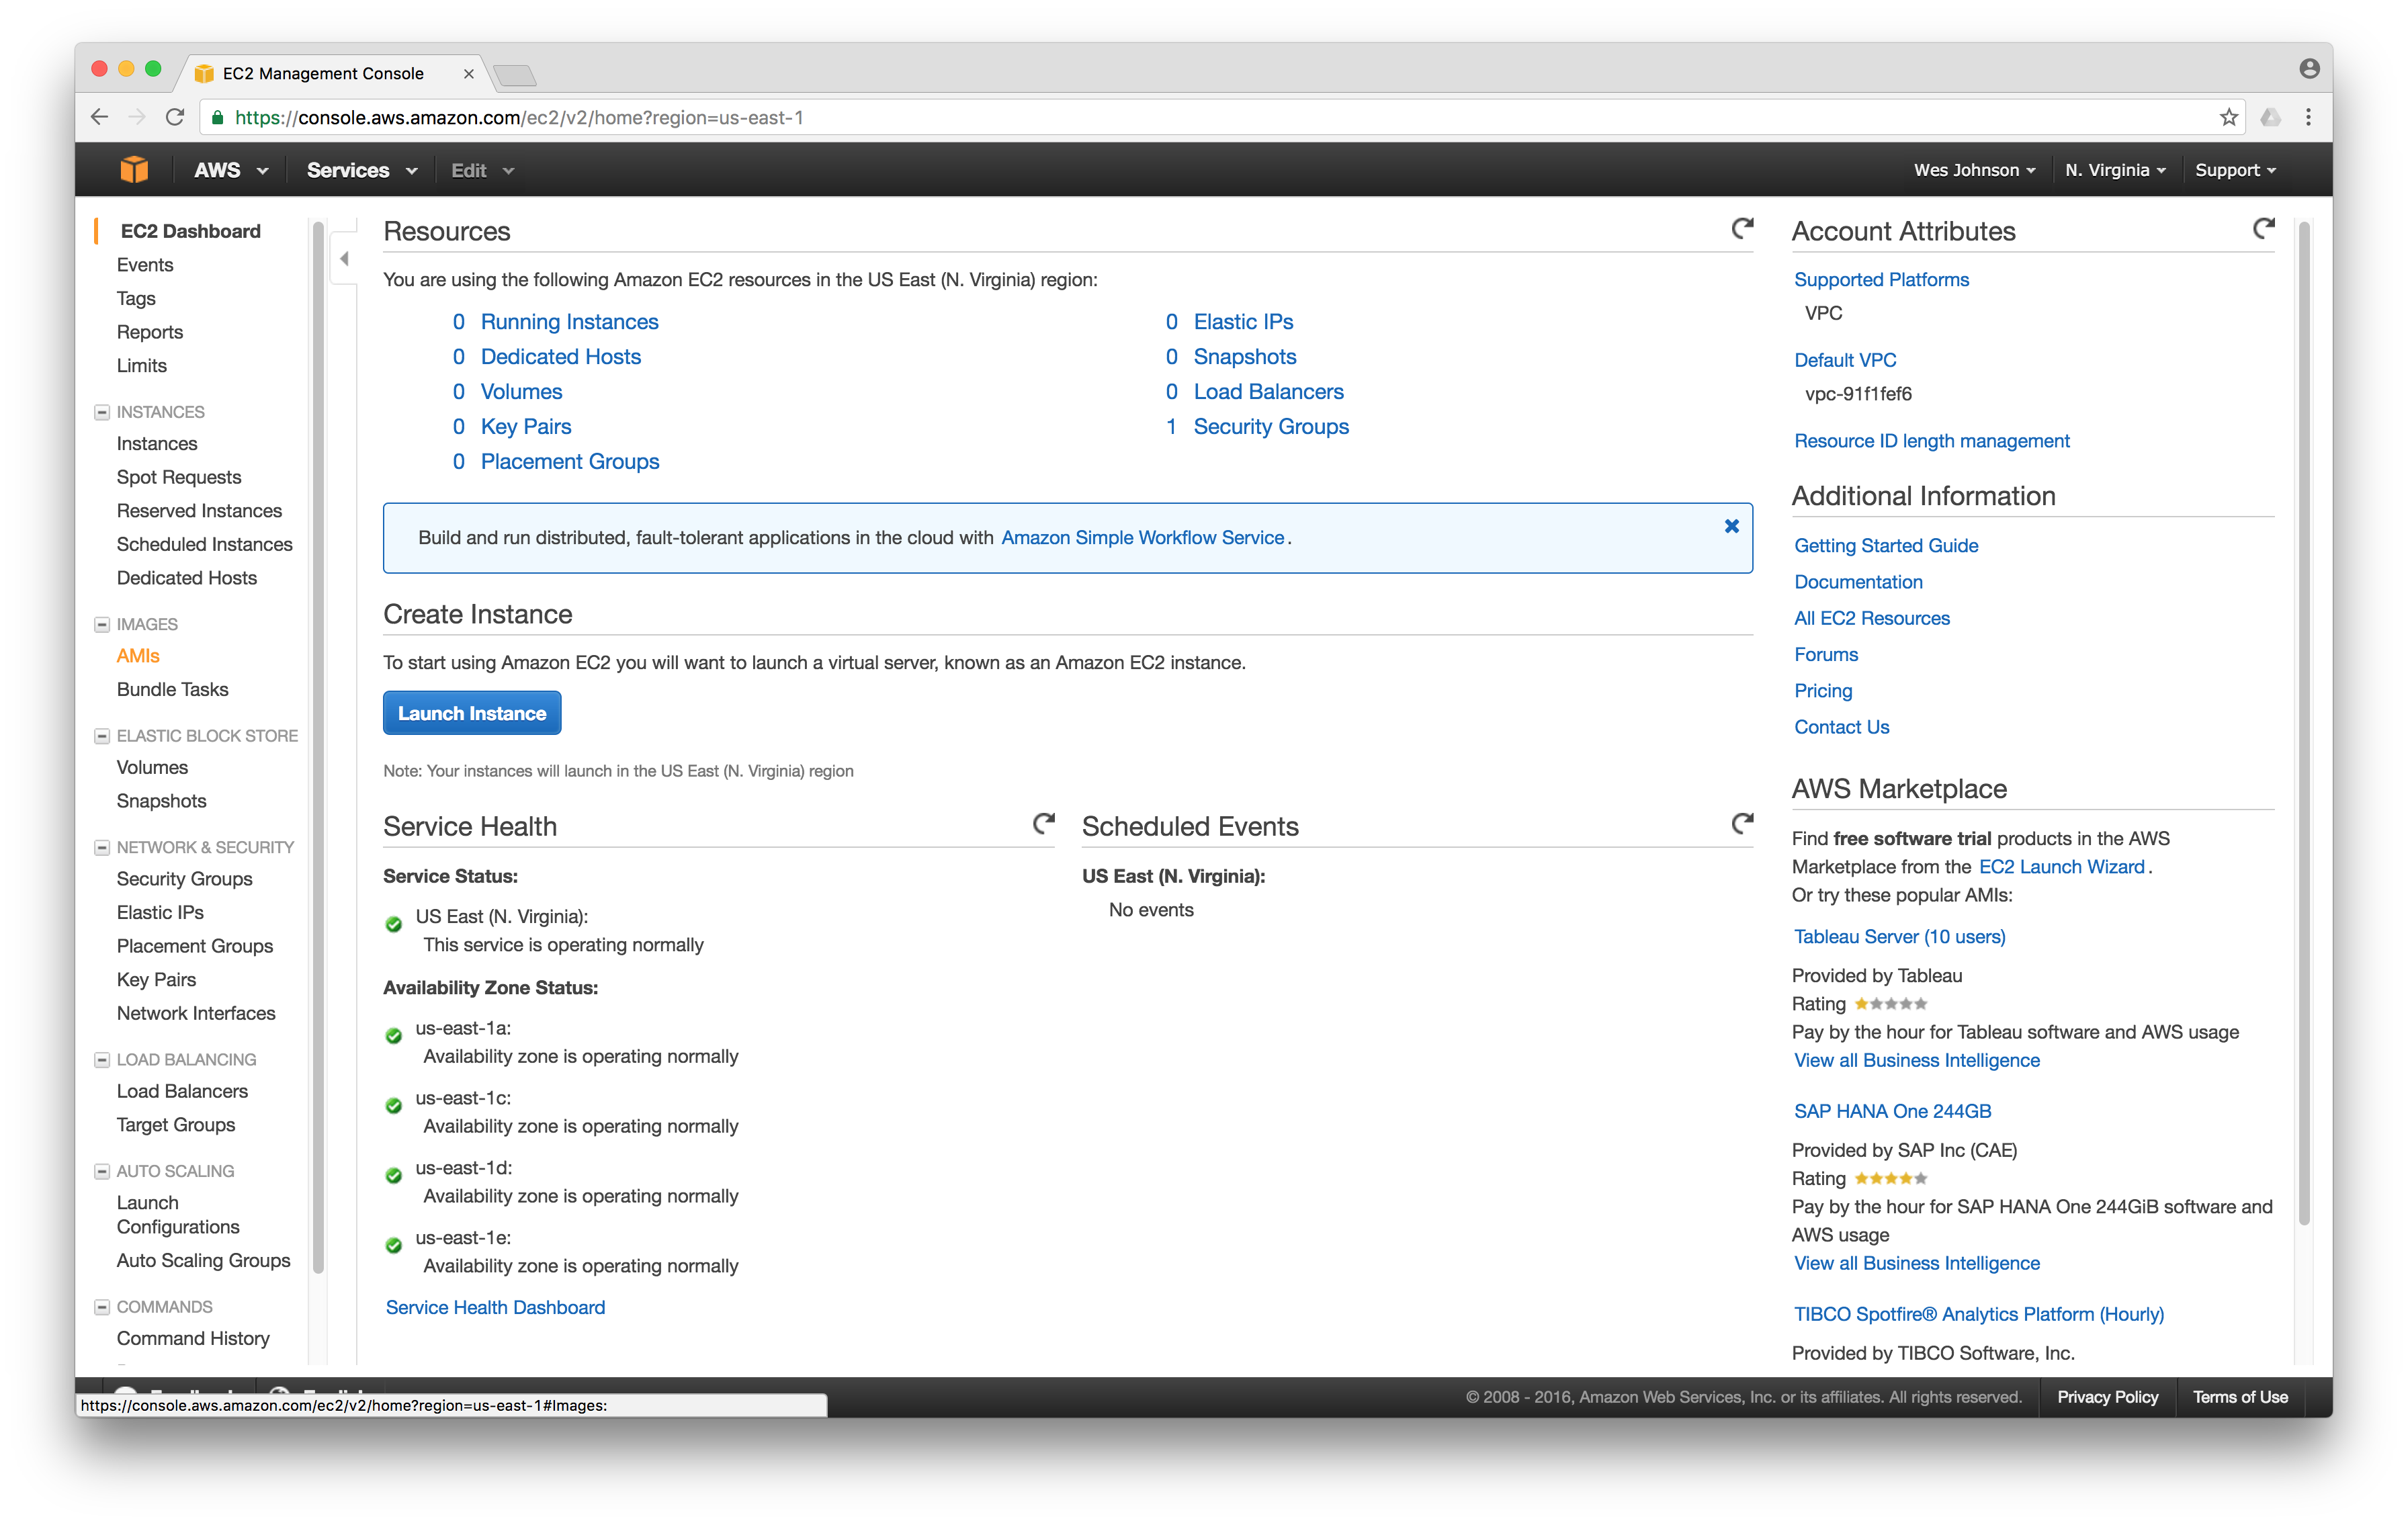
Now select 'AMIs' under 'Images' from the menu on the left as shown below:
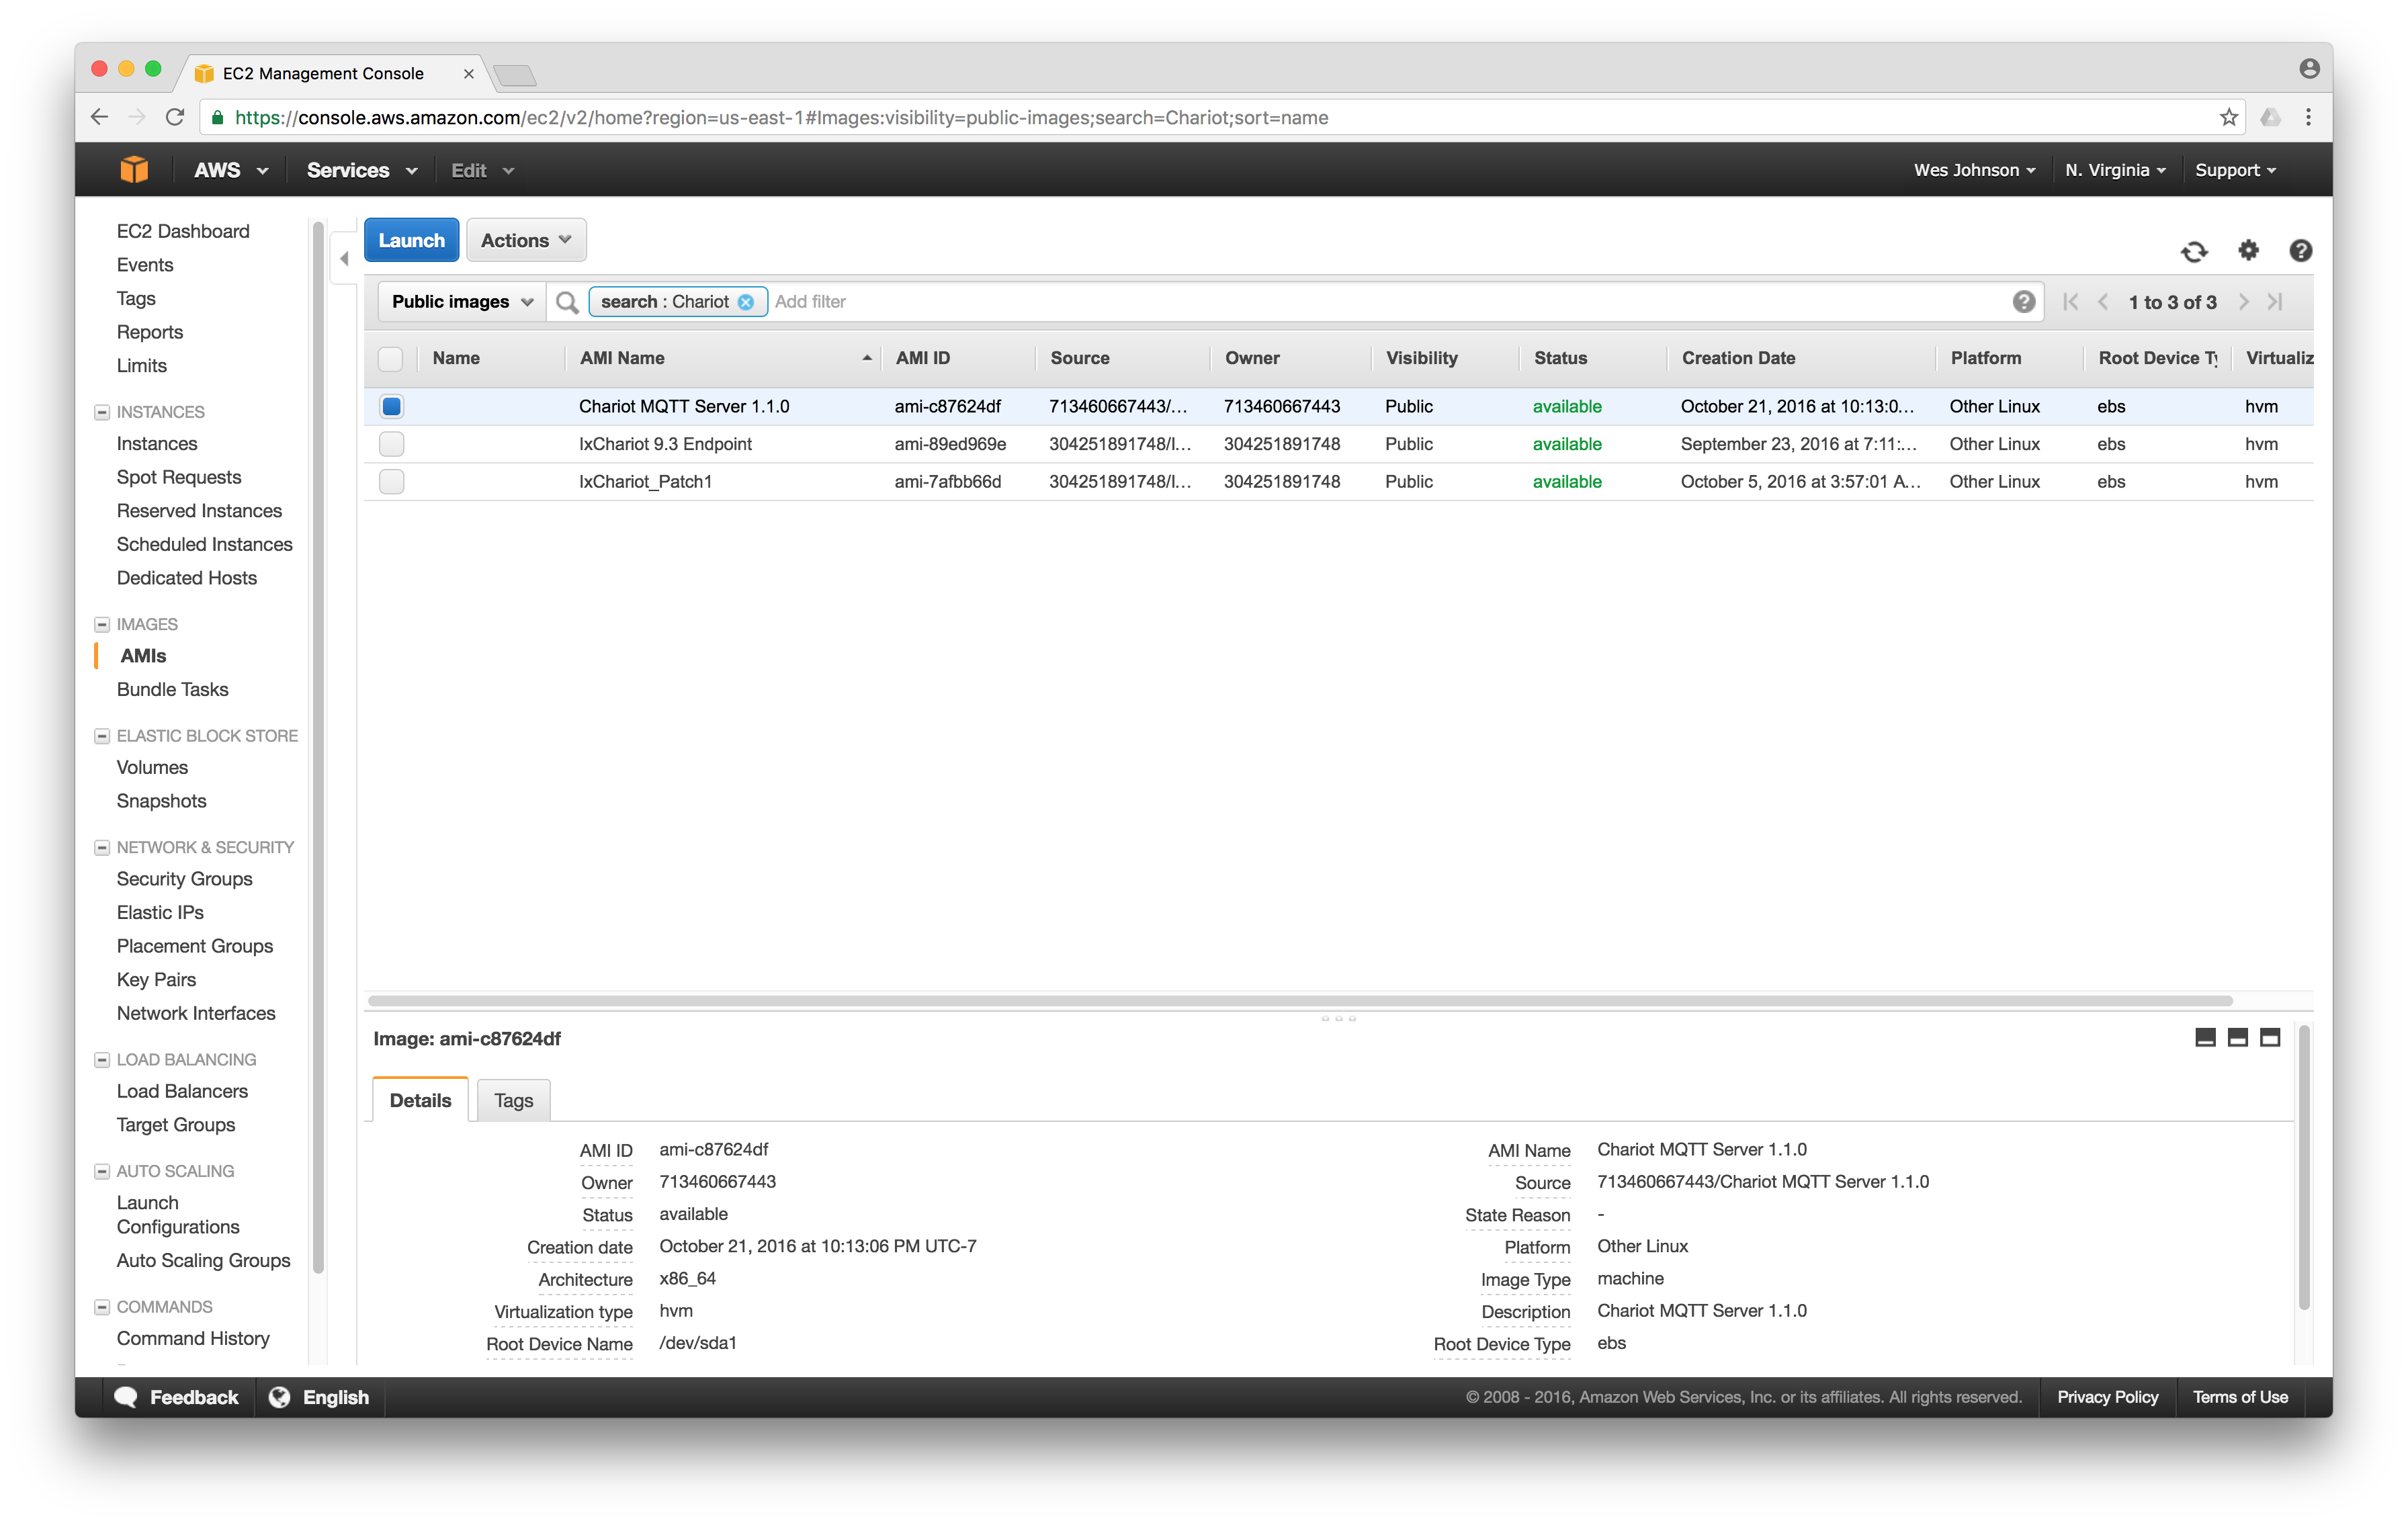
Now, change the 'Owned by me' dropdown to 'Public Images'. Then in the search bar add 'Chariot' and hit enter. This will filter the public images to those that include the key word Chariot. Select the latest version of 'Chariot MQTT Server'. Finally click 'Launch' in the upper left.
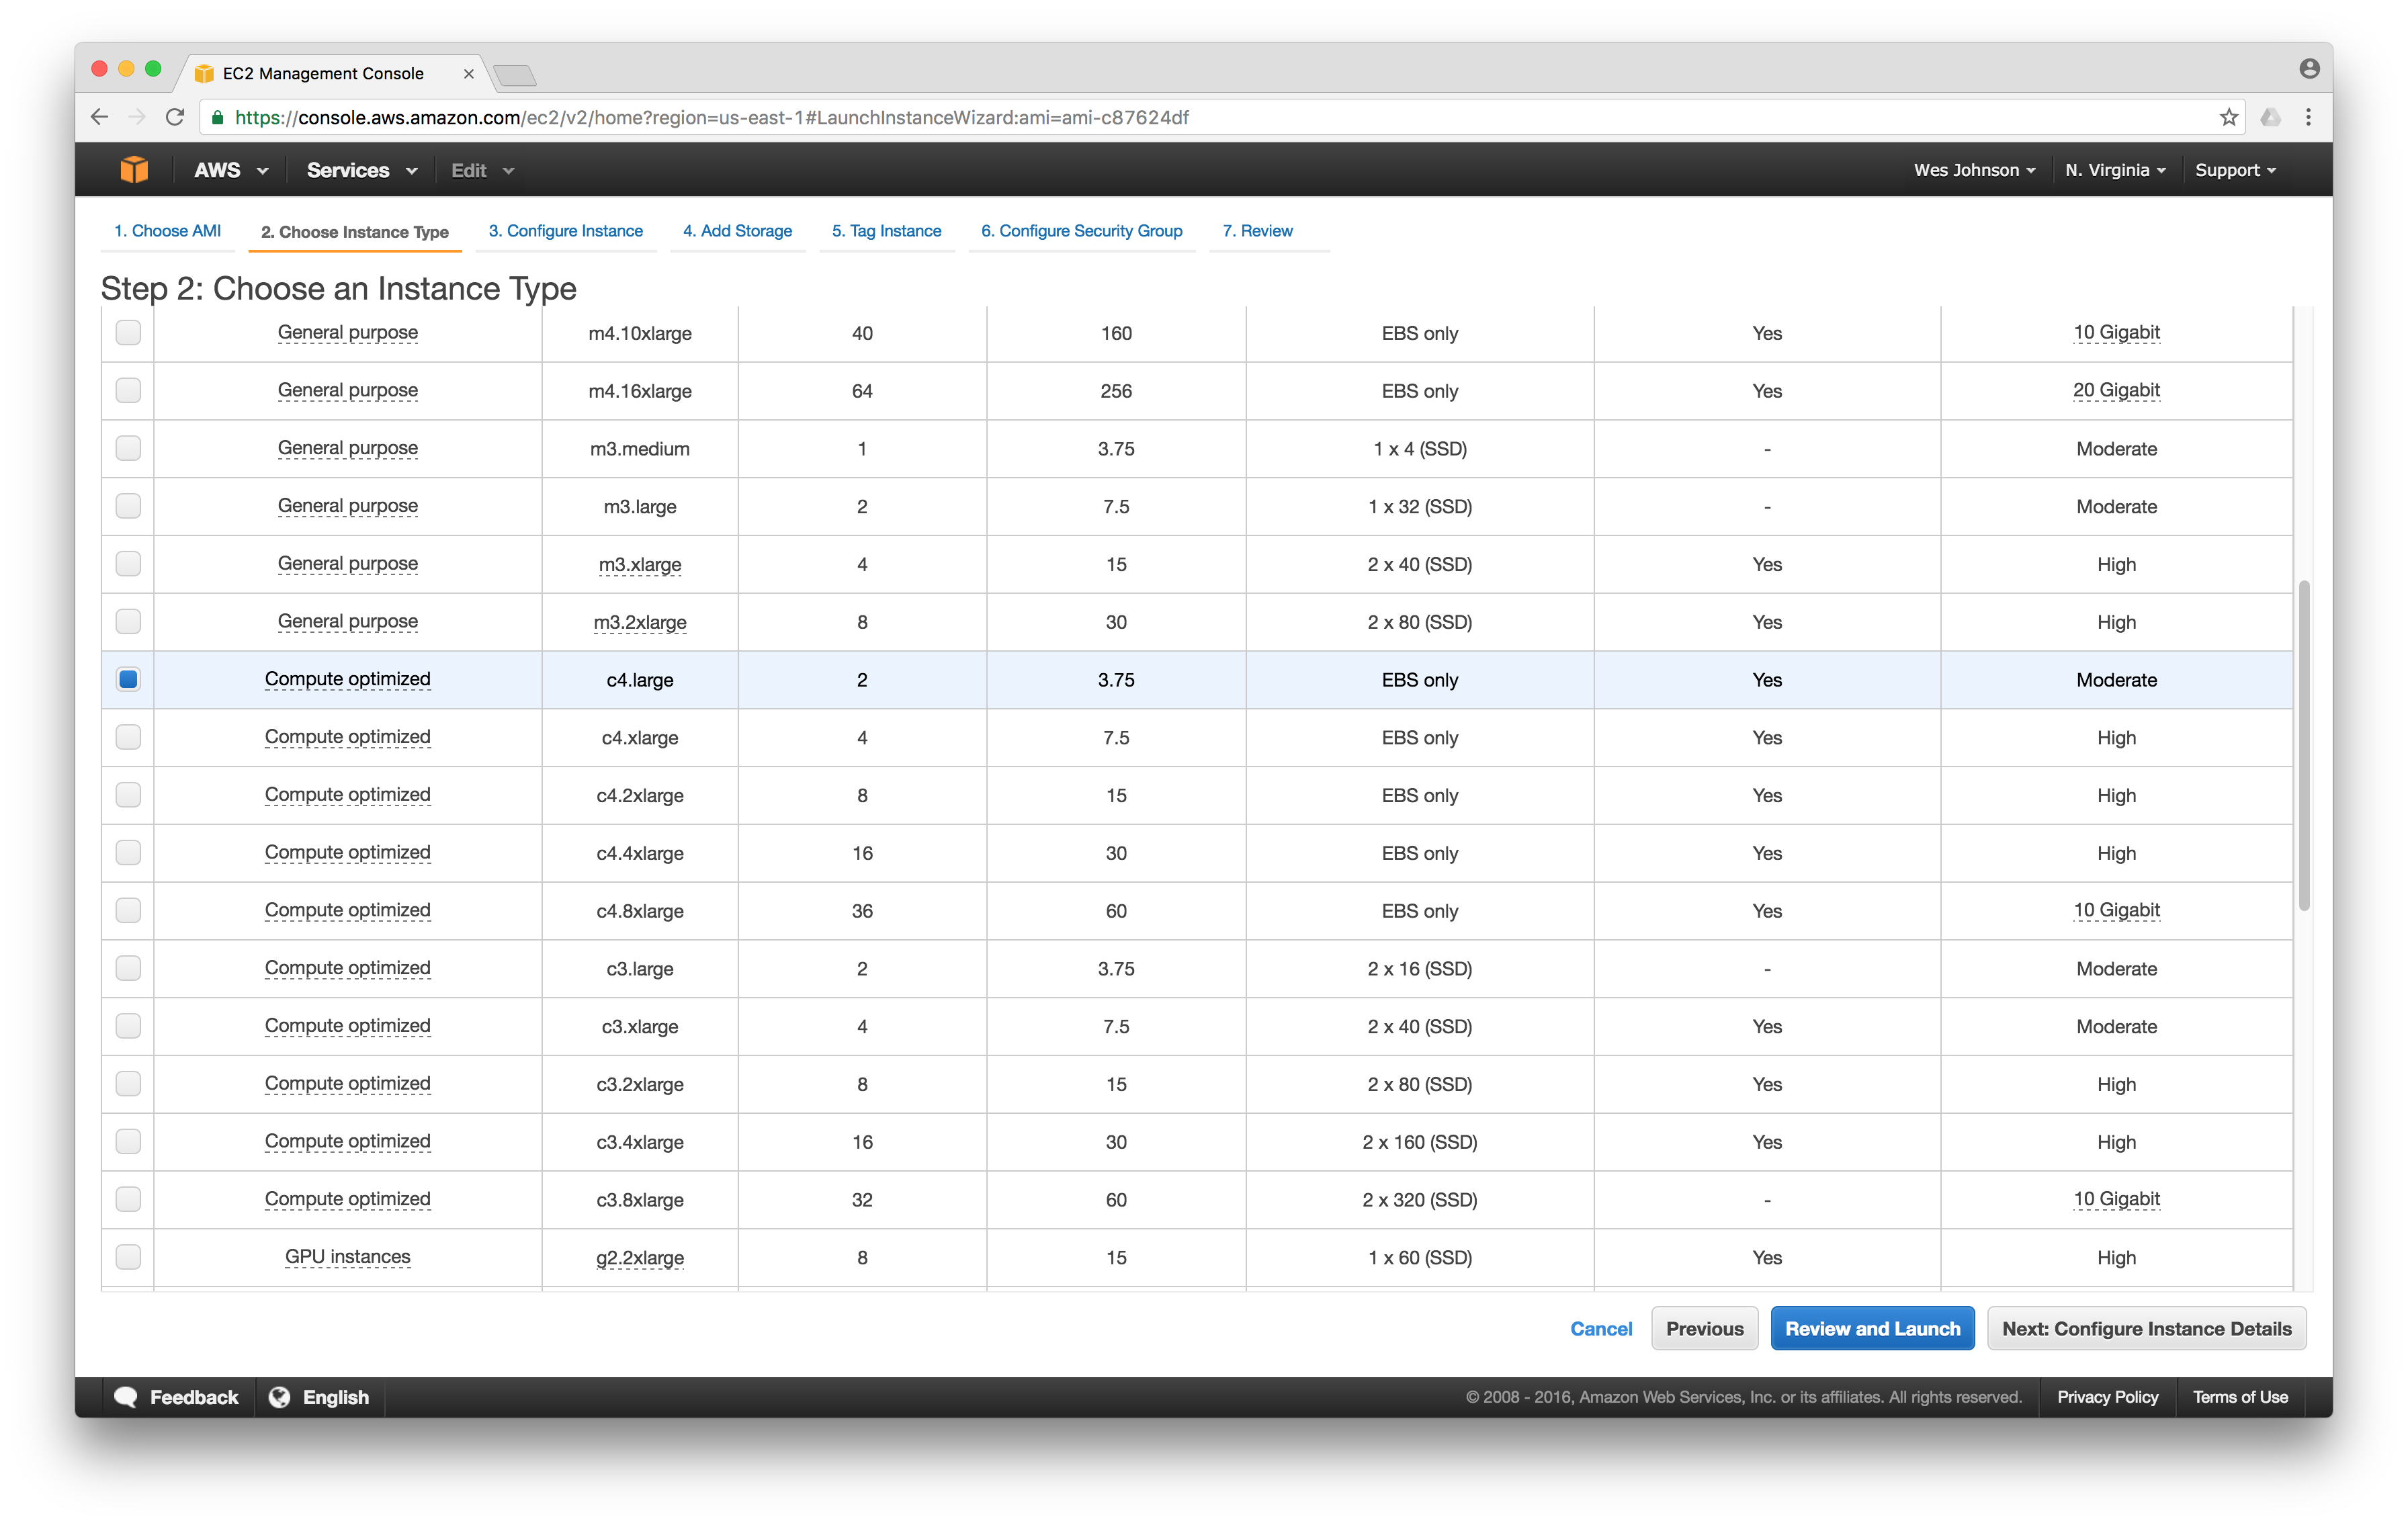
 Now select the instance size. Chariot MQTT Server works best with the 'Compute optimized' instance types. While even a micro instance will work, we recommend either a c4.large or c4.xlarge for the best performance. Select your instance type and click 'Next: Configure Instance Details' in the lower right corner.
On the 'Instance Details' page leave the defaults but make sure 'Auto-assign Public IP' is set to Enable as shown below. Then click 'Next: Add Storage' in the lower right.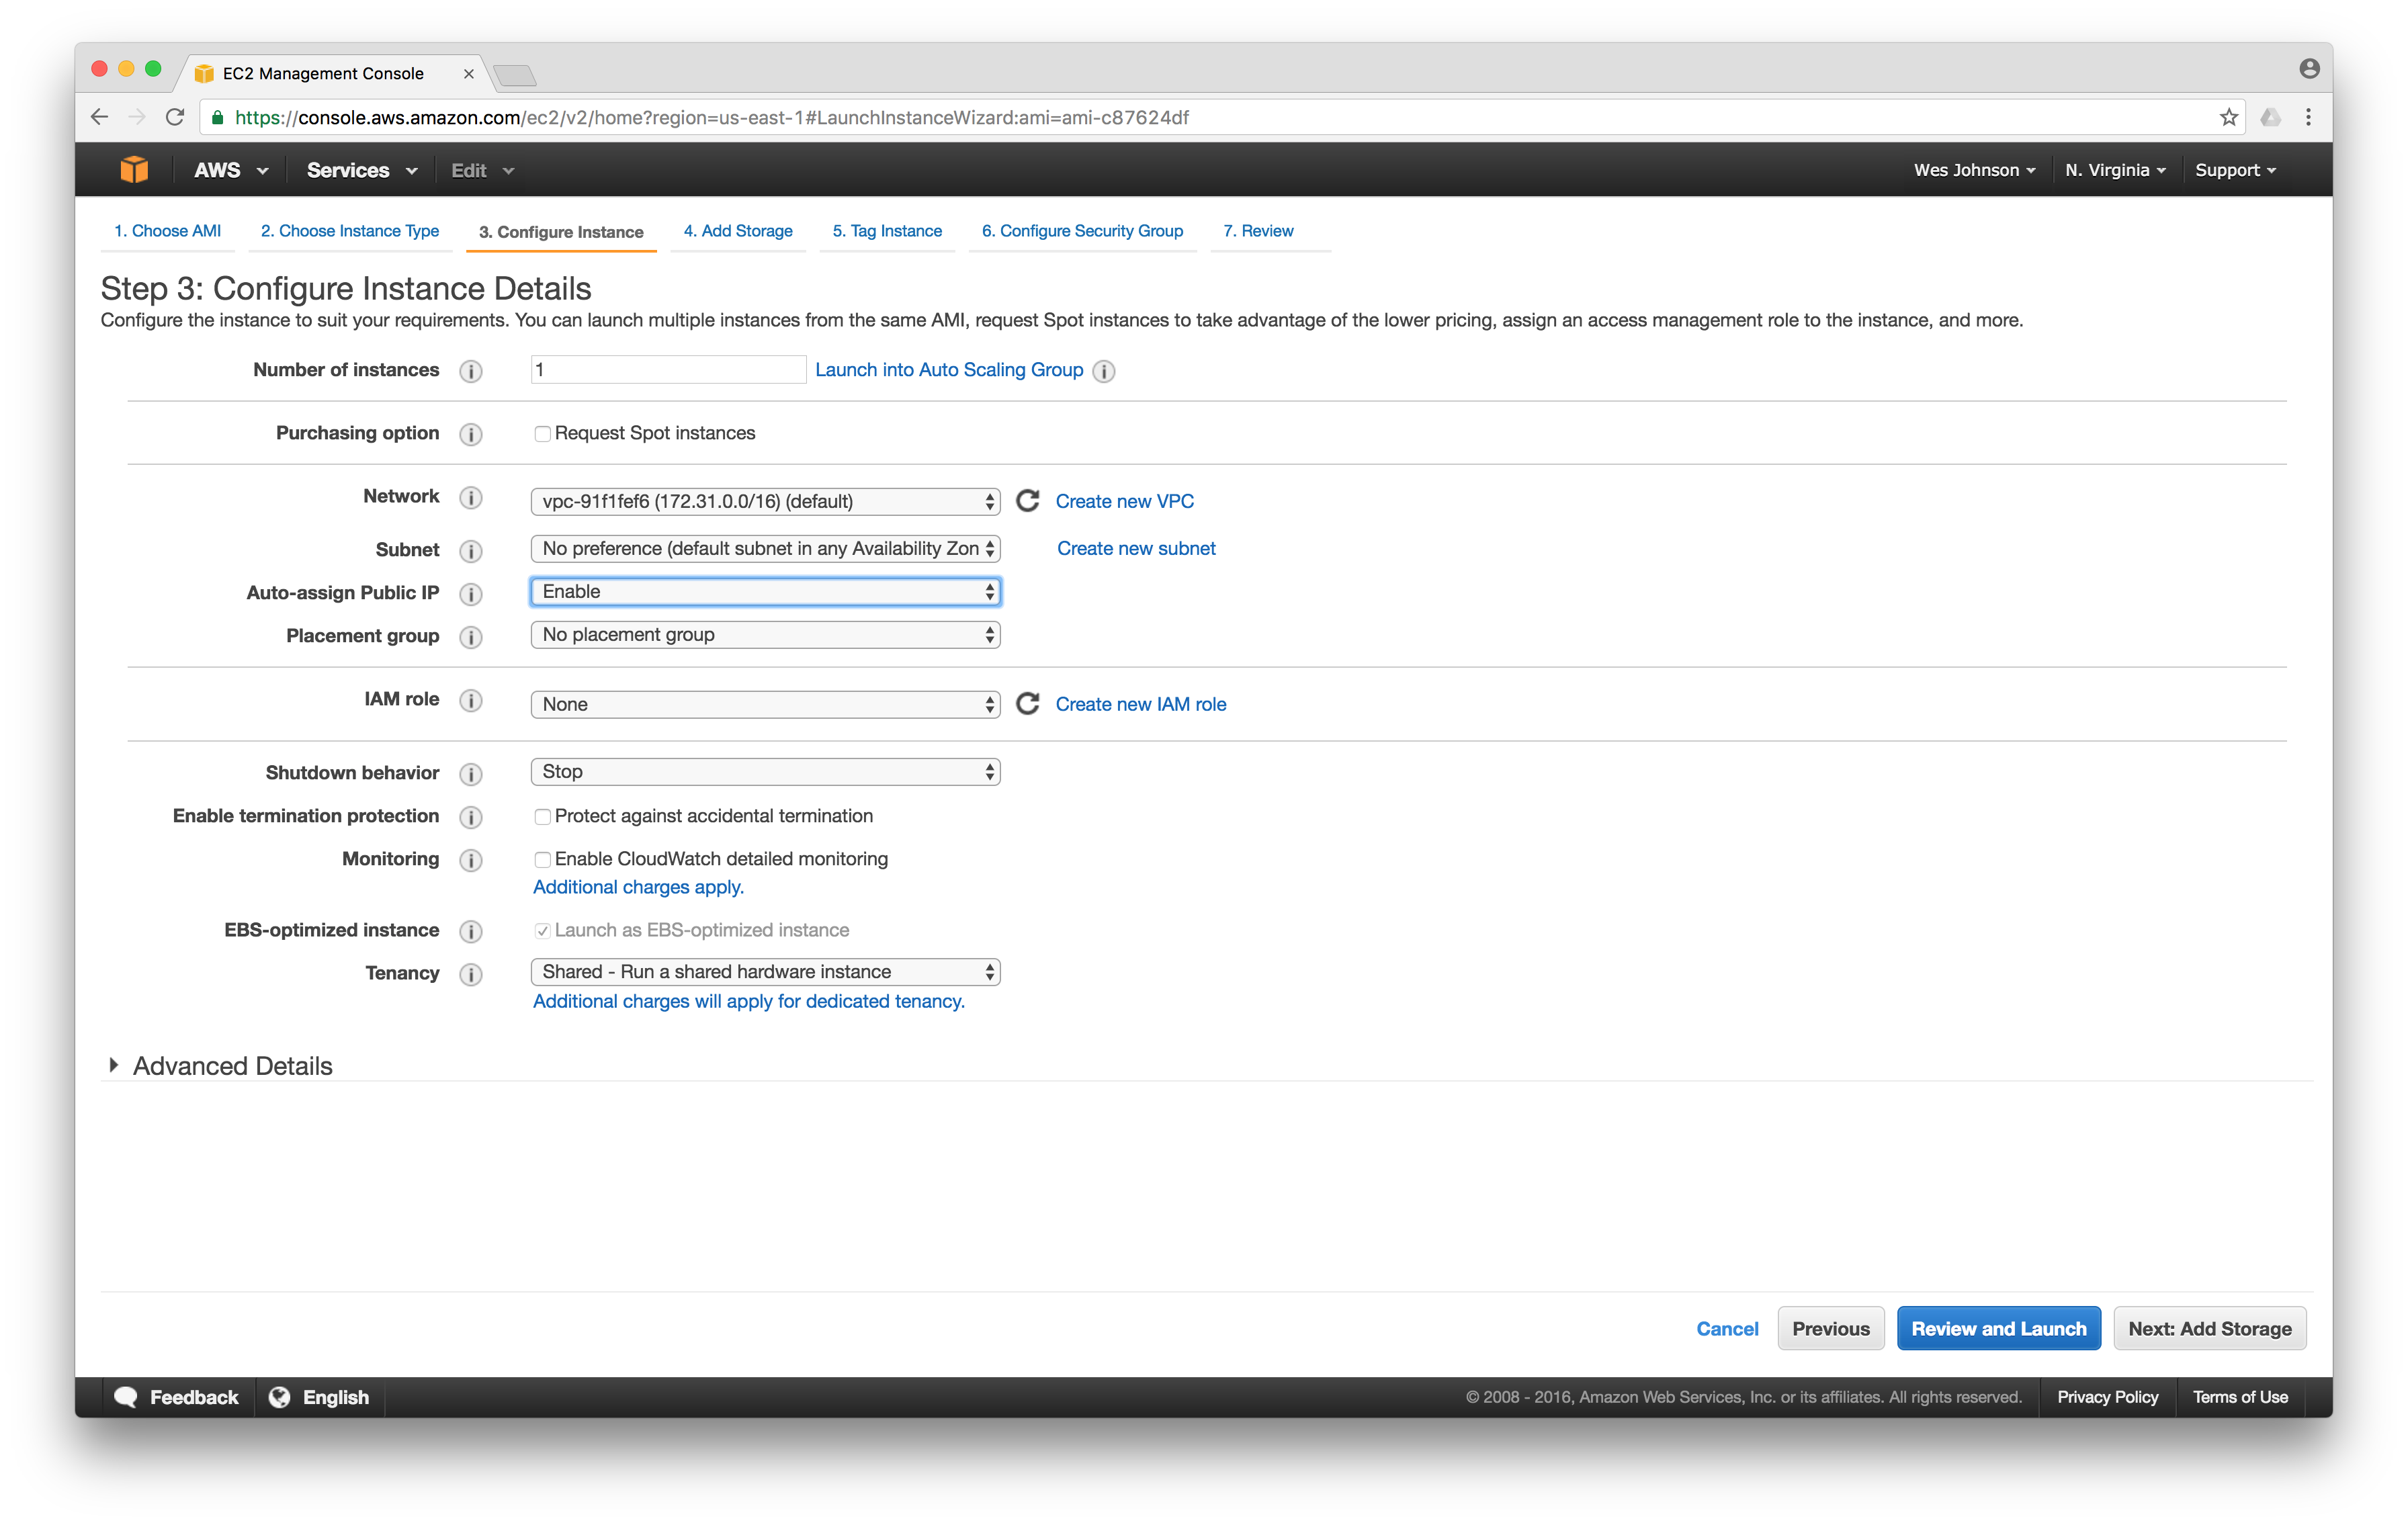
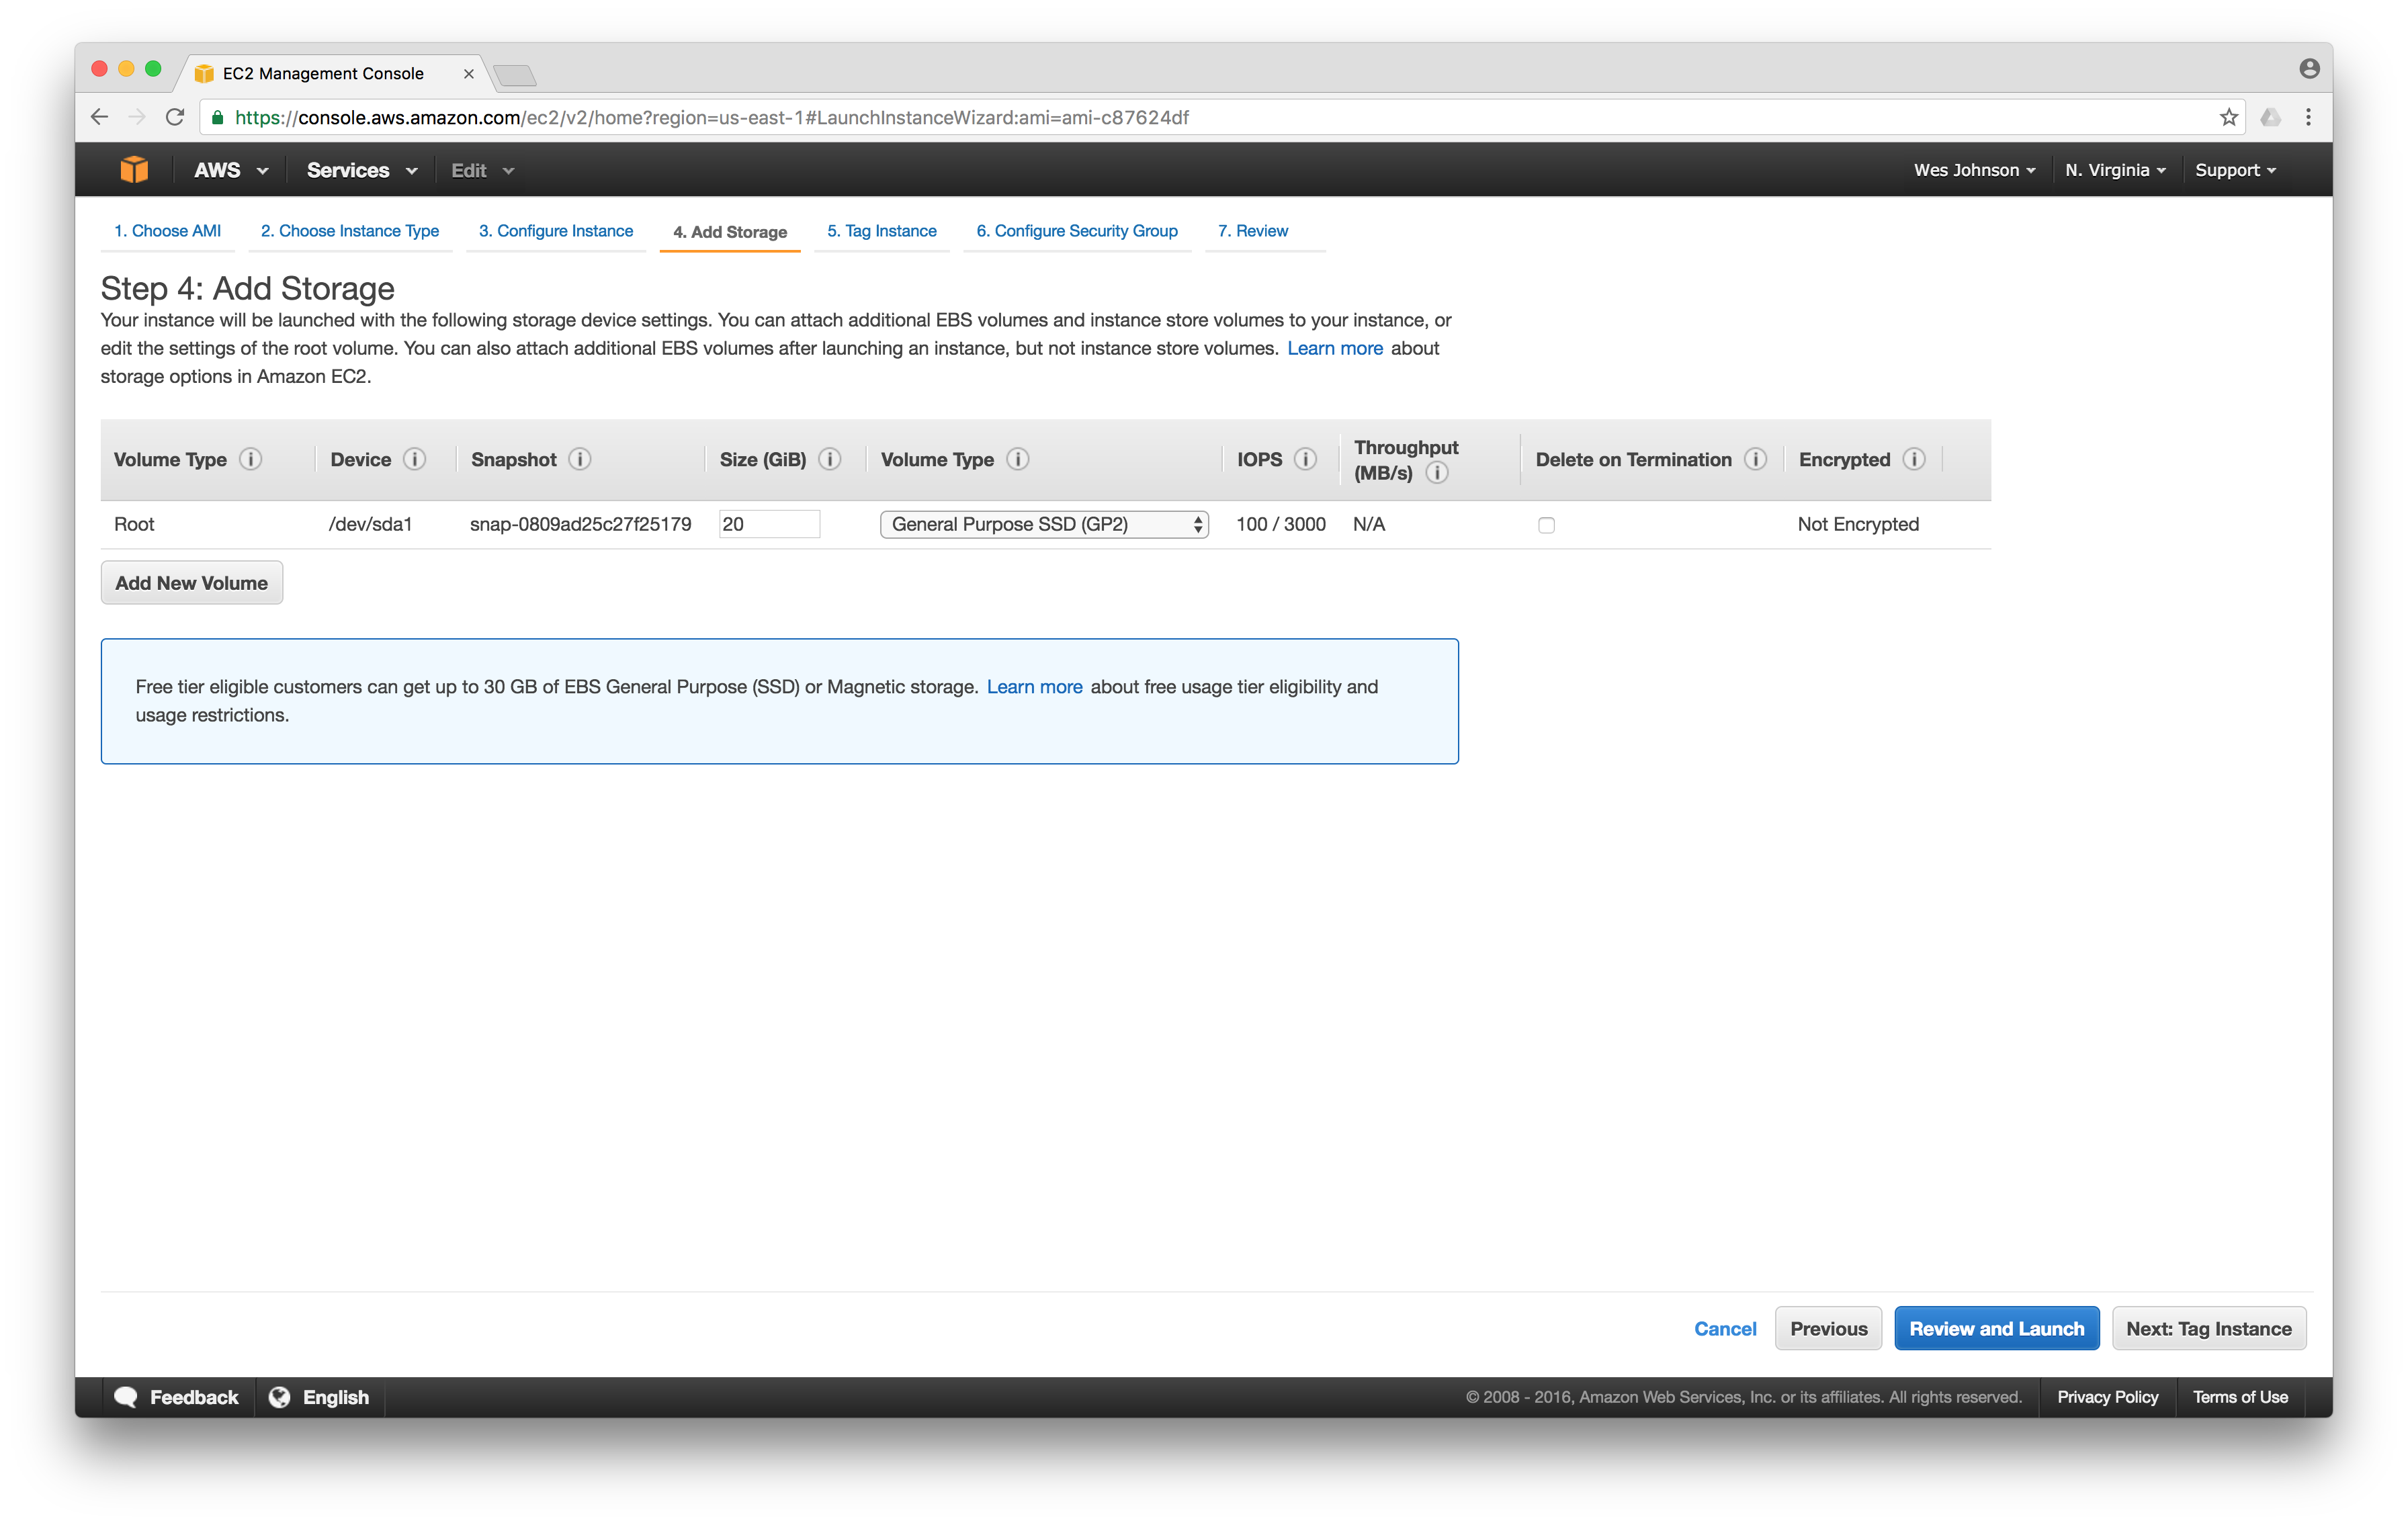
On the 'Add Storage' page, leave the defaults and click 'Next: Tag Instance' in the lower right.
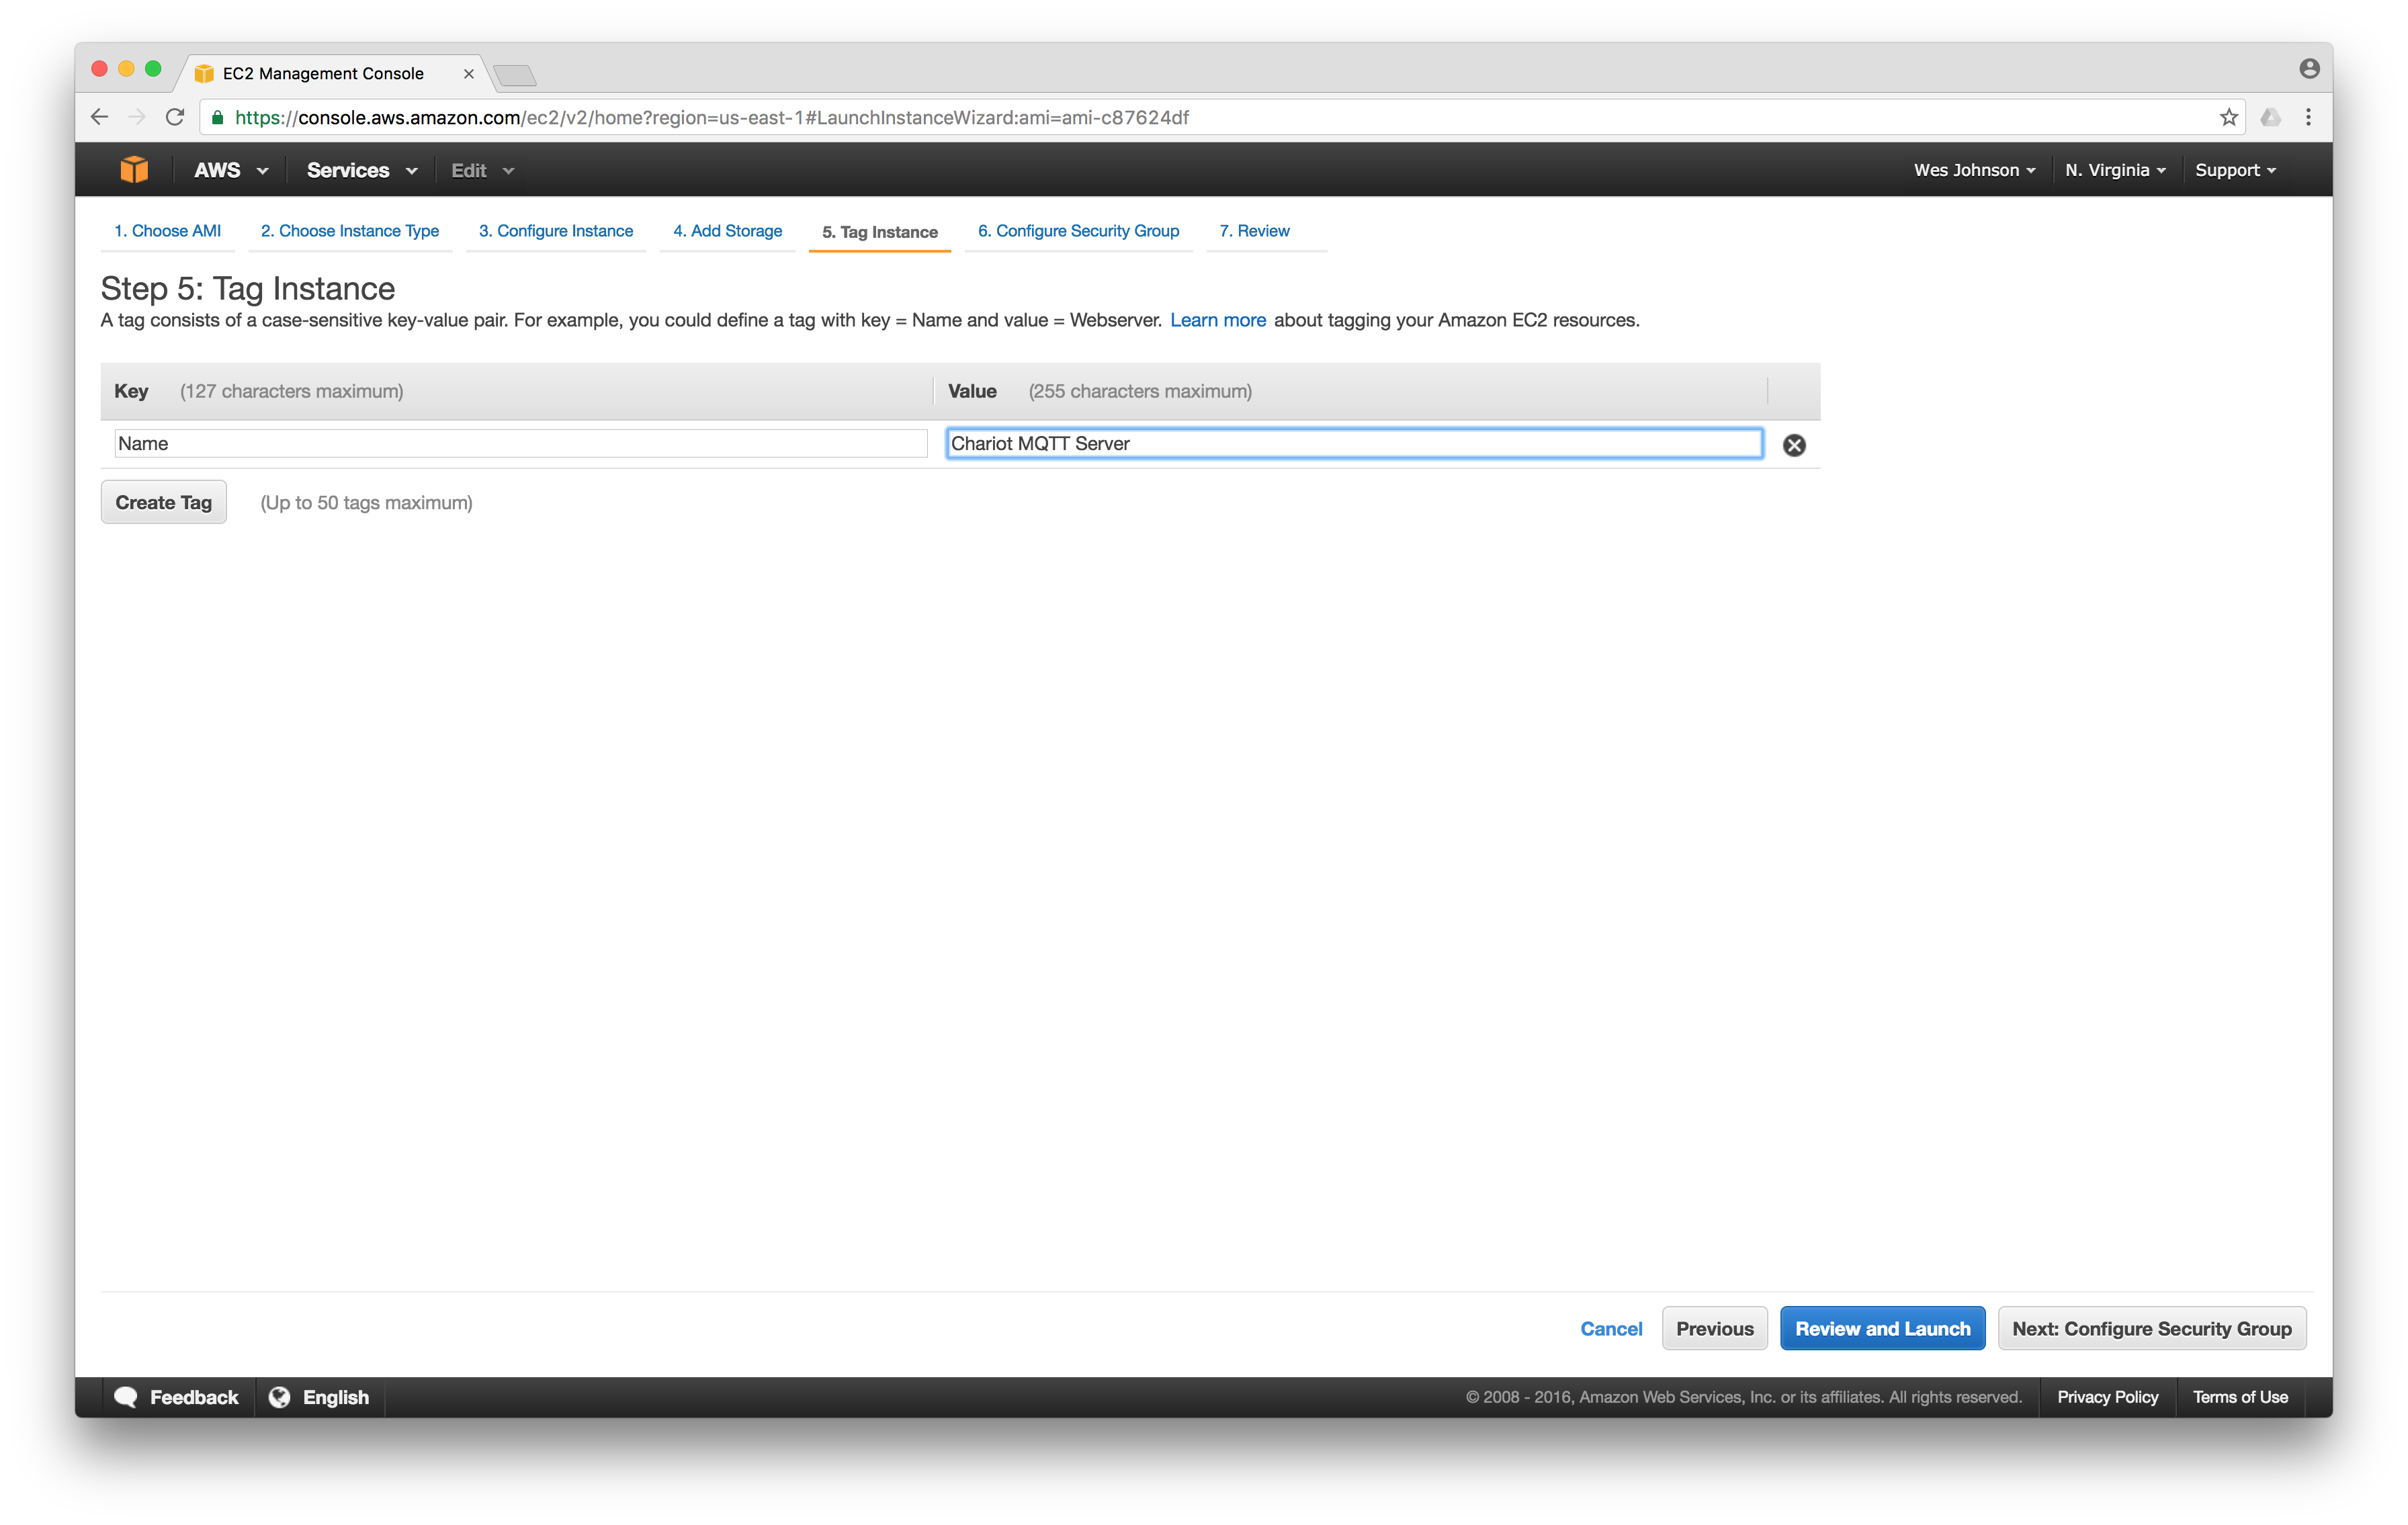
On the 'Tag Instance' screen, set the 'Name' value to 'Chariot MQTT Server' or some other name that you prefer. This is a name that will allow you to quickly identify this EC2 instance in the AWS console. Then click 'Next: Configure Security Group' in the lower right.