Prerequisites:
Overview:
Chariot MQTT Server is a MQTT 3.1.1 compliant MQTT server. It is capable of providing a functional replacement for MQTT Distributor in larger scale deployments. Like Inductive Automation's Ignition platform, it comes with a two hour re-settable trail period. It can also be set up with a license key from Cirrus Link to enable it permanently. Chariot MQTT Server provides a web based administration page for enabling and limiting user access to the MQTT server via an Access Control List (ACLs). Like MQTT Distributor it also supports TLS security and username/password authentication in addition to ACLs for user authorization.
Installing a Virtual Machine Manager:
Chariot MQTT Server can be run in a number of different Virtual Machine managers. Any Virtual Machine manager that supports importing of .ofv appliances should work. Tested versions include the following:
- Virtual Box 5.1.2
- VMWare Fusion 8.1.1
Installing Chariot MQTT Server:
Installation of Chariot MQTT Server is dependent upon the VM Manager being used. Below shows basic instructions for the various tested managers. First you will need to unzip the Cirrus_Link_Chariot_1.0.0.zip file and have access to the Cirrus Link Chariot_*.ovf file.
- Installing Chariot MQTT Server into VirtualBox:
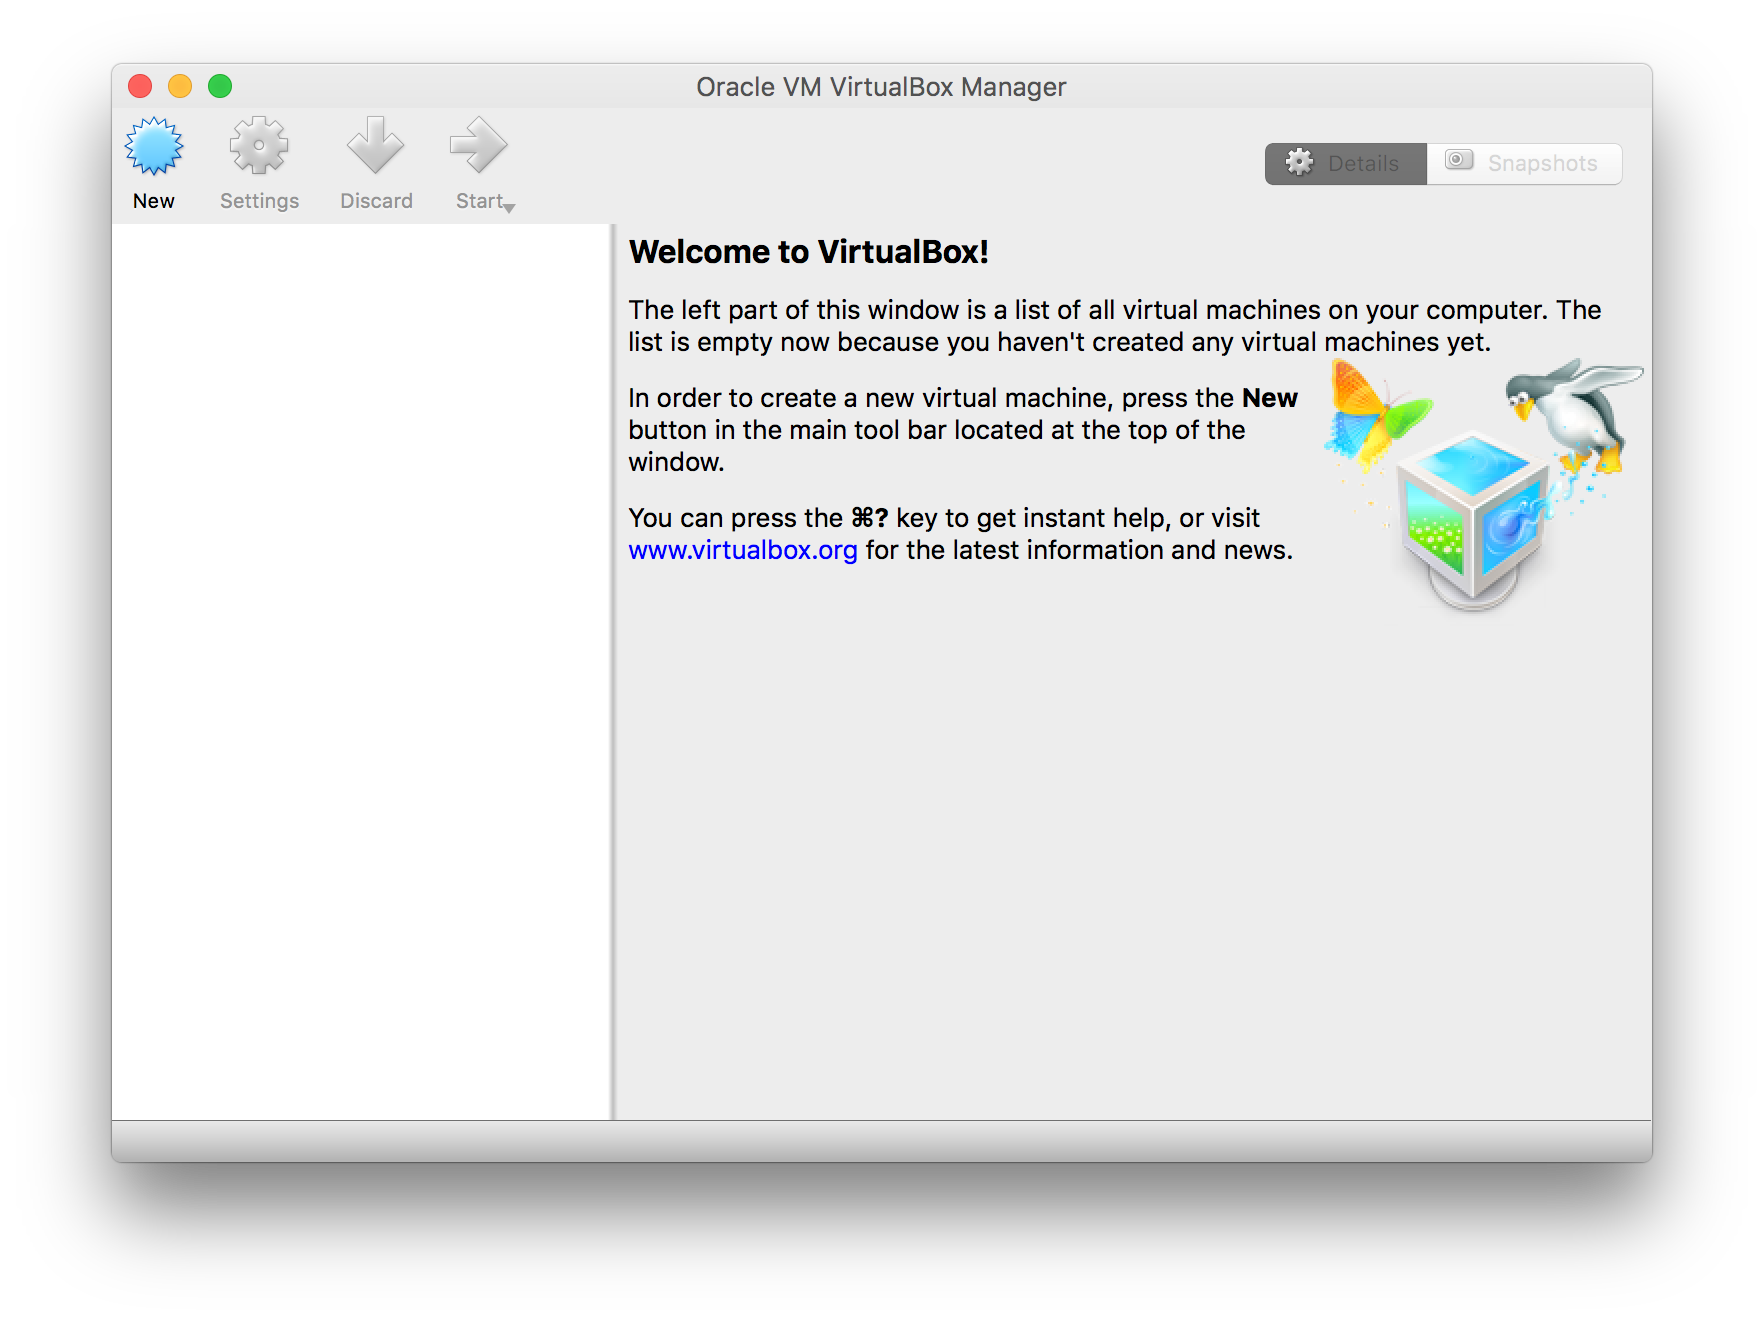
- First, open VirtualBox
- Now, select 'Import Appliance...', browse to Cirrus Link Chariot_*.ovf (which came from Cirrus_Link_Chariot_1.0.0.zip) and select Open. This will show the following window:
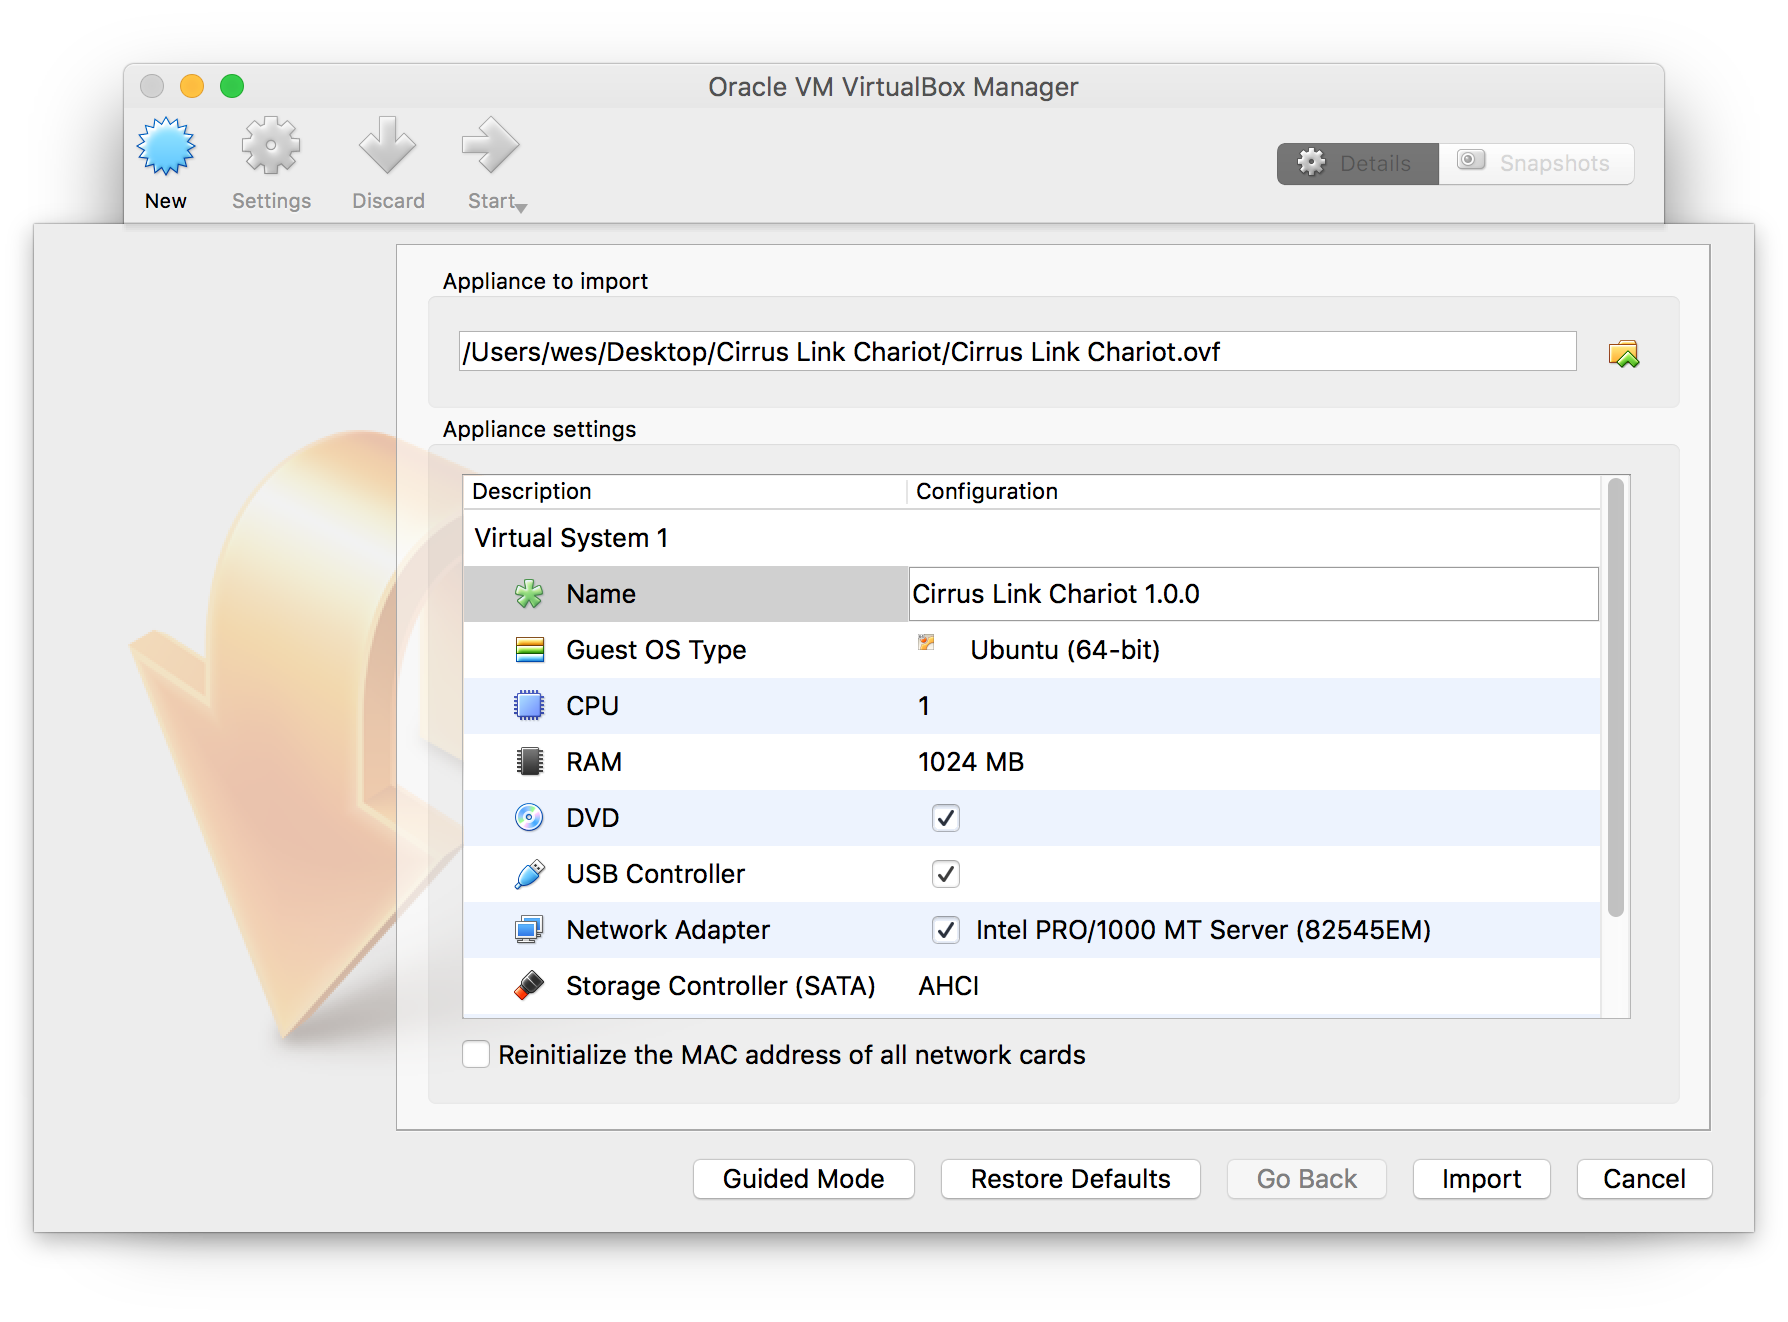
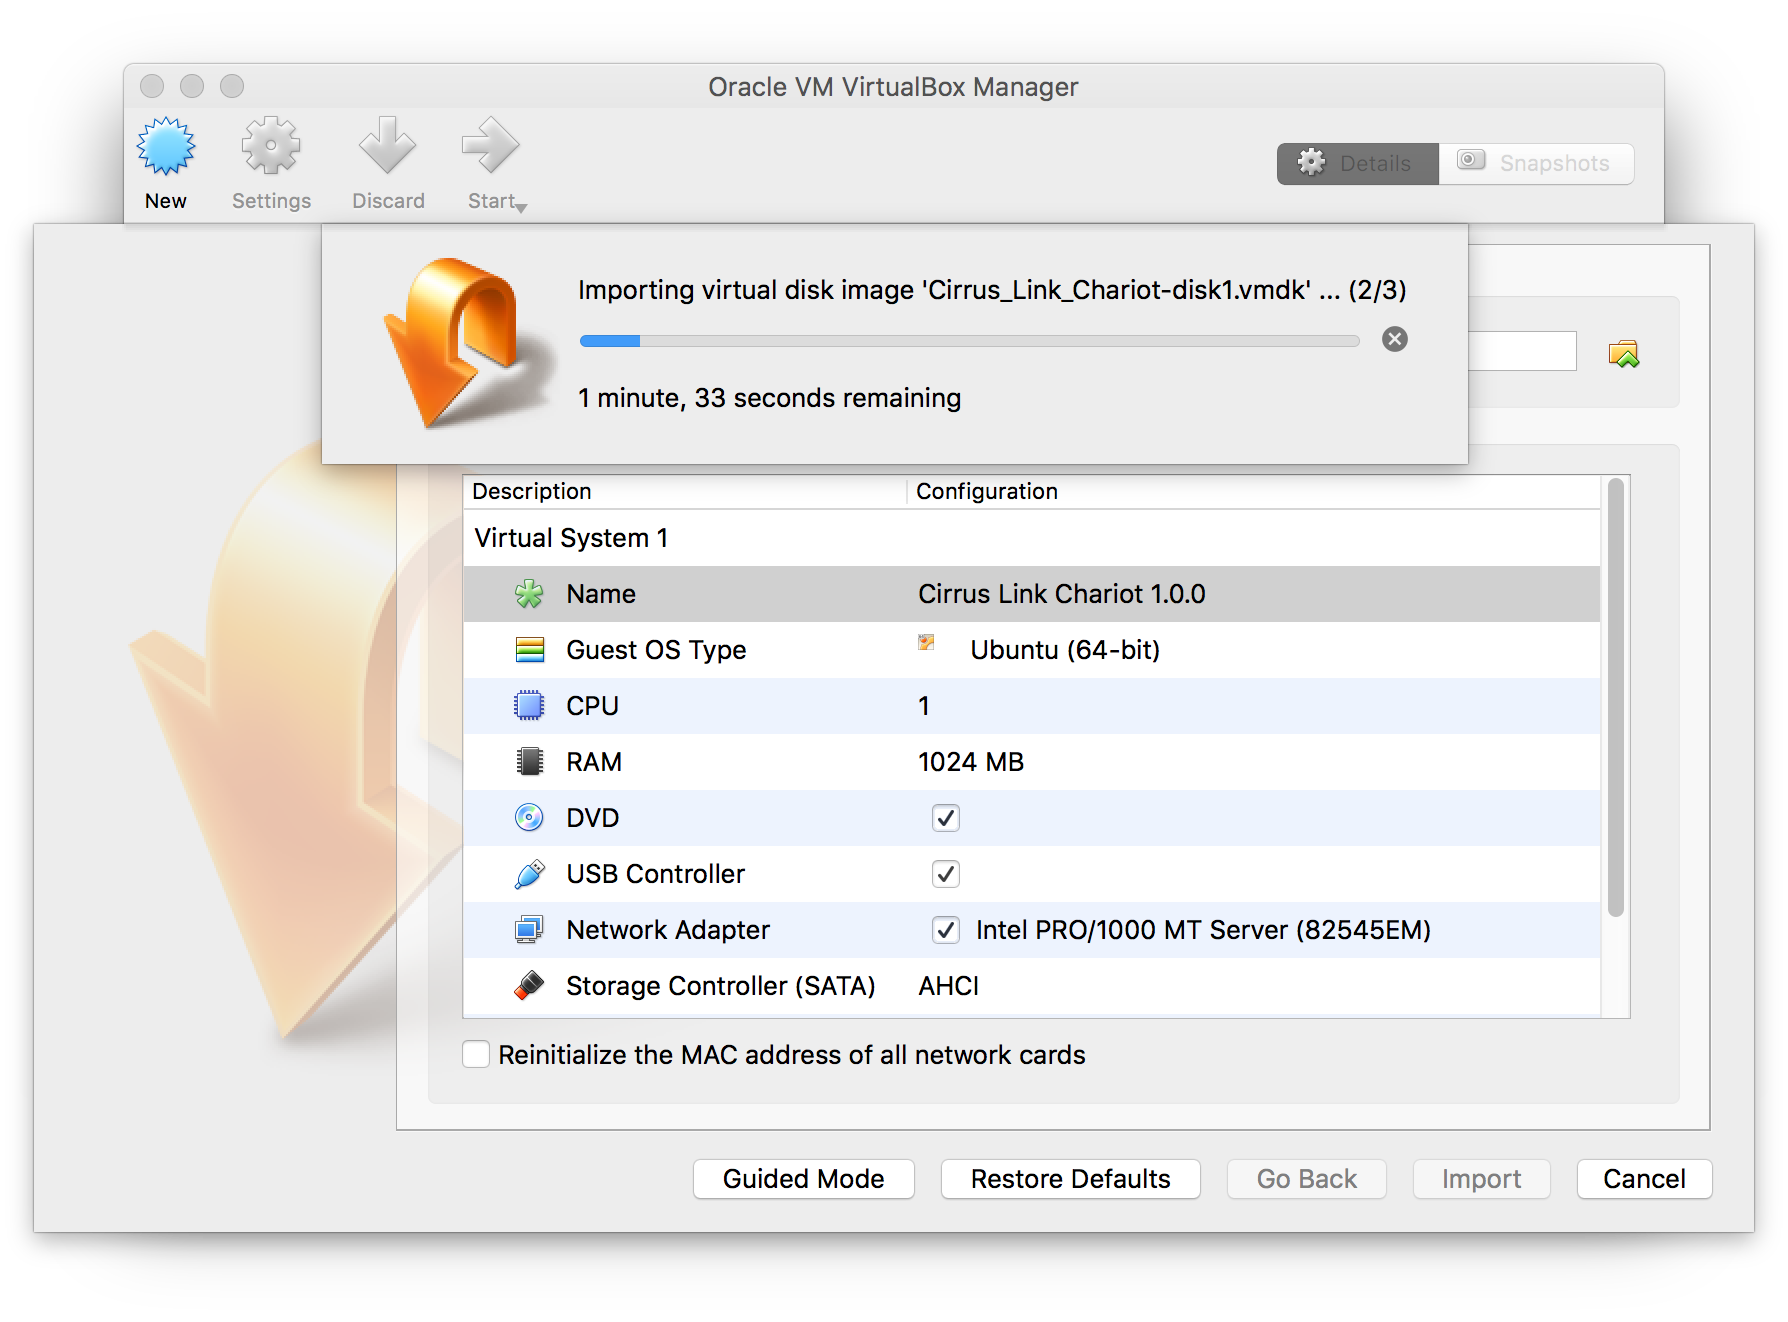
- Change the Name to 'Cirrus Link Chariot' and select 'Import'. The VM will take a few minutes to import depending on your computer.
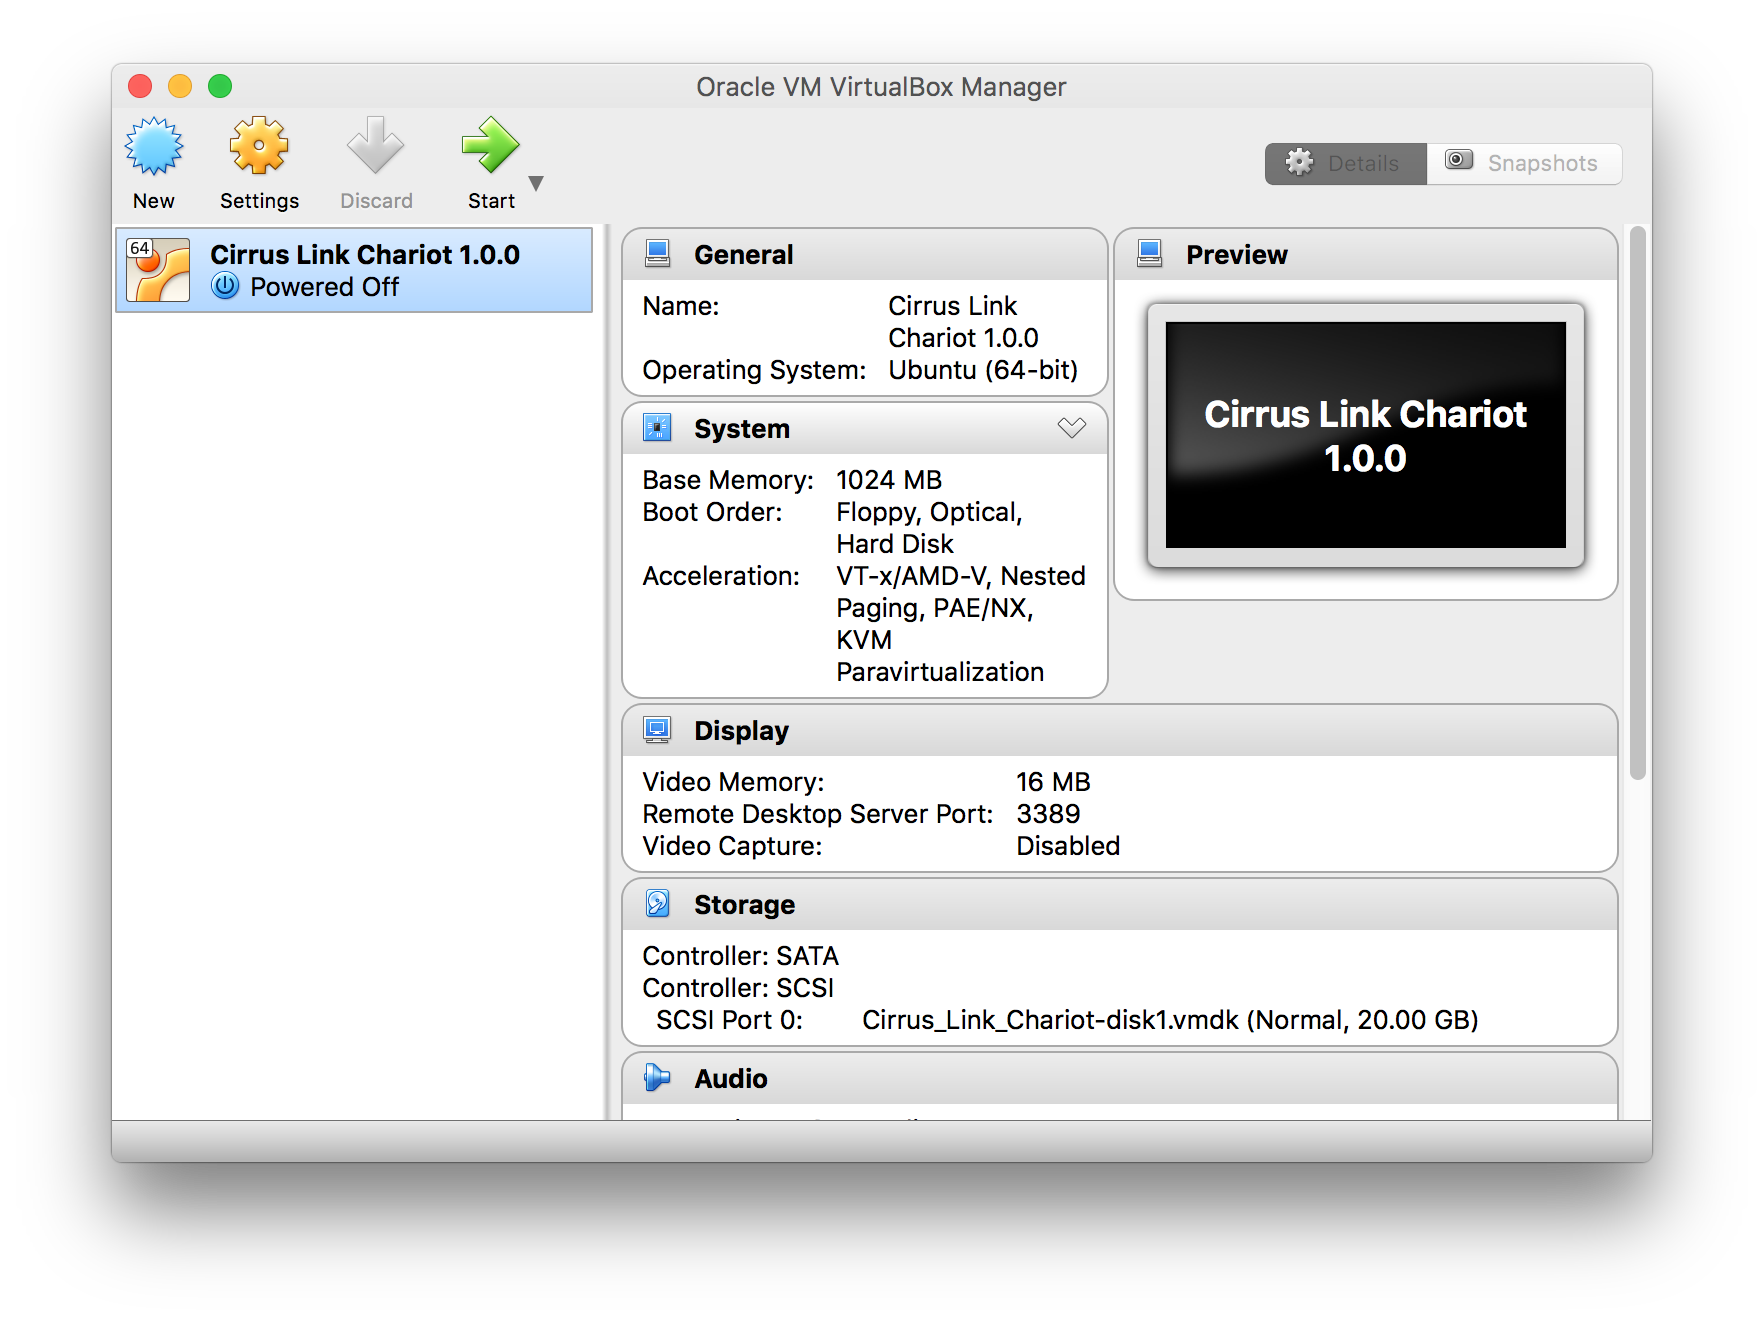
- When this is complete, you will see the new VM in the list as shown below.
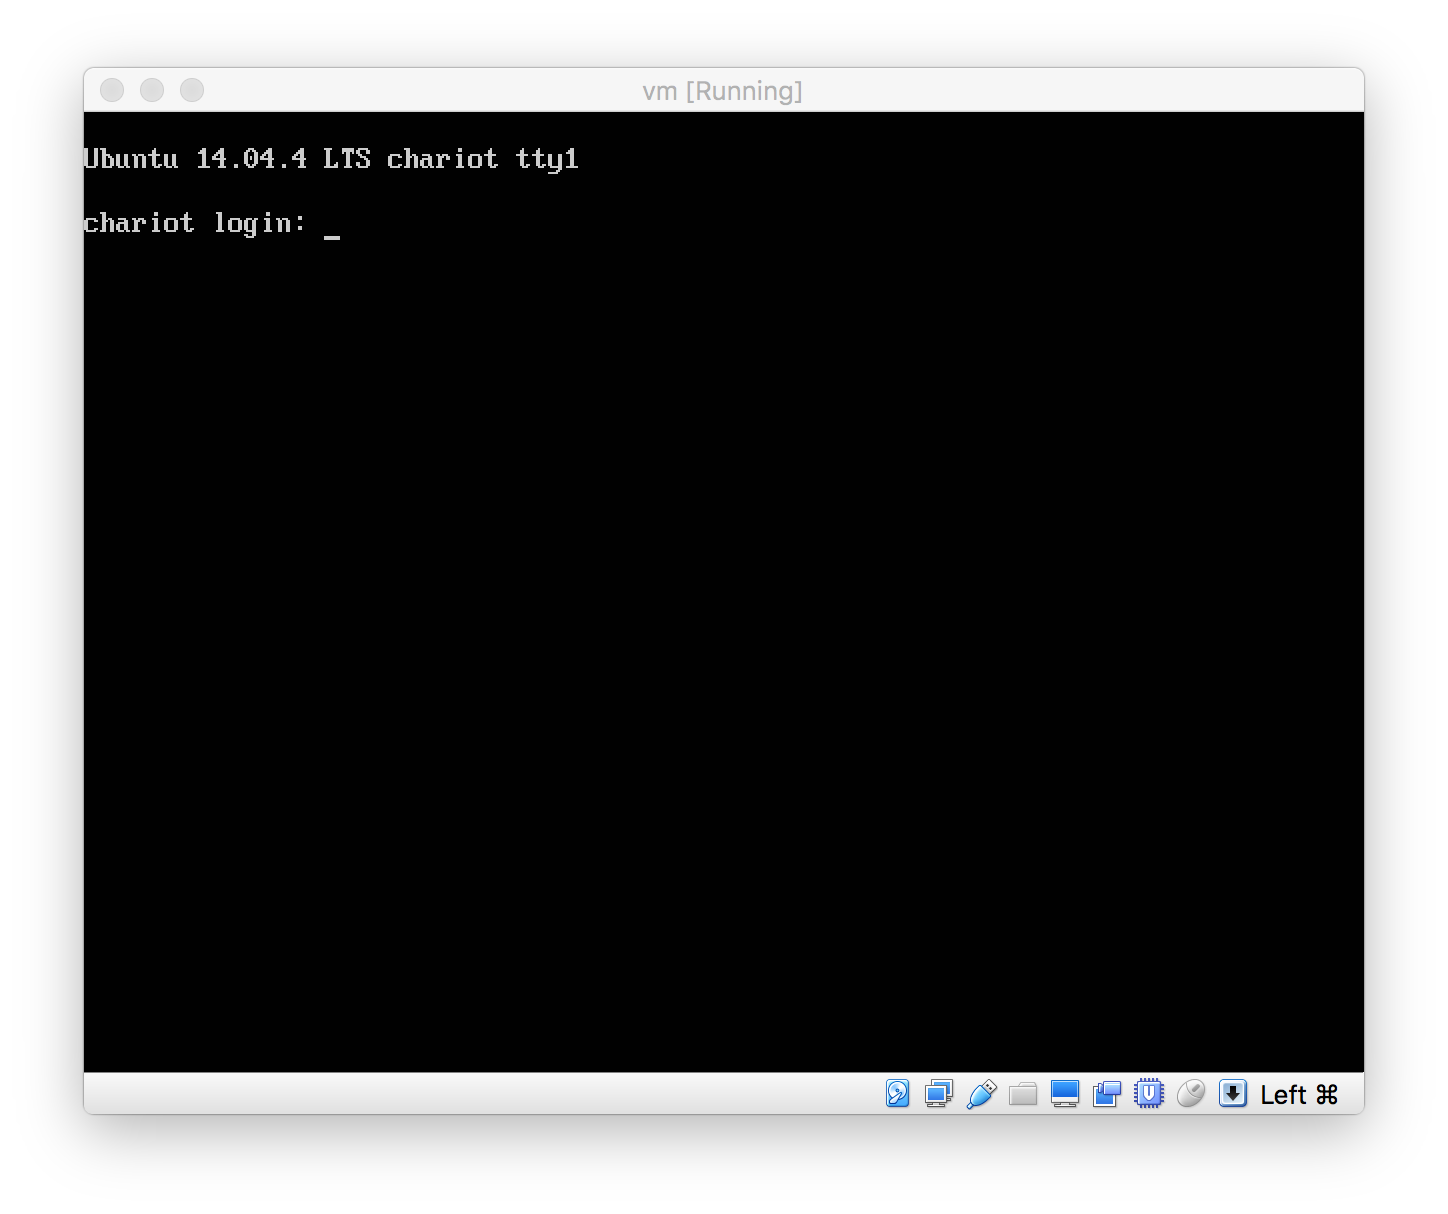
- Simply click the Start button to start the VM. You may get an error mentioning the lack of a configured sound card. You can ignore this. You may also get some messages talking about keyboard capture and mouse pointer integration as shown below. These can also be ignored. Once you see the following, the Chariot MQTT Server is up and running.
- Installing Chariot MQTT Server into VMWare Fusion:
- First, open VMWare Fusion and select 'Import...'
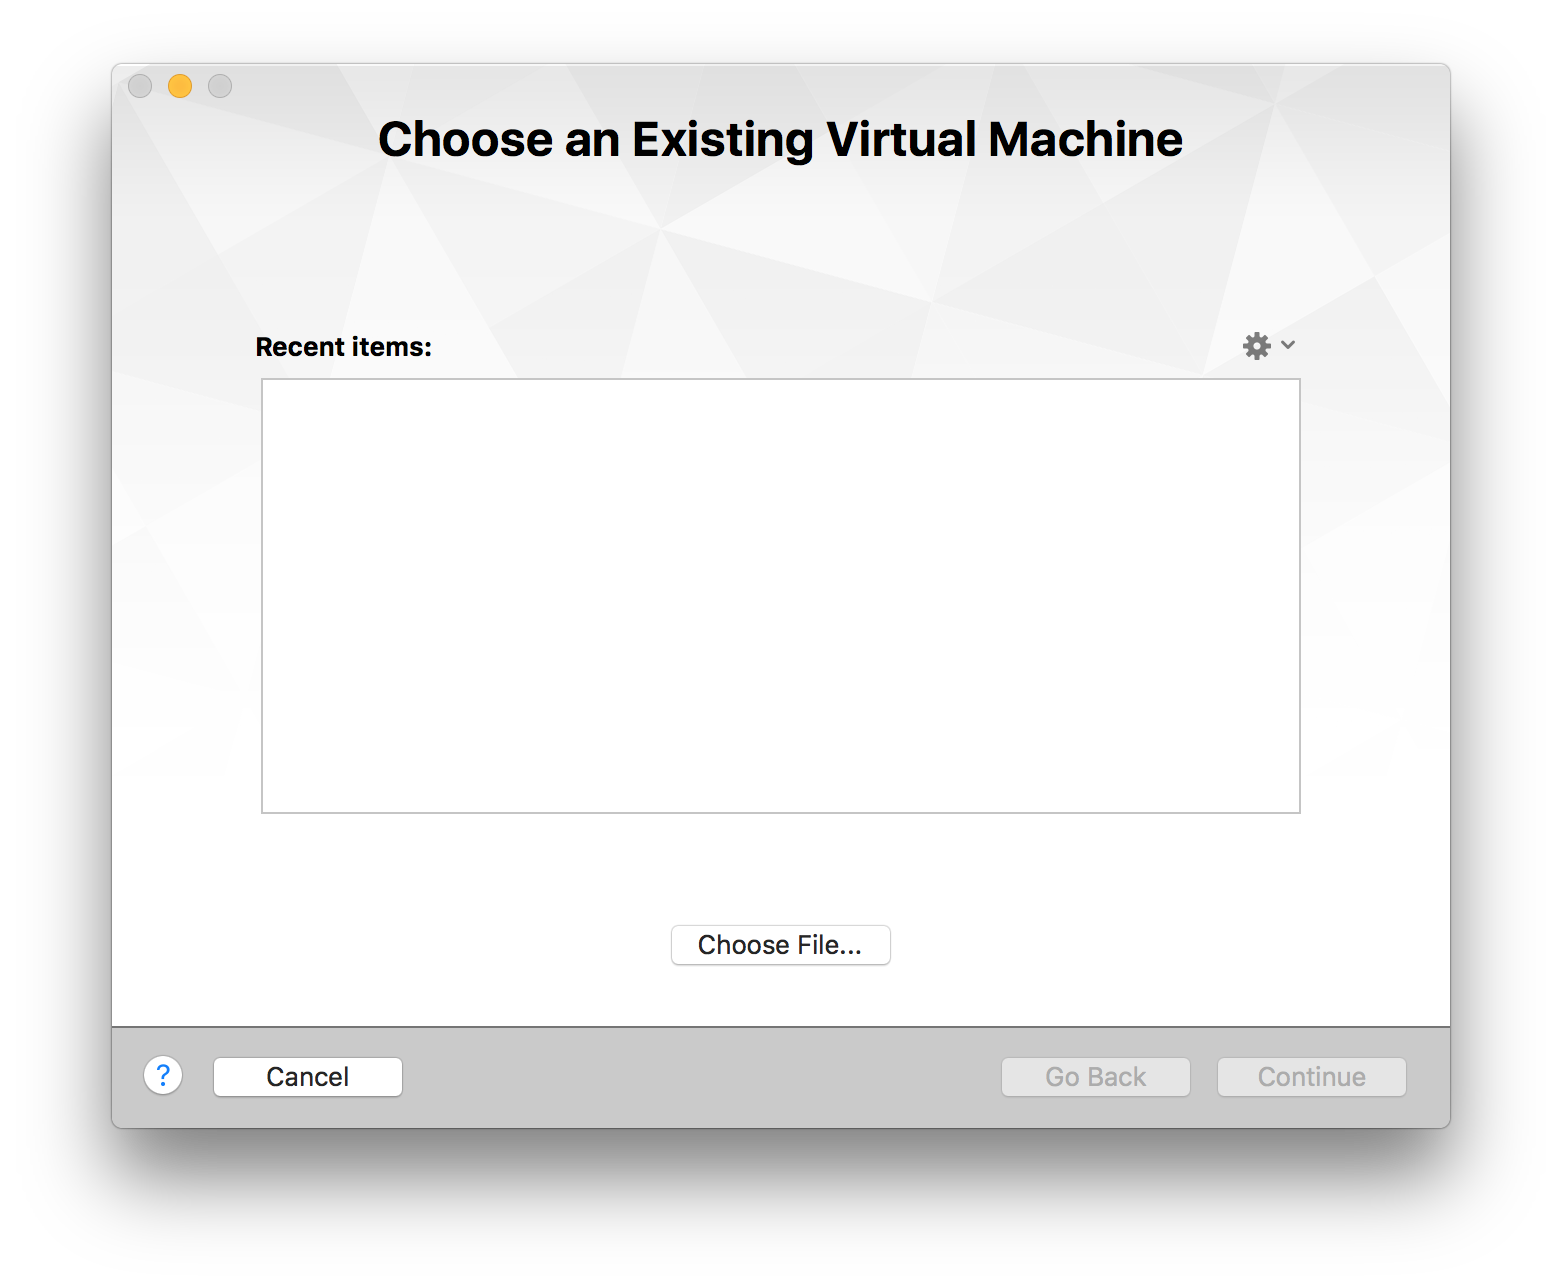
- Select 'Choose File...' and browse to Cirrus Link Chariot_*.ovf (which came from Cirrus_Link_Chariot_1.0.0.zip) and select Open. This will show the following window.
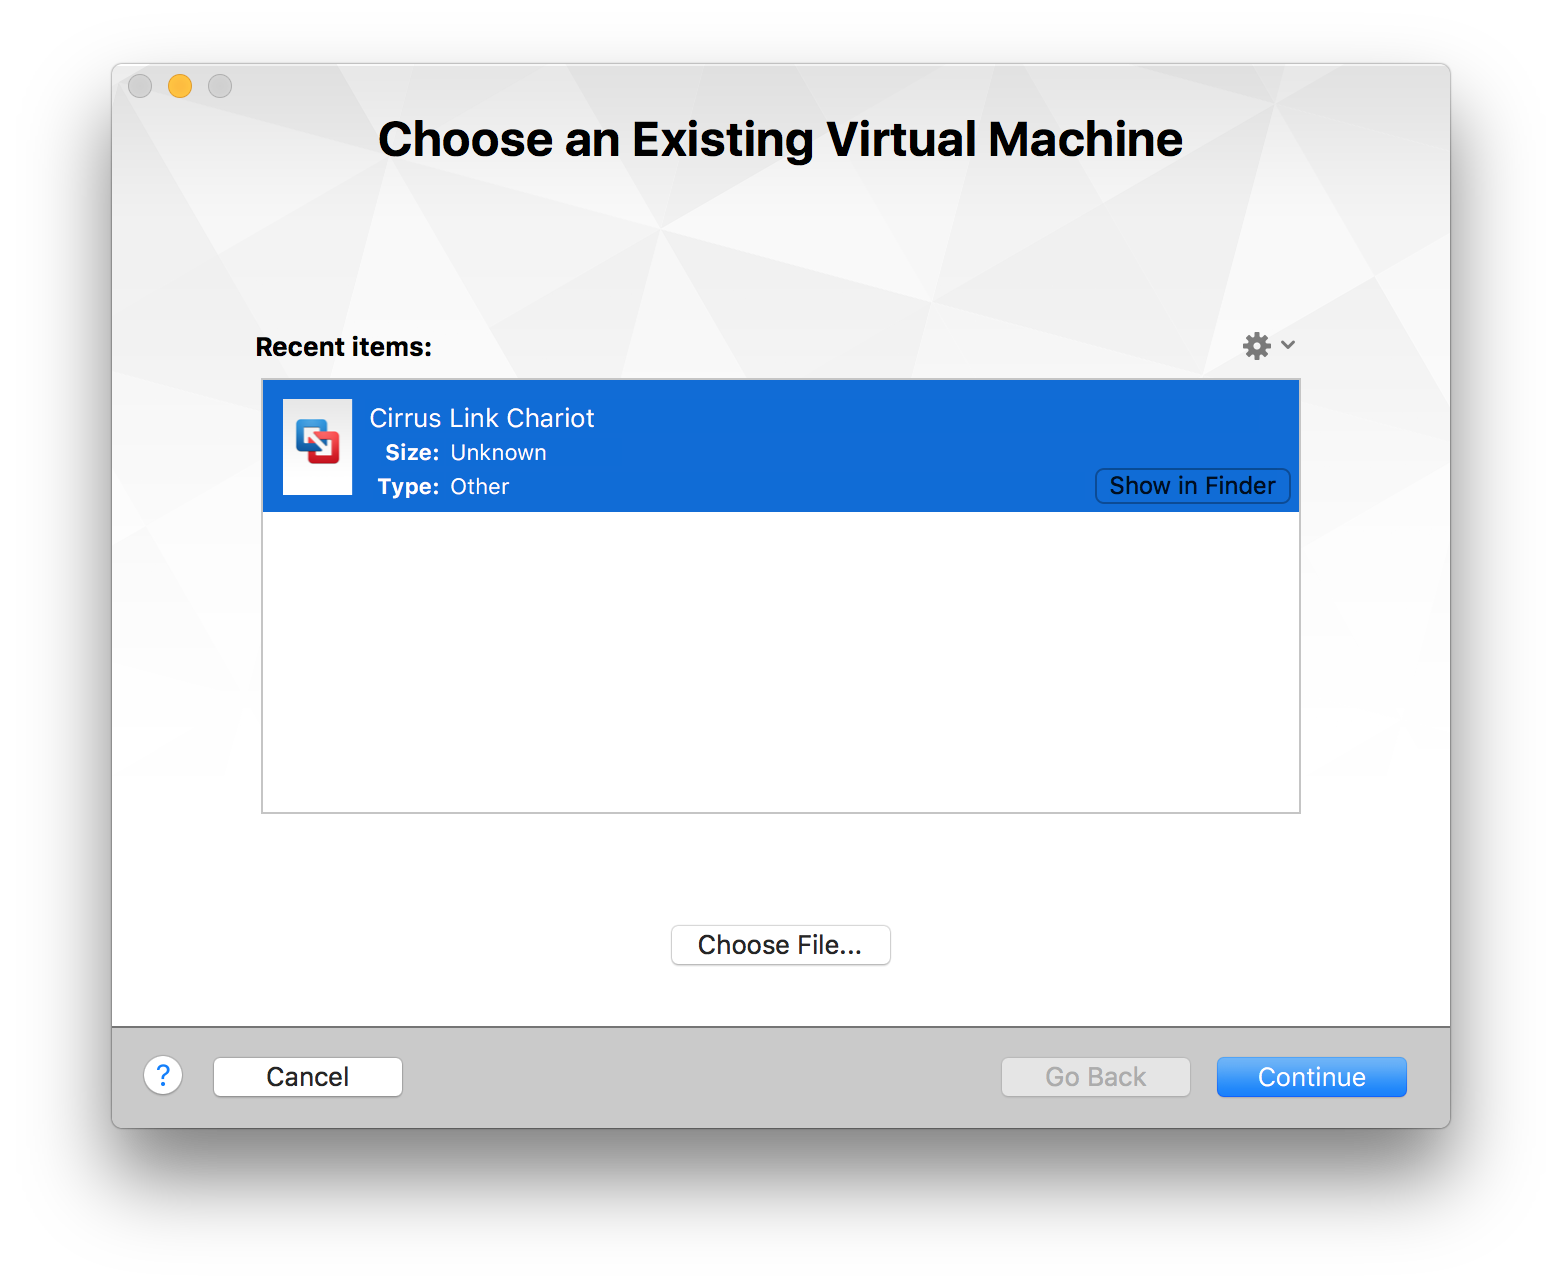
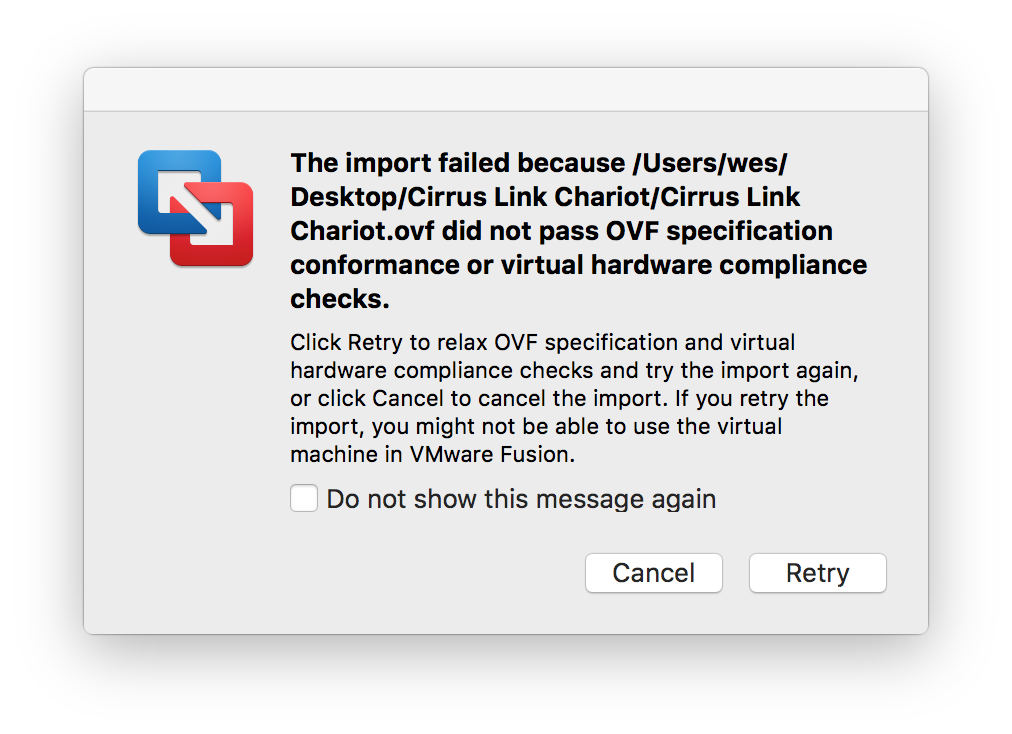
- Click 'Continue' and then click save to save the new Virtual Machine to your disk. At this point, you may get the following error. If so, simply click 'Retry'.
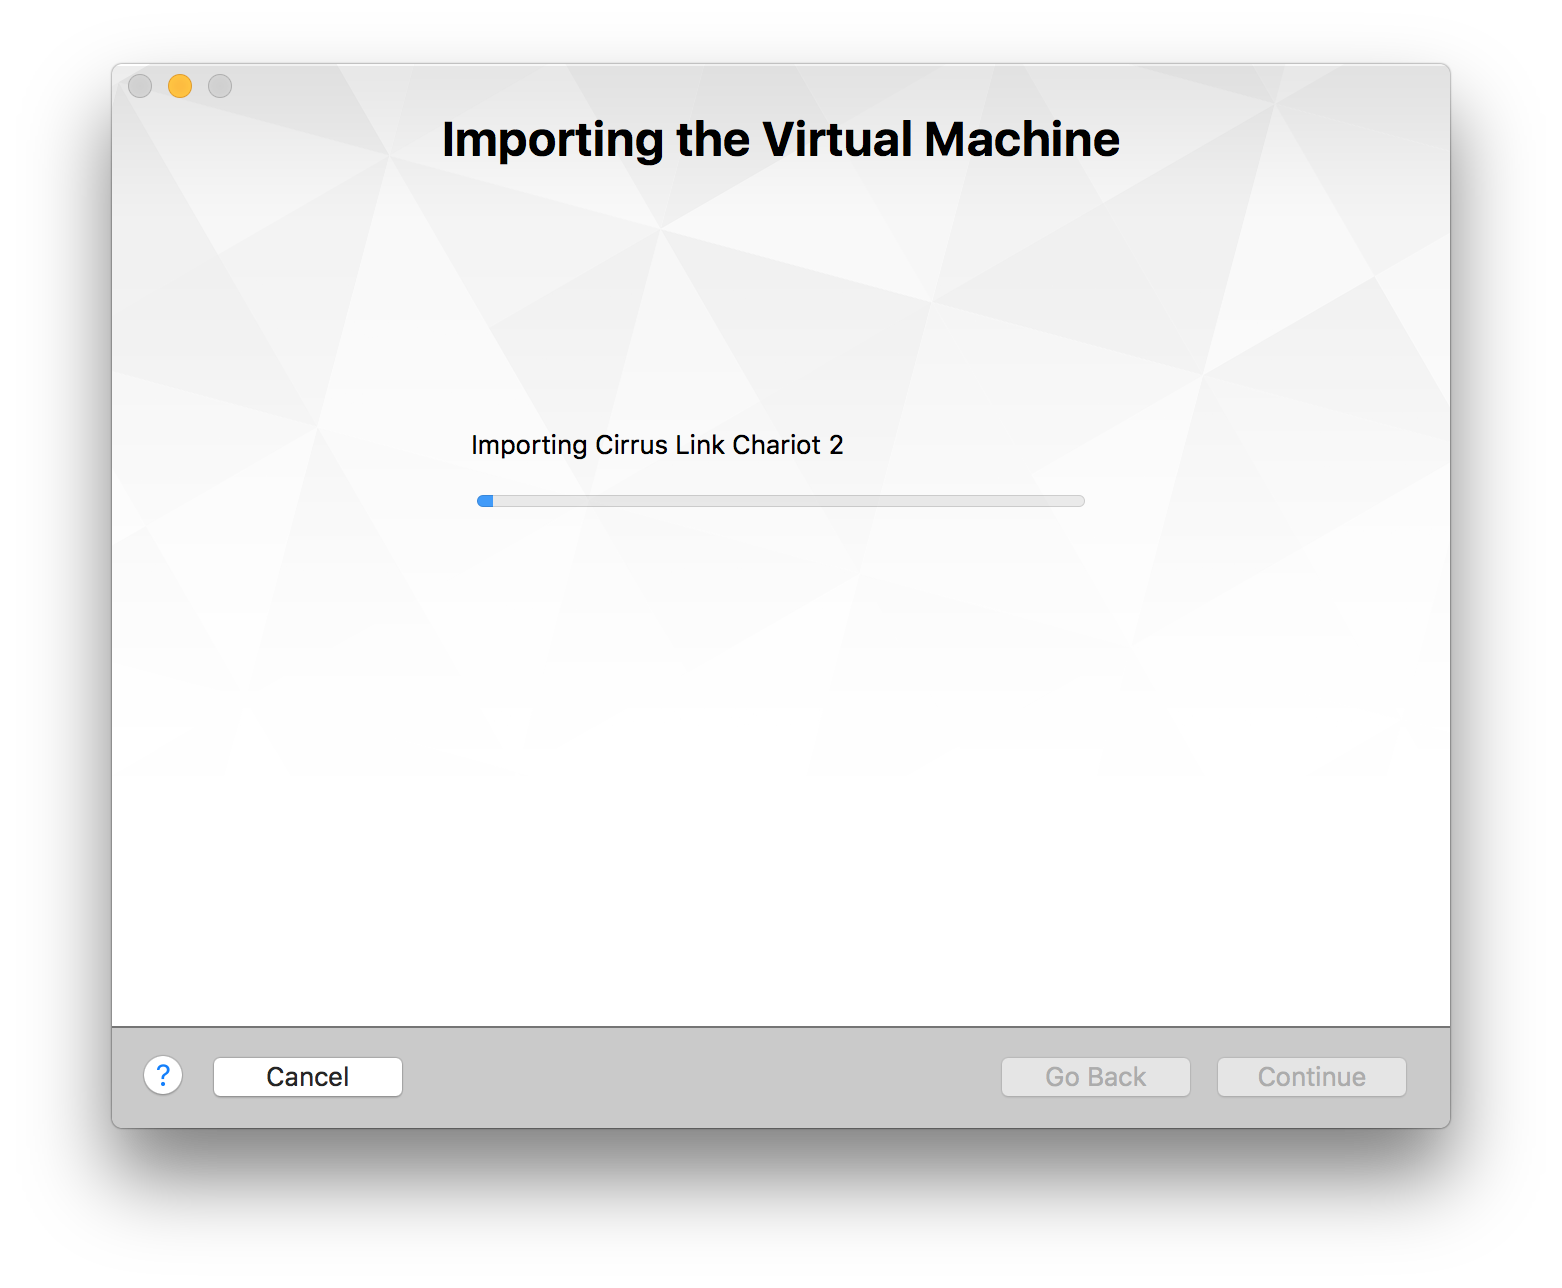
- At this point, the Chariot MQTT Server VM will be imported into your computer. This will take a few minutes.
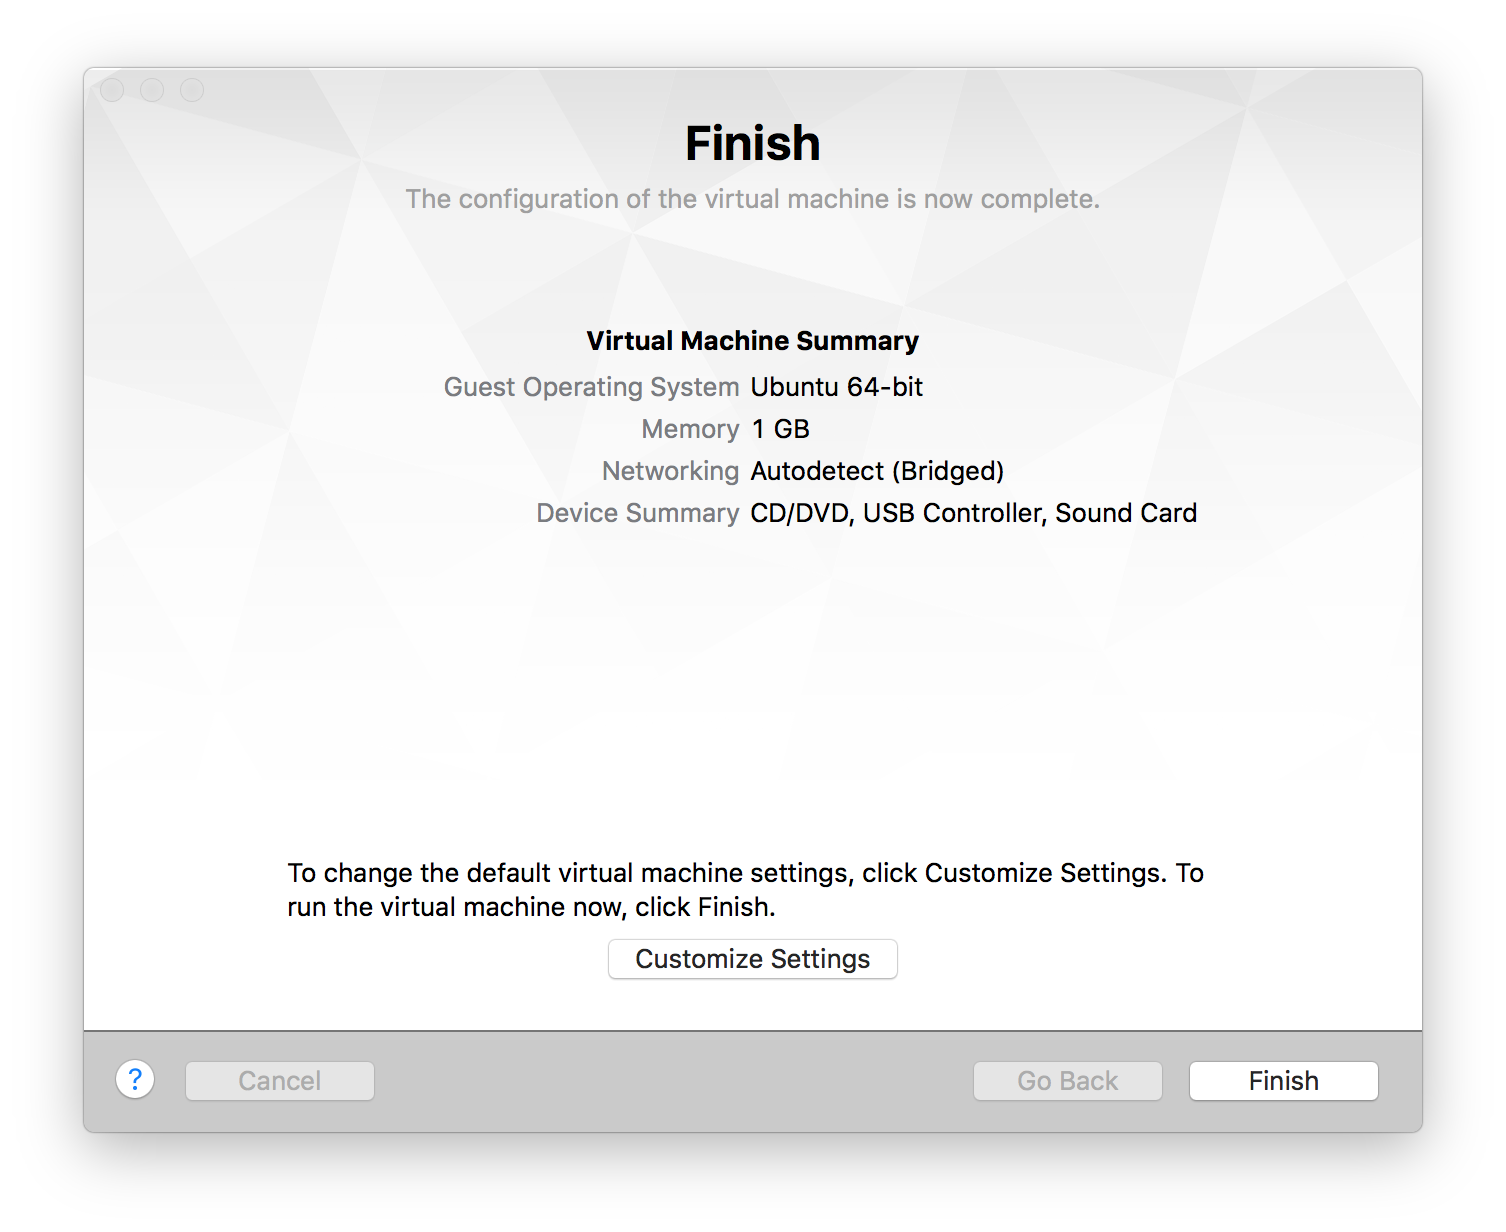
- Once imported, you will something similar to the following. Click Finish to finalize the import.
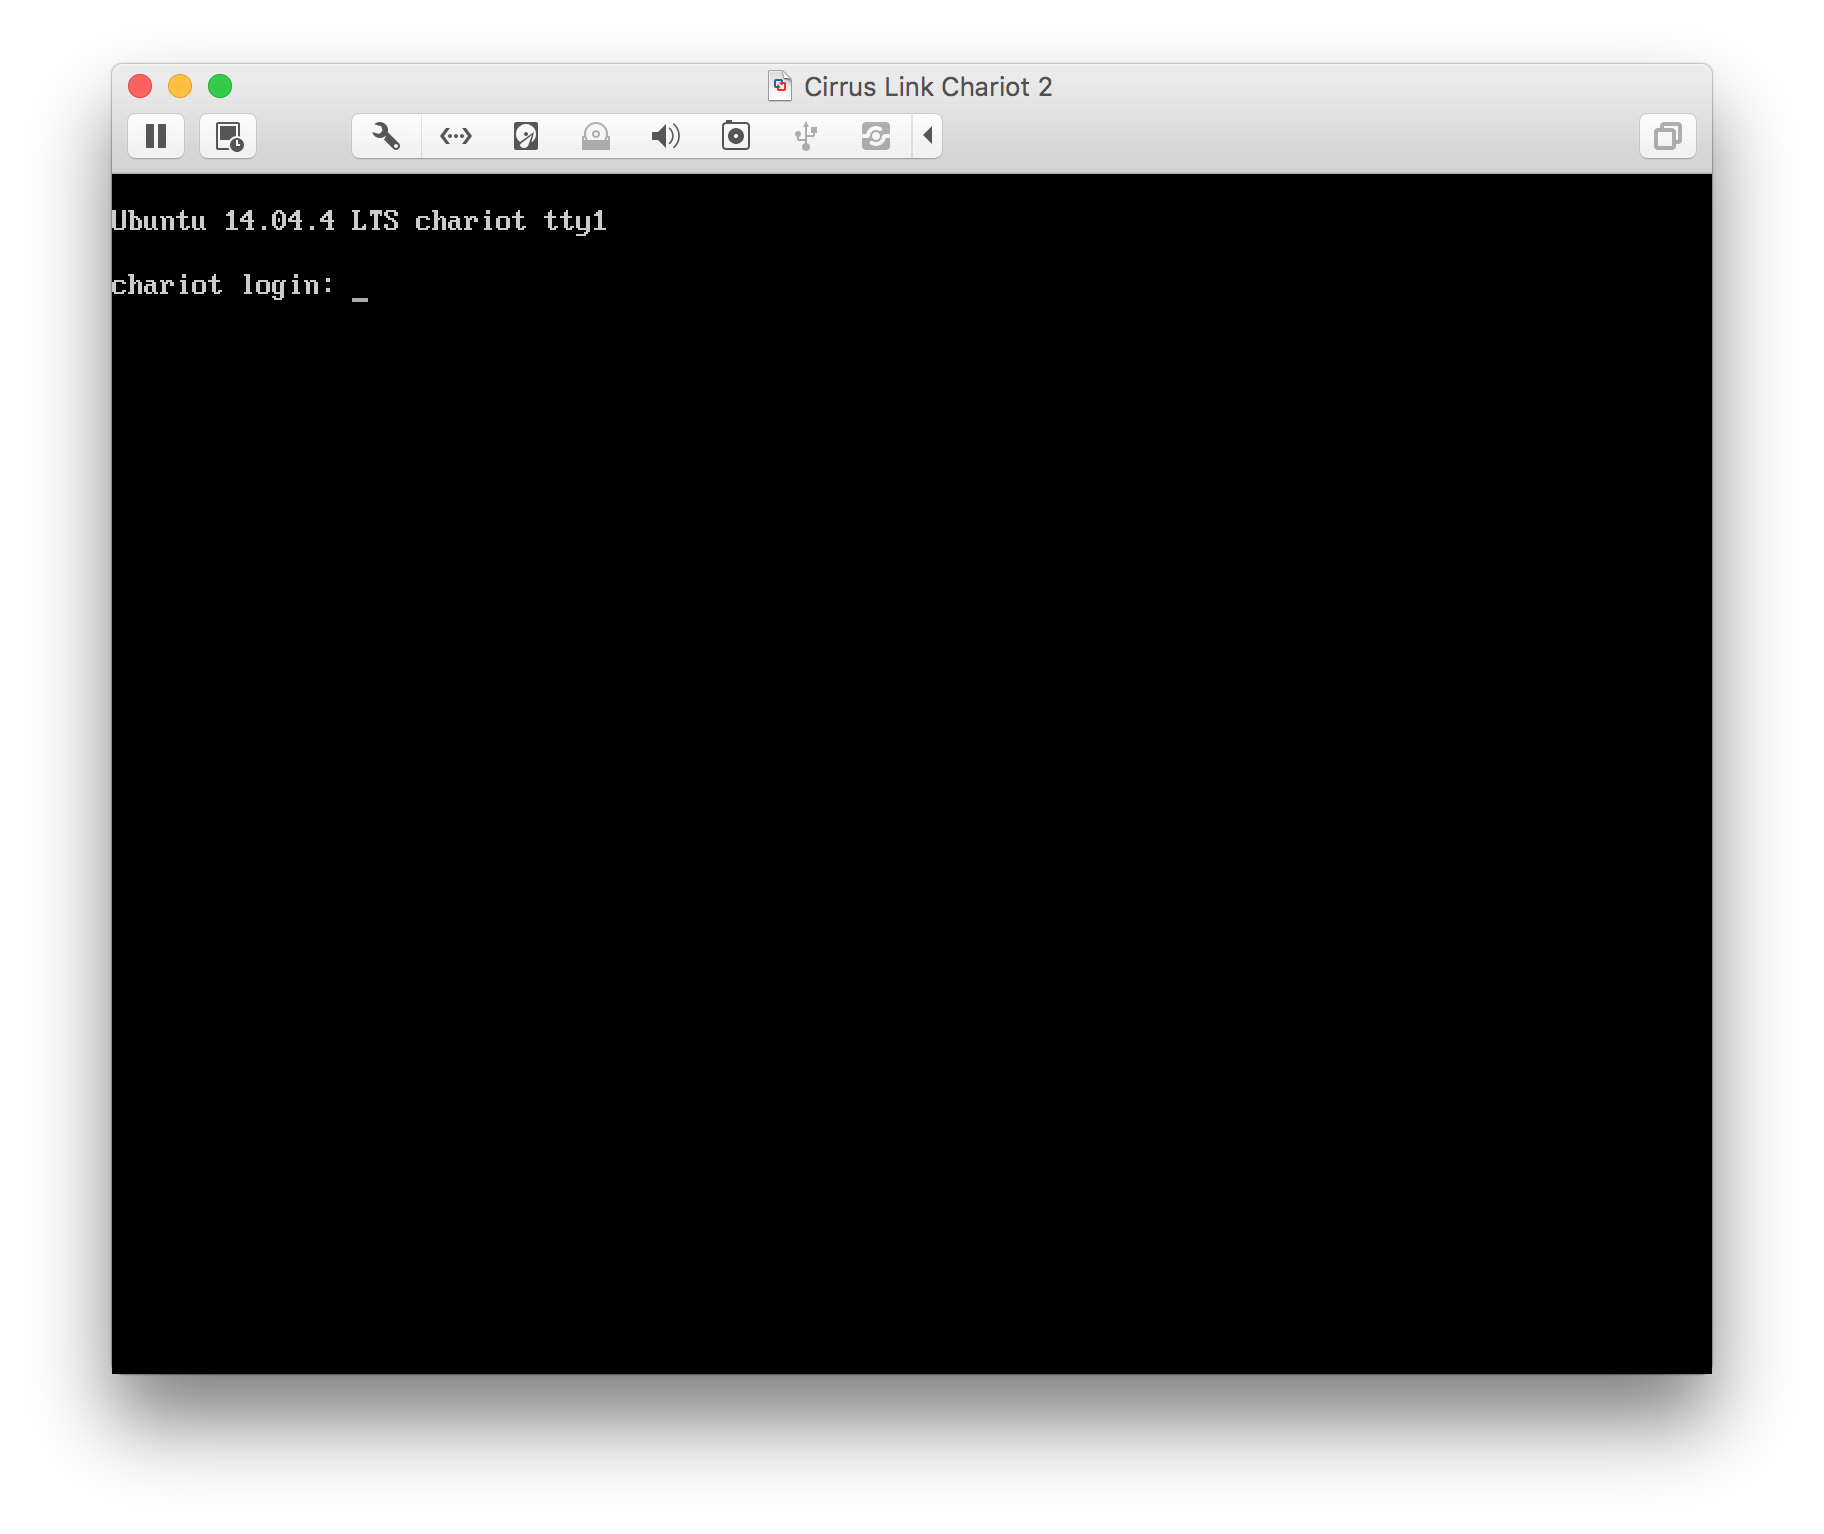
- At this point you can start the VM. Once you see the following, the Chariot MQTT Server is up and running.
Using Chariot MQTT Server:
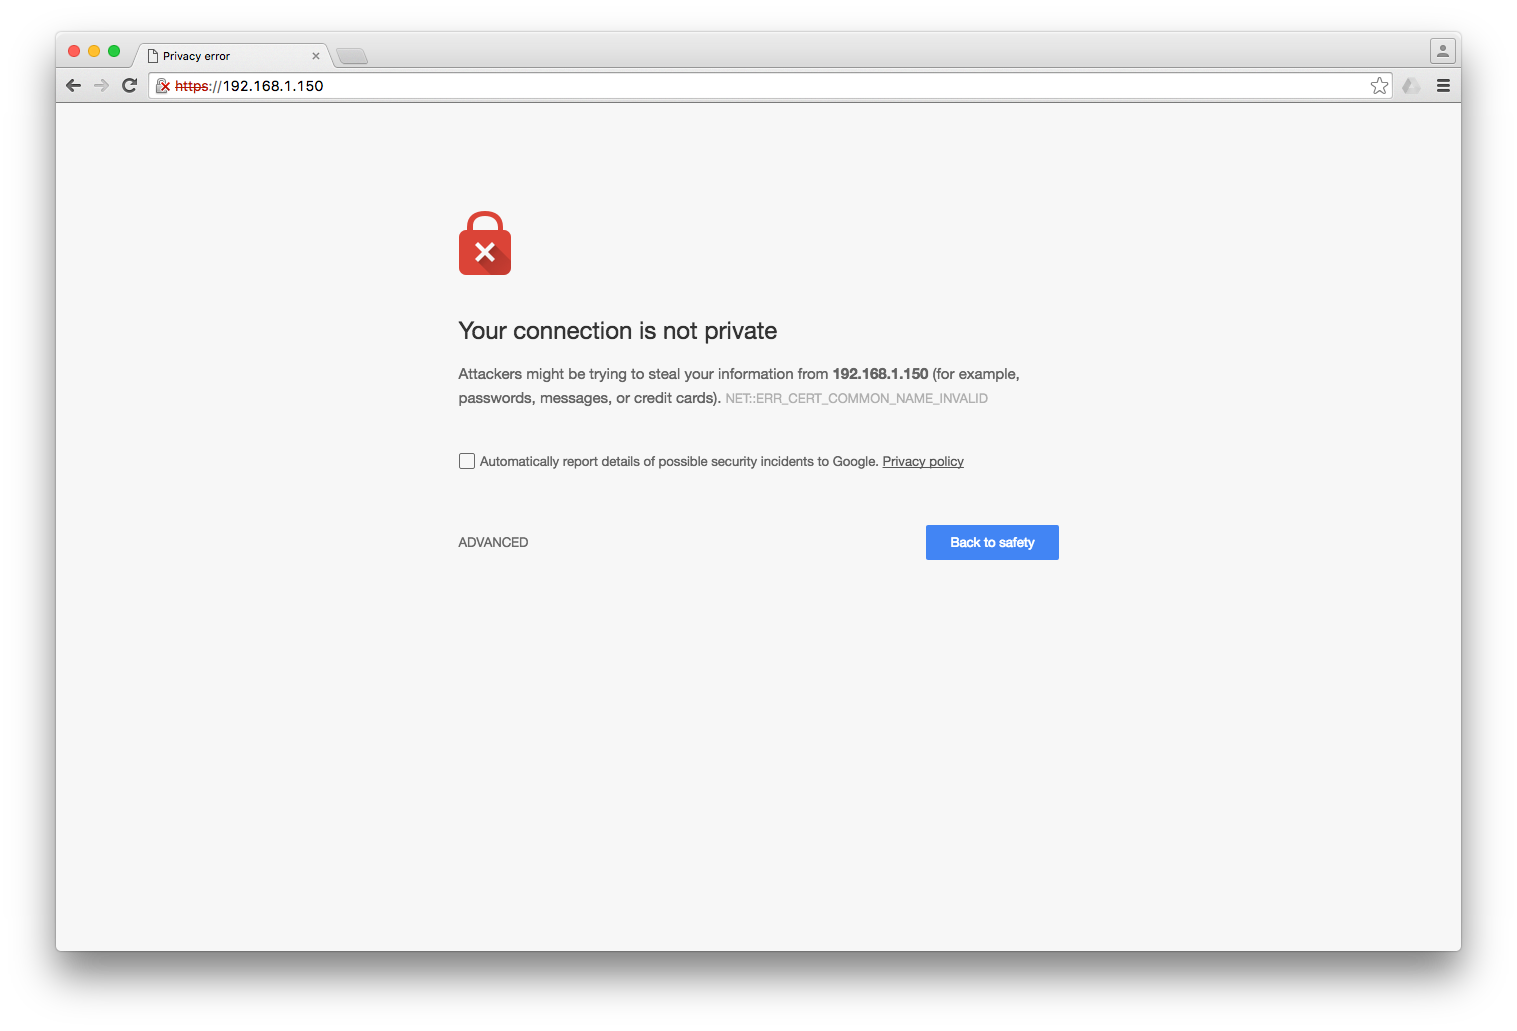
At this point the Chariot MQTT server is up and running. By default it has the hostname 'chariot' and is at the IP address 192.168.1.150 with a subnet mask of 255.255.255.0. In order for you to be able to browse to it, the host computer OS must be on the same network. Once you are on the same network, you can browse to Chariot MQTT Server by going to https://192.168.1.150. You will likely get security warnings from your browser due to using a certificate that is not signed by a trusted Certificate Authority (CA). This is fine, just accept the certificate (typically by clicking an 'advanced' button or something similar depending on the browser type). Below is an example warning from Google Chrome.
Once you accept the security warning, you should see the following.

Log in using the default Instance Admin credentials:
- username: admin
- password: changeme
After doing so you should see the following:
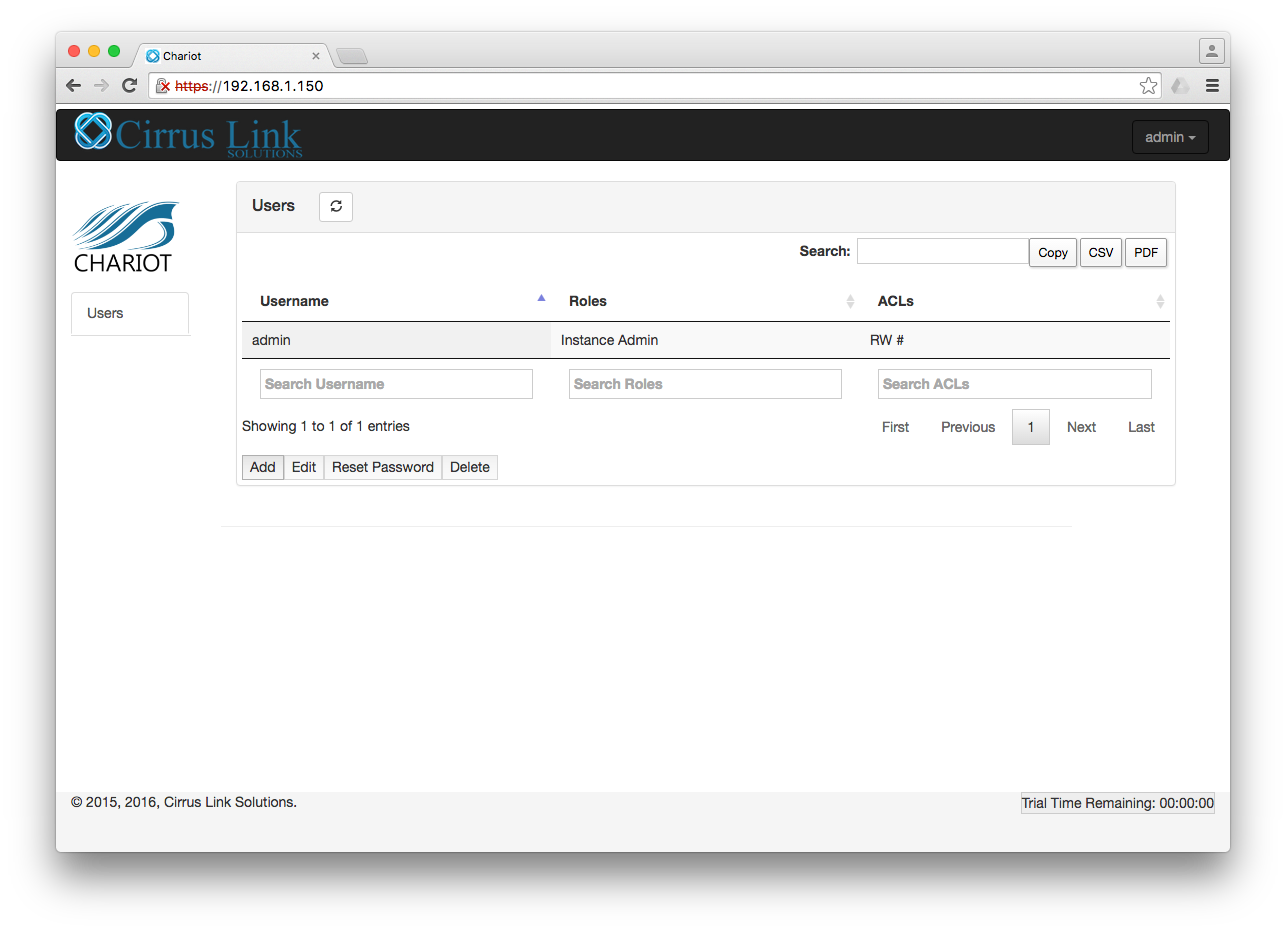
This shows a list of the users that are allowed to connect to the MQTT Server. By default, there is only one which is 'admin'. This user is an Instance Admin. There are three different types of user roles:
- Instance Admin
- Is allowed to connect to the MQTT server using the specified ACLs
- Is allowed to make changes to all users in the system (Add, View, Edit, Reset Password, Delete)
- Is allowed to make changes to the VM instance such as setting the hostname, network settings, resetting the trial, uploading a license
- Is not allowed to delete self
- Account Admin
- Is allowed to connect to the MQTT server using the specified ACLs
- Is allowed to make changes to all Account Admin and Account User users in the system (Add, Edit, Reset Password, Delete)
- Is allowed to make changes to the VM instance such as setting the hostname, network settings, resetting the trial, uploading a license
- Is not allowed any operations on Instance Admins - not even view.
- Is not allowed to delete self
- Account User
- Is allowed to connect to the MQTT server using the specified ACLs
- Is not allowed any operations on any other users - not even view.
- Is allowed to Reset Password of self
Basic Usage of Features
- Adding a User
- Users can be added by Instance Admin and Account Admins but the users being added must be at that role level or lower
- Done by clicking 'Add User' which opens the following Window
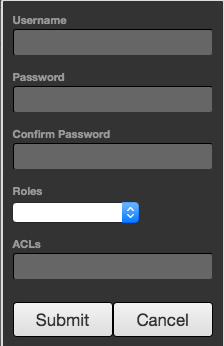
- Username and Password must be set as well as one of the three roles.
- ACLs must be defined. This is a comma separated list of ACLs that define which topics users can publish and subscribe on
ACLs are defined by the following format: [R|W|RW] topic
where:
R = Read or 'subscribe' privileges
W = Write or 'publish' privileges
RW = Read and Write (subscribe and publish) privileges
topic = The topic or wildcard topic representing the scope of the privilege
Below are some example ACL definitions
- RW #
- This allows clients connecting using this username/password to publish and subscribe on any topic
- R #
- This allows clients connecting using this username/password to subscribe on any topic but not publish on any topics
- W #
- This allows clients connecting using this username/password to publish on any topic but not subscribe on any topics
- W device_one/temp/#,R state/#
- This allows clients connecting using this username/password to publish on device_one/temp/# and subscribe on state/# topics
ACLs should be designed with a 'principal of least privilege' model while also considering device management and maintenance. For example gateways and devices in the field should be limited to publishing and subscribing only on the topics for which they should be expected to. The same should be true of 'consumer' applications that will be either sending commands to devices in the field or consuming data coming from those devices.
It is also important to note that a username is not limited to a single MQTT client. A username/password pair could be used for multiple MQTT clients.
If you are new to MQTT topics, Eclipse provides good information here on the basics and wildcards.
- Editing a User
- This is the same as adding a user except does not allow modifying the username. It also doesn't allow resetting the passwords from this view.
- Resetting a User Password
- Resets the password for another user.
- Deleting a User
- Deletes a user. This is only allowed for users other than the one currently logged in.
- Reset Trial Timer
- Resets the trial timer to two hours. This is only allowed once the trial timer has expired and as long as a license has not been issued to this instance.
- Important: The trial must be running or the instance must have a valid license from Cirrus Link for the MQTT server to work!
- Once the Chariot MQTT Server is licensed, this option goes away.
- Change Password
- Resets the password for the currently logged in user.
- Change Network Settings
- Allows for changing the following parameters:
- Hostname
- IP Address
- Network Mask
- Default Gateway
- DNS Servers
- Once the Chariot MQTT Server is licensed, this option goes away.
- Generate License Request
- Used to create a license request to submit to Cirrus Link for acquire a Chariot MQTT Server license. Once generated and downloaded, this is the file to submit to Cirrus Link to receive a license file.
- Once the Chariot MQTT Server is licensed, this option goes away.
- Upload License
- This is used to upload a license file after Cirrus Link creates it from the license request file.
- Once the Chariot MQTT Server is licensed, this option goes away.
- Logout
- Logs the current user out of the system.
Connecting to Chariot MQTT Server
MQTT.fx is a good free graphical based MQTT client to use for testing with Chariot MQTT Server. It is Java based so it will run on any OS that supports running graphical based Java applications.
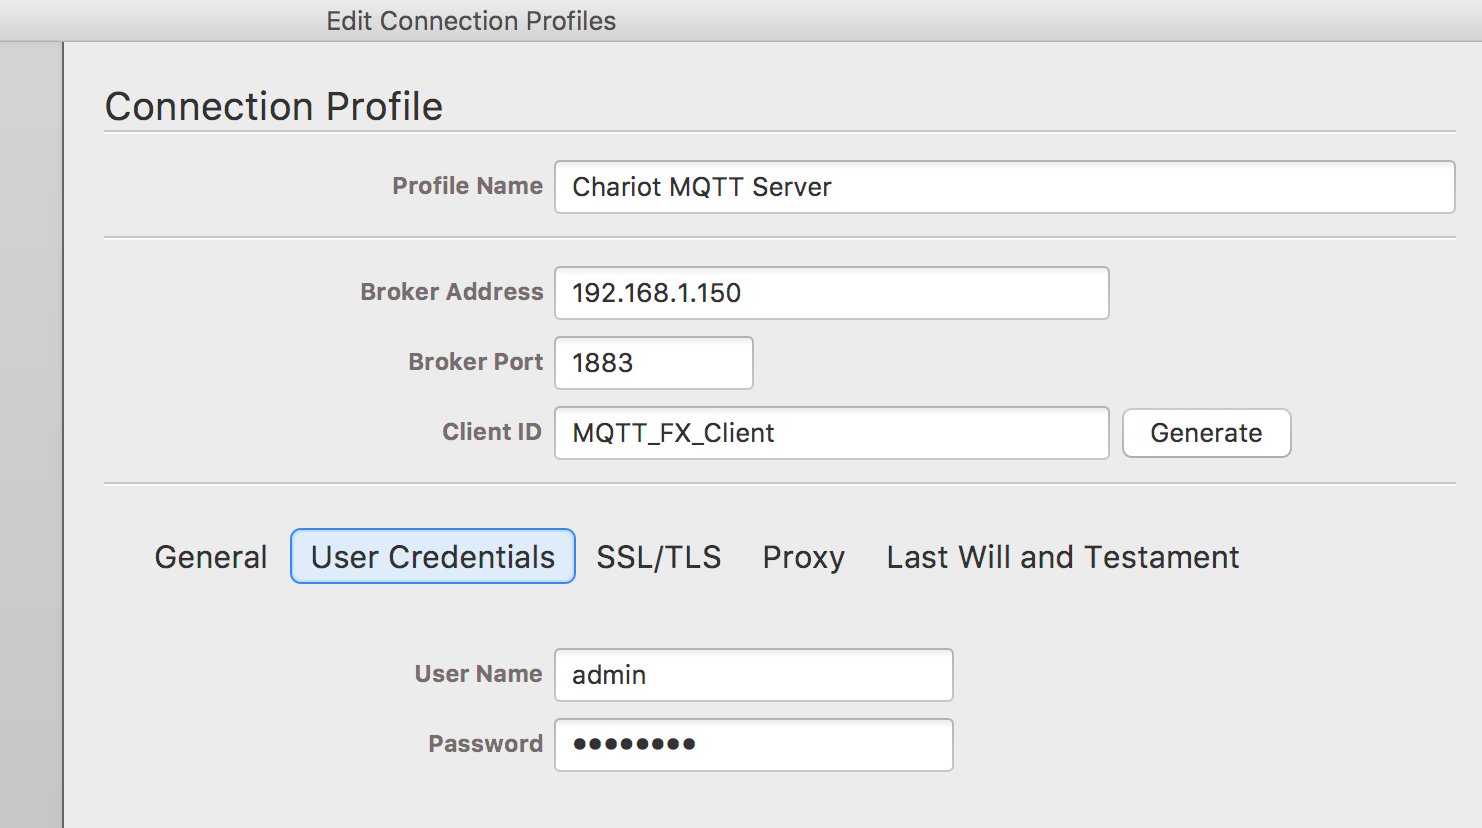
Once downloaded, start it and create a new connection profile called 'Chariot MQTT Server'. Use the settings shown below. The default password is 'changeme'. Everything else can remain at their defaults.
After the connection profile is created, from the main MQTT.fx window, select 'Chariot MQTT Server', and click Connect.

After a valid connection is established, you should see the connection indicator in the top right corner light green as shown below:

If the connection does not get established, check the following:
- The Trial Timer is not at 00:00:00
- The MQTT Server is on the same network as the computer running MQTT.fx
Once connected, you can use the publish and subscribe buttons in MQTT.fx to send and receive messages. To send a message and receive it back in this client, do the following.
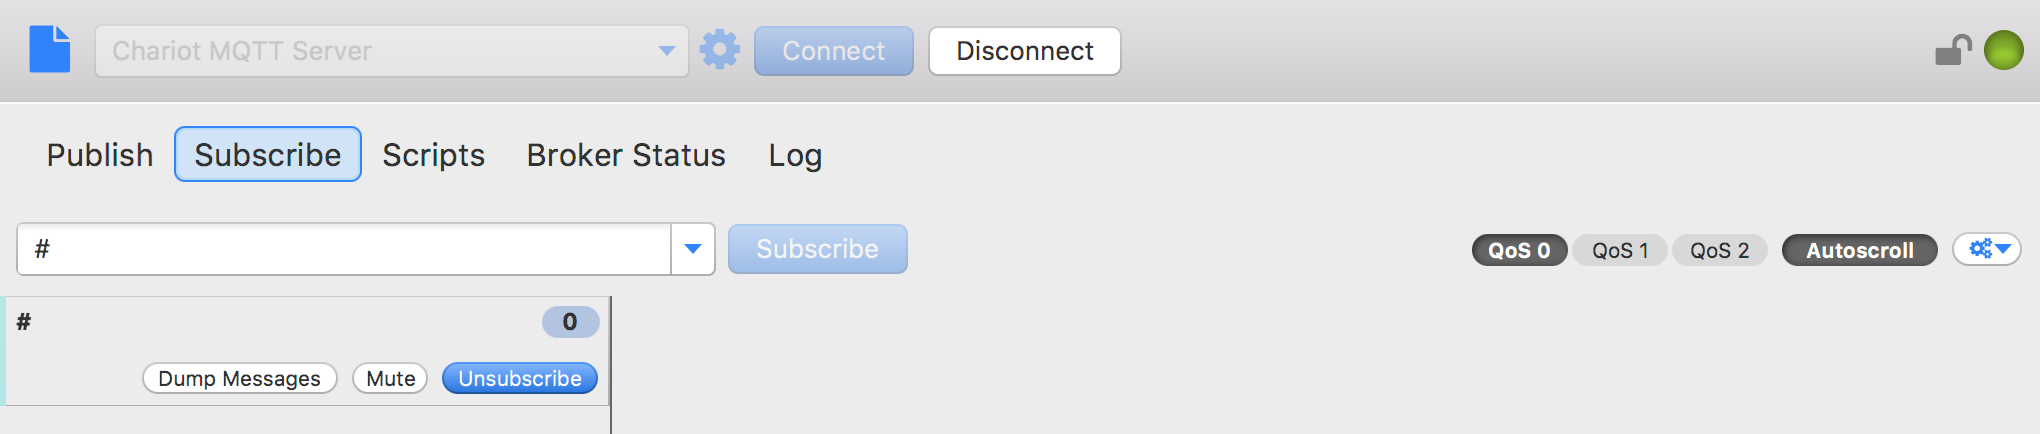
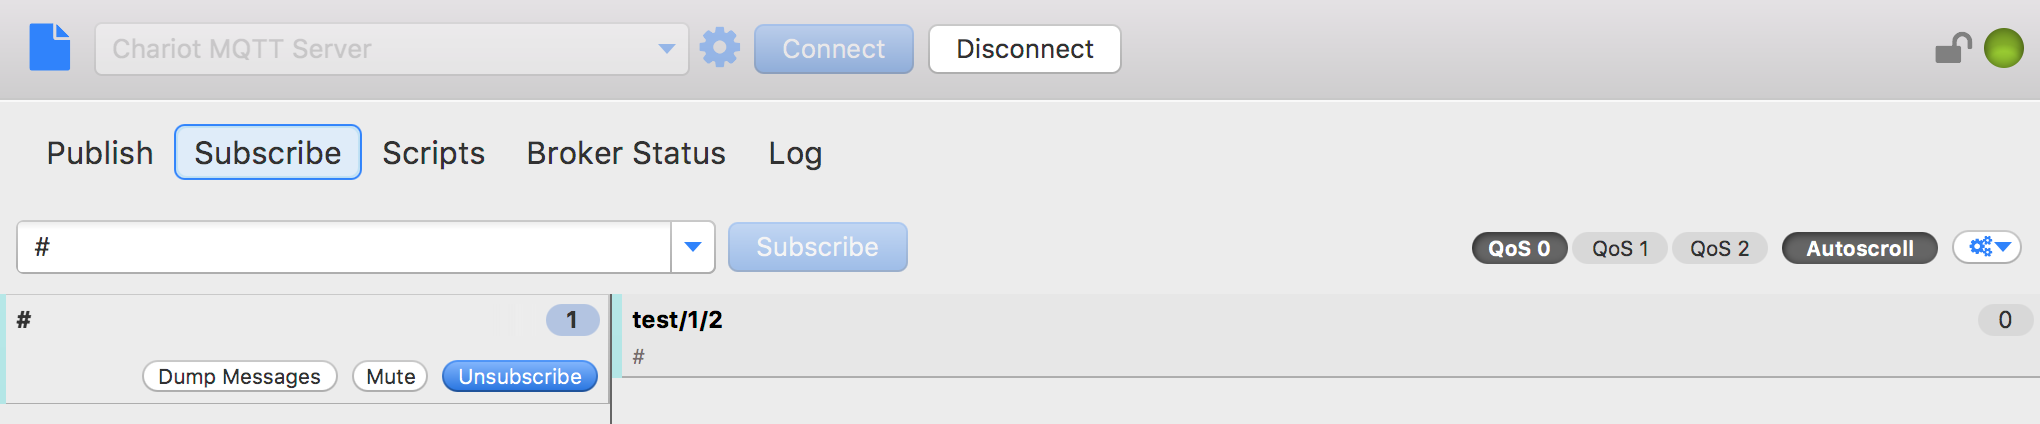
- Subscribe on # to enable this client to receive all messages. To do so, select the Subscribe tab, Type '#' into the topic window, and click the Subscribe button. Once done, it should look as follows.
- Publish a message on a topic. To do so, select the Publish tab, 'type test/1/2' into the topic window, and click the Publish button. Once do, it should look as follows.

- Now switch back to the Subscribe tab. You should see that a message has come in on 'test/1/2'.
This example isn't very interesting because we're sending and receiving a message from the same client. But, this exercise does prove the Chariot MQTT Server is up and running properly.