![]()
Contents
Cirrus Link Resources
Cirrus Link Website![]()
Contact Us (Sales/Support)![]()
Inductive Resources
Ignition User Manual![]()
Knowledge Base Articles![]()
Inductive University![]()
Forum![]()
![]()
Cirrus Link Website![]()
Contact Us (Sales/Support)![]()
Ignition User Manual![]()
Knowledge Base Articles![]()
Inductive University![]()
Forum![]()
This tutorial will provide step-by-step instructions for the following:
Upon completion of this module you will have an Ignition Gateway connected and publishing live Tag data to the IBM Watson IoT Platform.
Ignition is an Industrial Application Platform that can be used to create SCADA and HMI solutions. A fully functional Ignition system can be downloaded and run in trial mode. Using Ignition as a tool in this way, we can install the Sparkplug MQTT Modules and observe everything working.
Go to the Inductive Automation download page and download the desired Ignition installer for Windows, Linux or MacOS;
https://inductiveautomation.com/downloads/ignition
Once the Ignition installer has been downloaded, follow the instructions provided by Inductive Automation to install and startup Ignition.
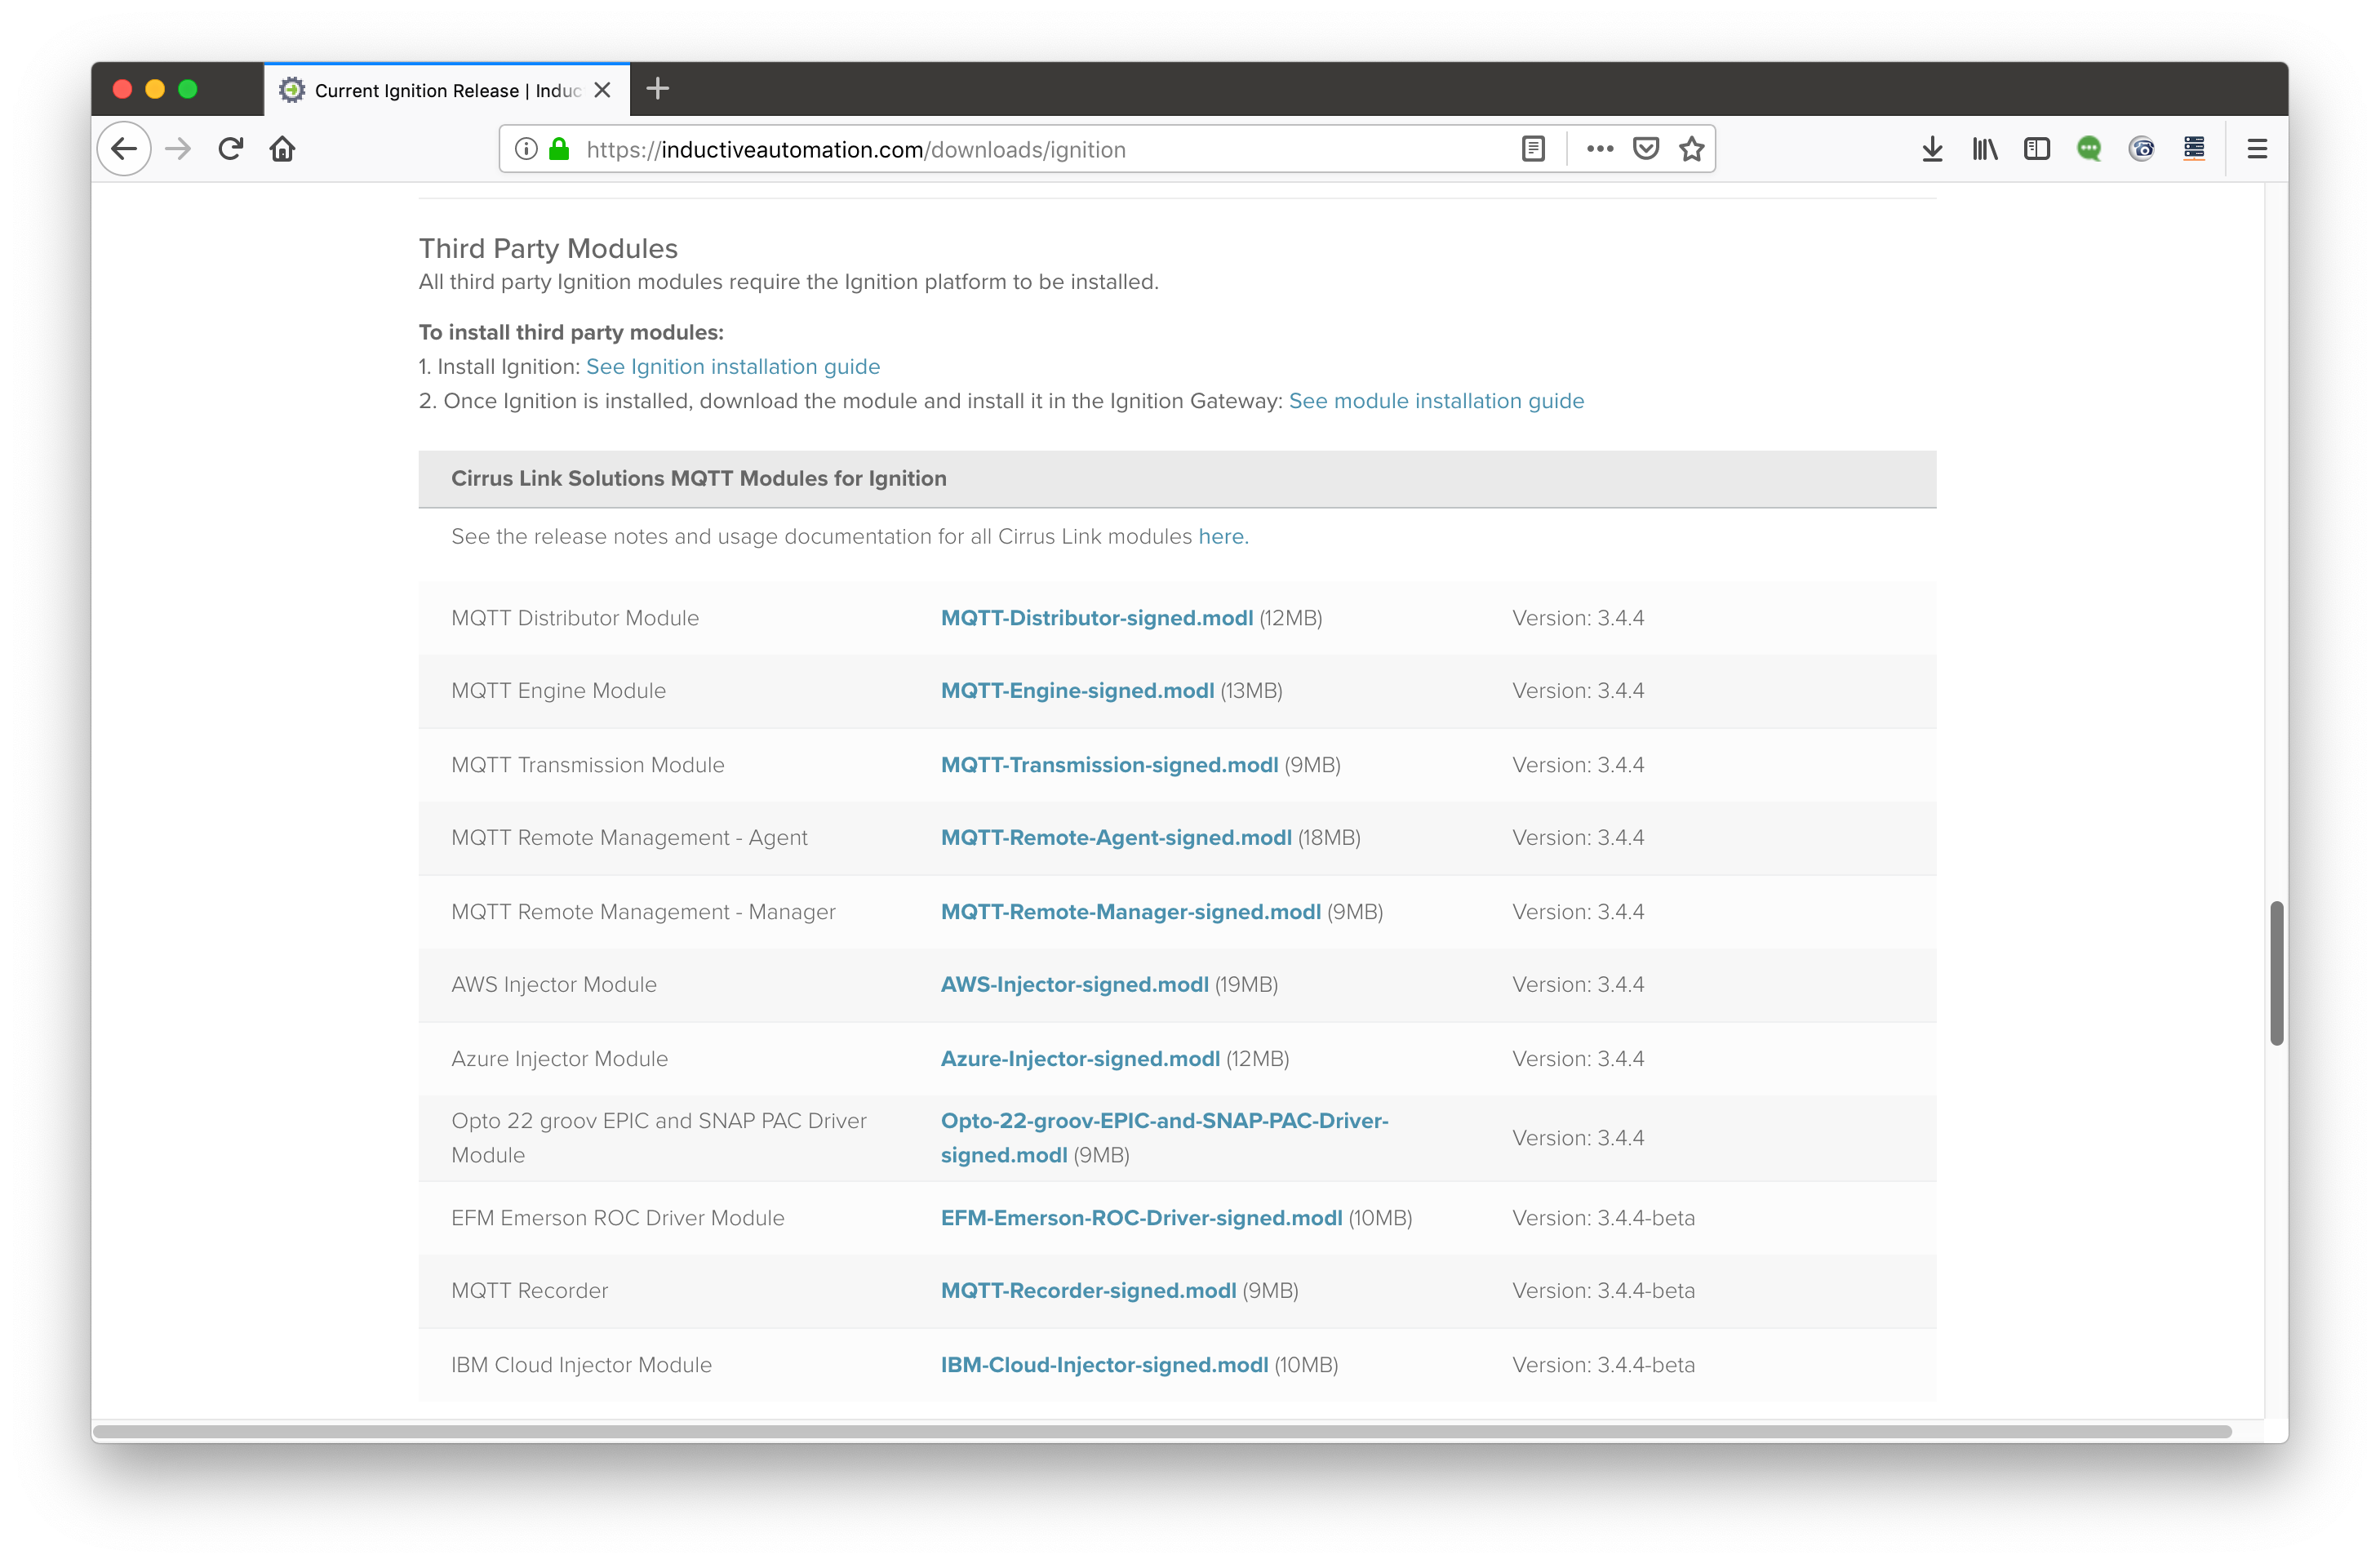
Go to the Inductive Automation download page again and scroll down to the Third Party modules section. Find the Cirrus Link modules section and download the IBM Cloud Injector Module.
https://inductiveautomation.com/downloads/ignition. The download links should look similar to what is shown below.
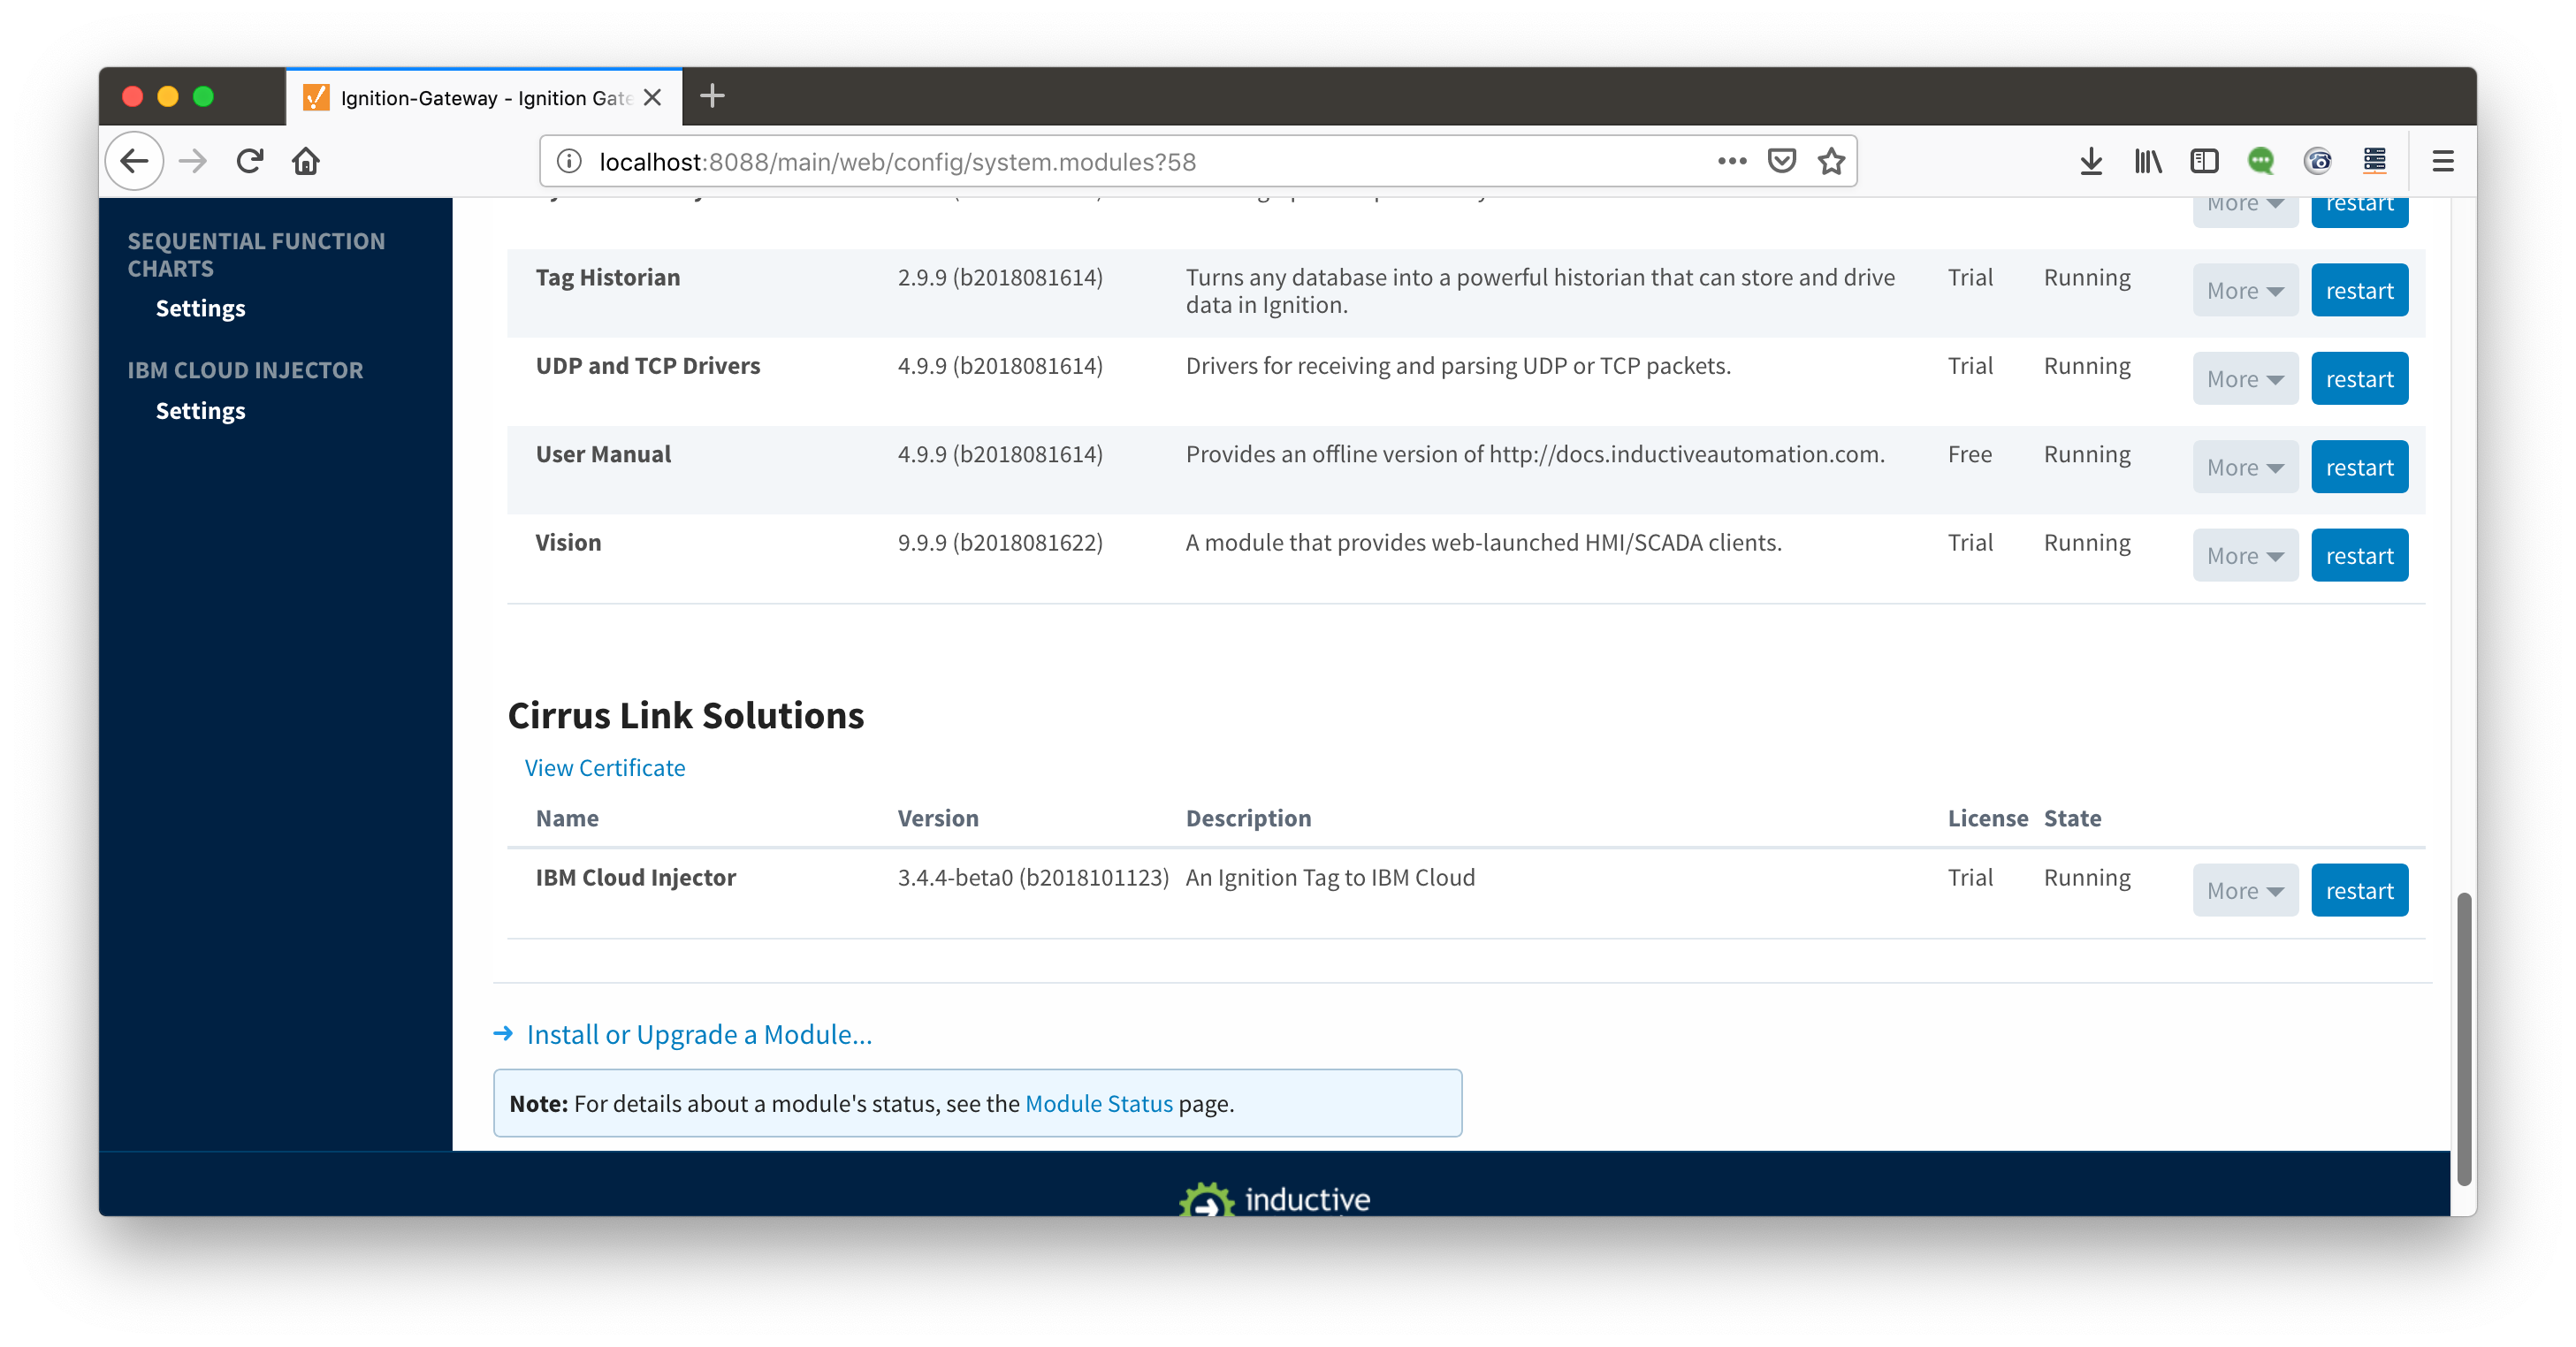
Once you have Ignition installed and running, and the IBM Cloud Injector module downloaded, browse to the Ignition Gateway console (e.g. http://localhost:8088). Login using the default credentials of admin/password. Click on Configuration tab and then click on the Modules tab on the left side of the page. Scroll to the bottom of the Modules section and click on the Download/Upgrade modules button. When prompted, select the IBM Cloud Injector module from the file browser and install it. When complete, the Ignition Gateway Web UI module section should look similar to what is shown below:
Select the "IBM CLOUD INJECTOR" → "Settings" link on the lower left of the page to navigate to the IBM Cloud Injector Module's configuration page. A detailed explanation of each configuration tab can be found here. For this tutorial, we will only be adding a new IBM Cloud MQTT Setting.
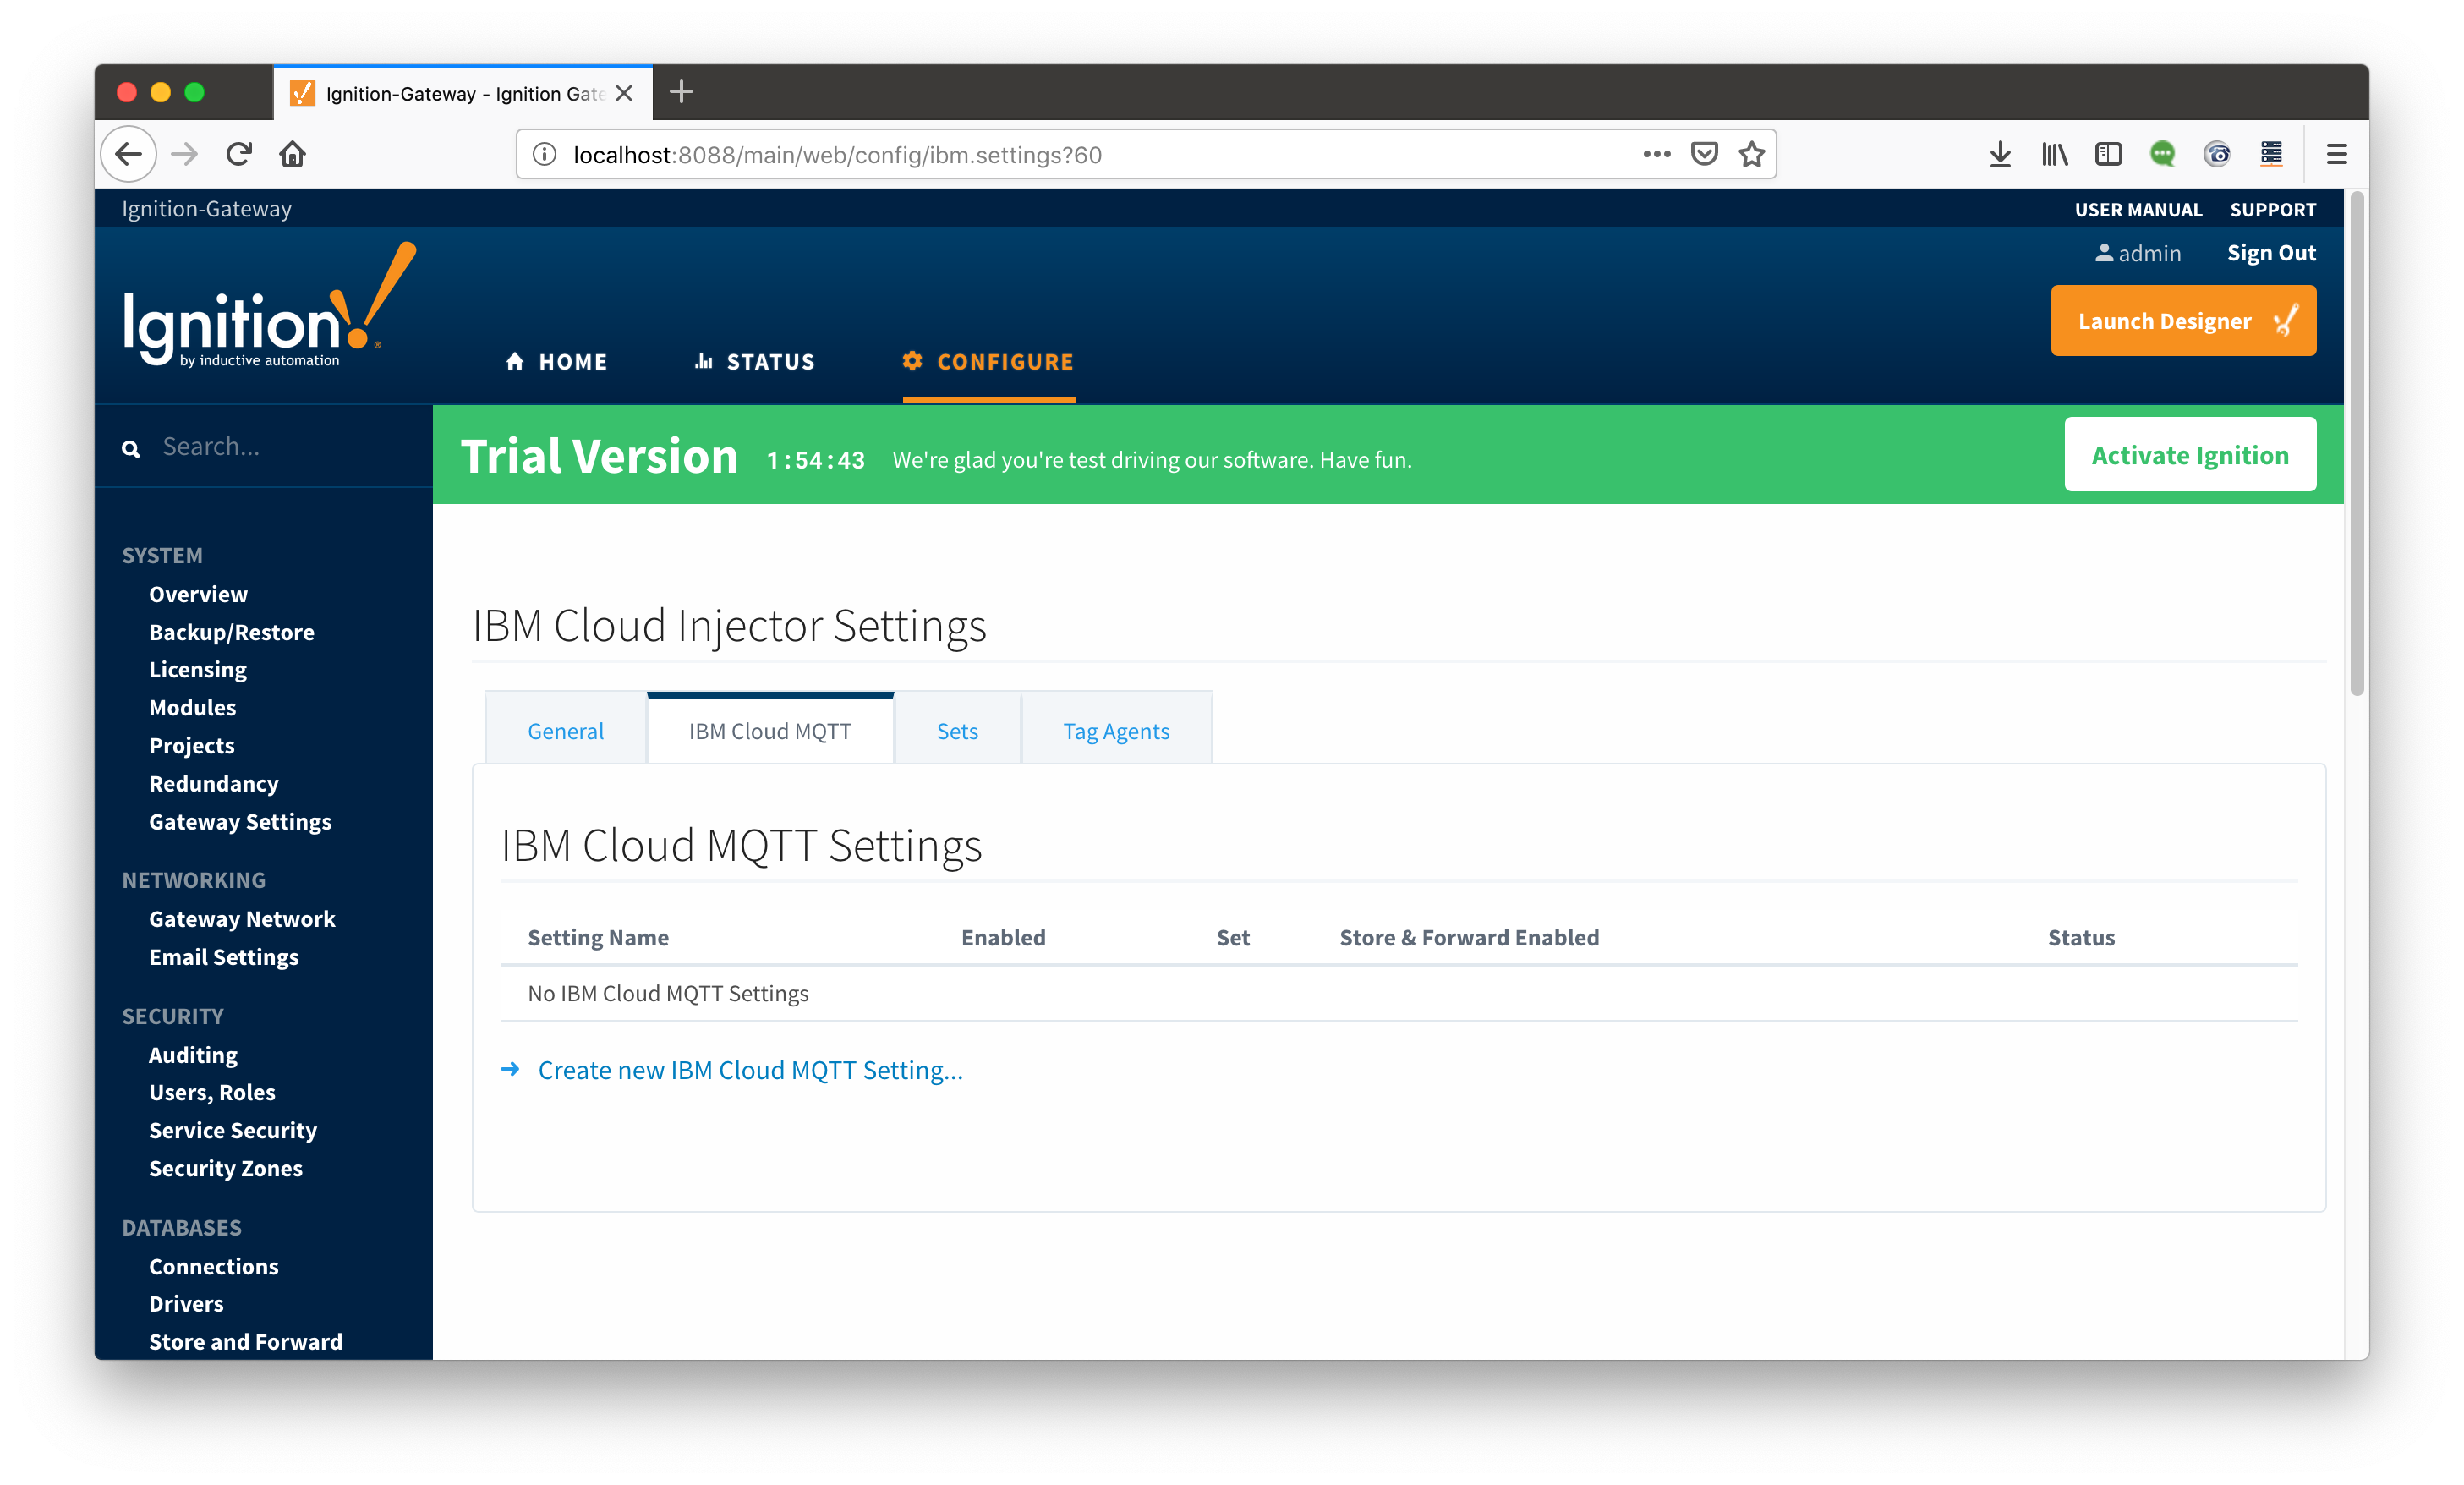
Click on the "Create new IBM Cloud MQTT Setting..." link to bring up the following configuration form:
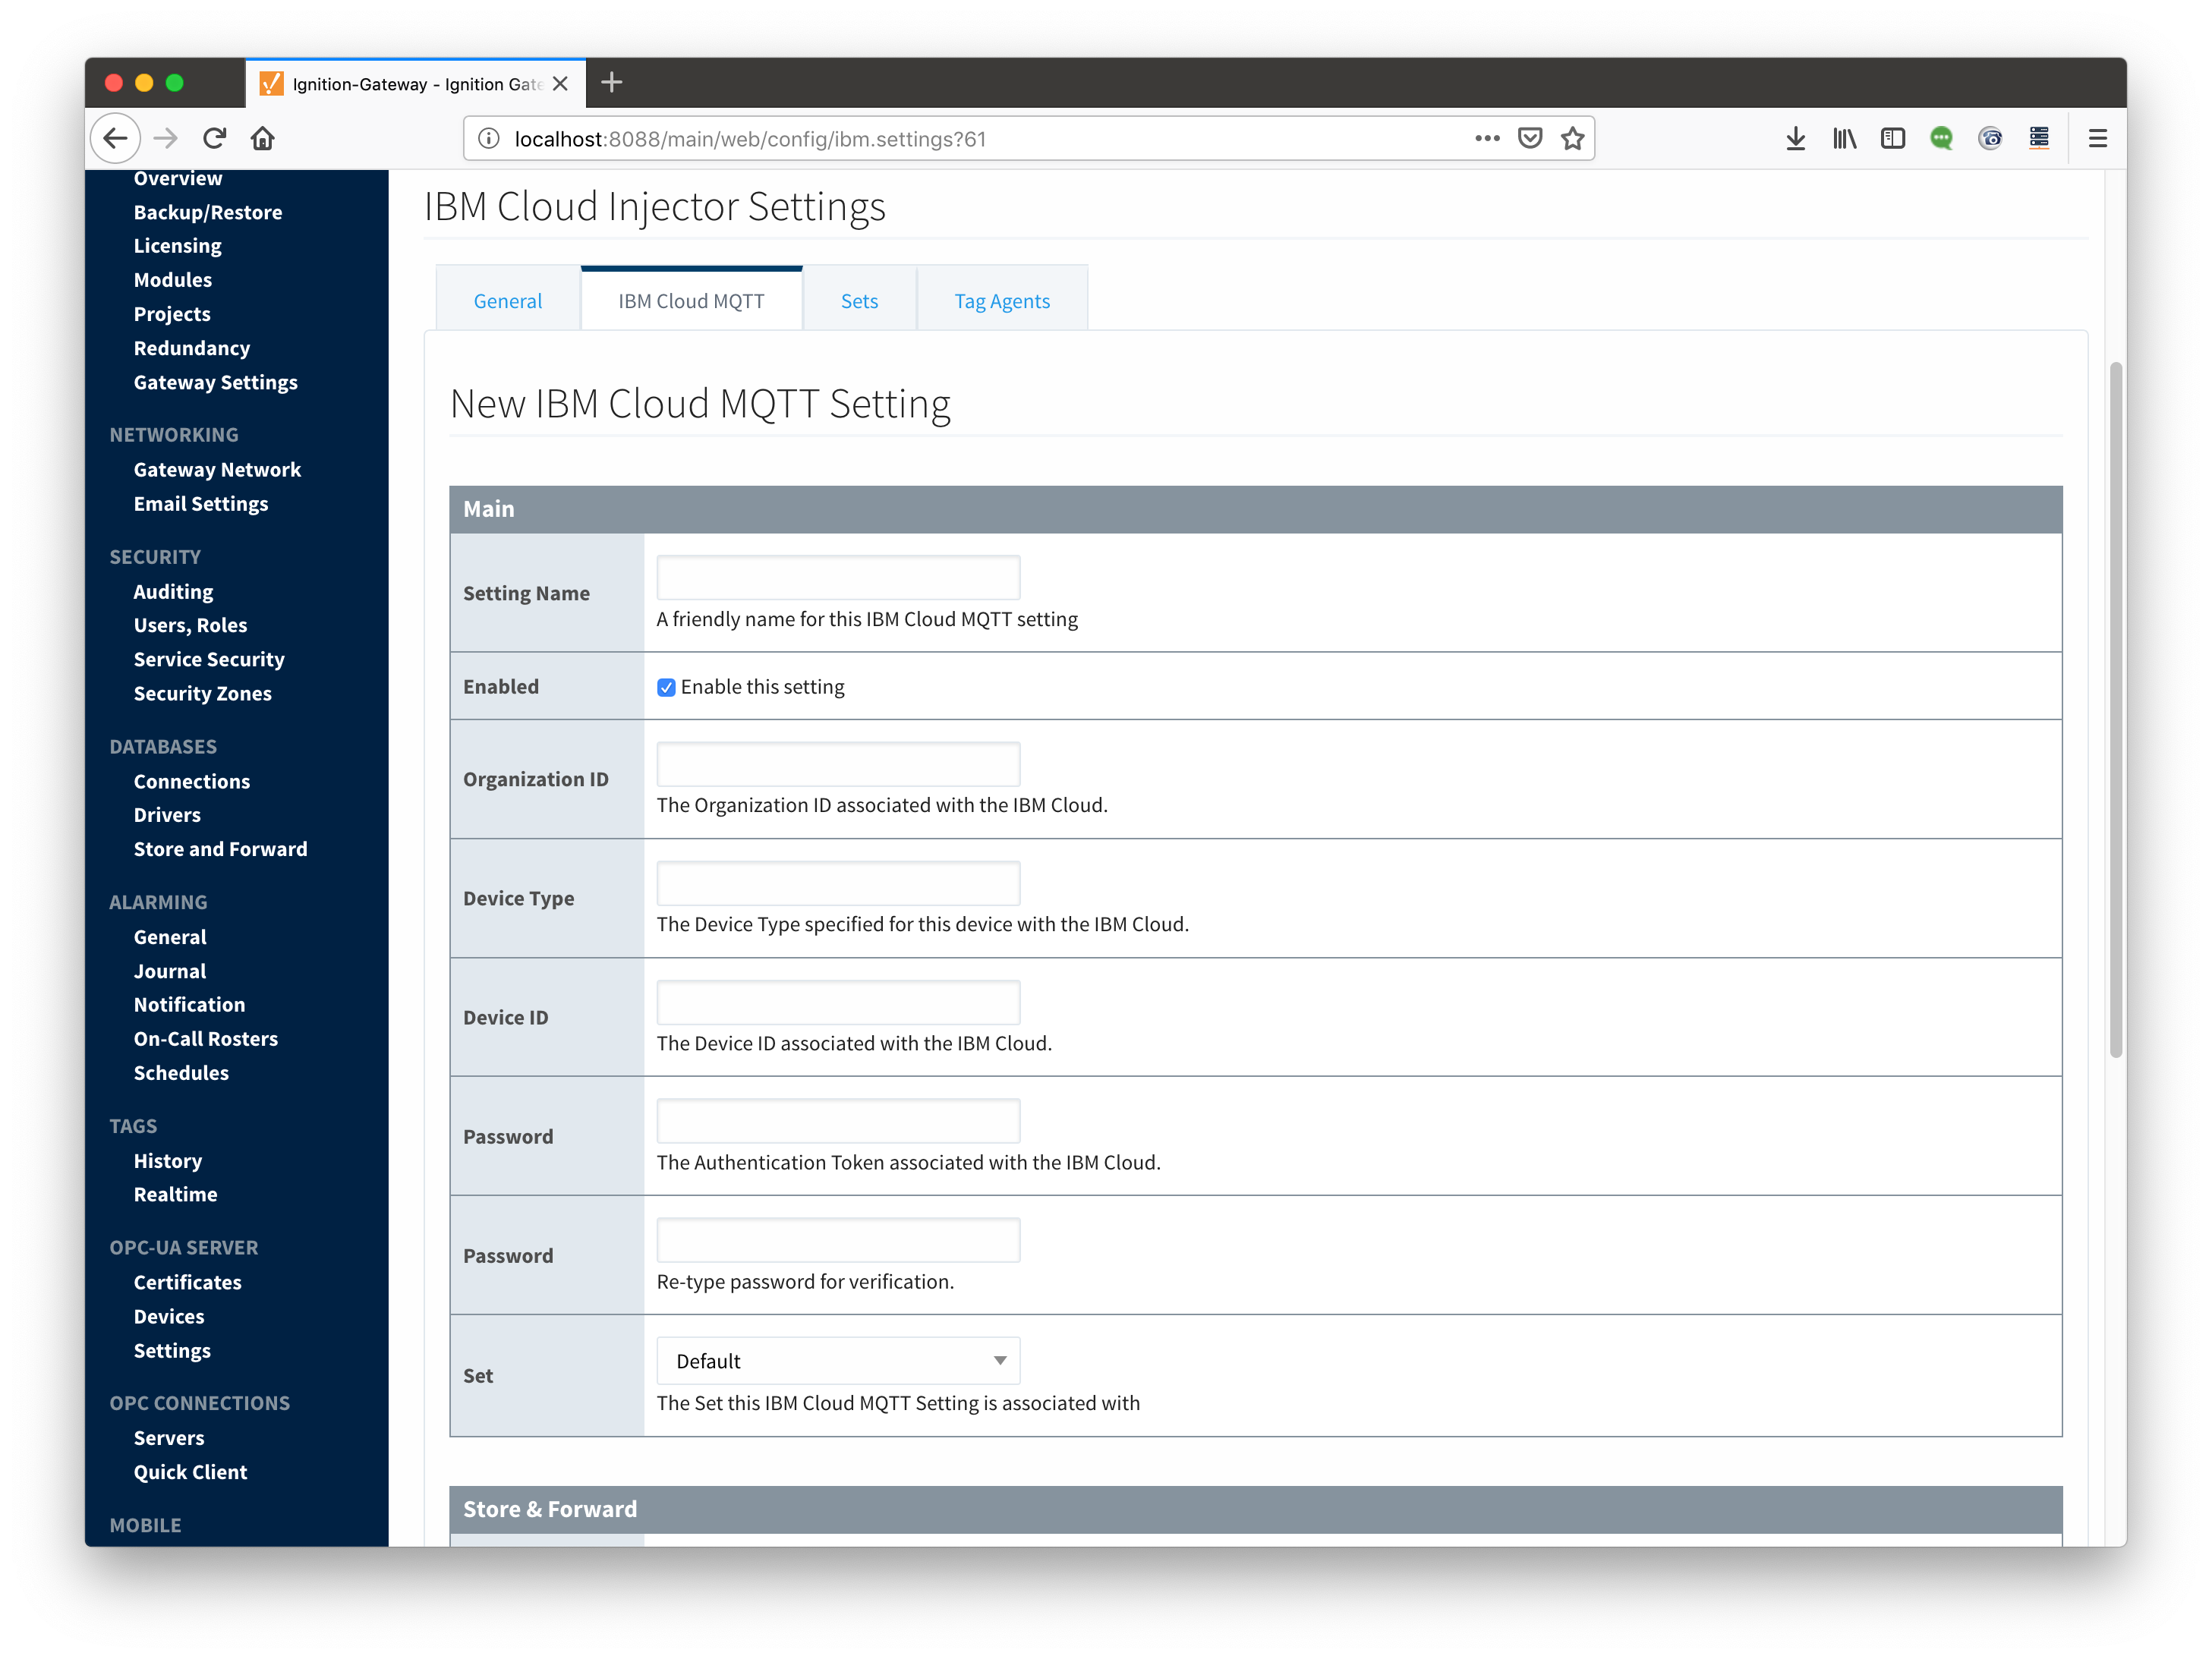
Set the parameters as follows:
Everything in the 'Store & Forward' and 'Advanced' settings can be left default. Click on "Create New IBM Cloud MQTT Setting" to finish creating the new configuration setting.
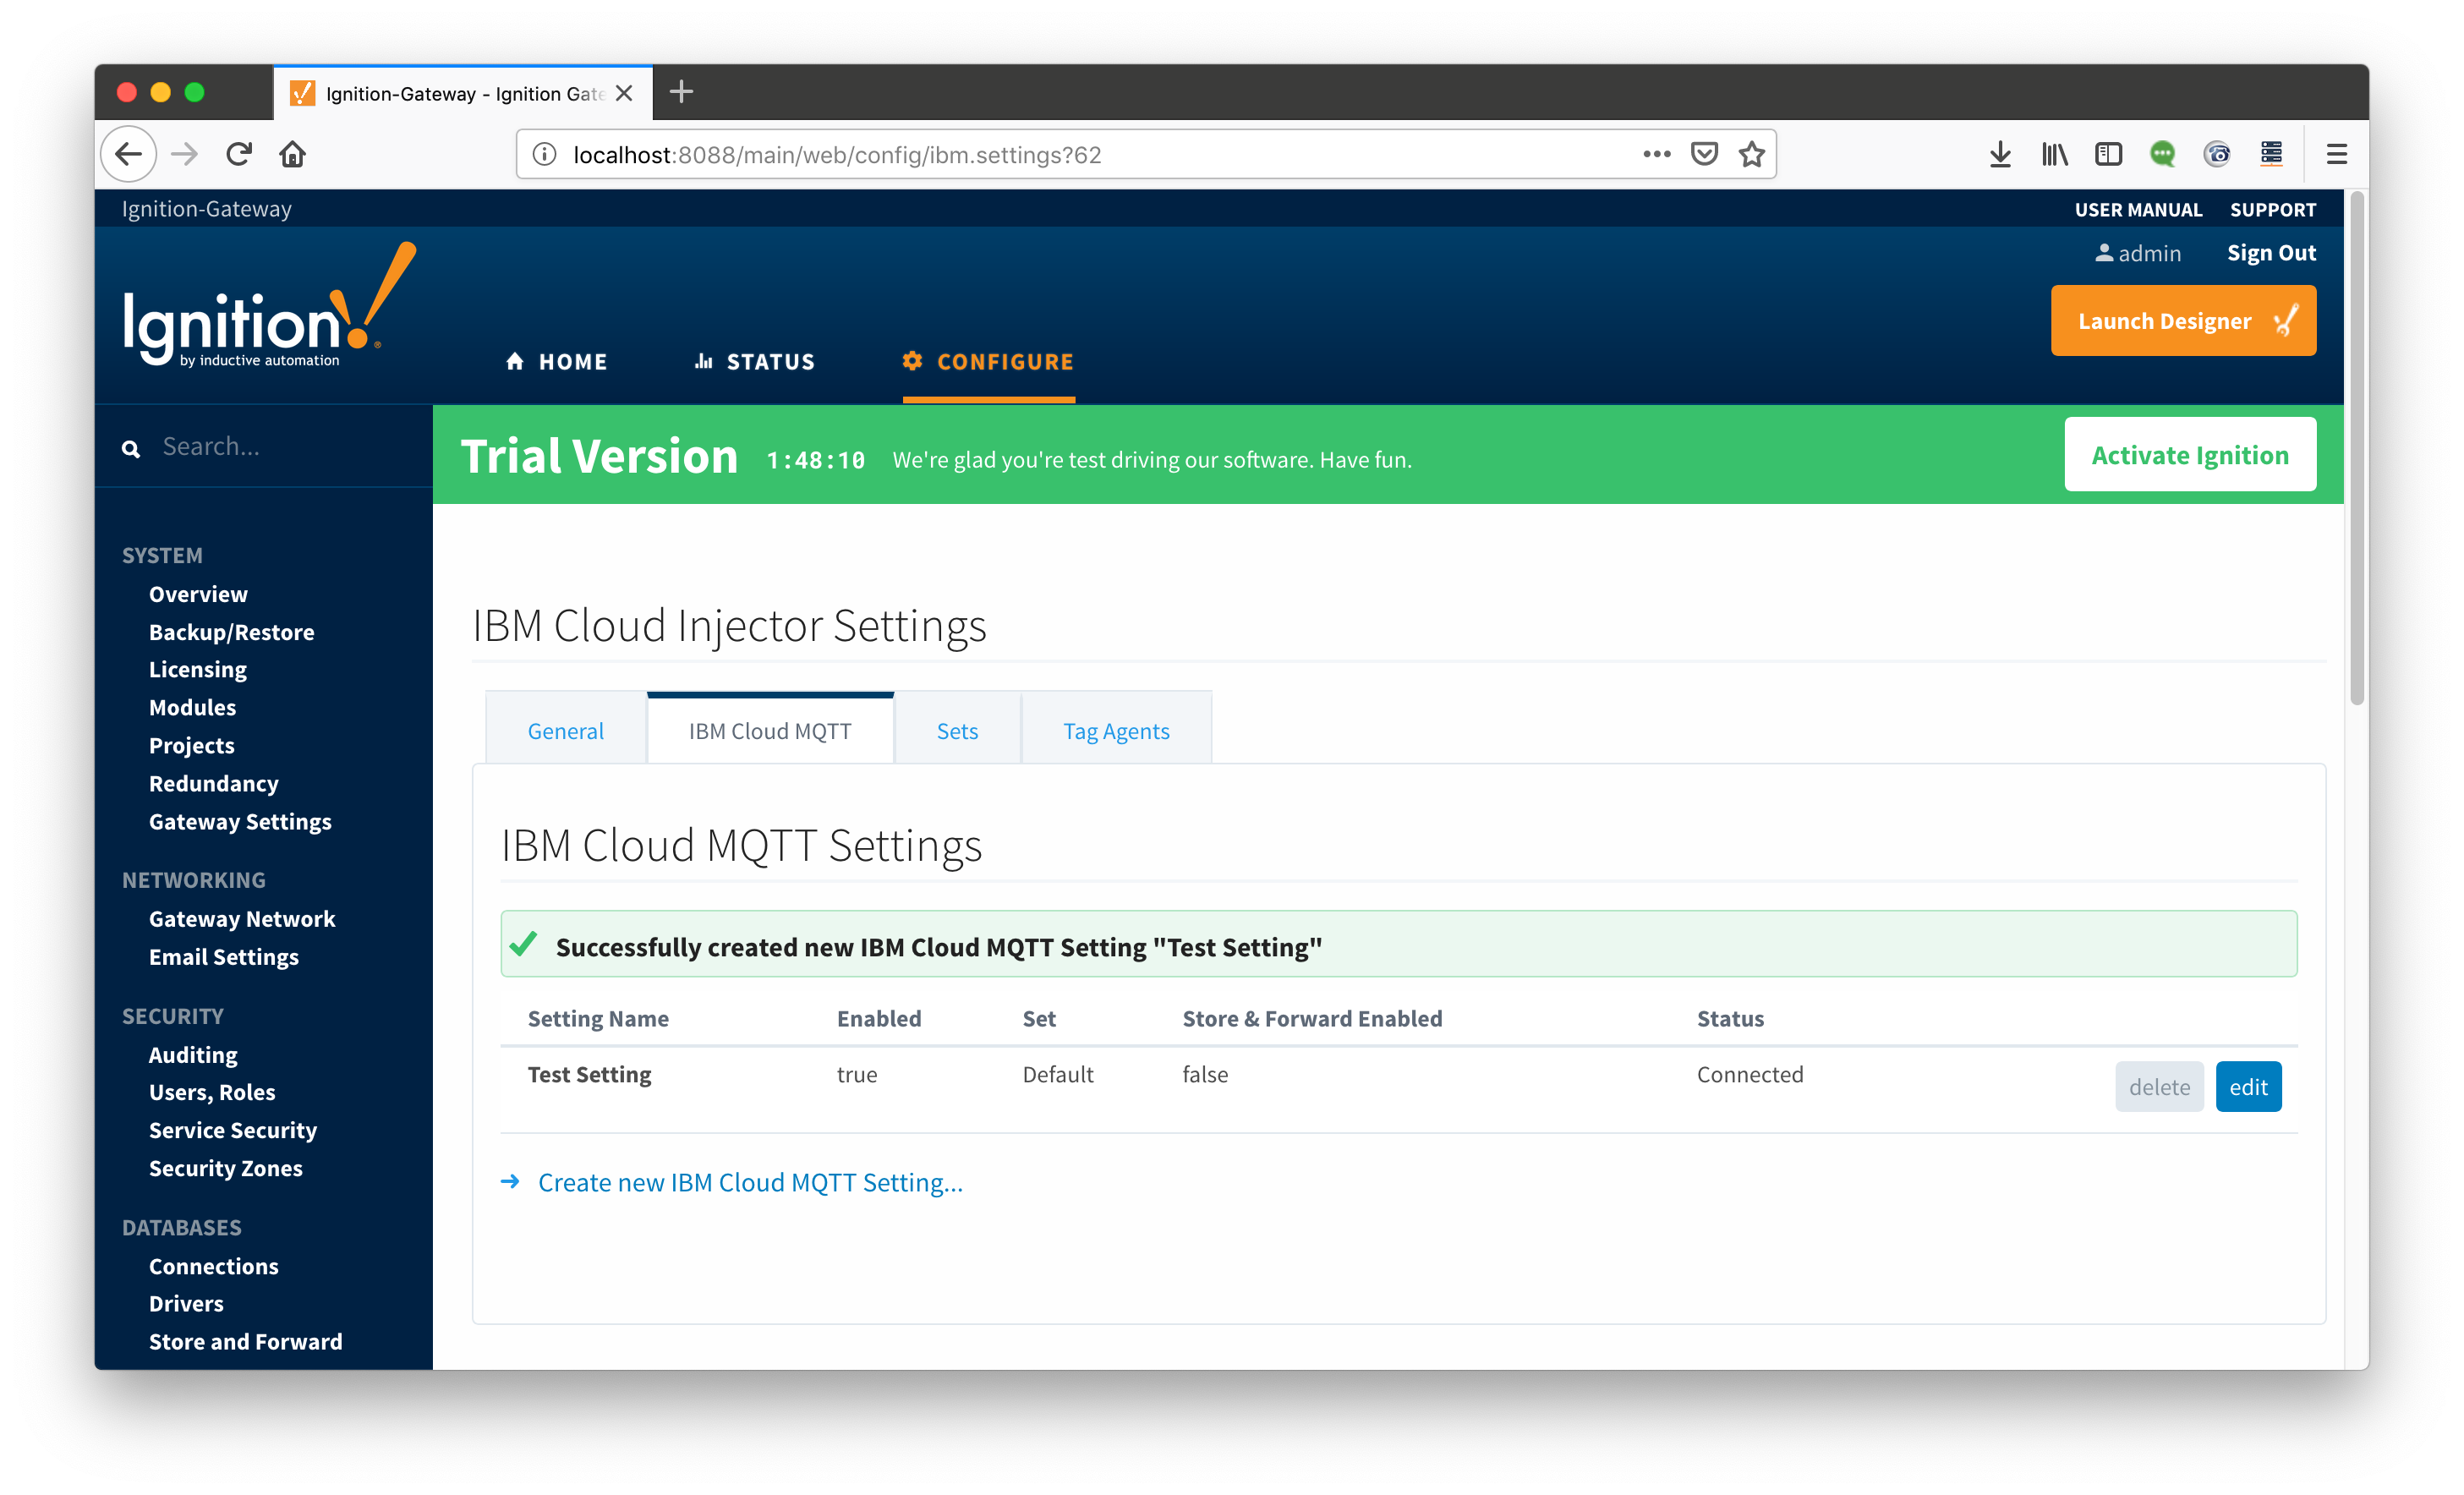
Now the IBM Cloud Injector module is connected to the MQTT server in IBM Cloud and ready to push Tag data.
If you click on the "Tag Agents" tab you will see that out-of-the-box the Azure Injector module will have one default Tag Agent defined. For this tutorial we will not need to make any configuration changes to the Tag Agents.