![]()
Contents
Cirrus Link Resources
Chariot MQTT Server v1 (previous version)![]()
Cirrus Link Modules for Ignition![]()
Contact Us (Sales/Support)![]()
Forum![]()
![]()
Chariot MQTT Server v1 (previous version)![]()
Cirrus Link Modules for Ignition![]()
Contact Us (Sales/Support)![]()
Forum![]()
The Chariot Chariot® MQTT Server Web UI allows for uploading, activating, and deactivating valid Chariot Licenses.
| Note |
|---|
| If you have deployed Chariot through AWS Marketplace or Azure Marketplace, then no additional steps are required - your license is already installed and activated. |
This tutorial will cover the process for both online and offline activations and deactivations:
...
...
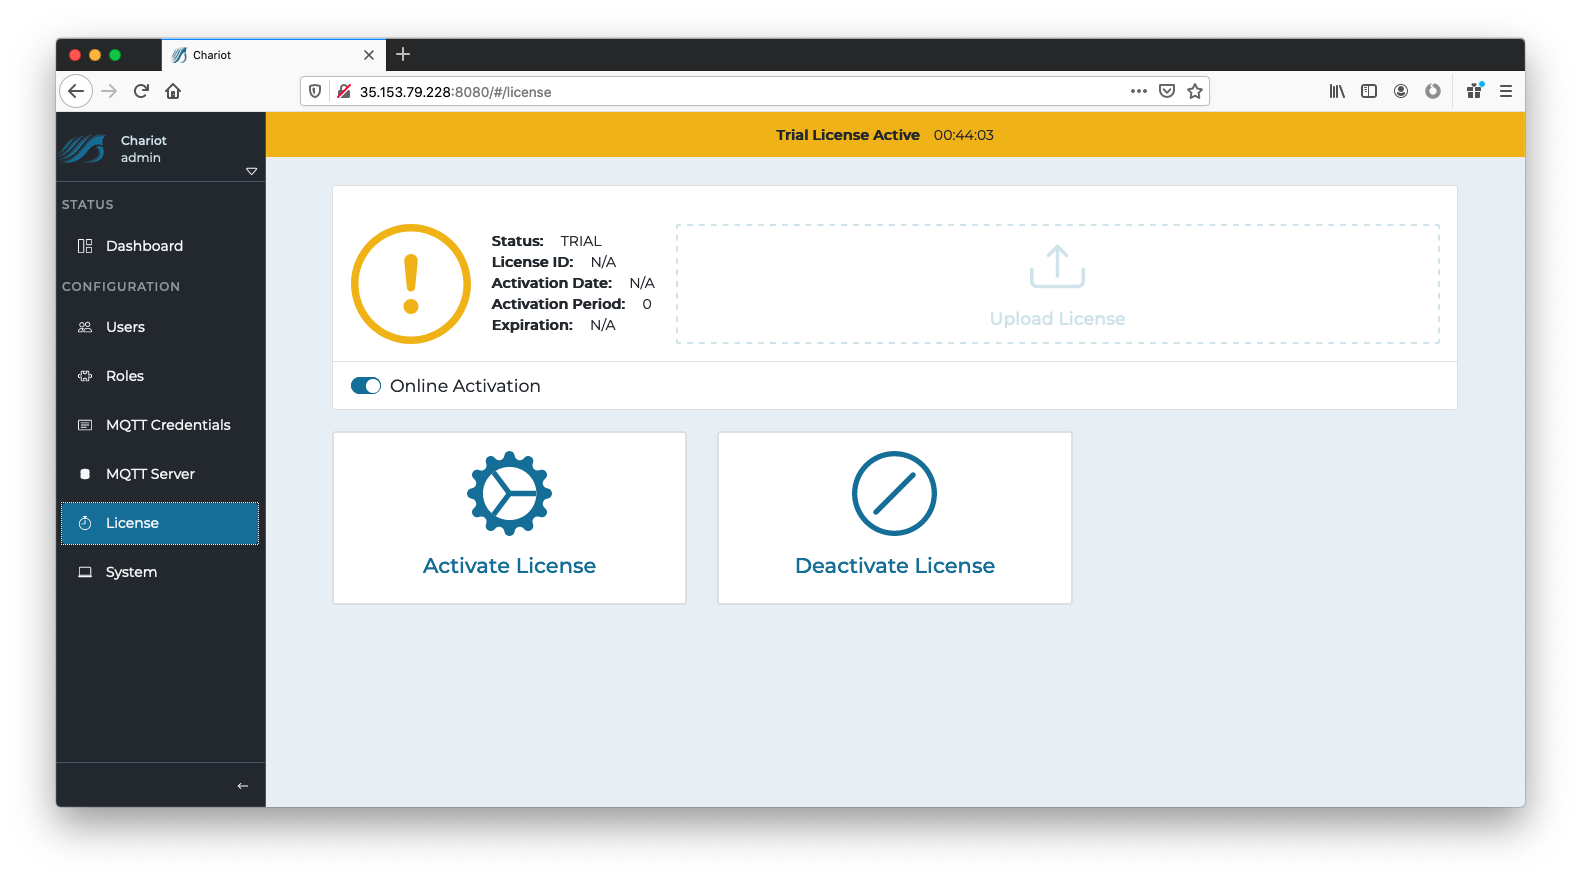
The Online Activation feature allows a Chariot License to be automatically activated on a Chariot MQTT Server instance that is connected to the internet. The Chariot MQTT Server will remotely connect and activate a Chariot License if it is valid and has an activation available.
...
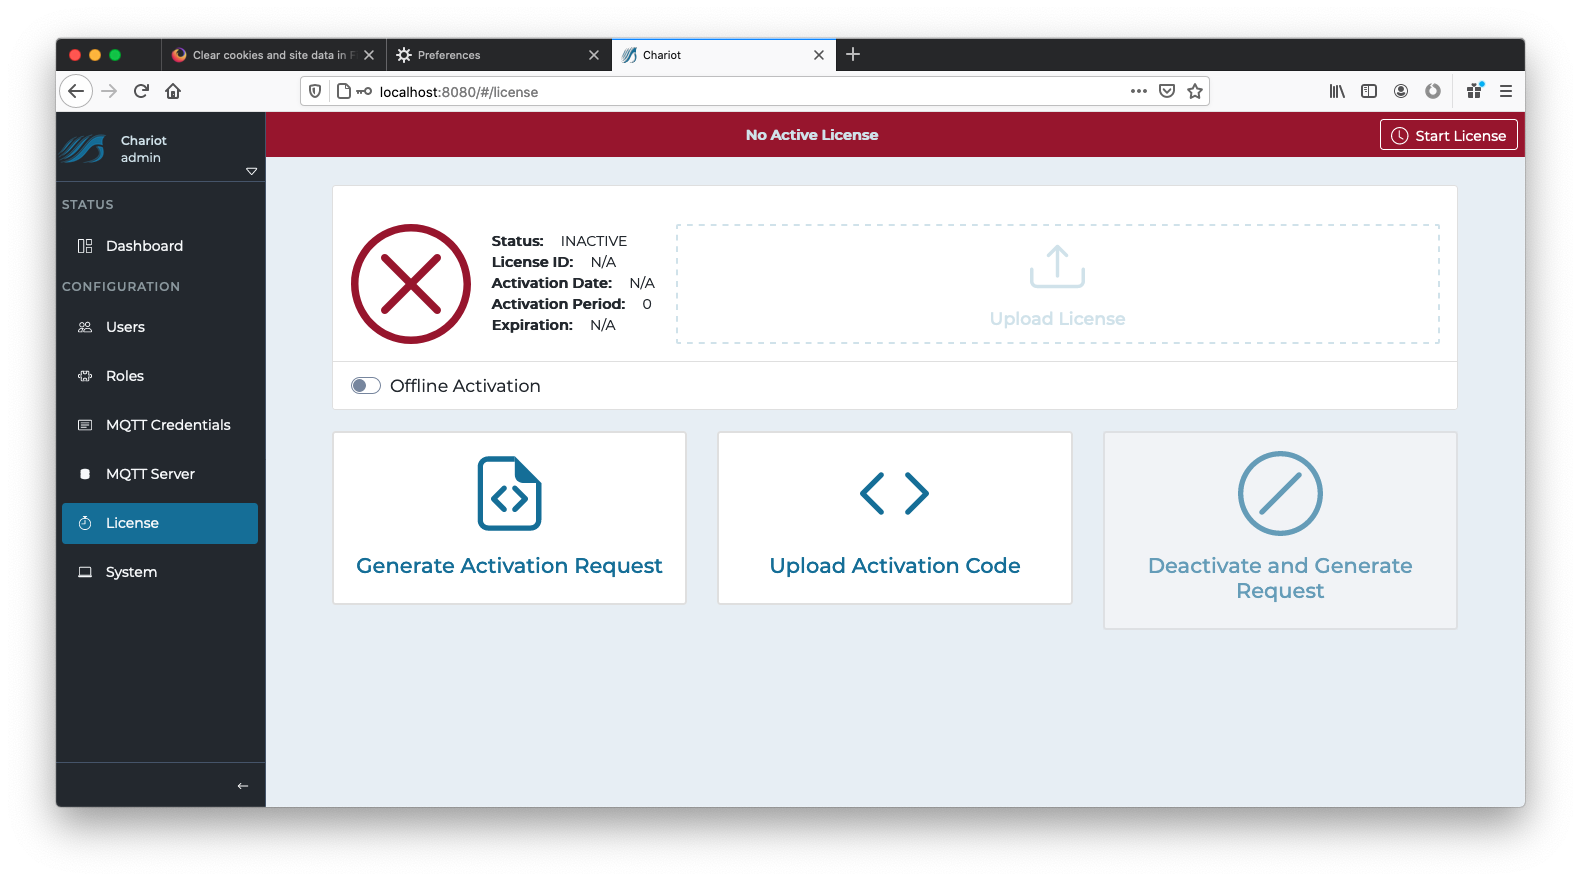
Log into the Chariot MQTT Server Web UI and
...
from the left hand menu bar select License as shown below
...
:
...
The text file containing the Chariot License can either be dragged/dropped in the "Upload License" area, or the area can be clicked to bring up an empty form and the license text can be copied/pasted into the form. A successfully added license will look like the following: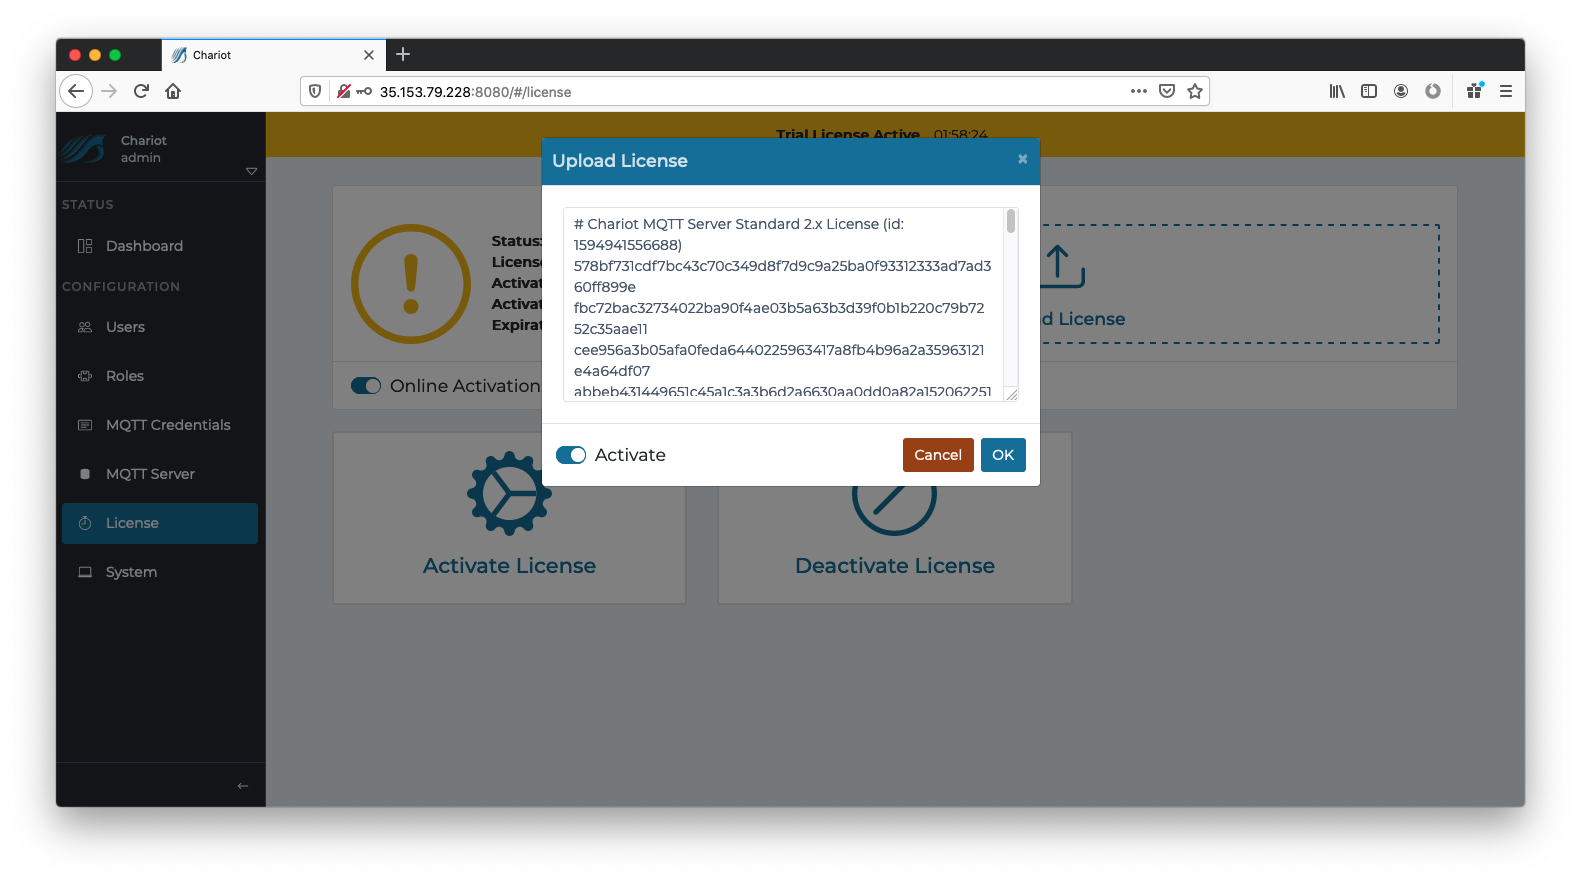
...
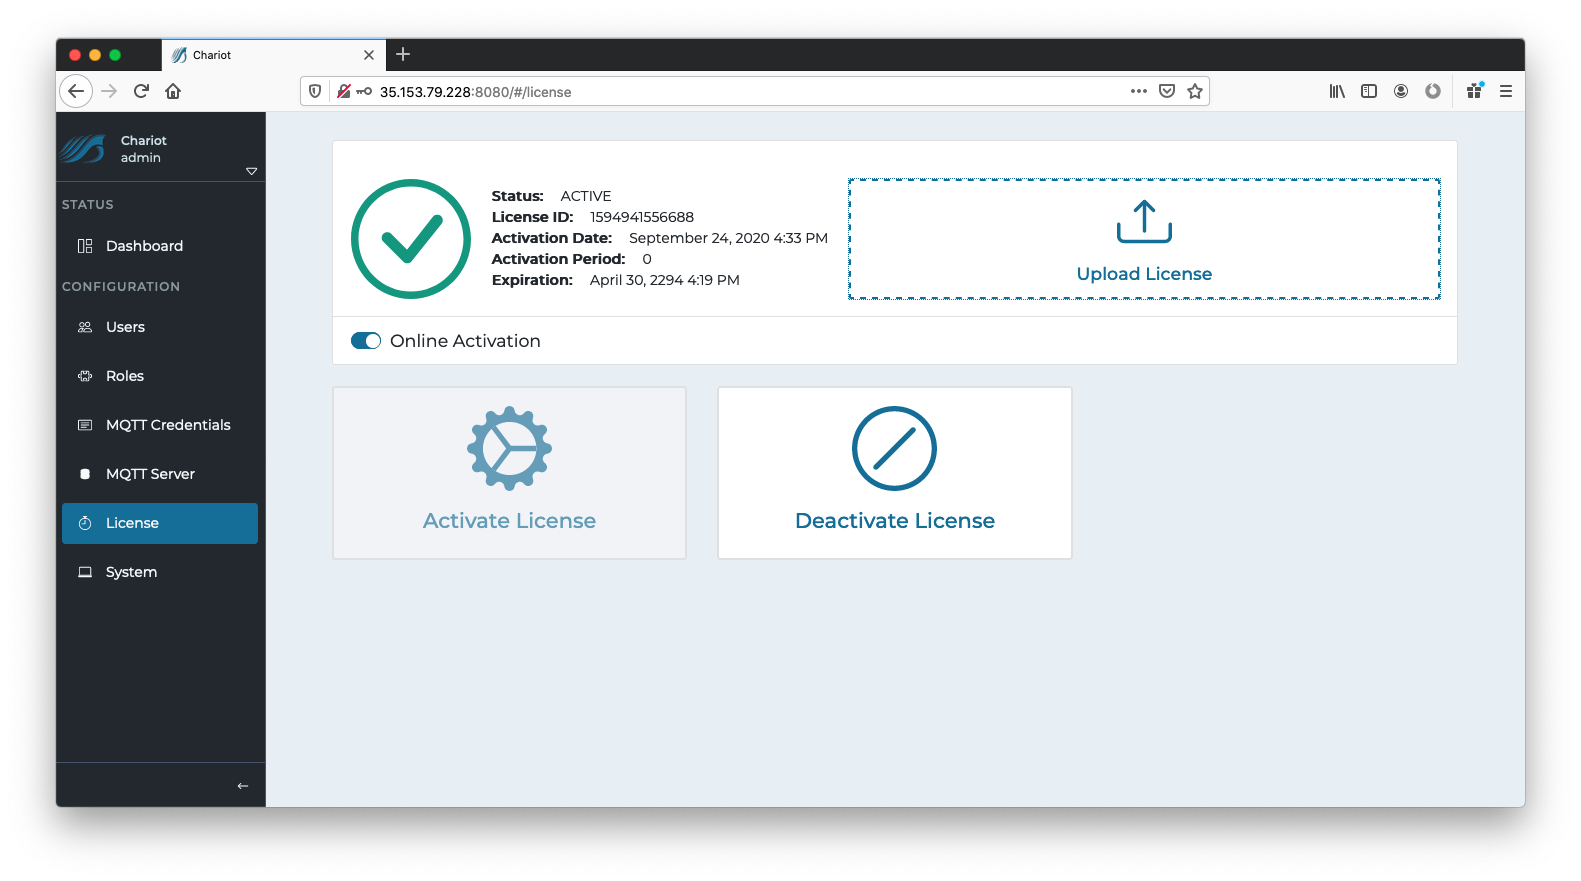
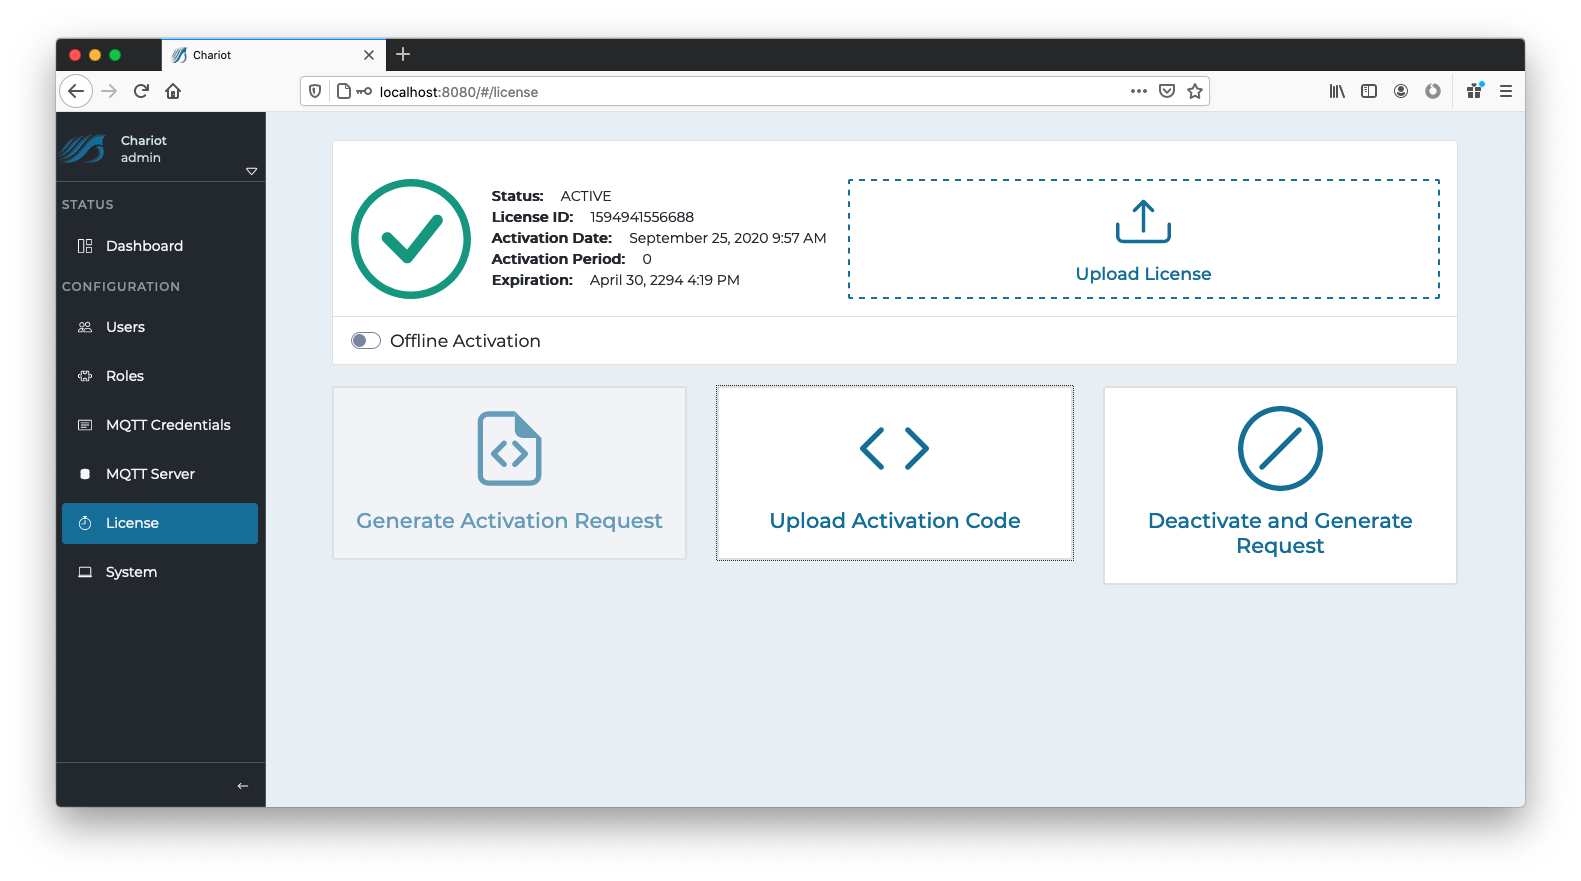
Click the OK button to finish uploading the Chariot License. The license will auto activate and the page should look like the following. The Chariot MQTT Server is now fully Licensed and read to you.
| Anchor | ||||
|---|---|---|---|---|
|
...
In order to deactivate the license online, log into the Chariot MQTT Server Web UI and from the left hand menu bar select License as shown below.
Select "Deactivate License" for the license to be remotely deactivated so that it can be potentially activated on another Chariot MQTT Server instance.
...
| Warning |
|---|
| If the server is terminated, deleted, or destroyed without deactivating the active Chariot License, that license will permanently lose one of its total number of activations |
...
| Anchor | ||||
|---|---|---|---|---|
|
...
For Chariot MQTT Server instances that do not have internet access, an offline action process is available.
...
Log into the Chariot MQTT Server Web UI and
...
from the left hand menu bar select License as shown below
...
:
...
Click on the "Online Activation" toggle to change it to "Offline Activation" mode, as shown below.
...
The text file containing the Chariot License can either be dragged/dropped in the "Upload License" area, or the area can be clicked to bring up an empty form and the license text can be copied/pasted into the form. A successfully added license will look like the following: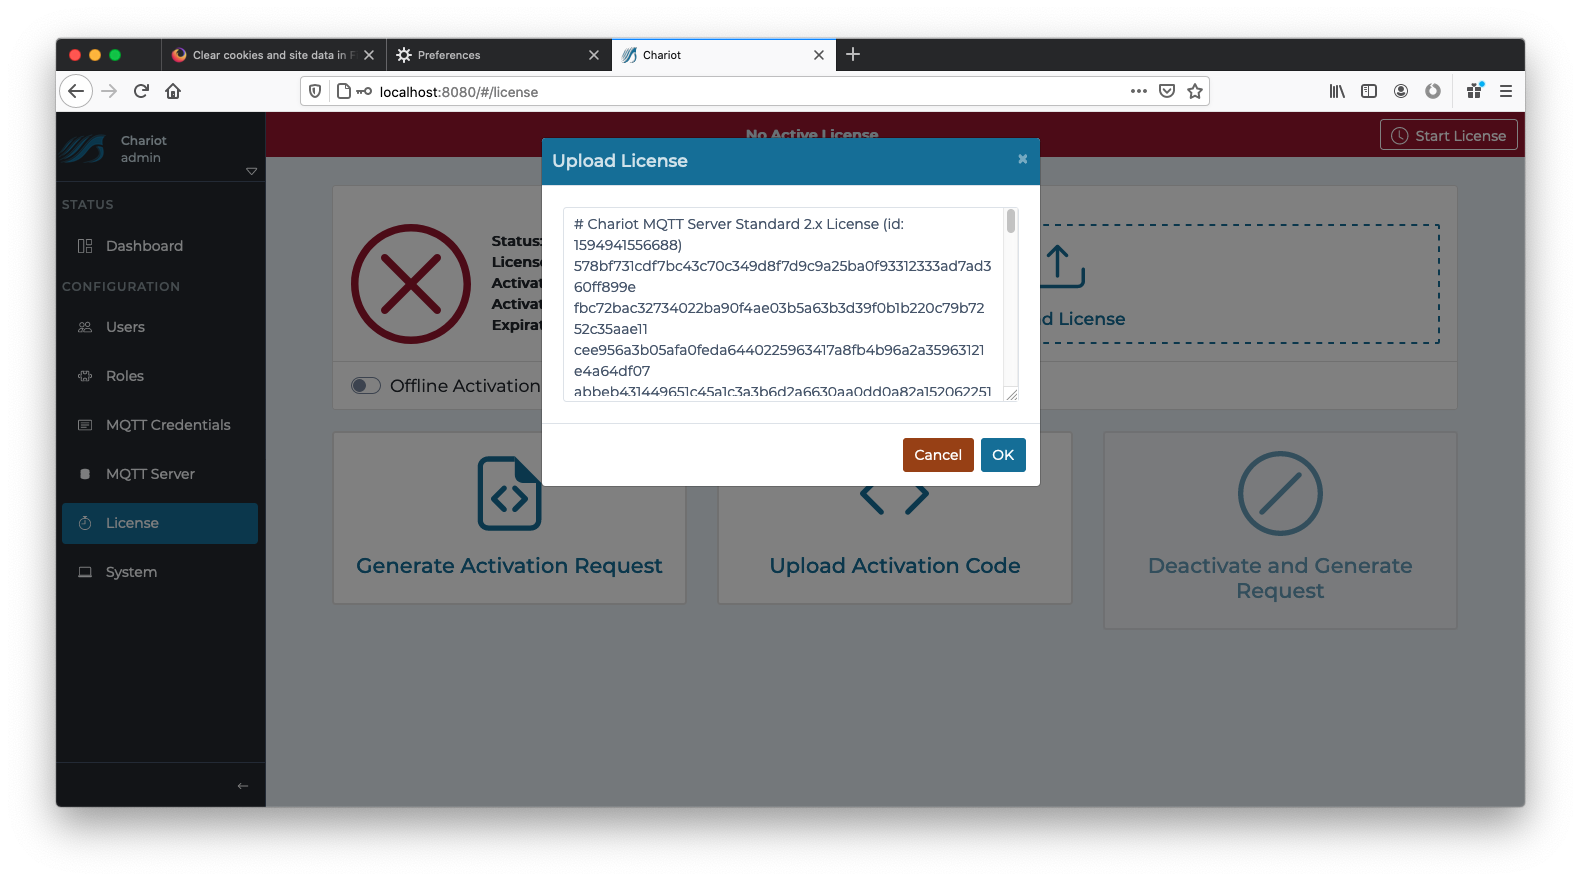
...
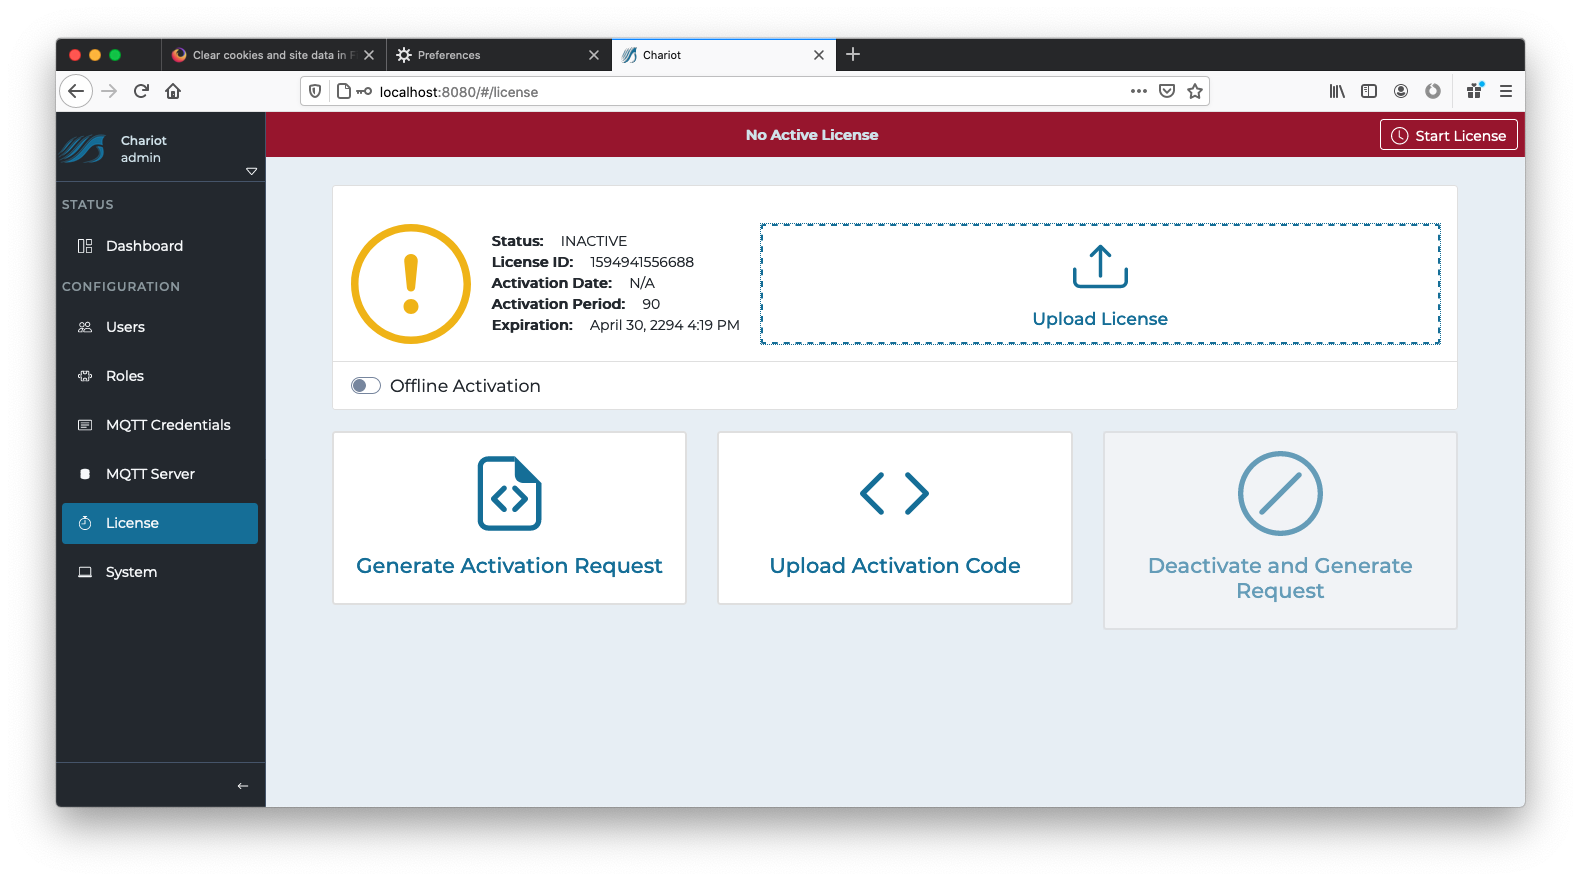
Click the OK button to finish uploading the Chariot License. The license will NOT activate and the page should look like the following:
...
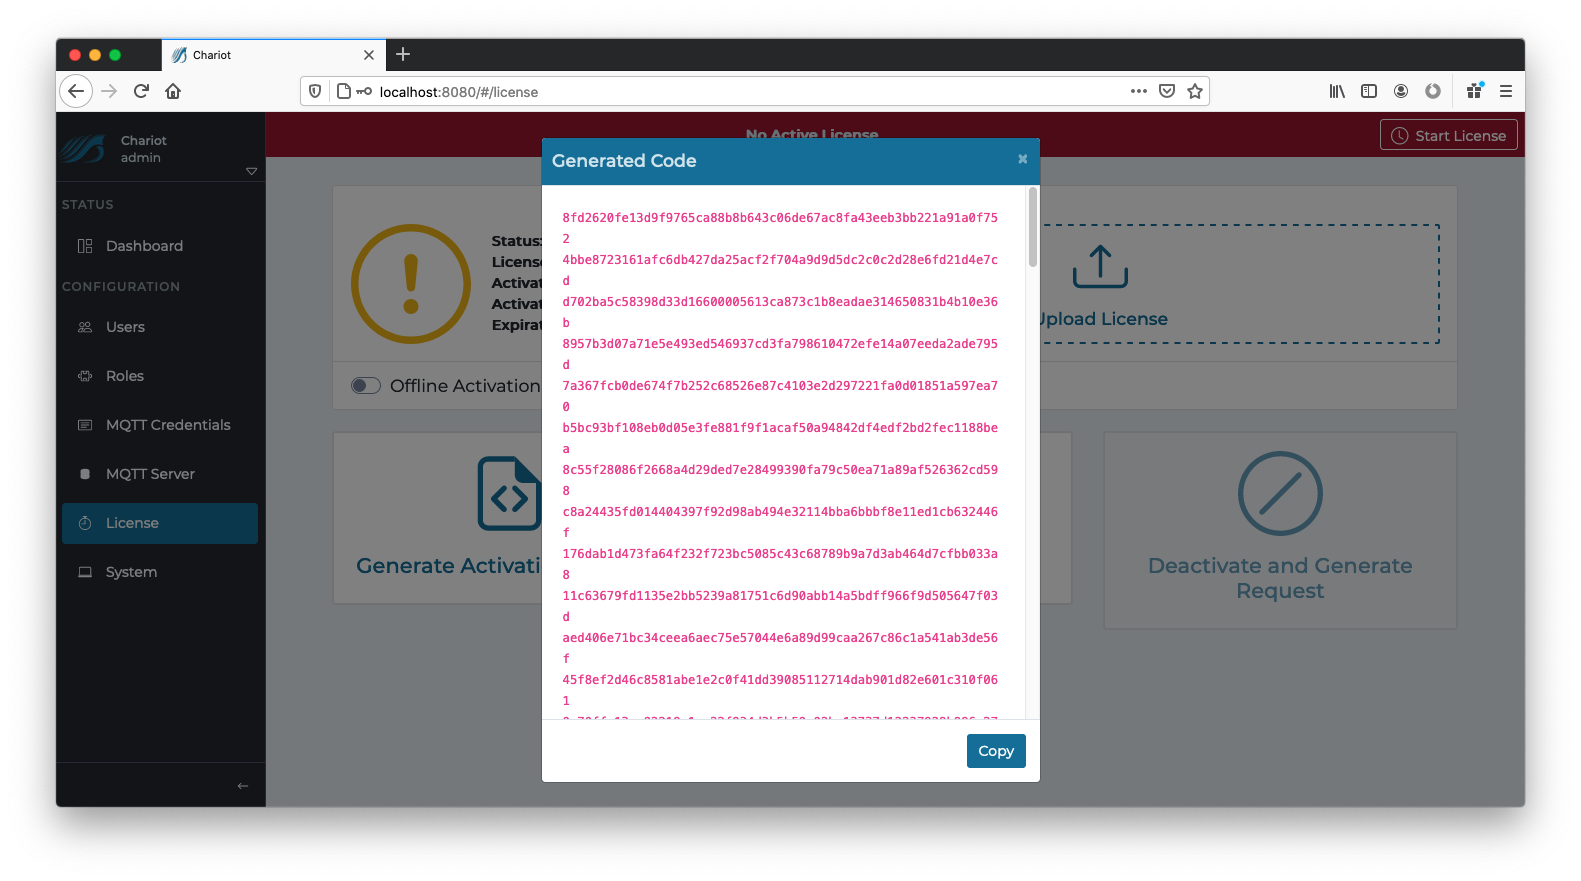
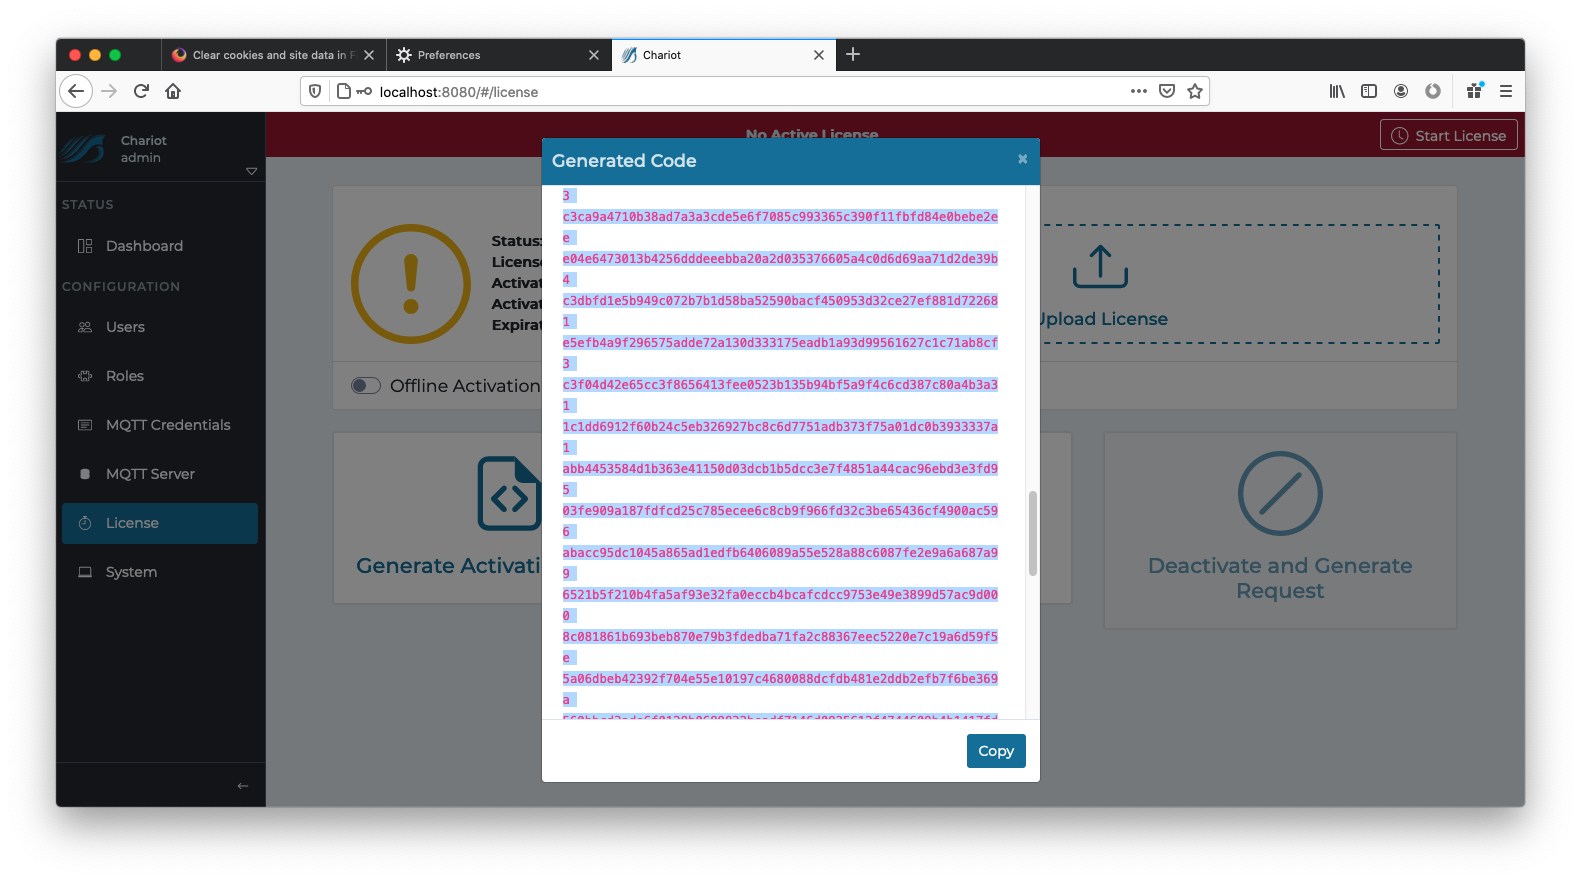
Now click the "Generate Activation Request" to generate a new request.
...
| Warning |
|---|
| Only do this ONCE as each new Activation Request will invalidate the previous one. |
| Tip |
|---|
...
| Copy/paste the generated code to a text file and send the file to Cirrus Link Support along with the License ID in order to obtain an Activation Code. |
...
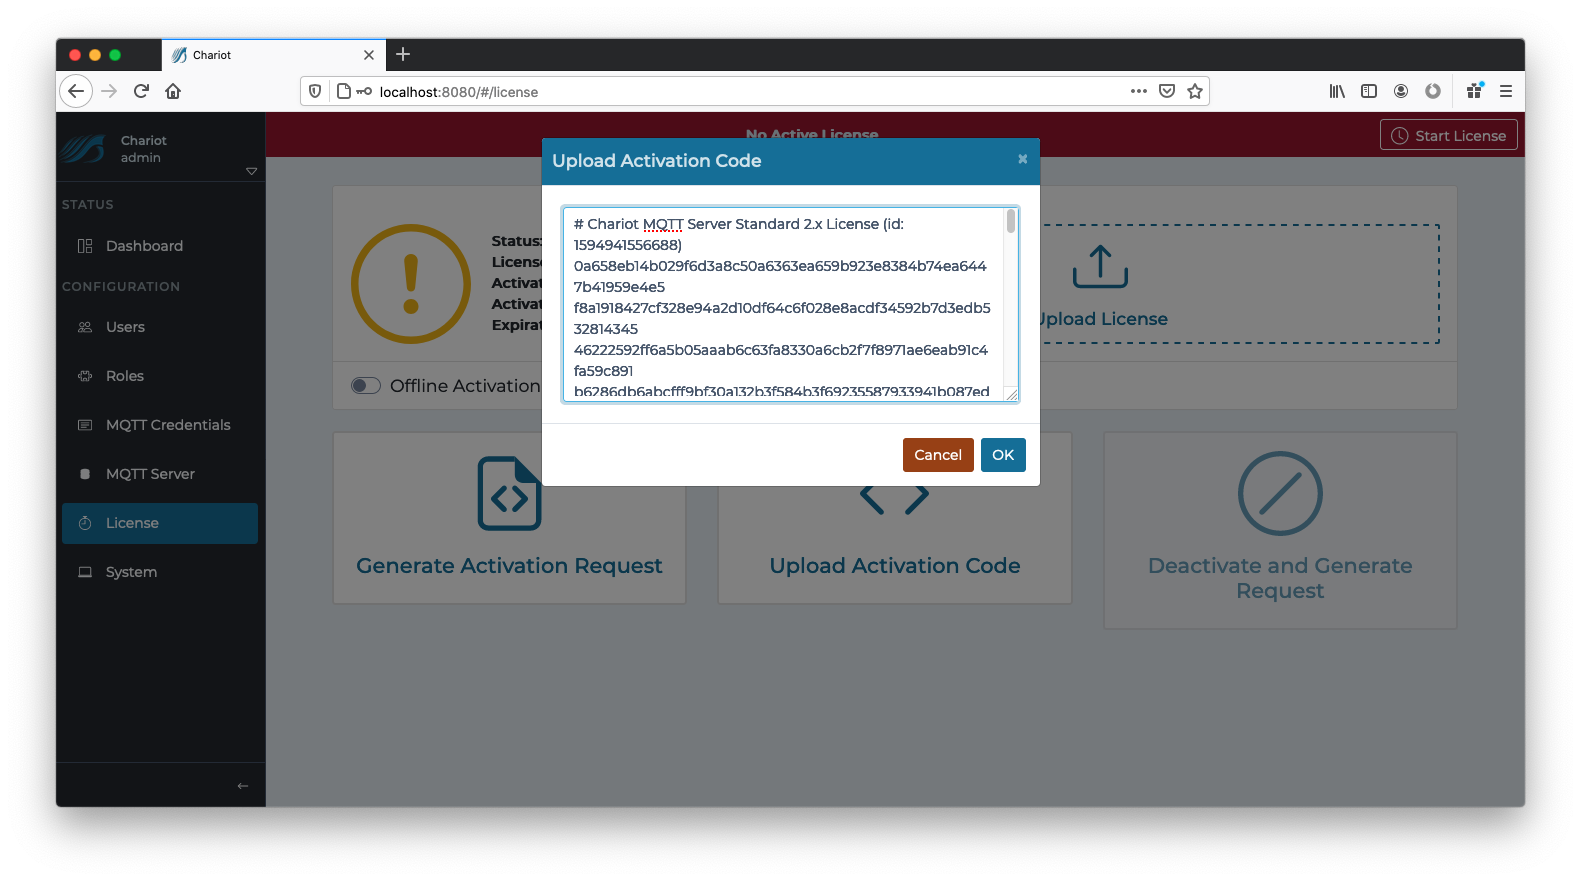
Once the Activation Code is obtained return to the License page in the Chariot MQTT Server Web UI and click on "Upload Activation Code" and copy/paste the Activation Code into the form.
...
Click OK and the license should be successfully activated.
| Anchor | ||||
|---|---|---|---|---|
|
...
In order to deactivate the license offline,
...
log into the Chariot MQTT Server Web UI and from the left hand menu bar select License. Ensure that "Offline Activation" is toggled as shown below:
Select the "Deactivate and Generate Request".
| Tip |
|---|
| This will provide a Deactivation Request code that should be provided to Cirrus Link Support along with the License ID in order to free up the previous activation for use with another Chariot MQTT Server instance. |