![]()
Contents
Cirrus Link Resources
Cirrus Link Website![]()
Contact Us (Sales/Support)![]()
Forum![]()
Cirrus Link Modules Docs for Ignition 7.9.x![]()
Inductive Resources
Ignition User Manual![]()
Knowledge Base Articles![]()
Inductive University![]()
Forum![]()
![]()
Cirrus Link Website![]()
Contact Us (Sales/Support)![]()
Forum![]()
Cirrus Link Modules Docs for Ignition 7.9.x![]()
Ignition User Manual![]()
Knowledge Base Articles![]()
Inductive University![]()
Forum![]()
...
After this has been done successfully you will see the role now associated with the new user as shown below.
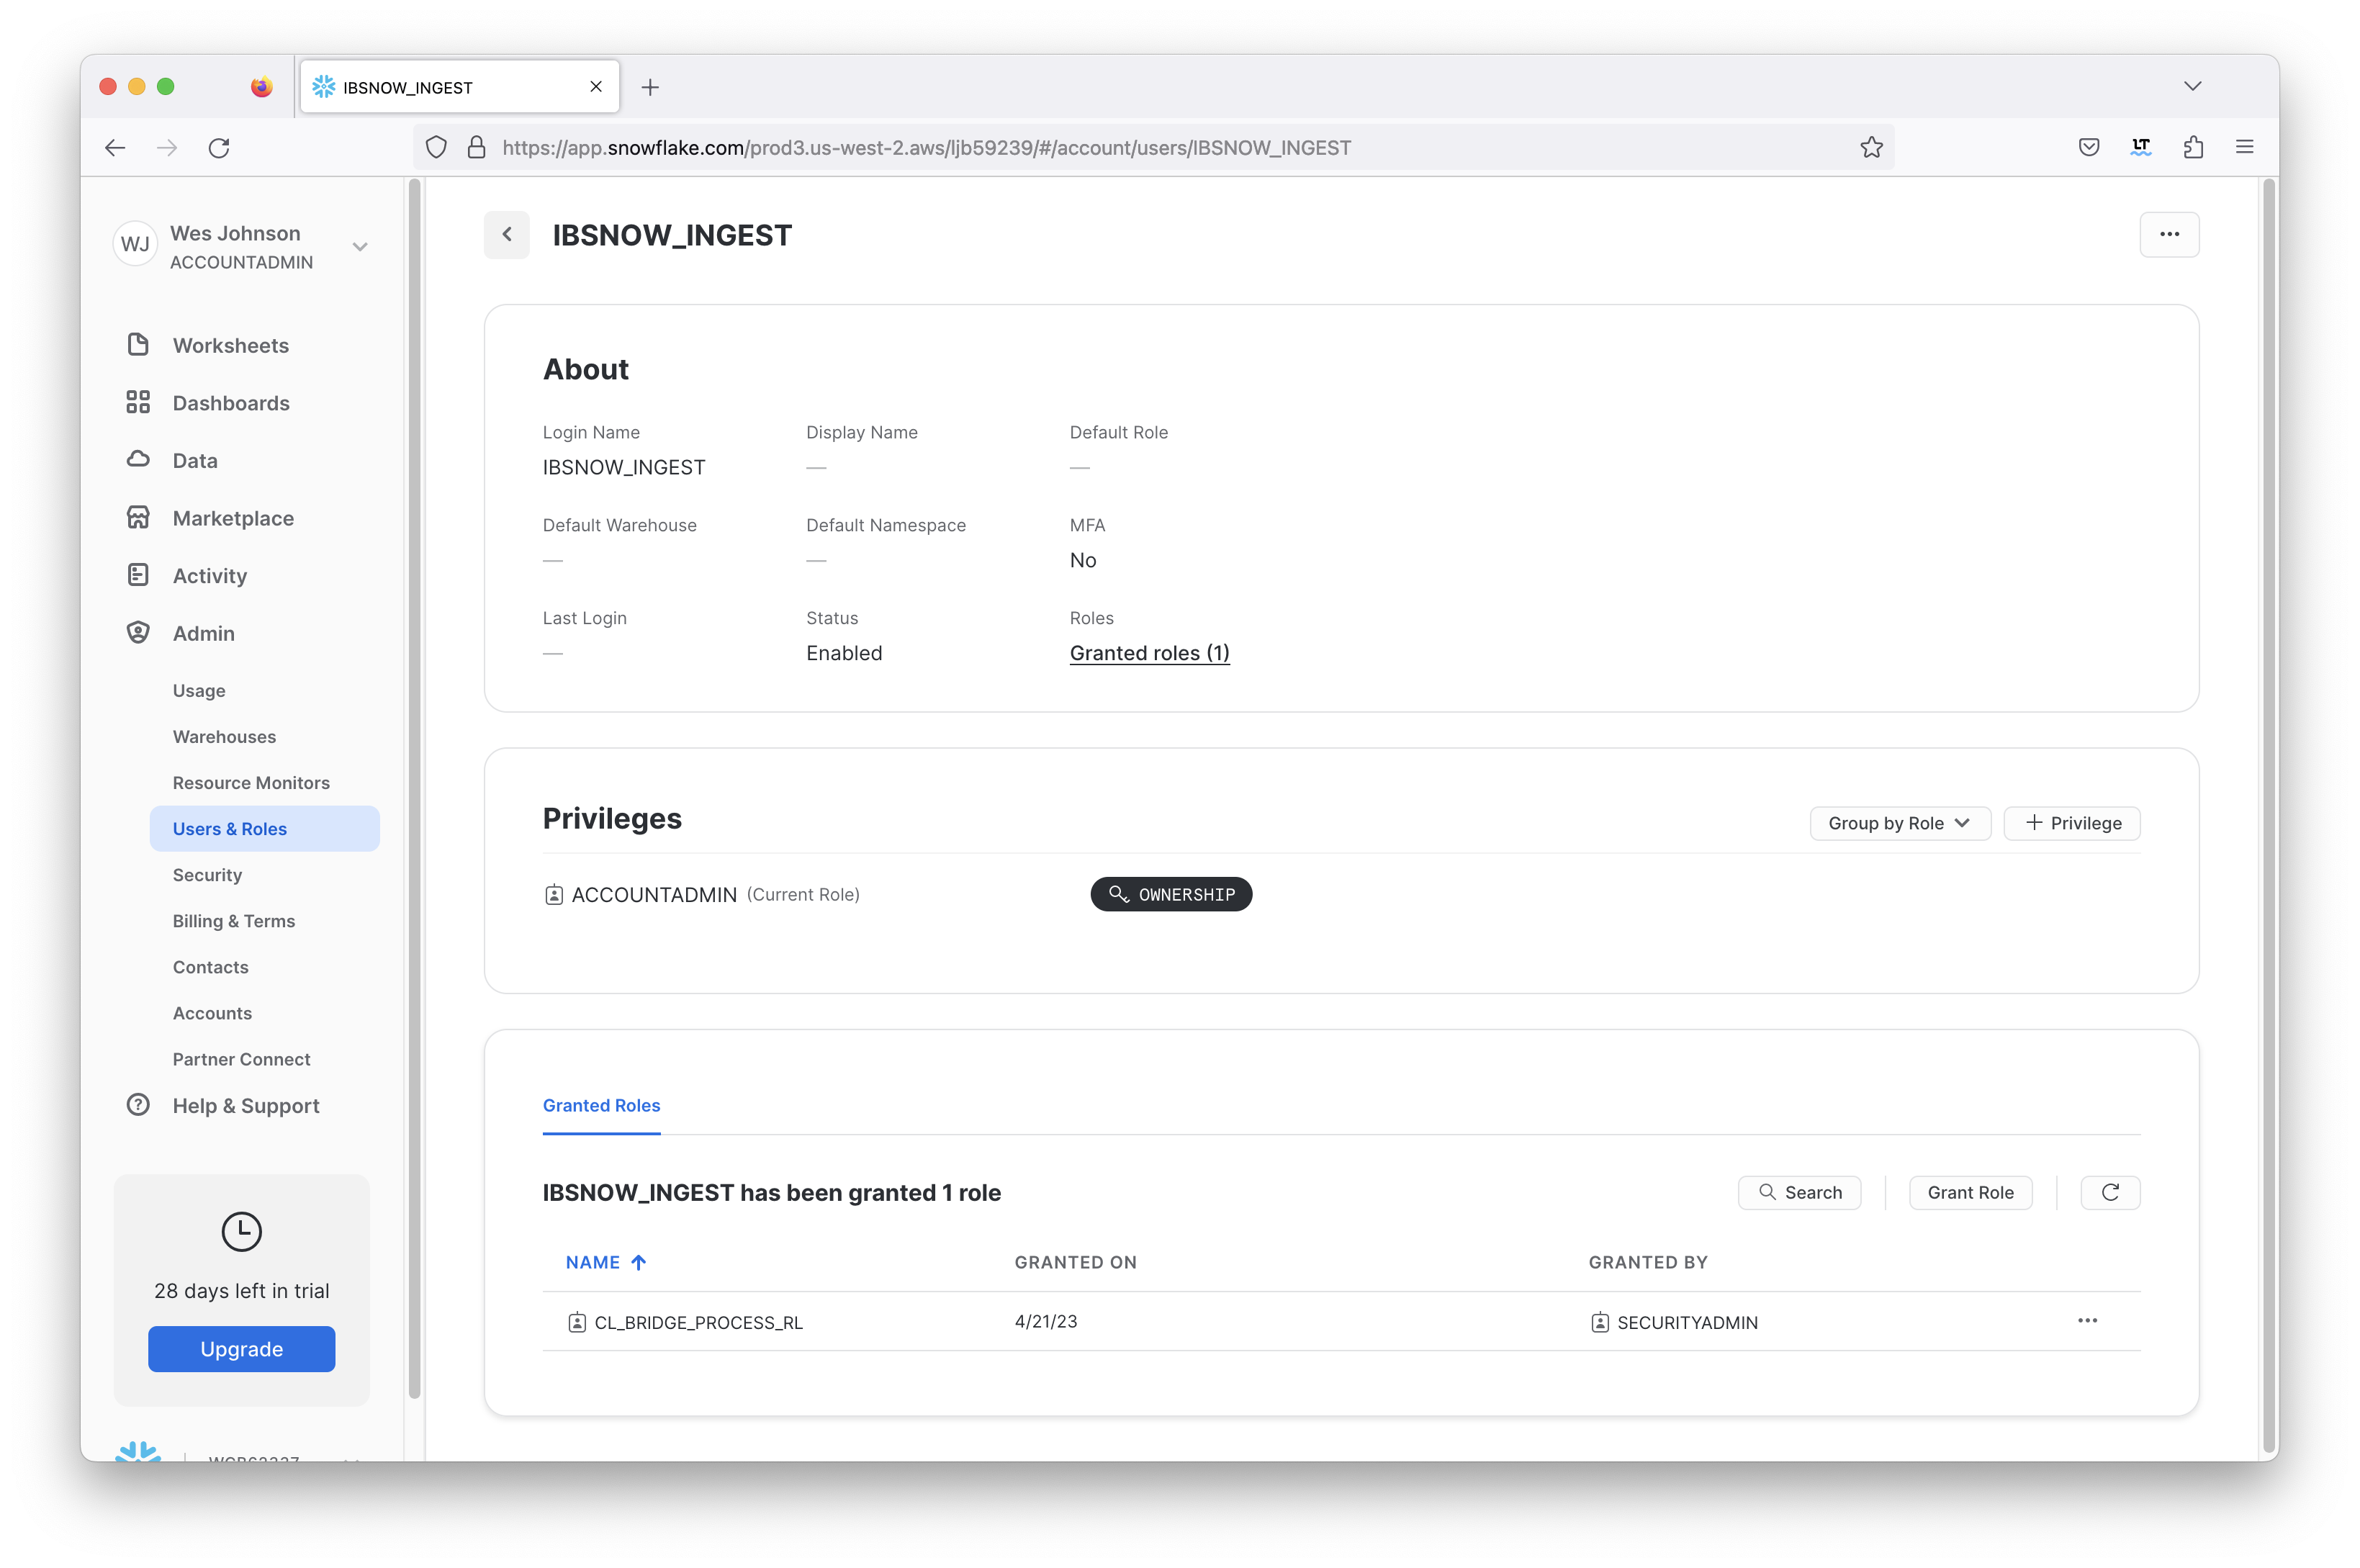
Now an unencrypted key pair must be generated and uploaded to Snowflake. This will be used for authentication by the IoT Bridge for Snowflake application to push data to Snowflake via the Snowflake Streaming API.
Attach the generated unencrypted public key to the IBSNOW_INGEST user that we just created for Snowflake ingest purposes.
| Tip | ||
|---|---|---|
See this document for details on how to generate this unencrypted key and assign this to a user in your snowflake account: https://docs.snowflake.com/en/user-guide/key-pair-auth. Note: The step "Configuring the Snowflake Client to User Key Pair Authentication" in the linked tutorial can be skipped.
|
With AWS IoT and Snowflake now properly provisioned and IBSNOW installed, IBSNOW must be configured. To configure it, you must be able to access it via SSH. Ensure you can access it via the Access Instructions here. Once you can access it, you must copy the three certificate files you captured when provisioning the AWS IoT Core thing. Again, these files are:
On the target EC2 instance, the following directory exists to hold the certificates.
First you will need access to the Snowflake IoT Bridge EC2 instance via SSH. See this document for information on how to do this.
Now, modify the file /opt/ibsnow/conf/
...
Now copy the three files to the /opt/ibsnow/conf/certs directory. To do this, first copy the files into the tmp folder of the EC2 instance using this command from your local:
...
scp -i /path/to/your.pem /path/to/your/filename ubuntu@[IP_ADDR]:/tmp/
.properties file. Set the following:
When complete, it should look similar to what is shown below.
Now modify the file /opt/ibsnow/conf/snowflake_streaming_profile.json as described in Setting snowflake_streaming_profile configuration
When complete, it should look similar to what is shown below.
| Excerpt Include | ||||||
|---|---|---|---|---|---|---|
|
Now the service can be restarted to pick up the new configuration. Do so by running the following command.
sudo systemctl restart ibsnow |
At this point, IBSNOW should connect to AWS IoT Core and be ready to receive MQTT Sparkplug messages. Verify by running the following command.
|
After doing so, you should see something similar to what is shown below. Note the last line is 'MQTT Client connected to ...'. That denotes we have successfully configured IBSNOW and properly provisioned AWS IoT Core.
| Code Block | ||
|---|---|---|
| ||
INFO|7263/0||23-06-29 20:19:32|20:19:32.932 [Thread-2] INFO  org.eclipse.tahu.mqtt.TahuClient - IBSNOW-8bc00095-9265-41: Creating the MQTT Client to ssl://54.236.16.39:8883 on thread Thread-2
INFO|7263/0||23-06-29 20:19:33|20:19:33.275 [MQTT Call: IBSNOW-8bc00095-9265-41] INFO  org.eclipse.tahu.mqtt.TahuClient - IBSNOW-8bc00095-9265-41: connect with retry succeeded
INFO|7263/0||23-06-29 20:19:33|20:19:33.280 [MQTT Call: IBSNOW-8bc00095-9265-41 |
Next, SSH into the instance:
...
ssh -i /path/to/your.pem ubuntu@[IP_ADDR]
Finally, move the files from the tmp folder into the destination folder by using this command:
...
sudo mv /tmp/filename /opt/ibsnow/conf/certs/When done, it should look similar to what is shown below.
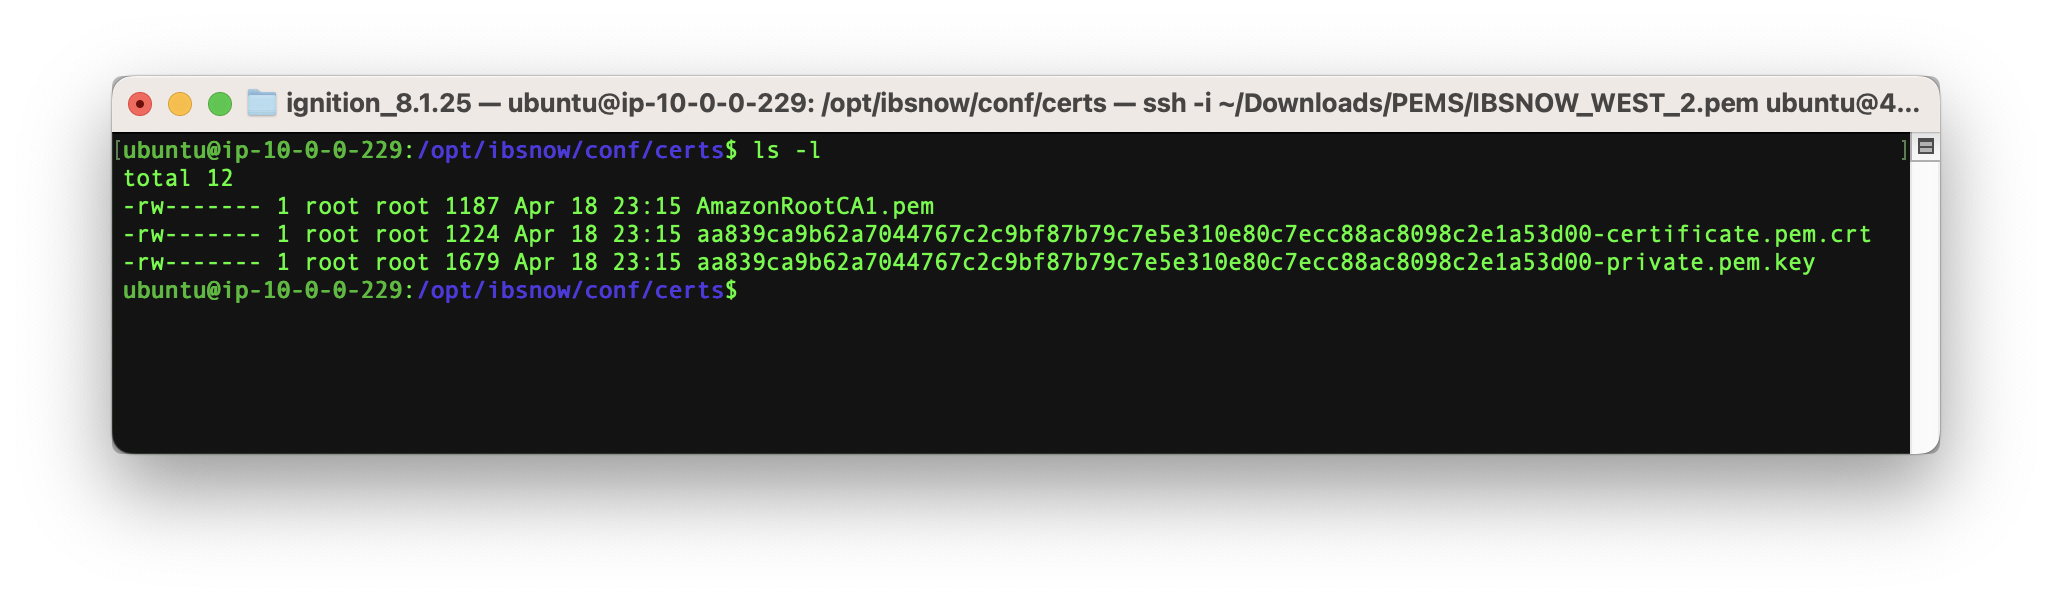
Note the files should be owned by root and not readable by other users. To set the ownership and permissions as shown above, run the following commands.
| Code Block | ||
|---|---|---|
| ||
sudo chown root:root /opt/ibsnow/conf/certs/*
sudo chmod 600 /opt/ibsnow/conf/certs/* |
Now, modify the file /opt/ibsnow/conf/ibsnow.properties file. Set the following:
When complete, it should look similar to what is shown below.
| Code Block | ||||
|---|---|---|---|---|
| ||||
# The IBSNOW instance friendly name. If ommitted, it will become 'IBSNOW-ec2-instance-id'
#ibsnow_instance_name =

# The Cloud region the IoT Bridge for Snowflake instance is in
# ibsnow_cloud_region = us-east-1

# MQTT Server definitions. IoT Bridge for Snowflake supports multiple MQTT Servers. Each definition must include and 'index' as shown
# below represented by 'X'. The first should begin with 1 and each additional server definition should have an index of 1 greater
# than the previous.
# mqtt_server_url.X                     # The MQTT Server URL
# mqtt_server_name.X                    # The MQTT Server name
# mqtt_username.X                       # The MQTT username (if required by the MQTT Server)
# mqtt_password.X                       # The MQTT password (if required by the MQTT Server)
# mqtt_keepalive_timeout.X              # The MQTT keep-alive timeout in seconds
# mqtt_ca_cert_chain_path.X             # The filepath to the TLS Certificate Authority certificate chain
# mqtt_client_cert_path.X               # The filepath to the TLS certificate
# mqtt_client_private_key_path.X        # The filepath to the TLS private key
# mqtt_client_private_key_password.X    # The TLS private key password
# mqtt_verify_hostname.X                # Whether or not to verify the hostname against the server certificate
# mqtt_client_id.X                      # The Client ID of the MQTT Client
# mqtt_sparkplug_subscriptions.X        # The Sparkplug subscriptions to issue when connecting to the MQTT Server.
					# By default this is spBv1.0/# but can be scoped more narrowly (e.g. spBv1.0/Group1/#)
                                        # It can also be a comma separated list (e.g. spBv1.0/Group1/#,spBv1.0/Group2/#)

mqtt_server_url.1 = ssl://a3edk3kas32kf7n10-ats.iot.us-west-2.amazonaws.com:8883
mqtt_server_name.1 = AWS IoT Core Server
mqtt_sparkplug_subscriptions.1 = spBv1.0/#
#mqtt_keepalive_timeout.1 = 30
#mqtt_verify_hostname.1 = true
#mqtt_username.1 =
#mqtt_password.1 =
mqtt_ca_cert_chain_path.1 = /opt/ibsnow/conf/certs/AmazonRootCA1.pem
mqtt_client_cert_path.1 = /opt/ibsnow/conf/certs/aa839ca9b62a7041aecffe79ddd9922286f12093444be8ac8098c2e1a53d00-certificate.pem.crt
mqtt_client_private_key_path.1 = /opt/ibsnow/conf/certs/aa839ca9b62a7041aecffe79ddd9922286f12093444be8ac8098c2e1a53d00-private.pem.key
#mqtt_client_private_key_password.1 =
#mqtt_client_id.1 =

# The Sparkplug sequence reordering timeout in milliseconds
sequence_reordering_timeout = 5000

# Whether or not to block auto-rebirth requests
#block_auto_rebirth = false

# The primary host ID if this is the acting primary host
primary_host_id = IamHost

# Snowflake streaming connection properties - A custom client name for the connection (e.g. MyClient)
snowflake_streaming_client_name = IBSNOWClient

# Snowflake streaming connection properties - The scheme to use for channels and their names
# This MUST be one of the following: STATIC, GROUP_ID, EDGE_ID
# STATIC - means to use a single channel. If using this mode, the snowflake_streaming_channel_name
# GROUP_ID - means to use the Sparkplug Group ID for the channel name on incoming data
# EDGE_ID - means to use the Sparkplug Group ID and the Edge Node ID for the channel name on incoming data
# DEVICE_ID - means to use the Sparkplug Group ID, Edge Node ID, and Device ID for the channel name on incoming data
snowflake_streaming_channel_scheme = EDGE_ID

# Snowflake streaming connection properties - A custom channel name for the connection (e.g. MyChannel)
# If this is left blank/empty, Channel names of the Sparkplug Group ID will be used instead of a single channel
# snowflake_streaming_channel_name =

# Snowflake streaming connection properties - The Table name associated with the Database and Schema already provisioned in the Snowflake account (e.g. MyTable)
snowflake_streaming_table_name = SPARKPLUG_RAW

# Snowflake notify connection properties - The Database name associated with the connection that is already provisioned in the Snowflake account (e.g. MyDb)
snowflake_notify_db_name = cl_bridge_node_db

# Snowflake notify connection properties - The Schema name associated with the Database already provisioned in the Snowflake account (e.g. PUBLIC)
snowflake_notify_schema_name = stage_db

# Snowflake notify connection properties - The Warehouse name associated with the notifications already provisioned in the Snowflake account (e.g. PUBLIC)
snowflake_notify_warehouse_name = cl_bridge_ingest_wh

# Whether or not to create and update IBSNOW infomational tracking metrics
# ibsnow_metrics_enabled = true

# The Sparkplug Group ID to use for IBSNOW asset names
ibsnow_metrics_sparkplug_group_id = IBSNOW

# The 'Bridge Info' Sparkplug Edge Node ID to use for IBSNOW assets
ibsnow_metrics_bridge_info_sparkplug_edge_node_id = Bridge Info

# The 'Edge Node Info' Sparkplug Edge Node ID to use for IBSNOW assets
ibsnow_metrics_edge_node_info_sparkplug_edge_node_id = Edge Node Info

# The 'MQTT Client Info' Sparkplug Edge Node ID to use for IBSNOW assets
ibsnow_metrics_mqtt_client_info_sparkplug_edge_node_id = MQTT Client Info

# Whether or not to send notification tasks to Snowflake based on incoming Sparkplug events
snowflake_notify_task_enabled = true

# The number of threads to use for BIRTH handling in Snowflake
# snowflake_notify_task_birth_thread_count = 100

# The number of milliseconds to delay after receiving an NBIRTH before notifying Snowflake over the event (requires snowflake_notify_task_enabled is true)
snowflake_notify_nbirth_task_delay = 10000

# The number of milliseconds to delay after receiving a DBIRTH or DATA message before notifying Snowflake over the event (requires snowflake_notify_task_enabled is true)
snowflake_notify_data_task_delay = 5000 |
Now modify the file /opt/ibsnow/conf/snowflake_streaming_profile.json as described in Setting snowflake_streaming_profile configuration
When complete, it should look similar to what is shown below.
...
Now the service can be restarted to pick up the new configuration. Do so by running the following command.
sudo systemctl restart ibsnow |
At this point, IBSNOW should connect to AWS IoT Core and be ready to receive MQTT Sparkplug messages. Verify by running the following command.
...
tail -f /opt/ibsnow/log/wrapper.log
After doing so, you should see something similar to what is shown below. Note the last line is 'MQTT Client connected to ...'. That denotes we have successfully configured IBSNOW and properly provisioned AWS IoT Core.
| Code Block | ||
|---|---|---|
| ||
INFO|199857/0||23-04-21 15:29:52|15:29:52.401 [Thread-2] INFO org.eclipse.tahu.mqtt.TahuClient - IBSNOW-79456ef78bc00095-8c909265-4541: Creating the MQTT ClientConnected to ssl://a3een7lsei6n10-ats54.iot.us-west-2.amazonaws.com:8883 on thread Thread-2236.16.39:8883 INFO|1998577263/0||23-0406-2129 1520:2919:5533|1520:2919:5533.836294 [MQTT Call: IBSNOW-79456ef78bc00095-8c909265-4541] INFO orgo.eclipse.tahu.mqtthost.TahuClientTahuHostCallback - IBSNOW-79456ef7-8c90-45: connect with retry succeeded INFO|199857This is a offline STATE message from IamHost - correcting with new online STATE message FINEST|7263/0||23-0406-2129 1520:2919:5533|1520:2919:5533.839297 [MQTT Call: IBSNOW-79456ef78bc00095-8c909265-4541] INFO orgo.eclipse.tahu.mqtthost.TahuClientTahuHostCallback - IBSNOW-79456ef7-8c90-45: Connected to ssl://a3een7lsei6n10-ats.iot.us-west-2.amazonaws.com:8883 INFO|199857This is a offline STATE message from IamHost - correcting with new online STATE message FINEST|7263/0||23-0406-2129 1520:2919:5633|1520:2919:5633.046957 [Thread-2] INFO org.eclipse.tahu.mqtt.TahuClient - IBSNOW-79456ef78bc00095-8c909265-4541: MQTT Client connected to ssl://a3een7lsei6n10-ats54.iot.us-west-2.amazonaws.com236.16.39:8883 on thread Thread-2 |
...