![]()
Contents
Cirrus Link Resources
Cirrus Link Website![]()
Contact Us (Sales/Support)![]()
Forum![]()
Cirrus Link Modules Docs for Ignition 7.9.x![]()
Inductive Resources
Ignition User Manual![]()
Knowledge Base Articles![]()
Inductive University![]()
Forum![]()
![]()
Cirrus Link Website![]()
Contact Us (Sales/Support)![]()
Forum![]()
Cirrus Link Modules Docs for Ignition 7.9.x![]()
Ignition User Manual![]()
Knowledge Base Articles![]()
Inductive University![]()
Forum![]()
...
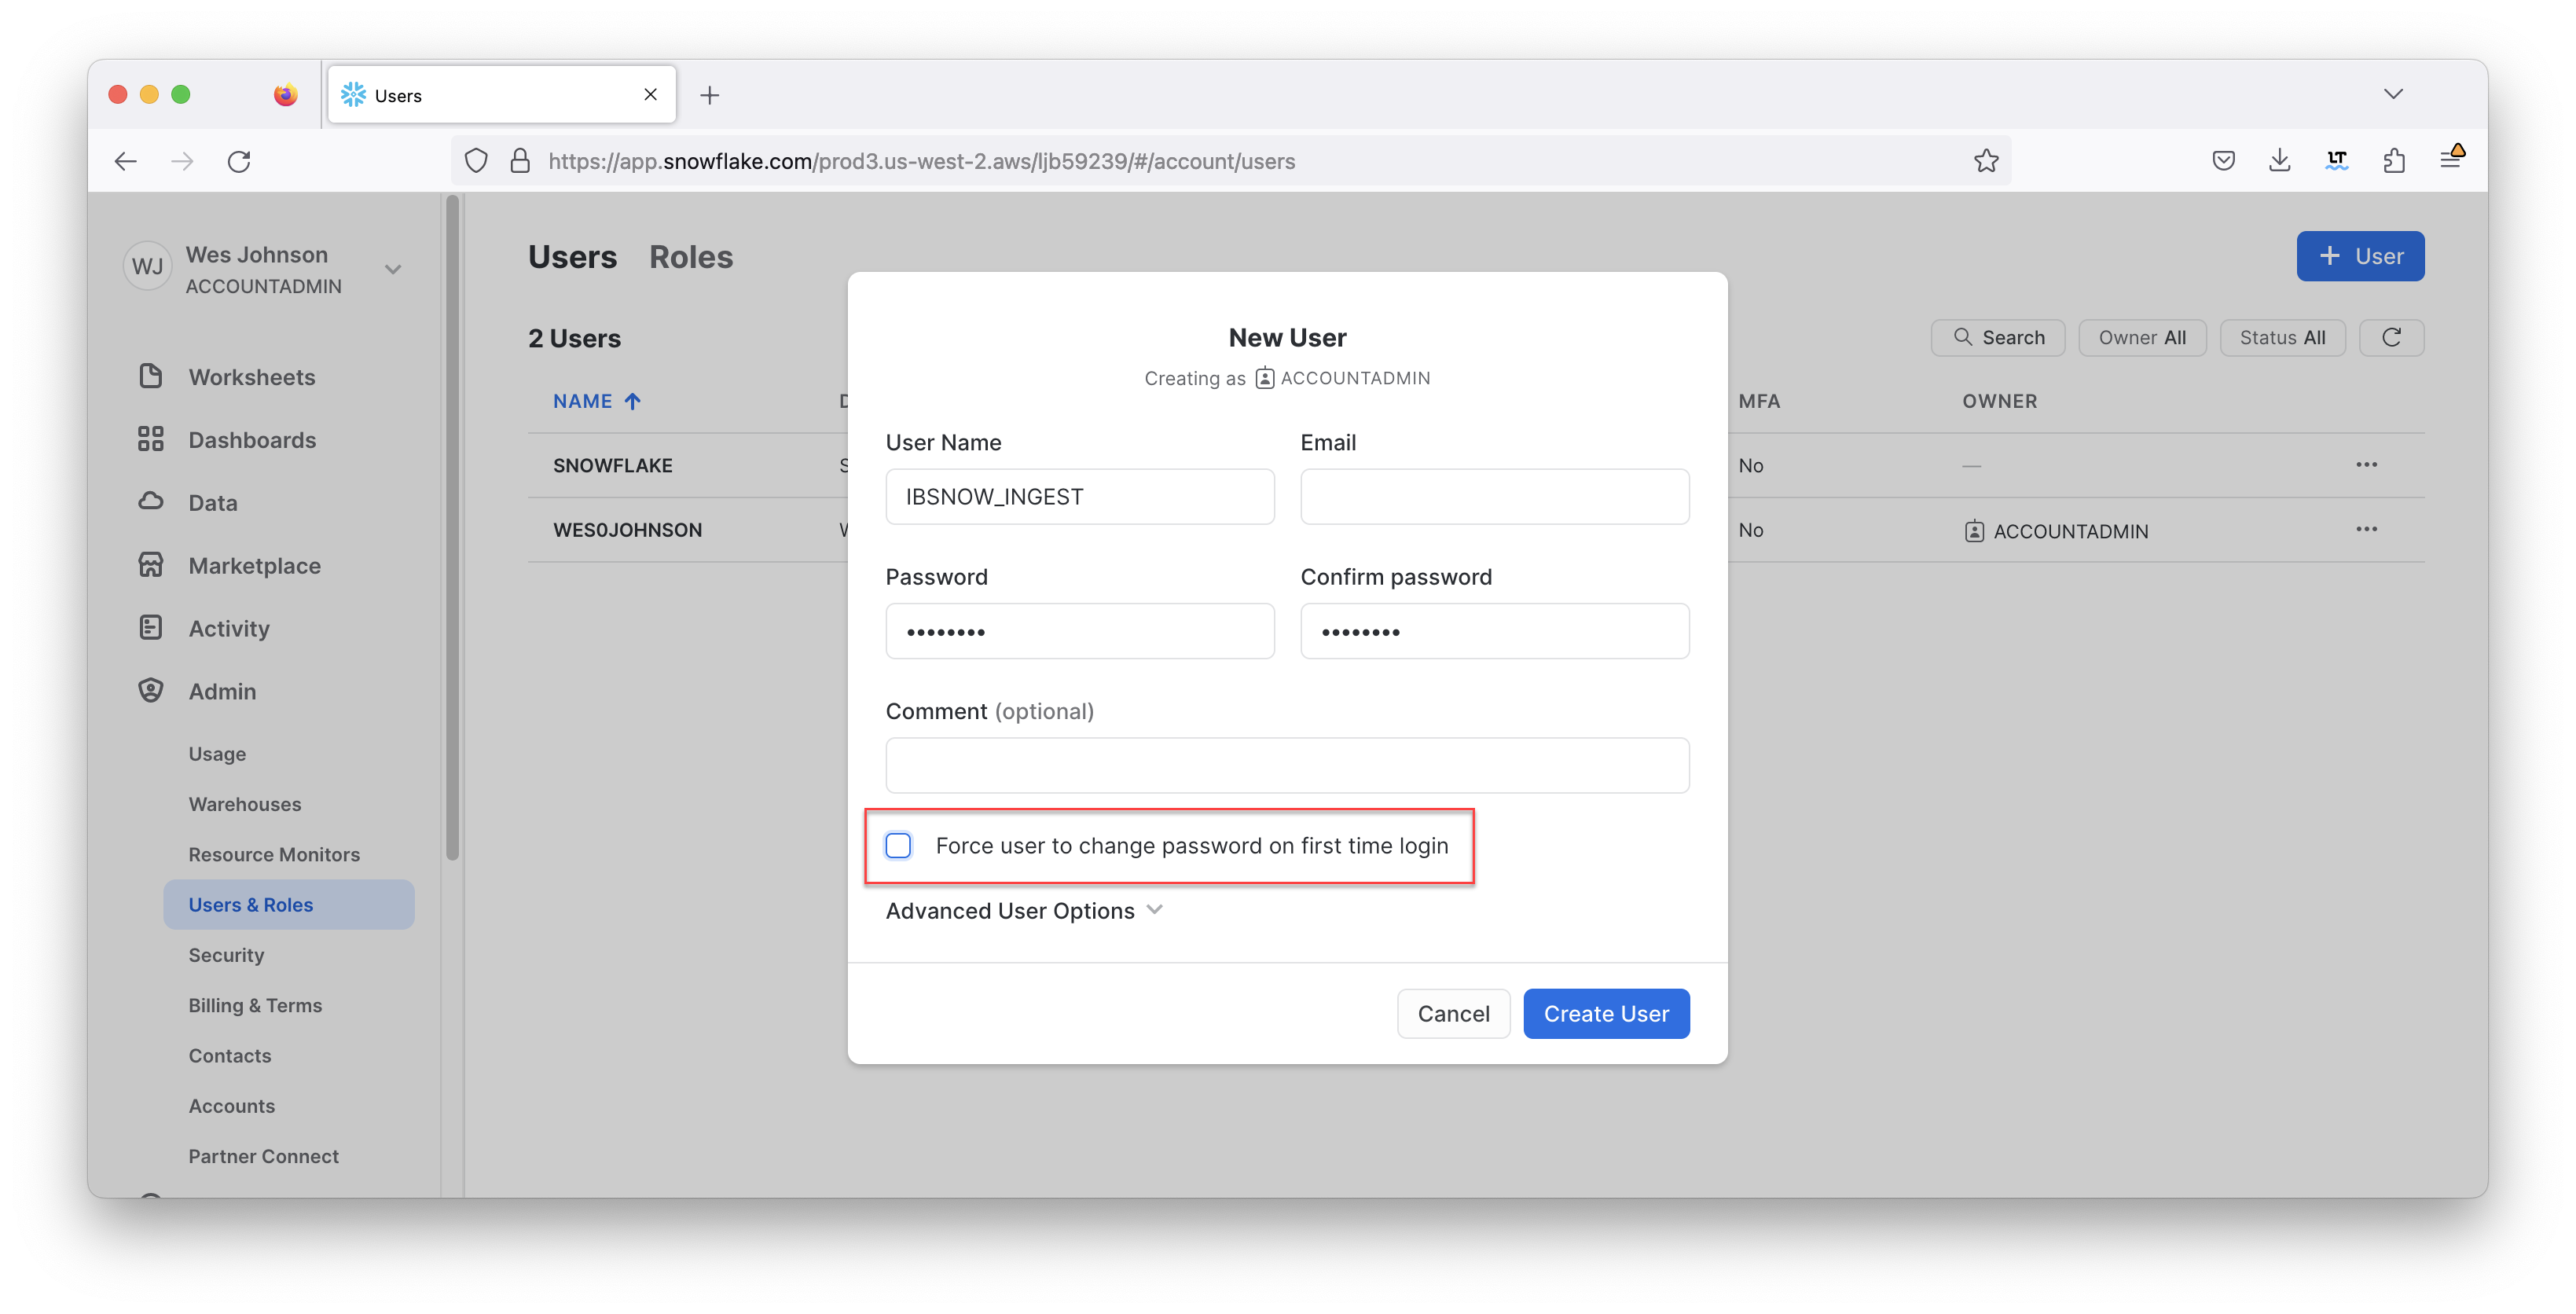
After all of the scripts have successfully executed, create a new user in Snowflake. This user will be used by IoT Bridge for Snowflake to push data into Snowflake. In the Snowflake Web UI, go to Admin → Users & Roles and then click '+ User' in the upper right hand corner. Give it a username of your choice and a secure password as shown below. For this example we're calling the user IBSNOW_INGEST so we know this user is for ingest purposes. See below for an example and then click 'Create User'.
In addition, the user must have a <TODO>

Now a key pair must be generated and uploaded to Snowflake. This will be used for authentication by the IoT Bridge for Snowflake application to push data to Snowflake via the Snowflake Streaming API. See this document for details on how to generate this and assign this to a user in your snowflake account: https://docs.snowflake.com/en/user-guide/key-pair-auth. Step 6 (Configuring the Snowflake Client to User Key Pair Authentication) in the linked tutorial can be skipped. This tutorial will cover configuring IoT Bridge for Snowflake with the generated key. Also note the generated key MUST NOT be encrypted. Attach the public key to the user that we just created for Snowflake ingest purposes.
...