![]()
Contents
Cirrus Link Resources
Cirrus Link Website![]()
Contact Us (Sales/Support)![]()
Forum![]()
Cirrus Link Modules Docs for Ignition 7.9.x![]()
Inductive Resources
Ignition User Manual![]()
Knowledge Base Articles![]()
Inductive University![]()
Forum![]()
![]()
Cirrus Link Website![]()
Contact Us (Sales/Support)![]()
Forum![]()
Cirrus Link Modules Docs for Ignition 7.9.x![]()
Ignition User Manual![]()
Knowledge Base Articles![]()
Inductive University![]()
Forum![]()
...
This tutorial describes how to connect MQTT Engine or MQTT Transmission to Amazon Web Services (AWS) IoT Core.
...
| Warning |
|---|
AWS IoT Core supports messages with a maximum message length of 128KB. If messages are received that exceed this limit AWS IoT Core will disconnect the client. Review our HowTo on ways to identify and resolve if this occurs |
The document comprises these sections:
| Table of Contents | ||
|---|---|---|
|
Before configuring MQTT Engine or MQTT Transmission, you must register a 'thing' connection in AWS IoT Core. Begin by browsing to AWS IoT Core in your AWS account. Make sure you are in the same AWS region that you intend to connect the MQTT Module to. Begin by expanding 'Secure' and click 'Policies' as shown below.
...
| Anchor | ||||
|---|---|---|---|---|
|
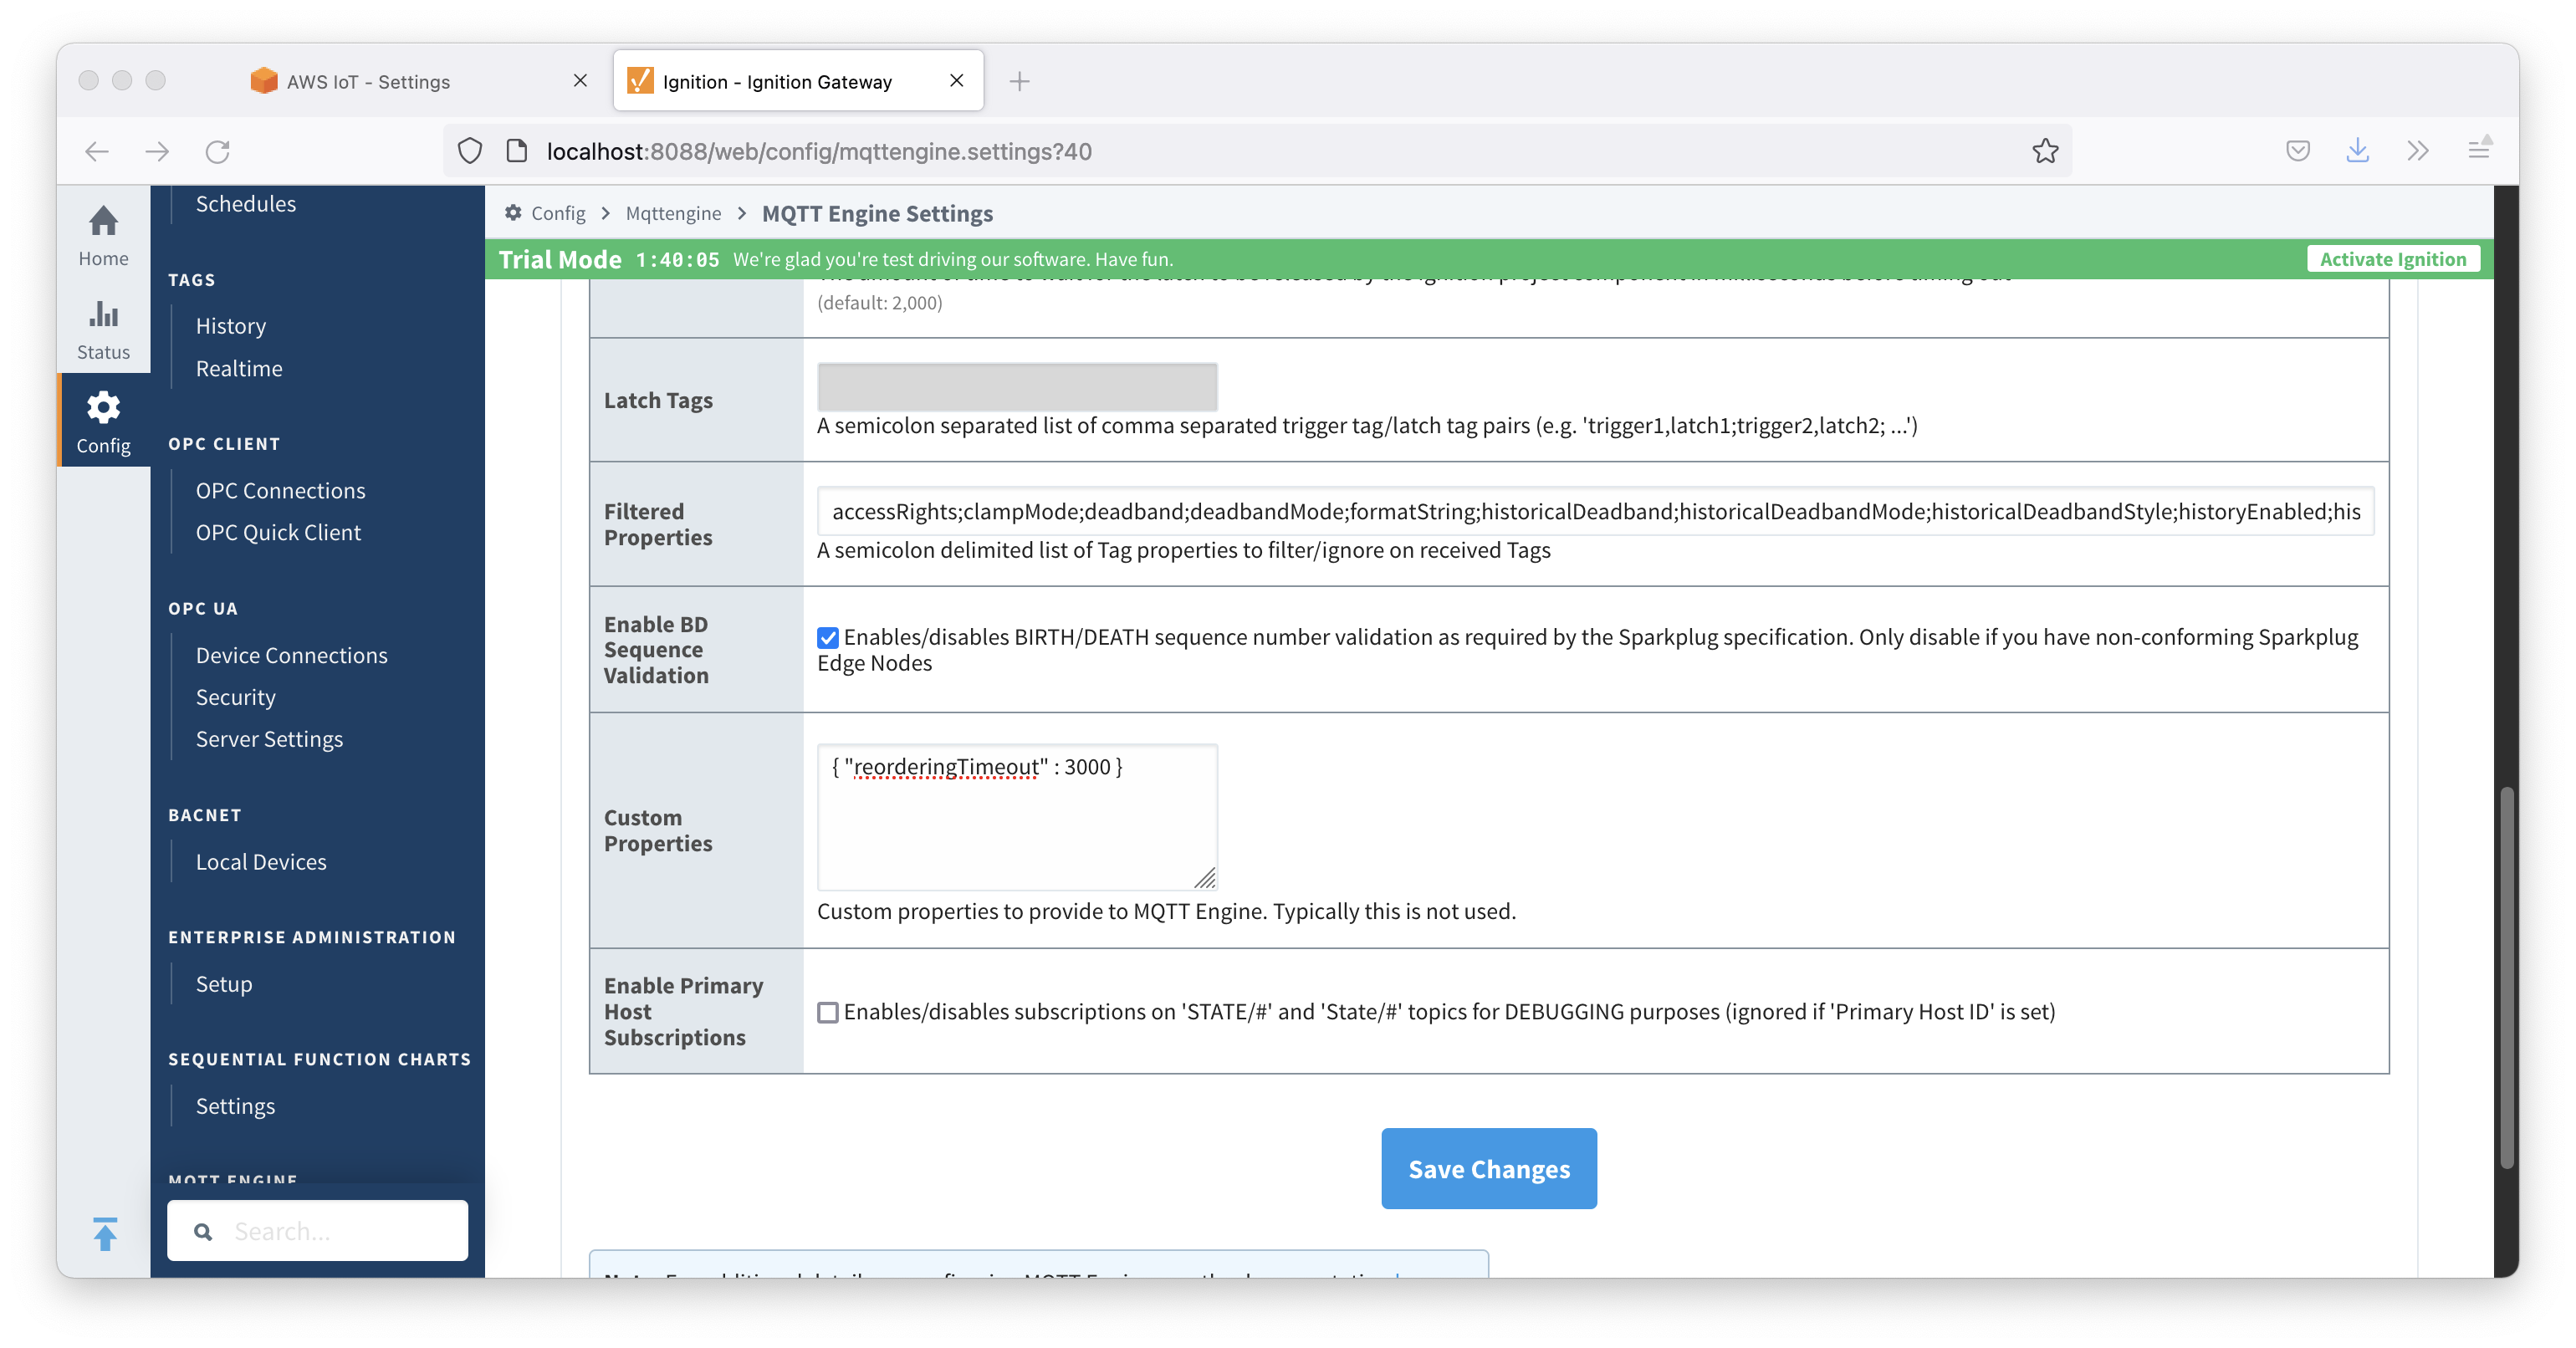
For this example we'll be using MQTT Engine. However, the steps are very similar for MQTT Transmission with regard to connection establishment. Using the Ignition Gateway Web UI, browse to the Igntion Ignition 'Config → > MQTT Engine /Transmission settings page'Settings > Servers' page. Now click the 'Certificates' tab as shown below:
...
This will allow MQTT Engine to buffer messages and reorder them should they be delivered out of order within a 3 second window. Generally 3 seconds seems to be plenty of time for the reordering with AWS IoT Core.
| Anchor | ||||
|---|---|---|---|---|
|
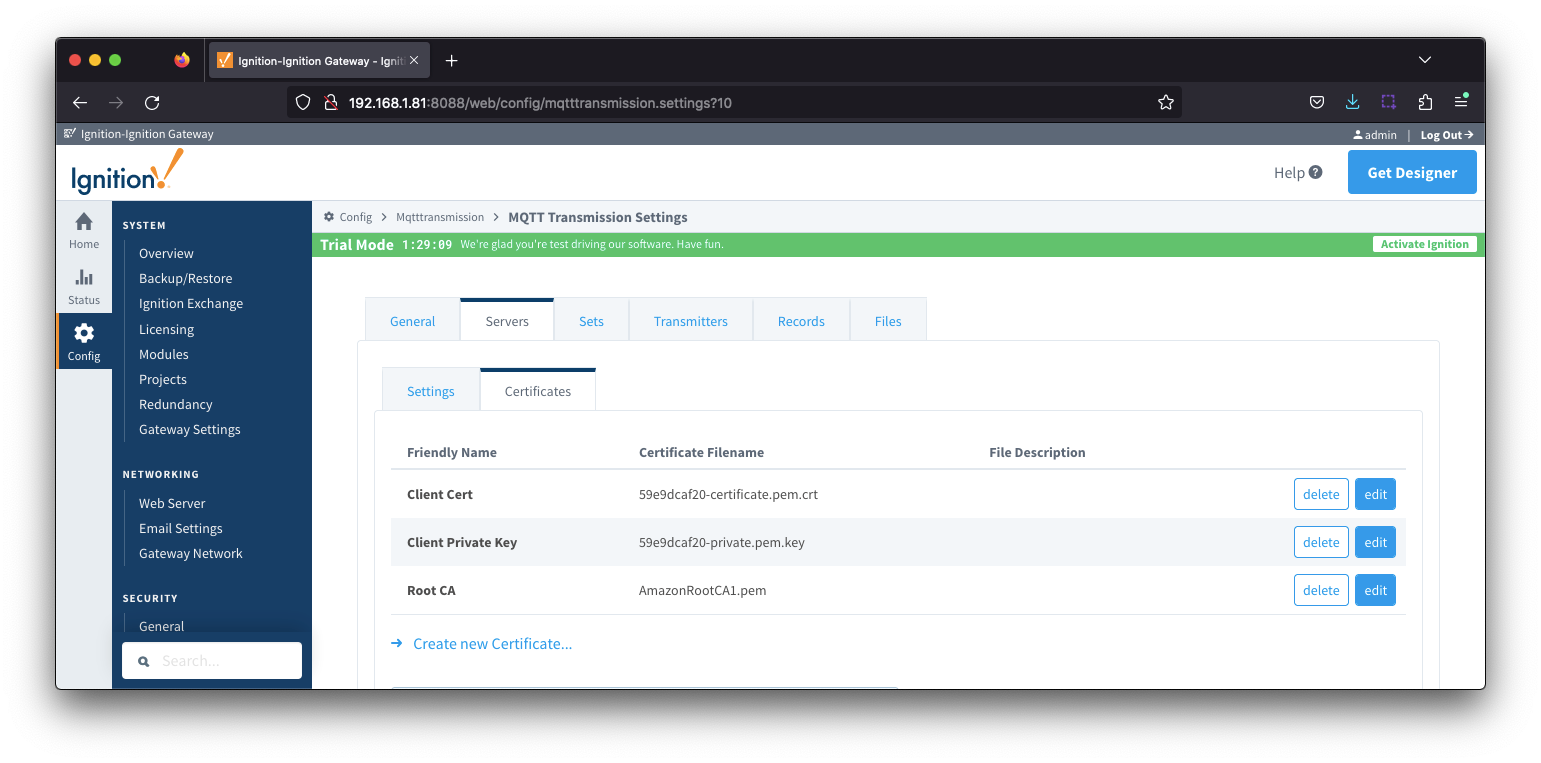
Using the Ignition Gateway Web UI, browse to the Ignition 'Config > MQTT Transmission Settings > Servers' page. Now click the 'Certificates' tab as shown below:
![]()
Now click the 'Create new Certificate' link. Then upload one of the three files previously downloaded when creating the IoT Core 'Thing'. Once completed, your Certificates page should look similar to the following with all three files.
Now, click the 'Servers' tab as shown below.
![]()
Select 'Create a new MQTT Server' link which will bring up the following page.
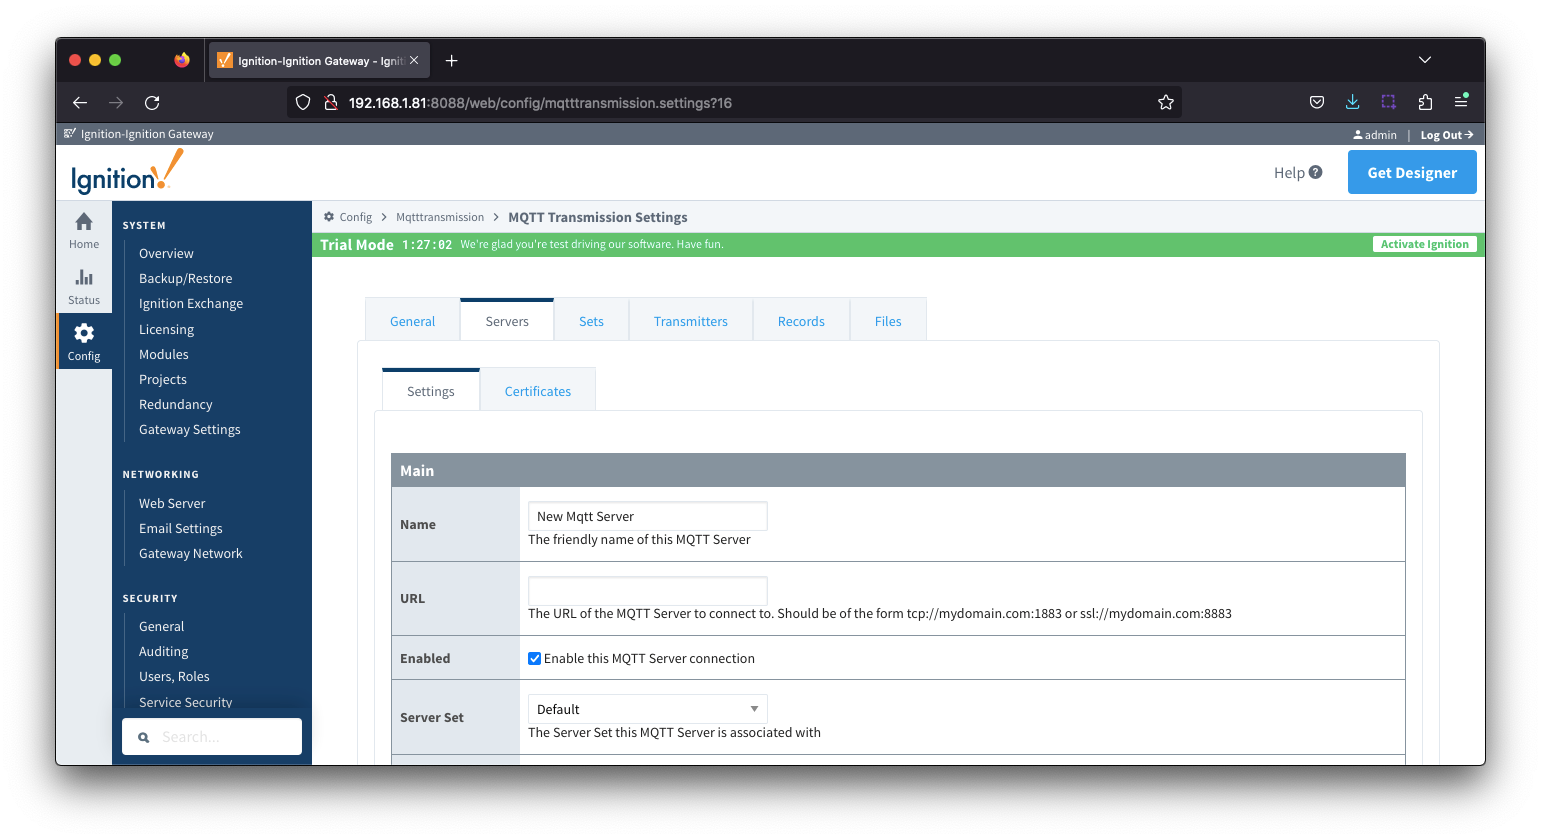
Set the following.
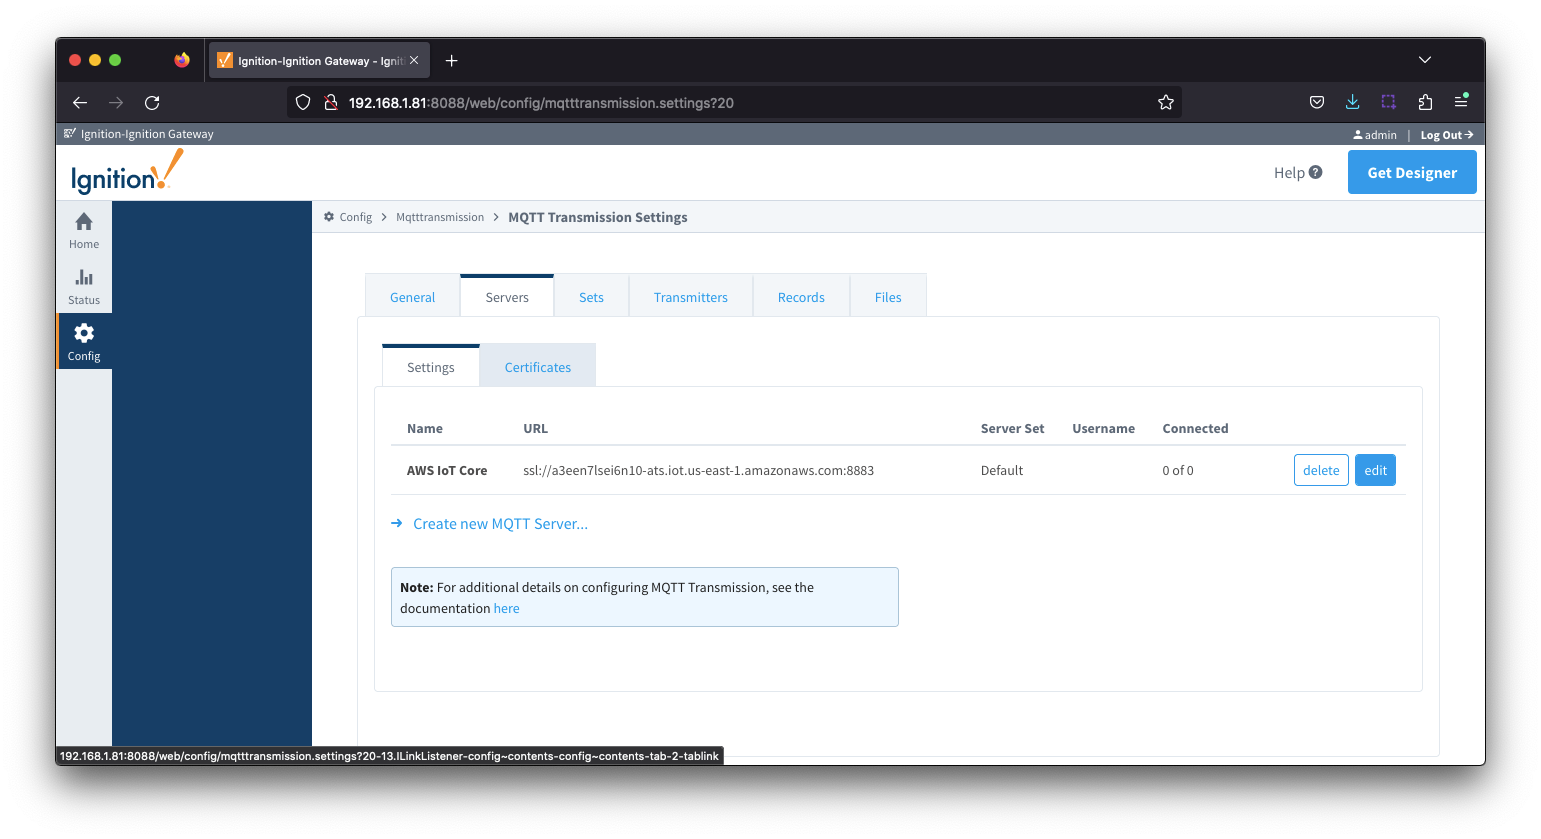
ssl://ENDPOINT_URL:8883ssl://a33fdj134jkj10-ats.iot.us-east-1.amazonaws.com:8883Leave all other fields blank and submit the configuration.
| Note |
|---|
| If no Transmitters have been configured, the 'Status' will show 0 of 0. |
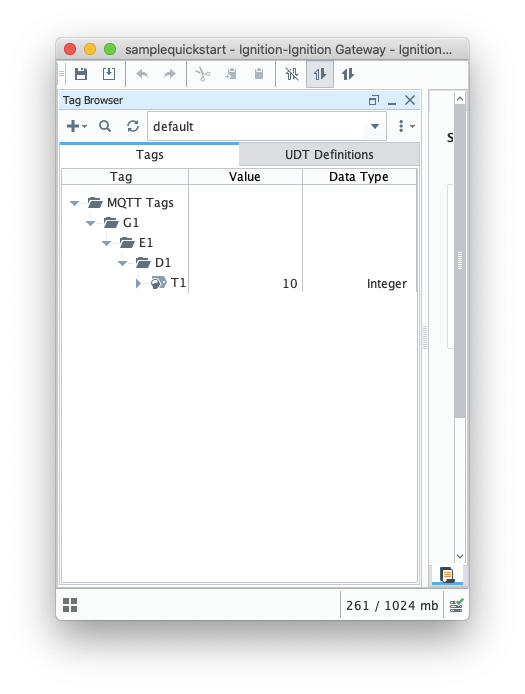
Configure an Transmitter as shown below and use Ignition Designer to created an appropriate tag tree in the default provider.
| Tip |
|---|
| Review the MQTT Transmission Transmitters and Tag Trees document for more information on how Transmitter configs and Ignition tag trees interact |
![]()
The server connection will now show the connected client as '1 of 1'

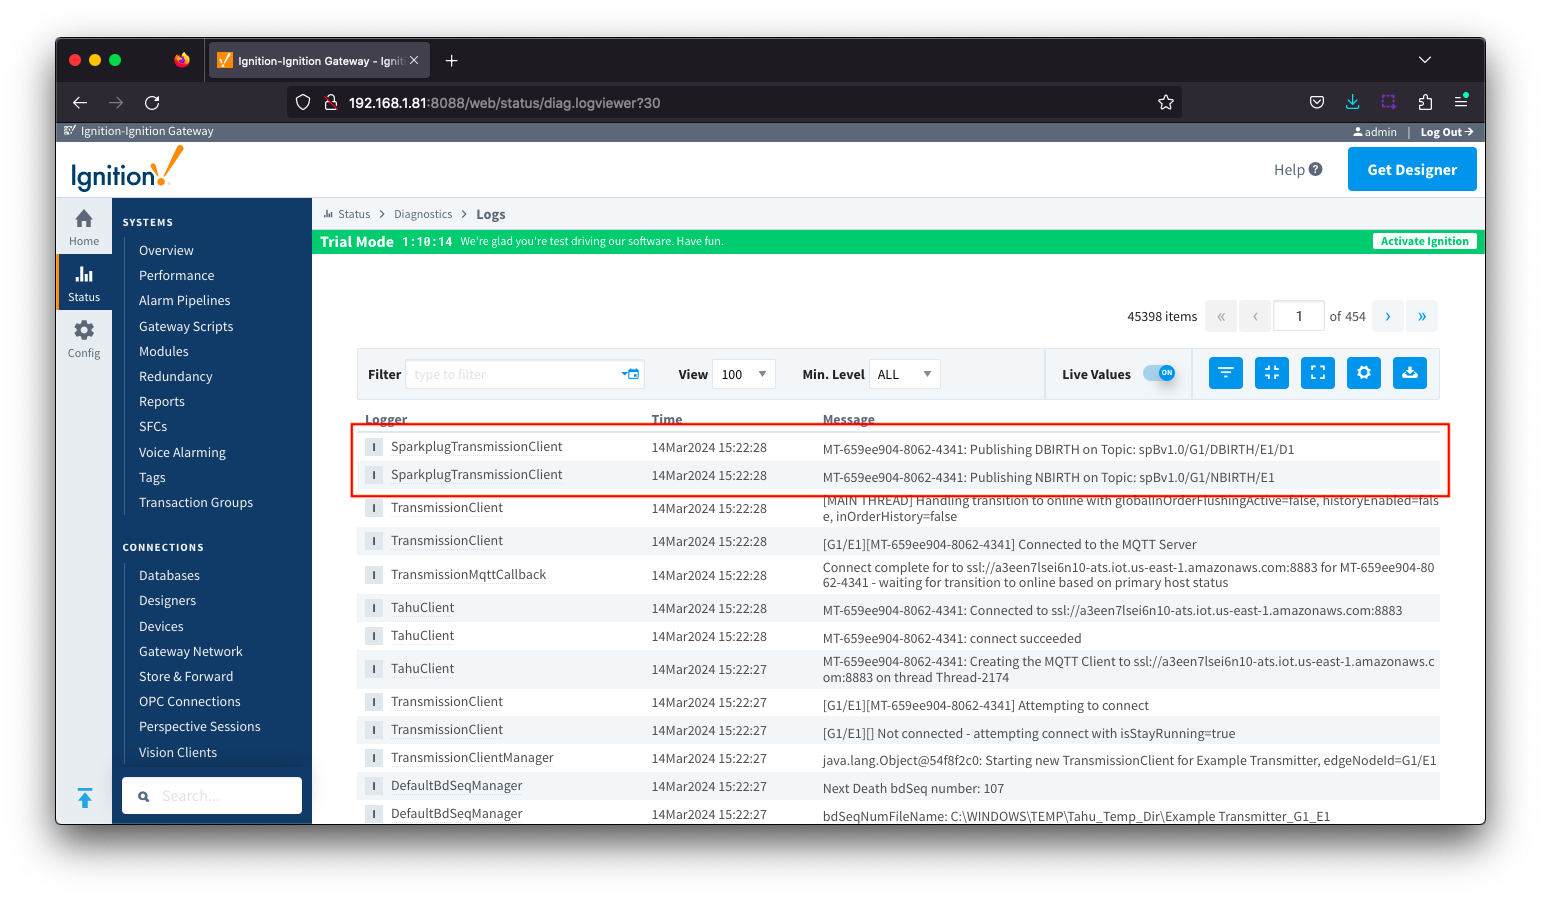
To confirm messages are published from Transmission, navigate to the Ignition logs and Refresh Transmission. This will cause the client to disconnect, reconnect and publish its BIRTH messages.
The SparkplugTransmissionClient logger will show the NBIRTH and DBIRTH messages pushed.
To confirm messages are received as AWS IoT Core. On your AWS account, navigate to AWS IoT > Test > MQTT test client.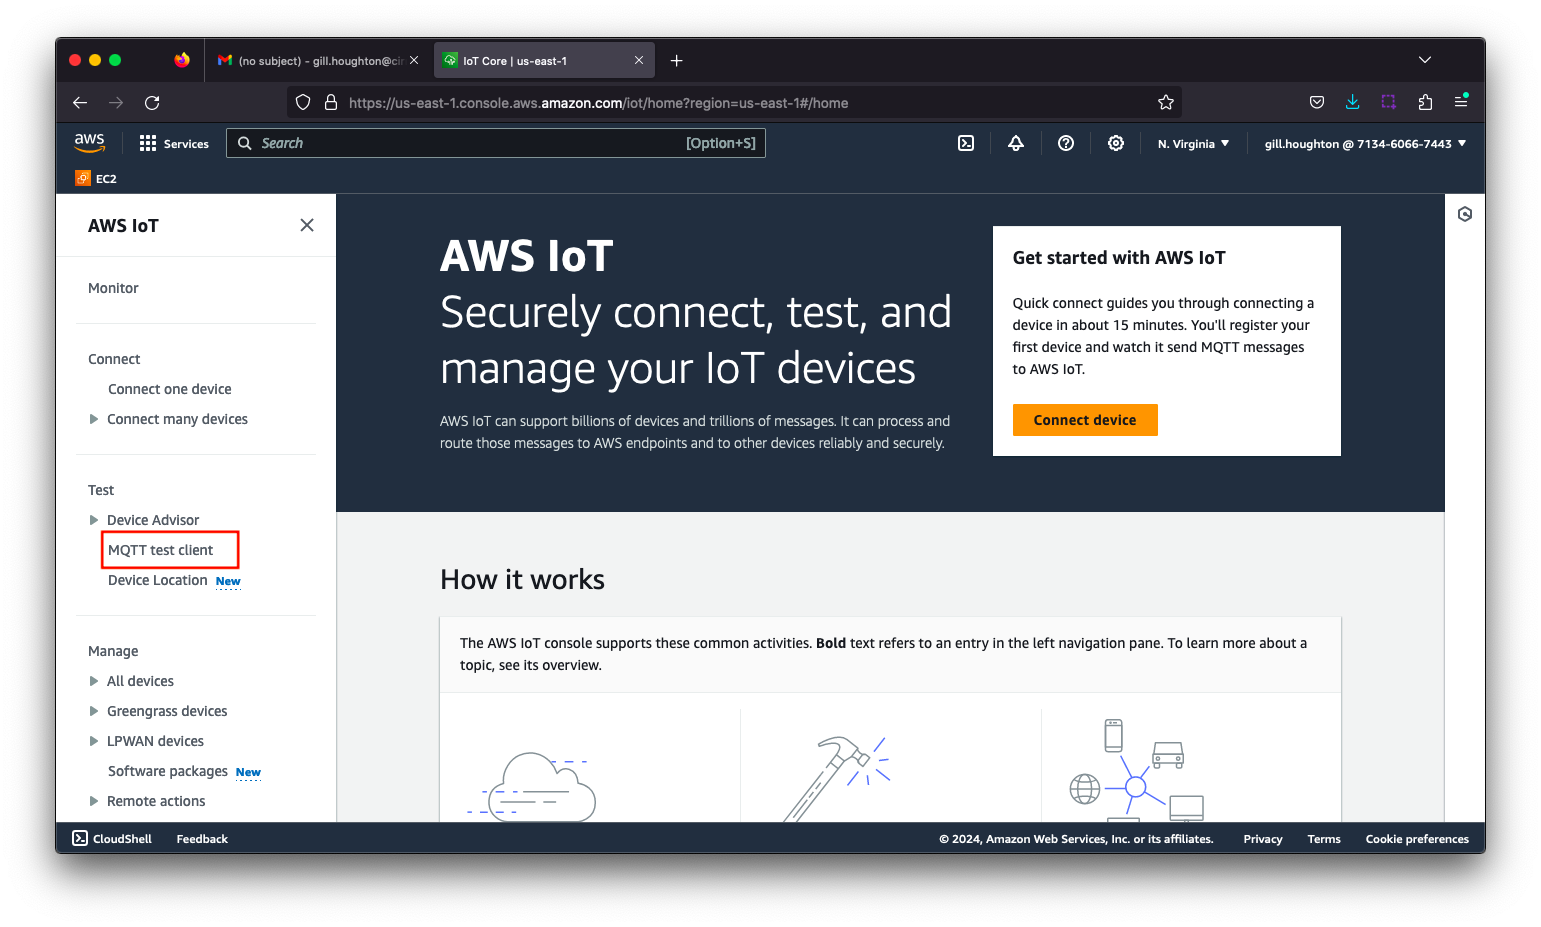
Select and subscribe on # to receive all published messages

On a Transmission Refresh you will see all DEATH messages published on the disconnect along with the new BIRTH messages on the reconnect. 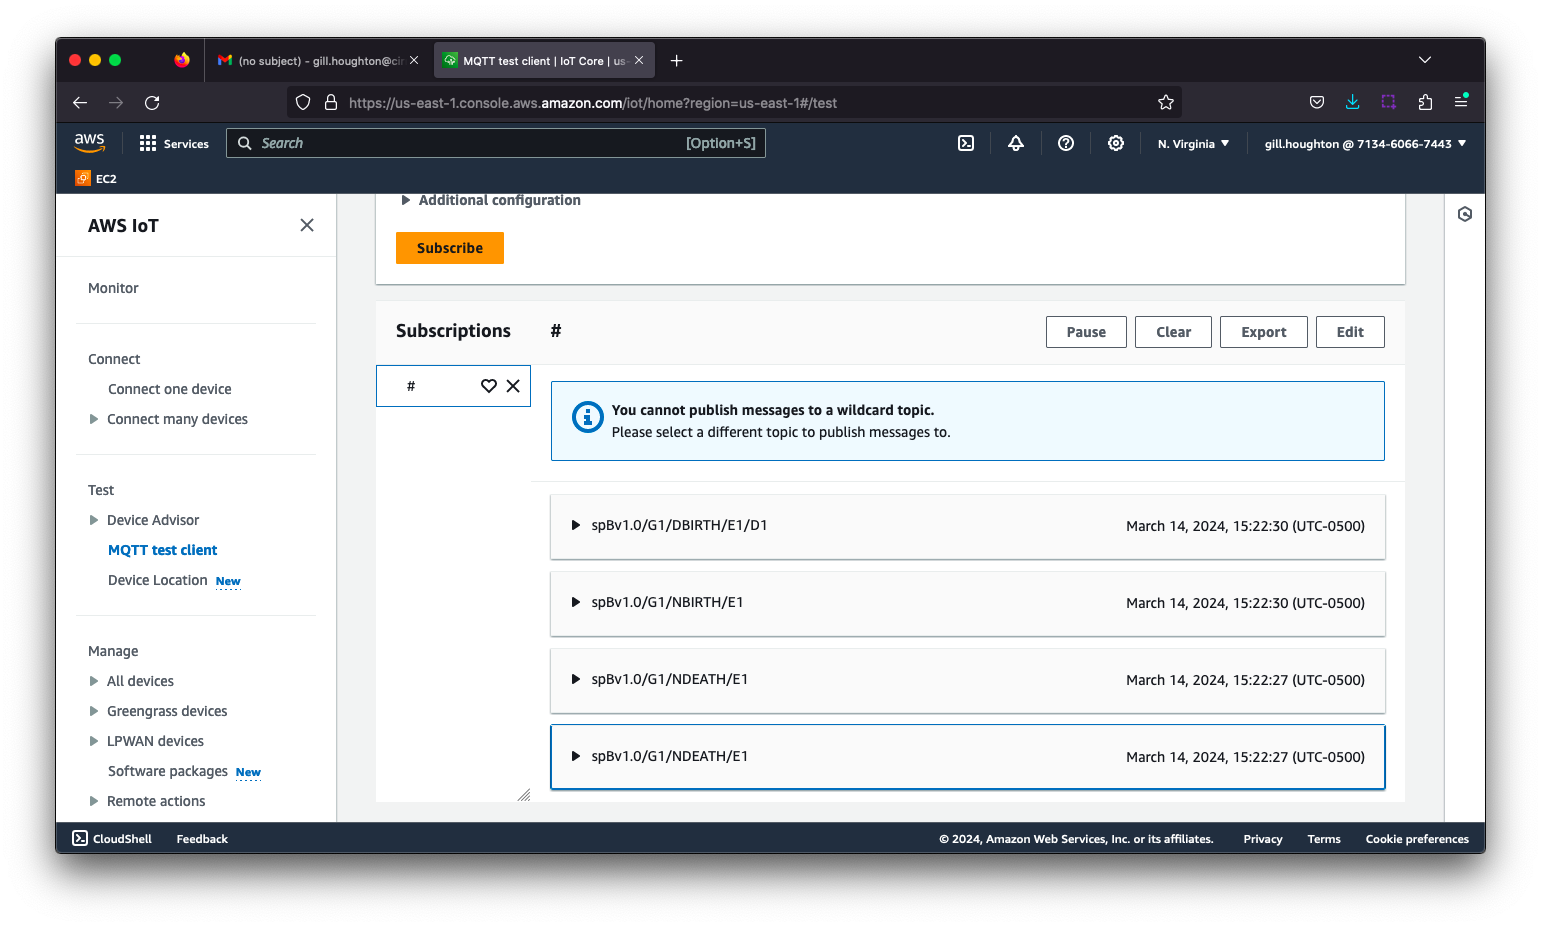
| Excerpt Include | ||||||
|---|---|---|---|---|---|---|
|