...
Copy and paste SQL Script 01 from Snowflake Setup Scripts into the center pane of the SQL Worksheet, click the drop down arrow next to the blue play button in the upper right corner of the window and click 'Run All' as shown below.
...
Now, repeat the process for each of the following scripts in the Snowflake Setup Scripts in order. Each time, fully replace the contents of the SQL script with the new script and click the 'Run All' button after pasting each script. Make sure no errors are displayed in the Results window after running each script.
...
After all of the scripts have successfully executed, create a new user in Snowflake. This user will be used by IoT Bridge for Snowflake to push data into Snowflake. In the Snowflake Web UI, go to Admin → Users & Roles and then click '+ User' in the upper right hand corner. Give it a username of your choice and a secure password as shown below. For this example we're calling the user IBSNOW_INGEST so we know this user is for ingest purposes. See below for an example and then click 'Create User'.
| Warning |
|---|
| Force user to change password on first time login must be set to False. |
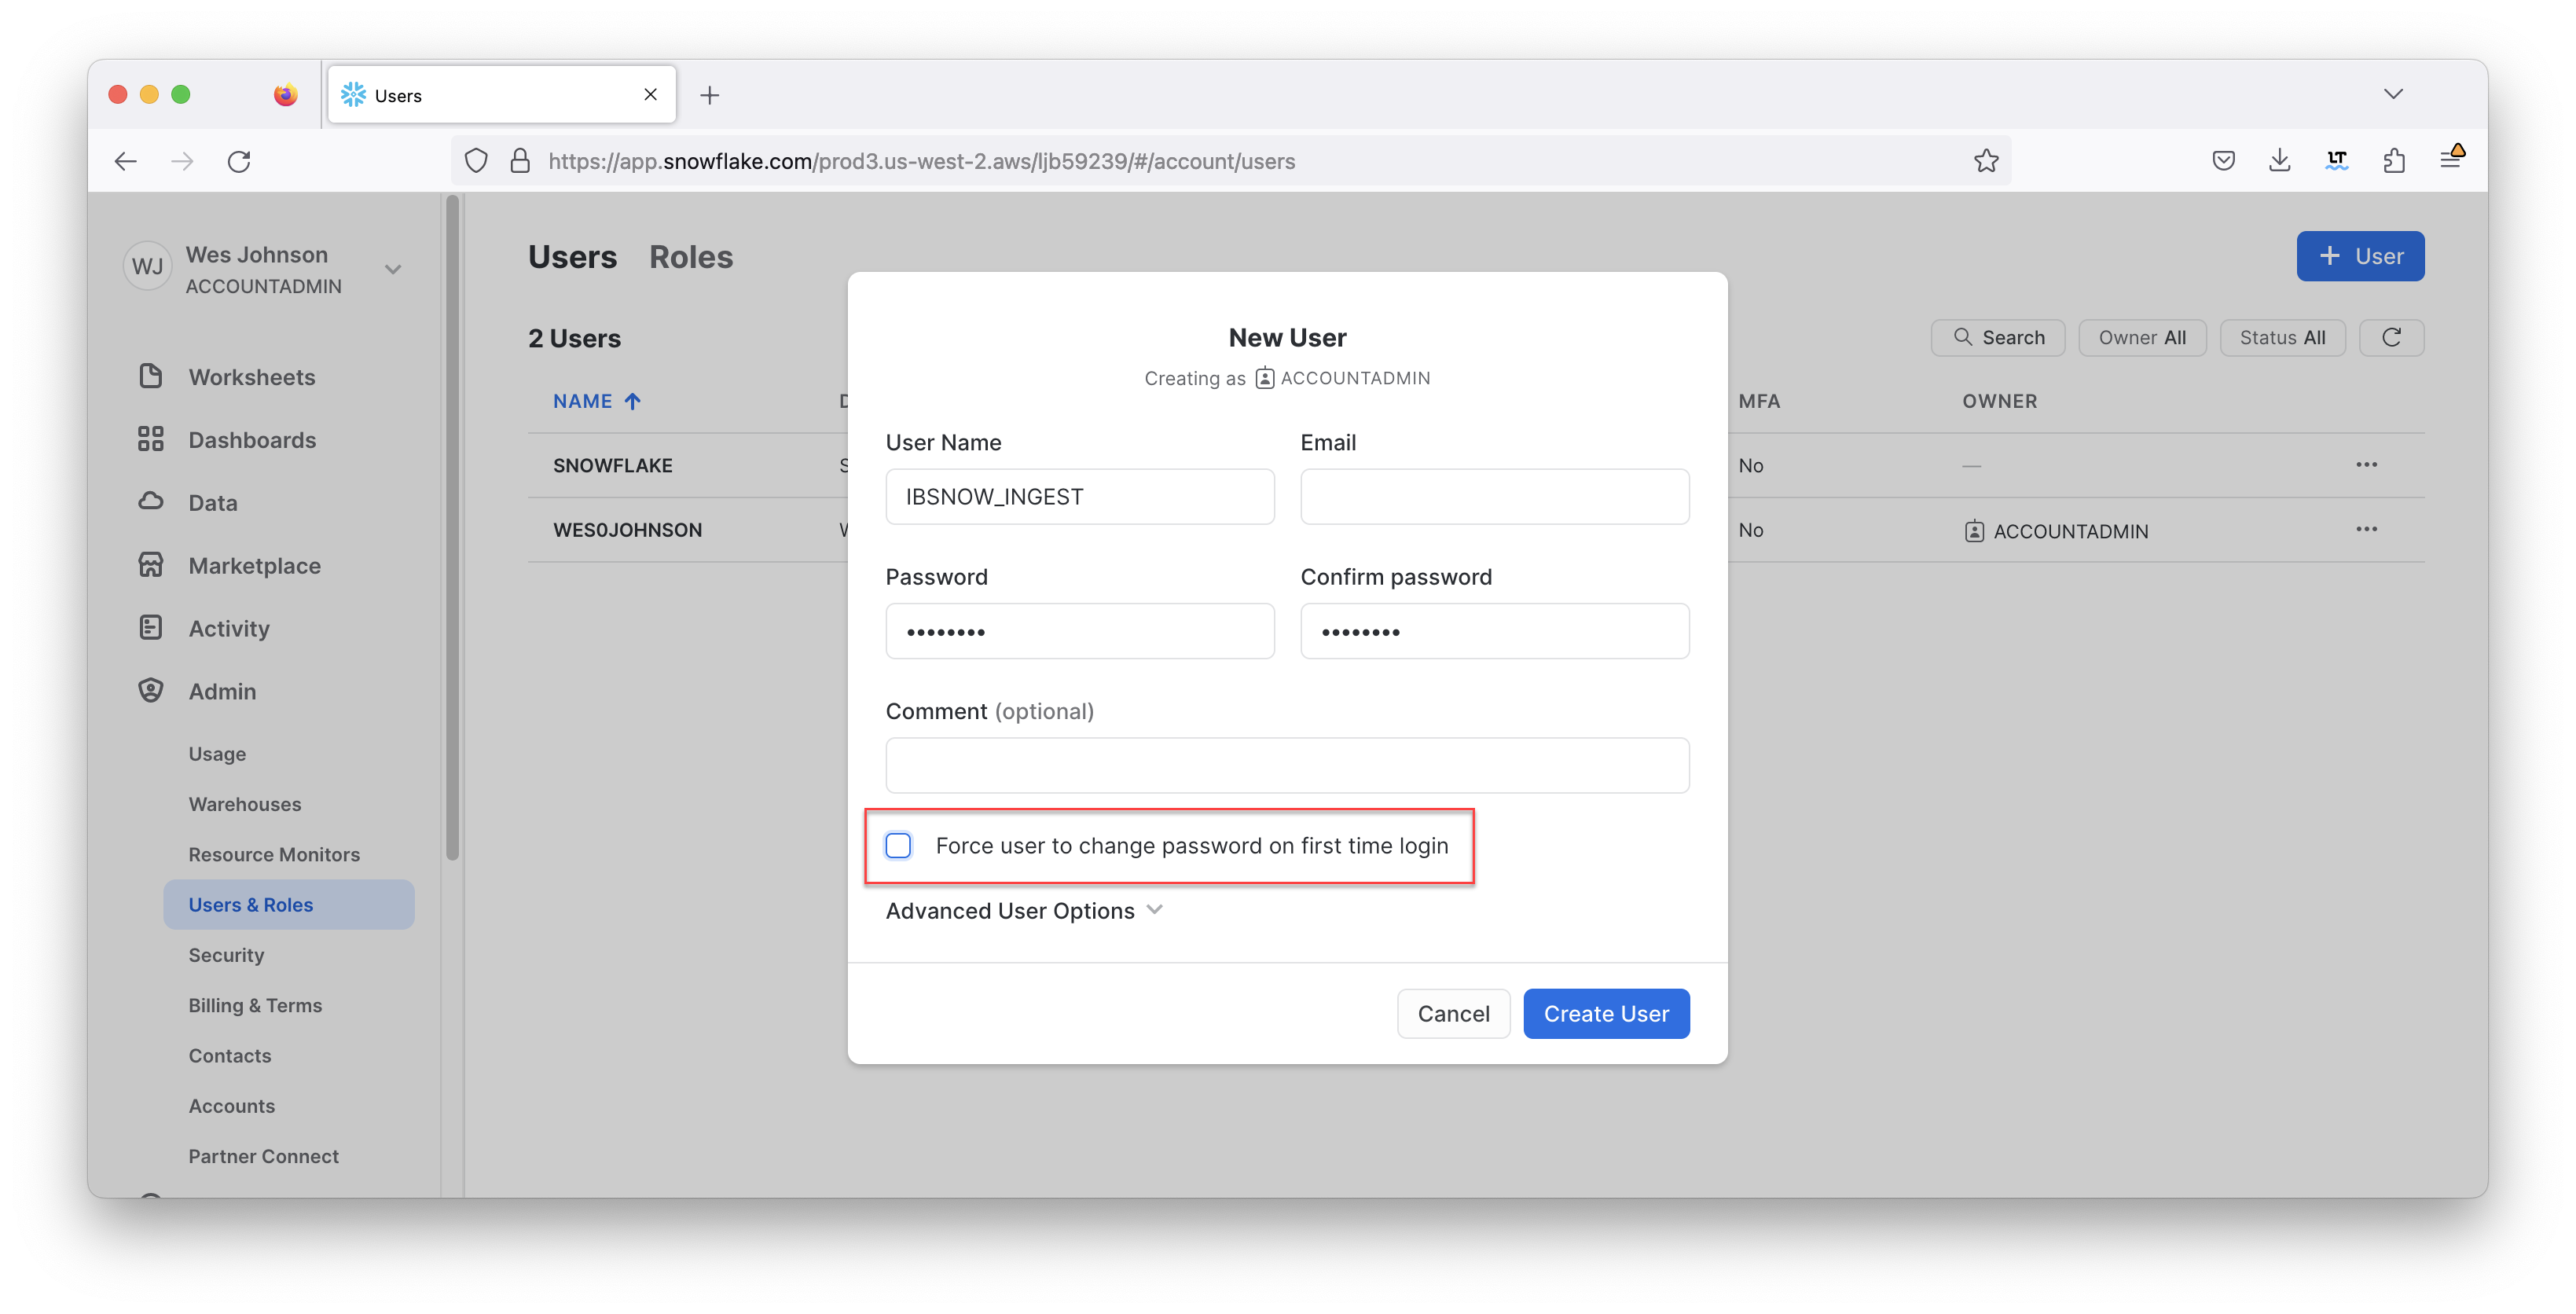
In addition, the user must have a specific role to be able to stream data into Snowflake. Click the newly created user to see the following.
...
- mqtt_server_url
- mqtt_server_name
- Give it a meaningful name if desired'
- mqtt_username
- The username for the MQTT connection if required
- If using Chariot MQTT Server, the default username is 'admin'
- mqtt_password
- The password for the MQTT connection if required
- If using Chariot MQTT Server, the default password is 'changeme'
- primary_host_id
- Set it to a text string such as 'IamHost'
- snowflake_streaming_client_name
- Some text string such as 'MY_CLIENT'
- snowflake_streaming_table_name
- This is the staged_sparkplug_raw_table created by the Snowflake setup in SQL Script 02
- If the default Snowflake setup scripts were used, this is 'SPARKPLUG_RAW'
- snowflake_notify_db_name
- snowflake_notify_schema_name
- snowflake_notify_warehouse_name
- This is the cl_bridge_ingest_wh created by the Snowflake setup in SQL Script 07
- If the default Snowflake setup scripts were used, this is 'cl_bridge_ingest_wh'
When complete, it should look similar to what is shown below.
| Note |
|---|
If you are using self-signed certificates rather than a real signed certificate, you will need to copy the CA certificate chain file uploaded to your MQTT Server to the bridge instance and set - mqtt_ca_cert_chain_path.1
- This is the filepath to the TLS Certificate Authority certificate chain
|
| Excerpt Include |
|---|
| Excerpt Include |
|---|
|
| CLD80:IBSNOW: Snowflake IoT Bridge properties configurationCLD80: | | IBSNOW: Snowflake IoT Bridge properties configuration |
|---|
| nopanel | true |
|---|
|
...
When complete, it should look similar to what is shown below.
| Excerpt Include |
|---|
| CLD80:IBSNOW: Setting snowflake_streaming_profile configurationCLD80: |
|---|
| IBSNOW: Setting snowflake_streaming_profile configuration |
|---|
| nopanel | true |
|---|
|
...
Edge Setup with Ignition and MQTT Transmission
Install Ignition and MQTT Transmission module
At this point IoT Bridge is configured and ready to receive data. To get data flowing into IBSNOW we'll set up Inductive Automation's Ignition platform along with the MQTT Transmission module from Cirrus Link. Begin by downloading Ignition here.
https://inductiveautomation.com/downloads
Installation of Ignition is very straightforward and fast. There is a guide to do so here.https://www.docs.inductiveautomation.com/docs/8.1/getting-started/installing-and-upgradingfollowing the instructions in the Installing and Upgrading Ignition guide.
With Ignition installed, the Cirrus Link MQTT Transmission module must be installed as well as a plugin to Ignition. Get MQTT Transmission for your version of Ignition here.
https://inductiveautomation.com/downloads/third-party-modules
Now use the procedure below to install the MQTT Transmission module.
https://www.docs.inductiveautomation.com/docs/8.1/getting-started/installing-and-upgrading/installing-or-upgrading-a-module
With Ignition and MQTT Transmission installed, we can configure the MQTT Transmission module to connect to Chariot MQTT Server that we provisioned earlier. Begin by clicking 'Get Designer' in the upper right hand corner of the Ignition Gateway Web UI as shown below.
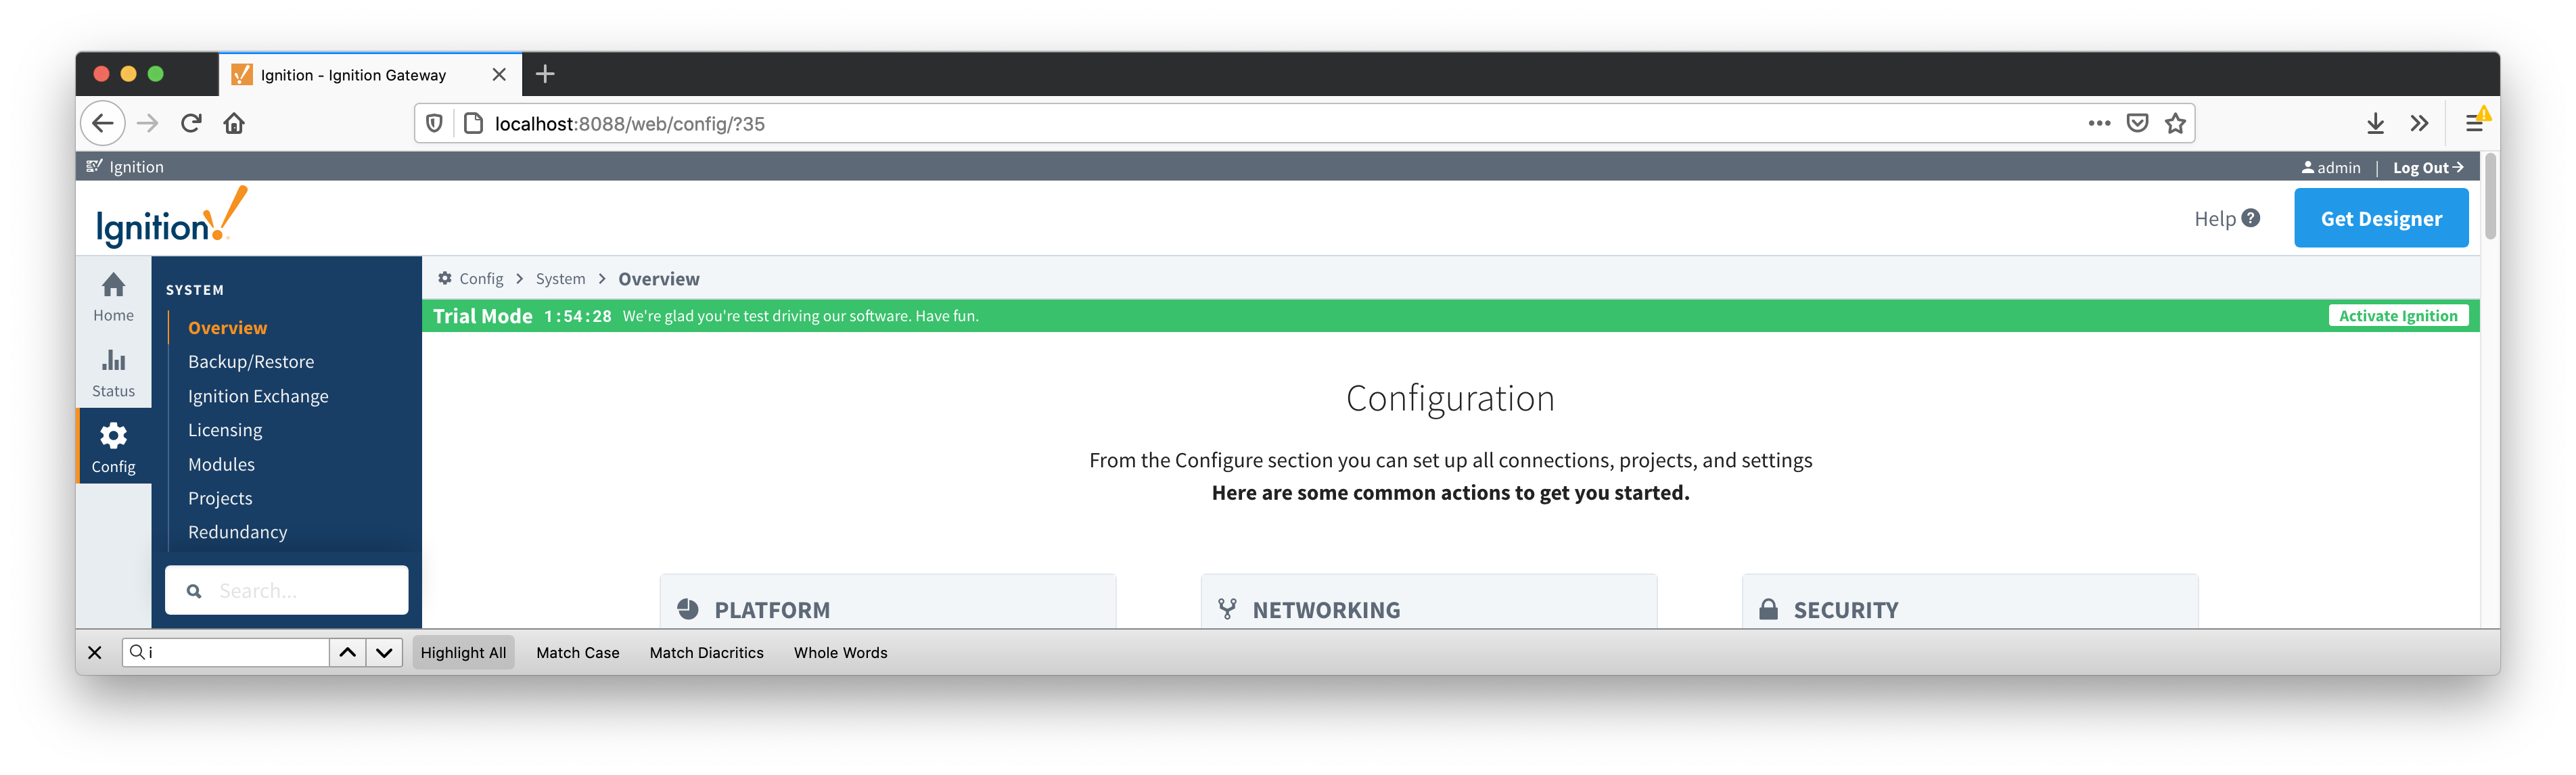 Image Removed
a plugin to Ignition. Follow the instructions in our Module Installation guide
Import UDTs and tags
Launch the Ignition Designer Now launch the Ignition Designer using the Designer Launcher to connect to your Ignition instance.
...
Once it is launched, navigate to the 'default' tag provider in the Tag Browser. In the image below , expand the tag tree has been expanded to show see the automatically created example tags.
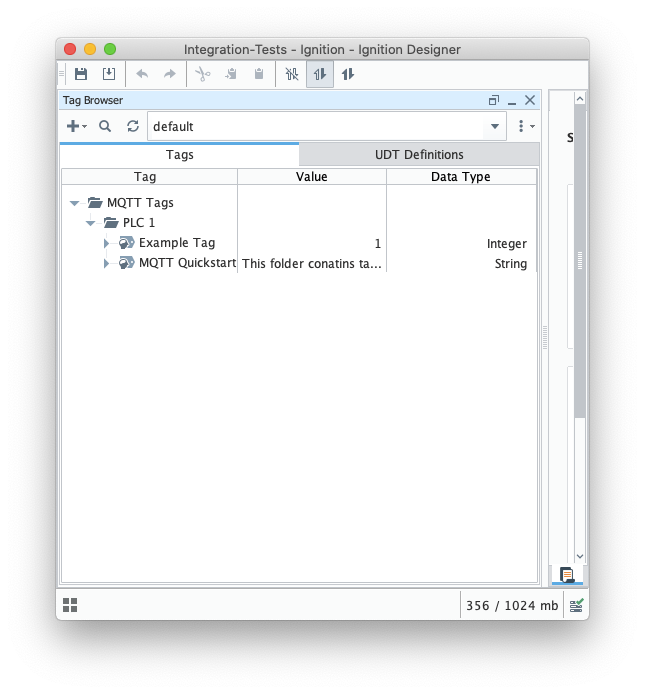 Image Removed
Begin by deleting these two tags (tags as shown below and delete tags Example Tag and MQTT Quickstart).Image Added
from the Designer Then import these tags IBSNOW_Quickstart_tags.json to MQTT Tags > PLC 1 create a UDT Definition and instance.
...
At this point, our tags are configured. A UDT definition will map to a model in Snowflake and UDT instances in Ignition will map to Snowflake.
But, before this will happen we need to point MQTT Transmission to the Chariot MQTT Server. To do so, browse back to the Ignition Gateway Web UI and select MQTT Transmission → Settings from the left navigation panel as shown below.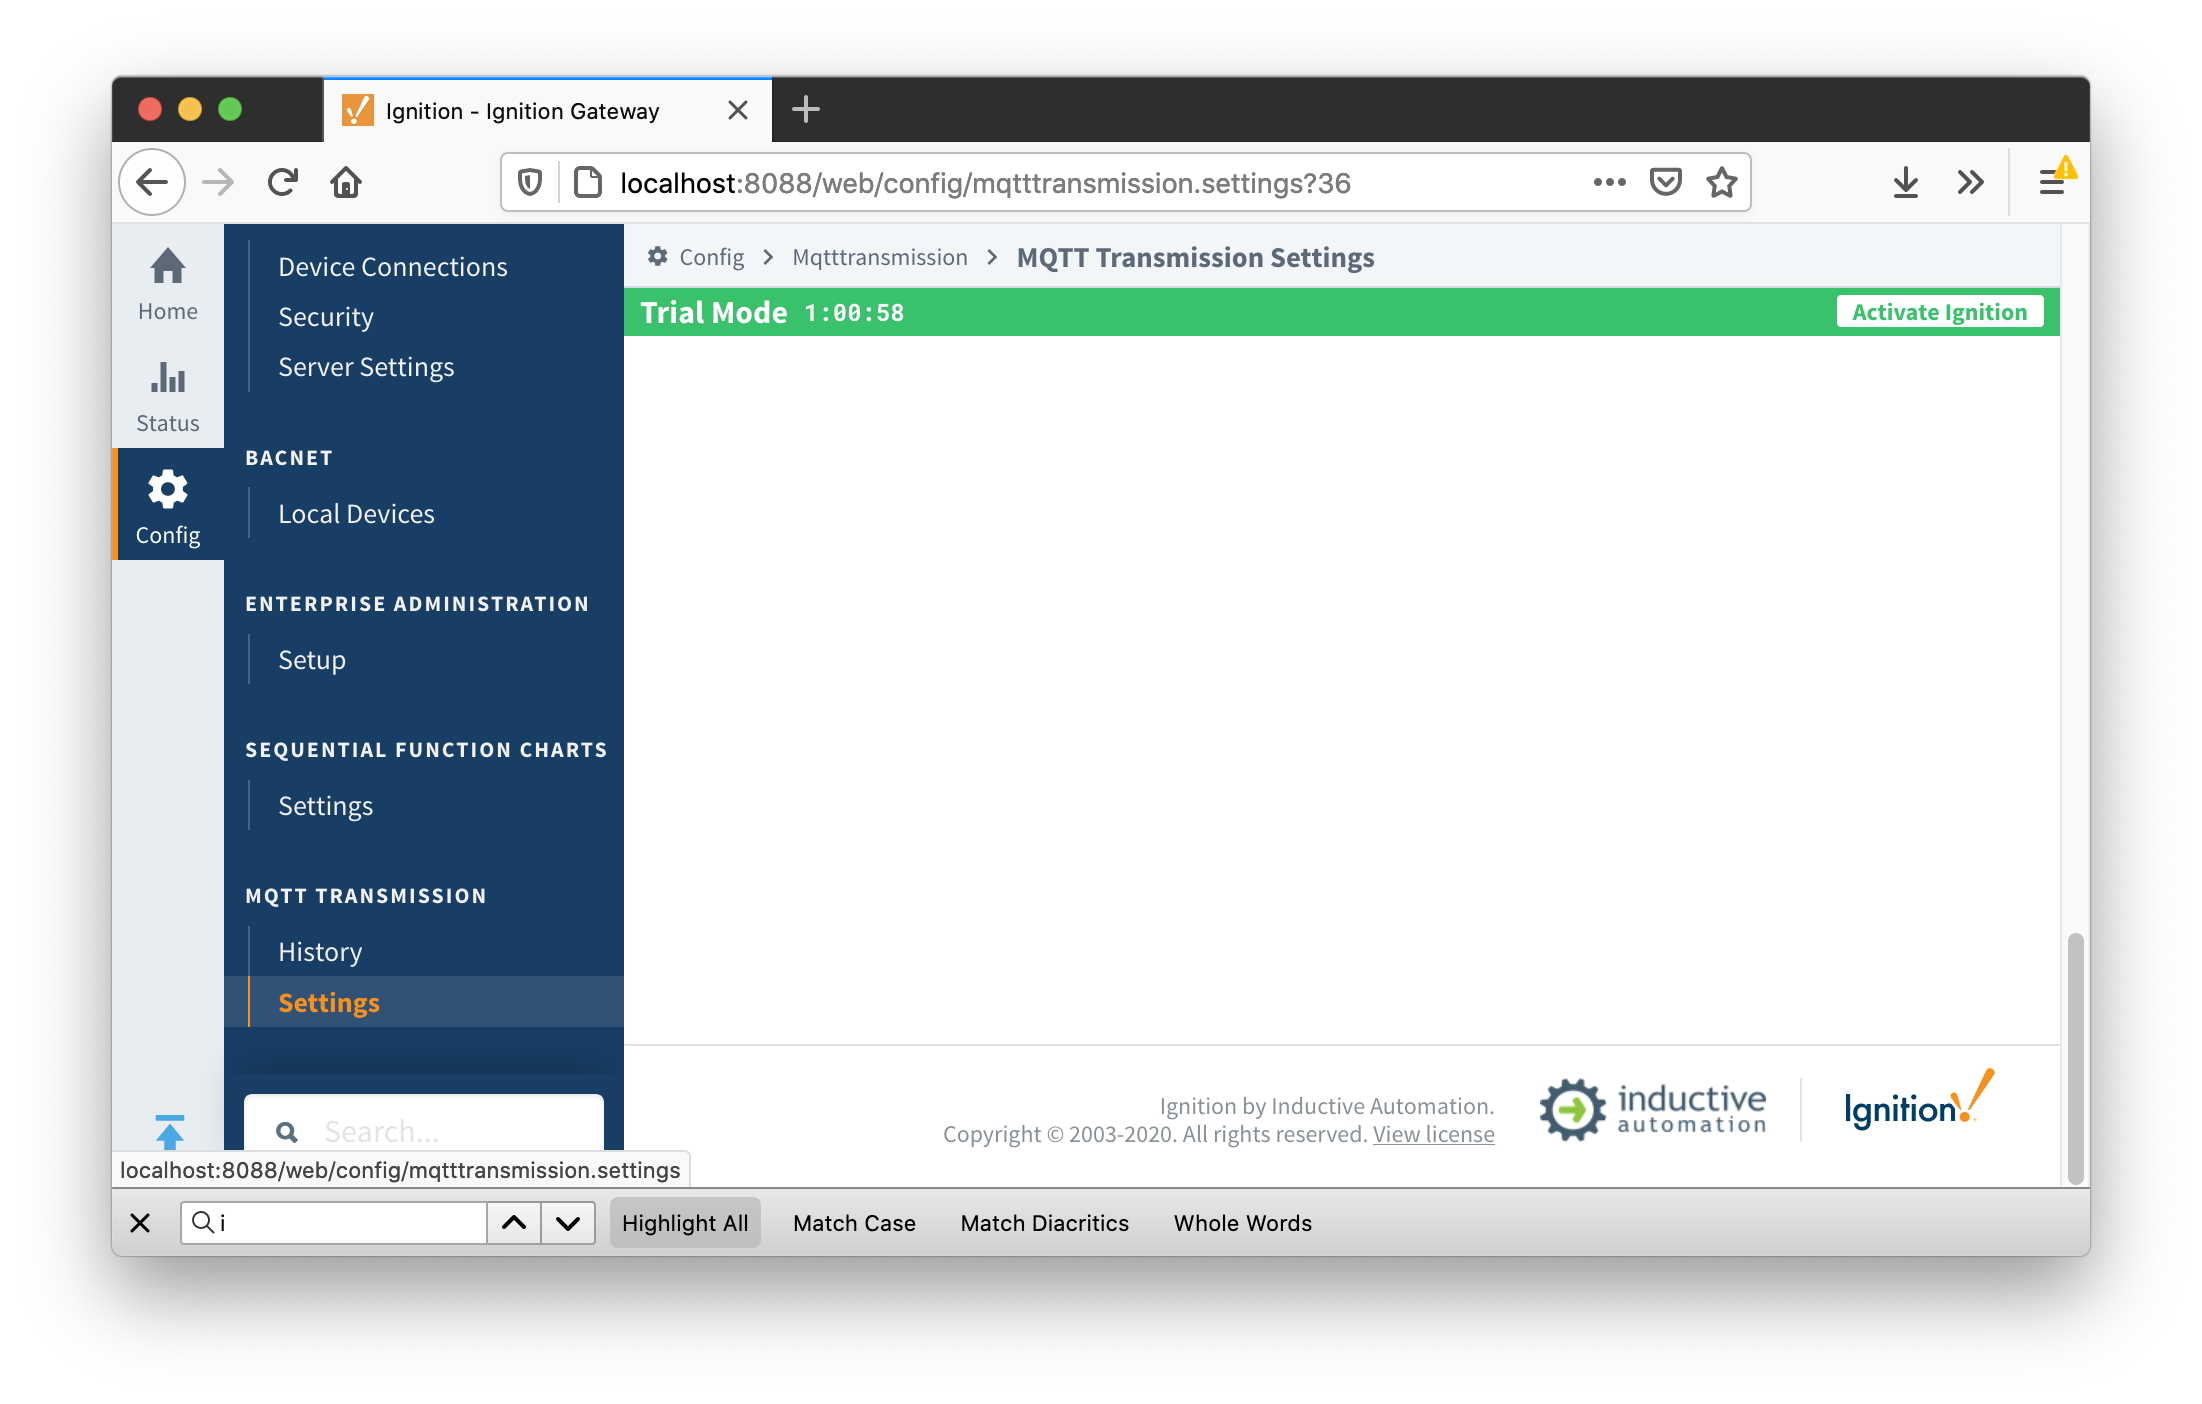 Image Removed
Now select the 'Transmitters' tab as shown below.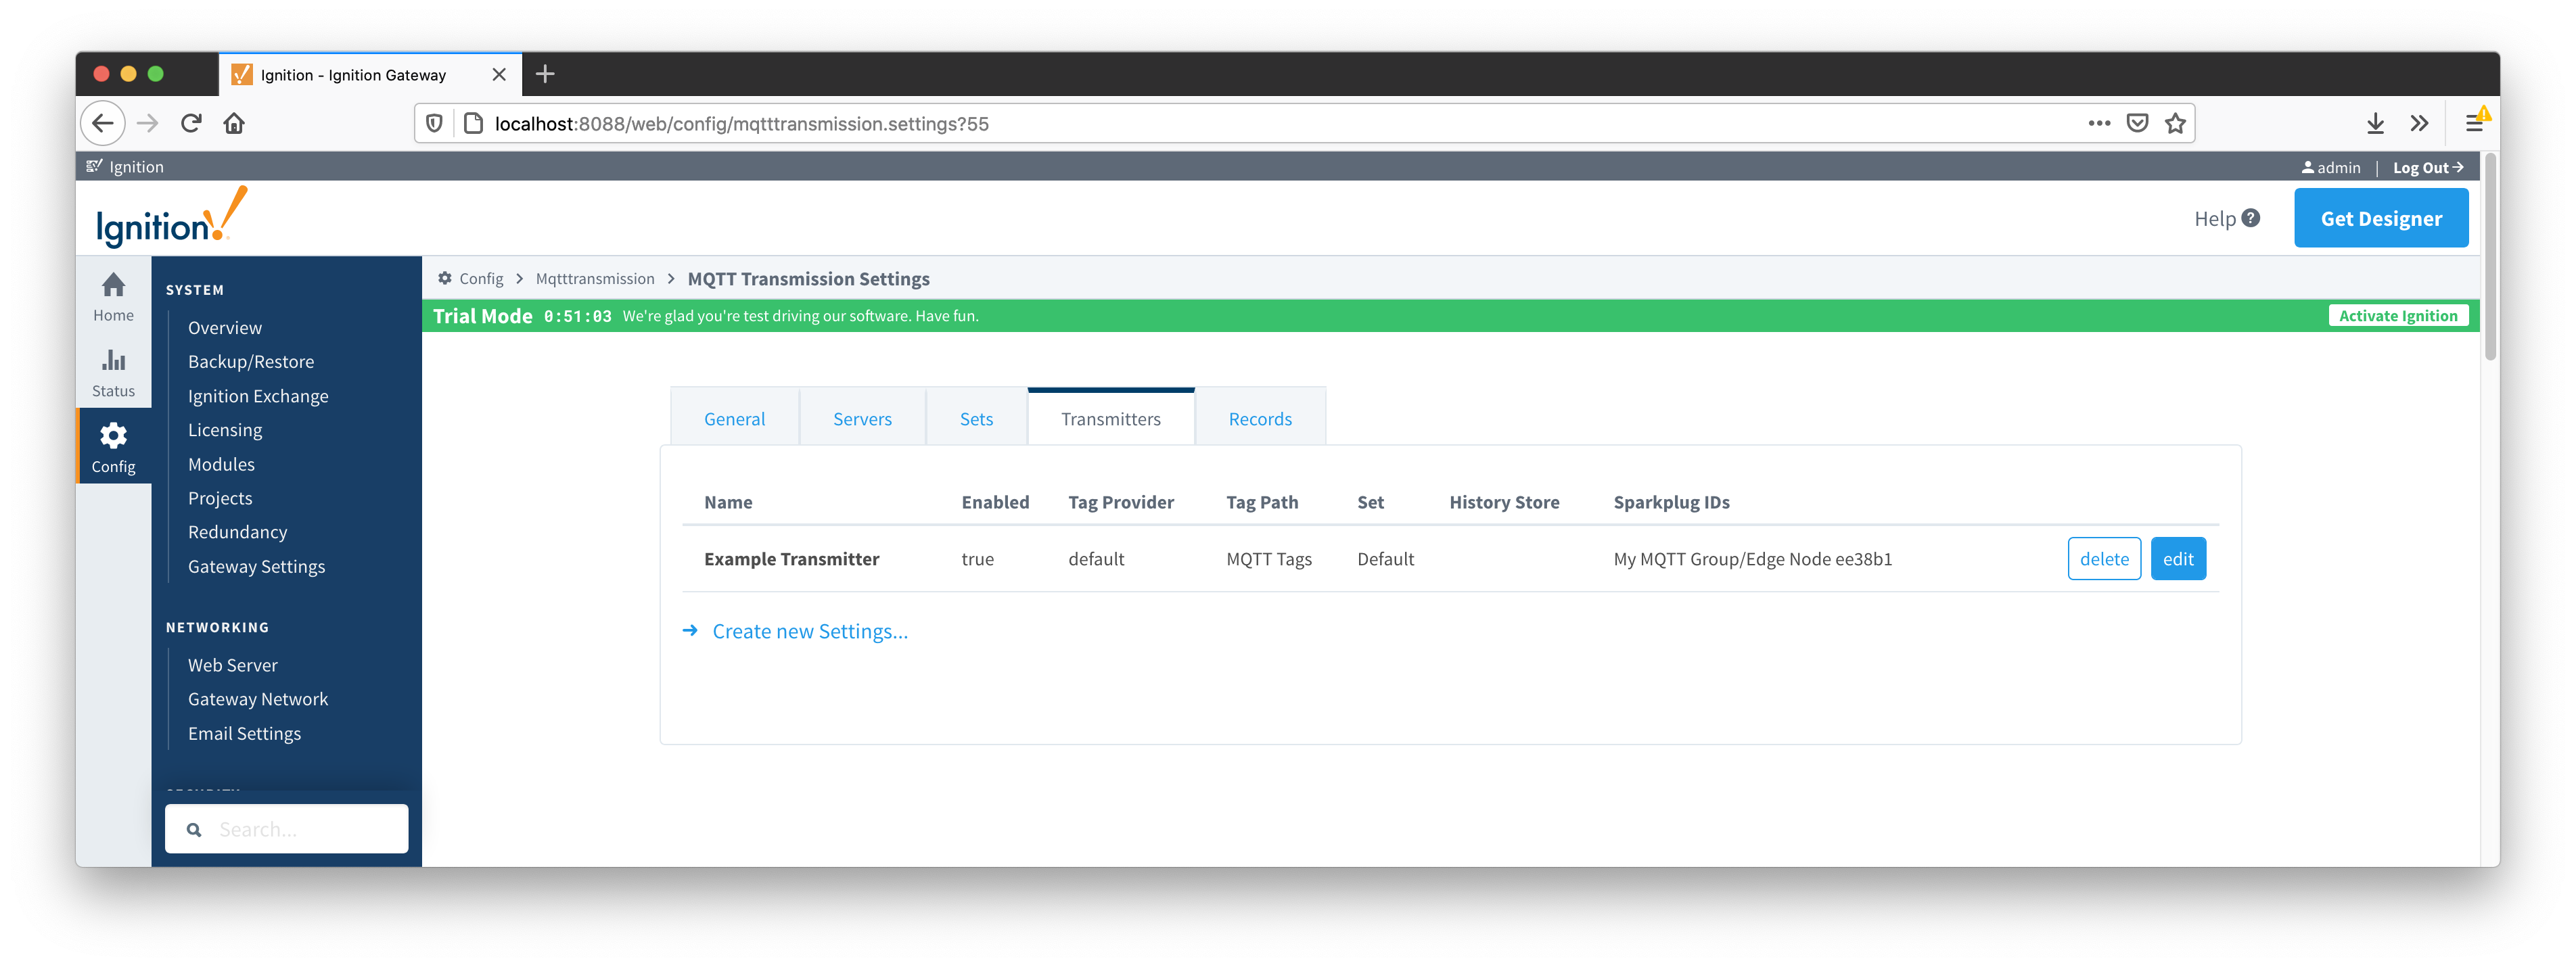 Image Removed
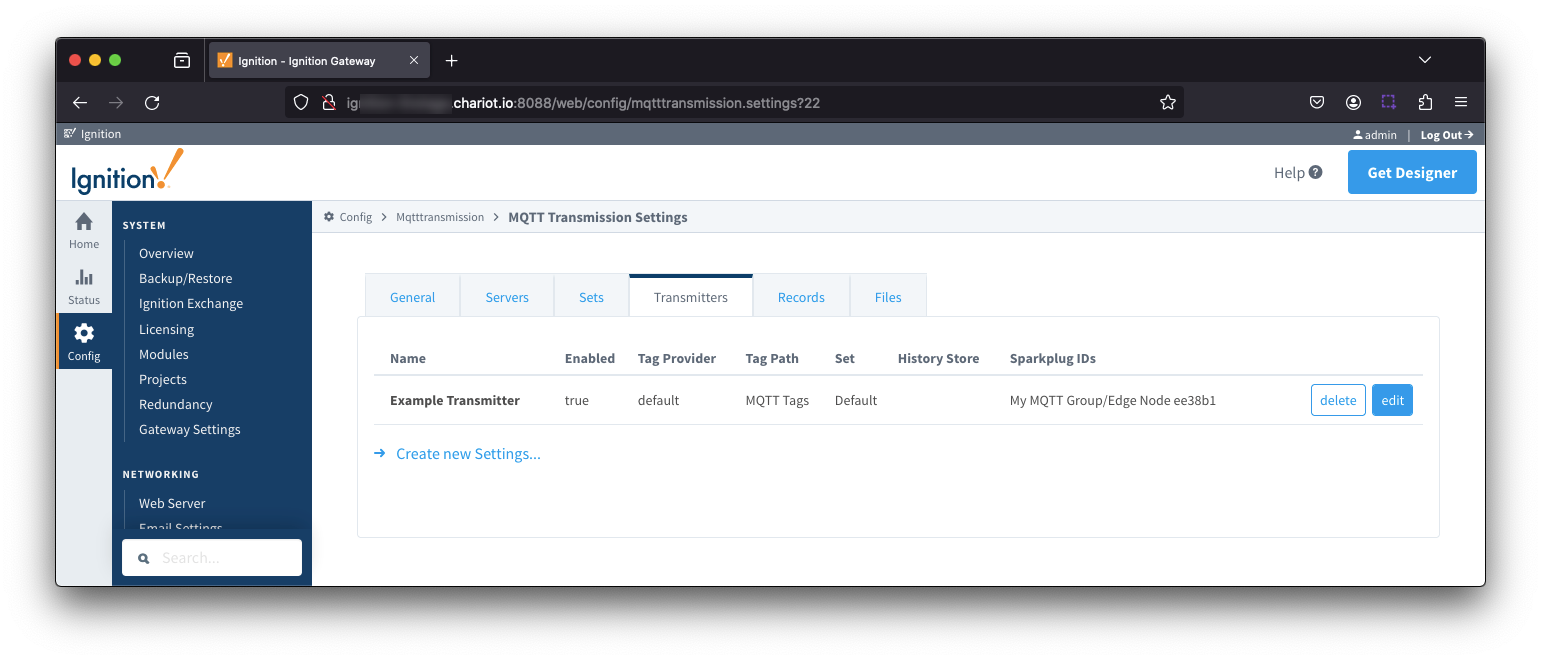 Image Added
Now click the 'edit' button to the right of the 'Example Transmitter'. Scroll down to the 'Convert UDTs' option and uncheck it as shown below. This will also un-grey the 'Publish UDT DefintionsDefinitions' option. Leave it selected as shown below.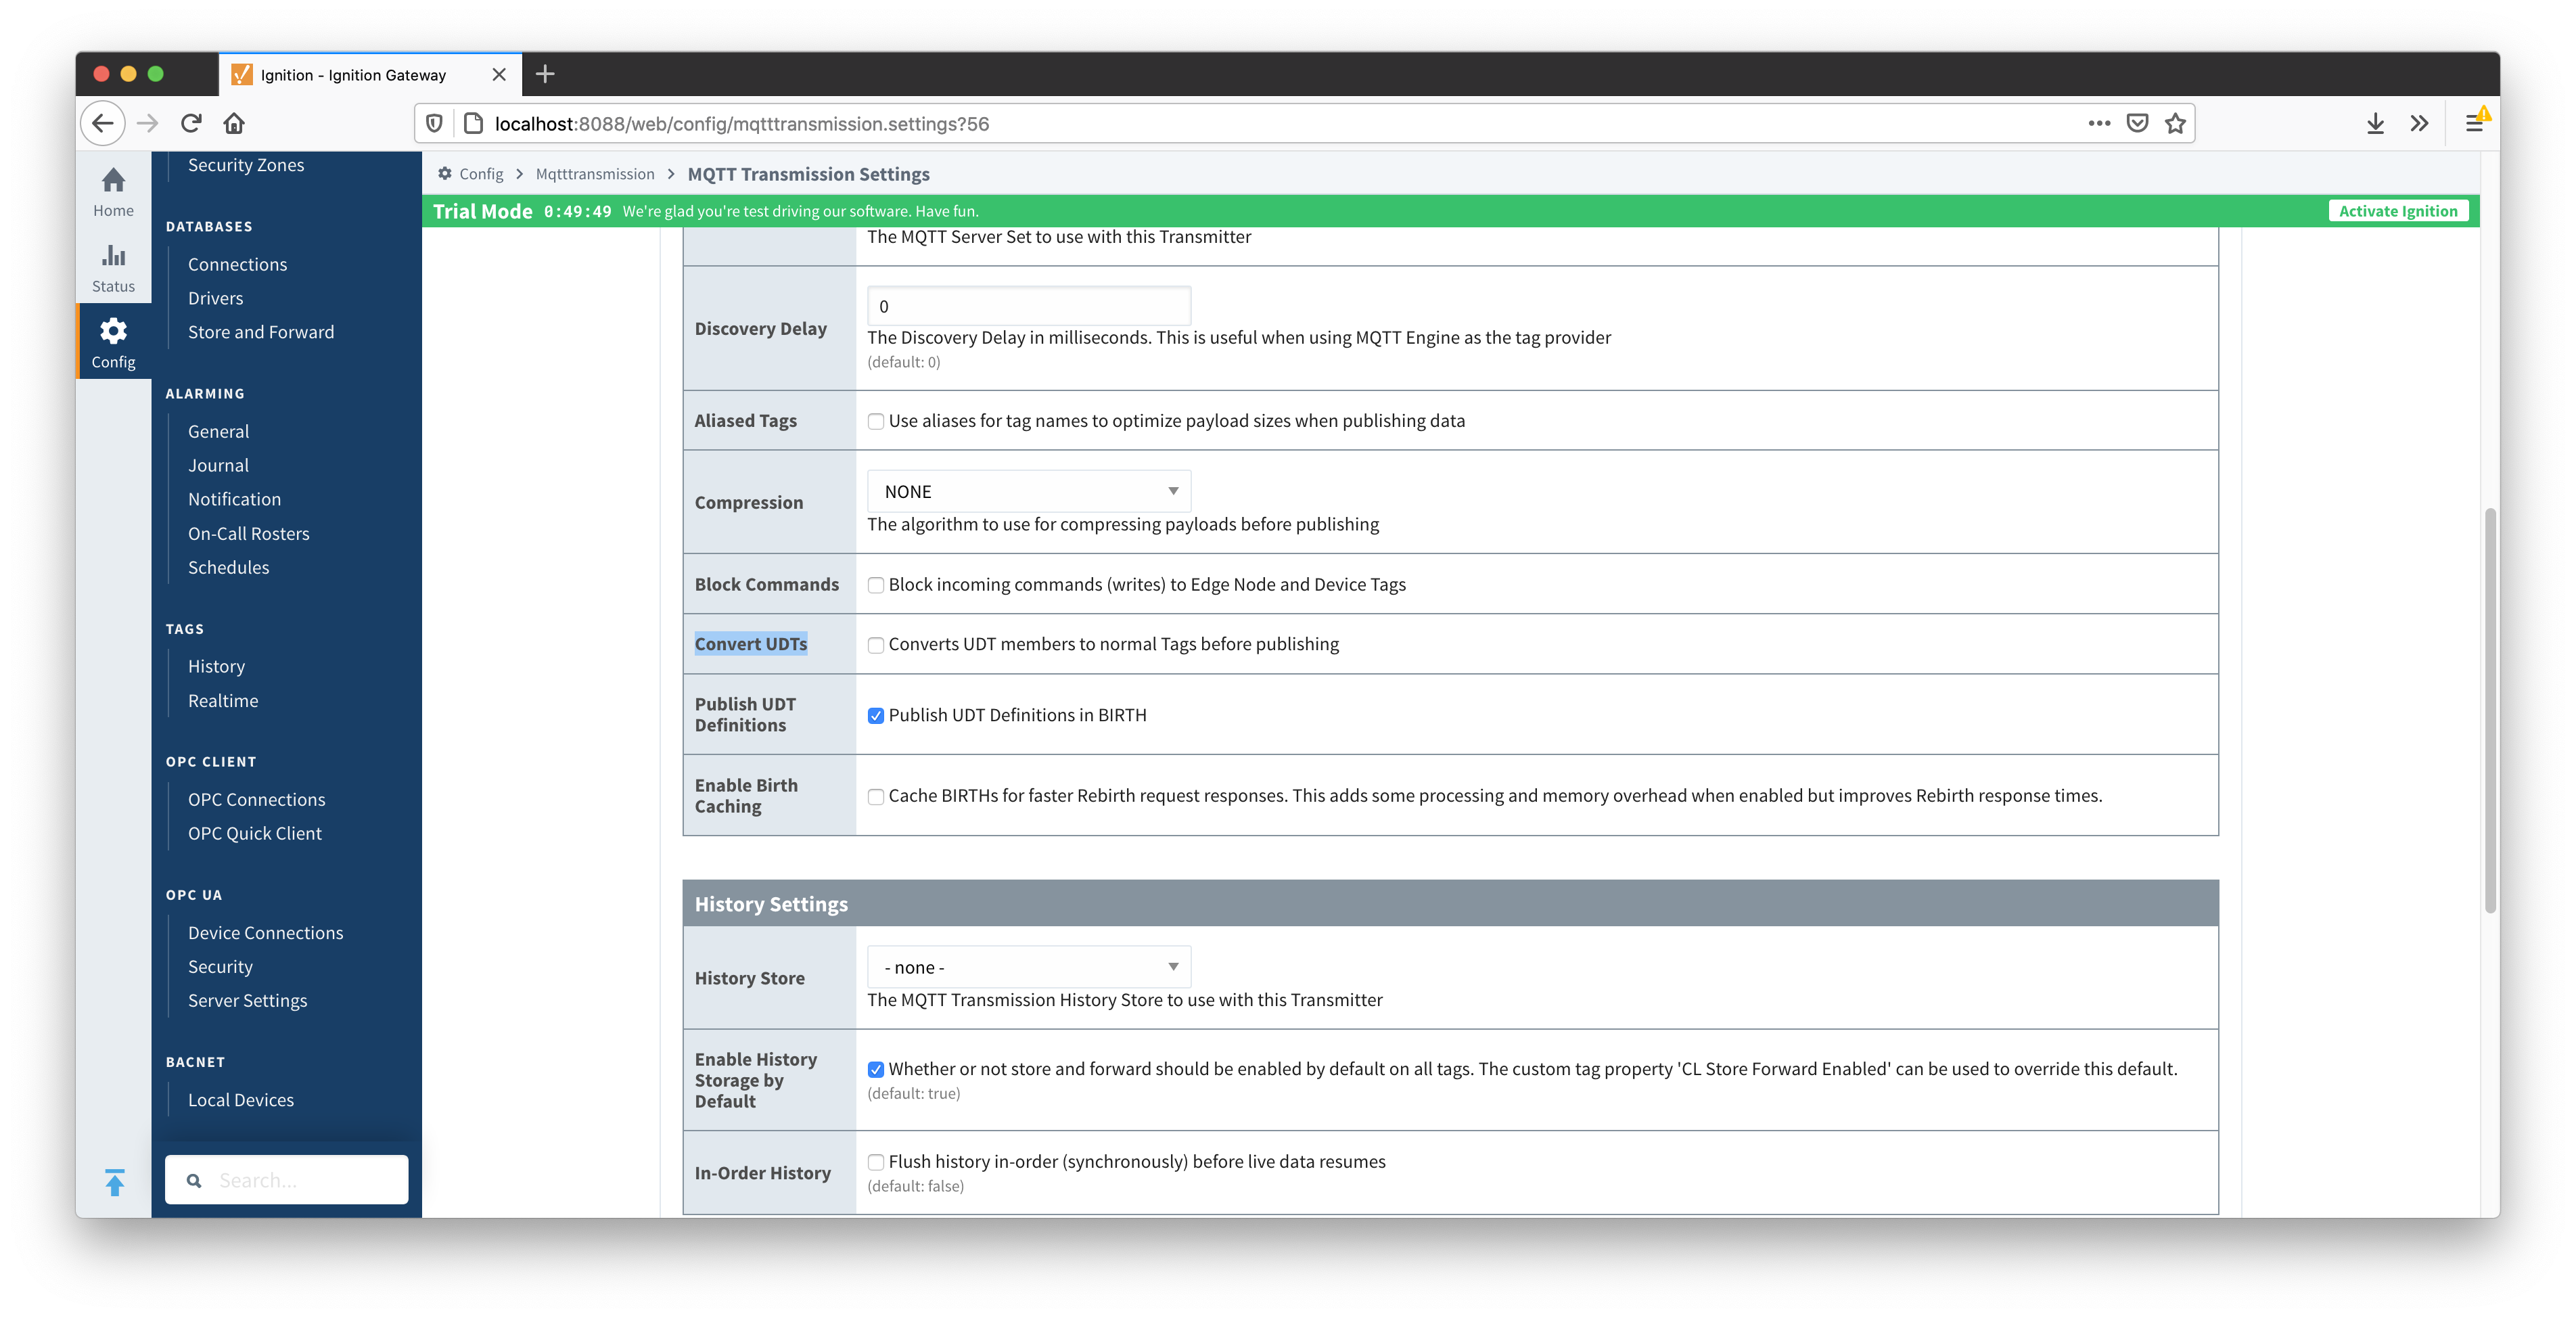 Image Removed
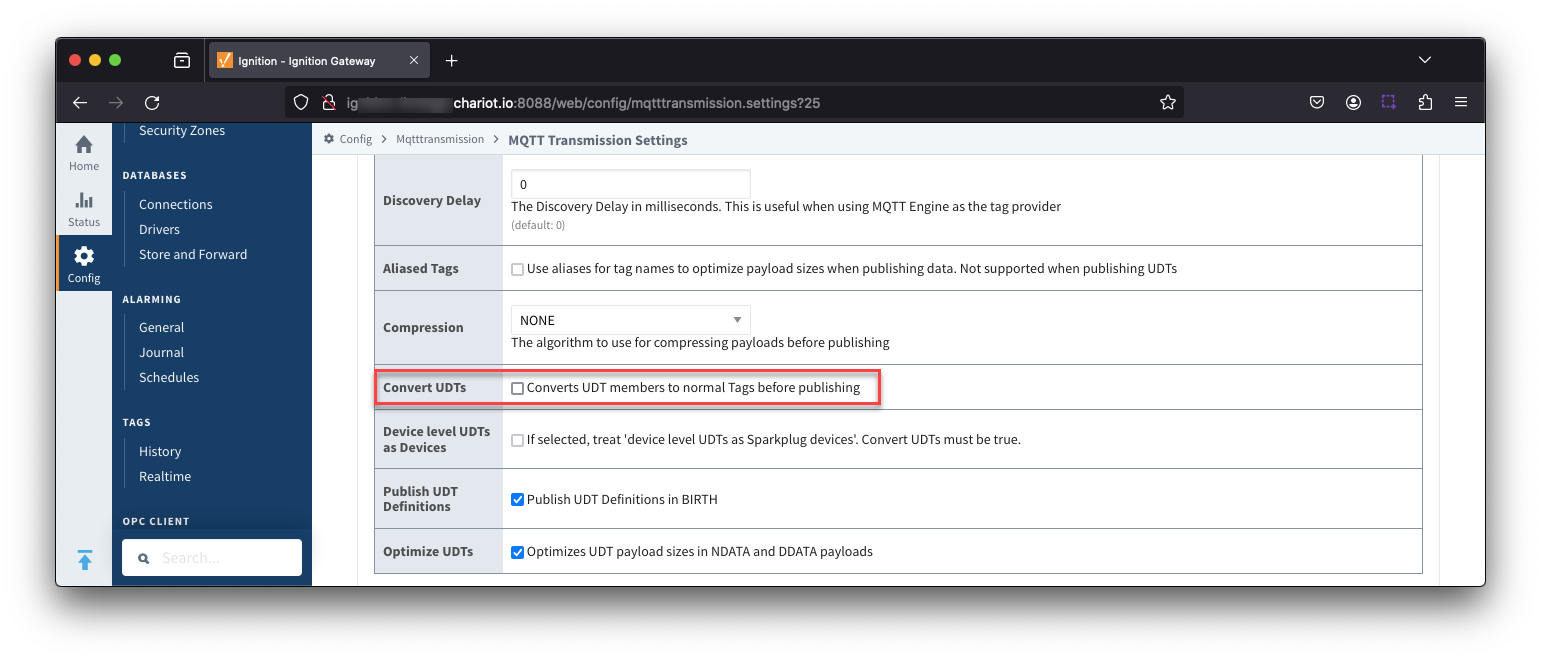 Image Added
Now switch to the 'Servers' and 'Settings' tab. Delete the existing 'Chariot SCADA' pre-seeded MQTT Server Definition. Then create a new one with the following configuration.
- Name
- URL
- Username
- Your username for the Chariot MQTT Server connection
- If using Chariot MQTT Server, the default username is 'admin'
- Password
- Your password for the Chariot MQTT Server connection
- If using Chariot MQTT Server, the default password is 'changeme'
When complete, you should see something similar to the following. However, the 'Connected' state should show '1 of 1' if everything was configured properly.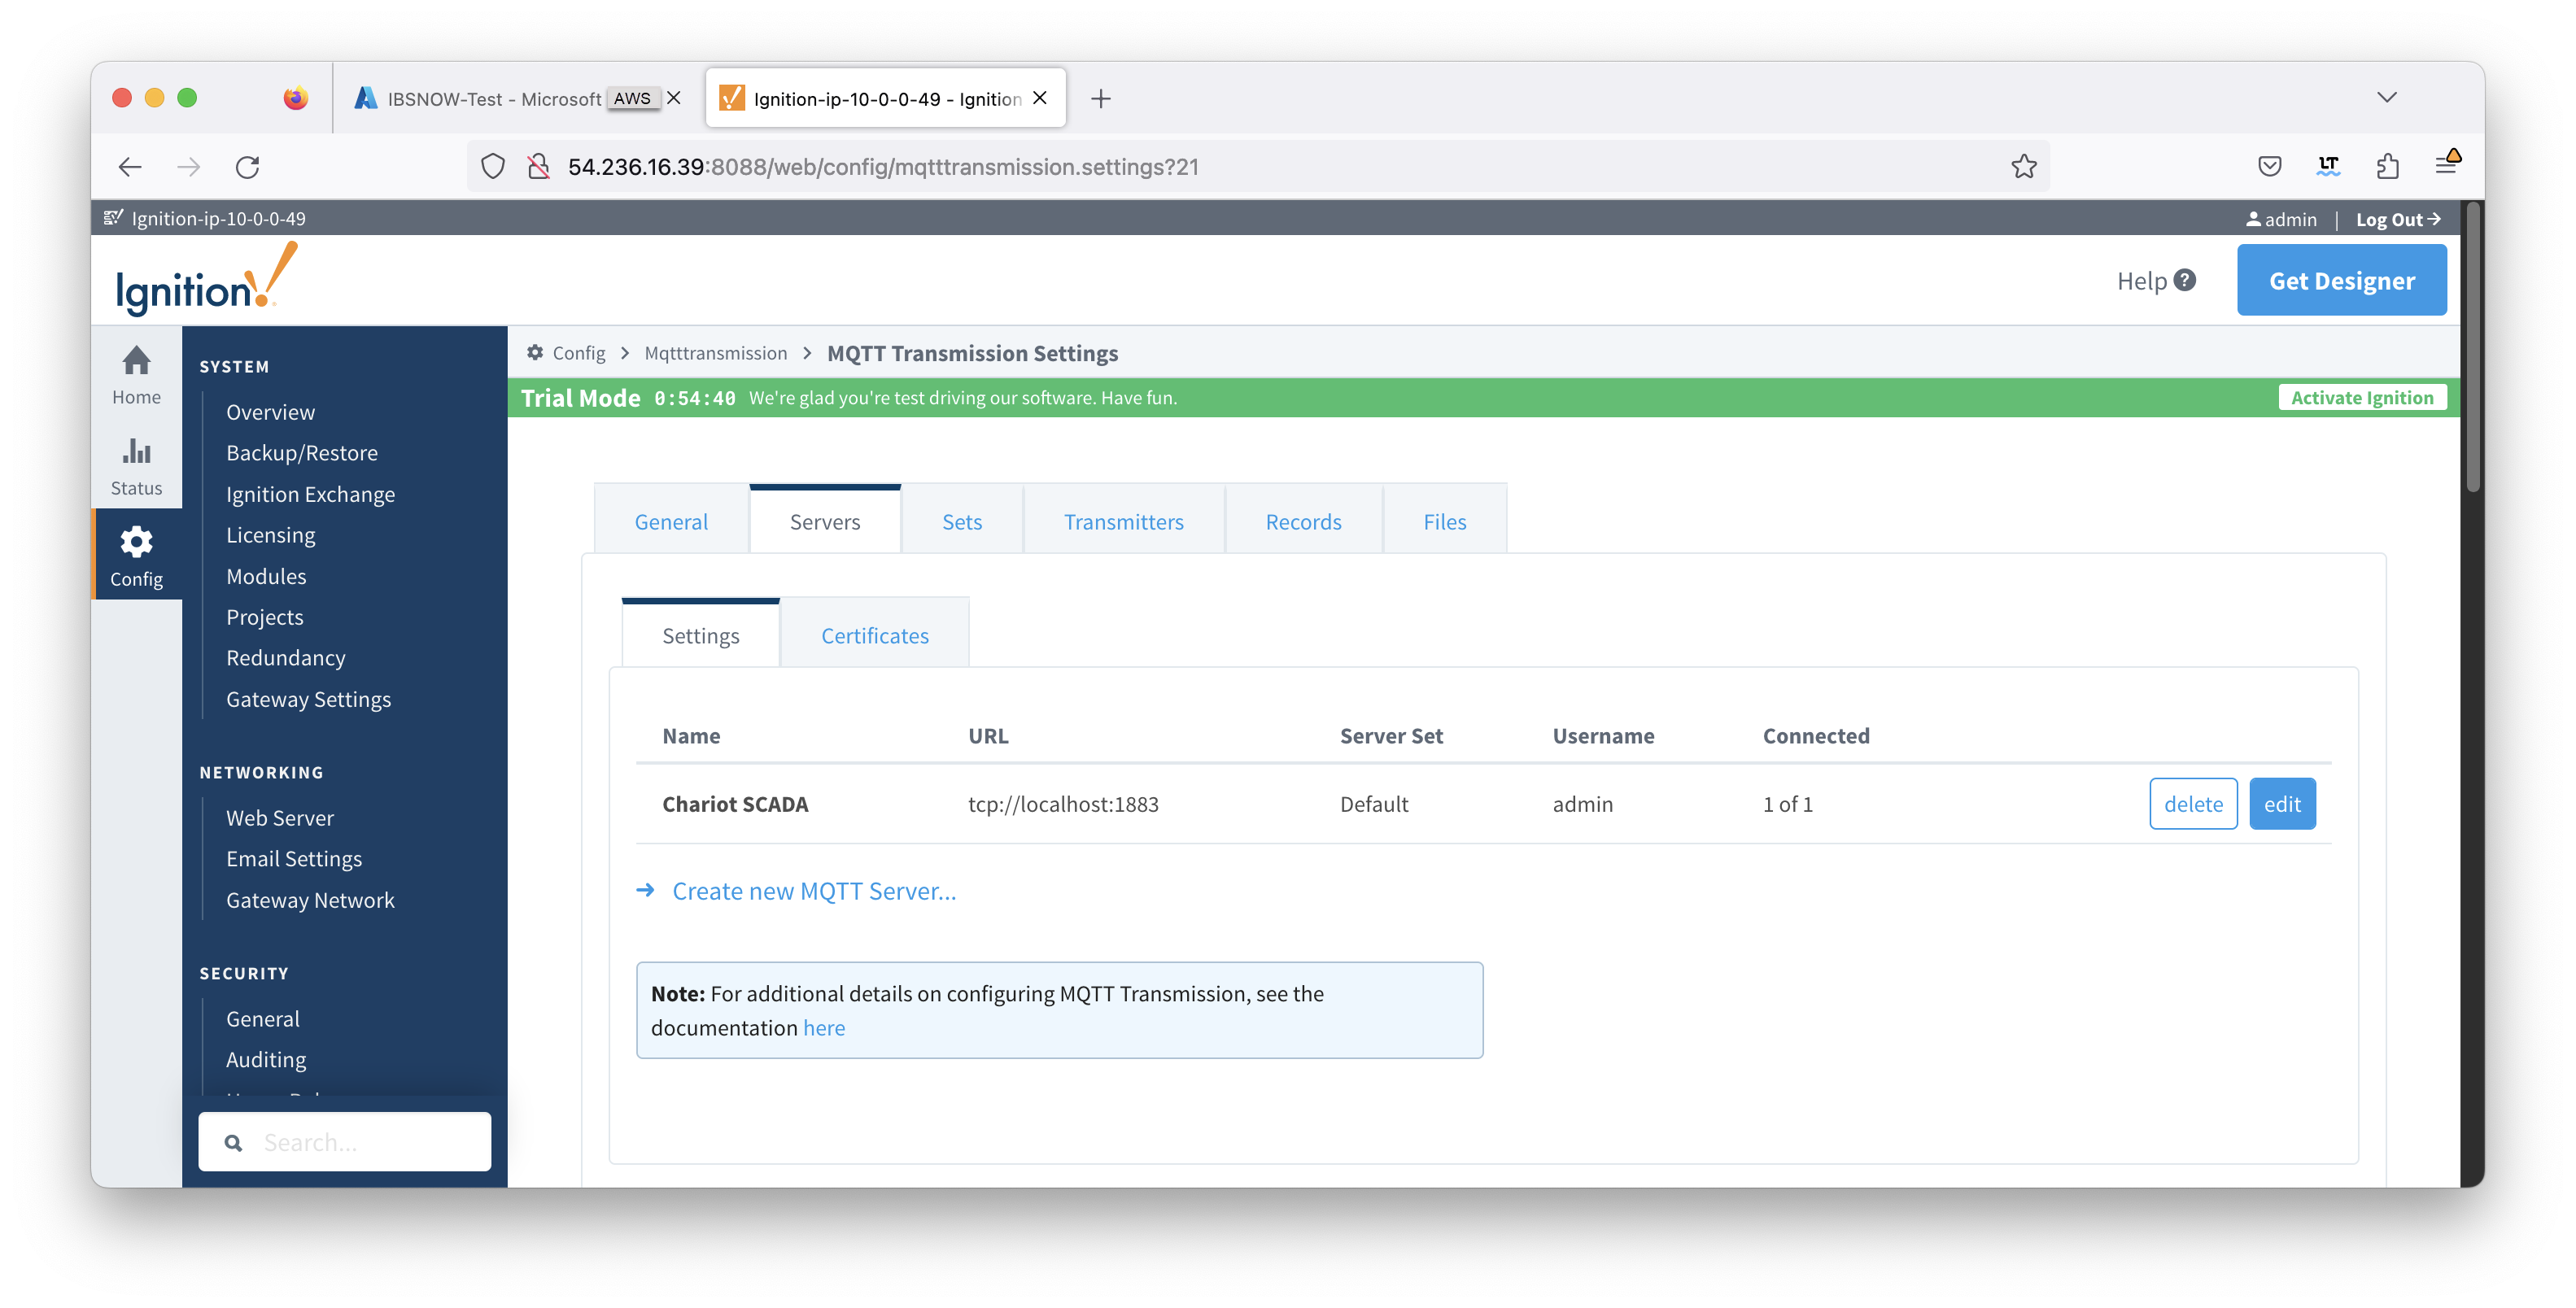 Image Removed
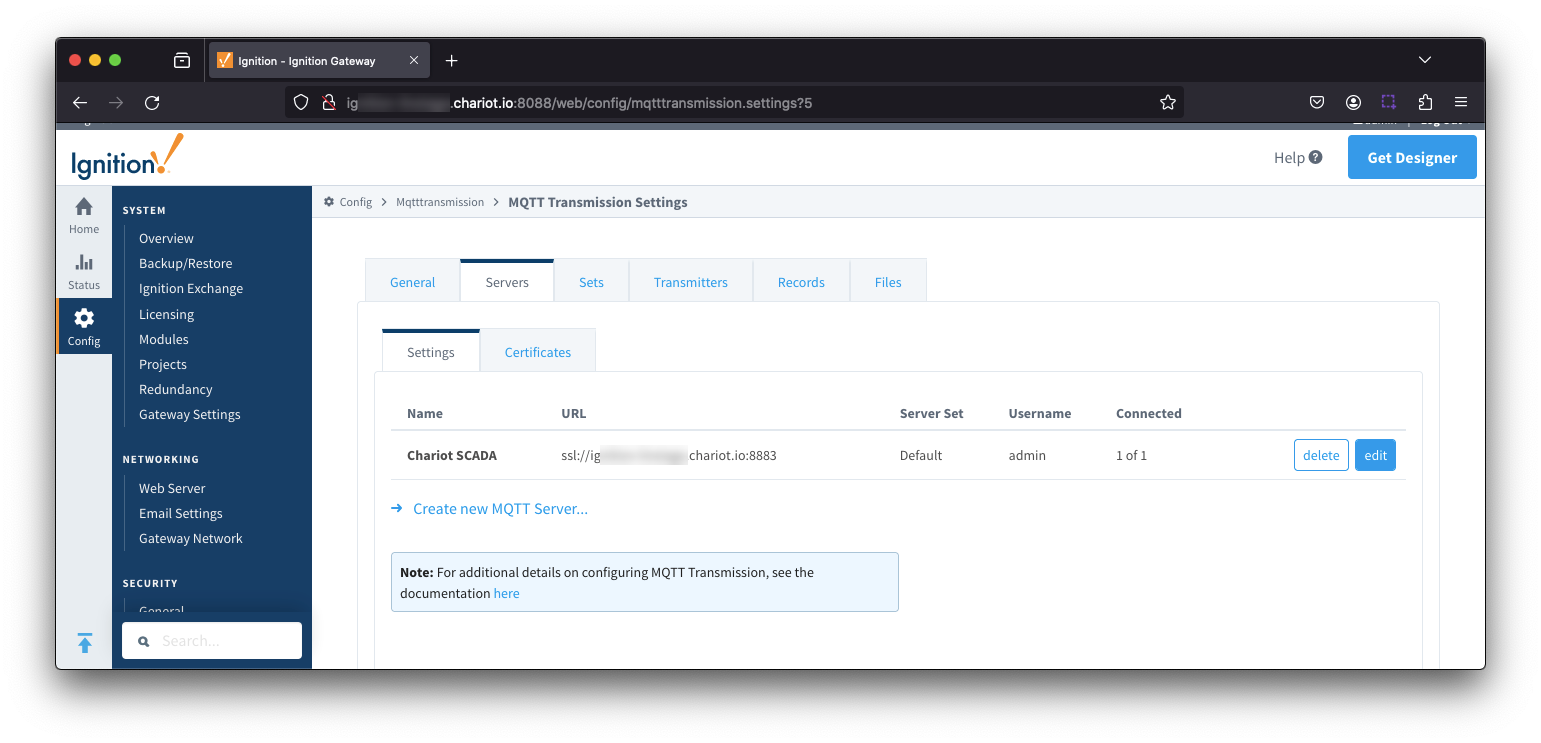 Image Added
At this point, data should be flowing into Snowflake.
By tailing the log in IBSNOW you should see something similar to what is shown below . This which shows IBSNOW receiving the messages published from Ignition/MQTT Transmission.
When IBSNOW receives the Sparkplug MQTT messages, it creates and updates asset models and assets in Snowflake. The log below is also a useful debugging tool if things don't appear to work as they should.
...