IoT Bridge for Snowflake on Azure is not quite ready but will be released in Q2 of 2023.
Prerequisites
Before being able to install and set up IoT Bridge for Snowflake on Azure you must have a Microsoft Azure account. If you do not already have one, you can create one here.
...
Subscription and Resource Group
This can be any resource group you want and can even be a new one as shown above
Tip
If the subscription is a Microsoft CSP (Cloud Solution Provider) created subscription, the CSP Tenant ID must be provided to CirrusLink to be added to the CSP whitelist on the offering.
The IoT Bridge will fail to deploy with a subscription error if this has not been completed.
To get the Tenant ID:
Provide the subscription ID to the CSP to give to Microsoft Support
The CSP needs to request their CSP Tenant ID for the subscription ID from Microsoft Support
Provide support@cirrus-link.com the Tenant ID to be added to the CSP whitelist on the offering
It usually takes 24 - 48 hours for this submission to complete
Virtual Machine Name
This can be anything you want
Region
It is recommended to have this be in the same region where your Snowflake account is
Image
Make sure you select 'Standard - x64 Gen1' as shown above. Note it has the 'IoT Bridge for Snowflake' icon next to it.
Size
Select the VM size you want.
Login details
Select these as you want
Select inbound ports
Make sure SSH is enabled. This is required for configuration of the IoT Bridge for Snowflake instance
...
As shown in the page above, it is recommended to '
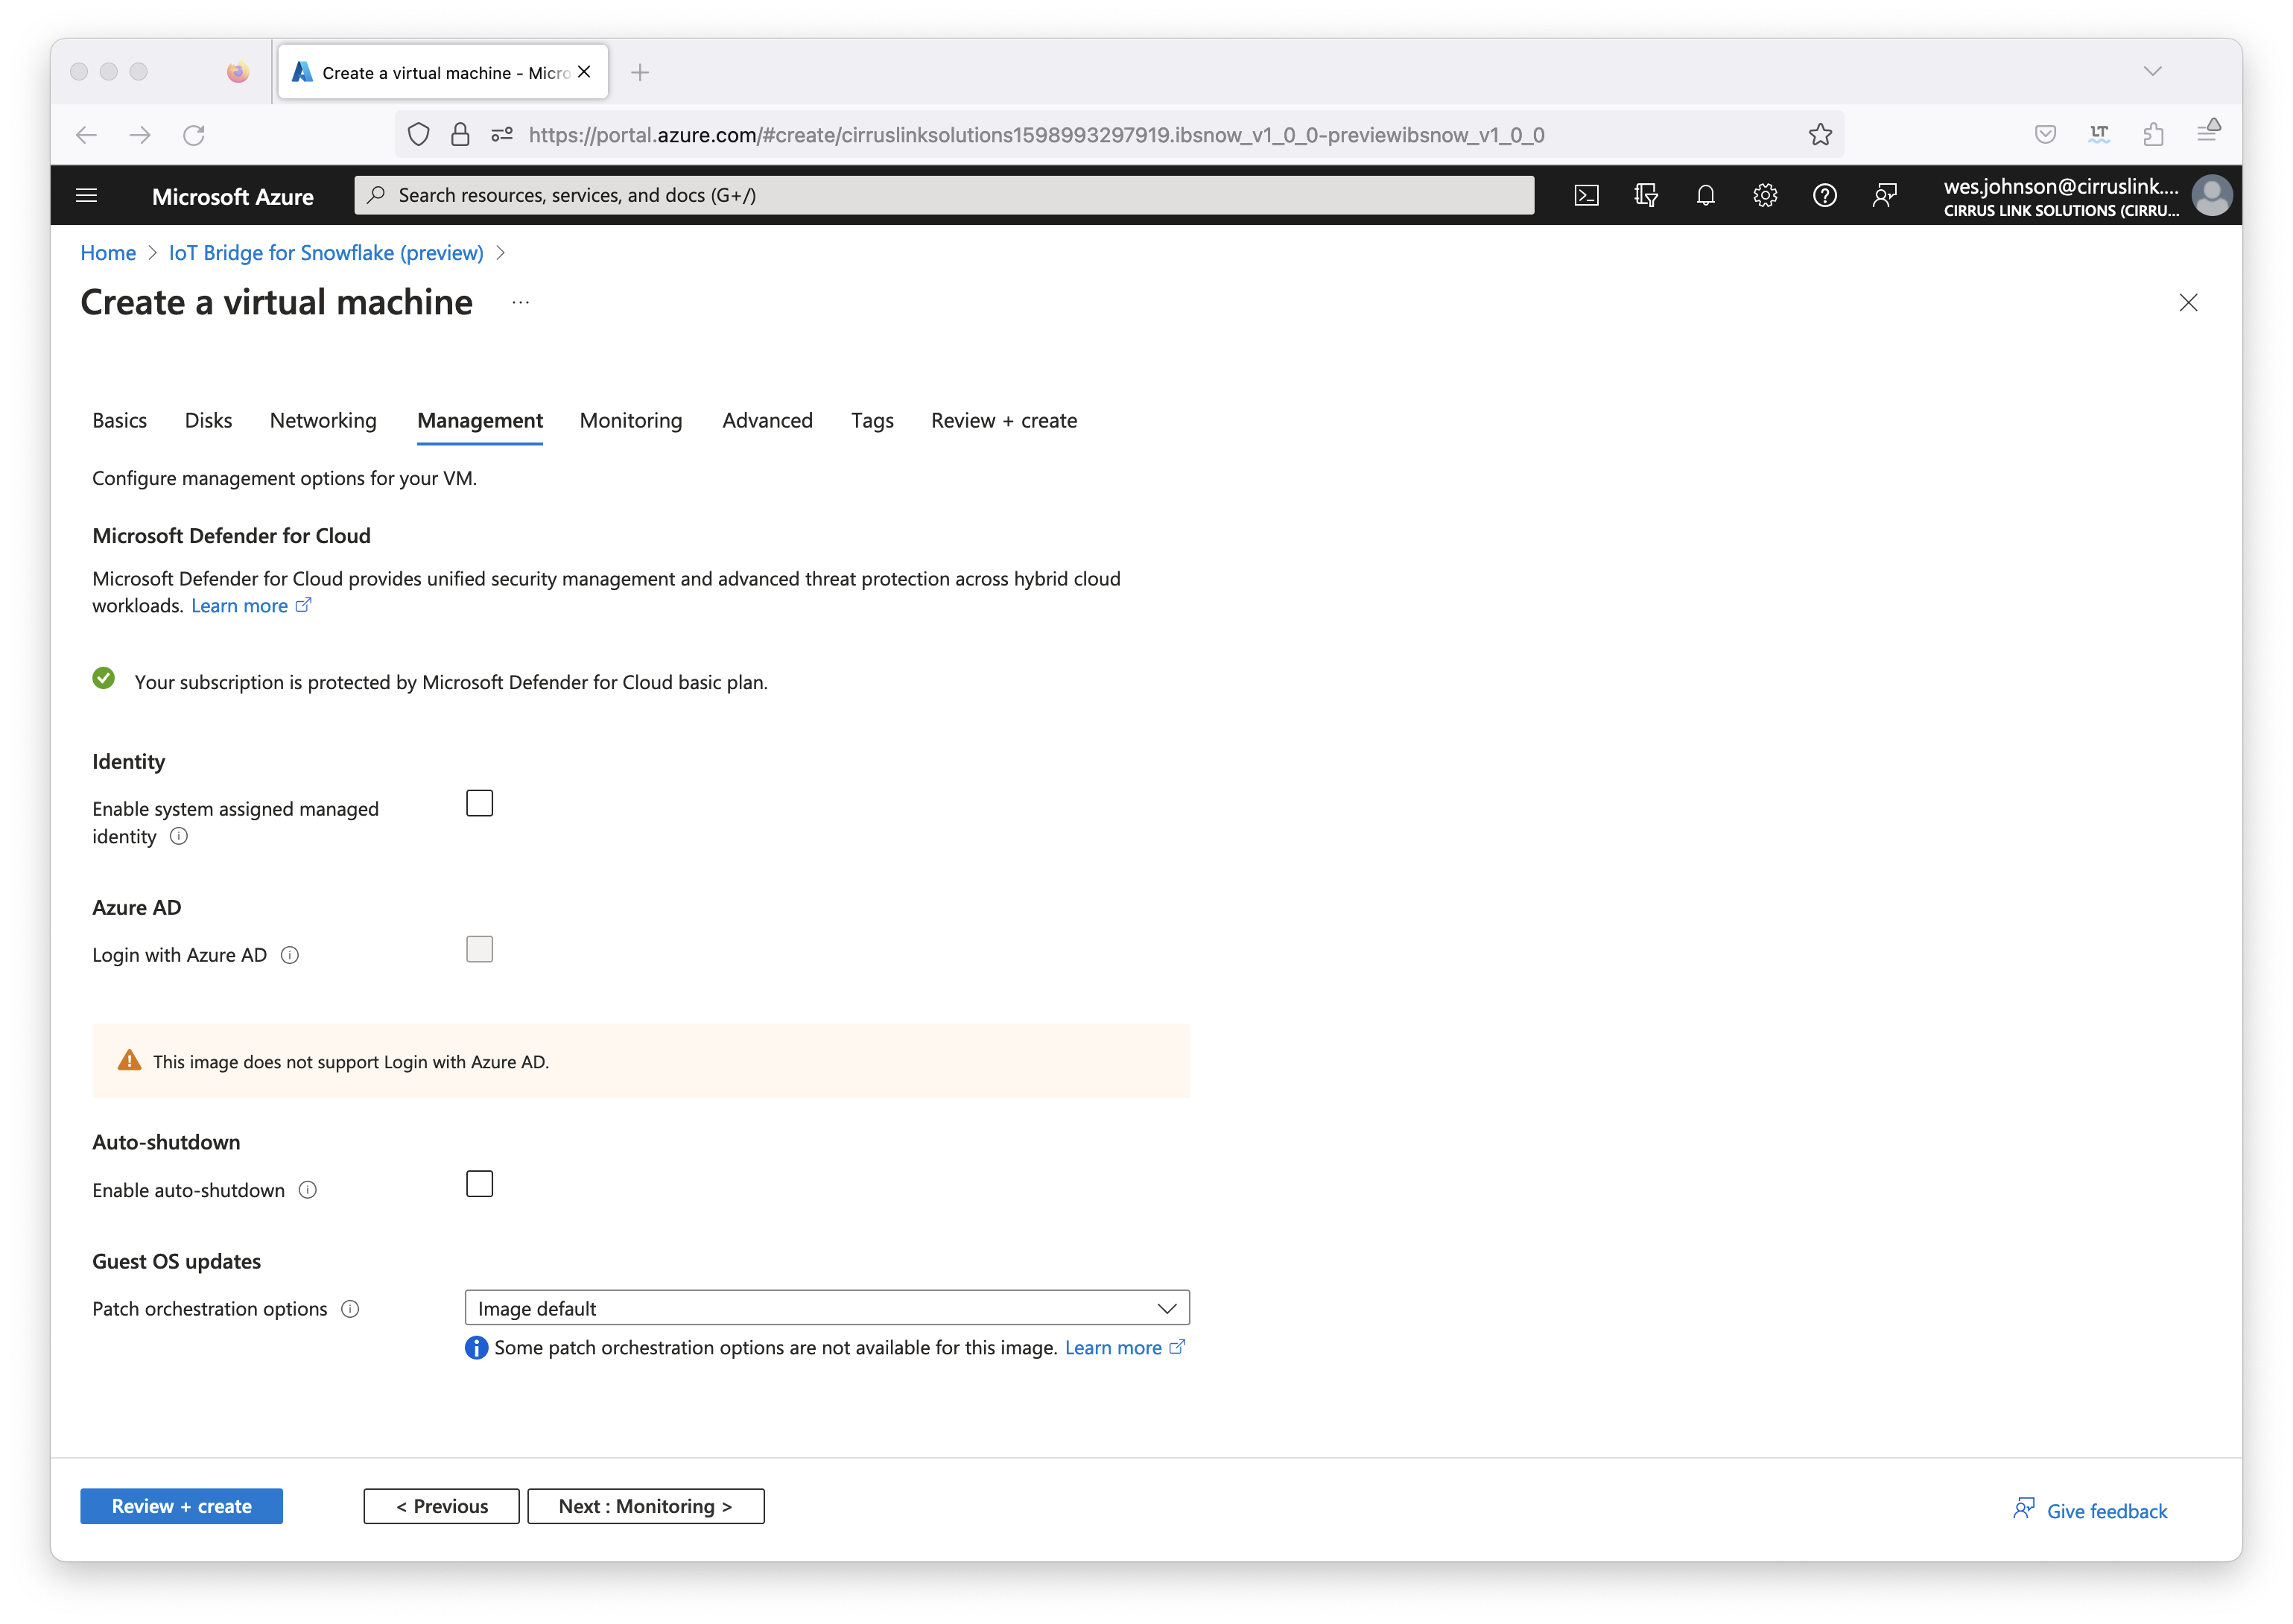
In this 'Management' tab, you can accept the defaults or change any settings you require. This is true for the 'Monitoring', 'Advanced', and 'Tags' tabs as well. Select the defaults or change anything you require. Once complete, click 'Review + create'. This will bring you to the following page:
...
Review the configuration and click 'Create' if everything looks good.This
If validation of the configuration is successful, it will bring you to the following page:
Image RemovedImage Added
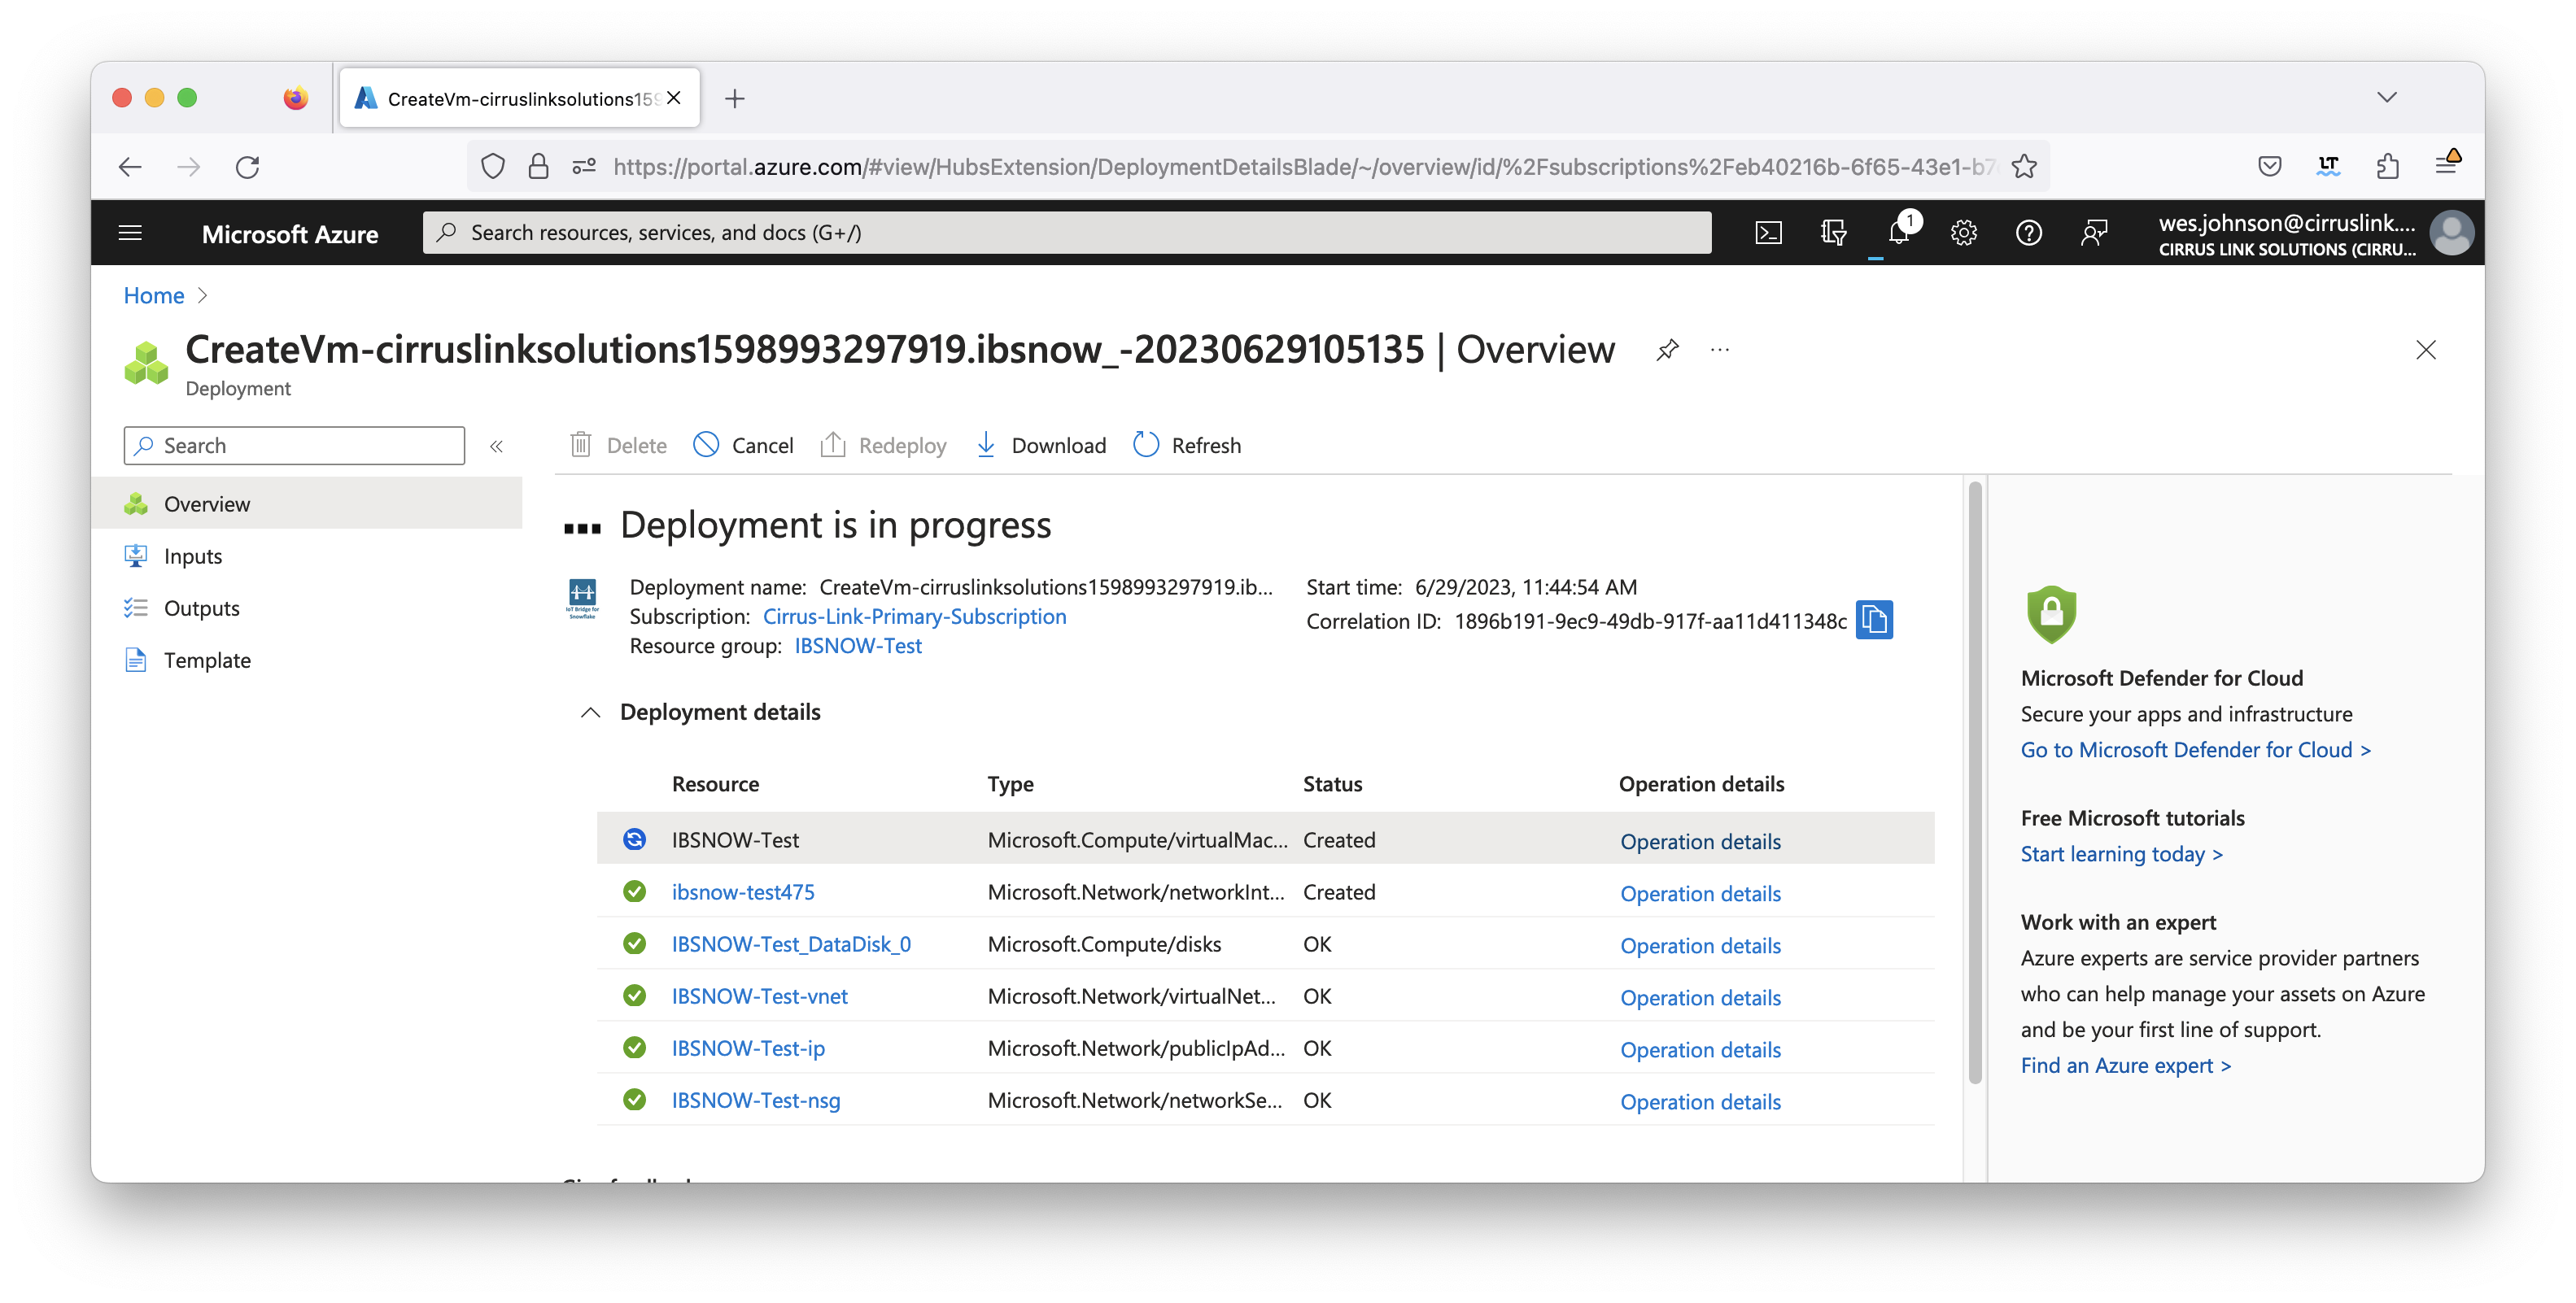
Deployment takes a few minutes to complete. Once it is complete, you will see the following:
Image Added
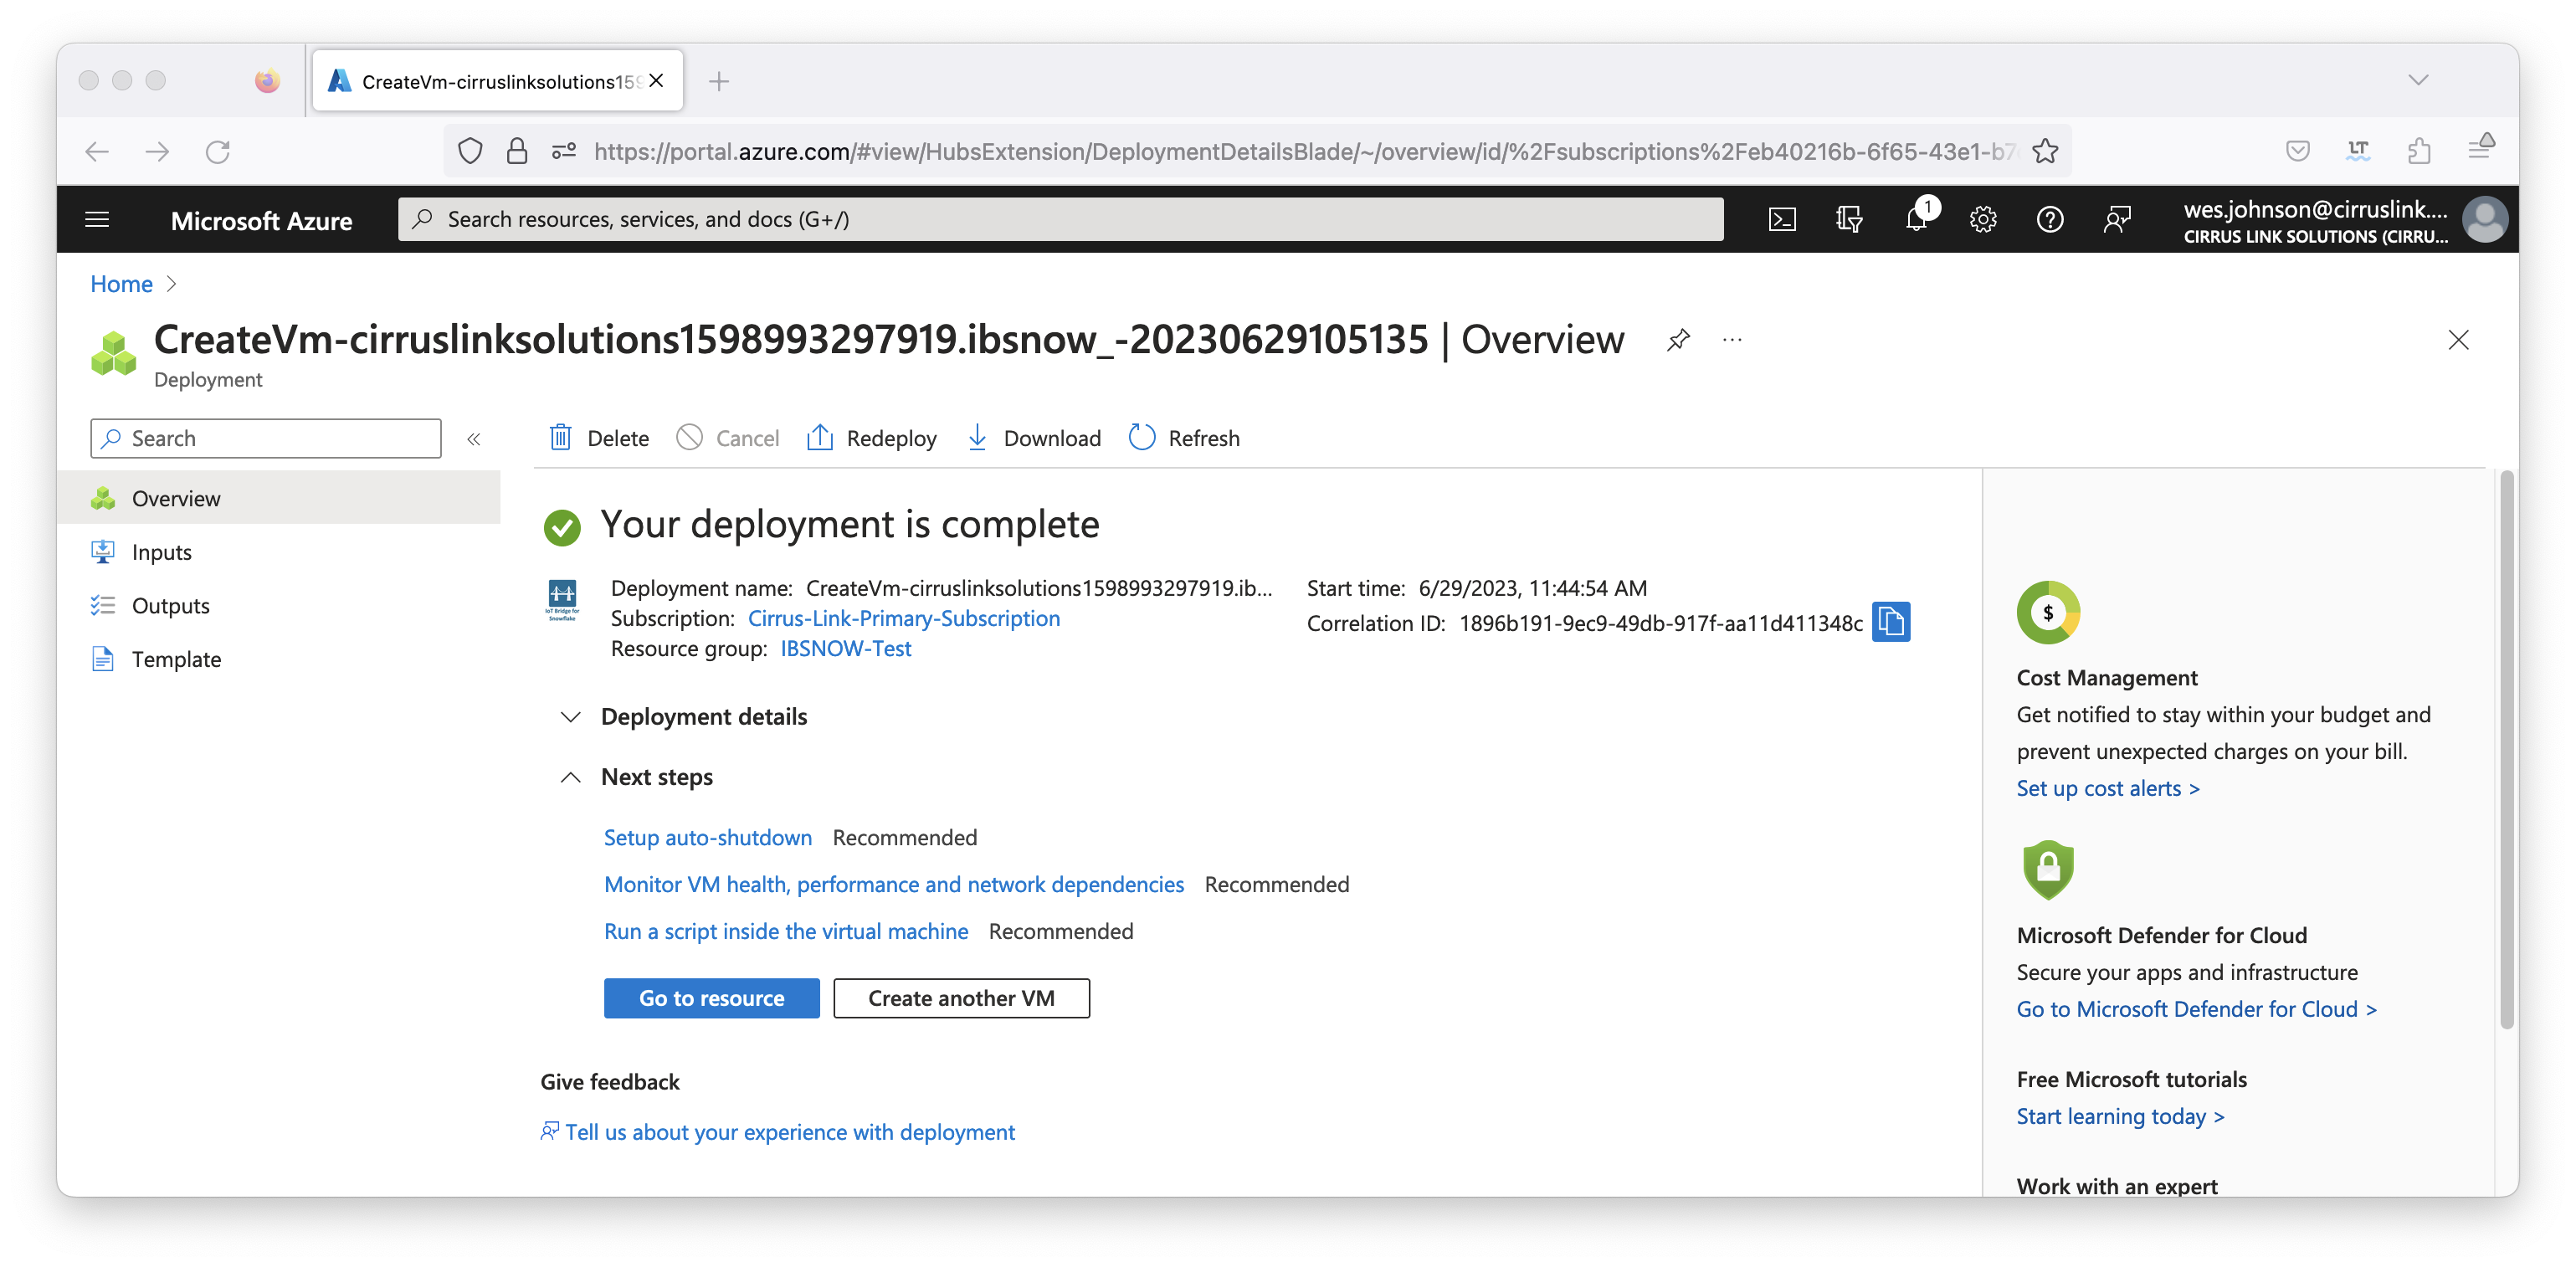
Now click the blue 'Go to resource' button. This will bring you to the following page:
Image Added
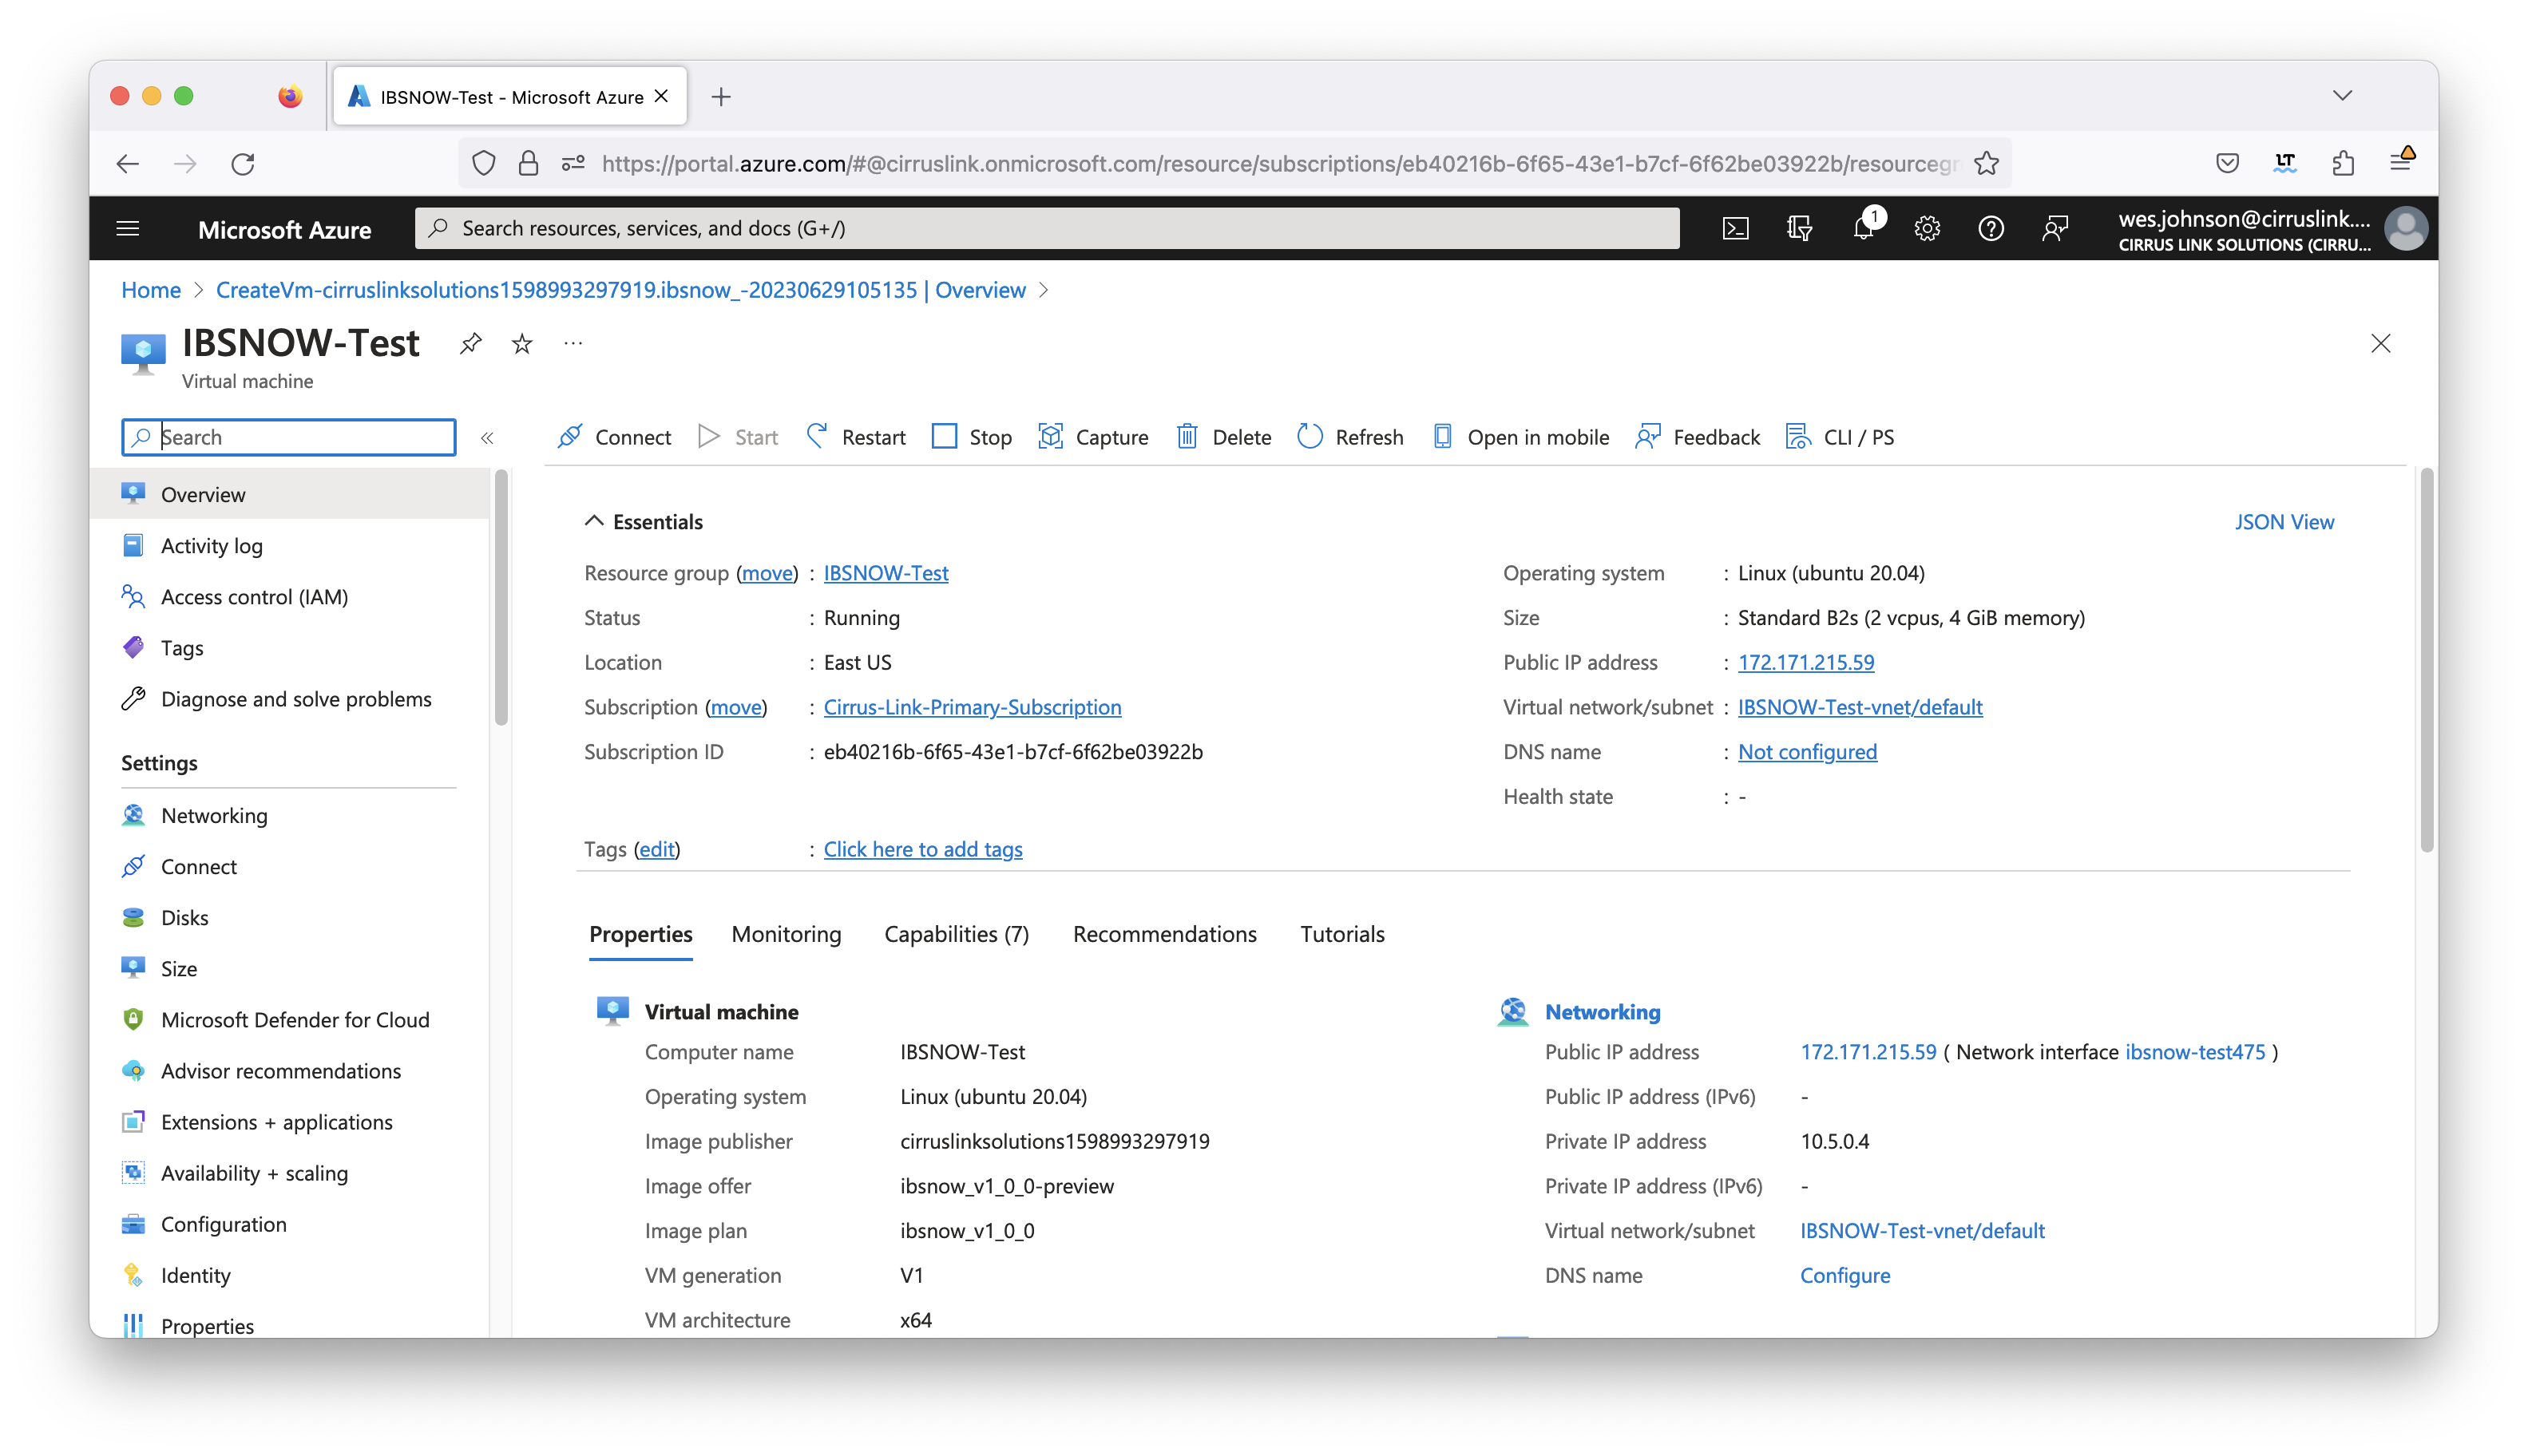
Note the 'Public IP address' above. This will be used for SSH access and configuration of the IoT bridge for Snowflake VM.