...
Select the "AZURE INJECTOR" → "Settings" link on the lower left of the page to navigate to the Azure Injector Module's configuration page. A detailed explanation of each configuration tab can be found here. For this tutorial, we will only be adding a new Azure IoT Hub Setting.
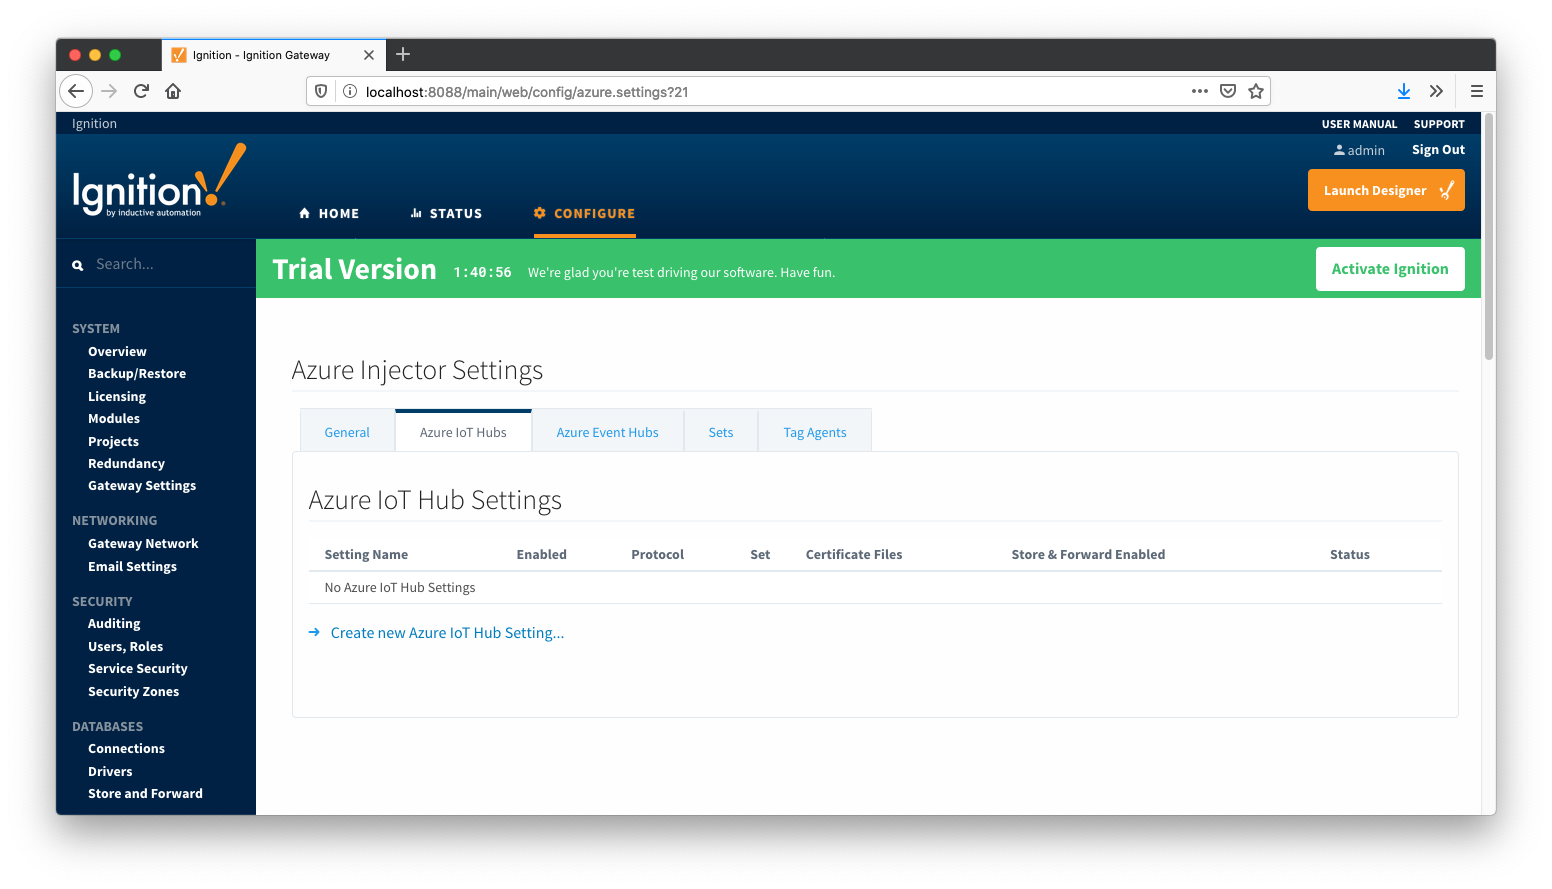 Image Modified
Click on the "Create new Azure IoT Hub Setting..." link to bring up the following configuration form:
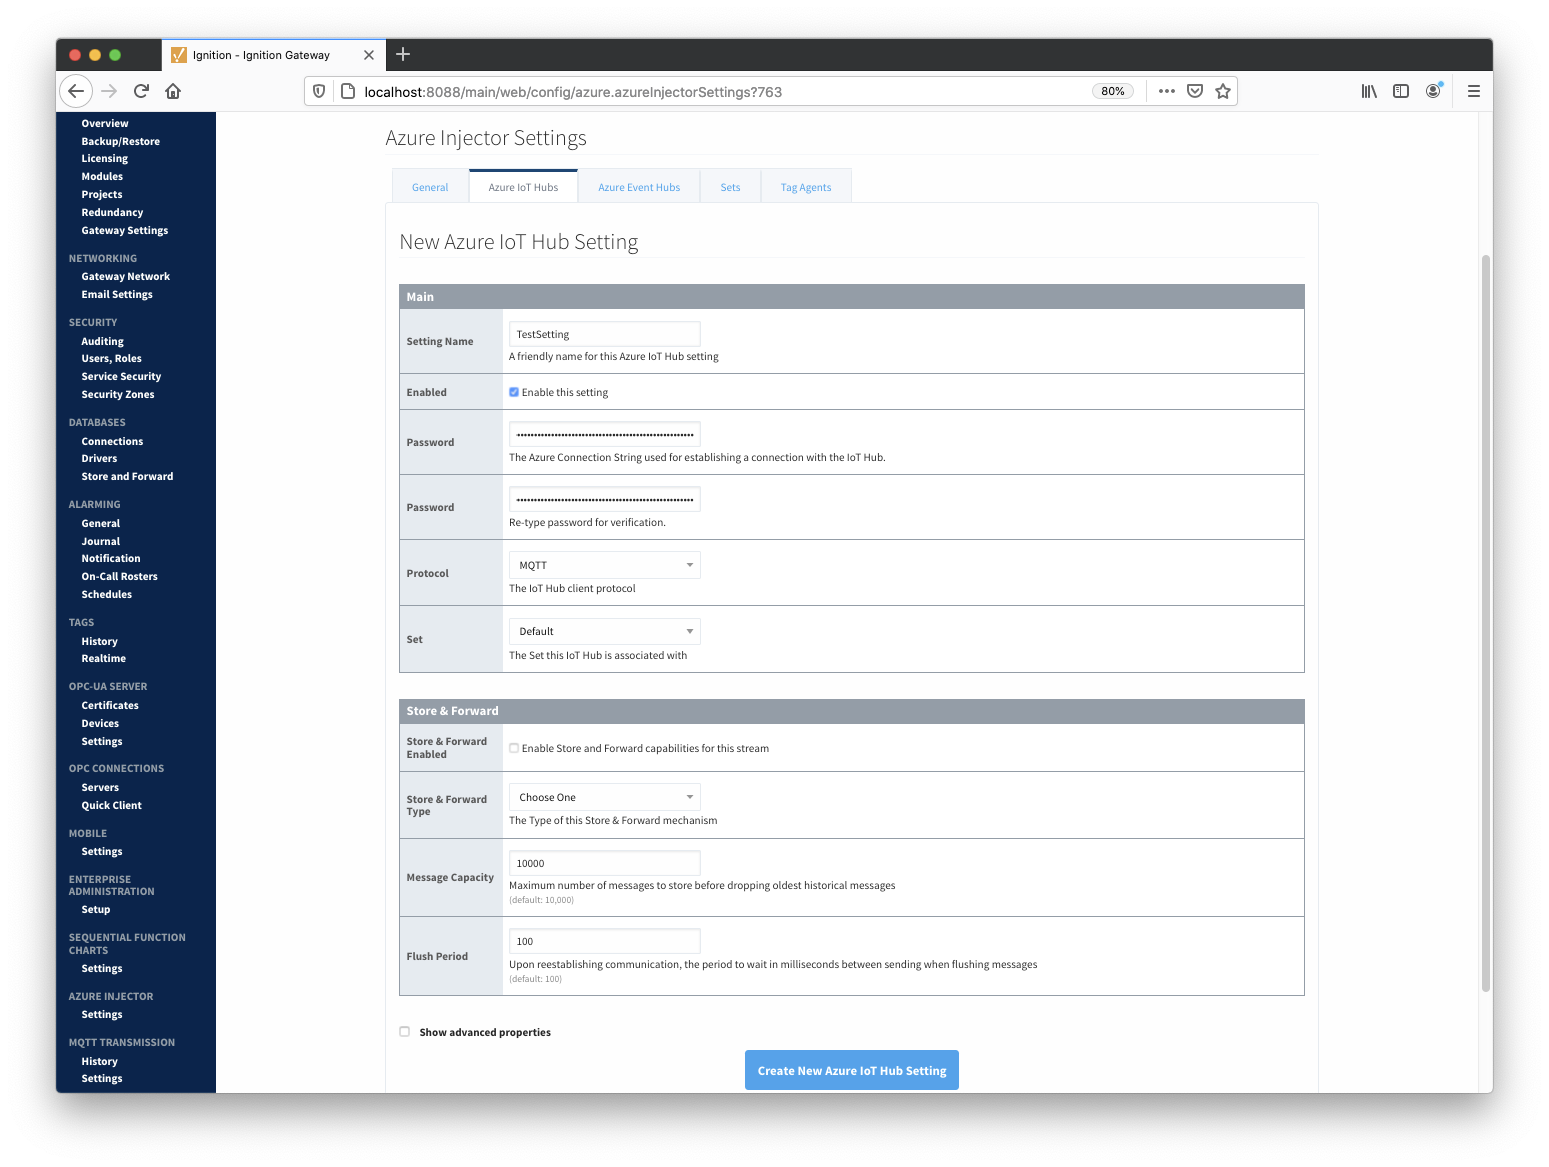 Image Added
 Image RemovedFor the Setting Name you can enter any unique identifier, we will use "TestSetting".
...
The Protocol, Set, and Certificates fields can be left with the default values. Click on "Create New Azure IoT Hub Setting" to finish creating the new configuration setting.
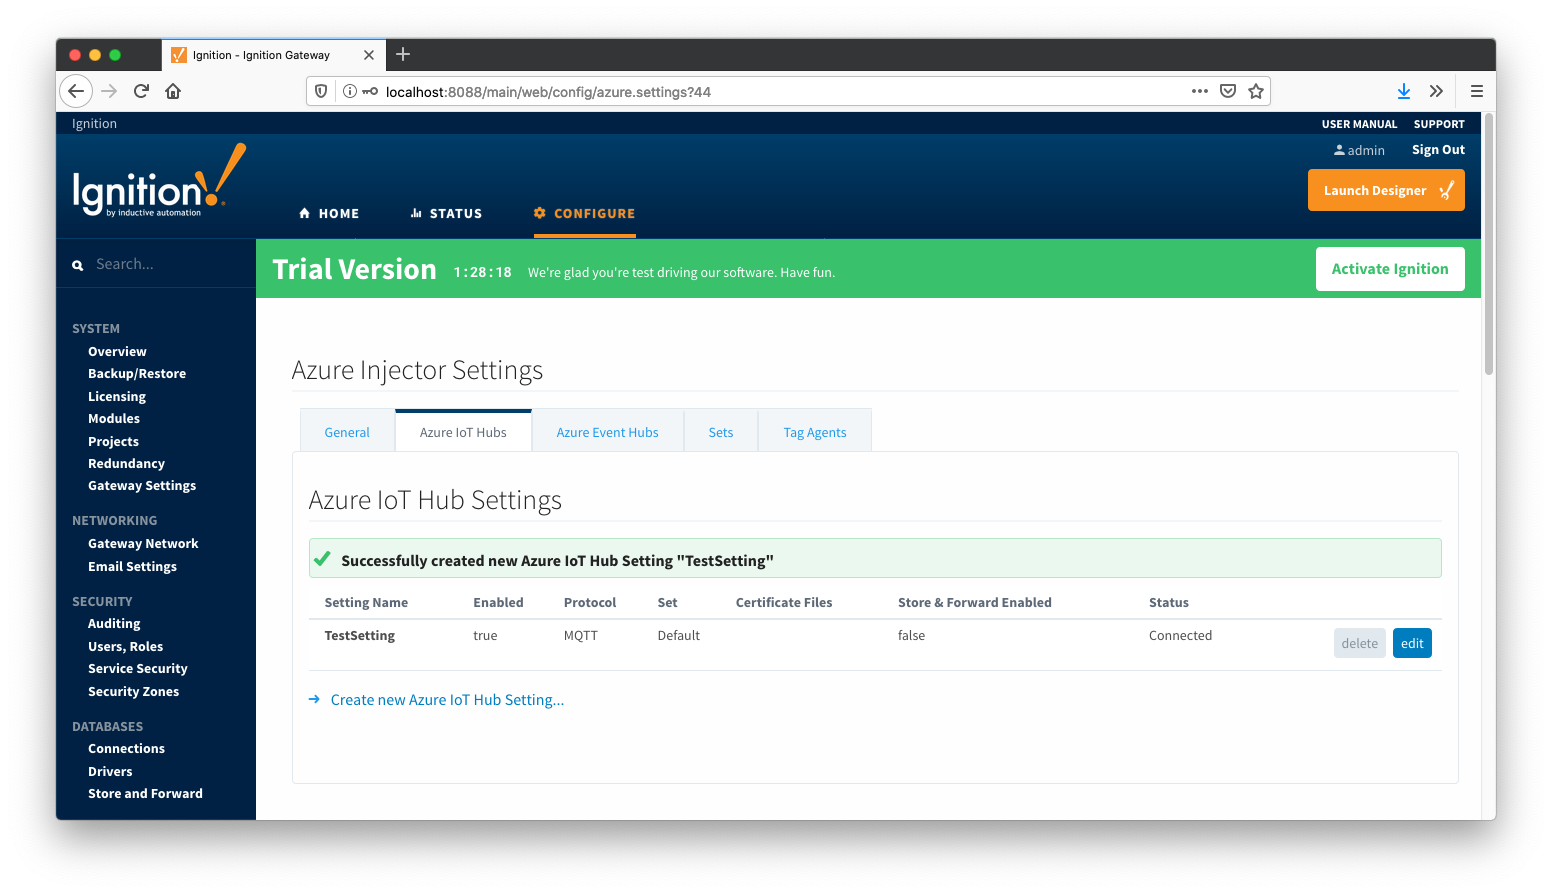 Image Added
 Image RemovedNow the Azure Injector module is connected to the IoT Hub and ready to push Tag data.
If you click on the "Tag Agents" tab you will see that out-of-the-box the Azure Injector module will have one default Tag Agent defined. For this tutorial we will not need to make any configuration changes to the Tag Agents.
 Image Removed
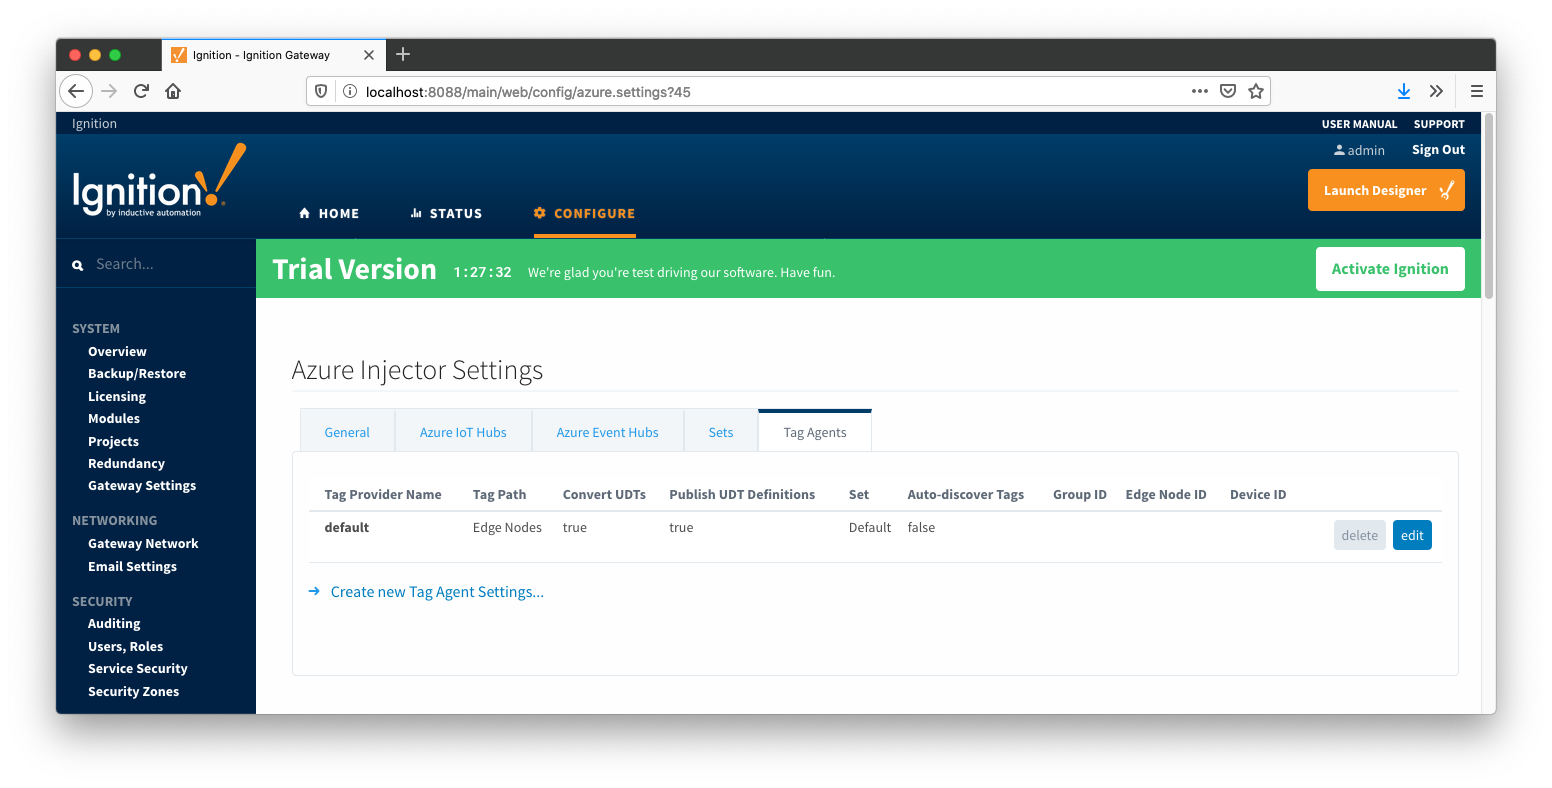 Image Added
The Default Tag Agent will monitor tags that are in the "Edge Nodes" folder of the "default" Tag Provider. In the next step we go into more detail about the tags in this folder.
...
It is beyond the scope of this tutorial to show how to design an application in Azure to handle the payloads as they are pushed in to the Azure IoT Hub. For additional information on developing applications to consume this data see https://docs.microsoft.com/en-us/azure/.
Additional Resources
- Additional Azure Injector Tutorials
- Inductive Automation's Ignition download with free trial
- Azure Injector download with free trial
- Questions about this tutorial?
- Sales questions
- About Cirrus Link