![]()
Contents
Cirrus Link Resources
Cirrus Link Website![]()
Contact Us (Sales/Support)![]()
Forum![]()
Cirrus Link Modules Docs for Ignition 7.9.x![]()
Inductive Resources
Ignition User Manual![]()
Knowledge Base Articles![]()
Inductive University![]()
Forum![]()
![]()
Cirrus Link Website![]()
Contact Us (Sales/Support)![]()
Forum![]()
Cirrus Link Modules Docs for Ignition 7.9.x![]()
Ignition User Manual![]()
Knowledge Base Articles![]()
Inductive University![]()
Forum![]()
...
Using the Ignition Gateway Web UI, browse to the Ignition 'Config > MQTT Engine Settings > Servers' page. Now click the 'Certificates' tab as shown below: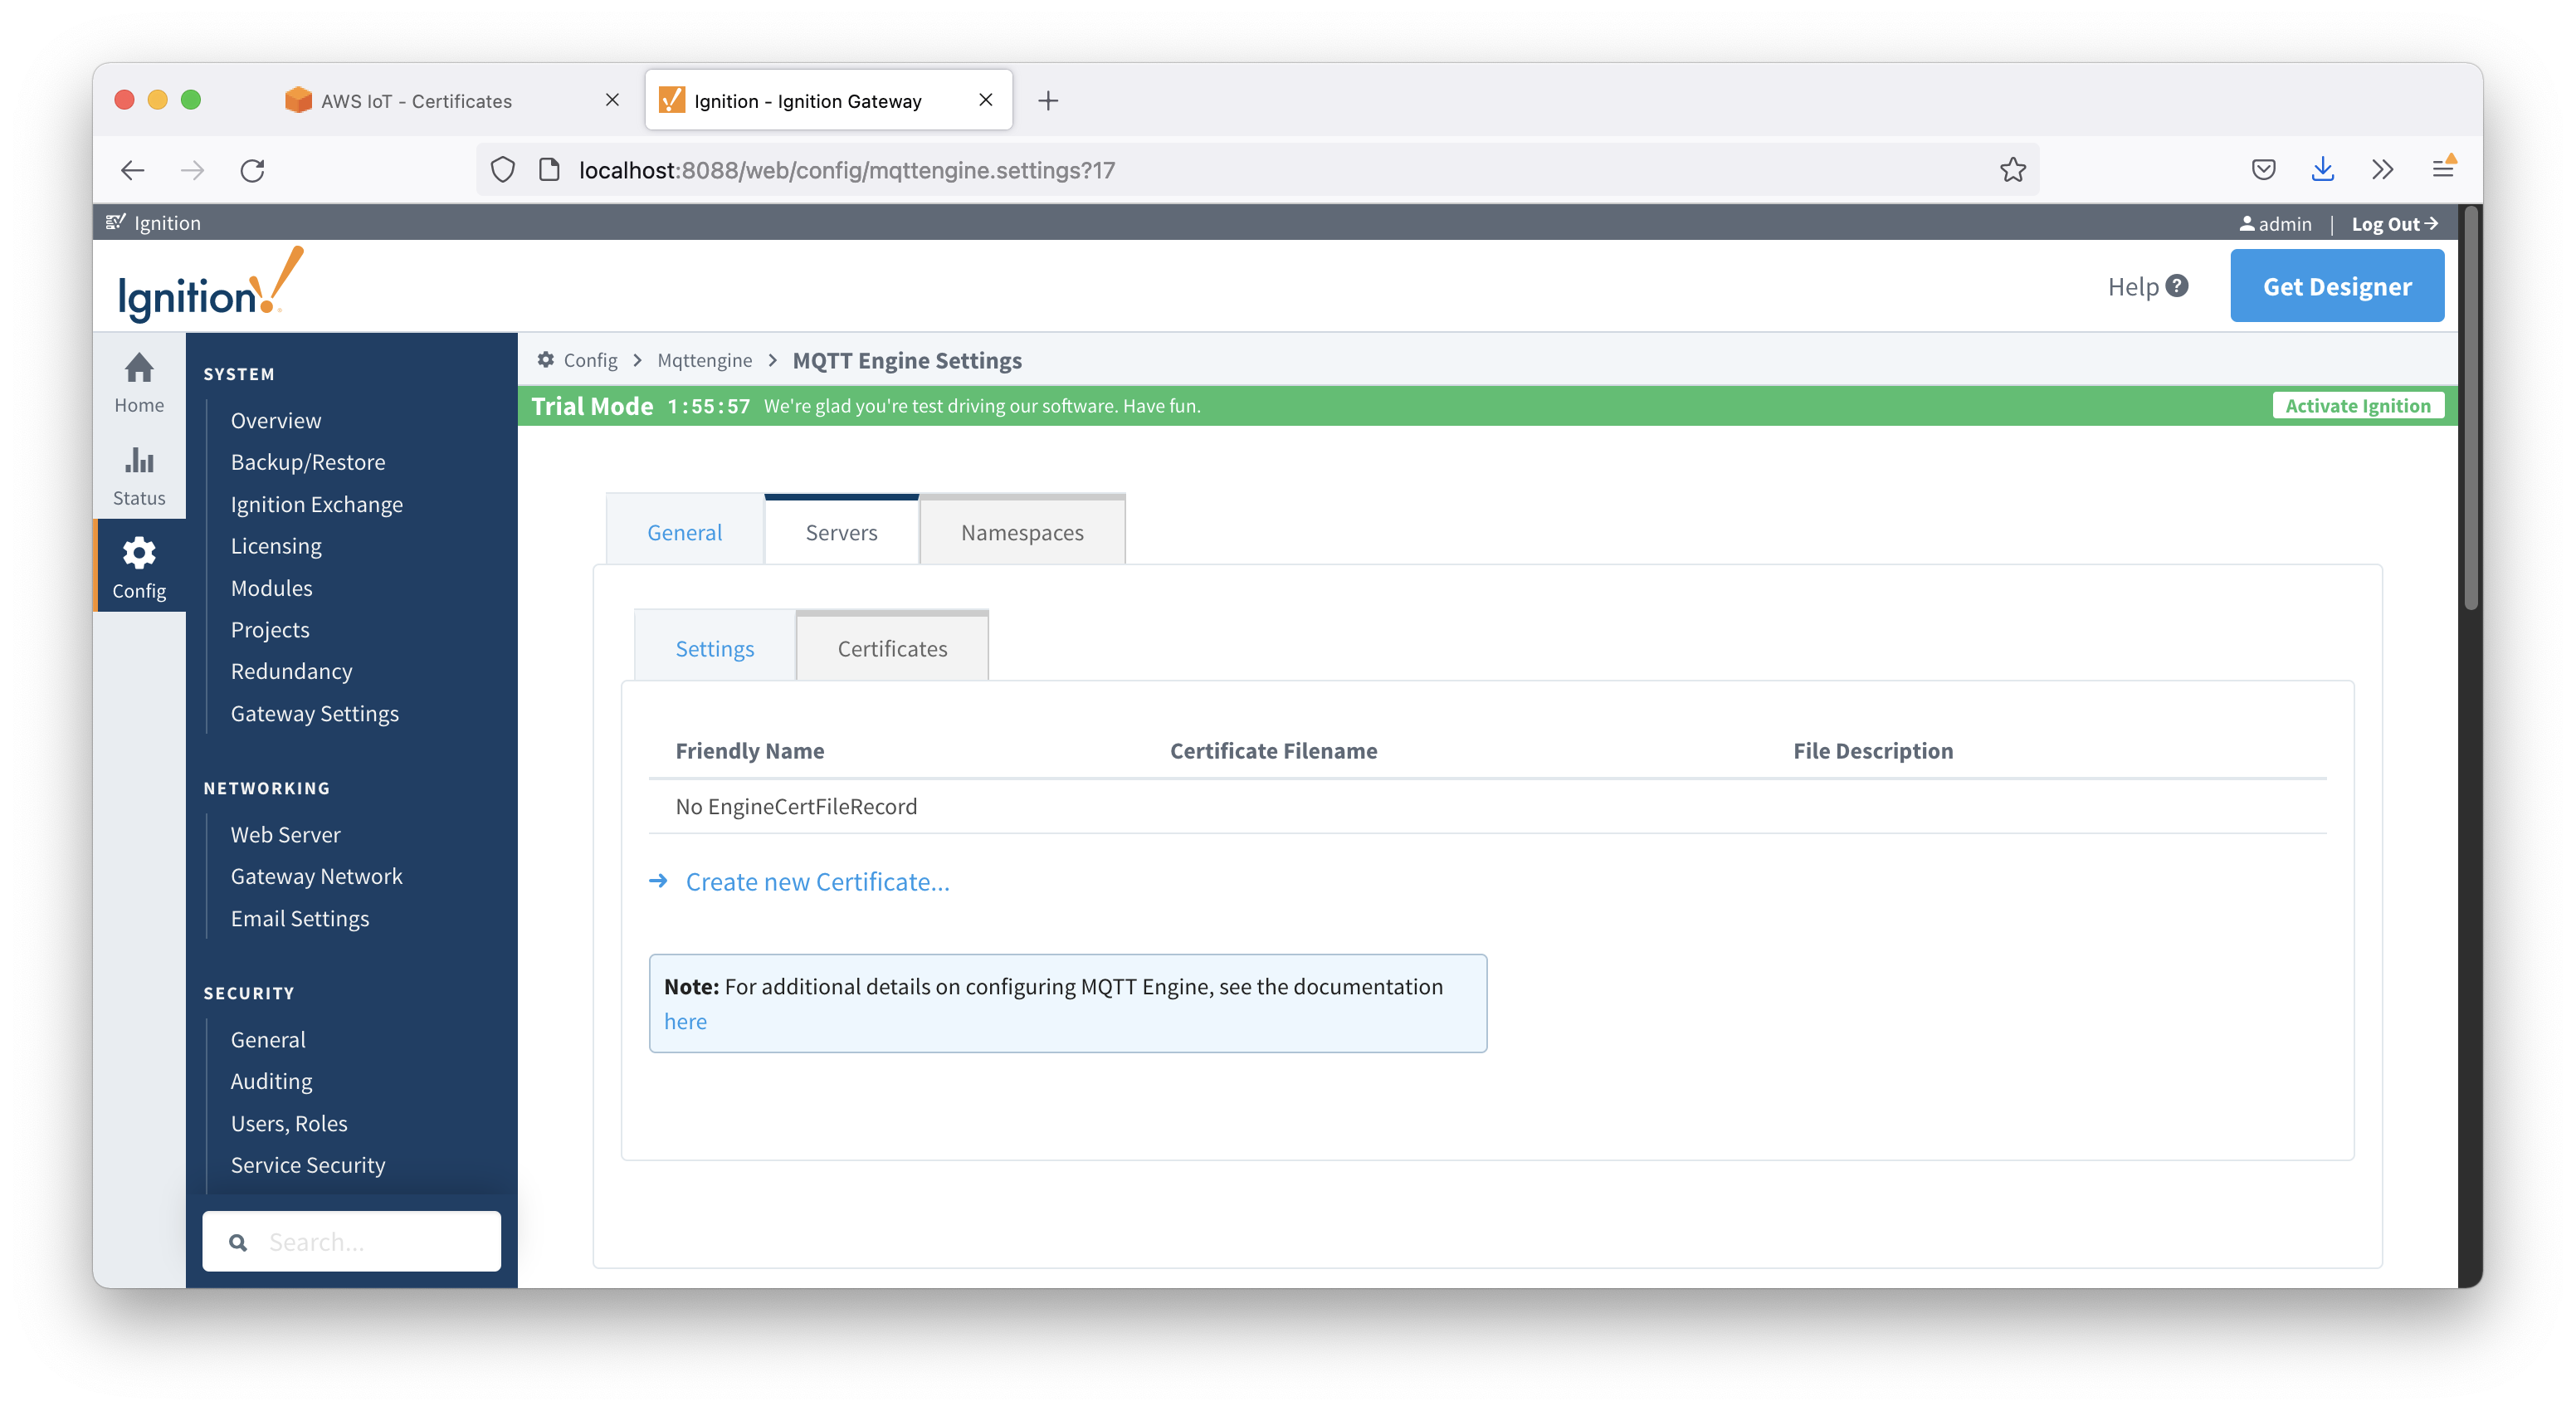

Now click the 'Create new Certificate' link. Then upload one of the three files previously downloaded when creating the IoT Core 'Thing'. Once completed, your Certificates page should look similar to the following with all three files.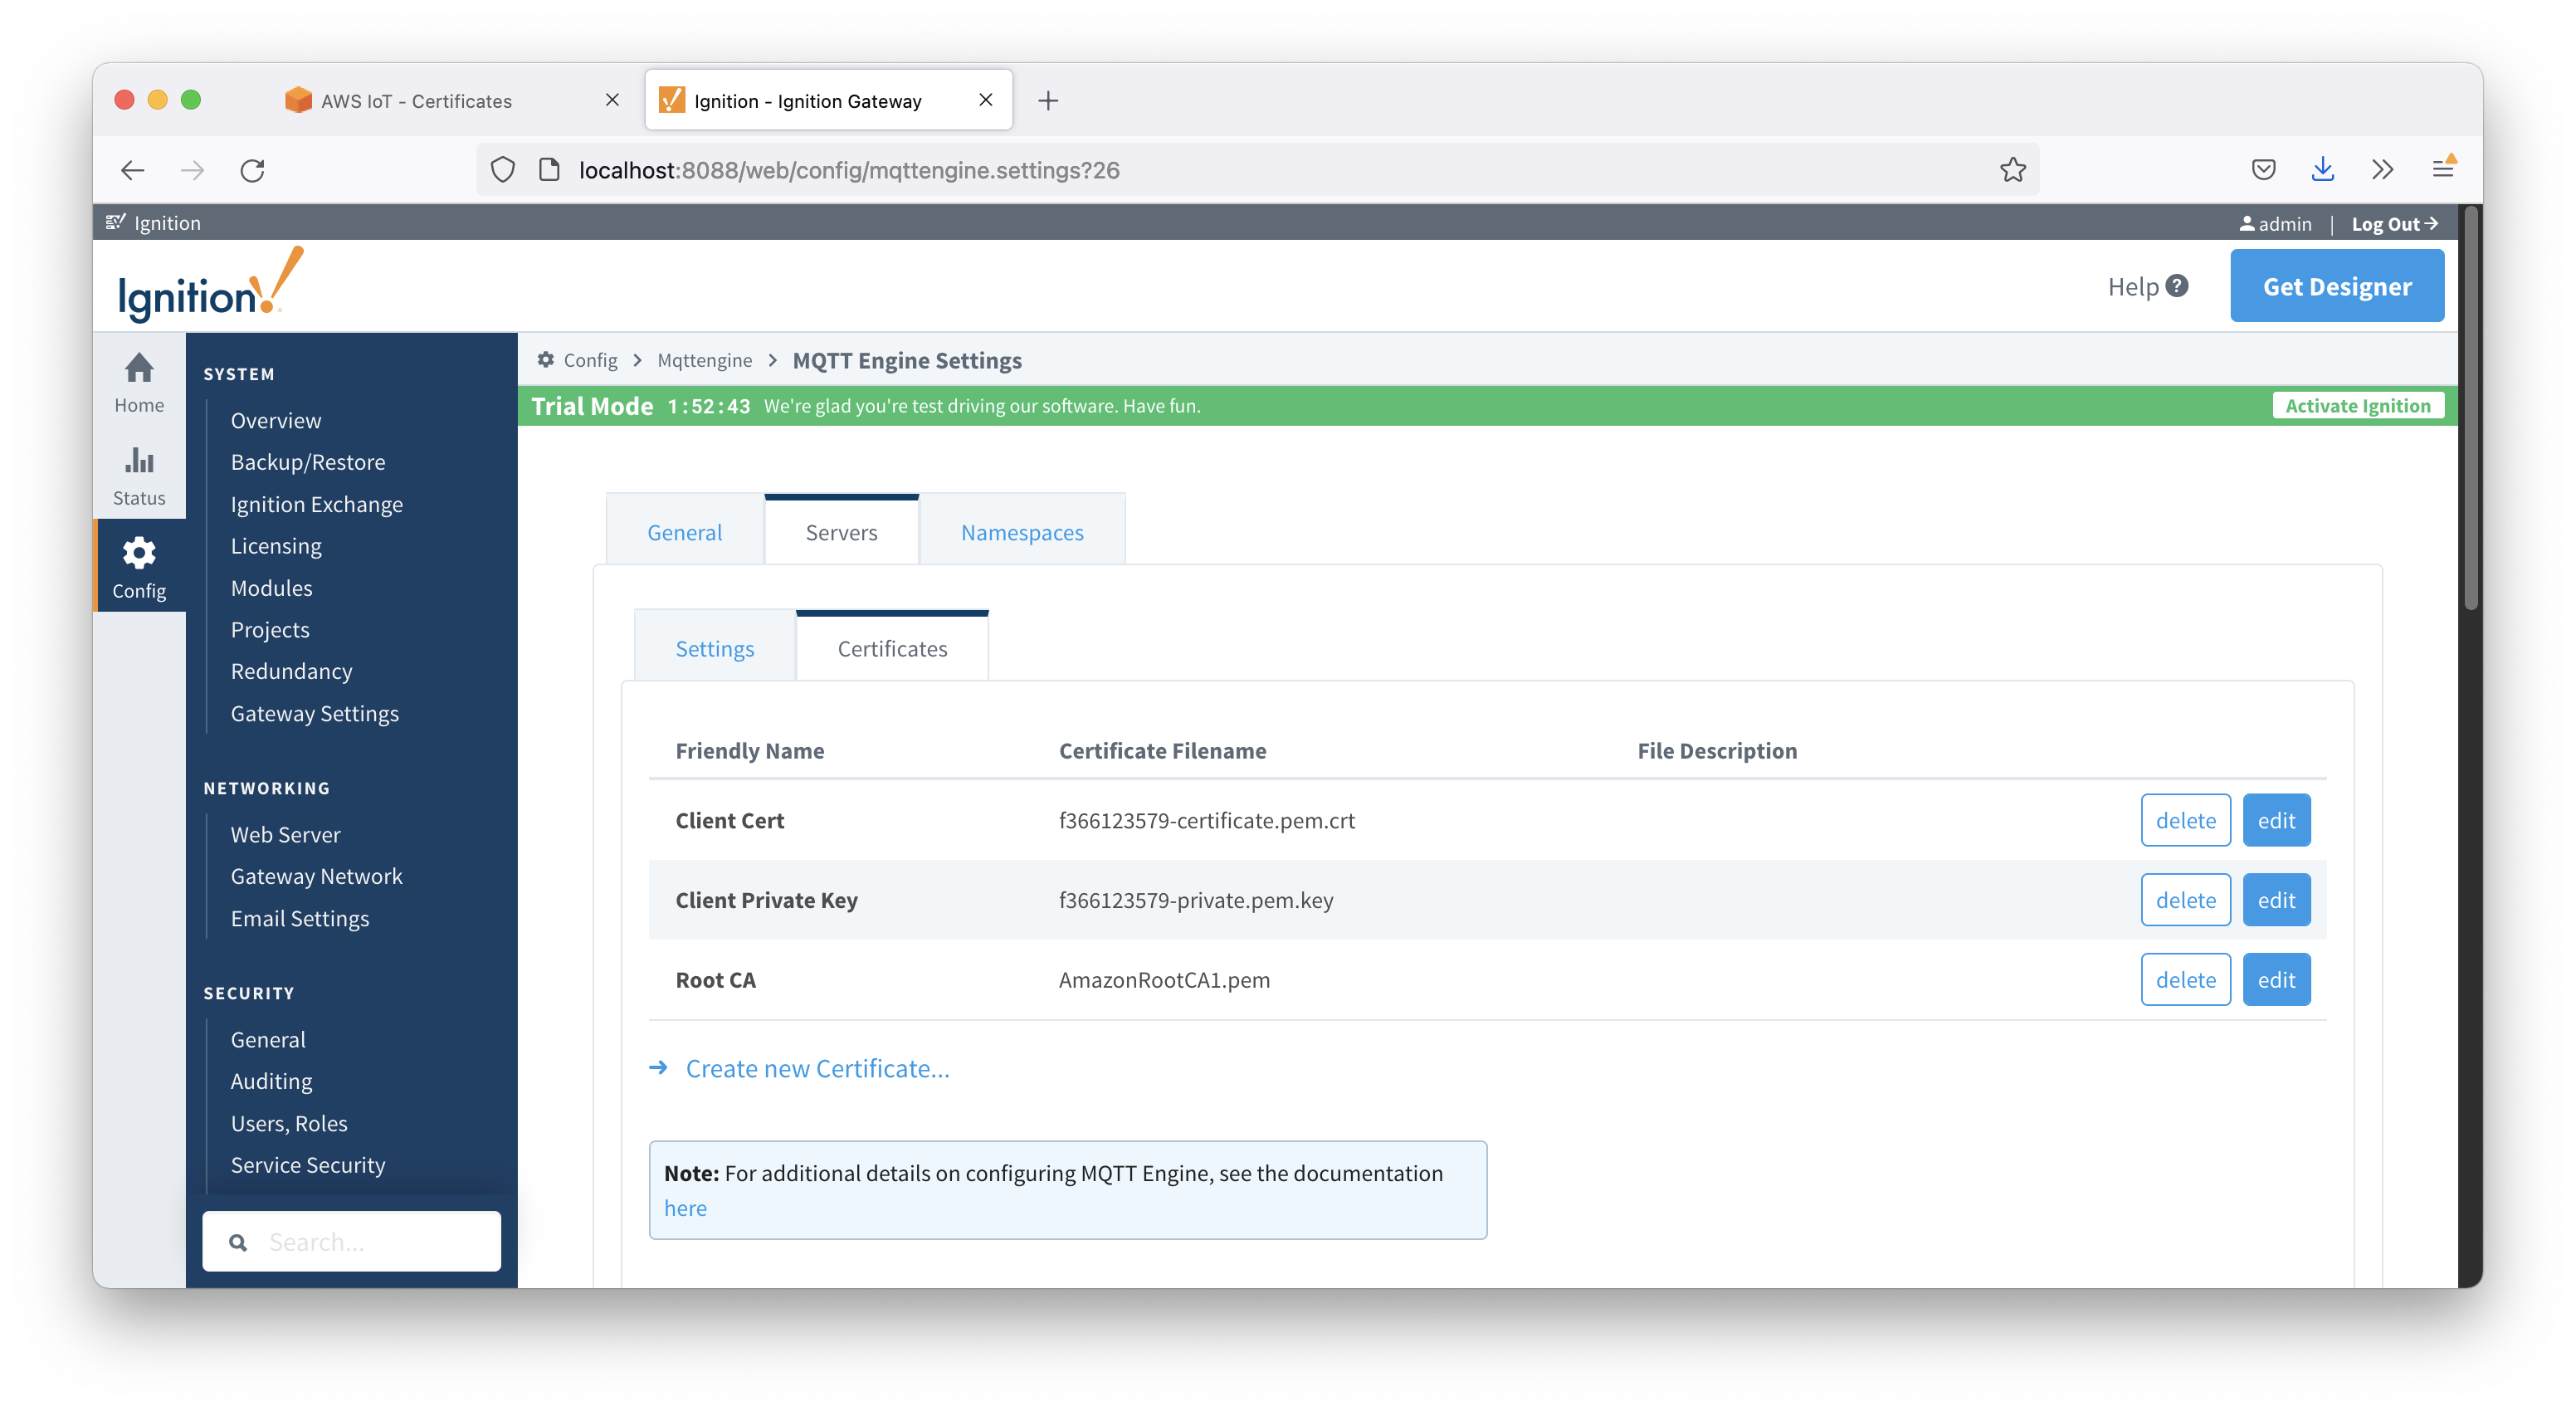

Now, click the 'Servers' tab as shown below.
...
If you are only going to be connecting to AWS IoT Core, edit the existing 'Chariot SCADA' setting. Otherwise, create a new MQTT Server Setting. This should bring up the following page.
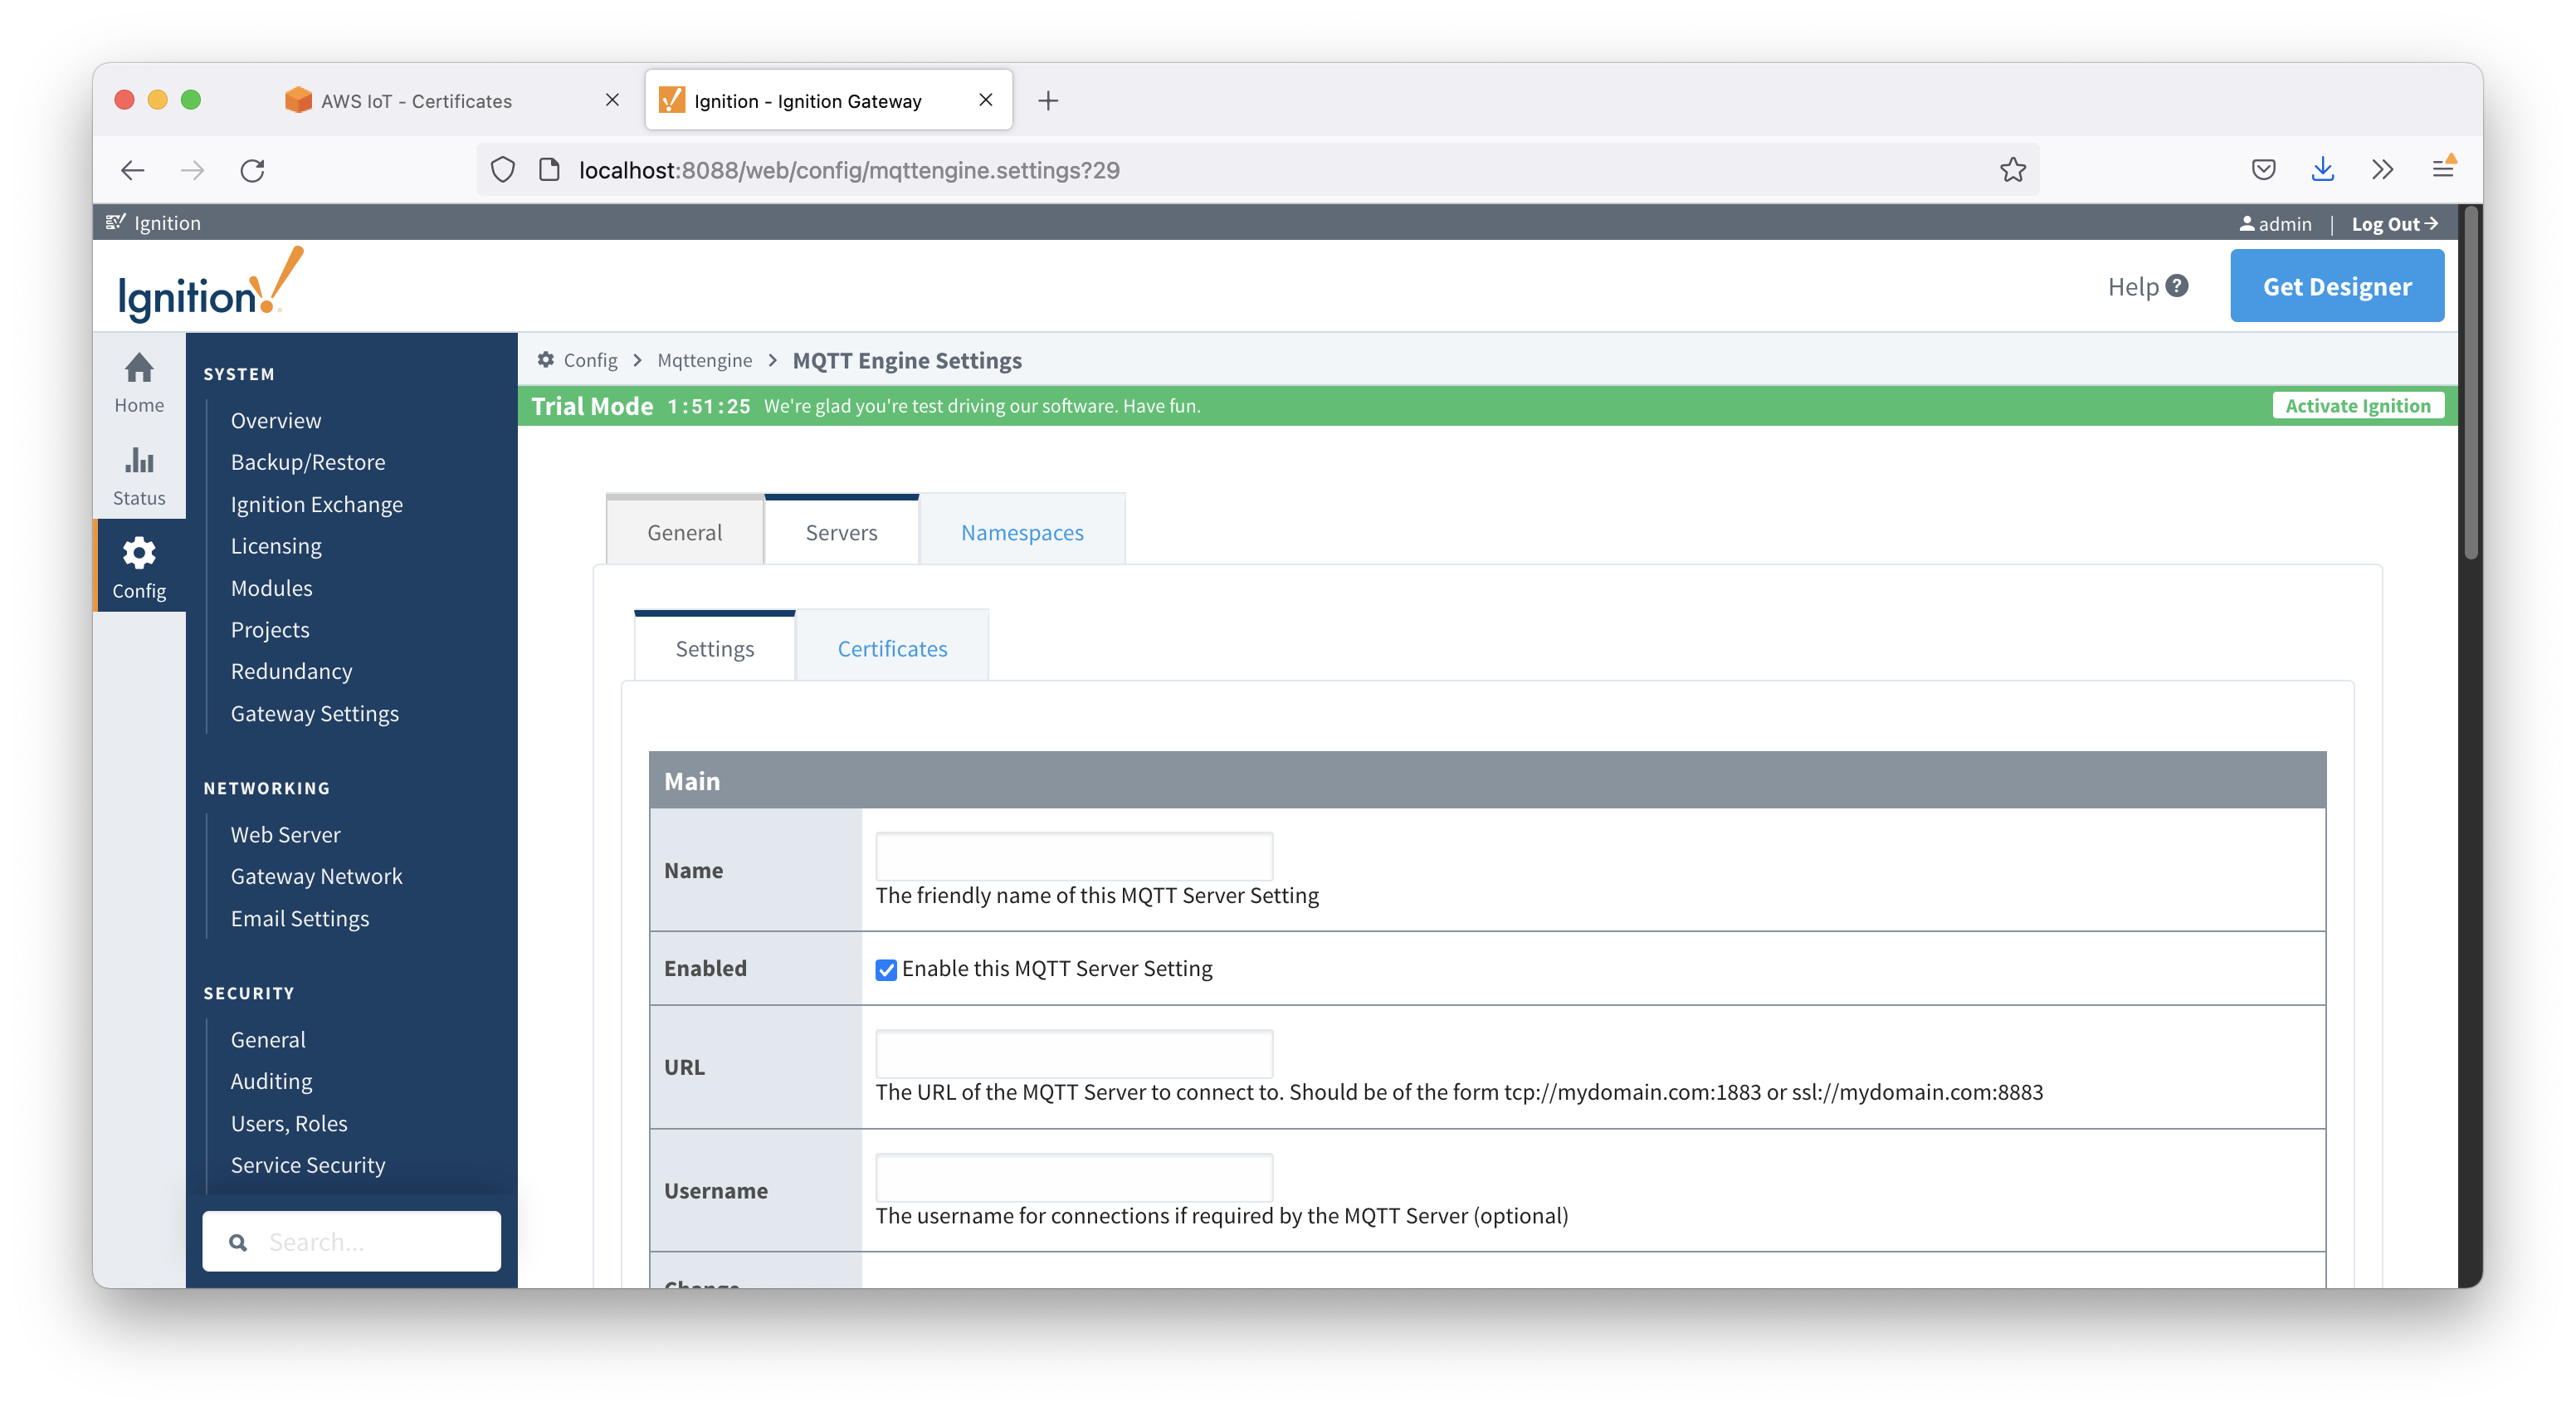
Set the following.
ssl://ENDPOINT_URL:8883ssl://a33fdj134jkj10-ats.iot.us-east-1.amazonaws.com:8883Leave all other fields blank and submit the configuration. If everything was set up properly, the 'Status' should show 'Connected' when complete.
| Anchor | ||||
|---|---|---|---|---|
|
{ "reorderingTimeout" : 3000 } as shown below and save the changes....