...
Upon completion of this tutorial you will have all of the required components to configure, deploy, and observe the Sparkplug MQTT specification in action.
Architecture
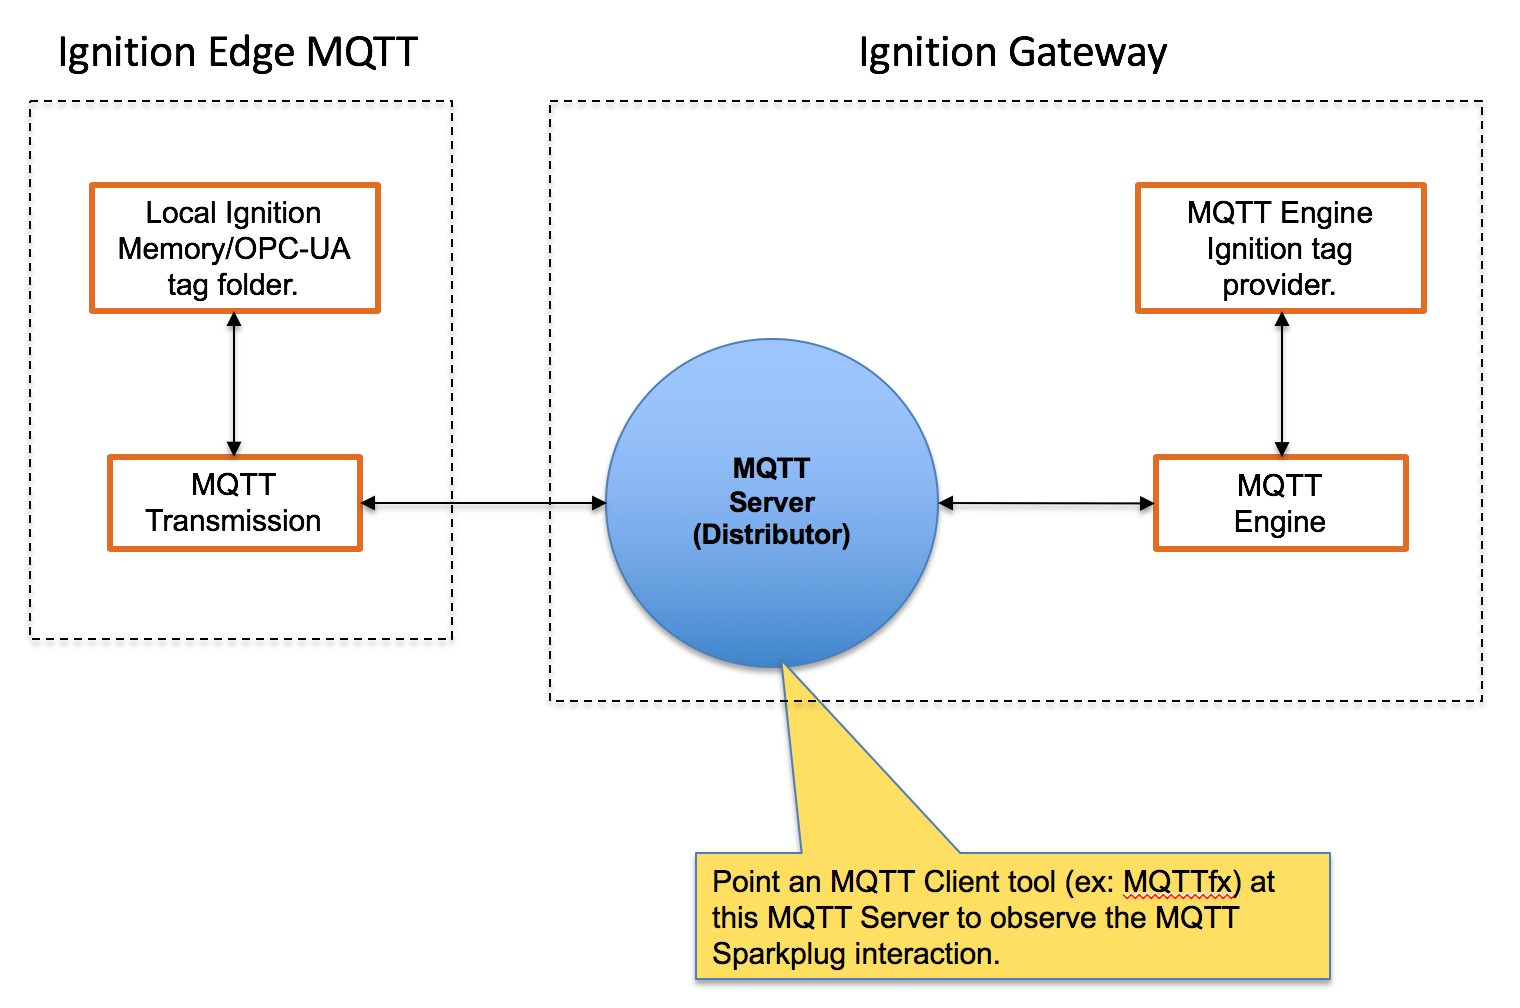 Image Modified
Tutorial
Step 1: Download and Install the Central Ignition Gateway
...
Go to the Inductive Automation download page again and scroll down to the Third Party modules section. Find the Cirrus Link modules section and download the MQTT Distributor, MQTT Engine, MQTT Transmission modules.
https://inductiveautomation.com/downloads/archive. The download links should look similar to what is shown below.
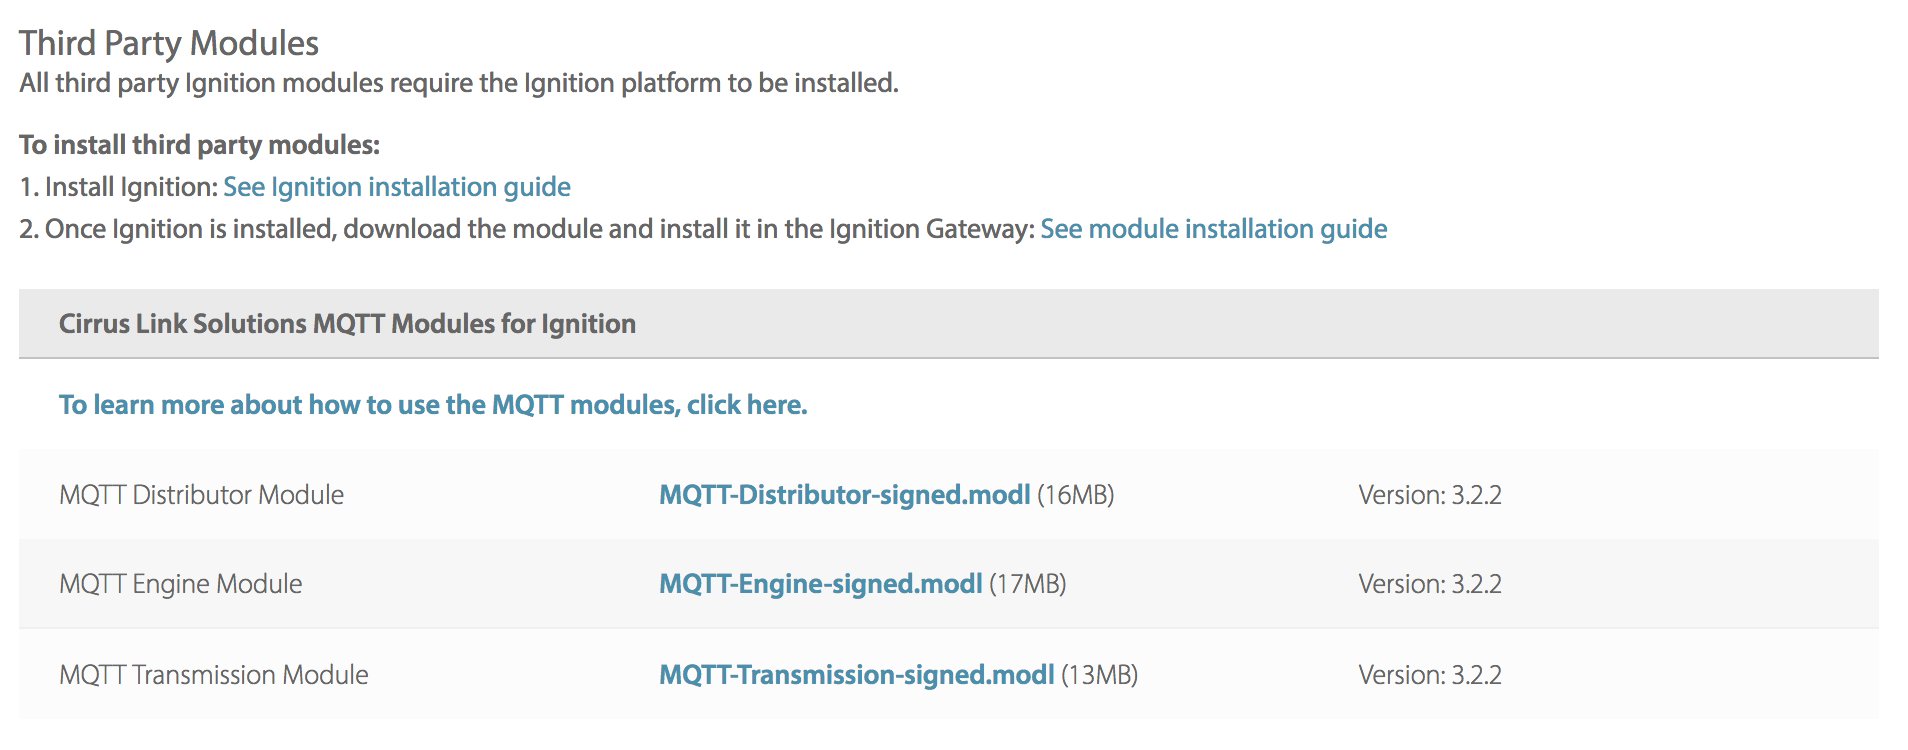 Image Modified
- In Step 4 you will:
- Install MQTT Distributor and MQTT Engine into the Central Ignition Gateway installed in step 1.
- Install MQTT Transmission into Ignition Edge MQTT that was installed in step 2.
...
Log in to the Ignition Gateway installed in step 1 using the default credentials of admin/password. Click on Configuration tab and then click on the Modules tab on the left side of the page. Scroll to the bottom of the Modules section and click on the Download/Upgrade modules button. When prompted, select the MQTT Distributor module from the file browser and install it. Do the same for the MQTT Engine module. When complete, the Ignition Gateway Web UI module section should look similar to what is shown below.
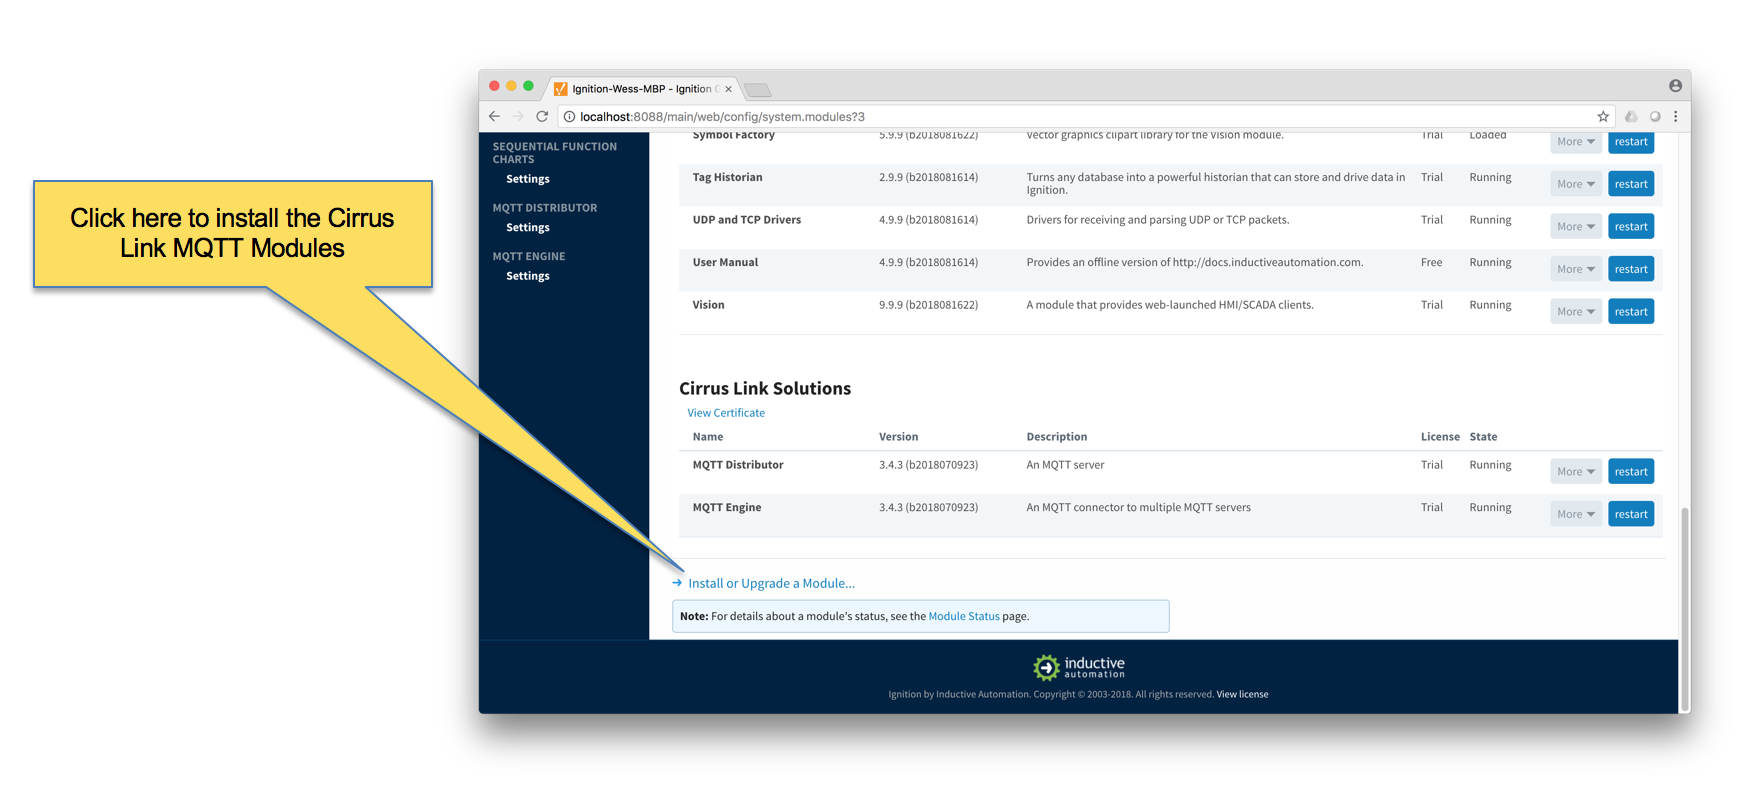 Image Modified
Now log in to the Ignition Edge MQTT installed in step 2 using the default credentials of admin/password. Click on Configuration tab and then click on the Modules tab on the left side of the page. Scroll to the bottom of the Modules section and click on the Download/Upgrade modules button. When prompted, select the MQTT Transmission module from the file browser and install it. When complete, the Ignition Edge MQTT Web UI module section should look similar to what is shown below.
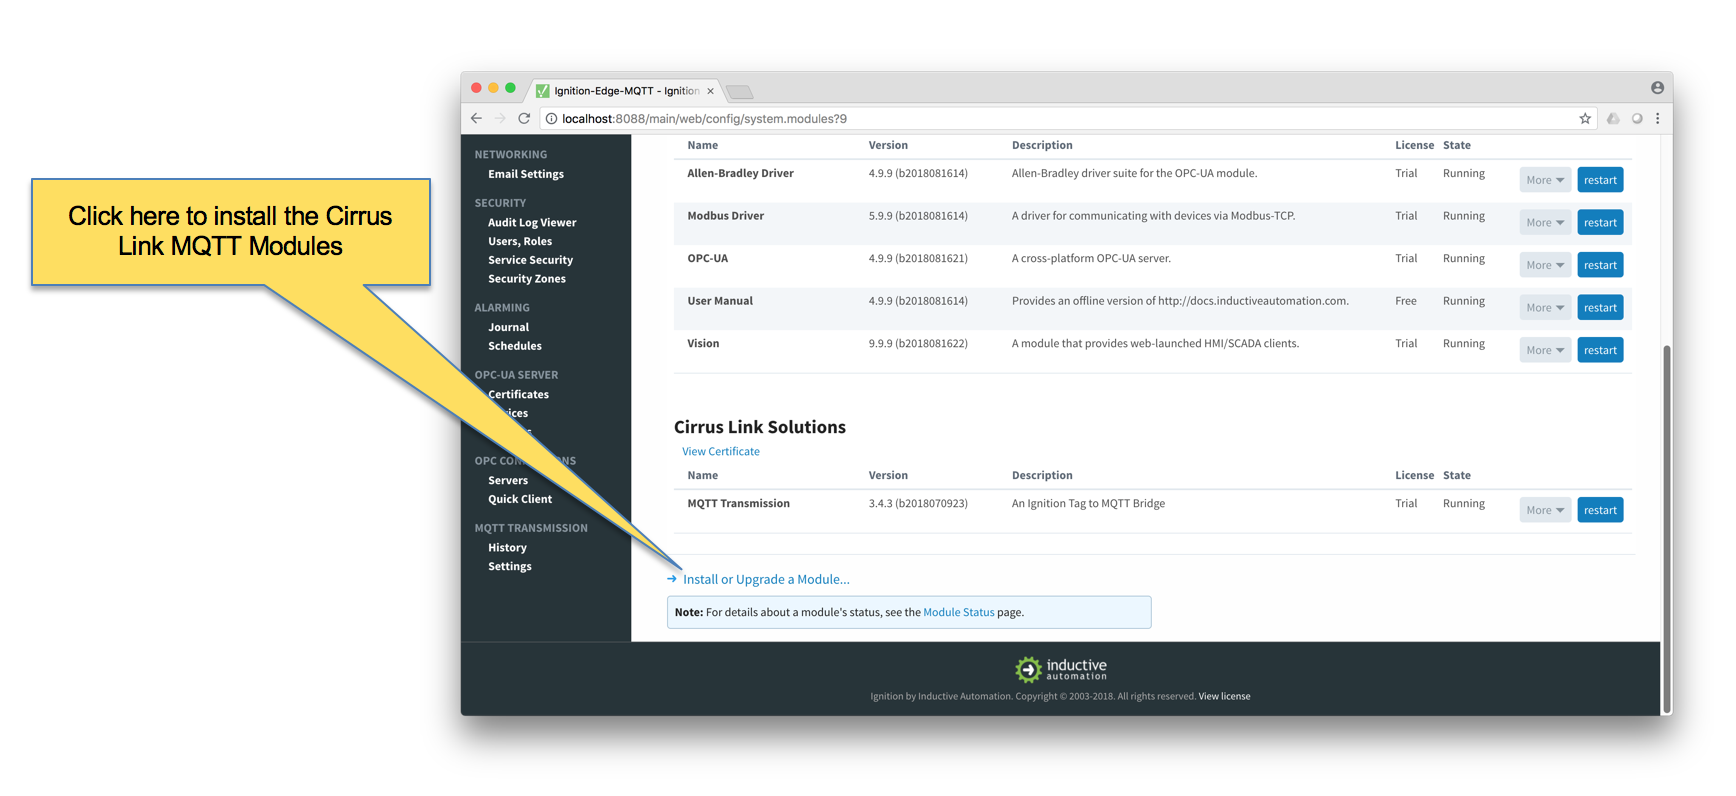 Image Modified
Step 4: Configure the MQTT Modules on the Central Ignition Gateway
By default, MQTT Engine is already configured to point to an MQTT Server at tcp://localhost:1883. This means it will automatically connect to MQTT Distributor which is installed with it. There are some other configuration parameters that could optionally be set. The first is the 'Primary Host ID'. This is a setting that is highly recommended and should be set on both MQTT Engine and any MQTT Transmission instances that are reporting in as well. The ASCII string should match exactly on MQTT Engine and all MQTT Transmission instances. Also, optionally the 'Block Node Commands' and 'Block Device Commands' could be unchecked if you want to allow tag writes in MQTT Engine to result in tag writes on the MQTT Transmission instances (i.e. remote tag writes). Save the settings after making the changes.
 Image Modified
Step 4: Configure MQTT Transmission on Ignition Edge MQTT
MQTT Transmission needs to be modified to point to the MQTT Server (MQTT Distributor) in order to get data into MQTT Engine. To do so, browse to Ignition Edge MQTT with a web browser. Then click 'Configure' at the top, log in, and select MQTT Transmission 'Settings' on the left panel near the bottom. Then select the 'Servers' tab. Finally, click the 'edit' button to the right of the 'Chariot SCADA' definition as shown below.
 Image Modified
At this point, modify the URL to point to the Central Ignition Gateway's IP address. For example, if you central Ignition gateway is at 10.10.10.123, set the URL to tcp://10.10.10.123:1883. Then save your settings.
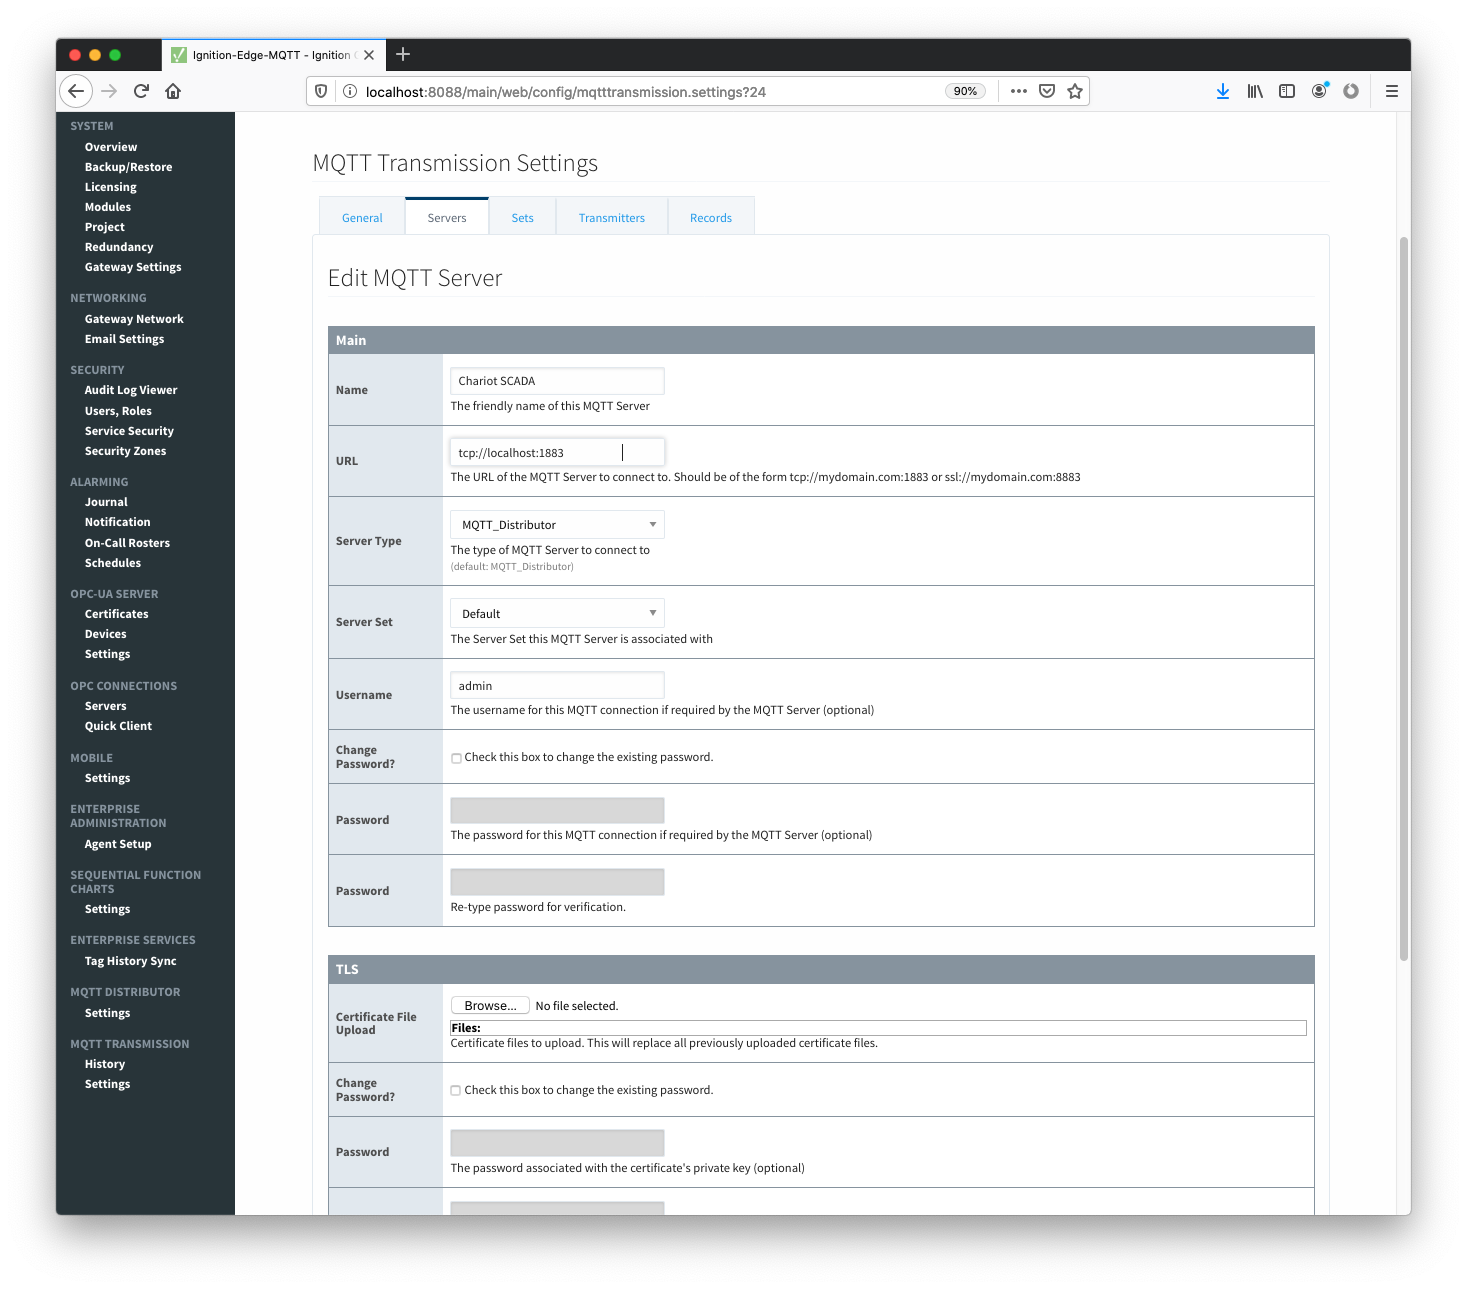 Image ModifiedNow select 'Sets' at the top and click the 'edit' button next to the 'Default' Server Set as shown below.
 Image ModifiedNow set the 'Primary Host ID' to the same ASCII string that was set in MQTT Engine previously as shown below and save the changes.
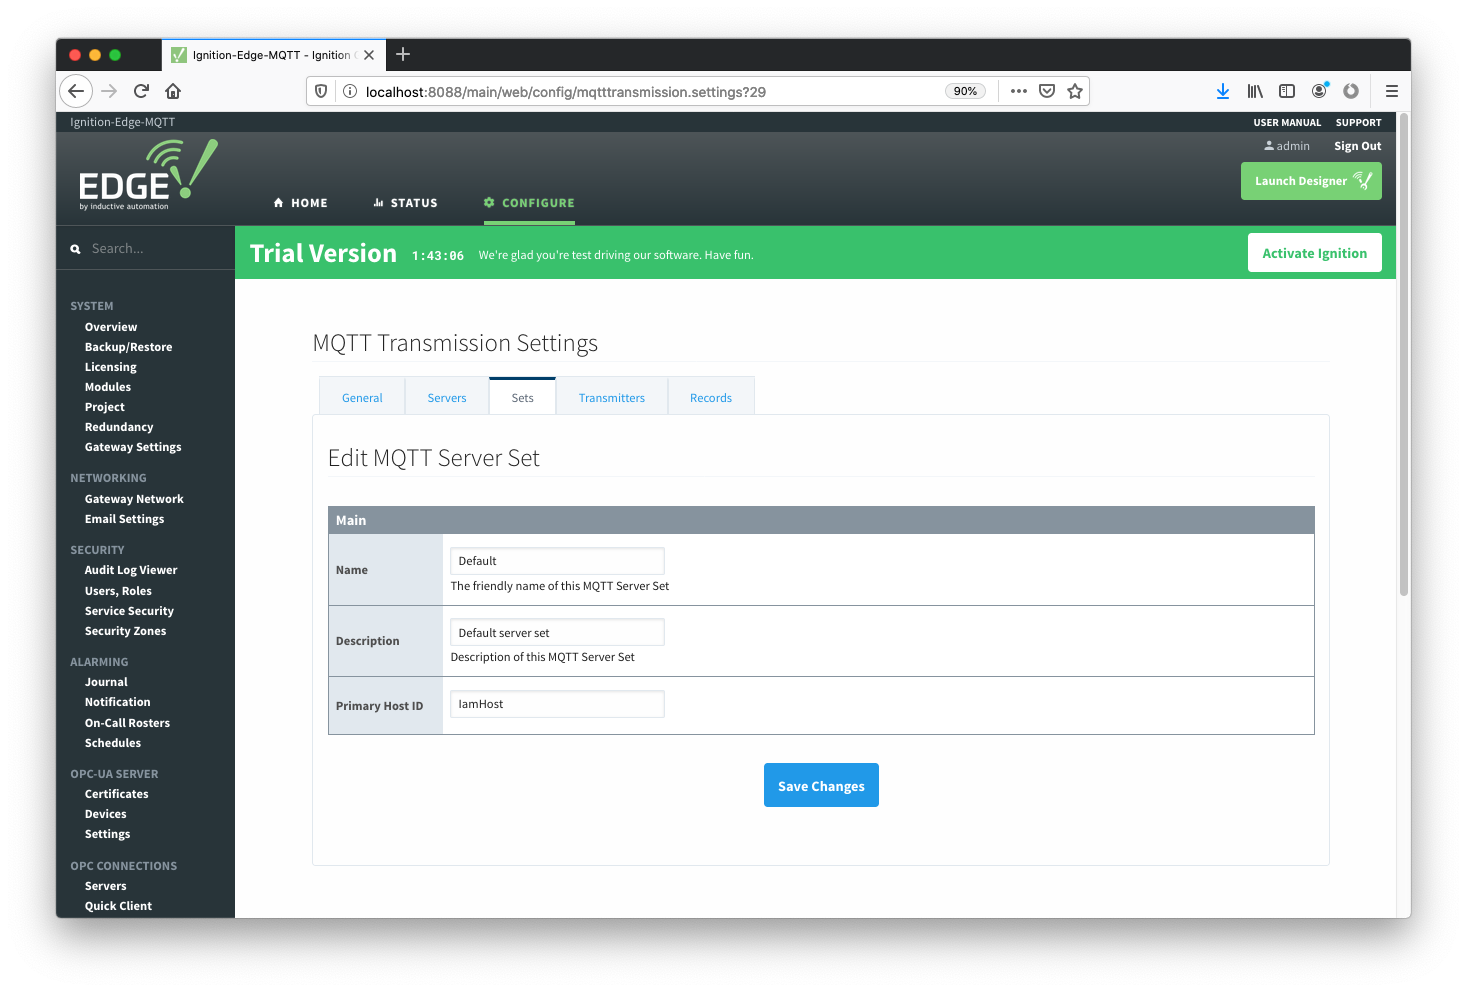 Image Modified
Step 5: Create Edge Tags
| Anchor |
|---|
| create-edge-tags |
|---|
| create-edge-tags |
|---|
|
At this point we must launch Ignition Designer to create some tags to send to MQTT Engine using the MQTT protocol. Launch Designer from Ignition Edge MQTT as shown below.
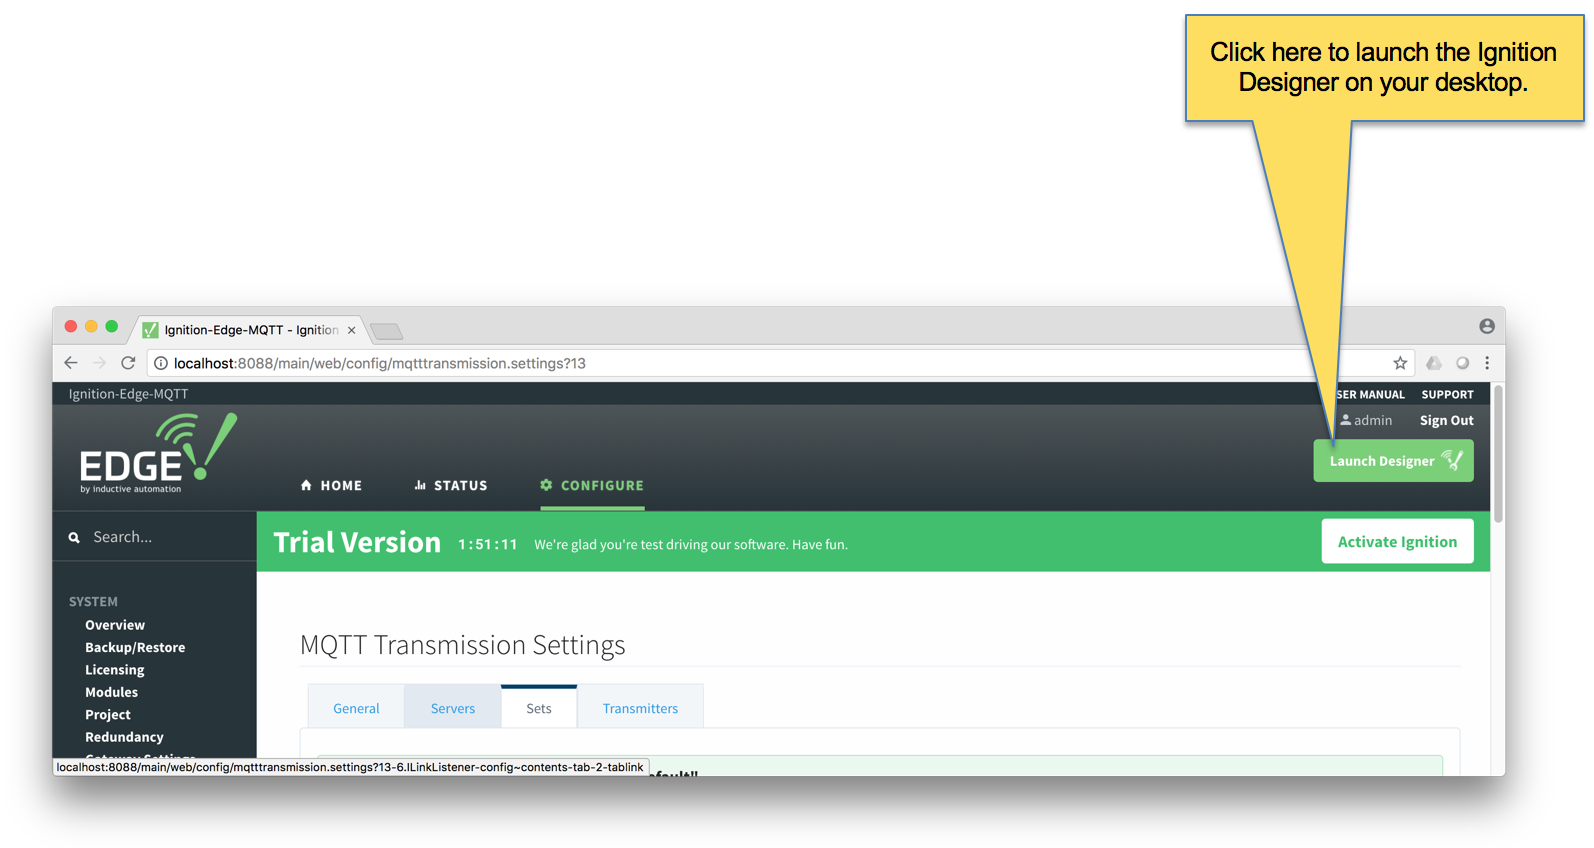 Image Modified
Below shows the Ignition Designer. Expand the 'Tag Browser' pane to get a better look. Note the 'All Providers/edge/Edge Nodes' folder. This is where we will add some specific folders and tags to work with the 'Default Transmitter' of MQTT Transmission.
...
- Under the 'Edge Node' folder, create a new folder called 'Group 1'
- Under the 'Group 1' folder, create a new folder called 'Edge Node 1'
- Under the 'Edge Node 1', create a new folder called 'Device 1'
- Under the 'Device 1' folder, create a new Memory Tag as shown below.
 Image Modified
When done with the steps above, you should have a folder/tag structure as shown below.
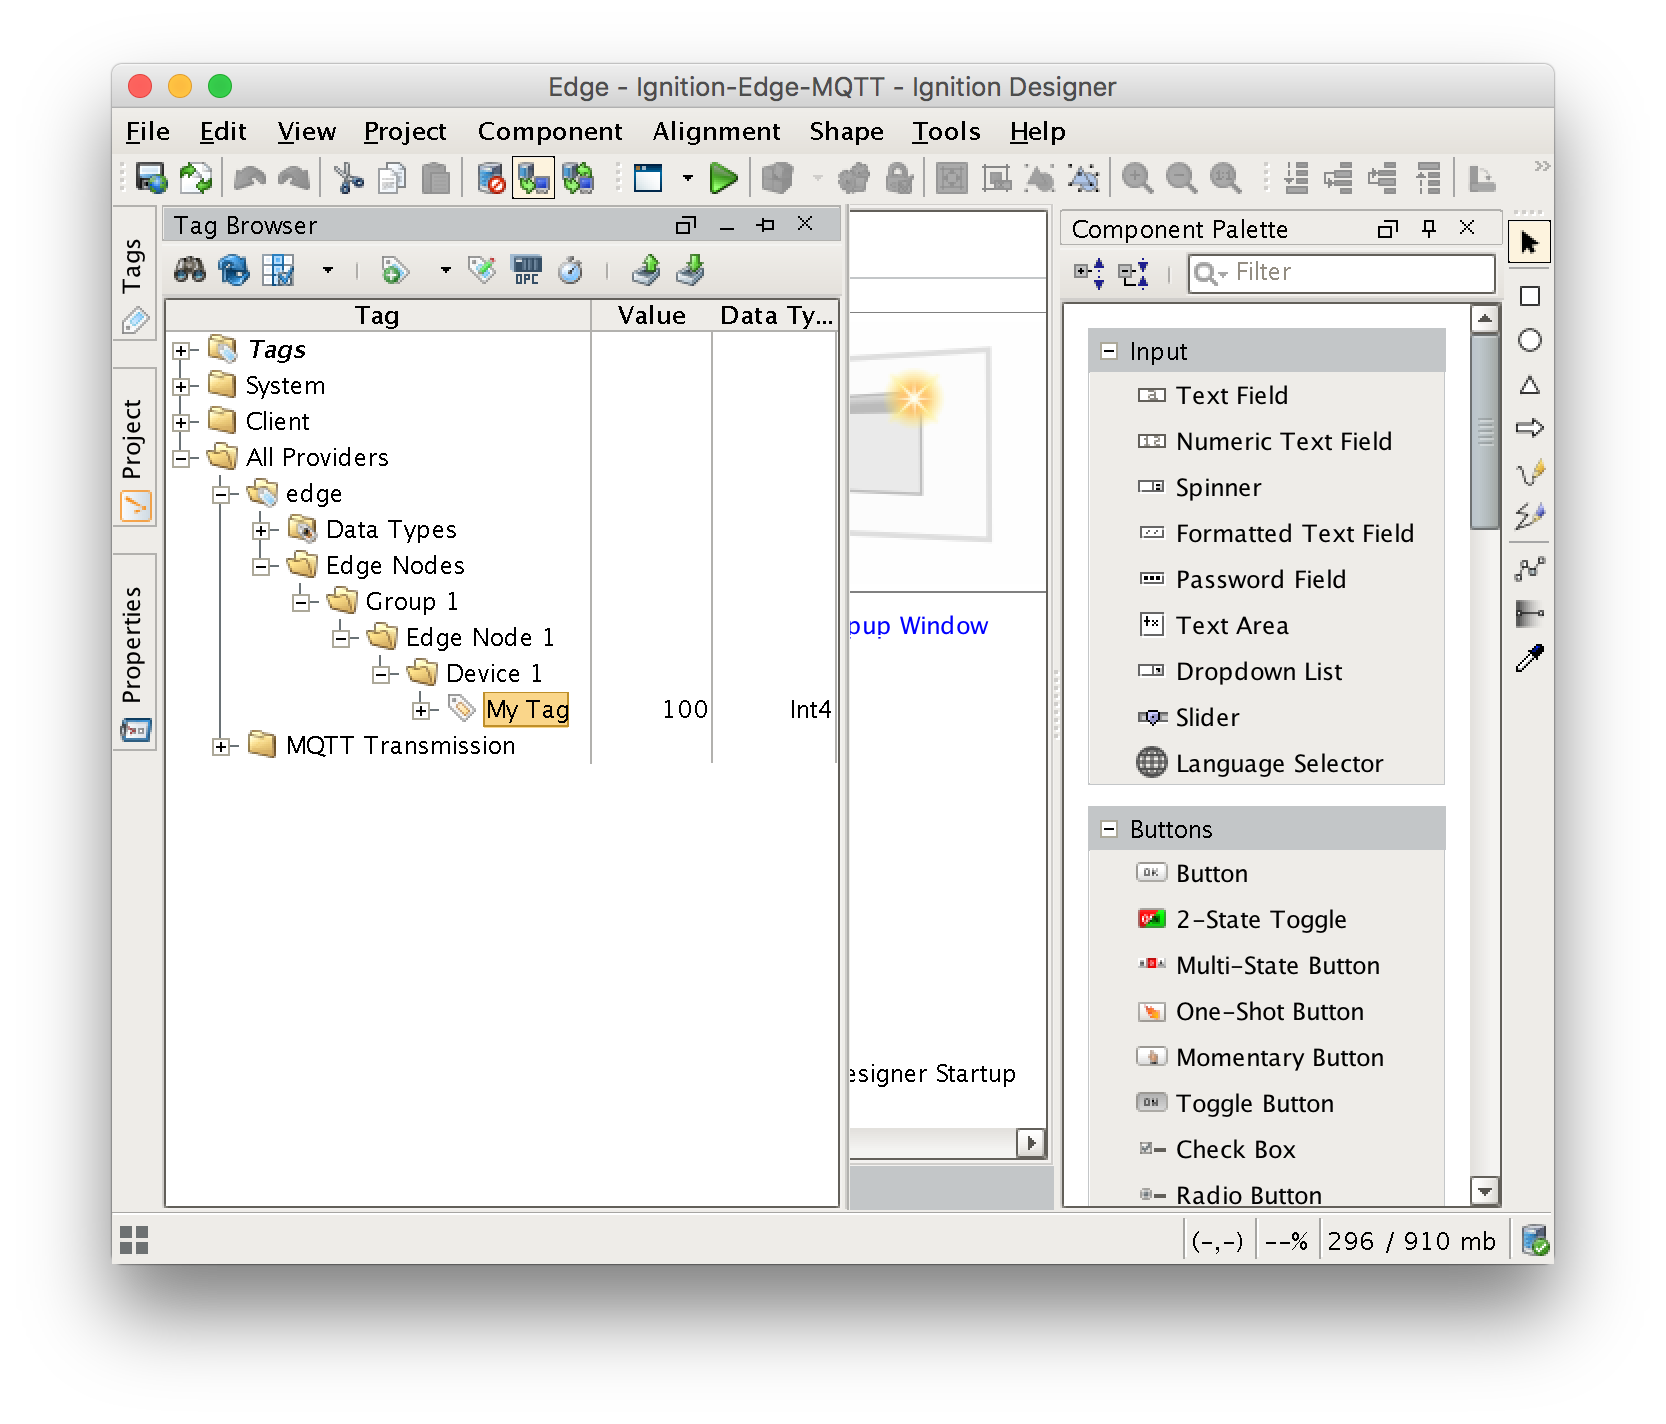 Image Modified
Note additional tags could be added to the 'Device 1' folder as well. These could be OPC tags, UDTs, or other types of tags. Also, additional folders could be added below this level as well. The structure of the 'default transmitter' requires that the first three folder levels represent the Sparkplug Group ID, Edge Node ID, and Device ID respectively.
At this point, we can start the Transmitter by writing to the 'Transmission Control/Refresh' boolean tag. Writing to this tag tells MQTT Transmission to rescan the entire tag tree, detect the folders and tags present, and then begin publishing Sparkplug messages to the MQTT Server. The location of the tag to write to is shown below.
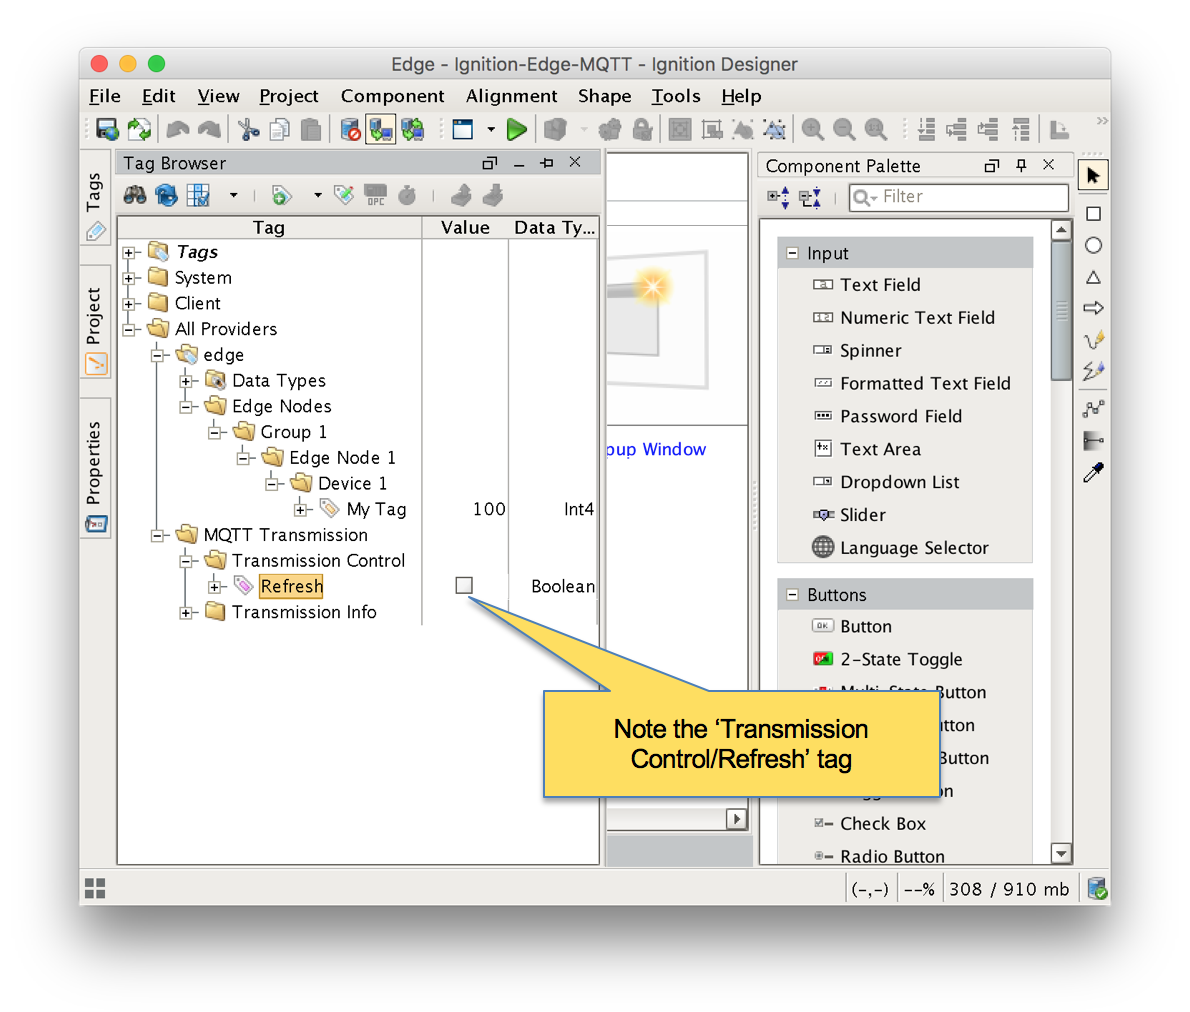 Image Modified
Step 6: Verify MQTT Transmission is Connected
Open the Ignition Edge MQTT Web UI and browse to 'Configure → MQTT Transmission → Settings → Servers' and verify the connected status shows '1 of 1'. If it does not, double check the firewall and antivirus settings on the Central Ignition Gateway and ensure port 1883 is open.
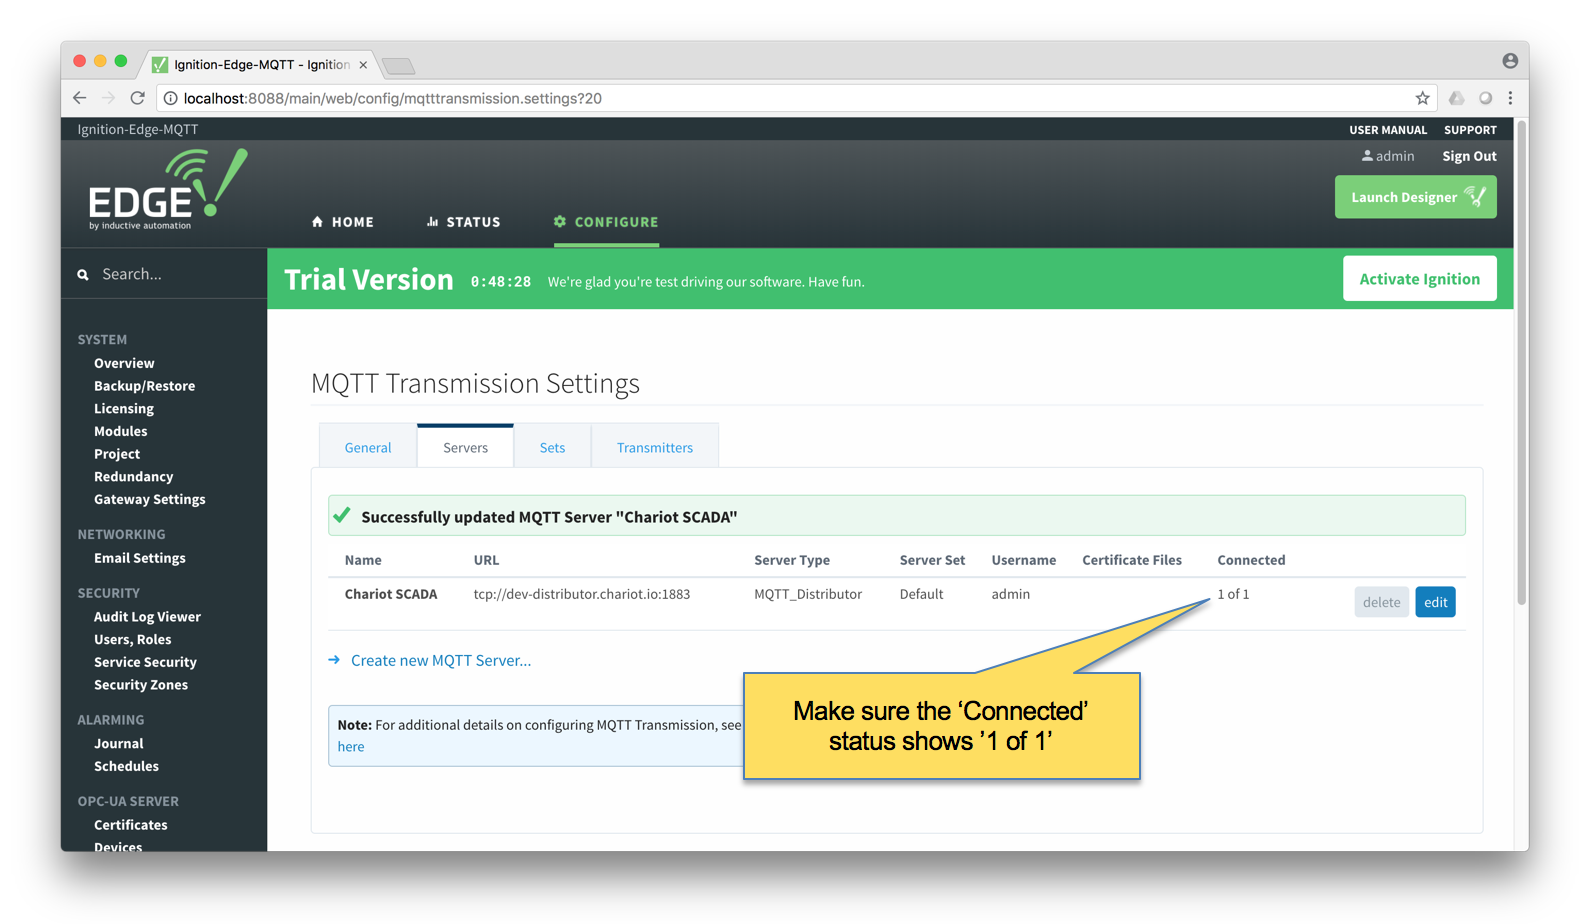 Image Modified
Step 7: Verify Data Flowing into MQTT Engine
With MQTT Transmission now connected, open Ignition Designer on the Central Ignition Gateway. Expand the Tag Browser and look expand the folder tree as shown below. You should see the 'My Tag' tag published from the Ignition Edge MQTT Edge Node.
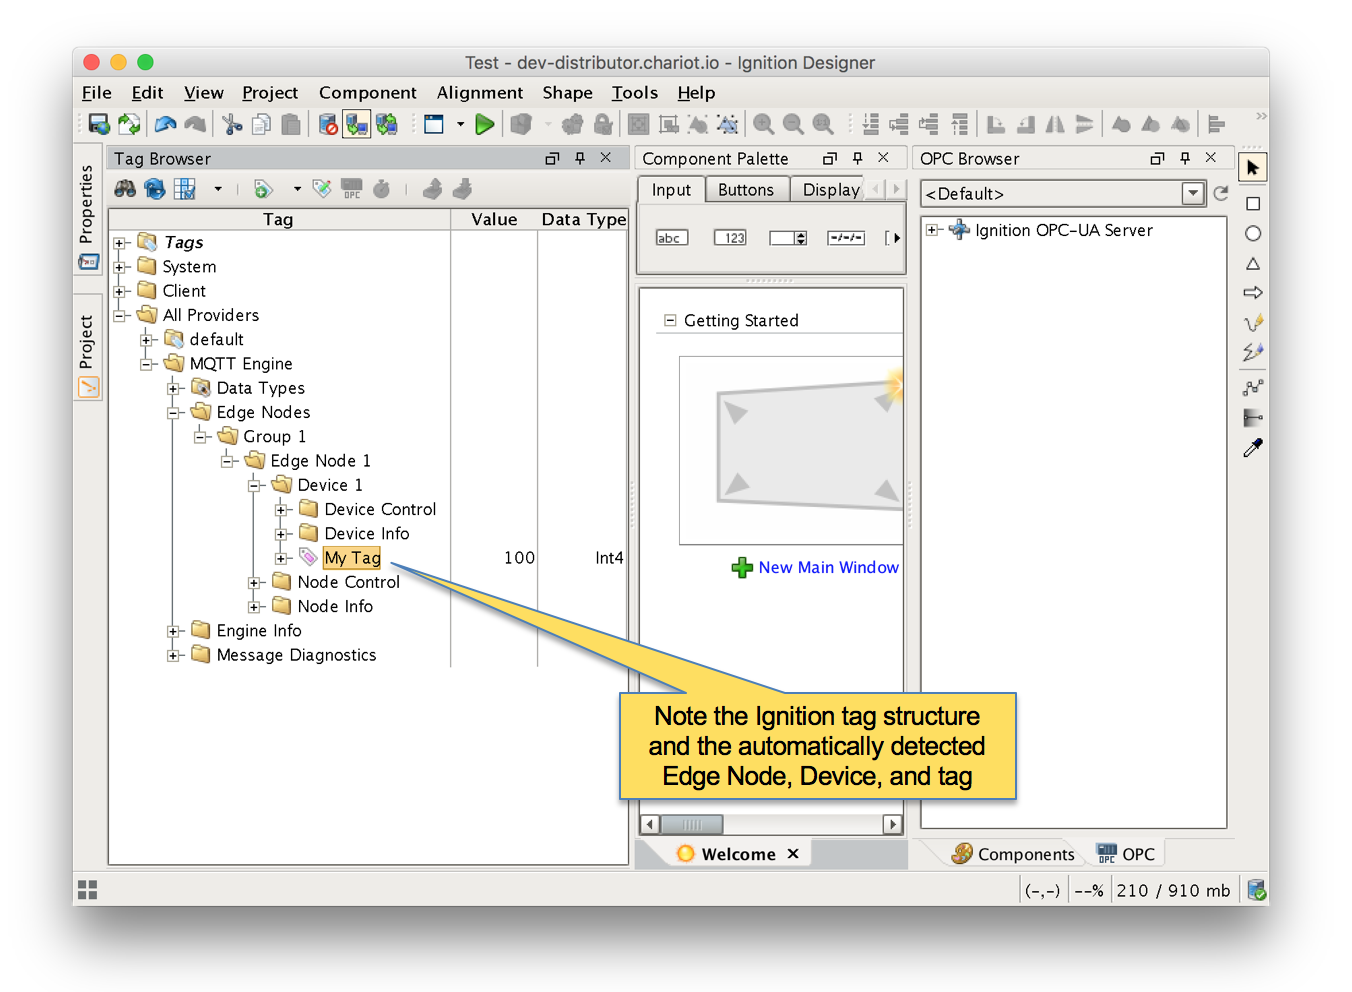 Image Modified
...