![]()
Contents
Cirrus Link Resources
Chariot MQTT Server v1 (previous version)![]()
Cirrus Link Modules for Ignition![]()
Contact Us (Sales/Support)![]()
Forum![]()
![]()
Chariot MQTT Server v1 (previous version)![]()
Cirrus Link Modules for Ignition![]()
Contact Us (Sales/Support)![]()
Forum![]()
Before being able to install and set up the Chariot MQTT Server you must have a Microsoft Azure account. If you do not already have one you can create one here.
This process covers installing the Chariot MQTT Server into an subscription as a VM instance.
Chariot is installed through the Azure Marketplace as a Virtual Machine offering. Begin by logging into the Azure Portal https://portal.azure.com then navigate to the Azure Marketplace. After doing so, you will see something similar to what is shown below.
...
Click the blue 'Create' button near the top of the screen. This will bring up the following Azure VM wizard to guide you through the Chariot MQTT Server VM creation.
| Tip |
|---|
If the subscription is a Microsoft CSP (Cloud Solution Provider) created subscription, the CSP Tenant ID must be provided to CirrusLink to be added to the CSP whitelist on the offering. The Chariot MQTT Server will fail to deploy with a subscription error if this has not been completed. To get the Tenant ID:
|
| Note |
|---|
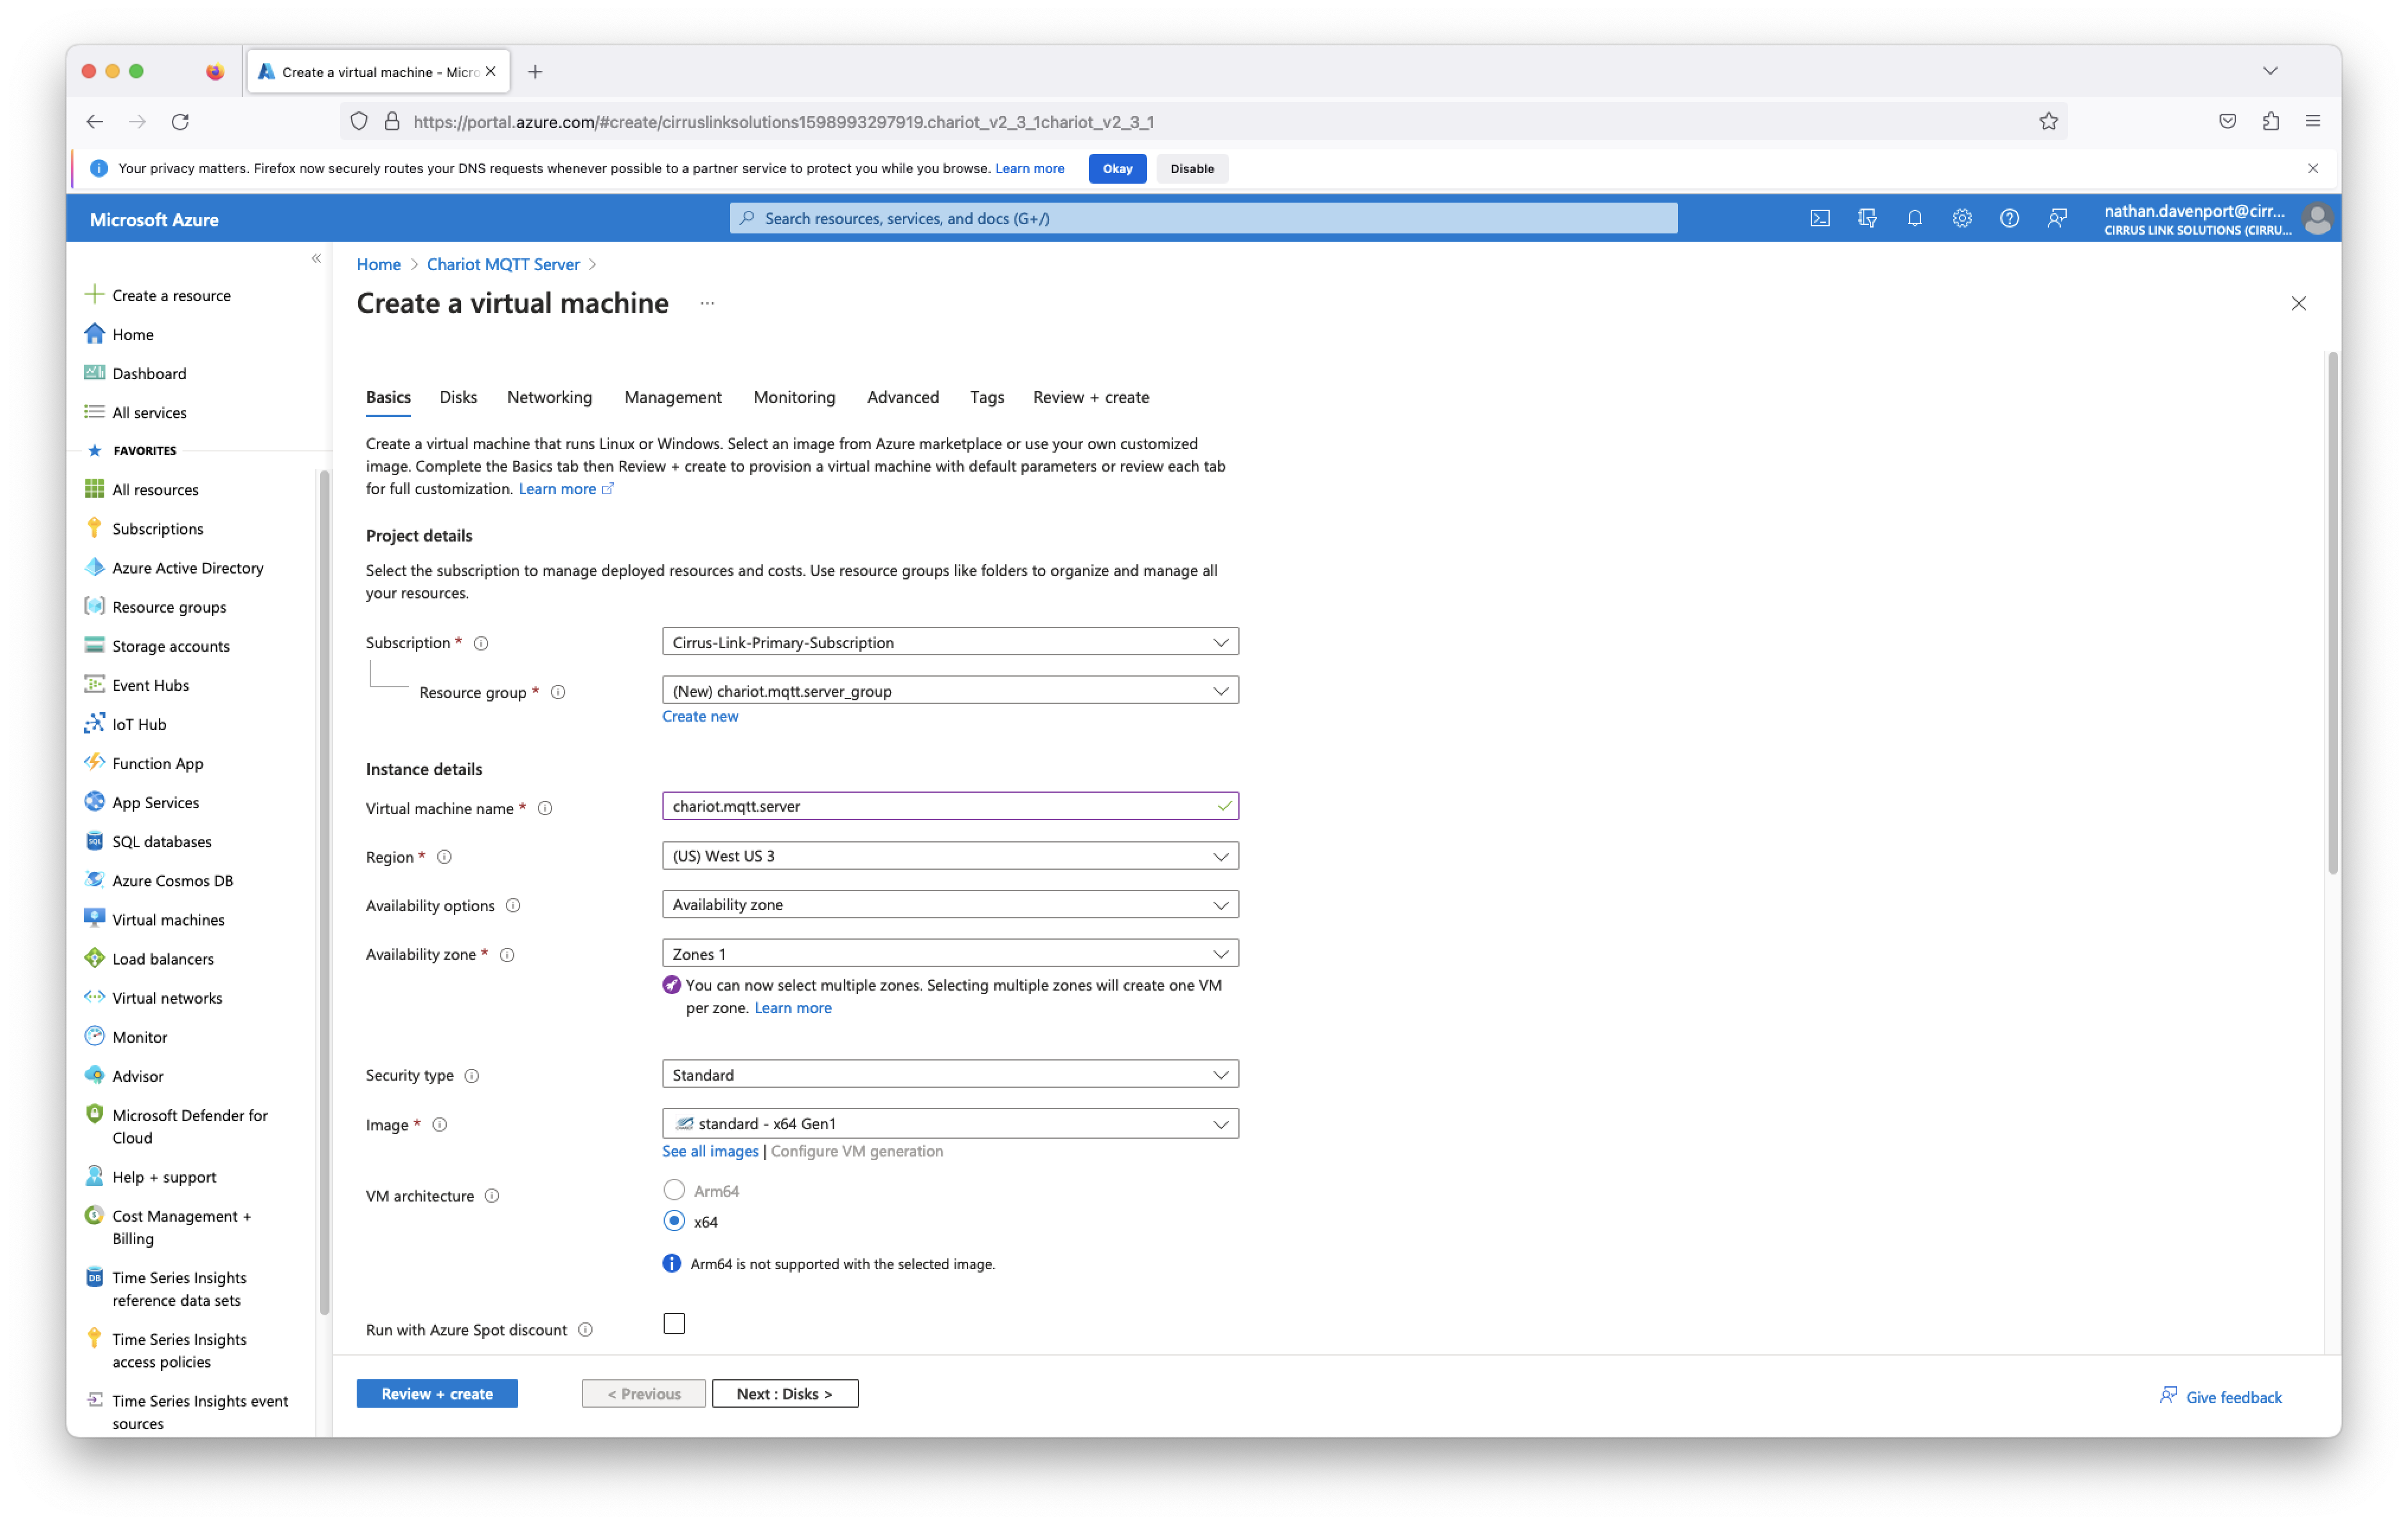
| On the top portion of the Basics step, make sure to set Security type to Standard and the VM Image named standard - x64 Gen1 with with the Chariot logo next to it. This will install the Cirrus Link provided Ubuntu Linux VM image with the Chariot MQTT Server software preloaded. You do not have the option to chose another OS type via any other VM image provided. |
...
Configure anything else that may be required in the remaining VM wizard steps to complete your Chariot MQTT Server deployment. Generally, nothing must be set here given that the user you are logged in as has the permissions to create everything that will created as part of the Cloud Formation deployment. Also, the 'Roll back all stack resources' should be selected in case there is a failure in deployment. This will ensure no resources get created and left in place should any portion of the stack creation fail. After setting any additional configuration here, click the 'Next' button in the lower right corner. This will bring up the review screen as shown below.By default, port 22 will be open on the VM so one can SSH into the instance when required. You will need to configure additional Networking rules on the Chariot VM instance to allow connections to Chariot's web UI (default port is 8080), MQTT (1883) and MQTTS (8883) ports.
More information on configuring the Chariot MQTT Server can be found here.
Information on accessing the EC2 Chariot MQTT Server VM instance via SSH can be found here.
For configuration details, please see: Chariot MQTT Server: Configuration