![]()
Contents
Cirrus Link Resources
Cirrus Link Website![]()
Contact Us (Sales/Support)![]()
Forum![]()
Cirrus Link Modules Docs for Ignition 7.9.x![]()
Inductive Resources
Ignition User Manual![]()
Knowledge Base Articles![]()
Inductive University![]()
Forum![]()
![]()
Cirrus Link Website![]()
Contact Us (Sales/Support)![]()
Forum![]()
Cirrus Link Modules Docs for Ignition 7.9.x![]()
Ignition User Manual![]()
Knowledge Base Articles![]()
Inductive University![]()
Forum![]()
...
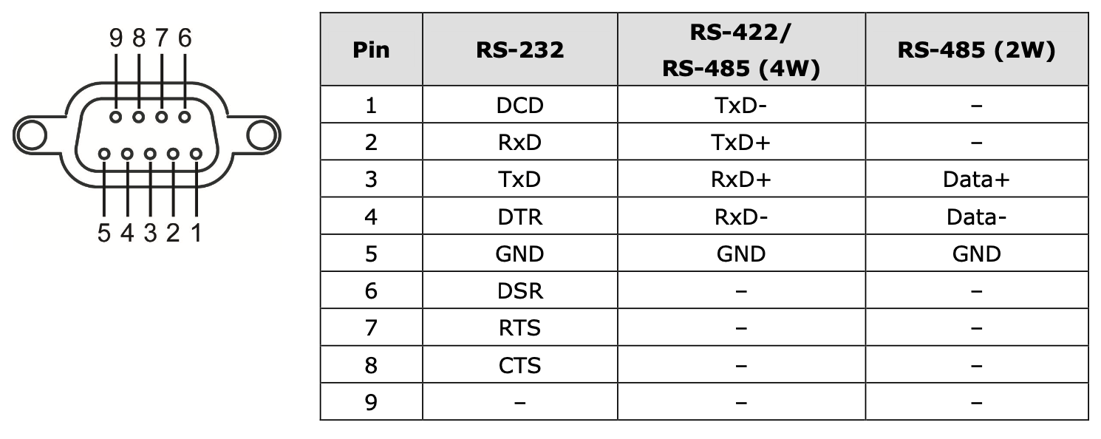
Each port supports three serial interfaces: RS-232, RS-422 and RS-485 (both 2 and 4 wire) with the pinout shown below:
...
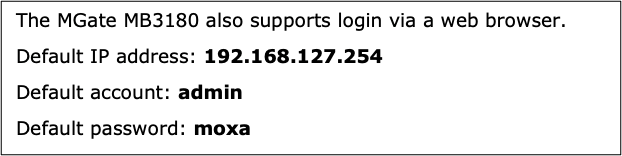
Moxa provide a Windows based utility that can be used to connect to the MGate and aid in configuring the unit. But the MGate also provides a native web UI that provides the same functionality from any operating system. Out of the box the MGate will have the following default TCP/IP address and default Account and Passwords:
Temporarily set your computer’s Ethernet domain to the 192.168.127.xxx domain. Once you have done that you should be able to , open a web browser and then browse to http://192.168.127.254. That should will result in the following web page to appearbeing displayed:

After you enter the default admin/moxa credentials you will be prompted to enter a new password.
...
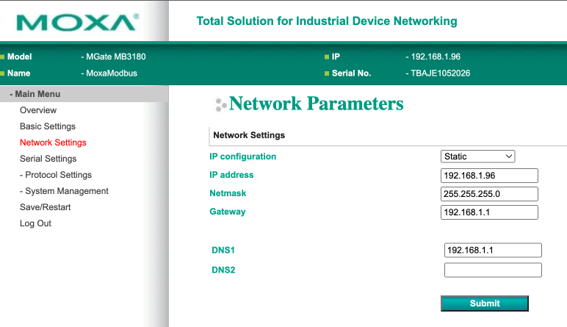
Once you have logged into the MGate unit, navigate to the “Network Parameter” tab within the web UI. The MGate unit provides for both DCHP as well as STATIC IP settings. Because we want the MGate to reliably appear at a known IP address after things like power outages and resets, it is best to configure the device with a known STATIC IP address.
| Note |
|---|
| Once we get a static IP assigned to the Moxa MGate unit, we can revert our computer from the Moxa default IP domain to it’s typical DHCP/fixed IP address. |
| Note |
|---|
| In most use cases you will now that to set the Ethernet interface for your computer back to the typical network settings it was originally using. The MGate Web UI will now be accessed thru the new TCP/IP address that you assigned. |
...