Prerequisites:
- Have a valid Microsoft Azure account. This can be set up here.
Overview:
Chariot MQTT Server is a MQTT 3.1.1 compliant MQTT server. It is capable of providing a functional replacement for MQTT Distributor in larger scale deployments. Like Inductive Automation's Ignition platform, it comes with a two hour re-settable trail period. It can also be set up with a license key from Cirrus Link to enable it permanently. Chariot MQTT Server provides a web based administration page for enabling and limiting user access to the MQTT server via an Access Control List (ACLs). Like MQTT Distributor it also supports TLS security and username/password authentication in addition to ACLs for user authorization.
Installation:
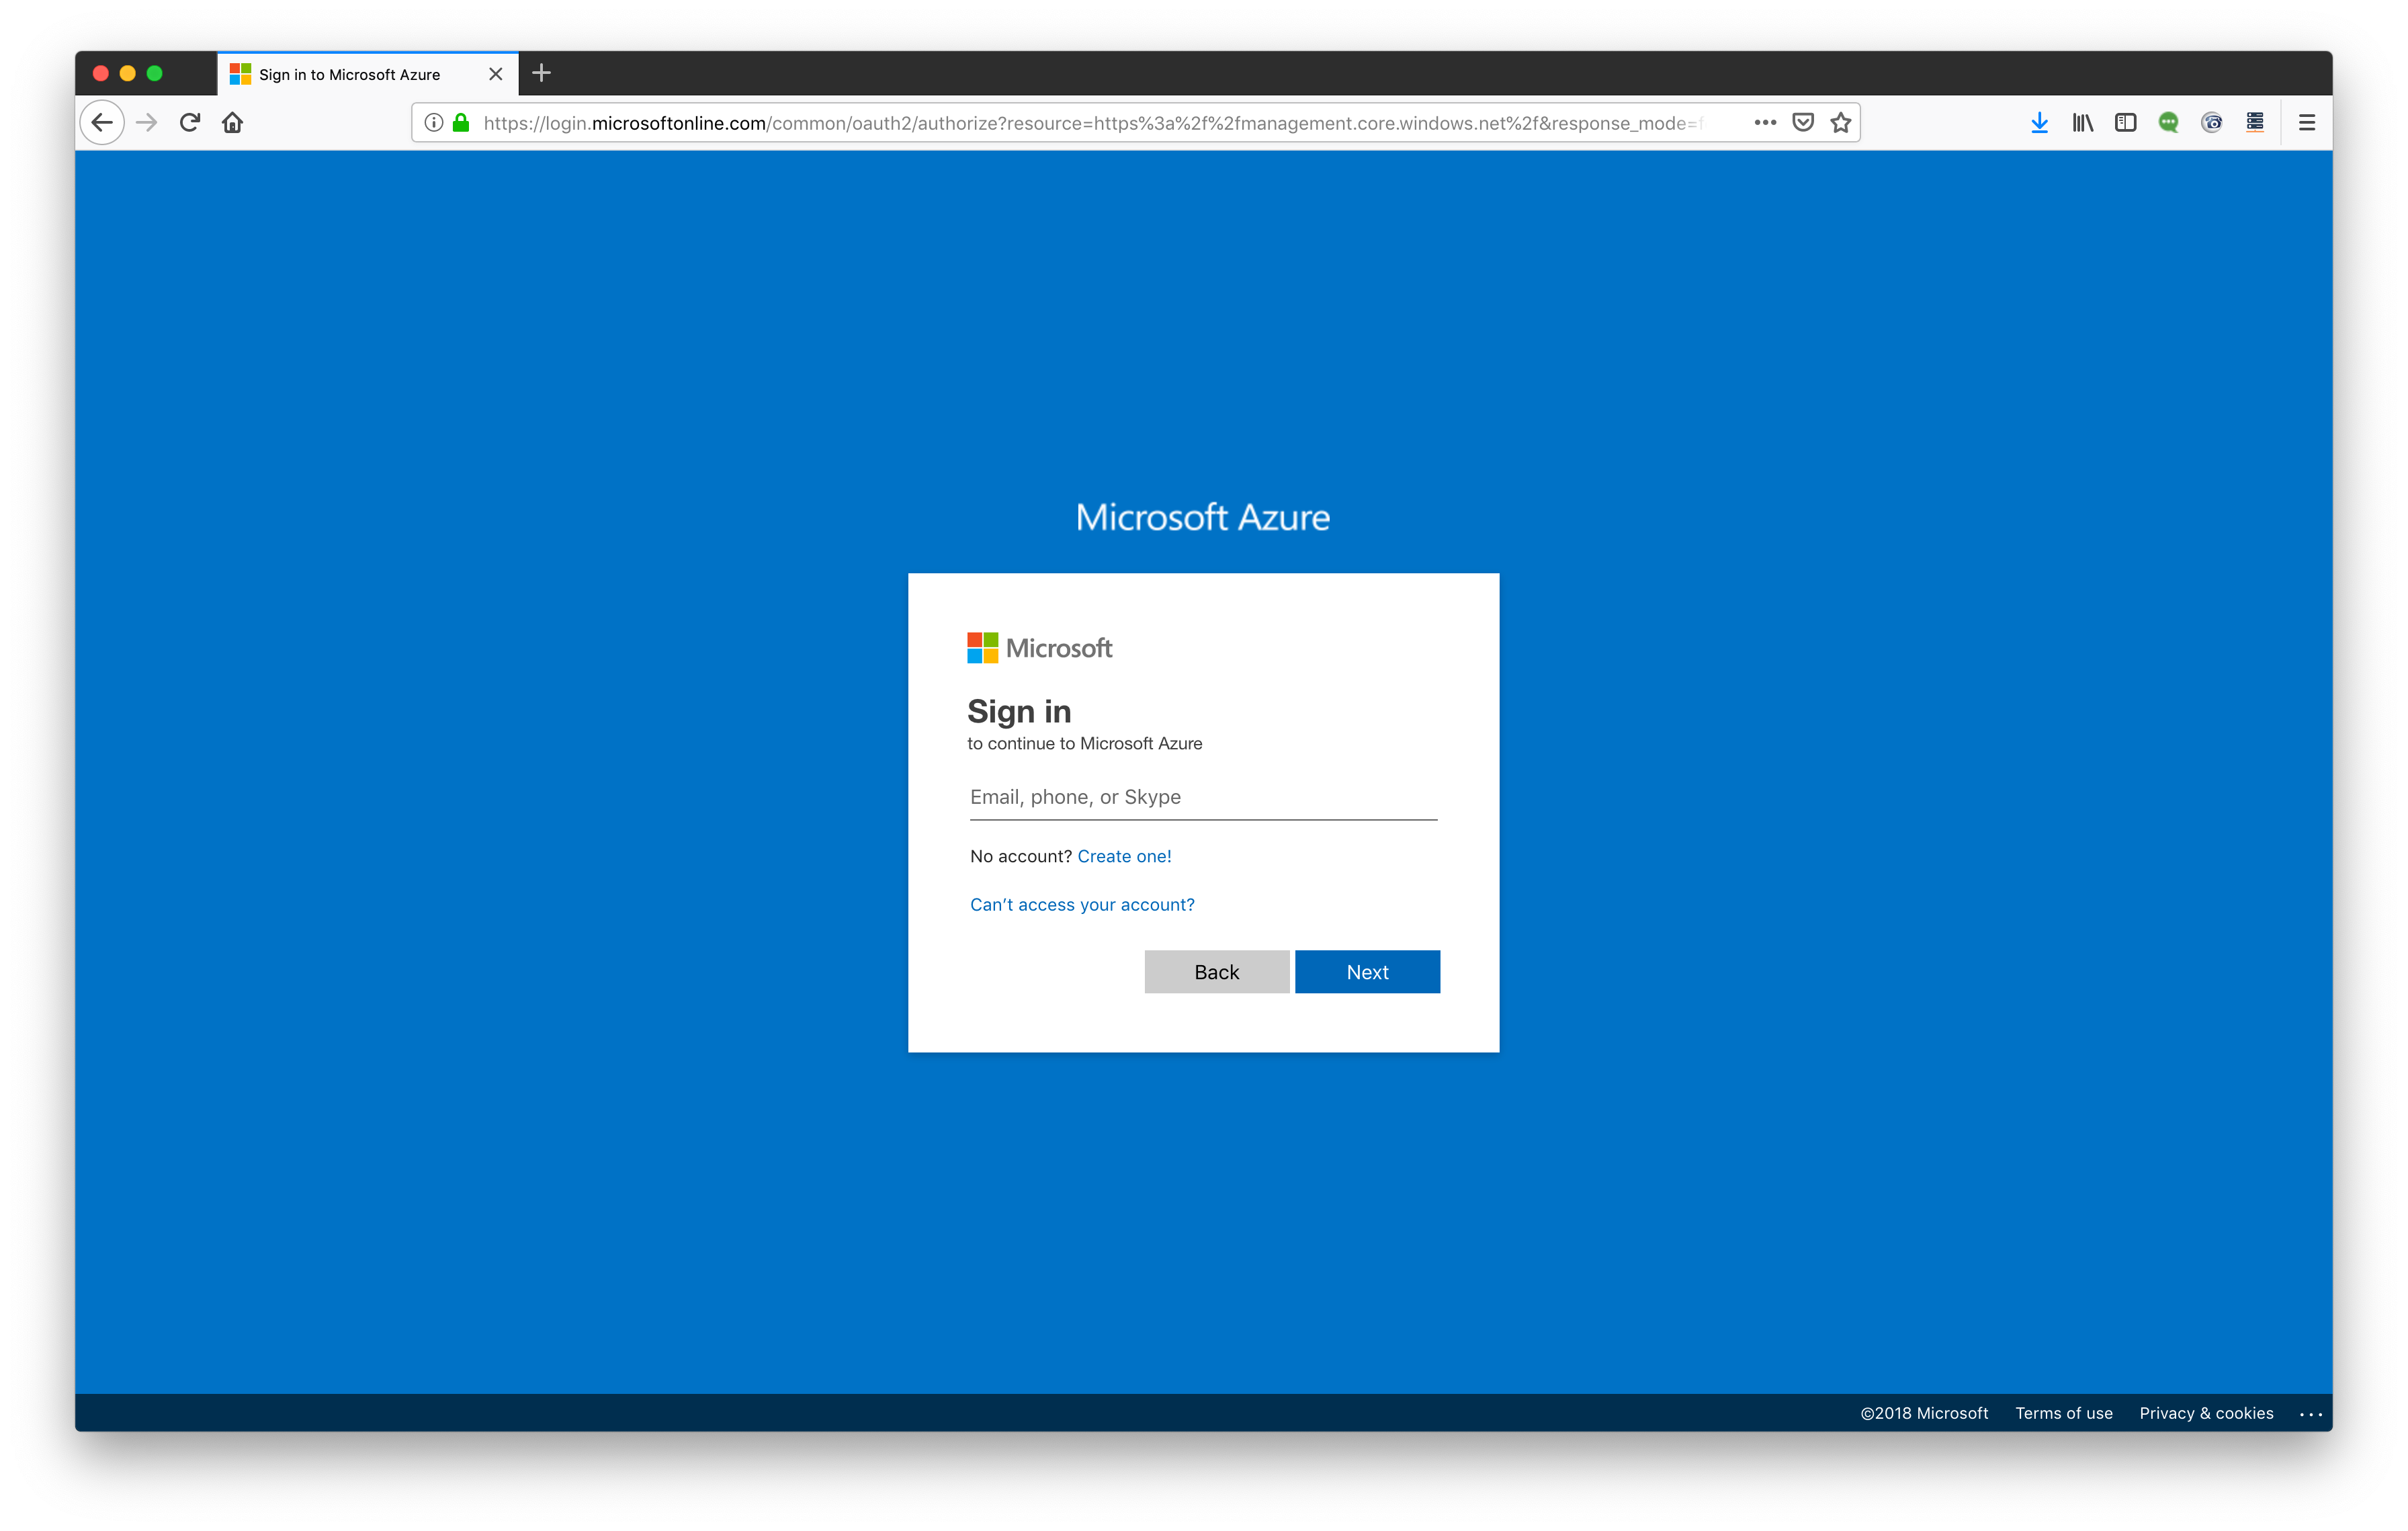
Browse to https://portal.azure.com/ and sign in.
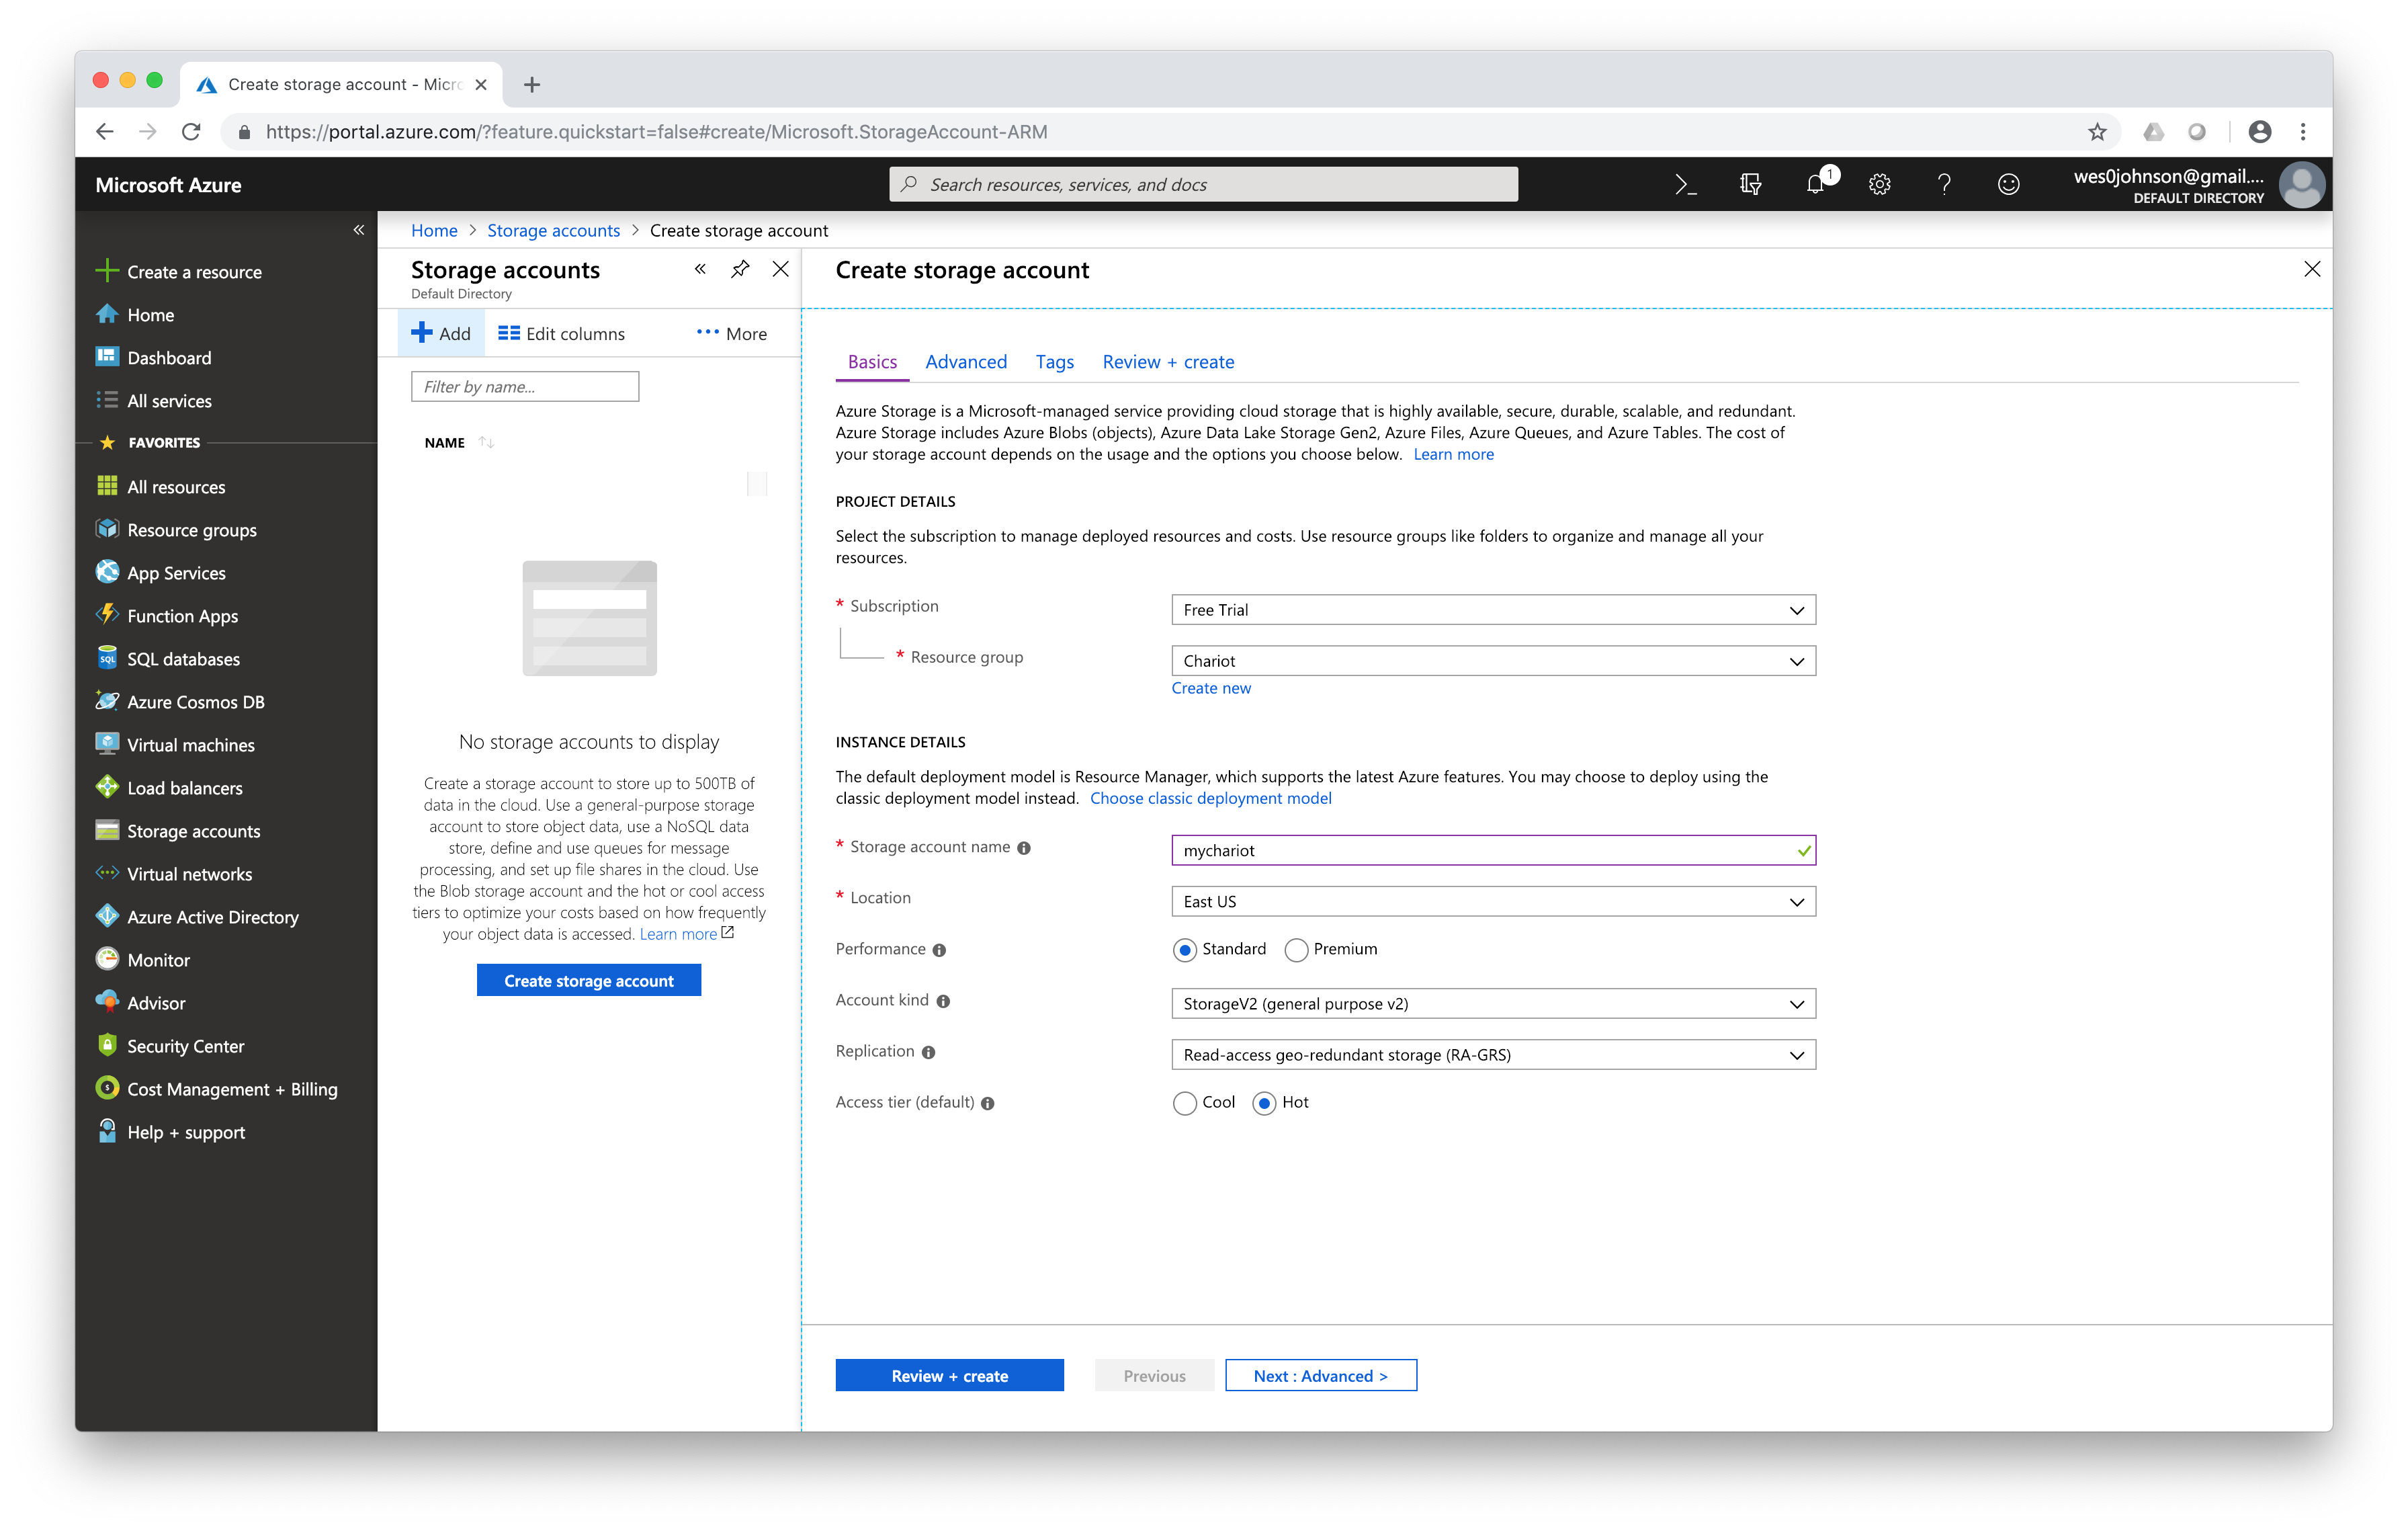
At this point, create a storage account to hold the VHD file. Do so by selecting storage accounts on the left panel. Set the parameters as shown below. The 'Storage account name' must be unique.
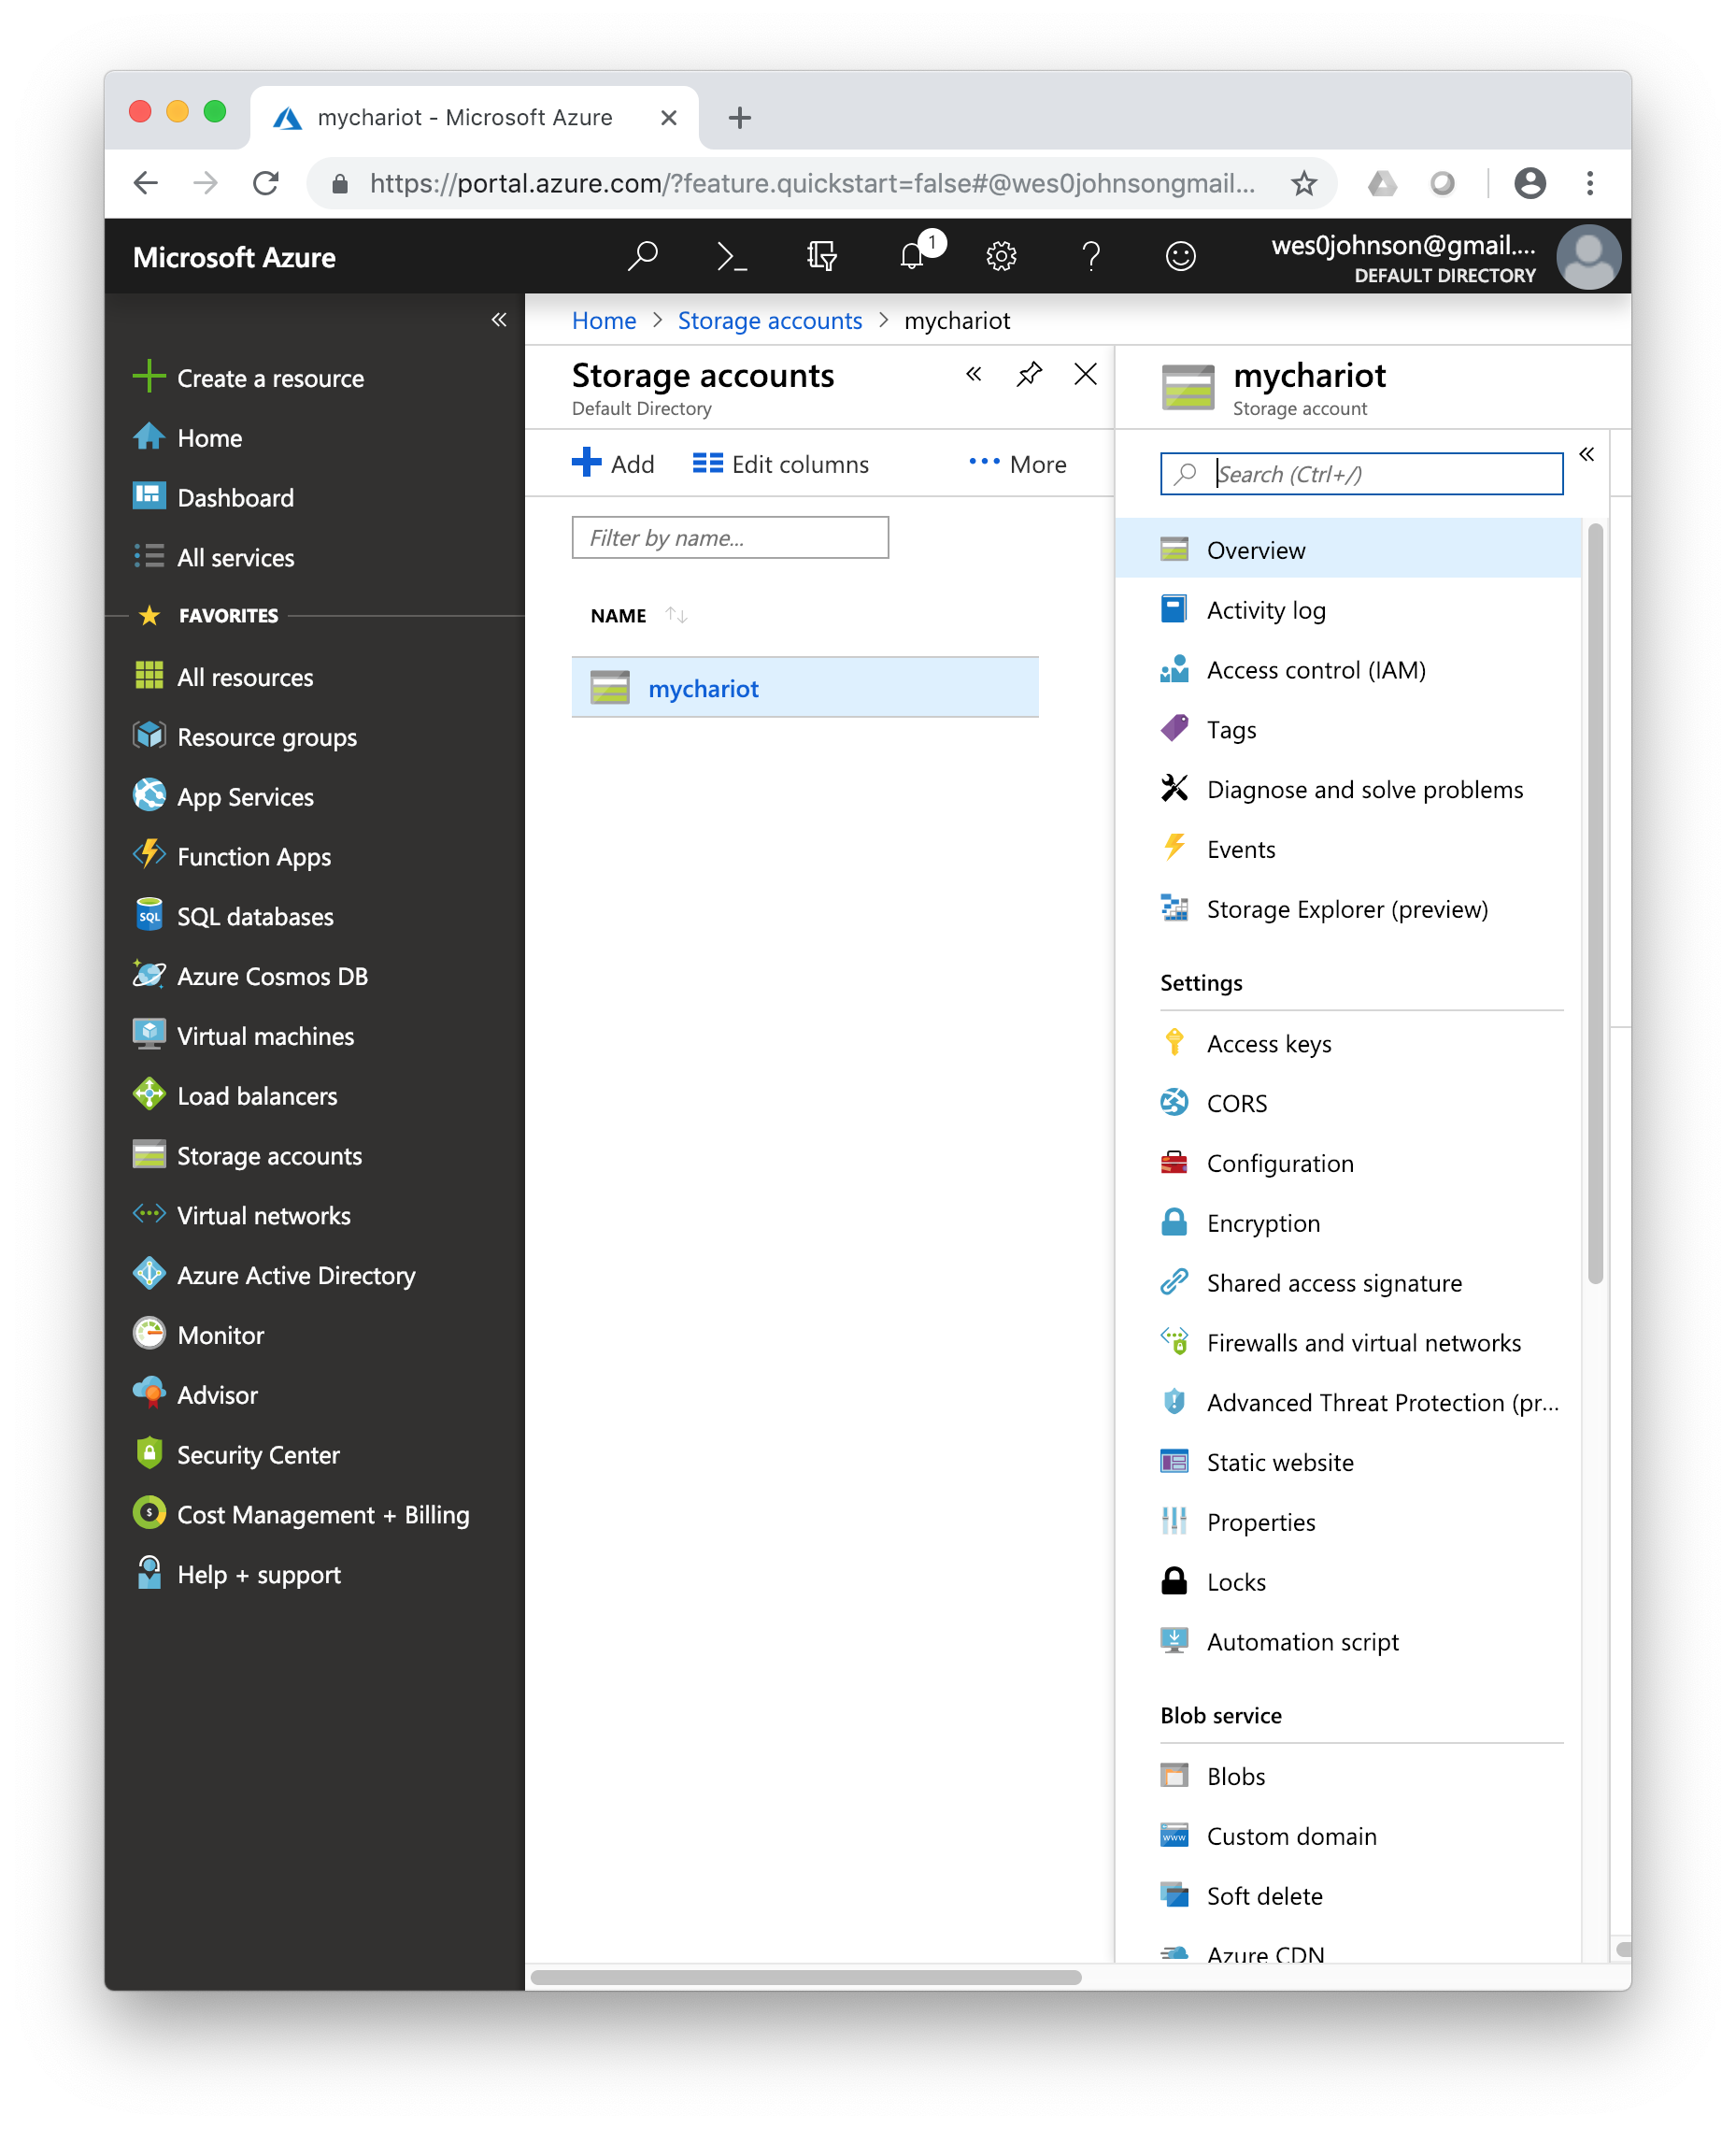
With the storage account made, select 'Blobs' under under the 'Blob service' section in the lower right as shown below.
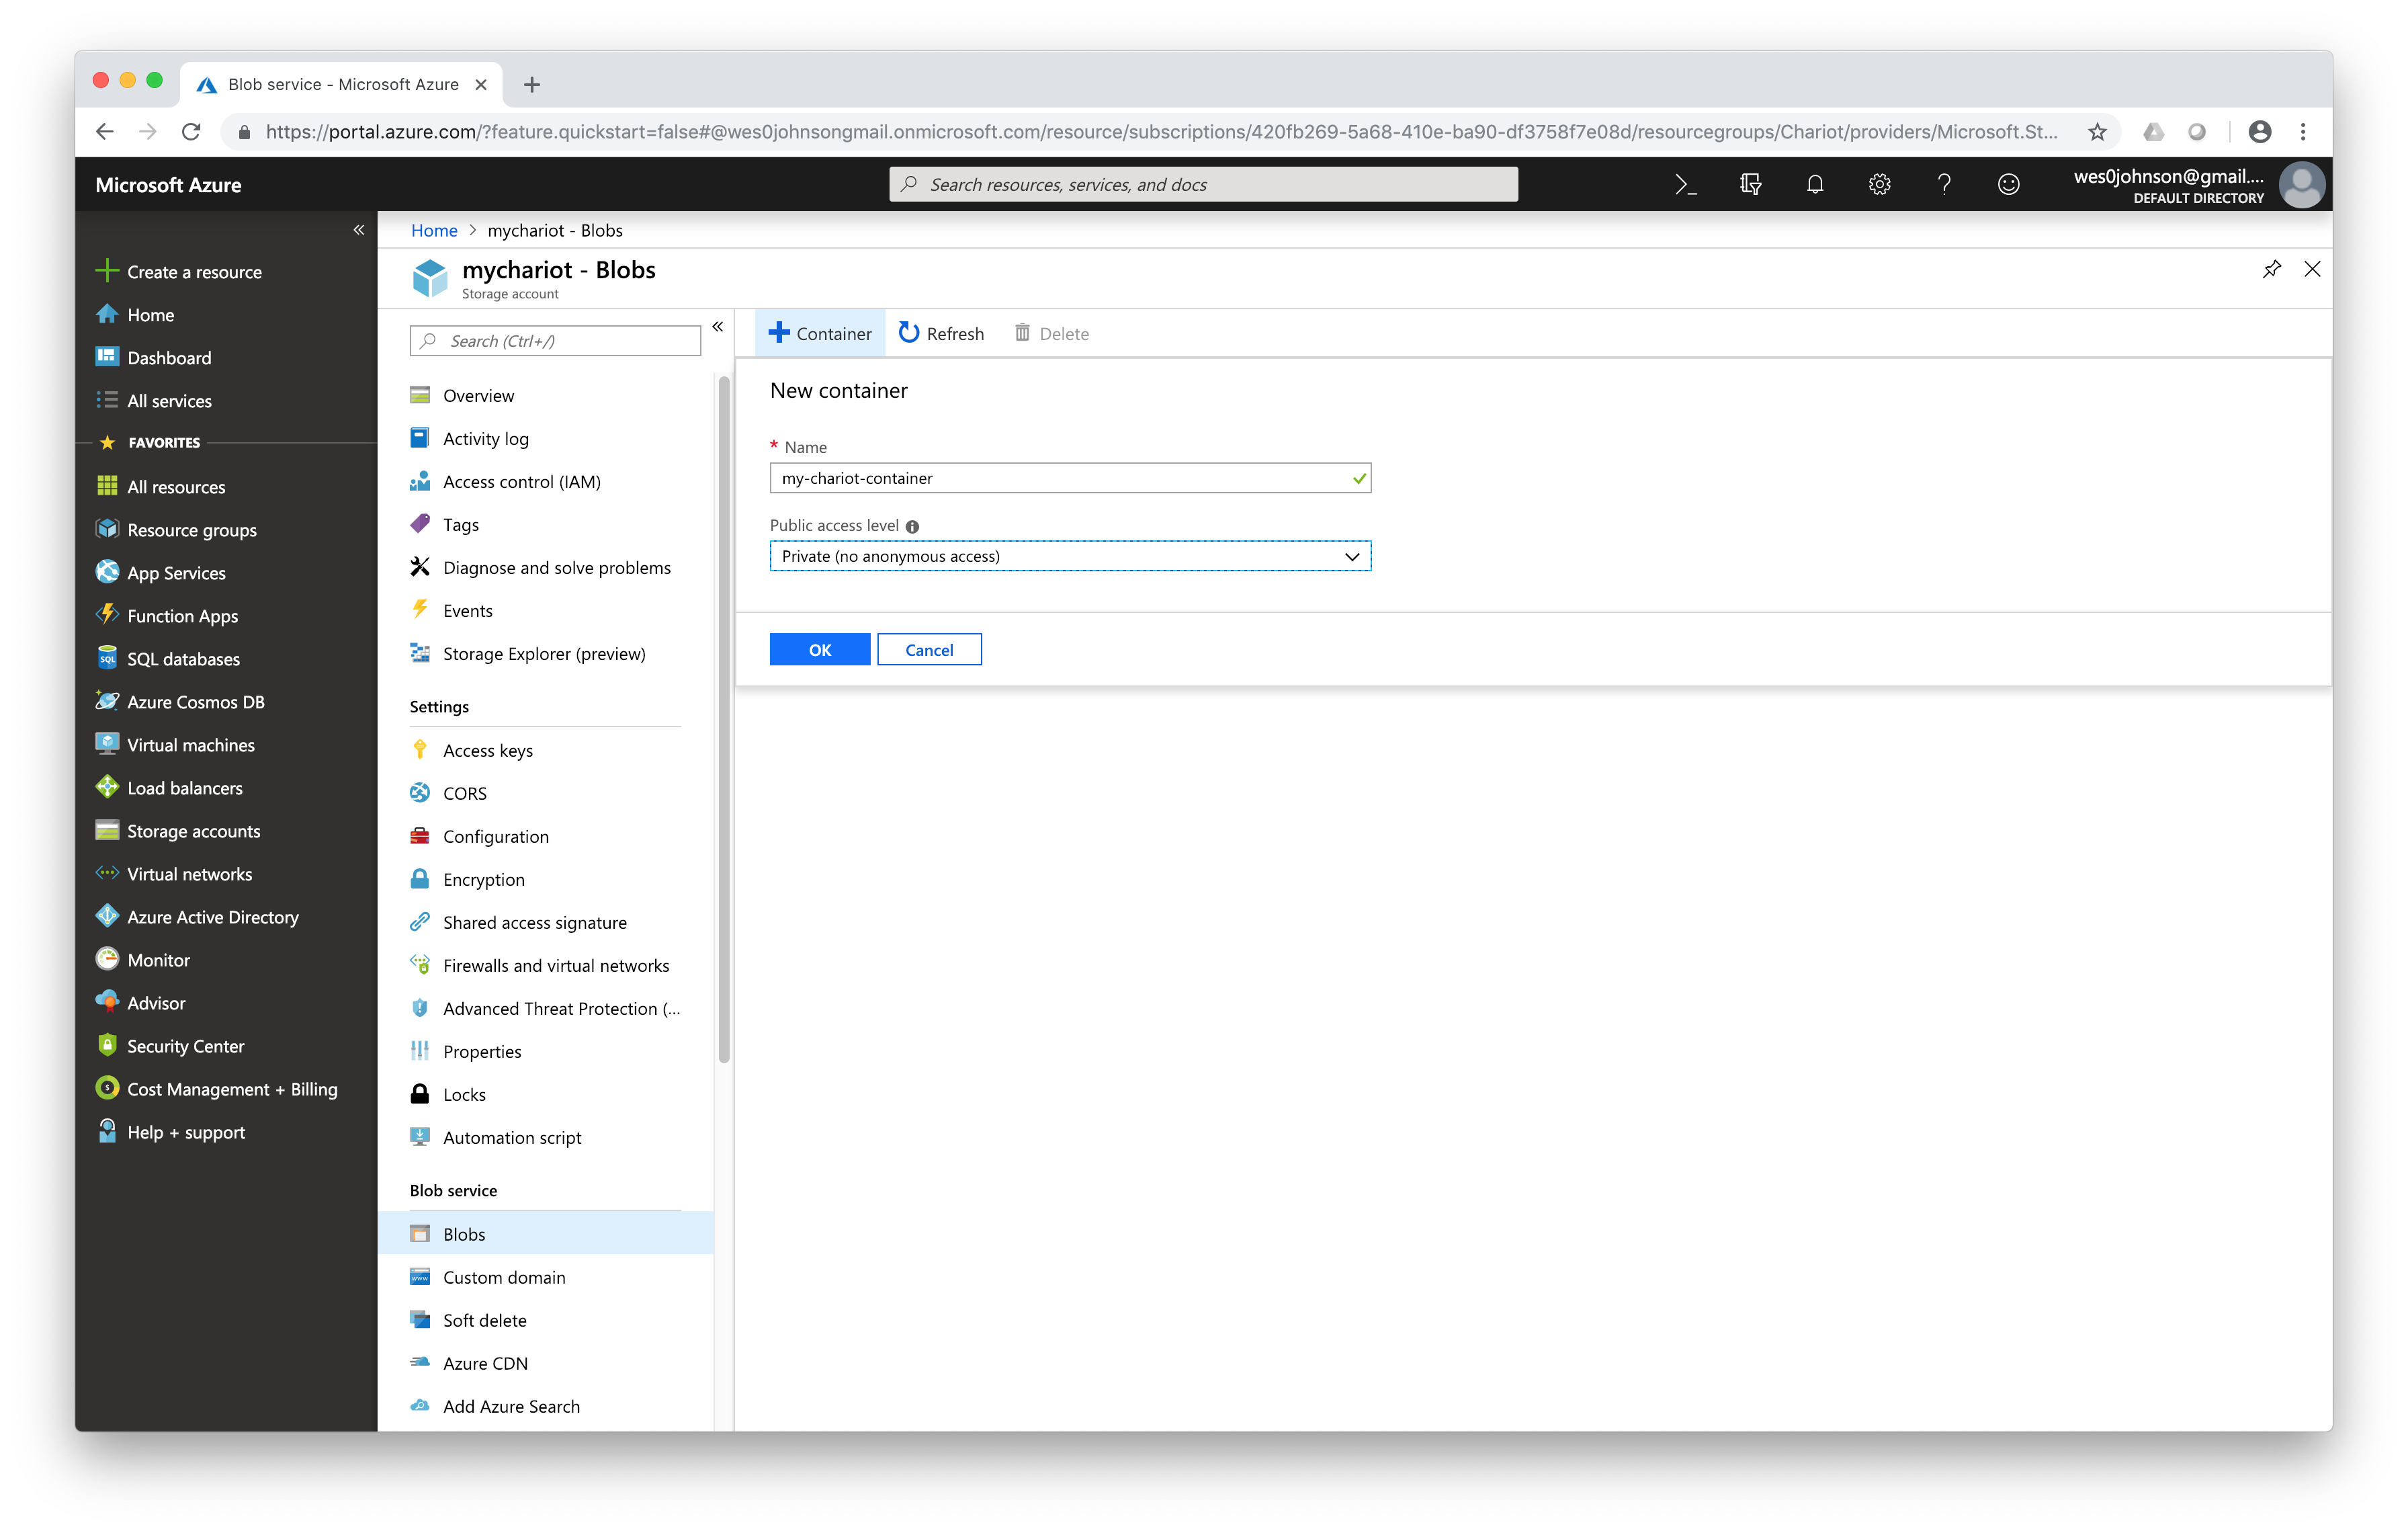
Now create a new container as shown below. This will be the container that holds the Chariot VHD file.
At this point you need to get the Chariot VHD file uploaded to your newly created container. The file is located here: https://chariotpublicblobs.blob.core.windows.net/chariot-public-blob-container/Chariot_v1.2.3_20190805.vhd
There are a couple of ways to perform the copy:
- Use the Azure CLI Tools to copy the Chariot VHD in Azure to your Azure container.
- Install the Azure CLI tools on your machine from here.
Log into the Azure Portal and create an Azure storage account, drill down into the Blobs service through the overview page and create a blob container to hold the VHD image. Take note of the storage account name and the blob container name.
Execute the az login command to log into Azure via the CLI. Follow the directions and input your Azure credentials.
az login
Execute the az copy command to copy the VHD file from the Cirrus Link owned storage account to your storage account created above.
az storage blob copy start --account-name <your_storage_account_name> --destination-blob <your_vhd_destination_file_name> --destination-container <your_blob_container_name> --source-uri https://chariotpublicblobs.blob.core.windows.net/chariot-public-blob-container/Chariot_v1.2.3_20190805.vhd
Execute the az show command to check the status of the copy operation.
az storage blob show --account-name <your_storage_account_name> -n <your_vhd_destination_file_name> -c <your_blob_container_name>
- Manually download the file here and then upload it as a 'page blob' to your container via the Azure Portal.
- Note this is a 30GB file and will take time to download and upload. Make sure your bandwidth and disk resources are sufficient before attempting this method.
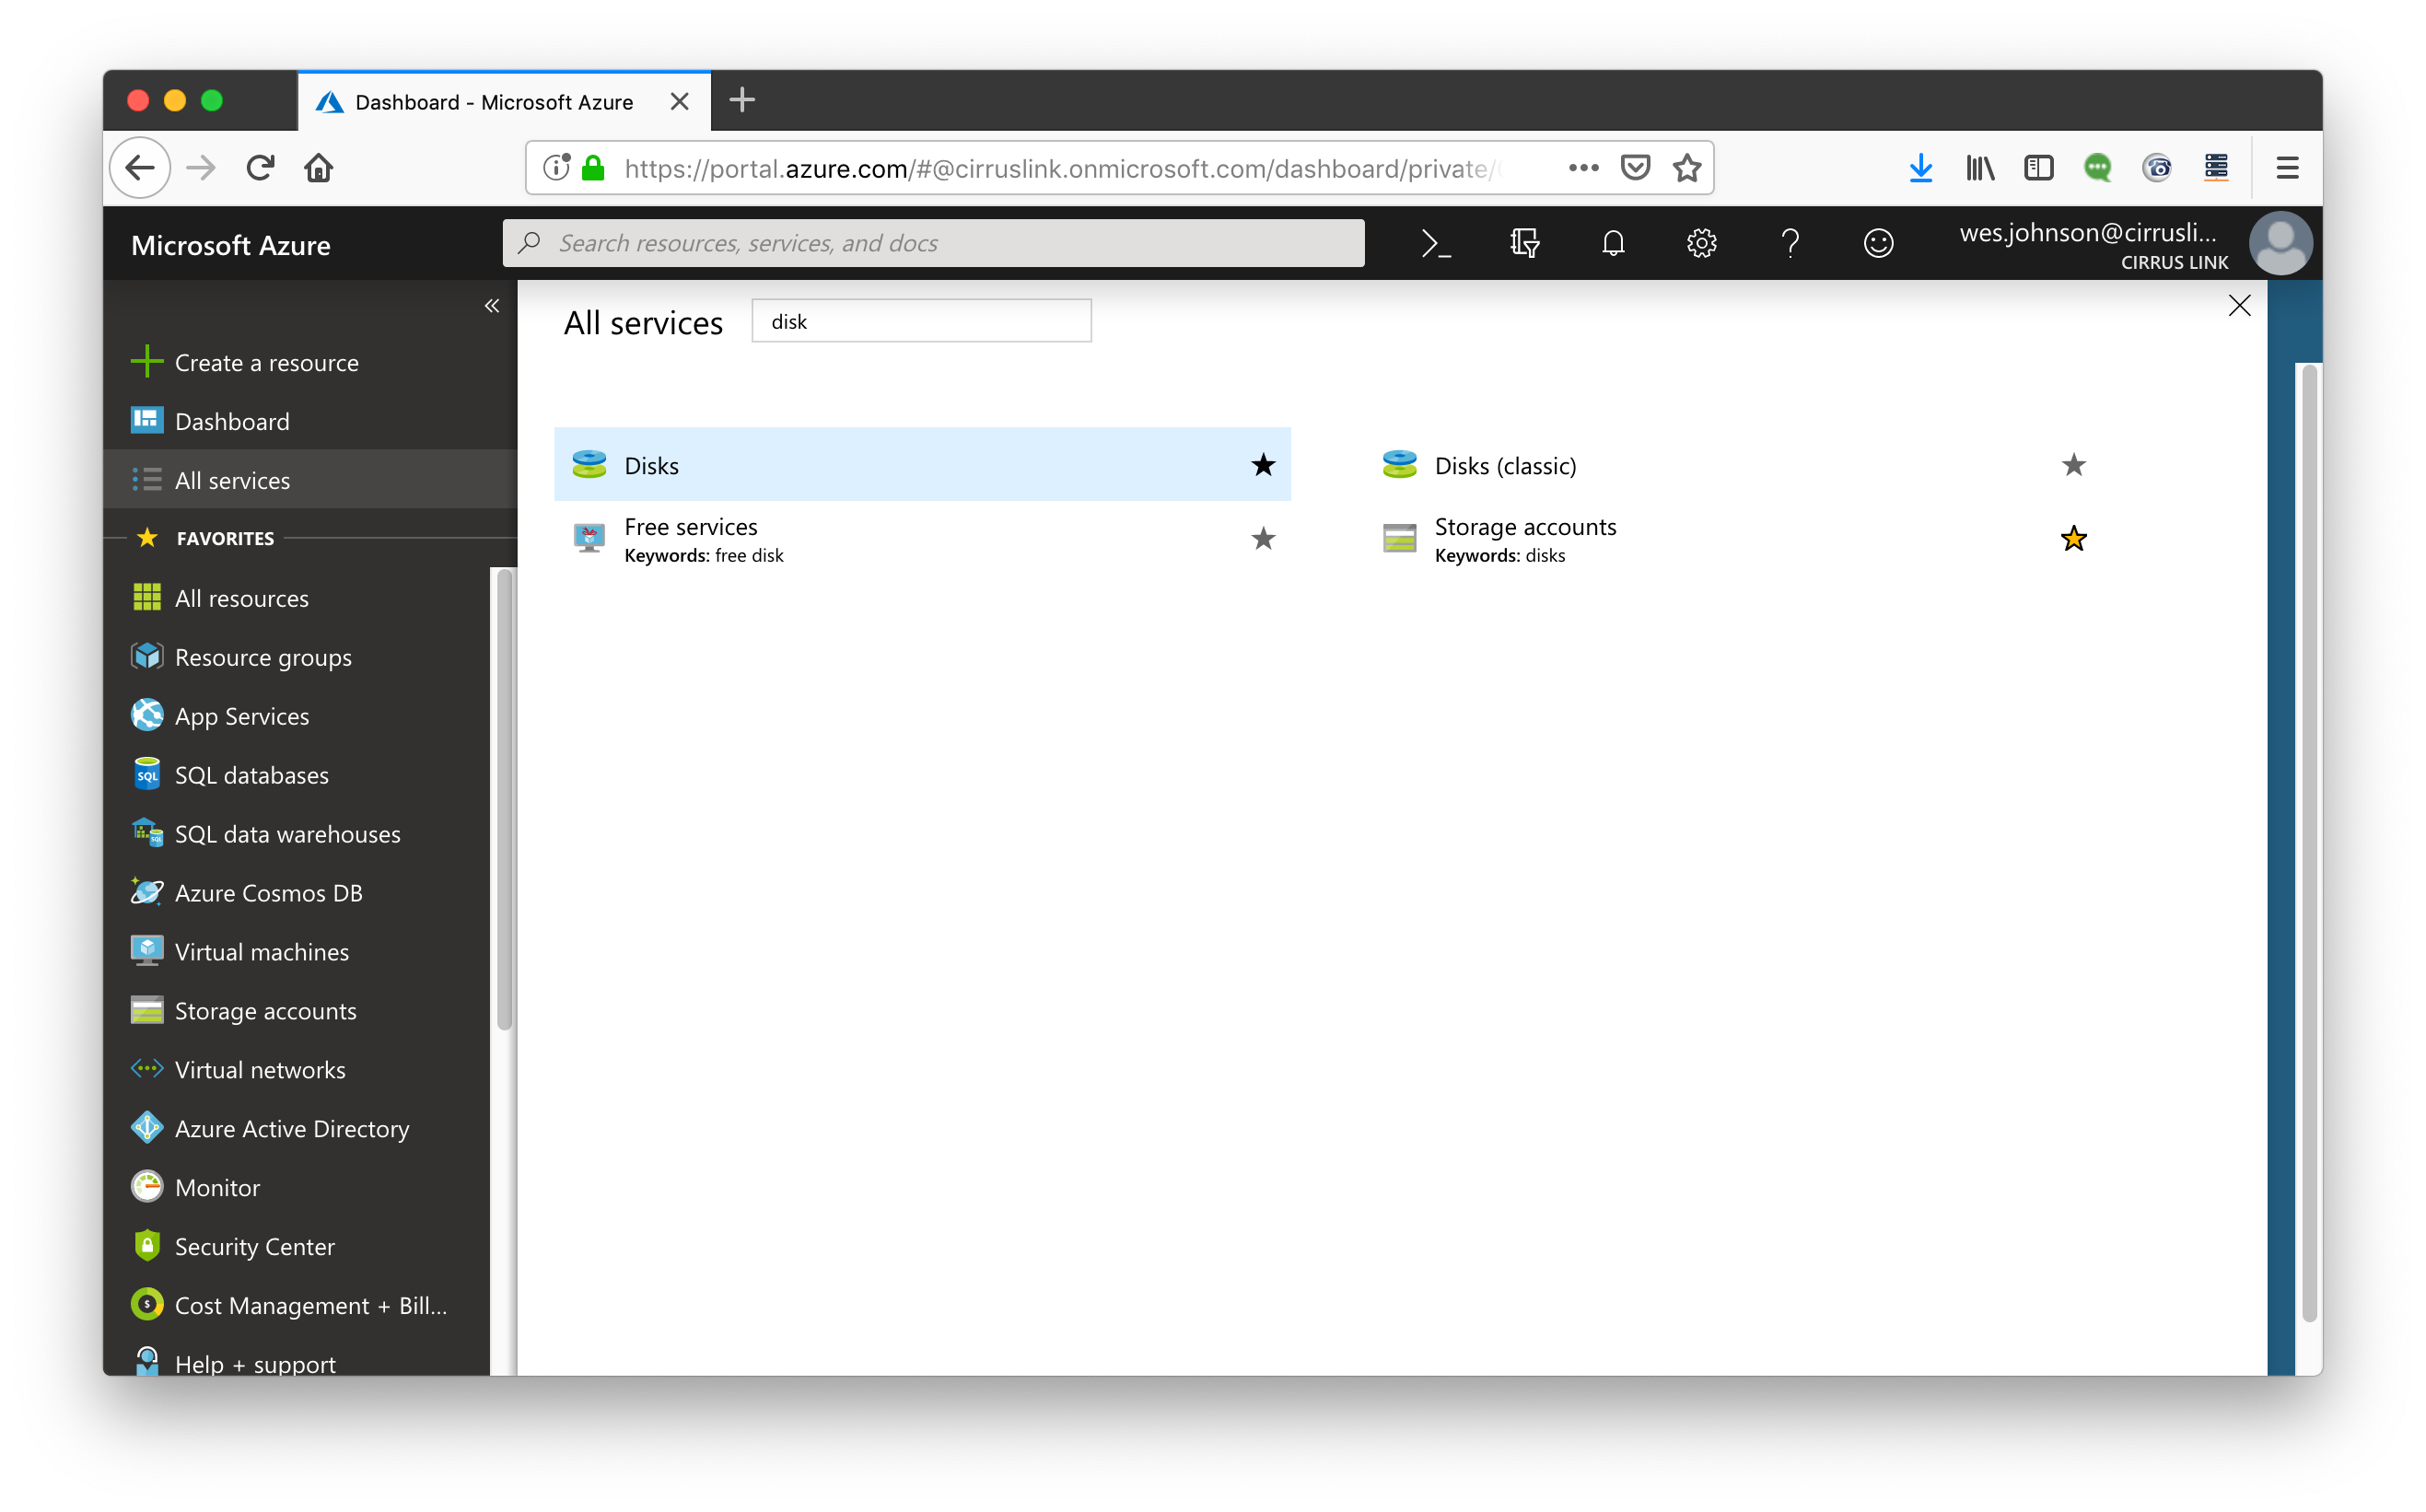
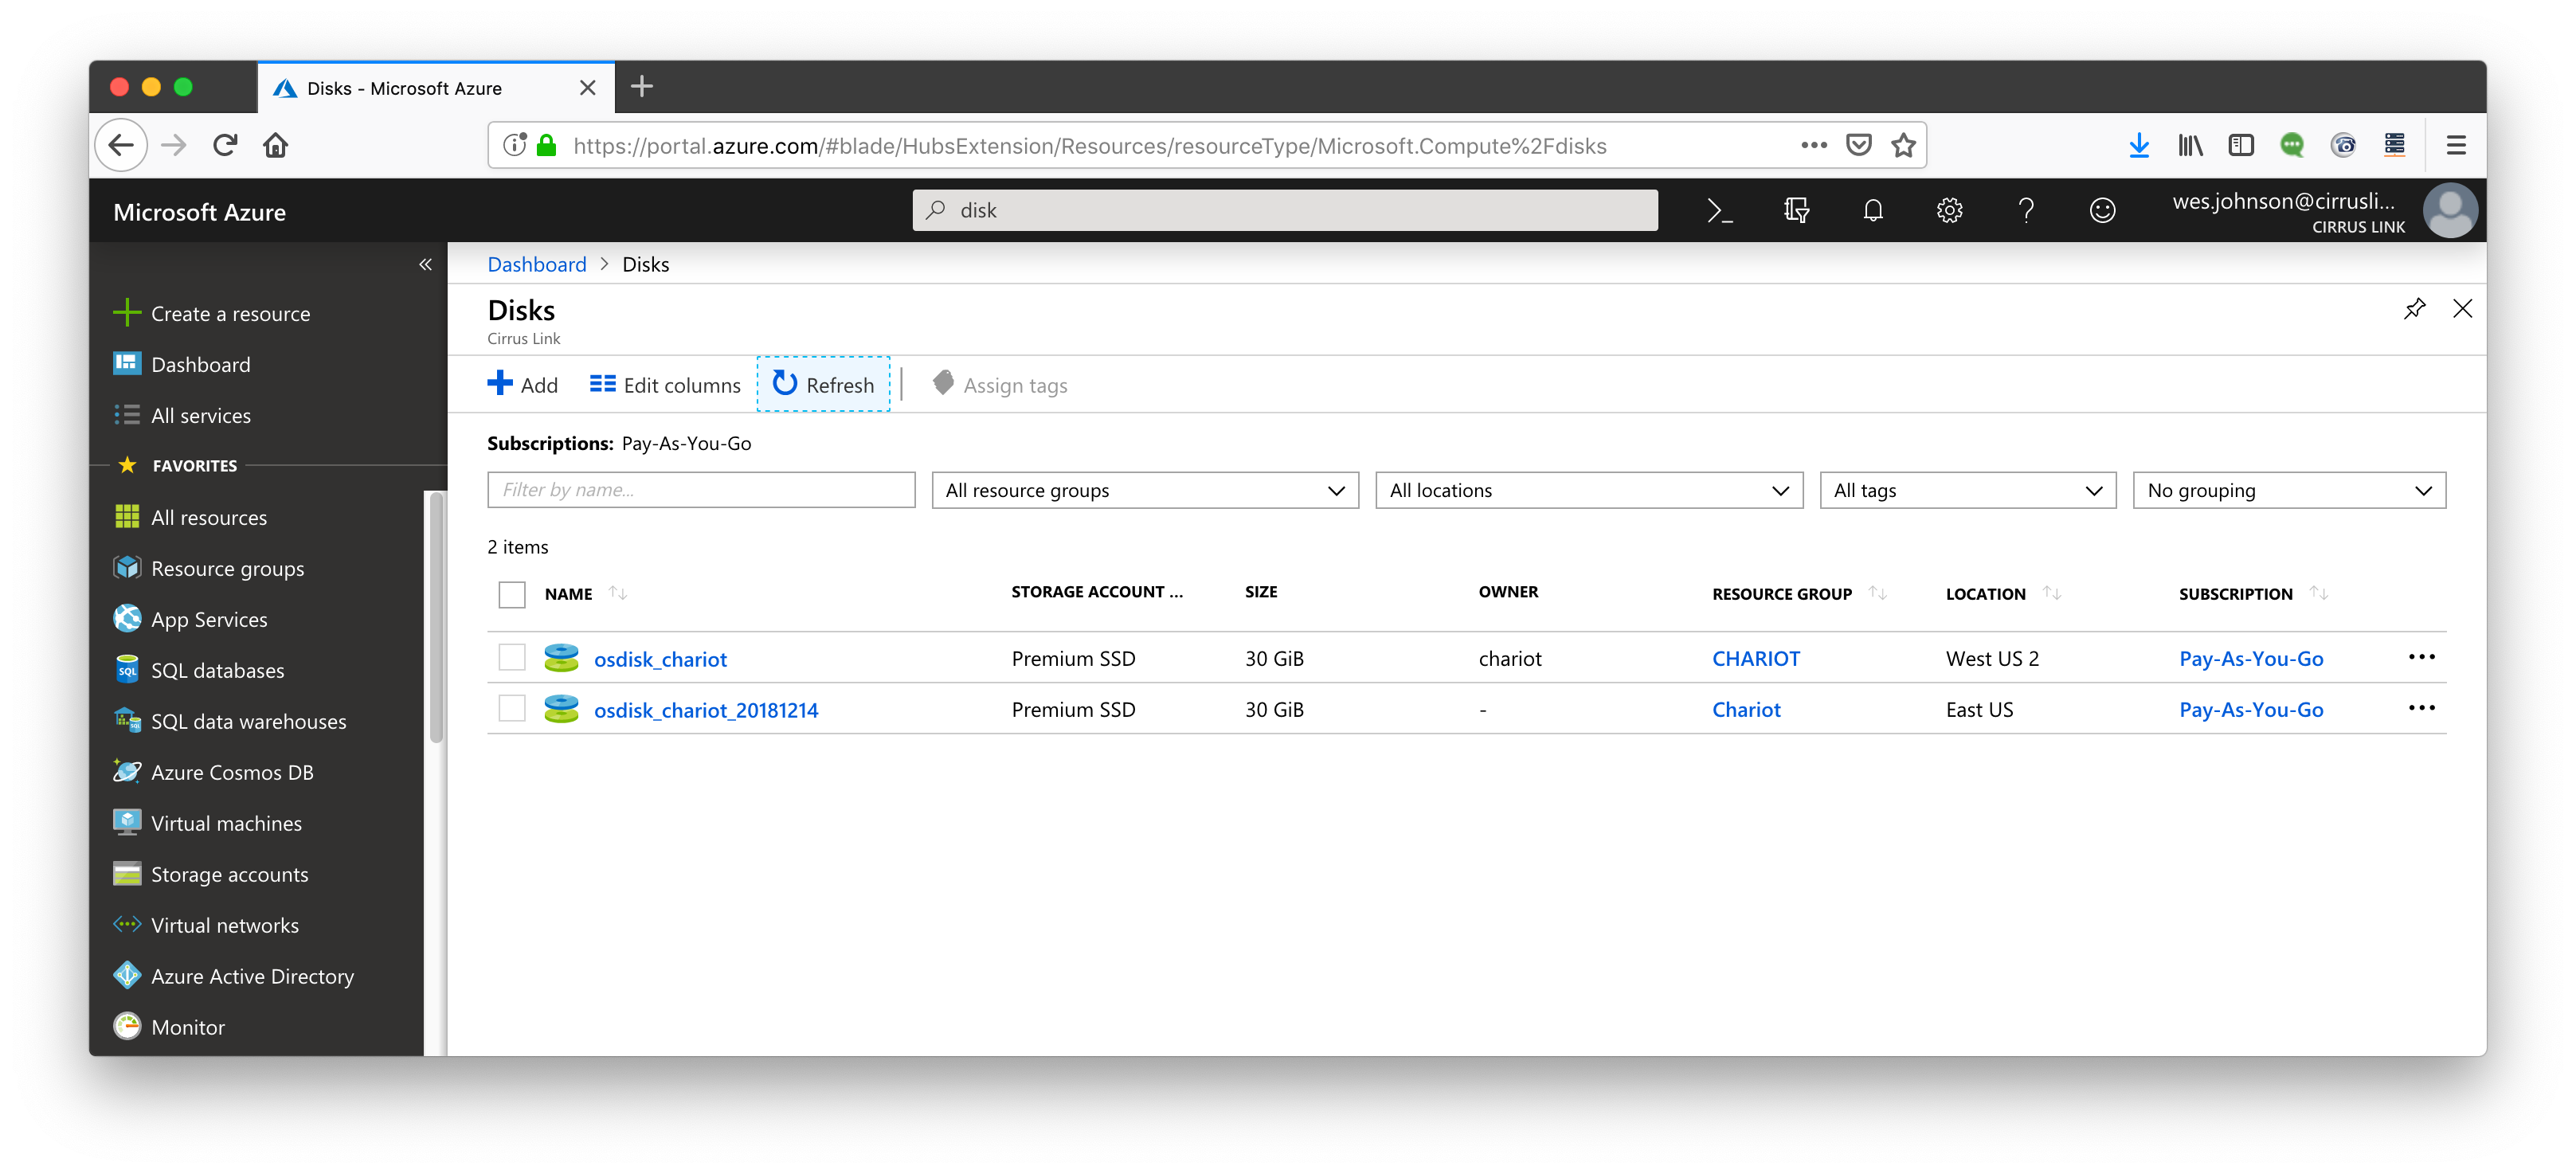
Once the file is copied, in the upper left corner click 'All Services'. Then type 'disk' in the filter box and then select the 'Disks' option as shown below.
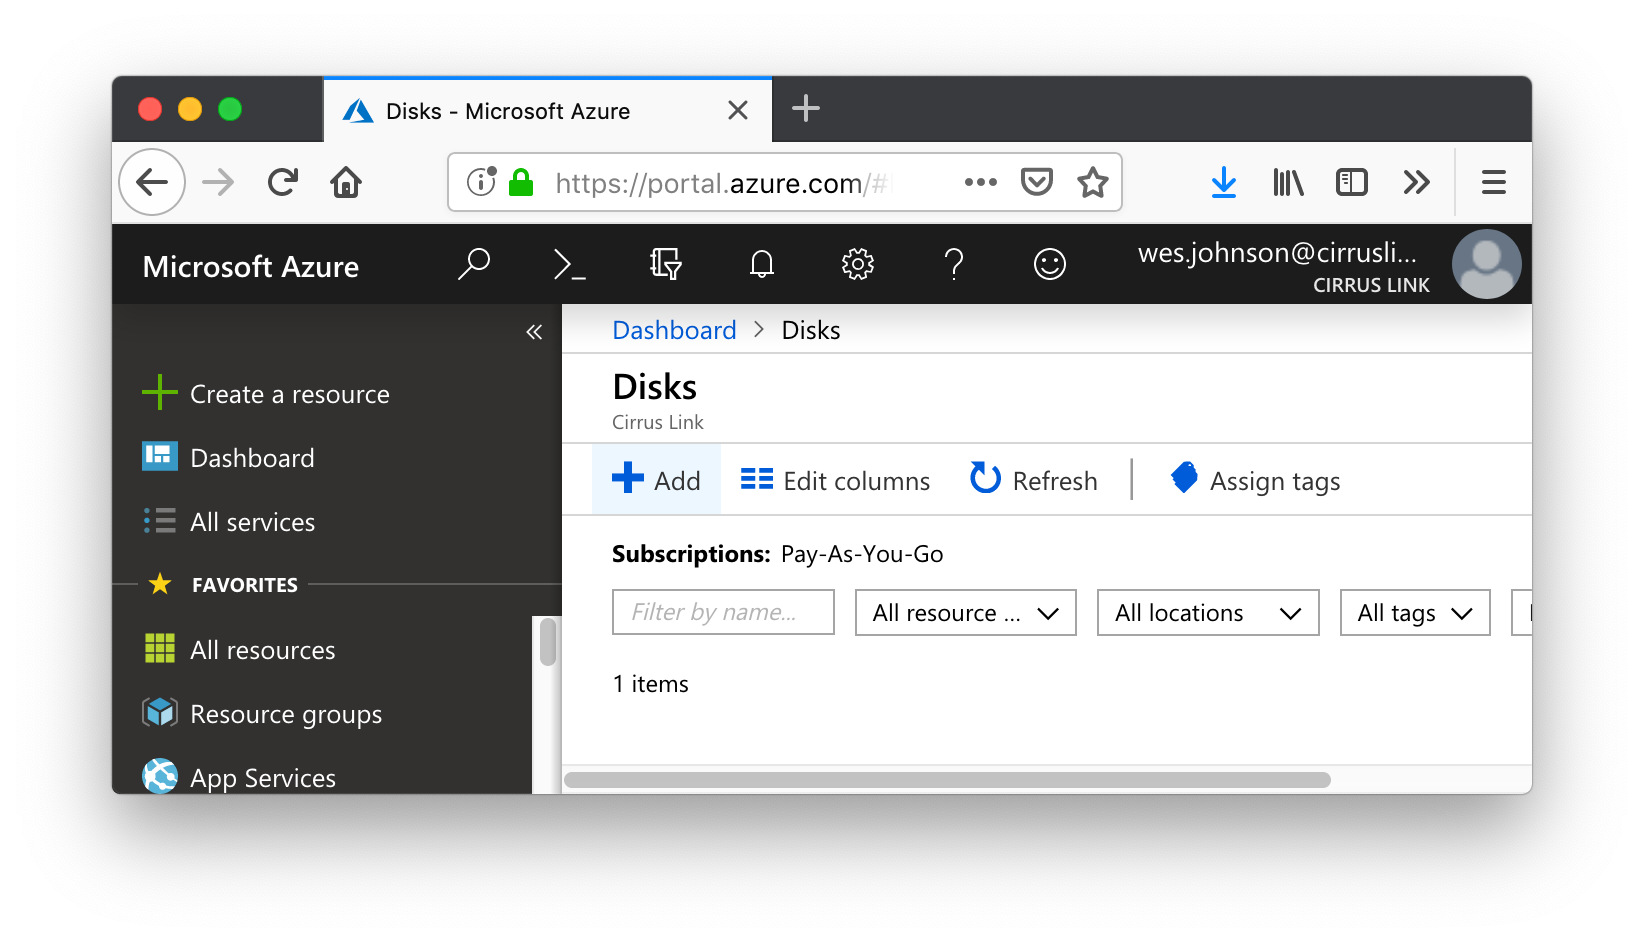
In the Disks view, click the 'Add' option as shown below:
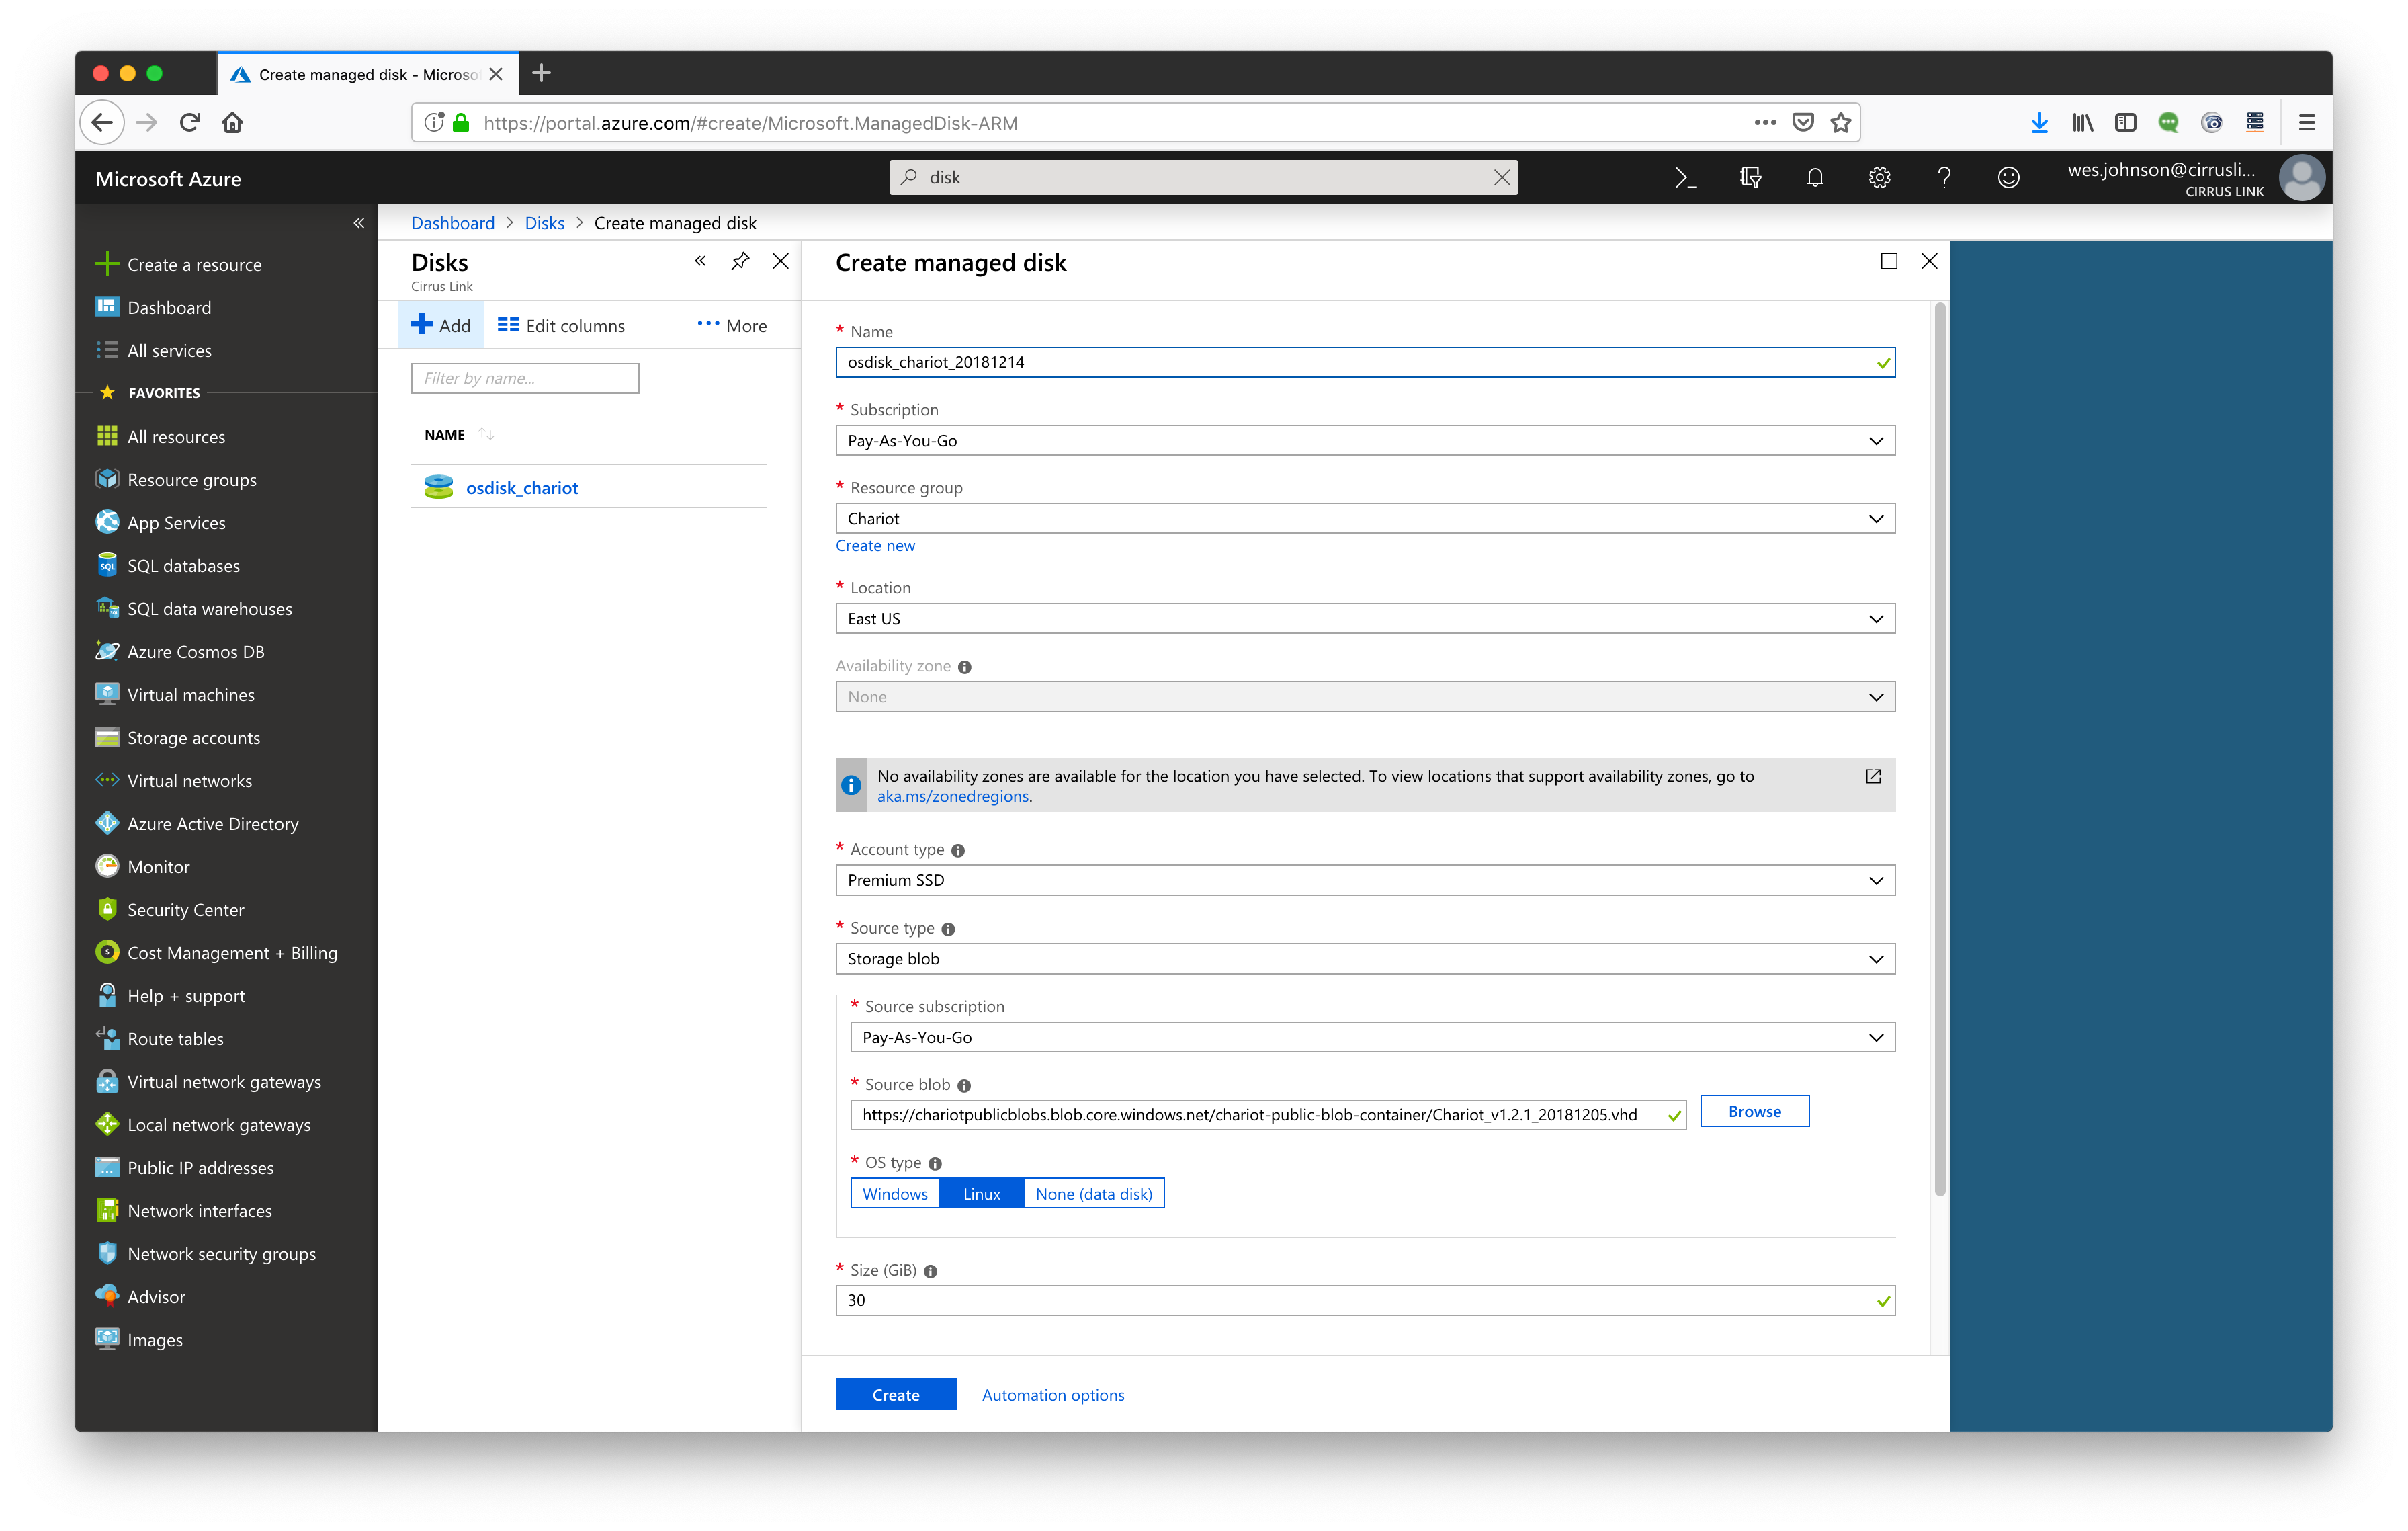
Now fill in the properties of the managed disk. Set the following. Also not the screen shot below showing the settings. When done, click the 'Create' button.
- Name = name of your choice - in this example it is osdisk_chariot_20181214
- Select a resource group of your choice
- Select a location of your choice
- Account type = Premium SSD
- Source type = Storage blob
- Source blob = https://[your_storage_account].blob.core.windows.net/[your_container]/Chariot_v1.2.3_20190805.vhd
- OS type = Linux
- Size (GB) = 30
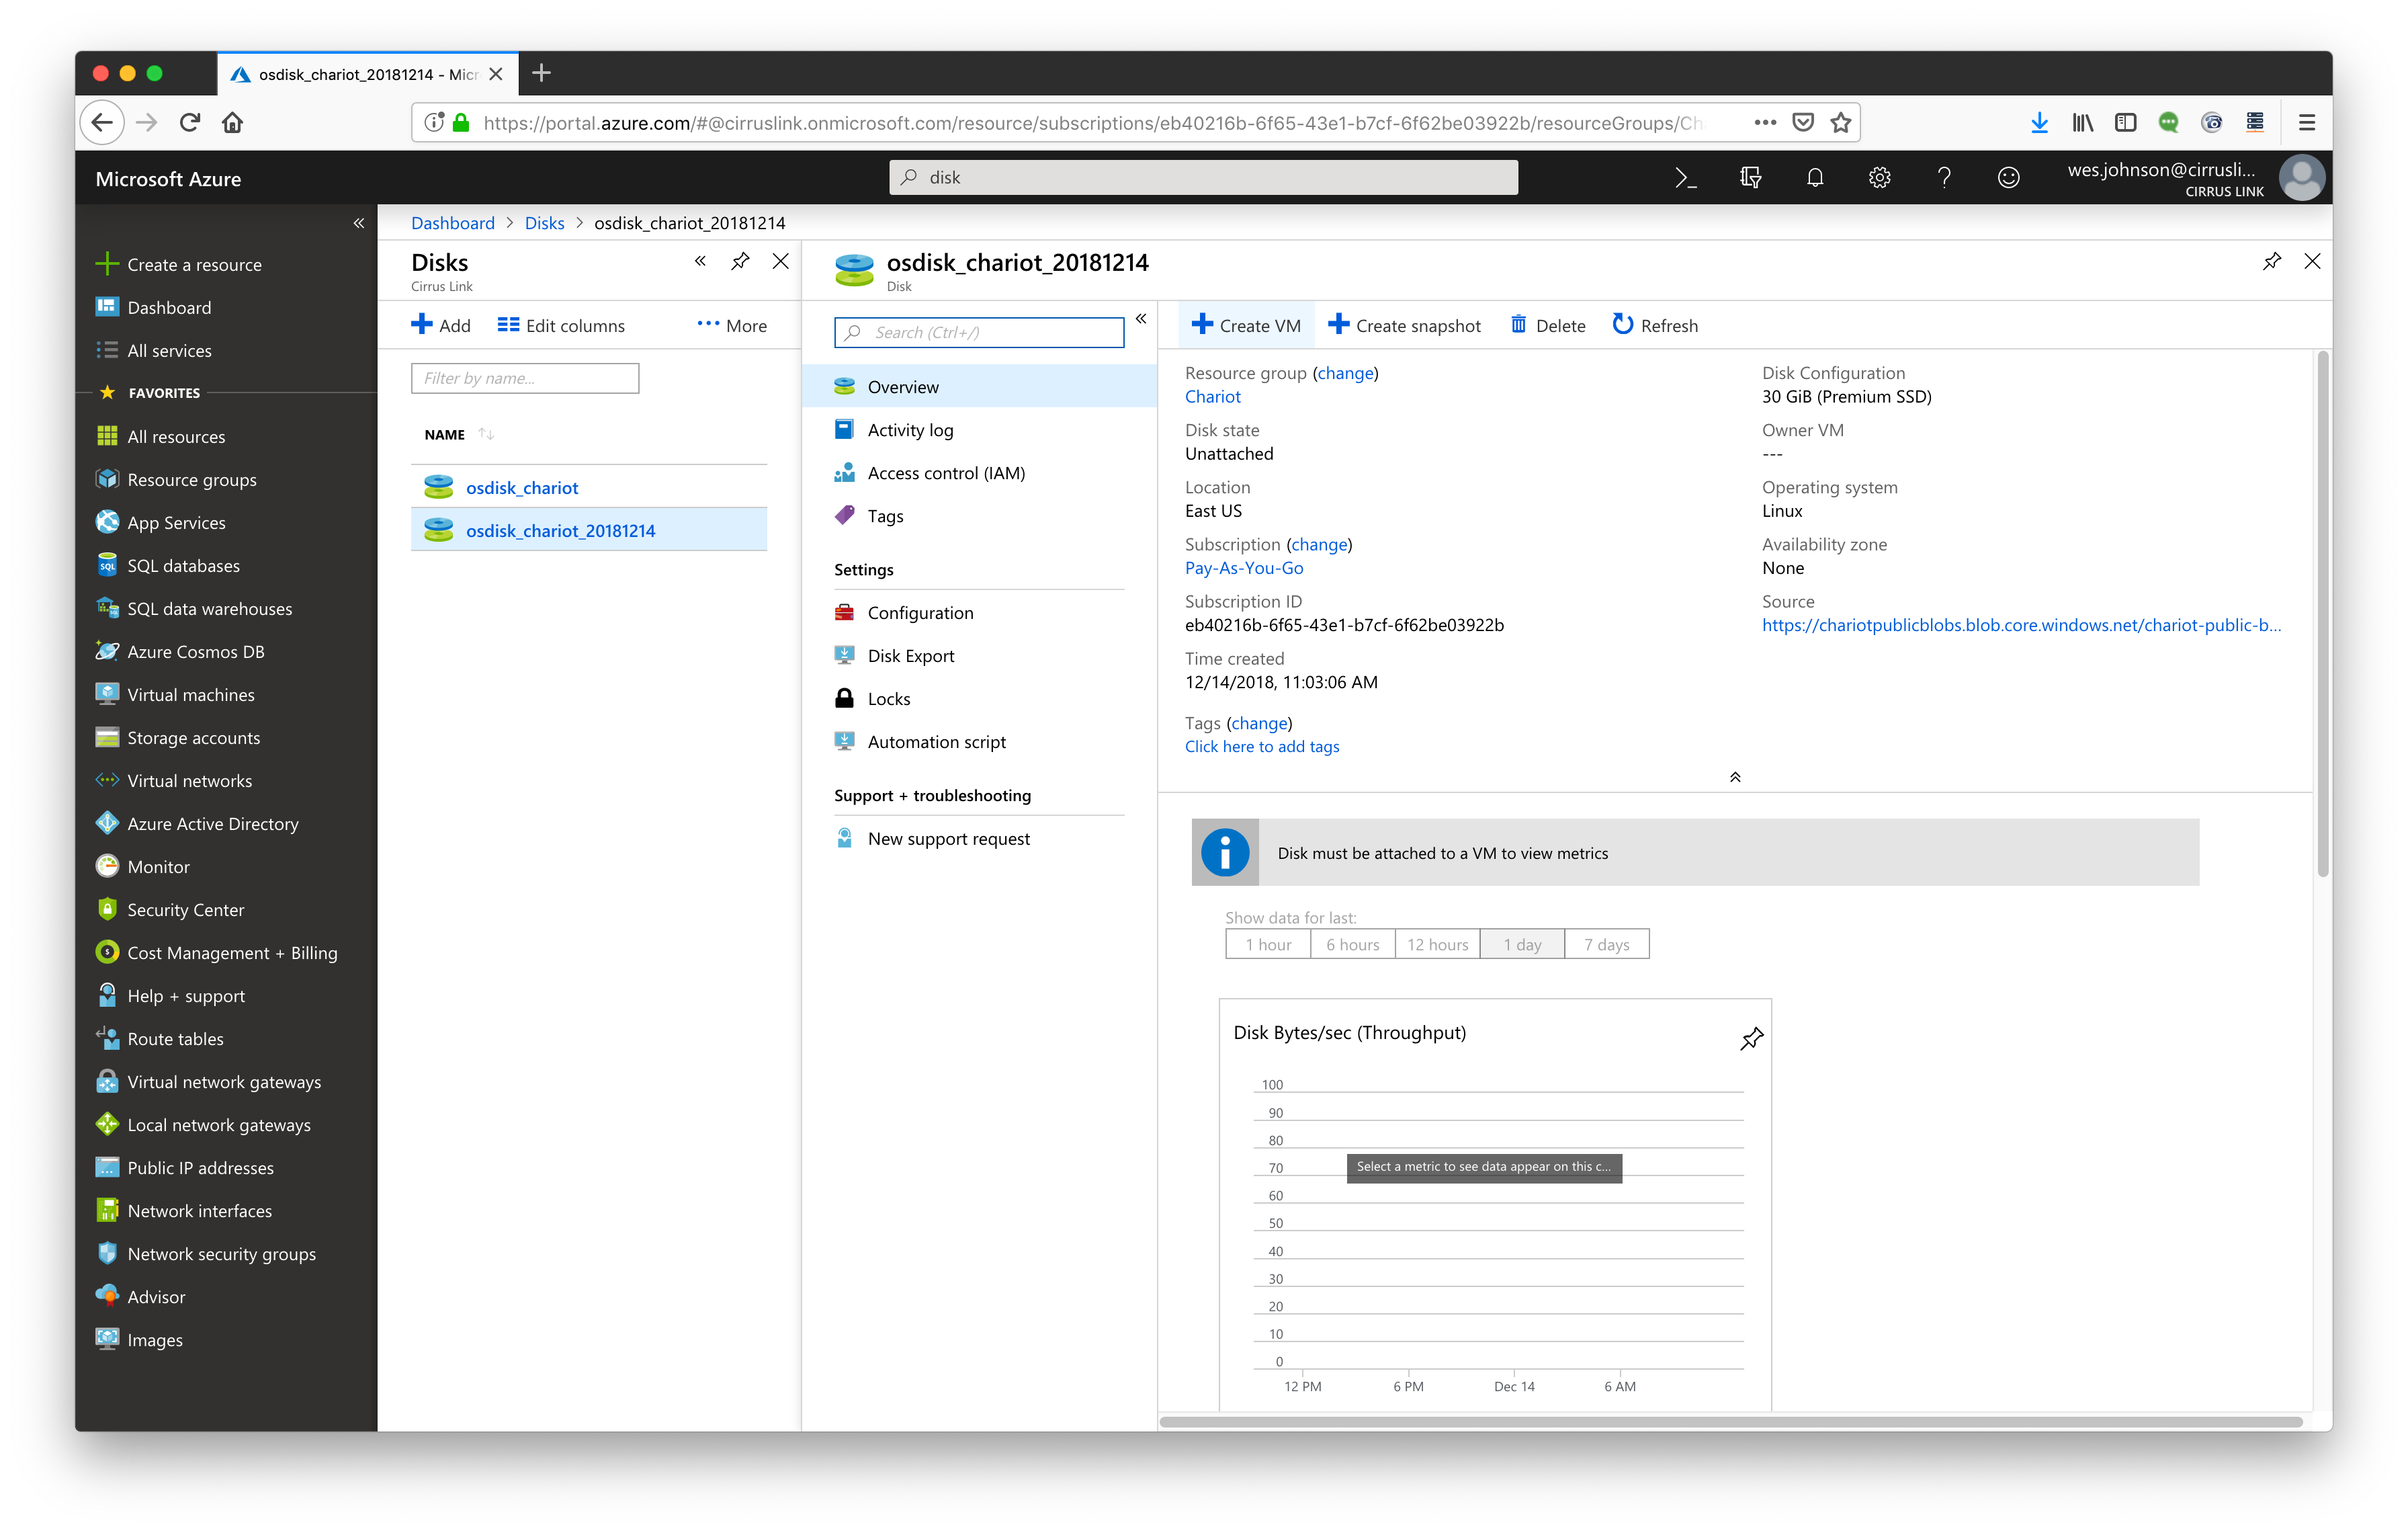
Creating the disk takes a few minutes. When it is complete, you should see a new disk (osdisk_chariot_20181214) as shown below.
With the disk created, select it. You will see a screen similar to what is shown below. Click the '+ Create VM' button as shown below.
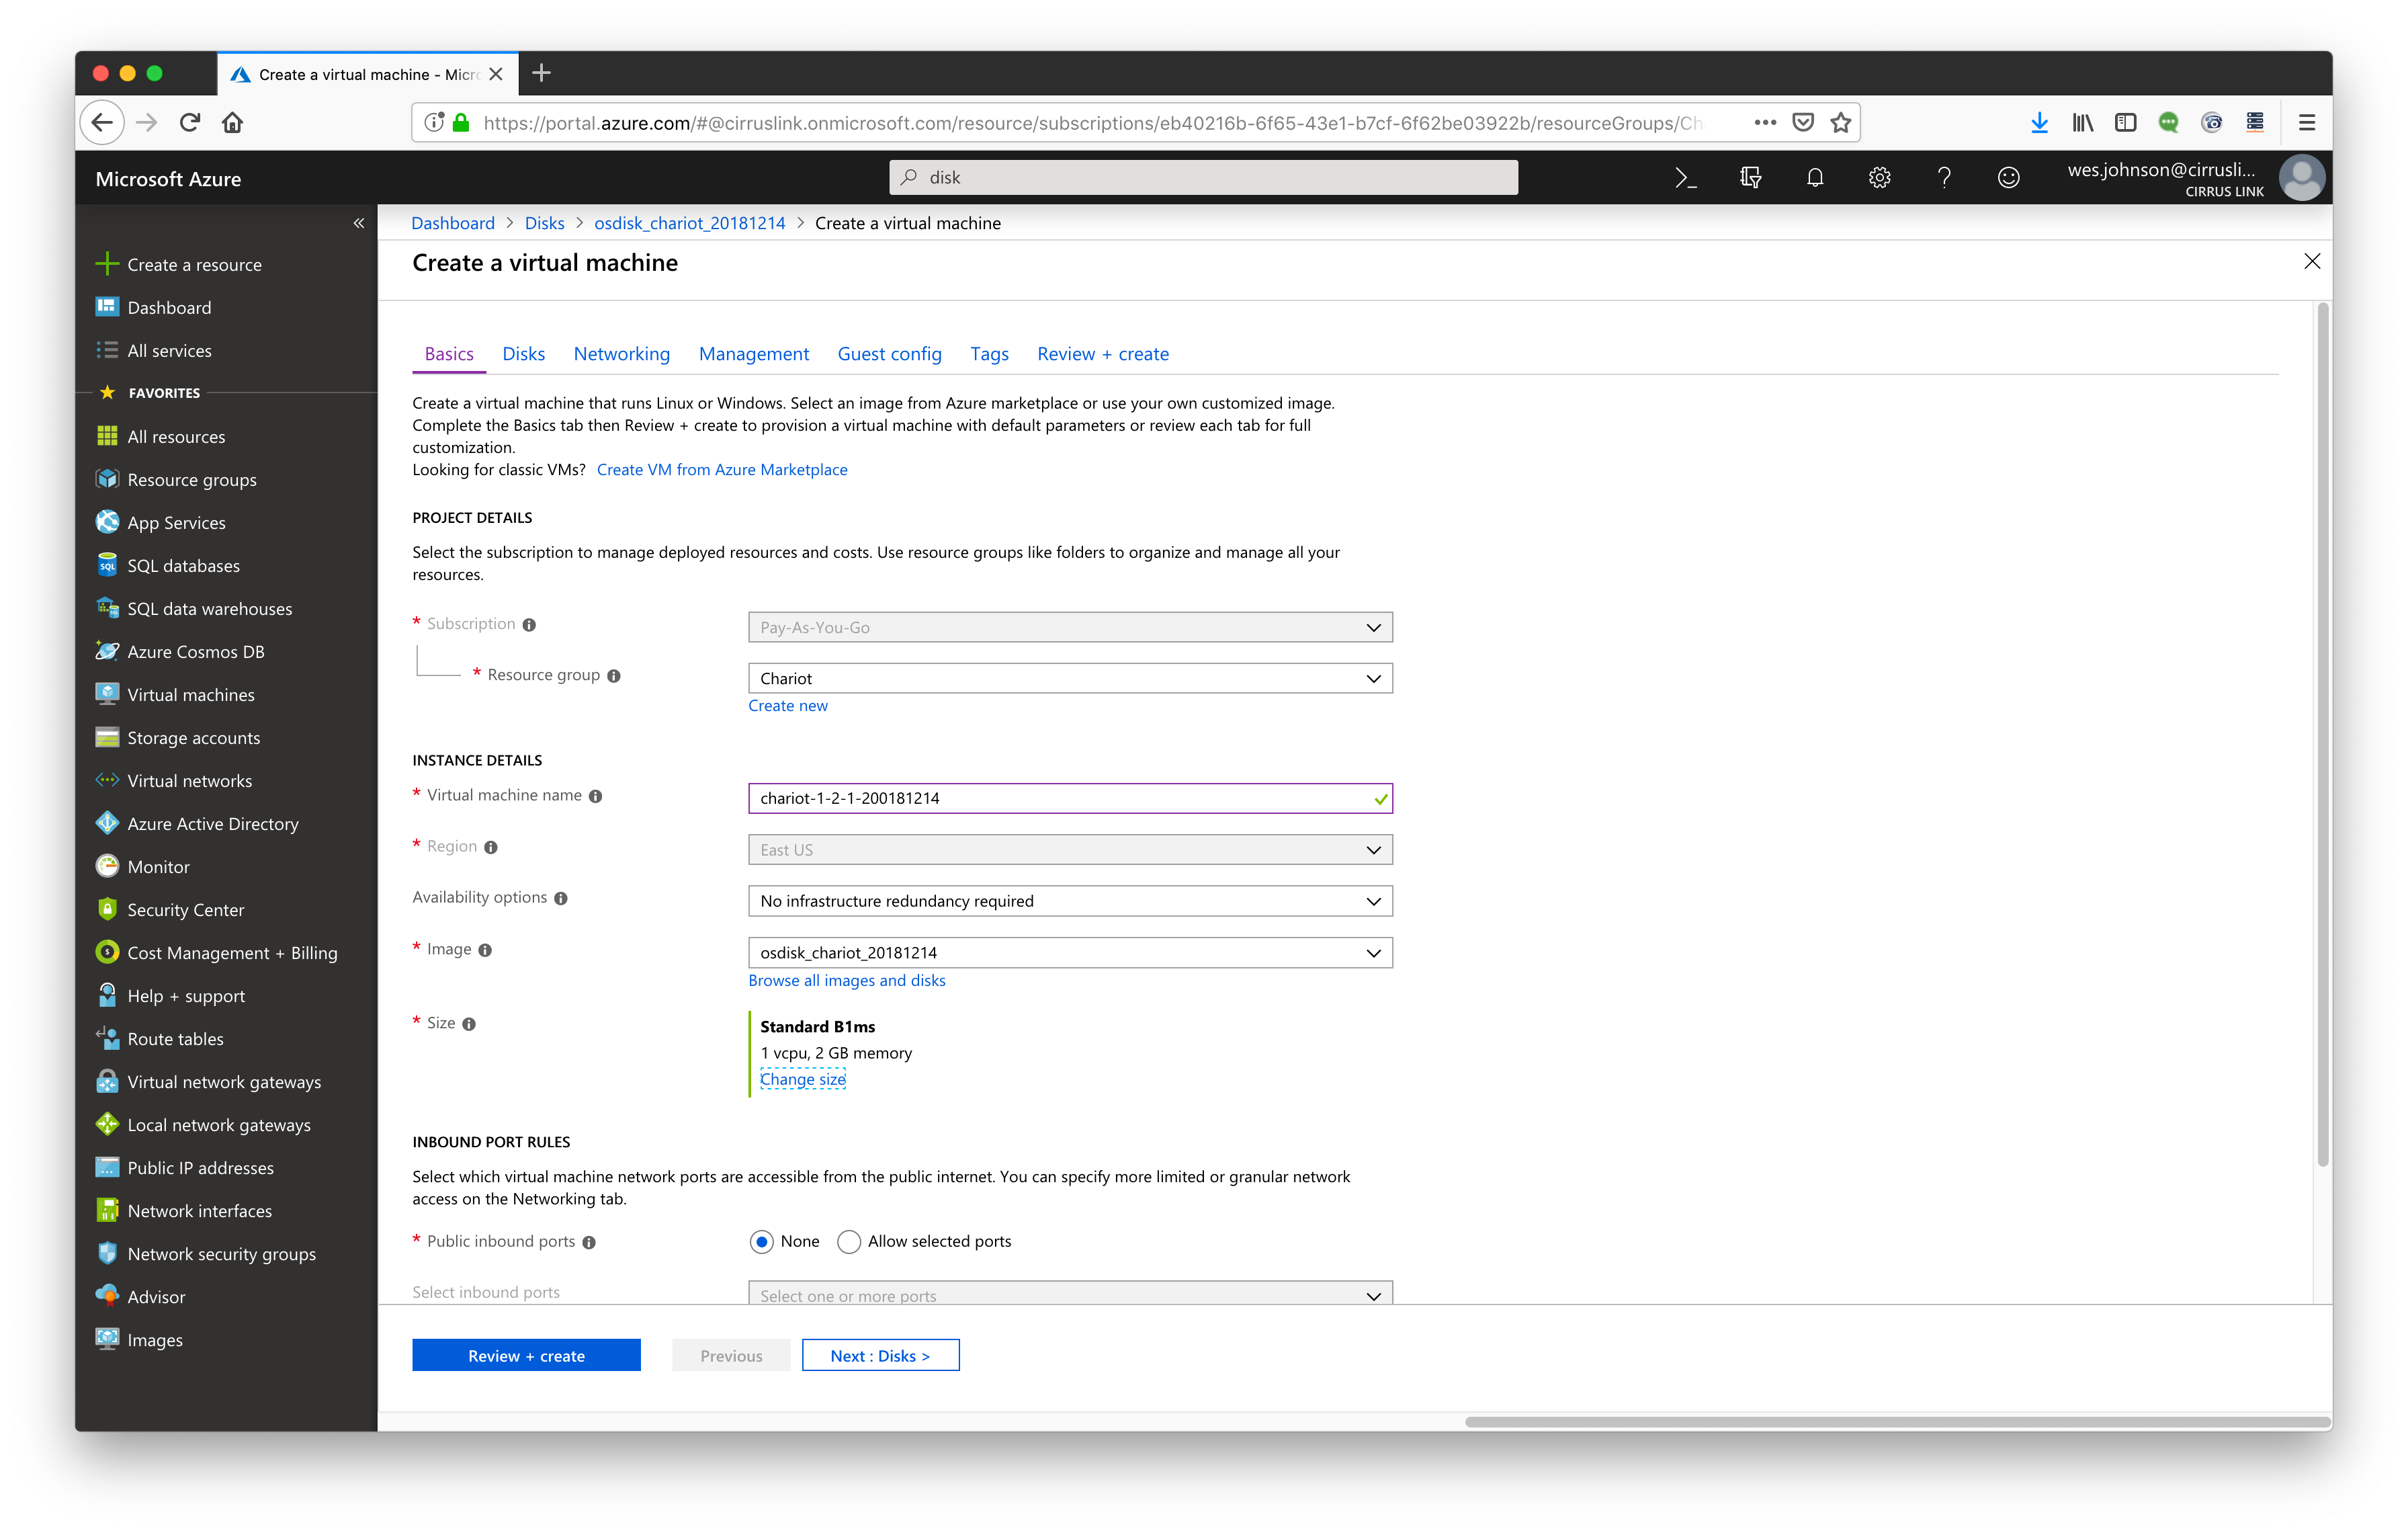
Set the name of the disk and note the Image is the disk you just created as shown below. Also, select the size of the VM. In this case we're using a B1ms. Leave everything else in its default and click 'Next: Disks'.
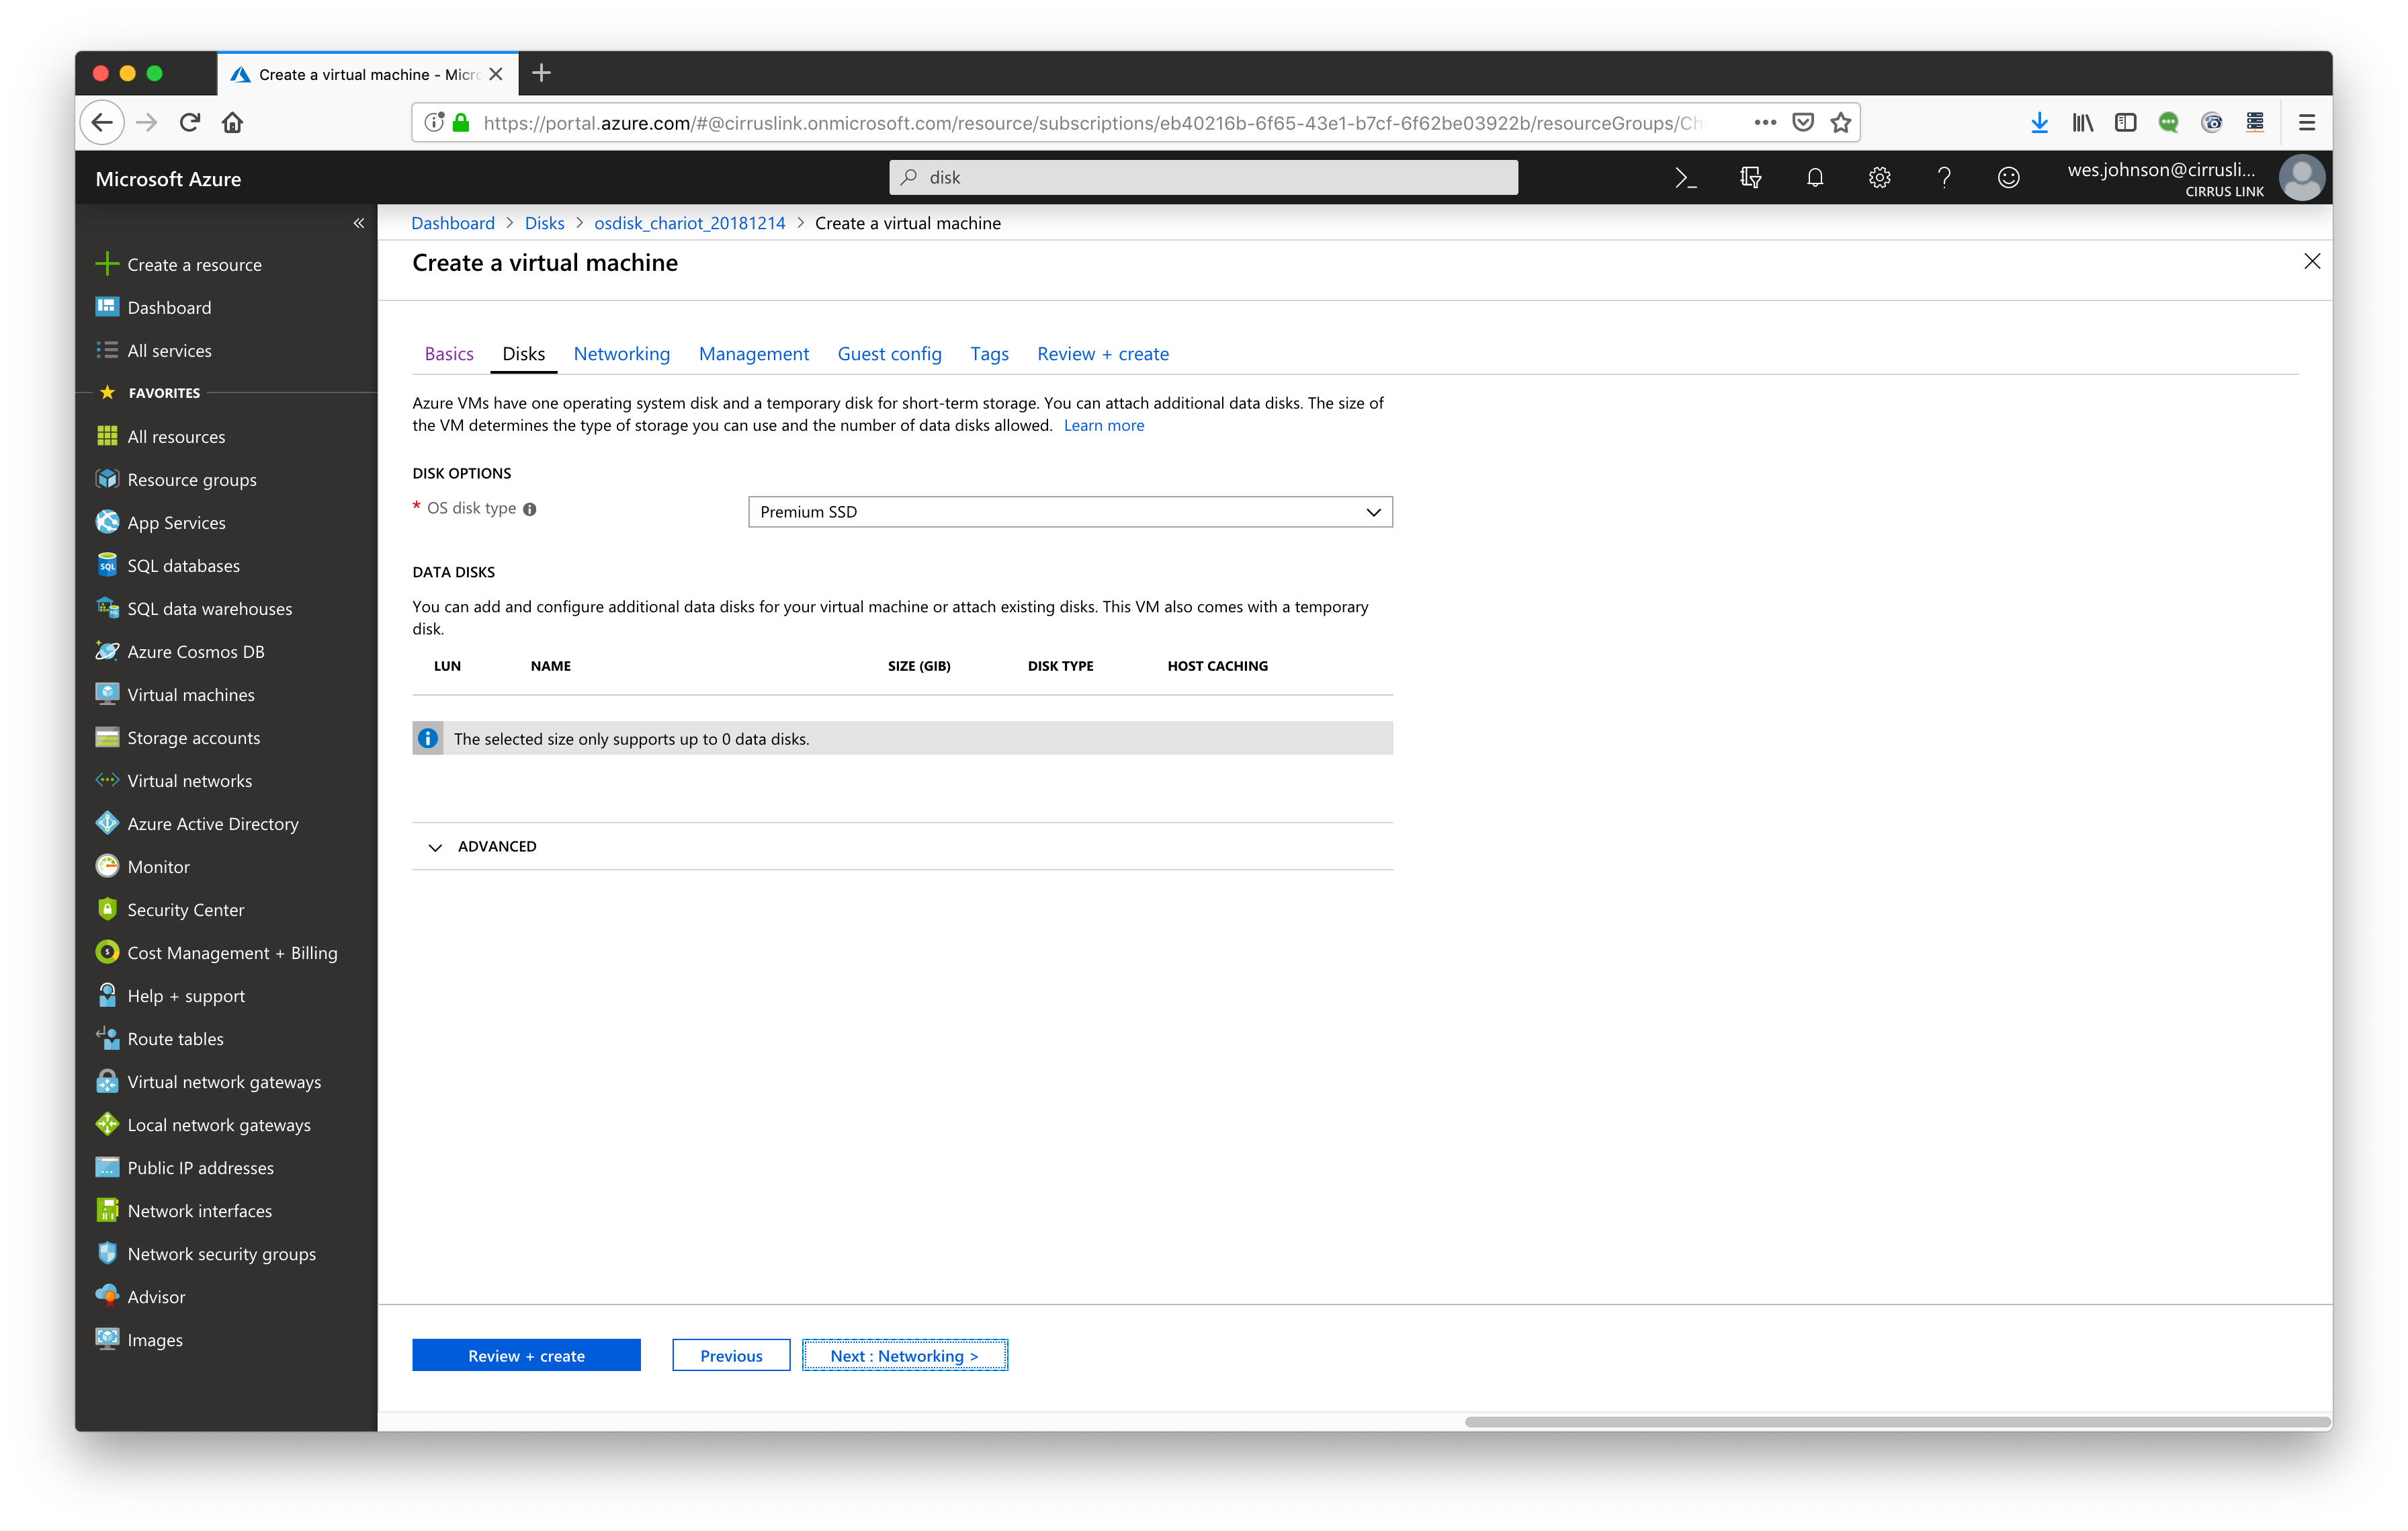
Leave everything default and click 'Next: Networking'
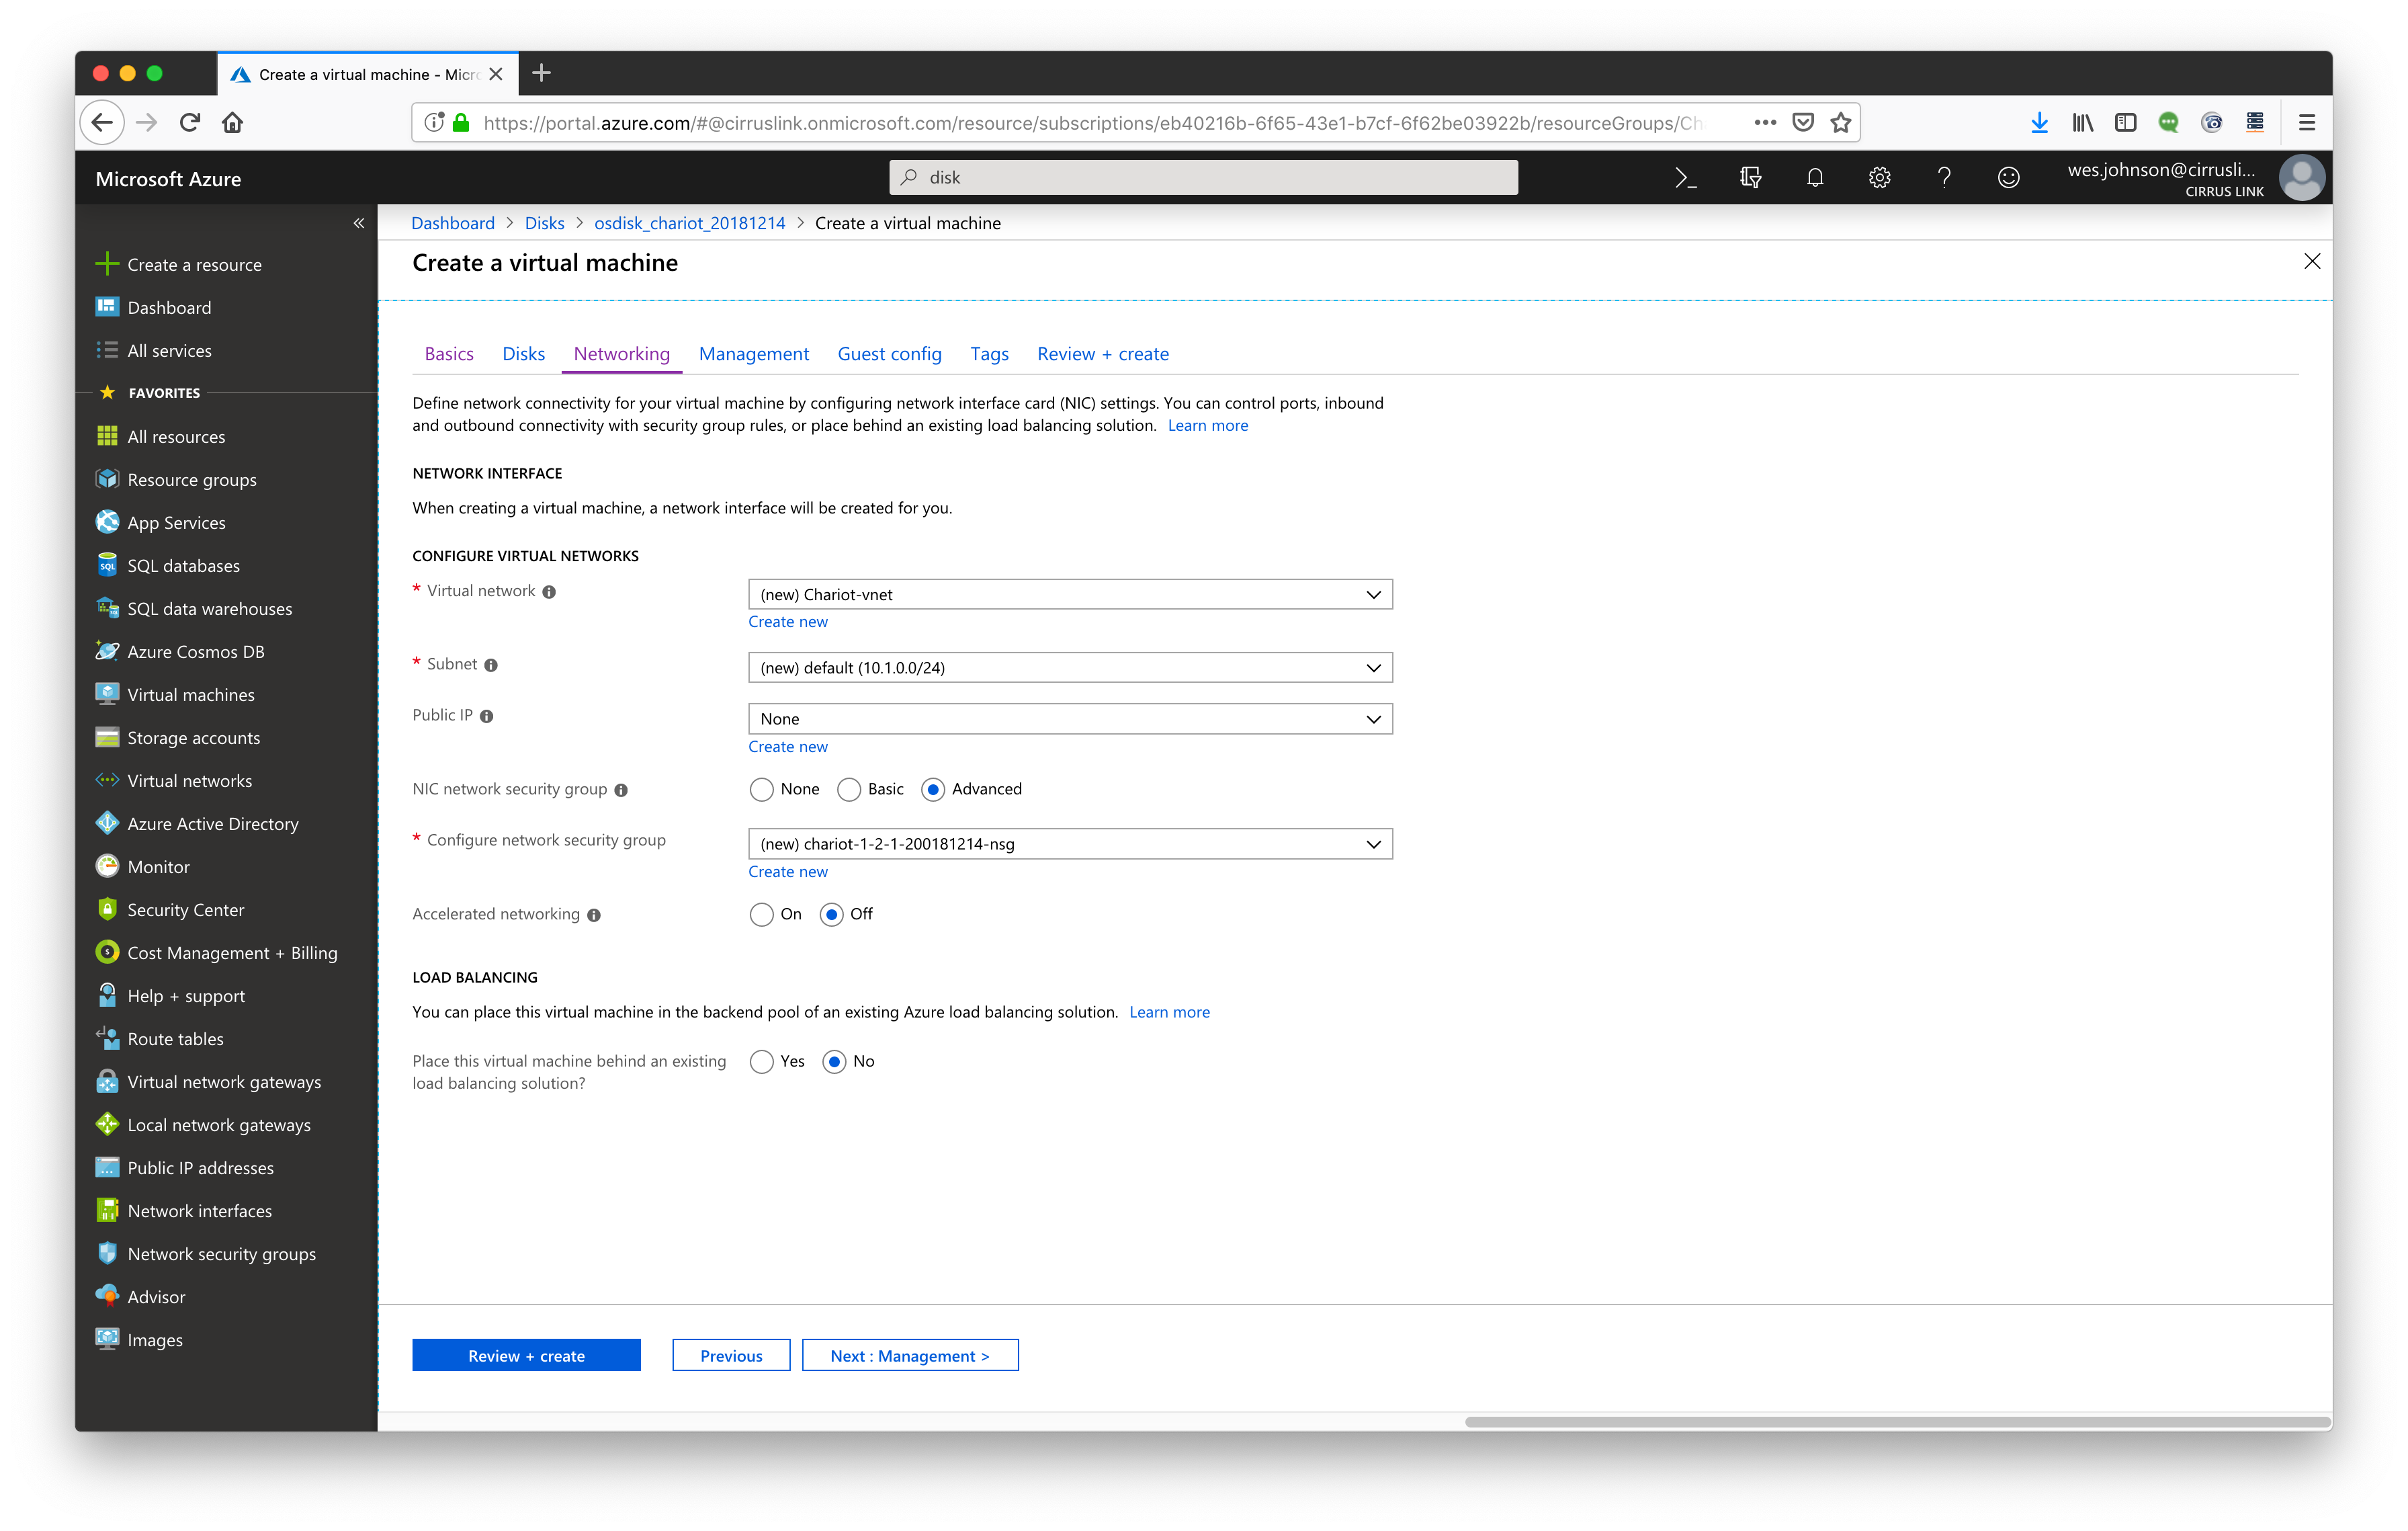
Select a Vitrtual Network and Subnet. Also, create a new Security Group and set it to 'Advanced' as shown below. Then click 'Next: Management'
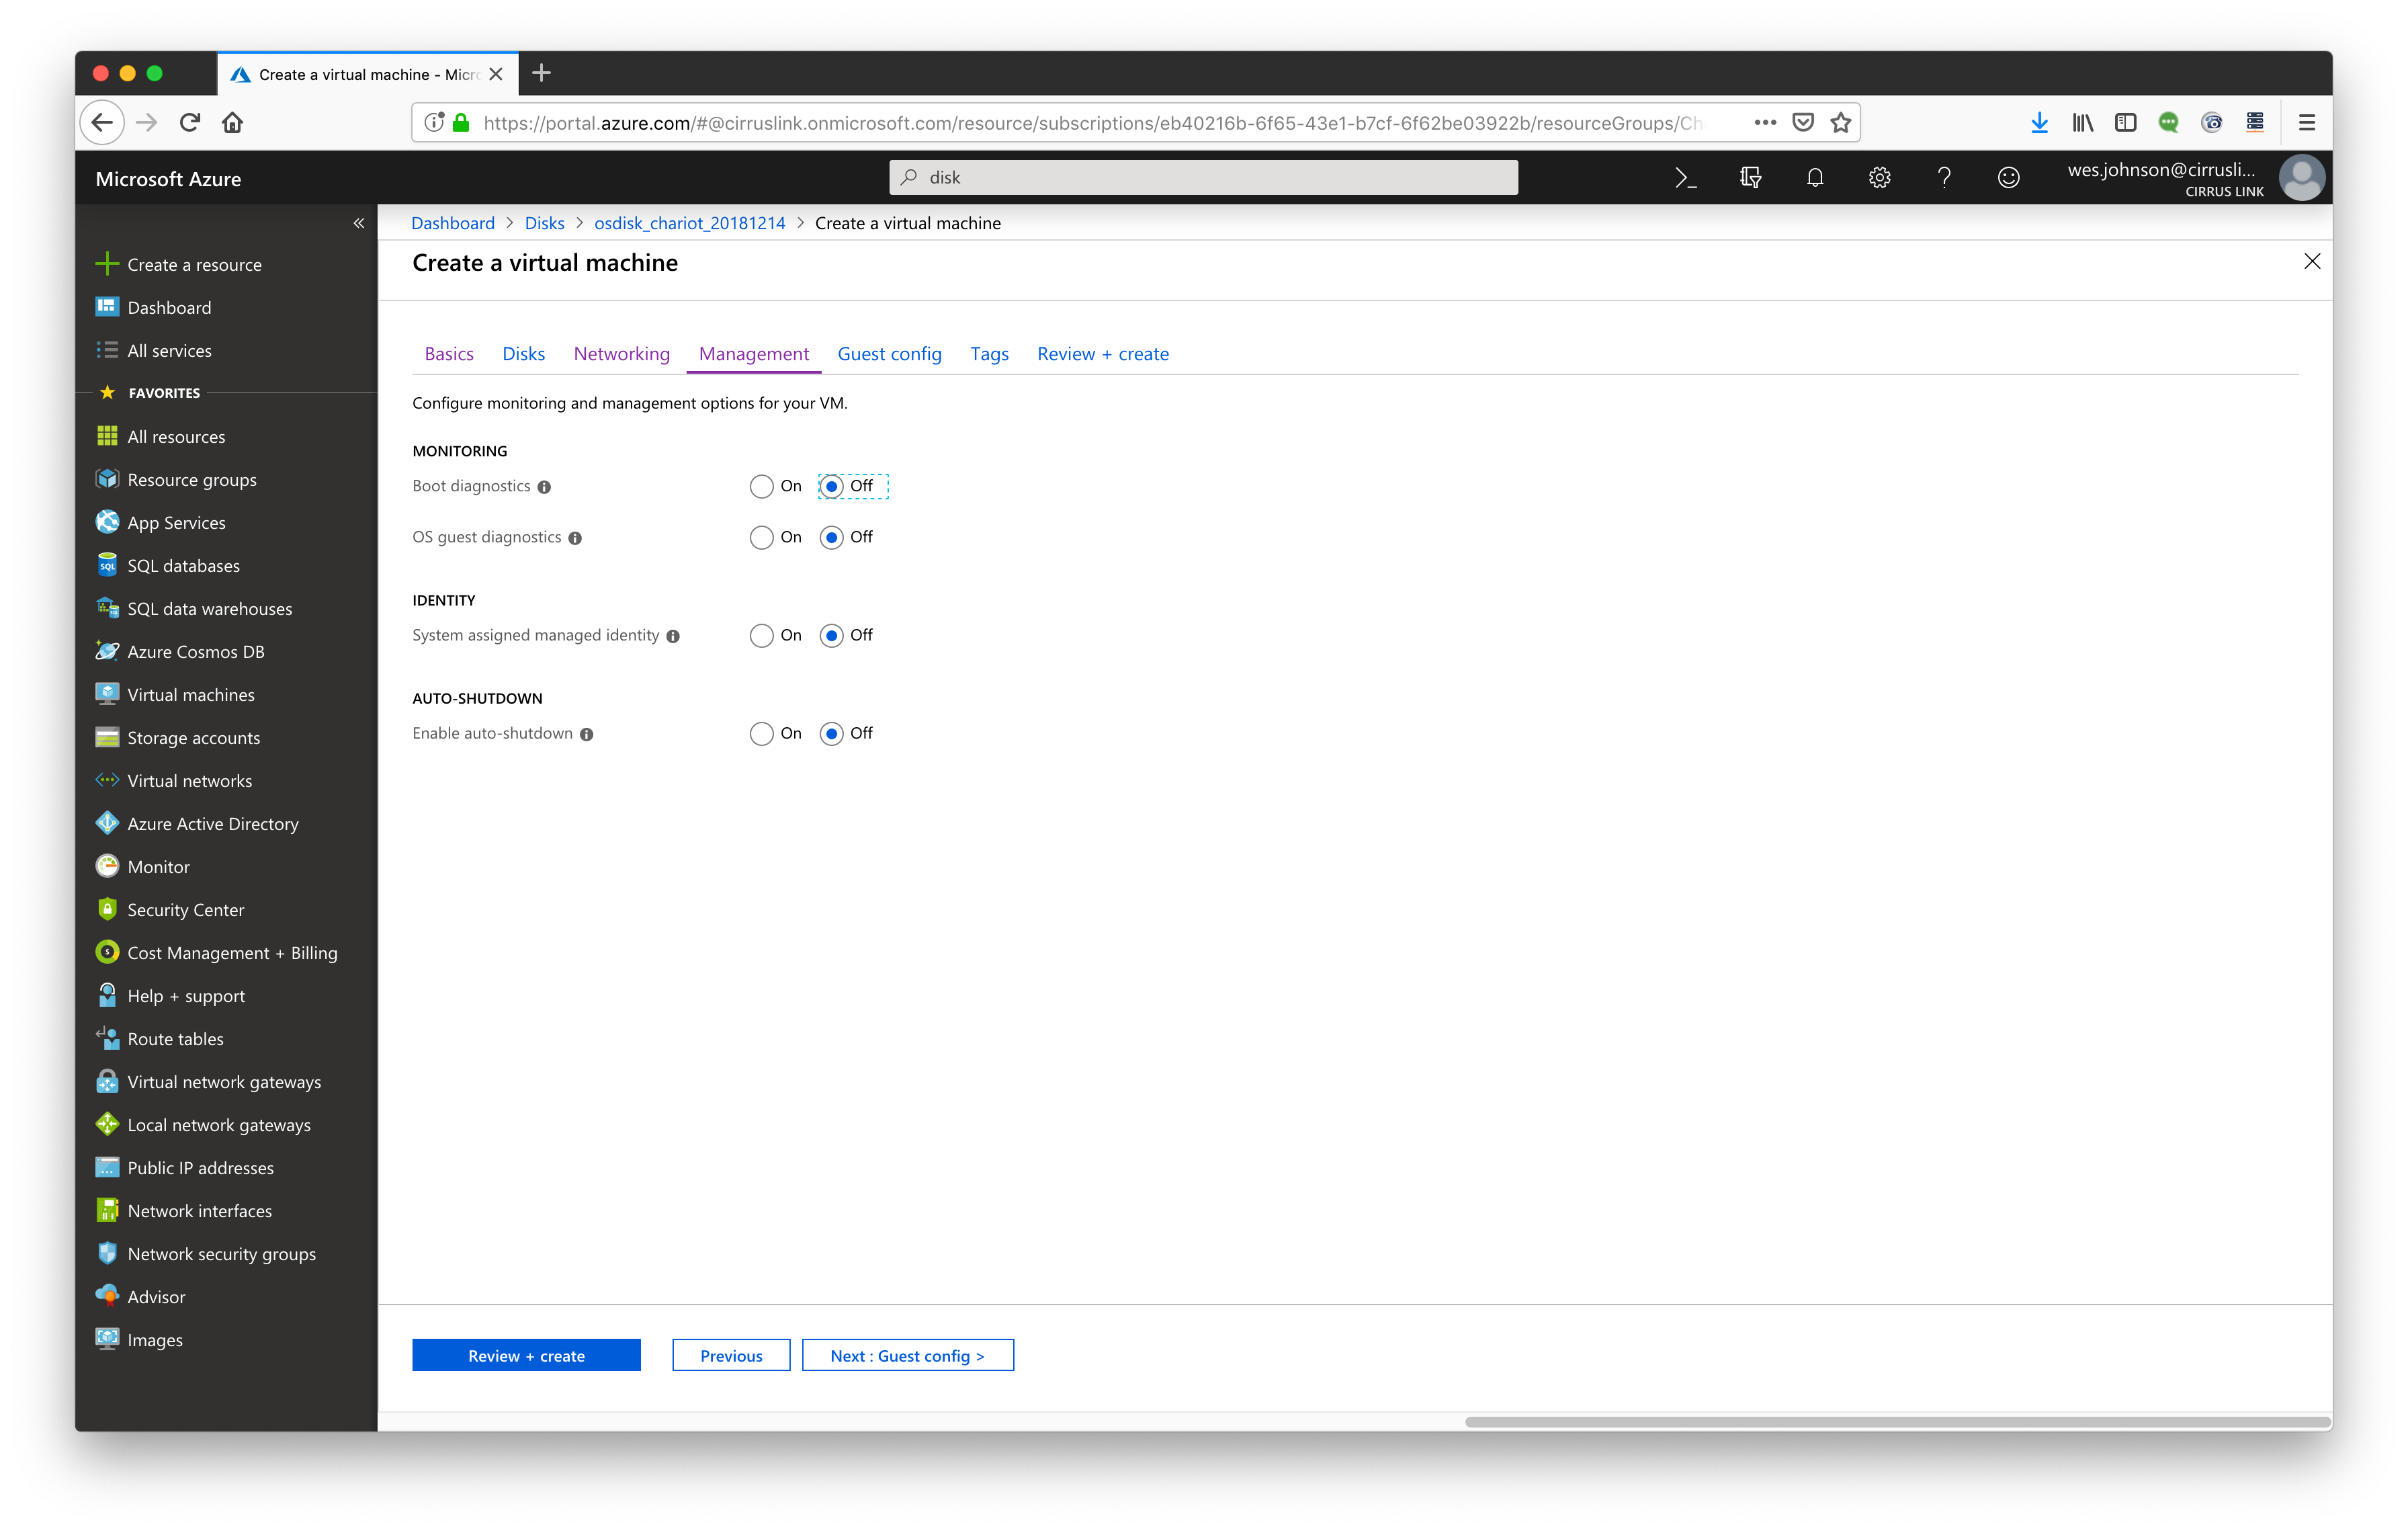
Turn all monitoring and diagnostics 'Off' as shown below and click 'Next: Guest Config'
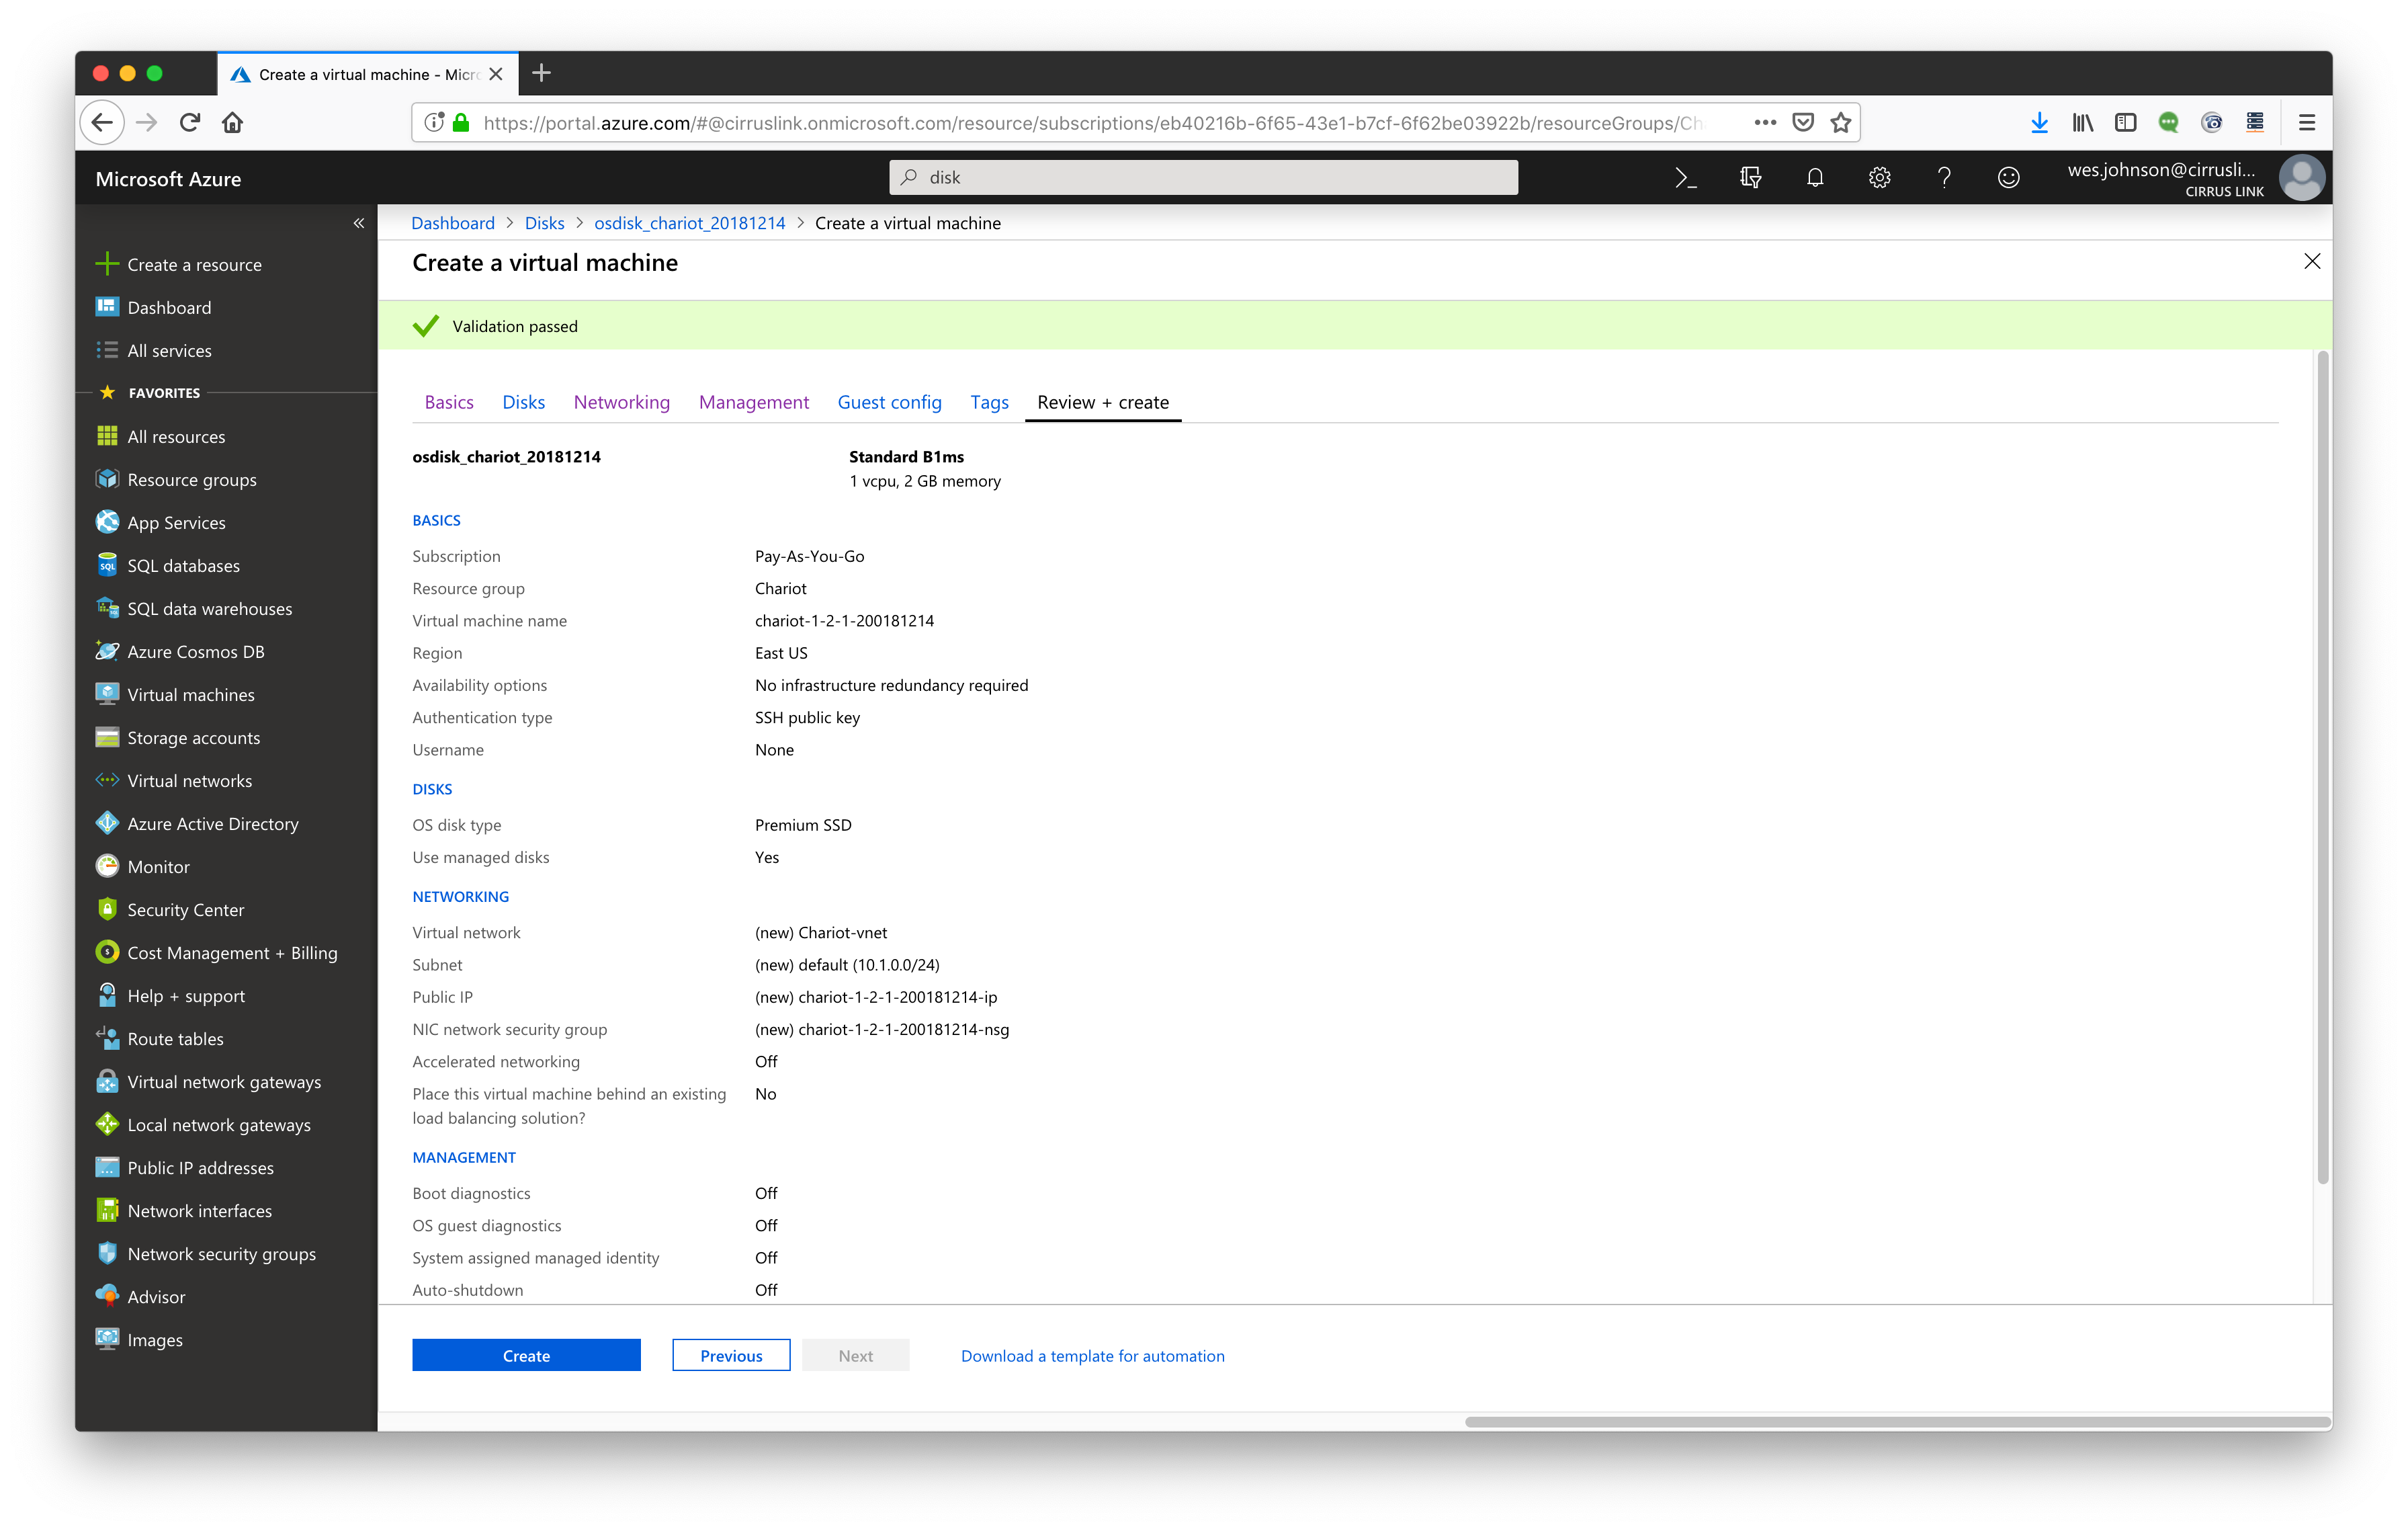
Click through 'Guest Config' and 'Tags' accepting all defaults until you get to the 'Review + create' section. Make sure validation passed as shown below. Then click 'Create' to build the VM.
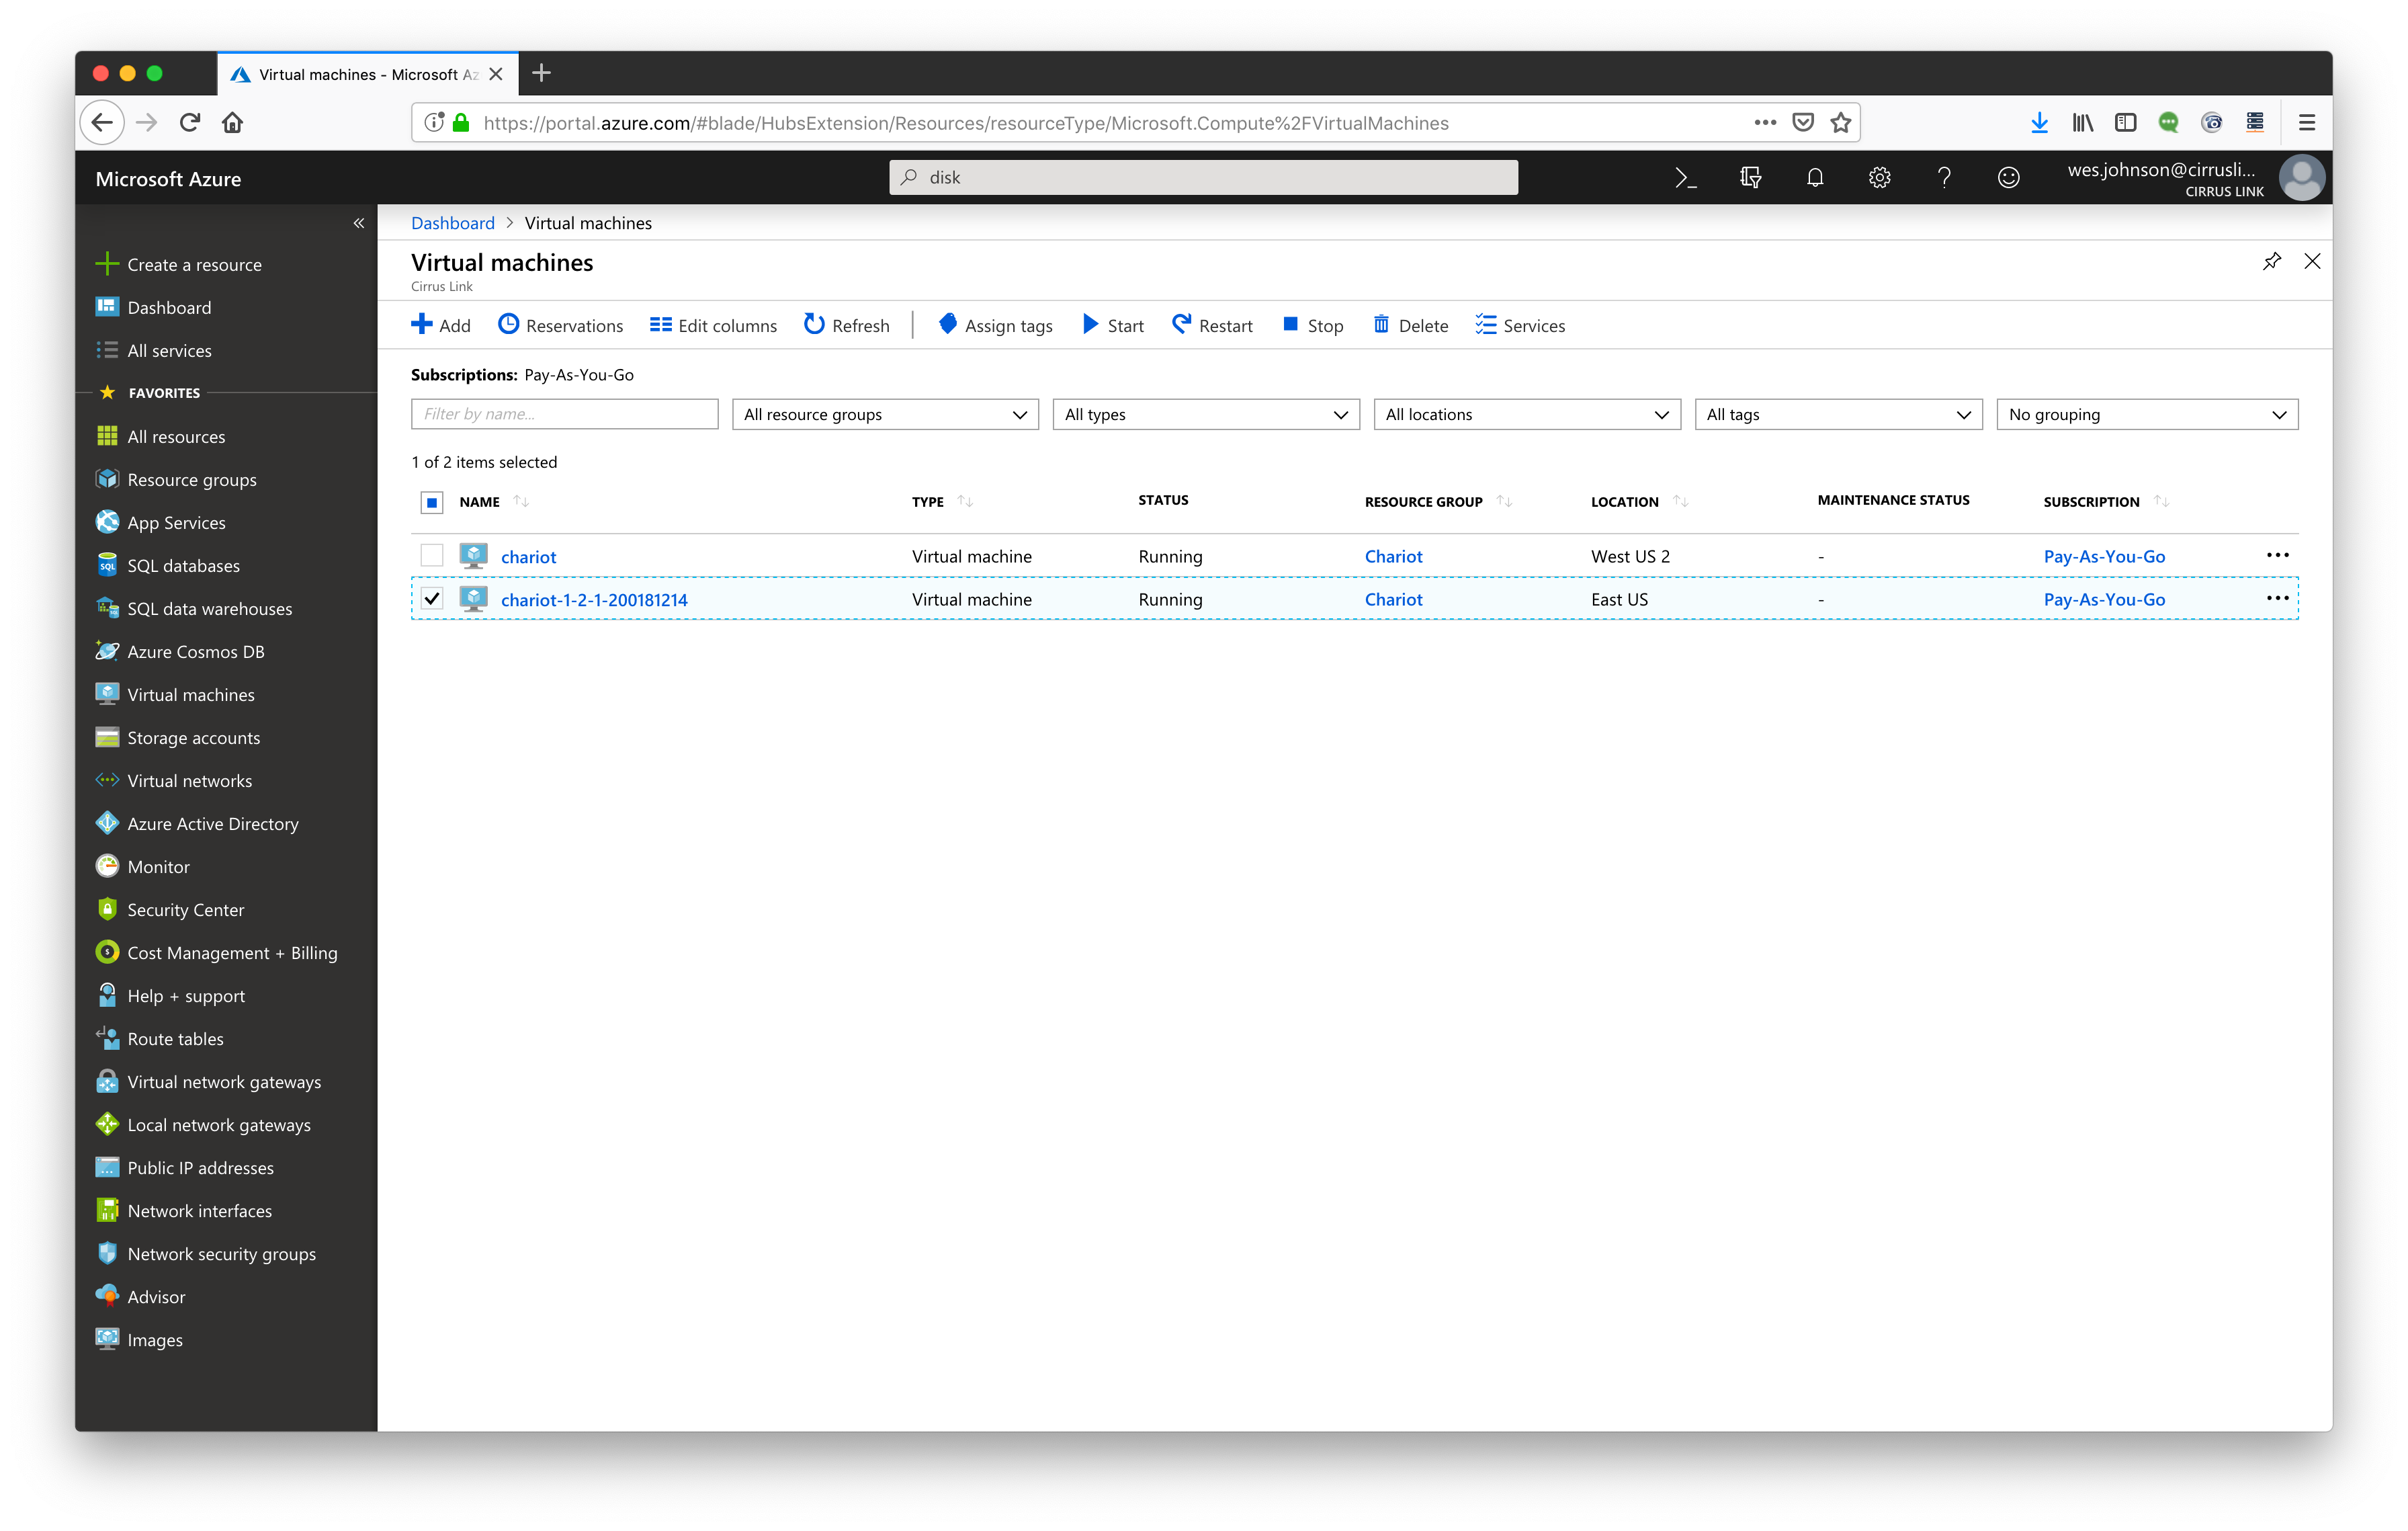
Now select 'Virtual machines' in the left navigation pane. You should now see your new VM as shown below. Select it to view the details.
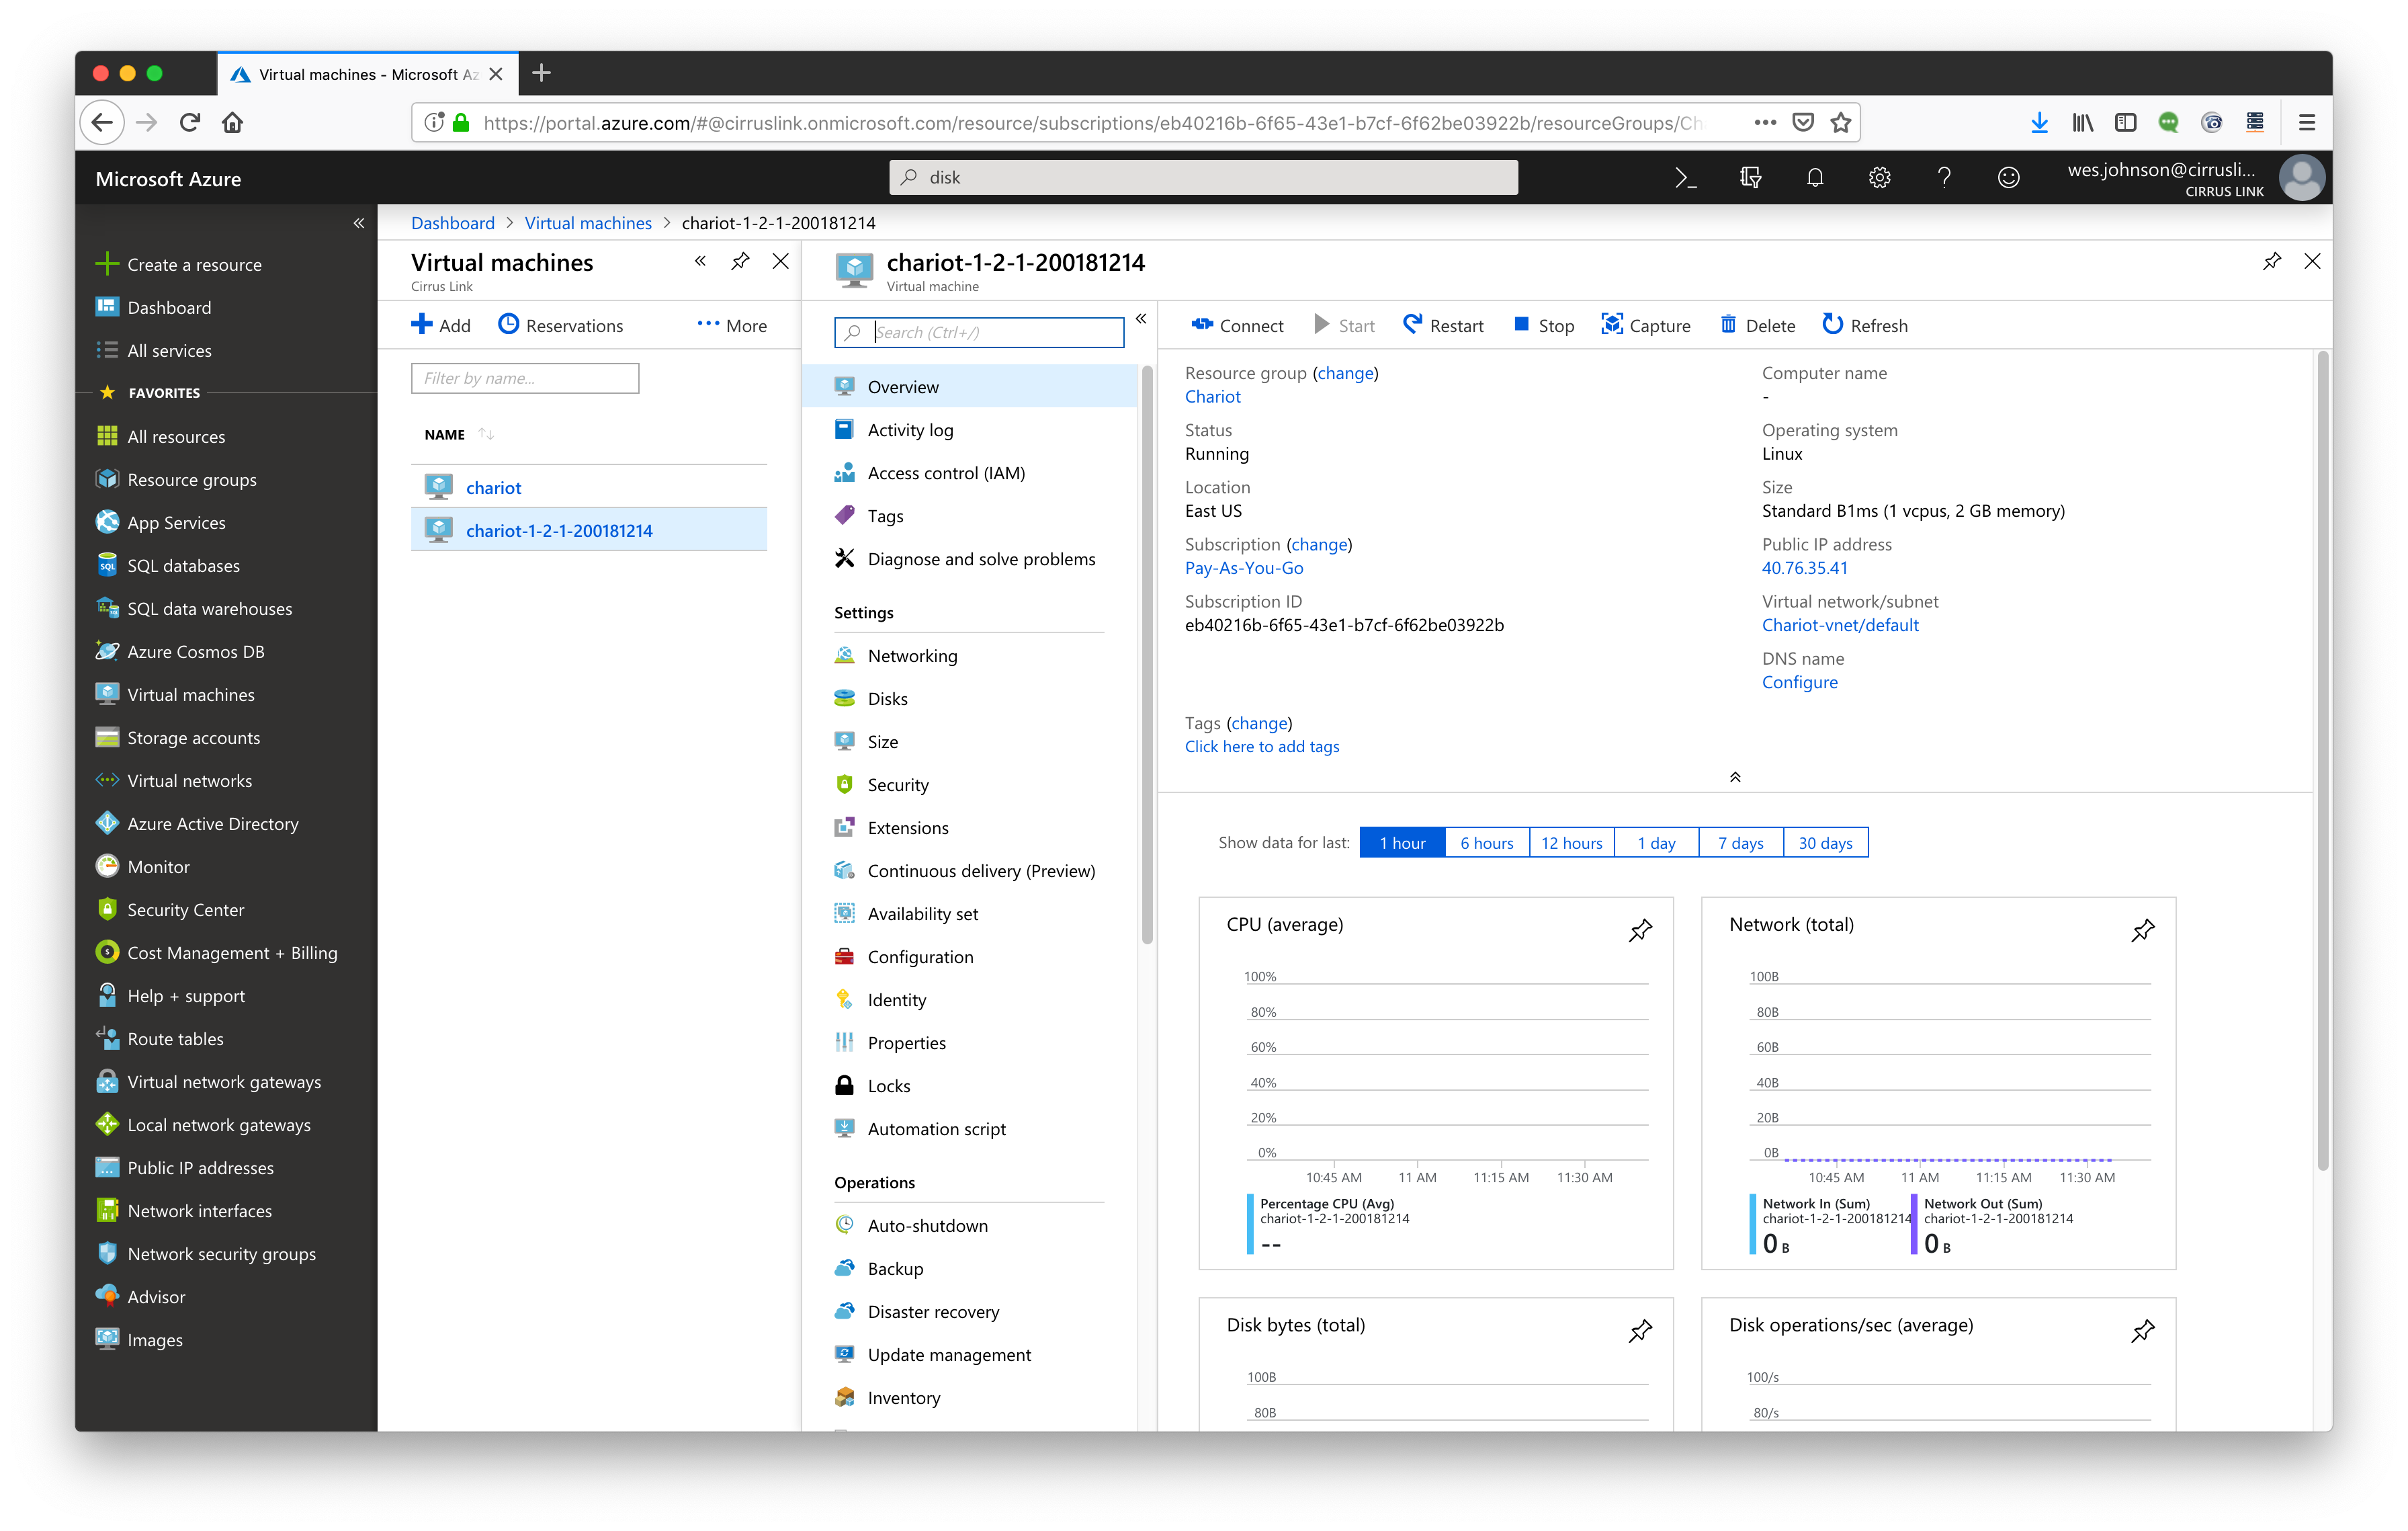
After clicking on the VM's name, you should see the following. Note the 'Public IP address' is 40.76.35.41. Note this as we will use it later.
In the center navigation pane, select 'Networking'. That will open the screen below.
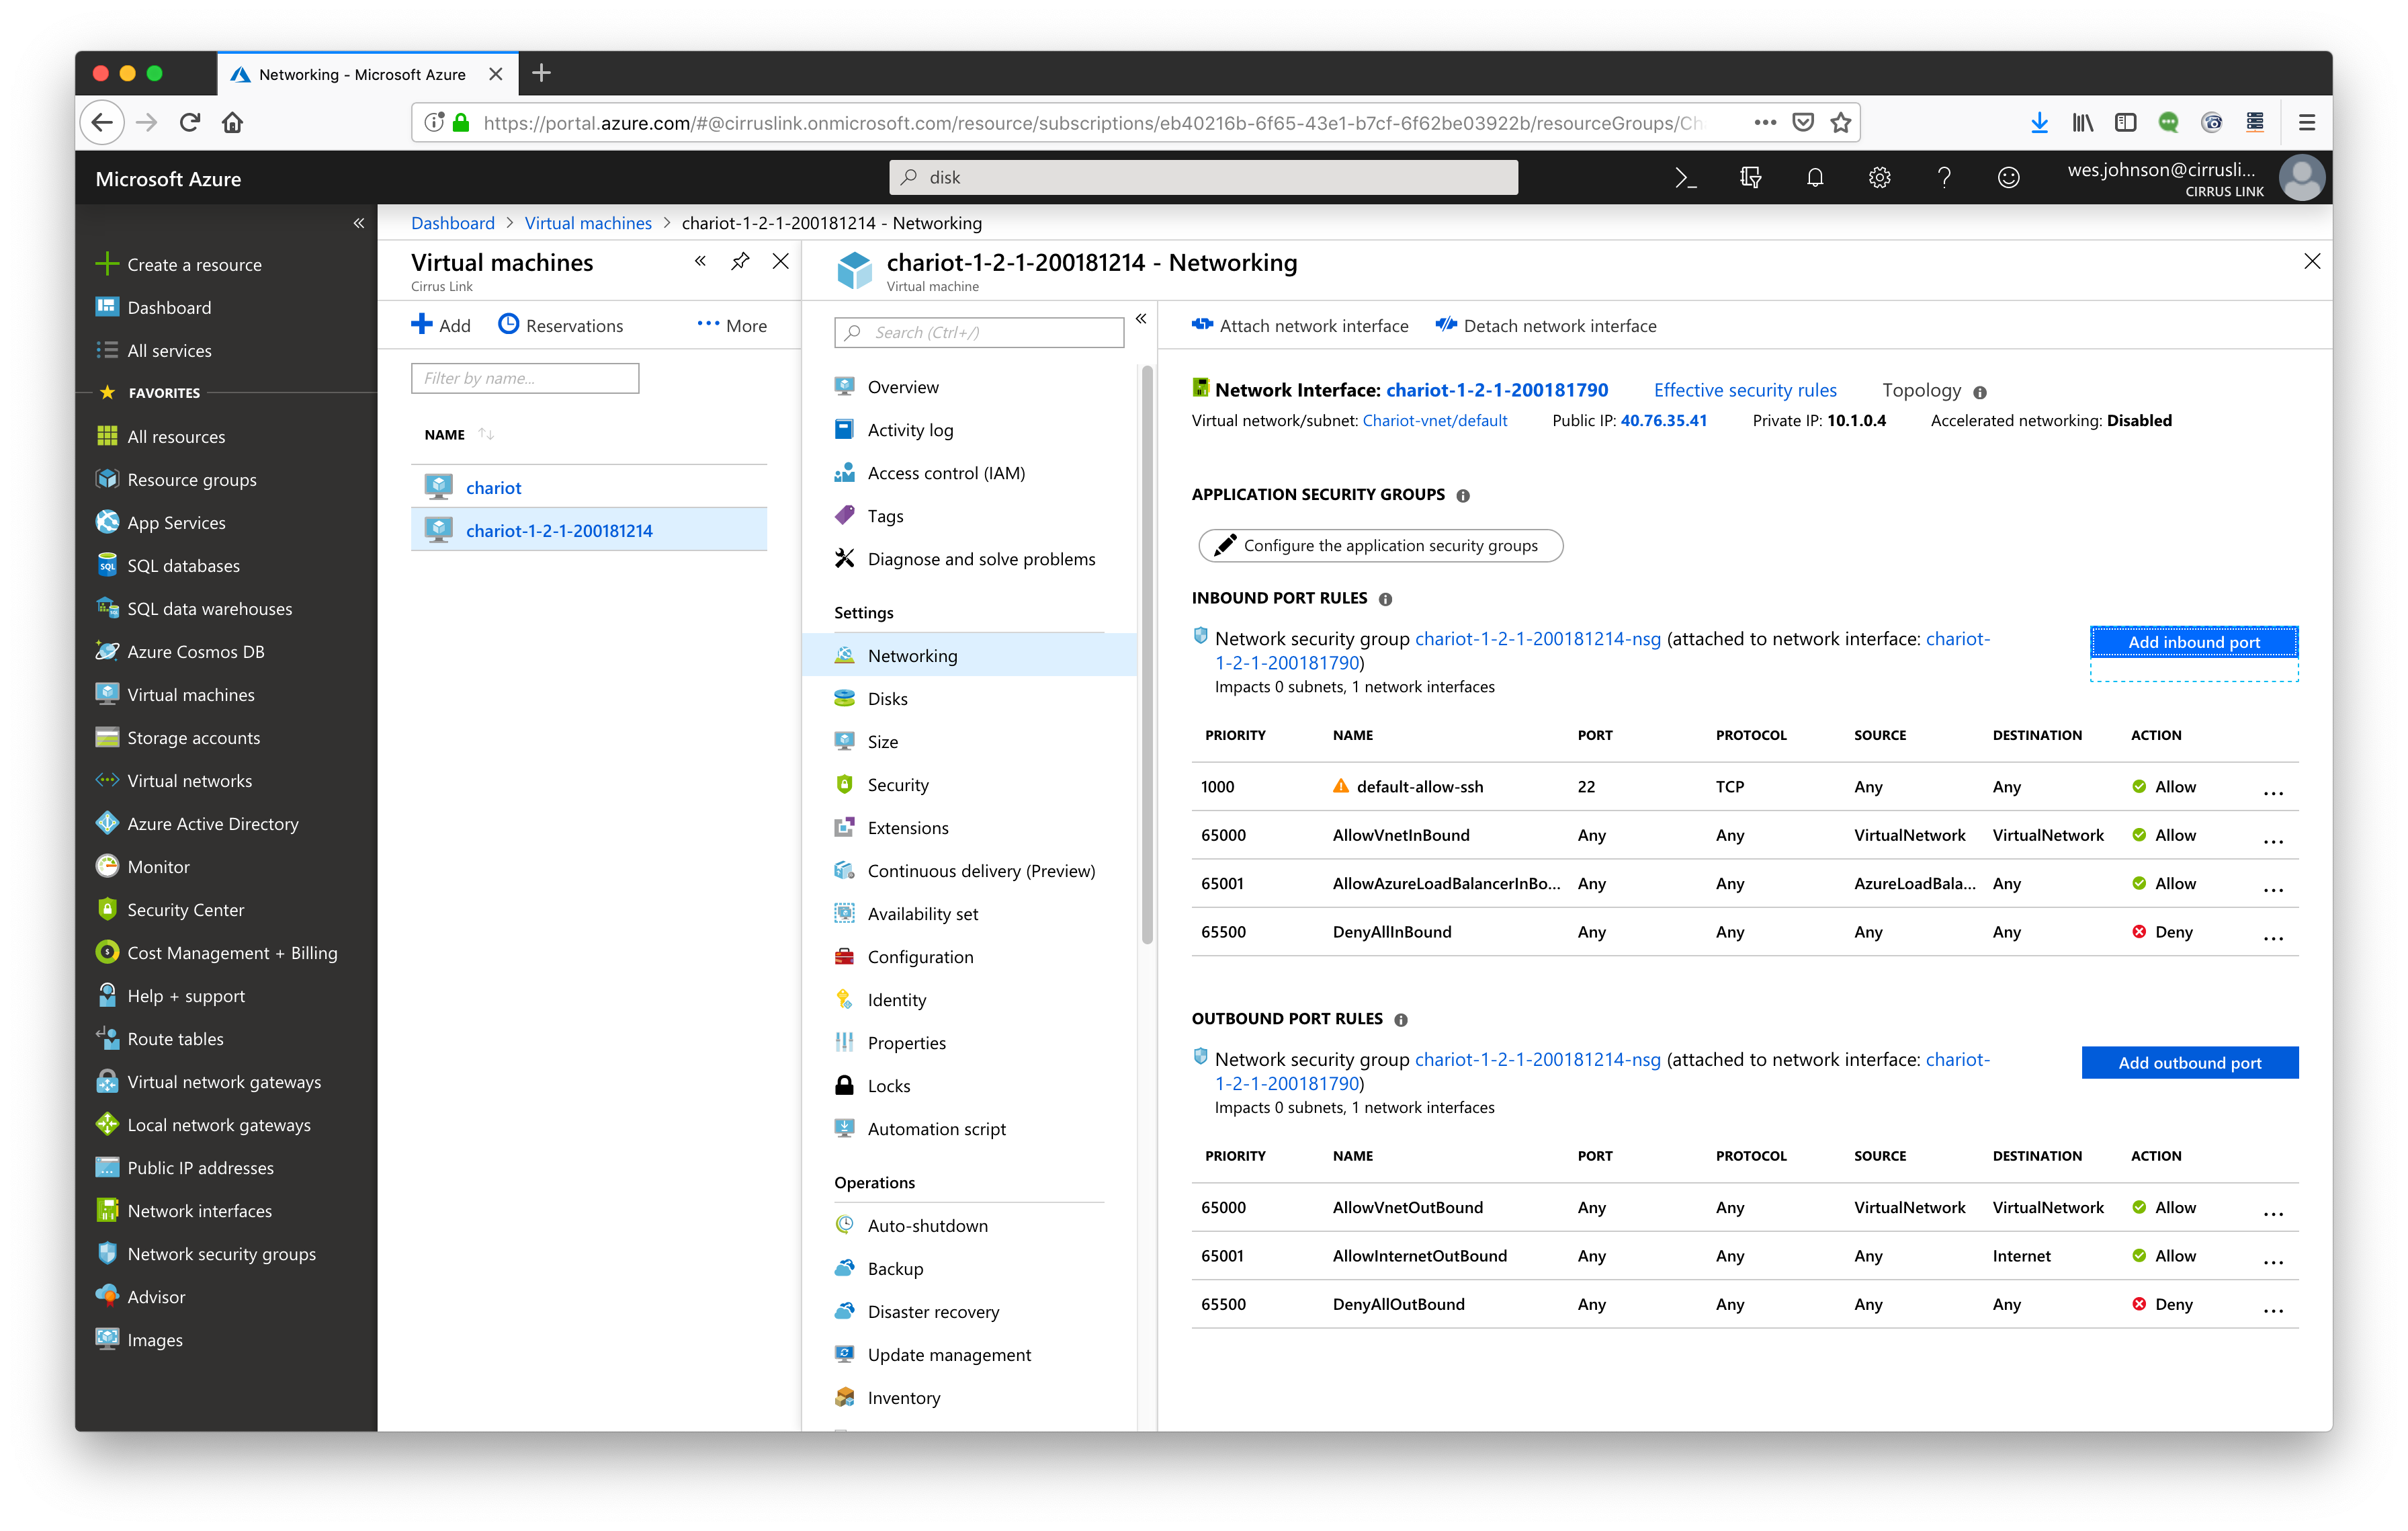
In the 'Networking' screen, select the 'Add inbound port' button on the right. That will open the screen shown below.
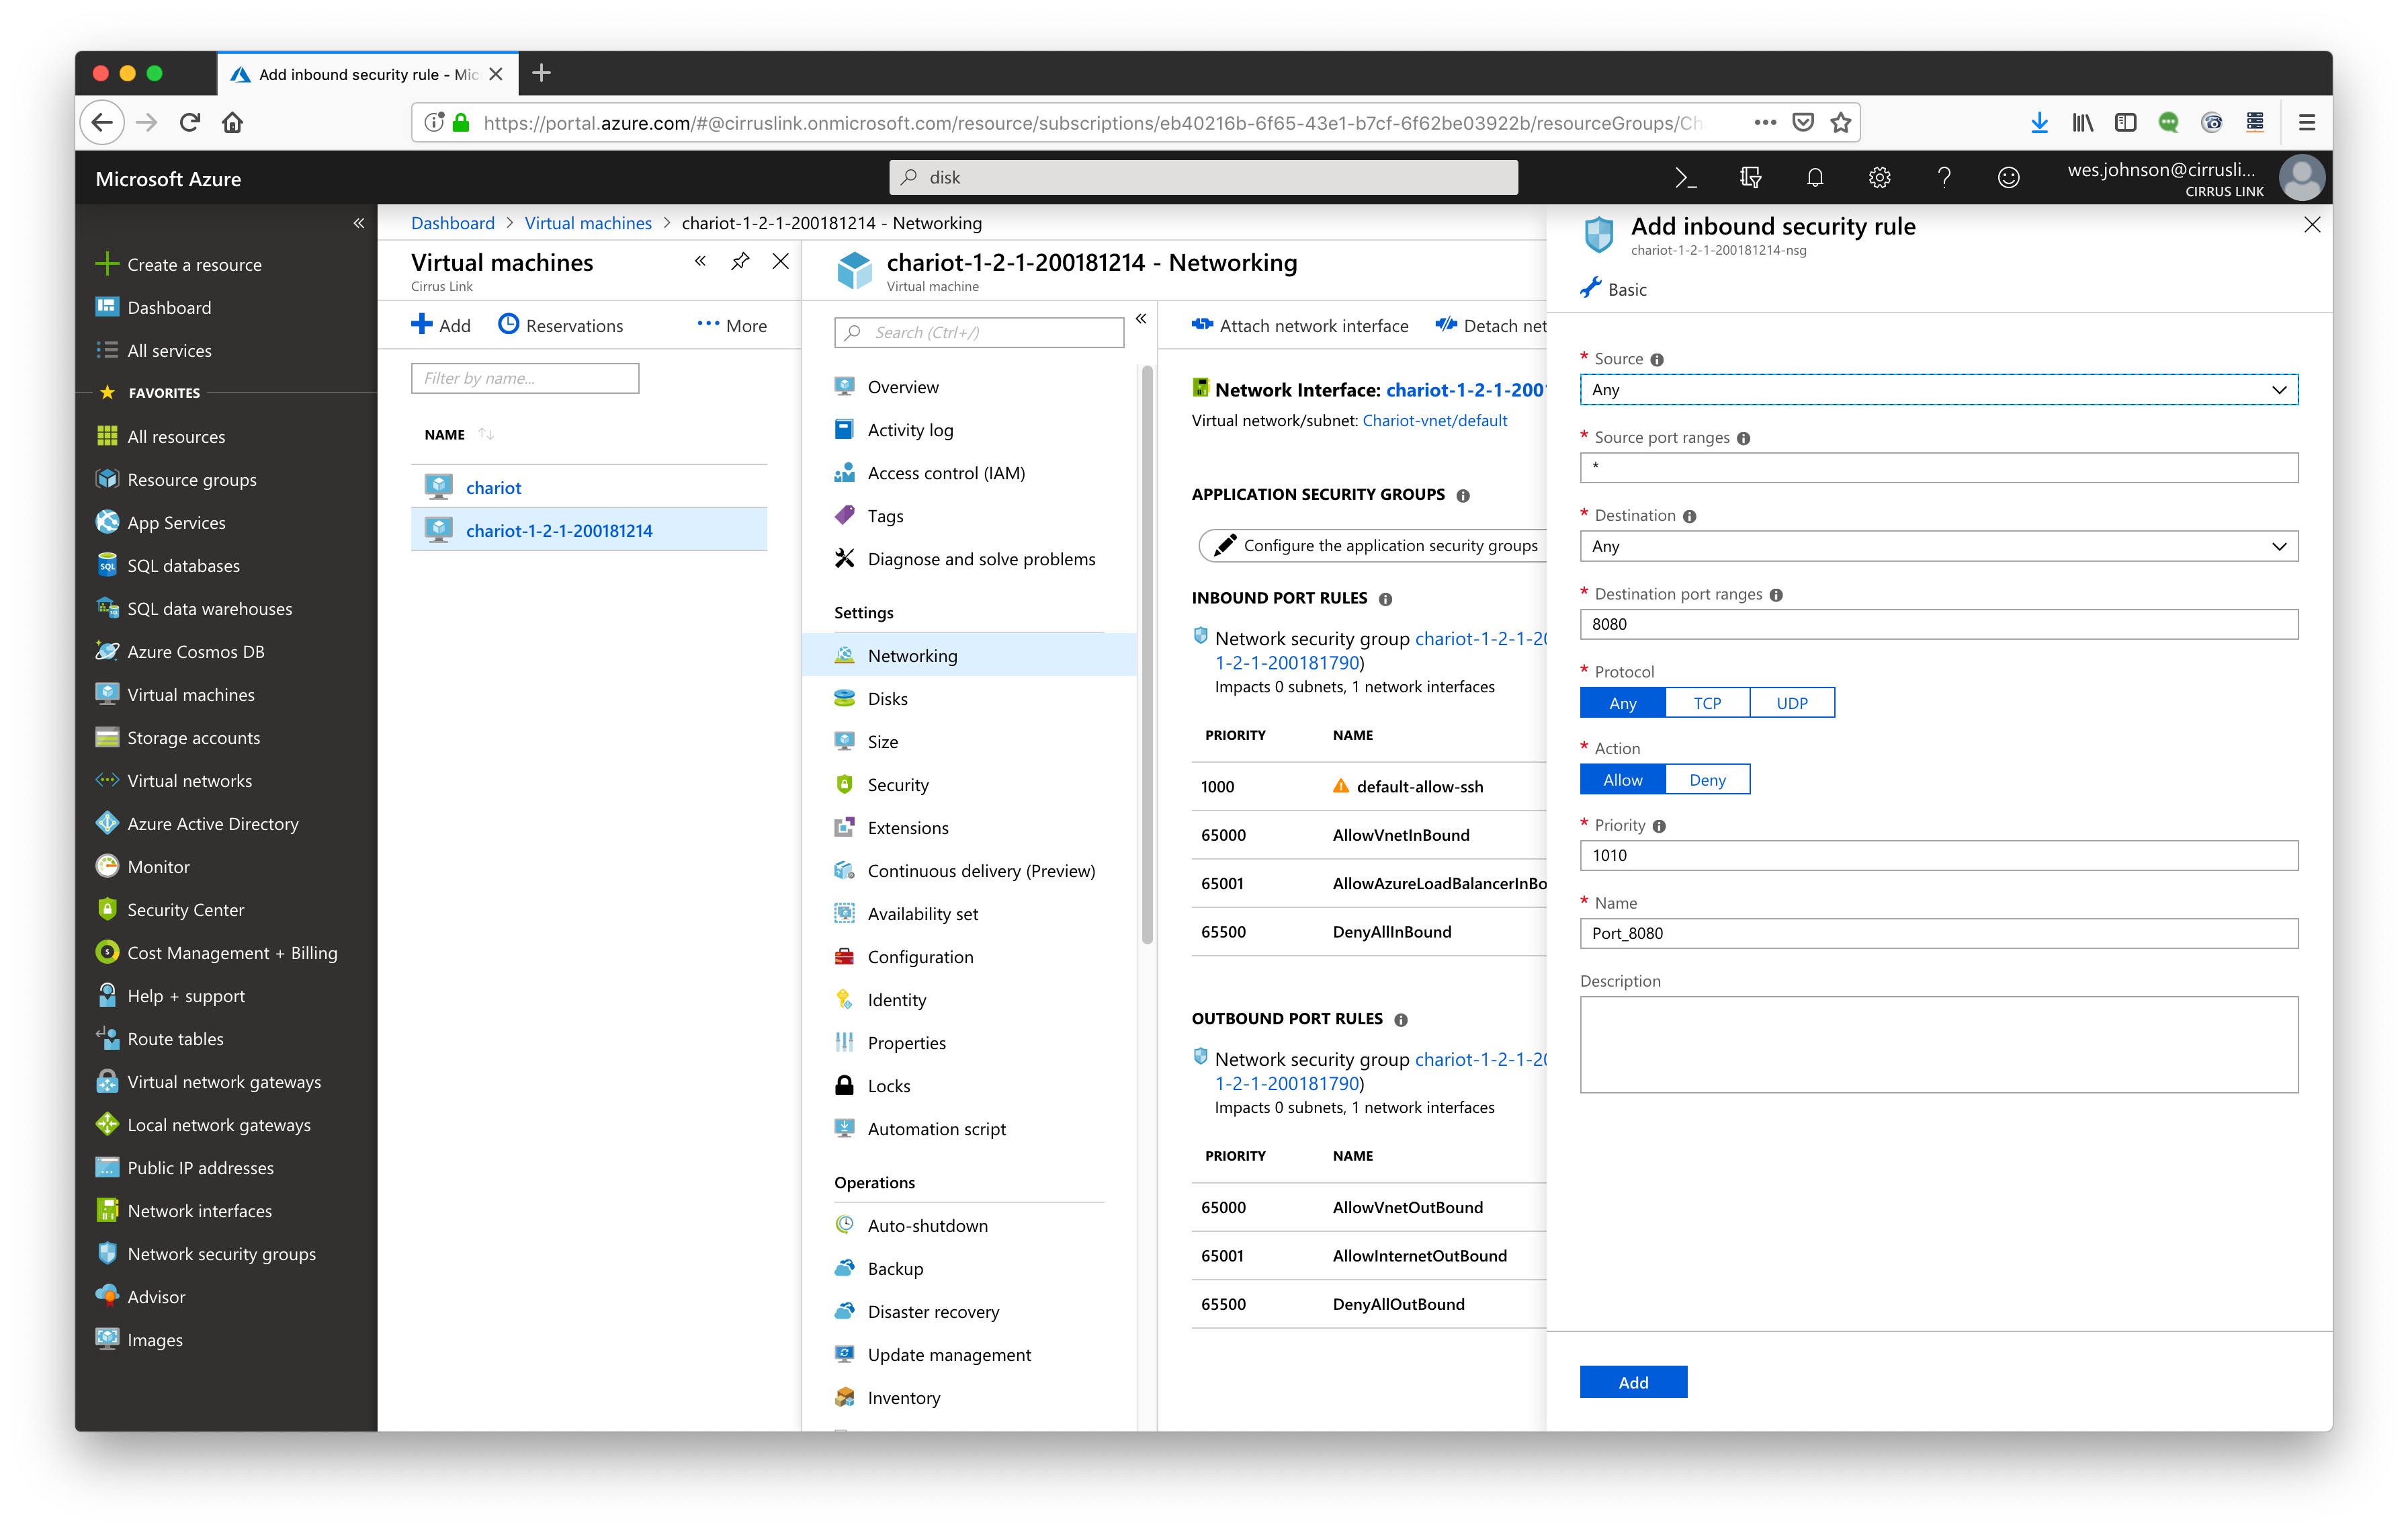
Add an inbound port in the Firewall rules for HTTPS using TCP on port 443 as shown below.
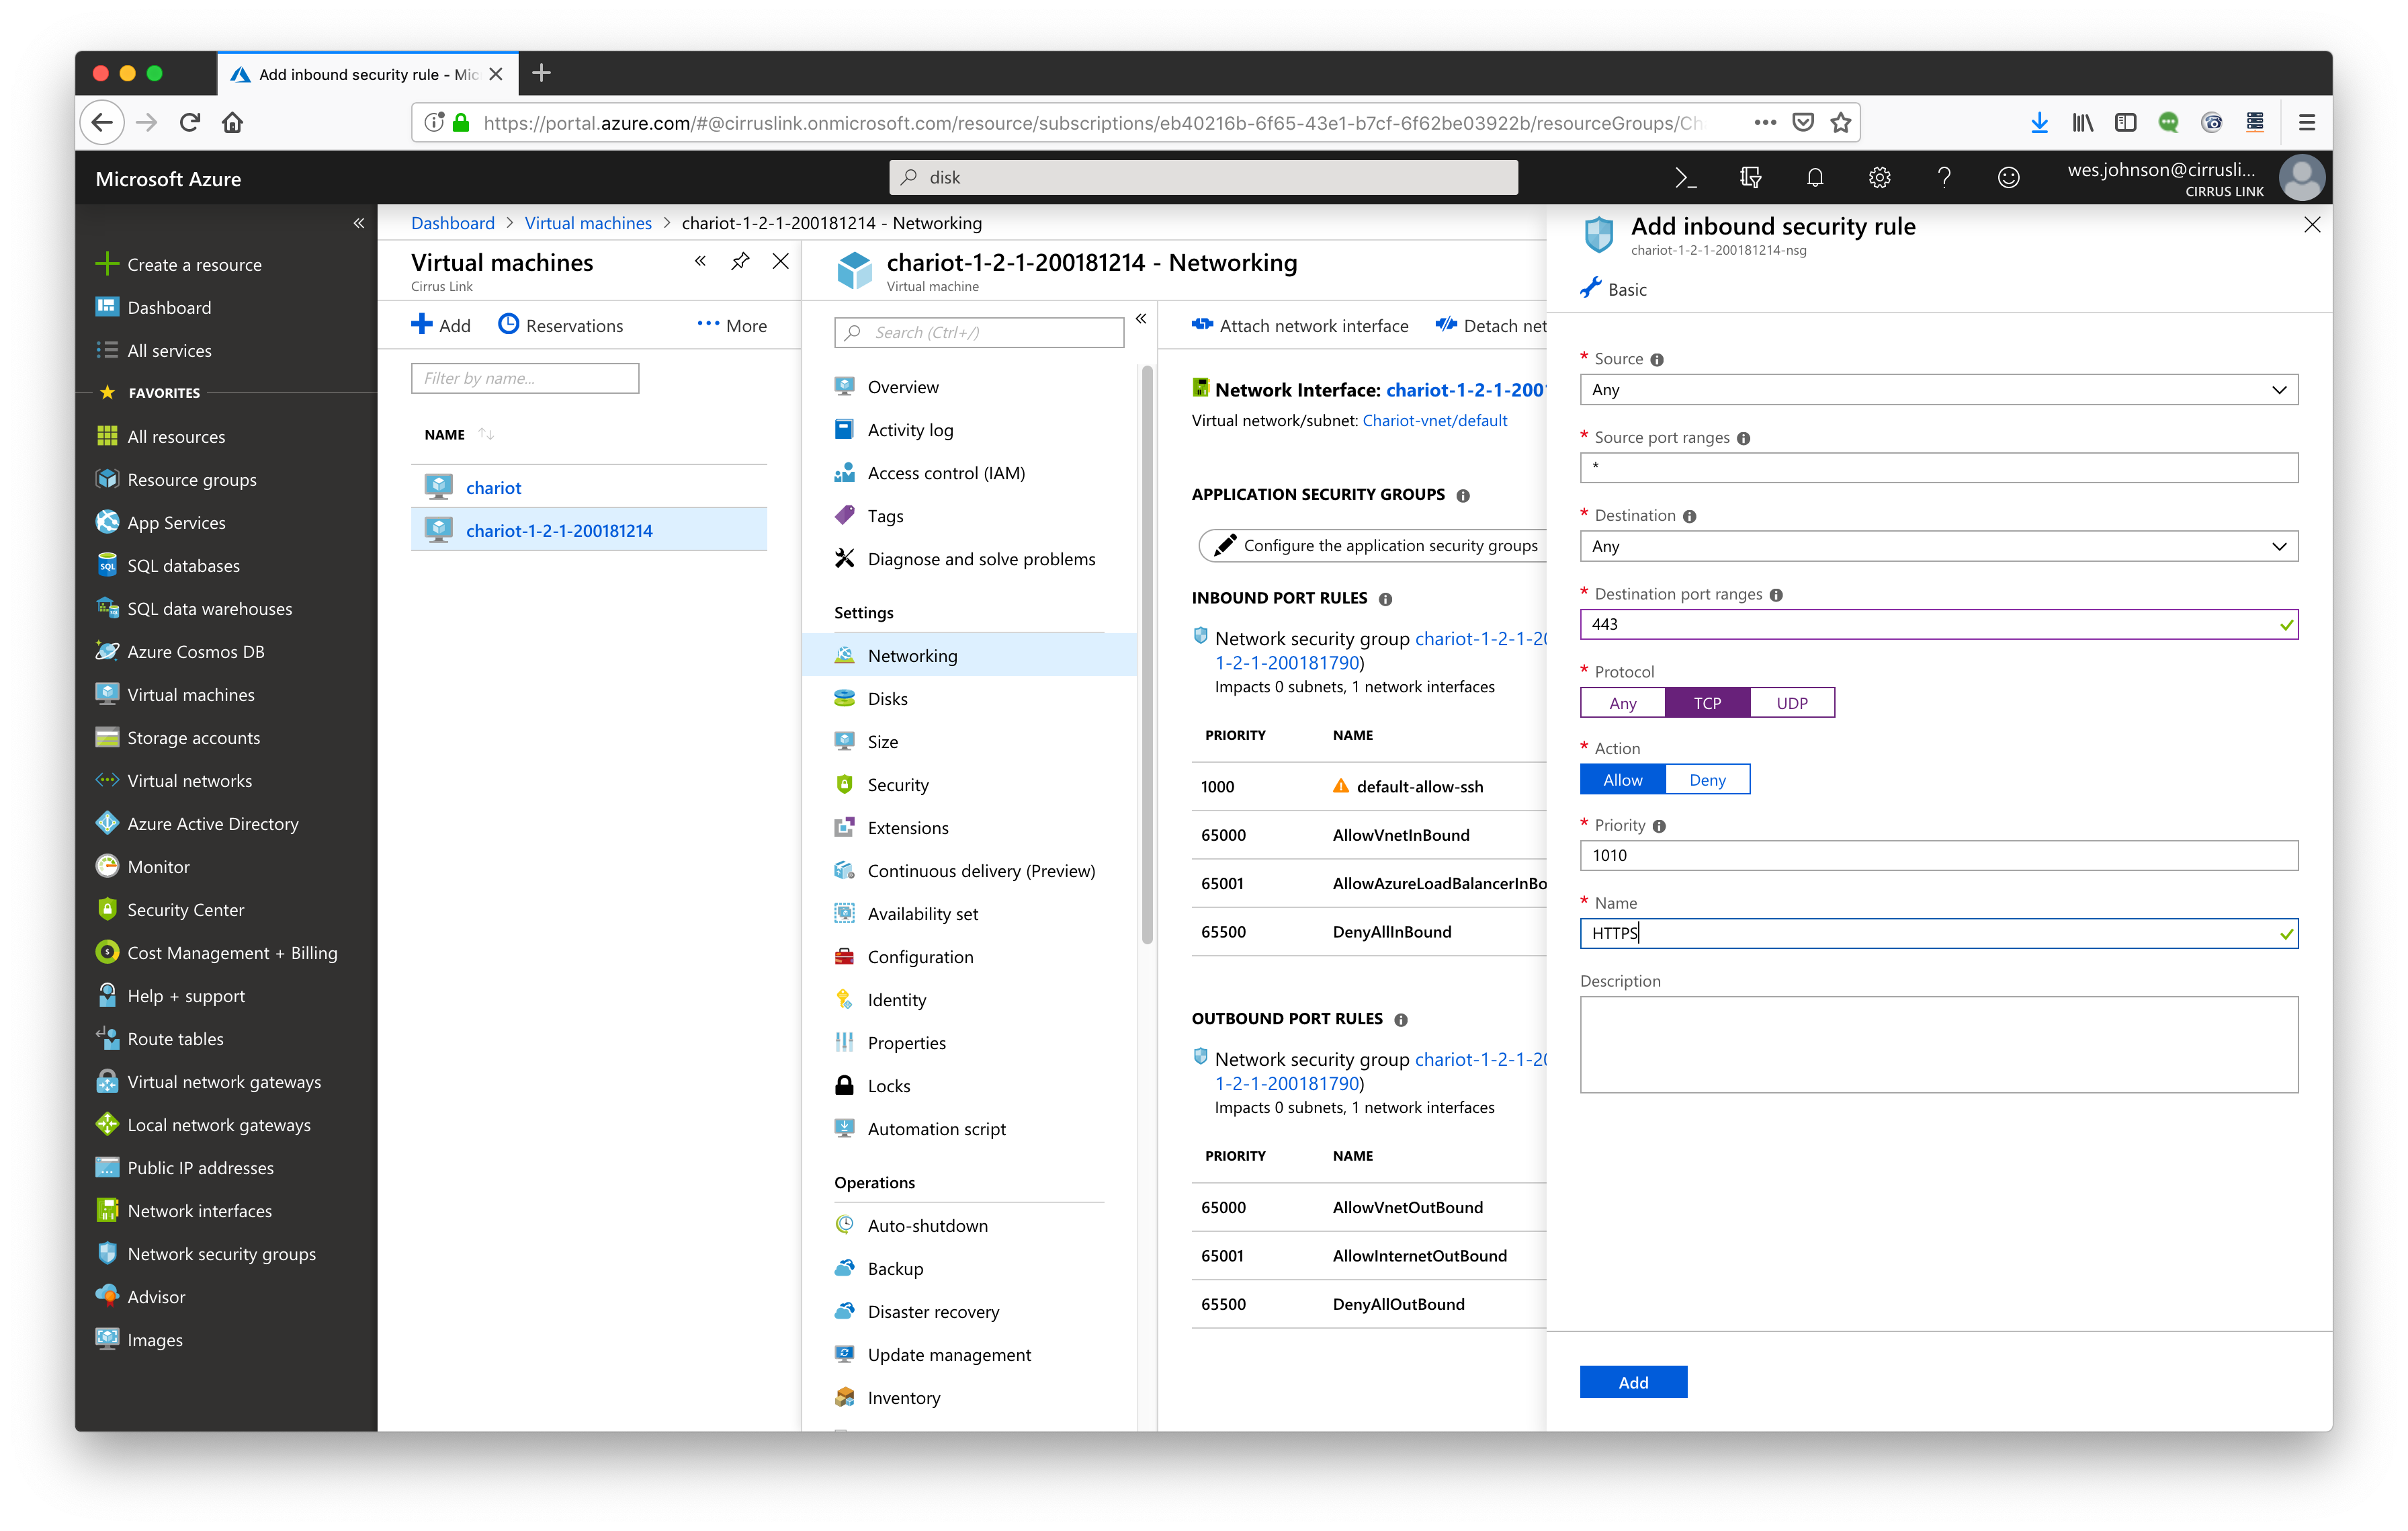
Repeat the step above for the following two rules
- MQTT: port 1883 TCP
- MQTTS: port 8883 TCP
When complete, you should see the new rules as shown below.
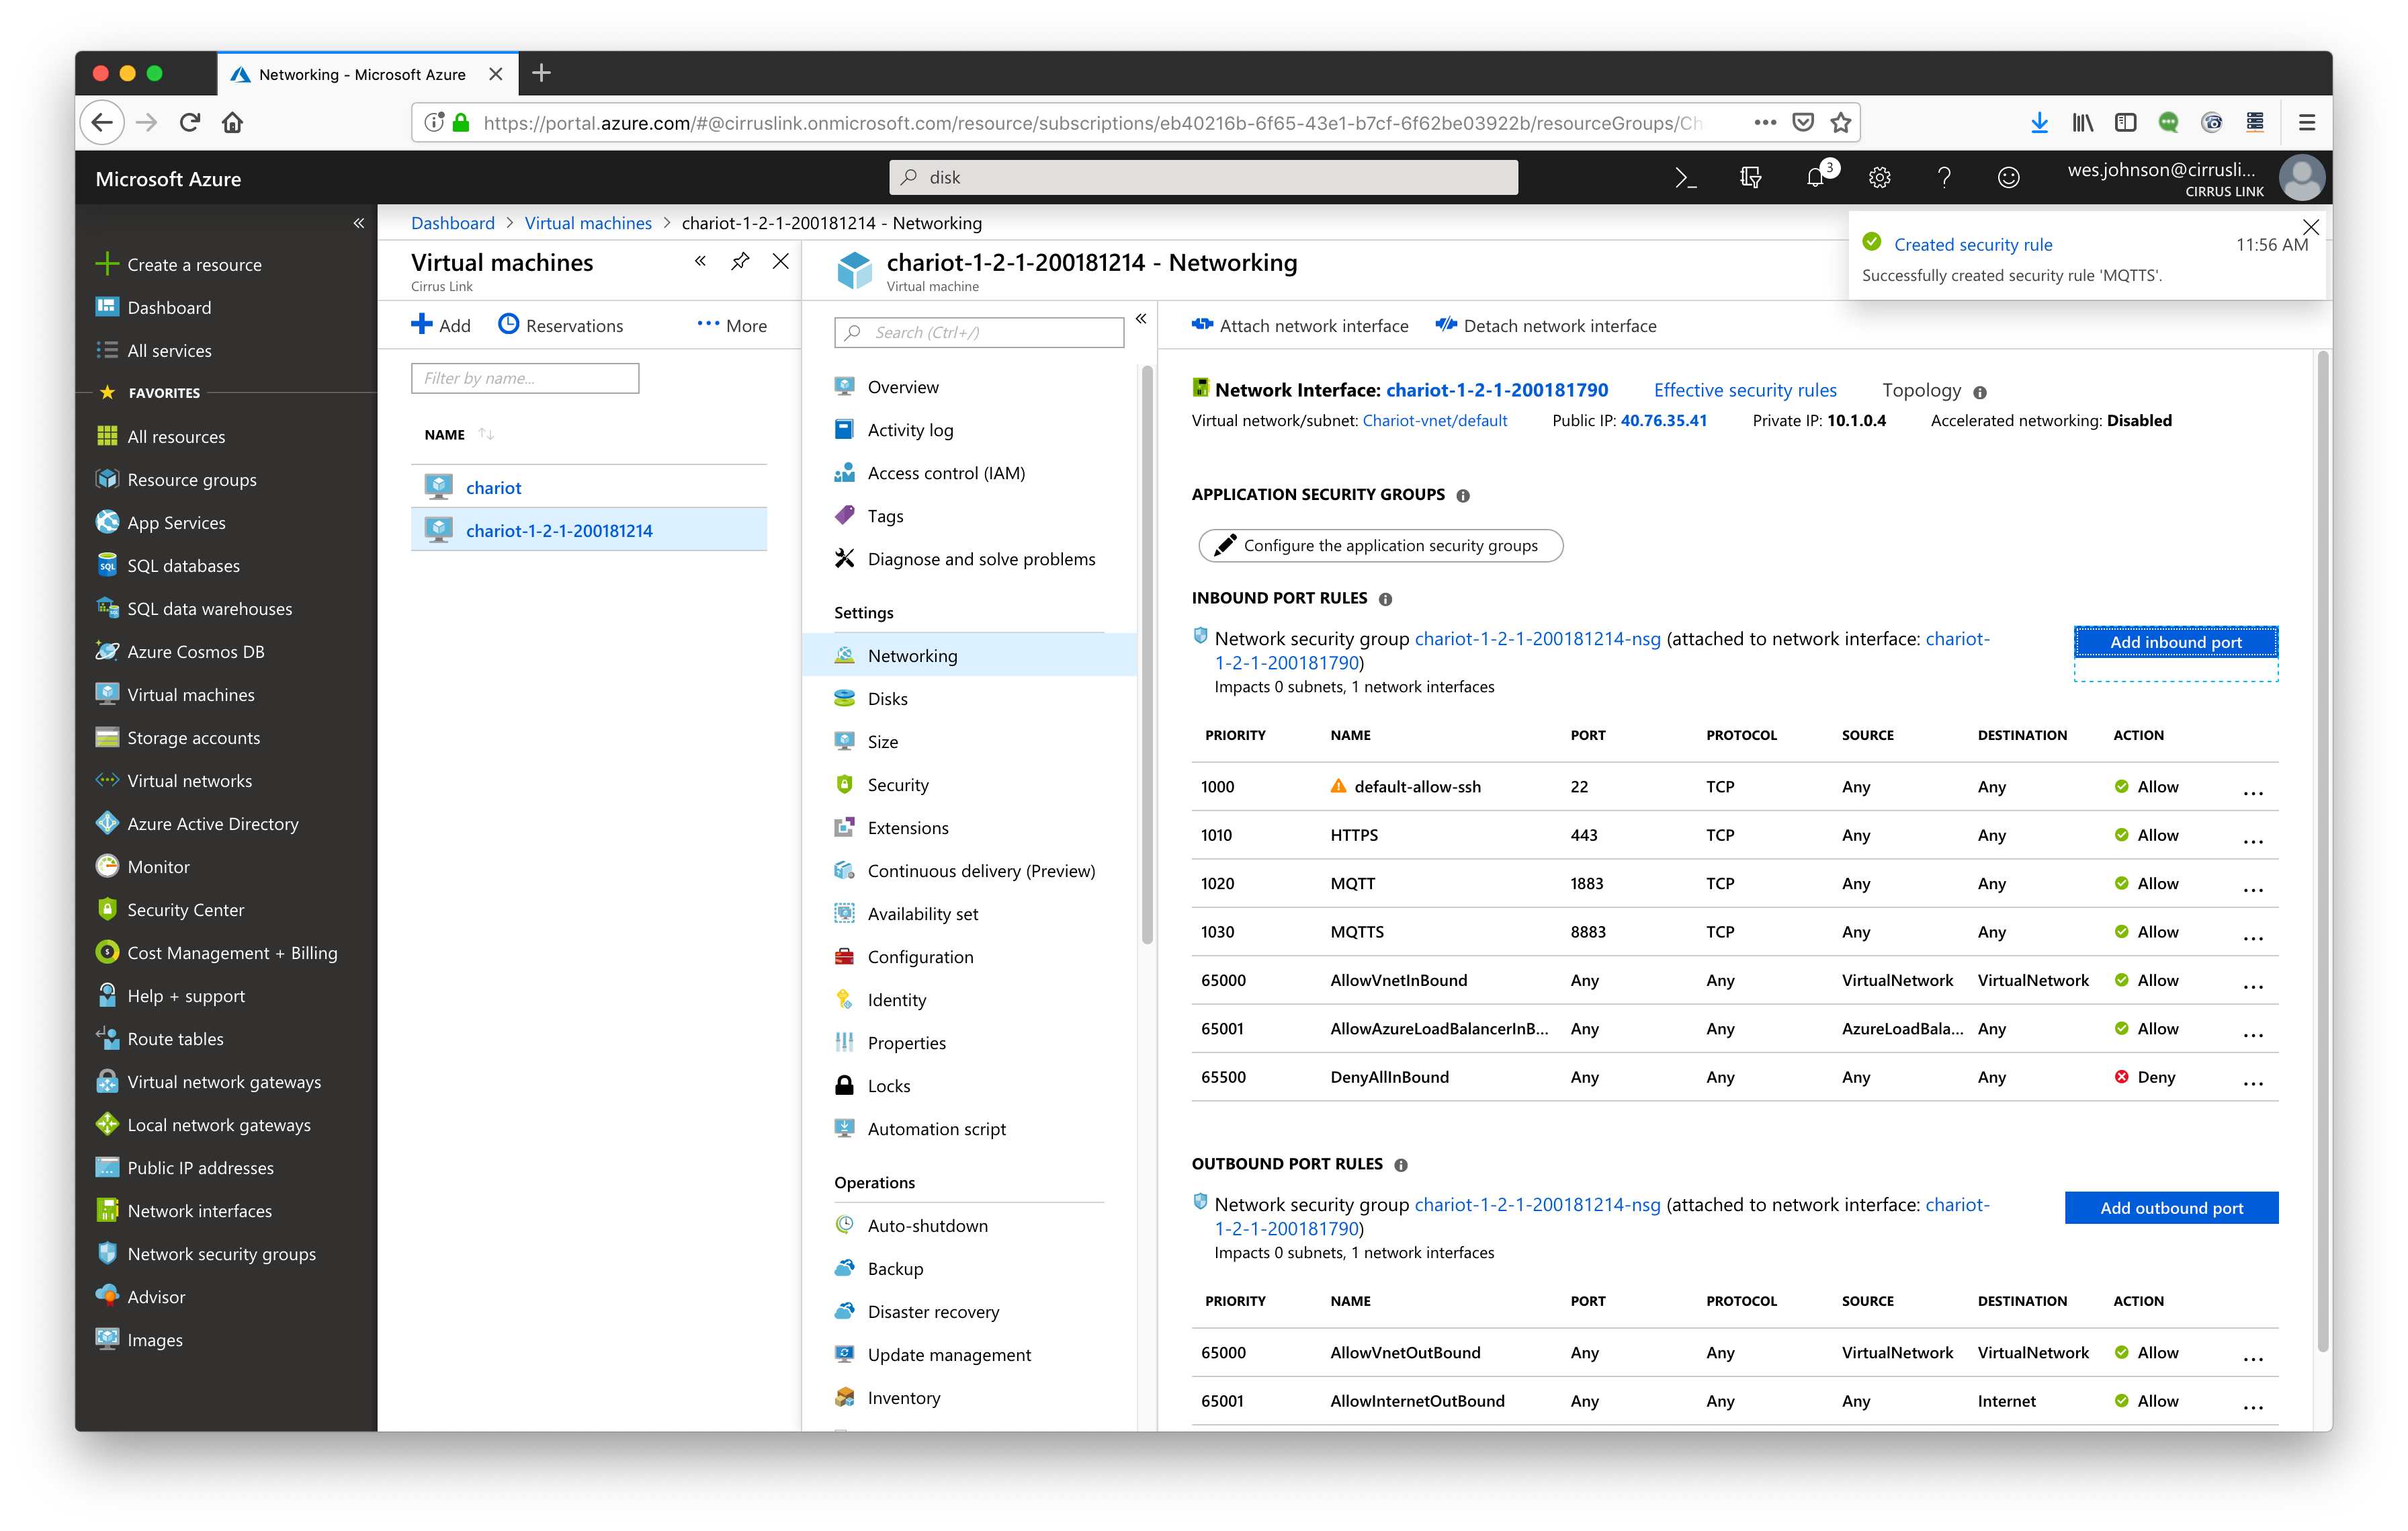
In this example the public IP address associated with the VM is 40.76.35.41. At this point, the Chariot Web UI will be available at https://[public_ip_address]. In our example this is https://40.76.35.41. Use a browser to open this page.
NOTE: Internet Explorer is not supported for connecting to the Chariot MQTT Server web front-end. Please use Chrome or Firefox.
You will likely get a browser security warning regarding the unsigned certificate. Accept the certificate to open the page. For configuration and usage instructions of the Chariot MQTT Server, visit this page.
