![]()
Contents
Cirrus Link Resources
Cirrus Link Website![]()
Contact Us (Sales/Support)![]()
Inductive Resources
Ignition User Manual![]()
Knowledge Base Articles![]()
Inductive University![]()
Forum![]()
![]()
Cirrus Link Website![]()
Contact Us (Sales/Support)![]()
Ignition User Manual![]()
Knowledge Base Articles![]()
Inductive University![]()
Forum![]()
Prerequisites:
Overview:
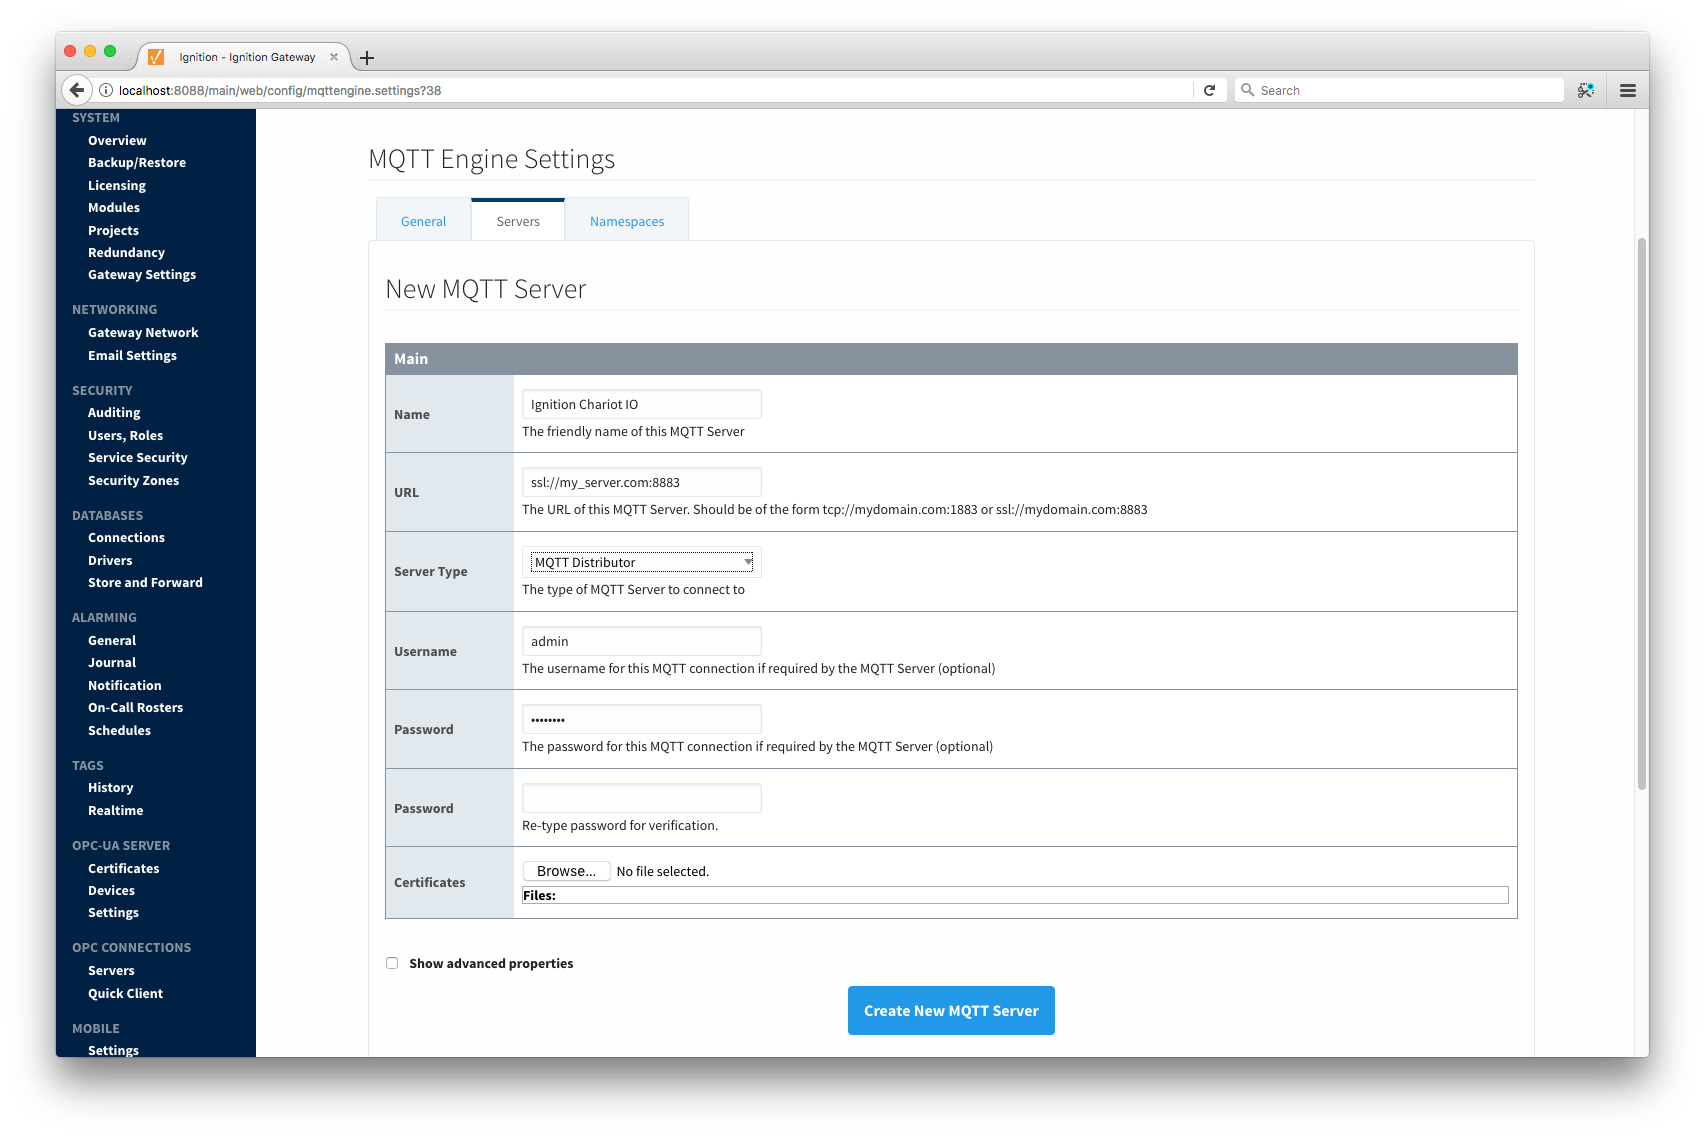
MQTT Distributor can be enabled to use TLS for encryption of the communication between MQTT clients. This is useful if MQTT Distributor is used on a public network. Since MQTT communications are not encrypted by default, enabling TLS is highly recommended on a public network. There are two ways this can be done. First is to certificate signed by a publicly trusted certificate authority (CA). While there are nominal costs associated with this, it is the proper and recommended way to go if communicating over the Internet. Alternatively, it is possible to create and use a self-signed certificate. This is useful for debugging and development. However, it is not recommended in production scenarios over the Internet. It is, however, a viable option if utilizing a private network in which encryption is a requirement.
Getting a Certificate from a Certificate Authority:
The first step is to get a certificate from a certificate authority (CA). There are many available such as Verisign, Thawte and RapidSSL. There are also a number of other certificate authorities available. The general process is as follows:
For creating the Java keystore in later steps, these files need to be in Base-64 encoded PEM format. If the certificate issued by the CA was not in this form, it must be converted to this form. Openssl is one free tool that can do this.
Creating a Self-Signed Certificate:
Creating your own CA, intermediate CA, and generating your own signed certificates can be done following the following three steps using some open source tooling. Note creating an Intermediate CA is not explicitly required but is recommended if you will be using self-signed certs in a private network in production. If this is simply for development that step can be skipped and the root CA can be used to sign server certificates. Again, using self-signed certs in production over the Internet is not recommended.
Using the Certificate to Secure Communication with MQTT Distributor:
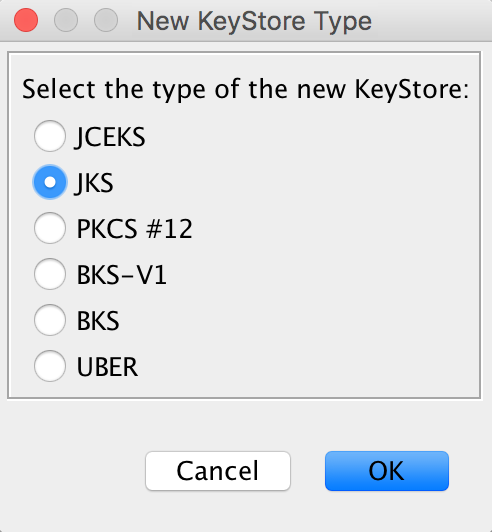
Whether you are using a certificate issued by a trusted CA or a self-signed certificate, a Java keystore file must be created for use with MQTT Distributor. This keystore will contain the public certificate, the private key, and possibly an intermediate certificate if applicable. There are many ways to create a Java keystore. In this example, we'll show how it can be done using Keystore Explorer. It can run on Windows, OSX, or any other OS that can run Java. It provides an easy to use graphical interface for creating and manipulating Java keystores. After installing Keystore Explorer, open it and you should see something similar to the following. It may ask you to modify some of your Java Security settings before starting. If so, follow the instructions it provides. Select 'Create a new Keystore'
Select a 'JKS' as the type as shown below:
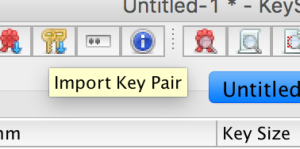
As this point, we need to pull the required components into the keystore. We'll start with the public/private keypair. This is the public certificate and the private key that we originally generated. Click the 'Import Key Pair' icon from the Keystore Explorer menu. It is the icon with two keys and a blue downward arrow:
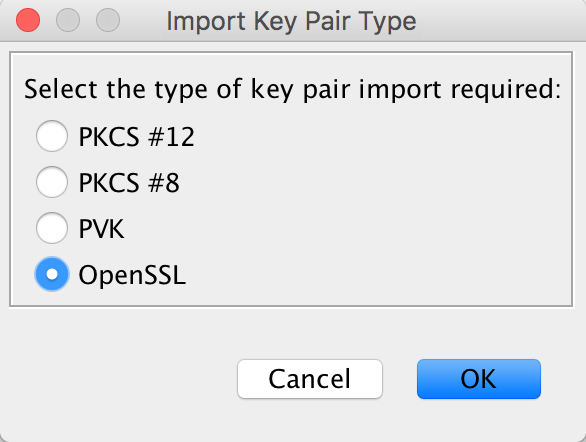
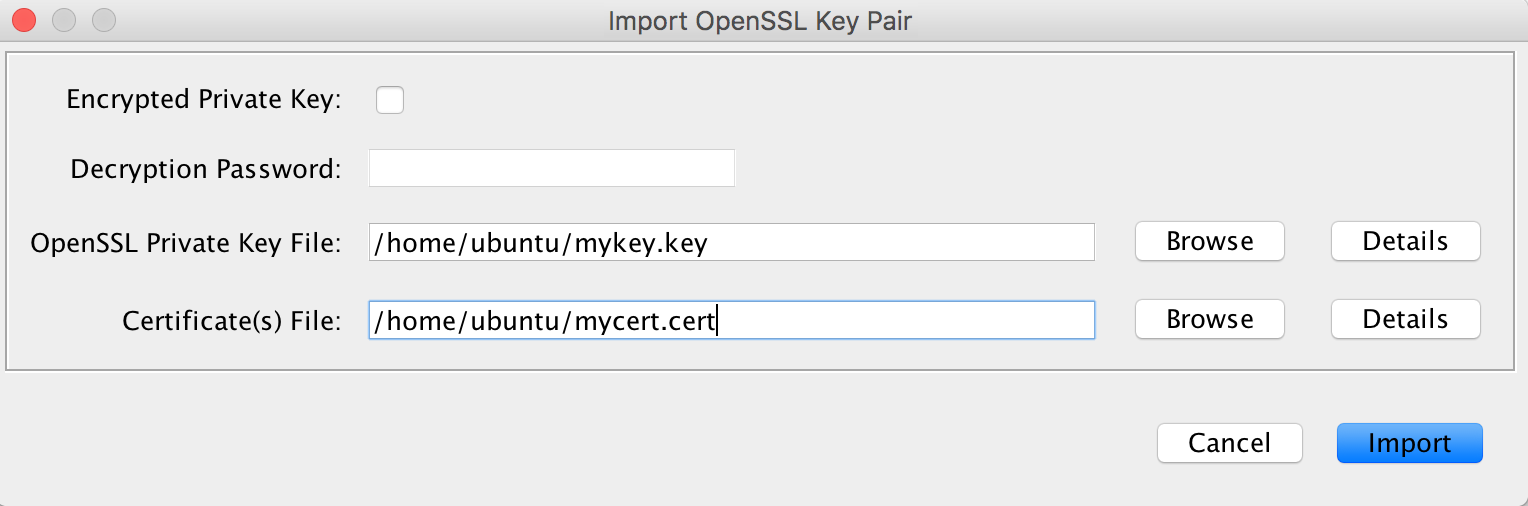
At this point, since the certificate we're using is in Base-64 encoded PEM format. We select OpenSSL as the type and click OK:
Now we can browse to our key and certificate files as shown below and click import:
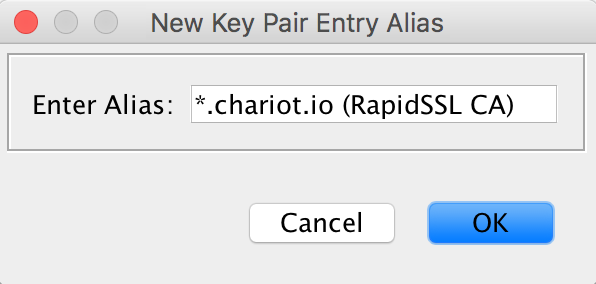
Now you will be asked to specify the alias. You can leave this as the default. It will reflect the Common Name that was specified during the CSR generation and the CA:
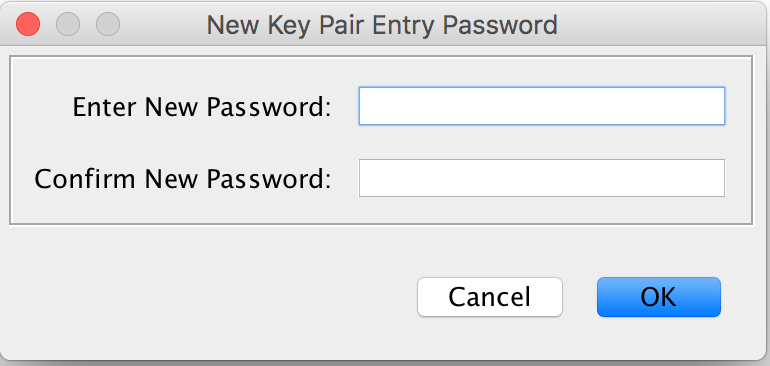
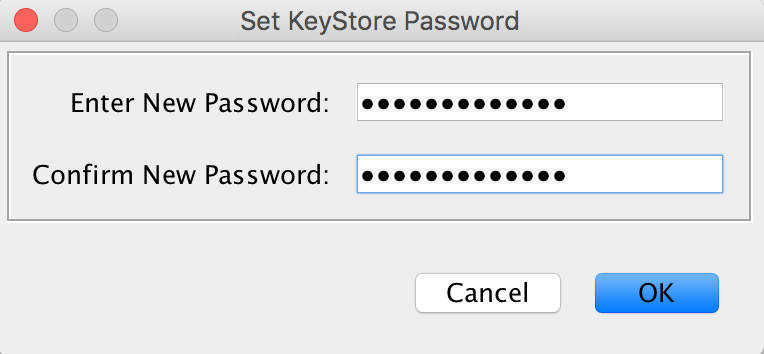
You will now be asked to specify a password for the keypair. At this point MQTT Distributor requires that the Key Pair passwords match the overall Keystore password. So, make sure you note this password because we'll need to use it as the overall keystore password as well.
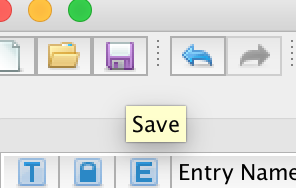
At this point, you can save your keystore and specify a keystore password. Do so by clicking the save icon in the upper left menu:
You will now be prompted for a password. Provide the same secure password you used for the public/private keypair earlier.
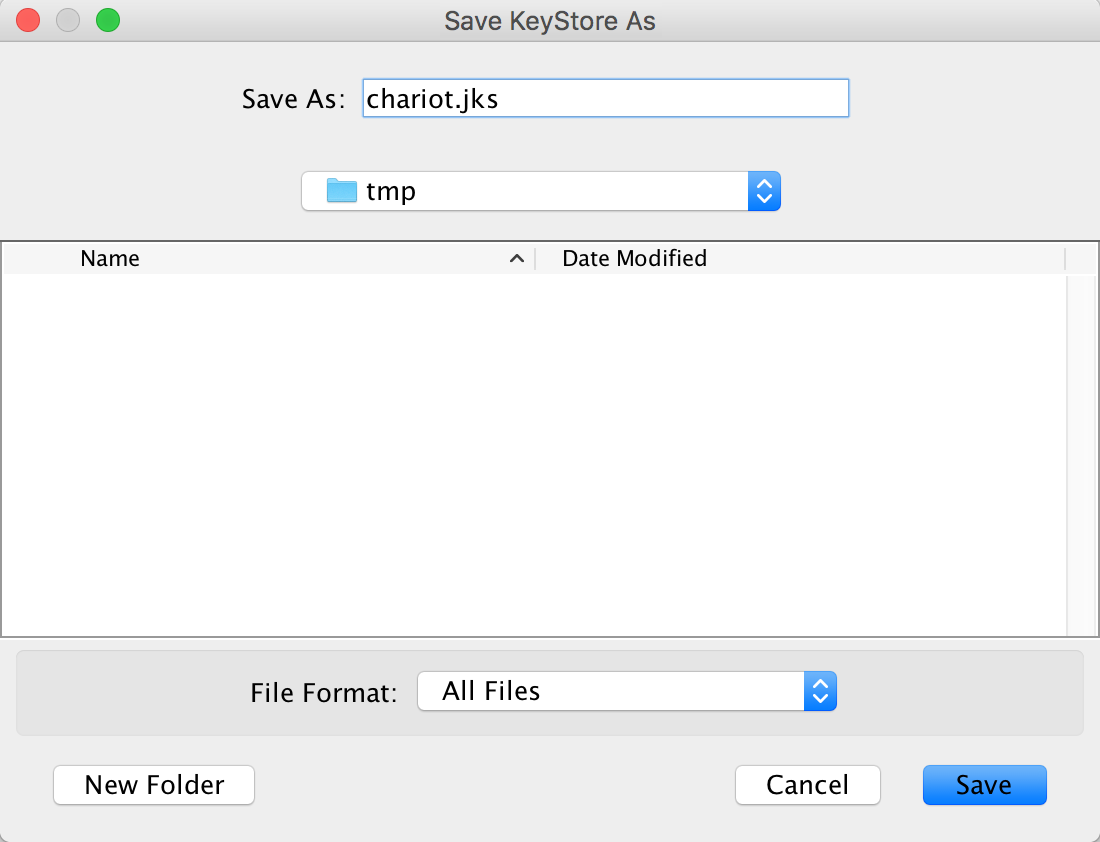
Finally, give it a name and location on the filesystem and click Save:
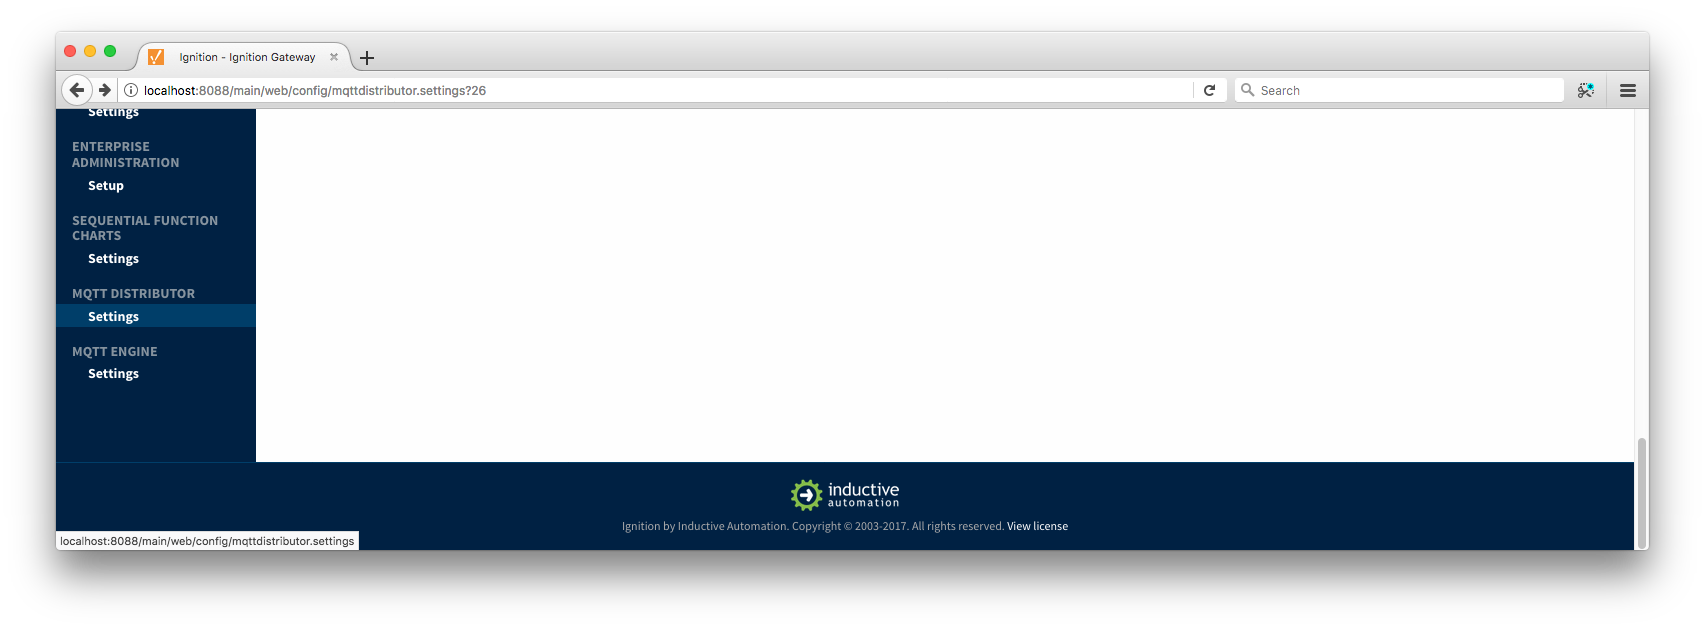
At this point, the Java keystore simply needs to be set in MQTT Distributor's configuration. Do so by browsing the the Ignition Gateway Web UI and select the Configure tab. Then select MQTT Distributor settings on the left side menu as shown below.
 Find the 'TLS Setting' section of the General Settings tab as shown below.
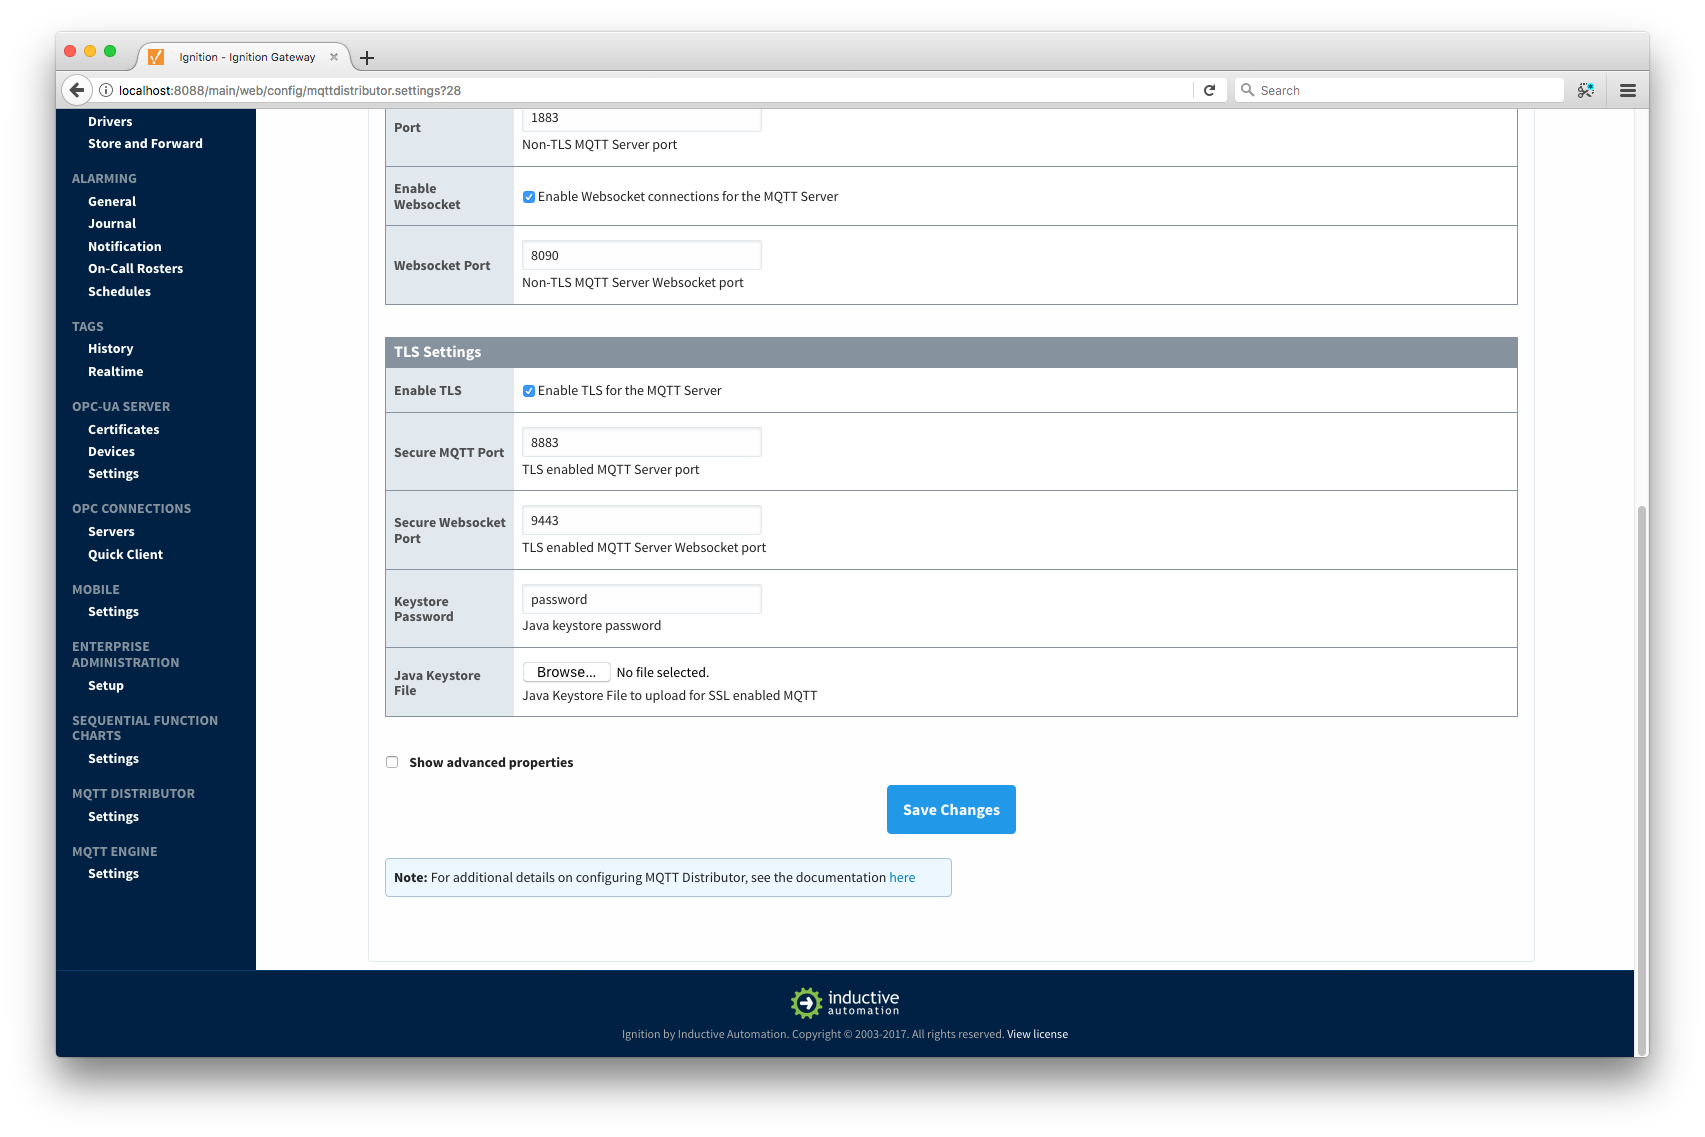 Make sure the 'Enable TLS' is checked. Select the 'Java Keystore File' 'Browse' button and then browse to the Java Keystore file you created above. Enter the Keystore password and then click Save Changes.
At this point, all MQTT clients can now connect over TLS enabled connections. Note the new port of 8883. If using a certificate signed by a publicly trusted CA and the OS with the MQTT client supports that specific CA, the clients don't have to make any modifications to their list of trusted root certificates. If using a self-signed certificate there are a couple options:
Note if your certificate also requires an intermediate certificate, this must also be added to the MQTT client so the full chain of trust can be established.
Using the Certificate to Secure Communication with MQTT Engine or MQTT Transmission:
In MQTT Engine or Transmission, there may be a need to specify the TLS components for the client configuration. In the case of using certificates signed by a trusted CA that do not require an internediate cert don't need any special configuration other changing the form of the URL. The form should be as follows:
An example is here:
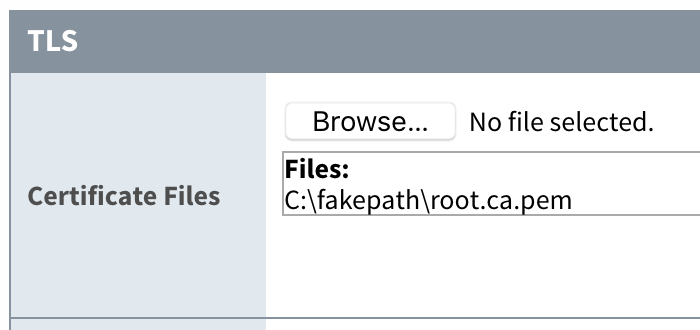
If the trusted CA you purchased your certificate from requires an intermediate certificate or if you created a self signed certificate, you will need to specify the CA certificate chain in the configuration. If you received your certificate from a trusted CA and they require an intermediate certificate, it will be provided by the CA. If you followed the tutorial above for a self-signed certificate and also created an intermediate CA, it will be the file called 'ca-chain.cert.pem'. If you simply created a CA without an intermediate cert, it will be the public CA certificate. Once you've identified the CA certificate chain based on these descriptions, copy it to a file called 'root.ca.pem' on your development system. Note this filename change is important and required. Upload the file via the configuration as shown here by clicking Save Changes:
Once the settings are saved, the MQTT client associated with MQTT Engine or MQTT Transmission will connect using TLS.