...
- Ignition Edge 2
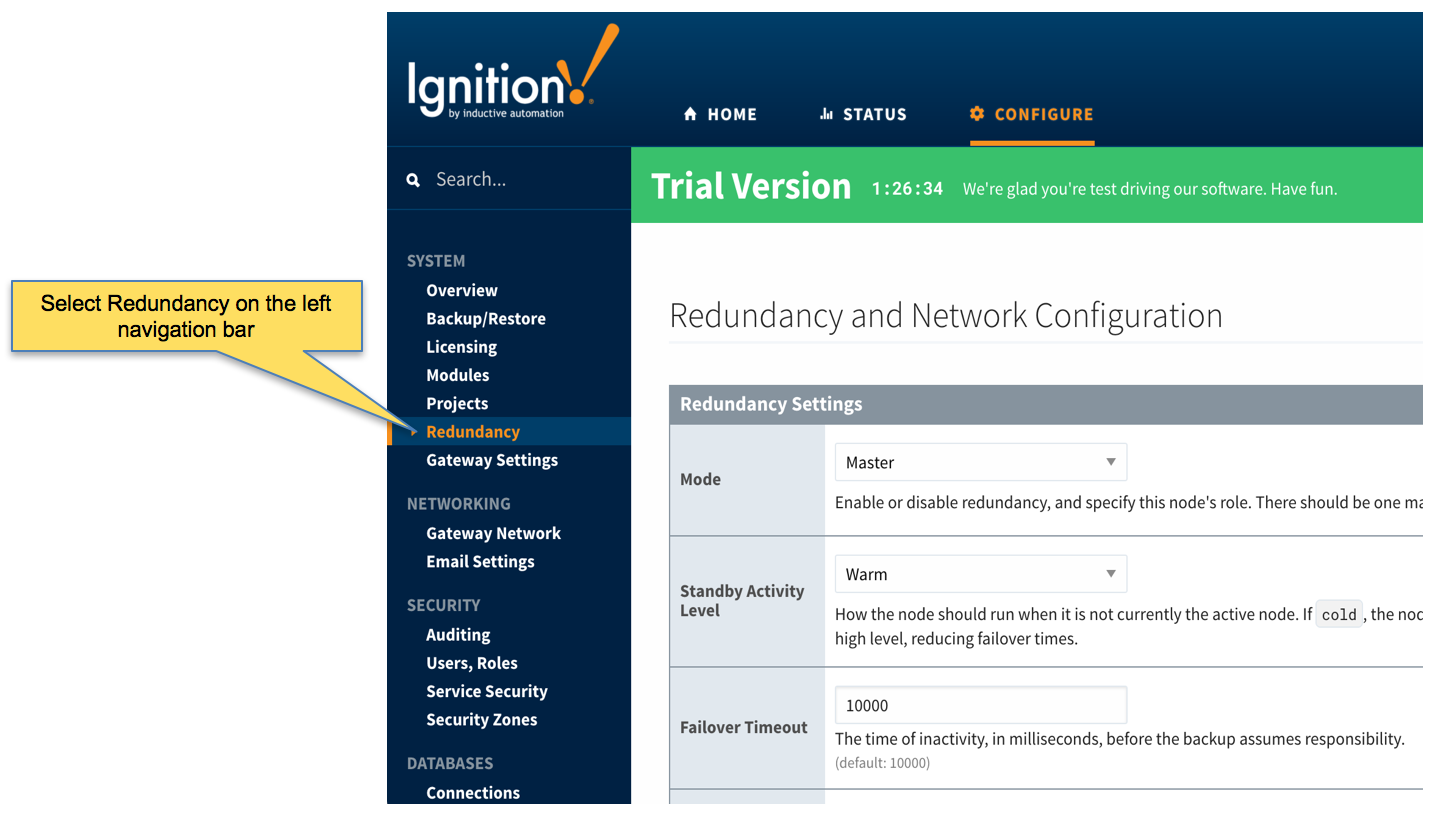
- Select Redundancy on the left navigation bar. Then set the Mode to 'Master' and set the Standby Activity left to 'Warm' as shown below.
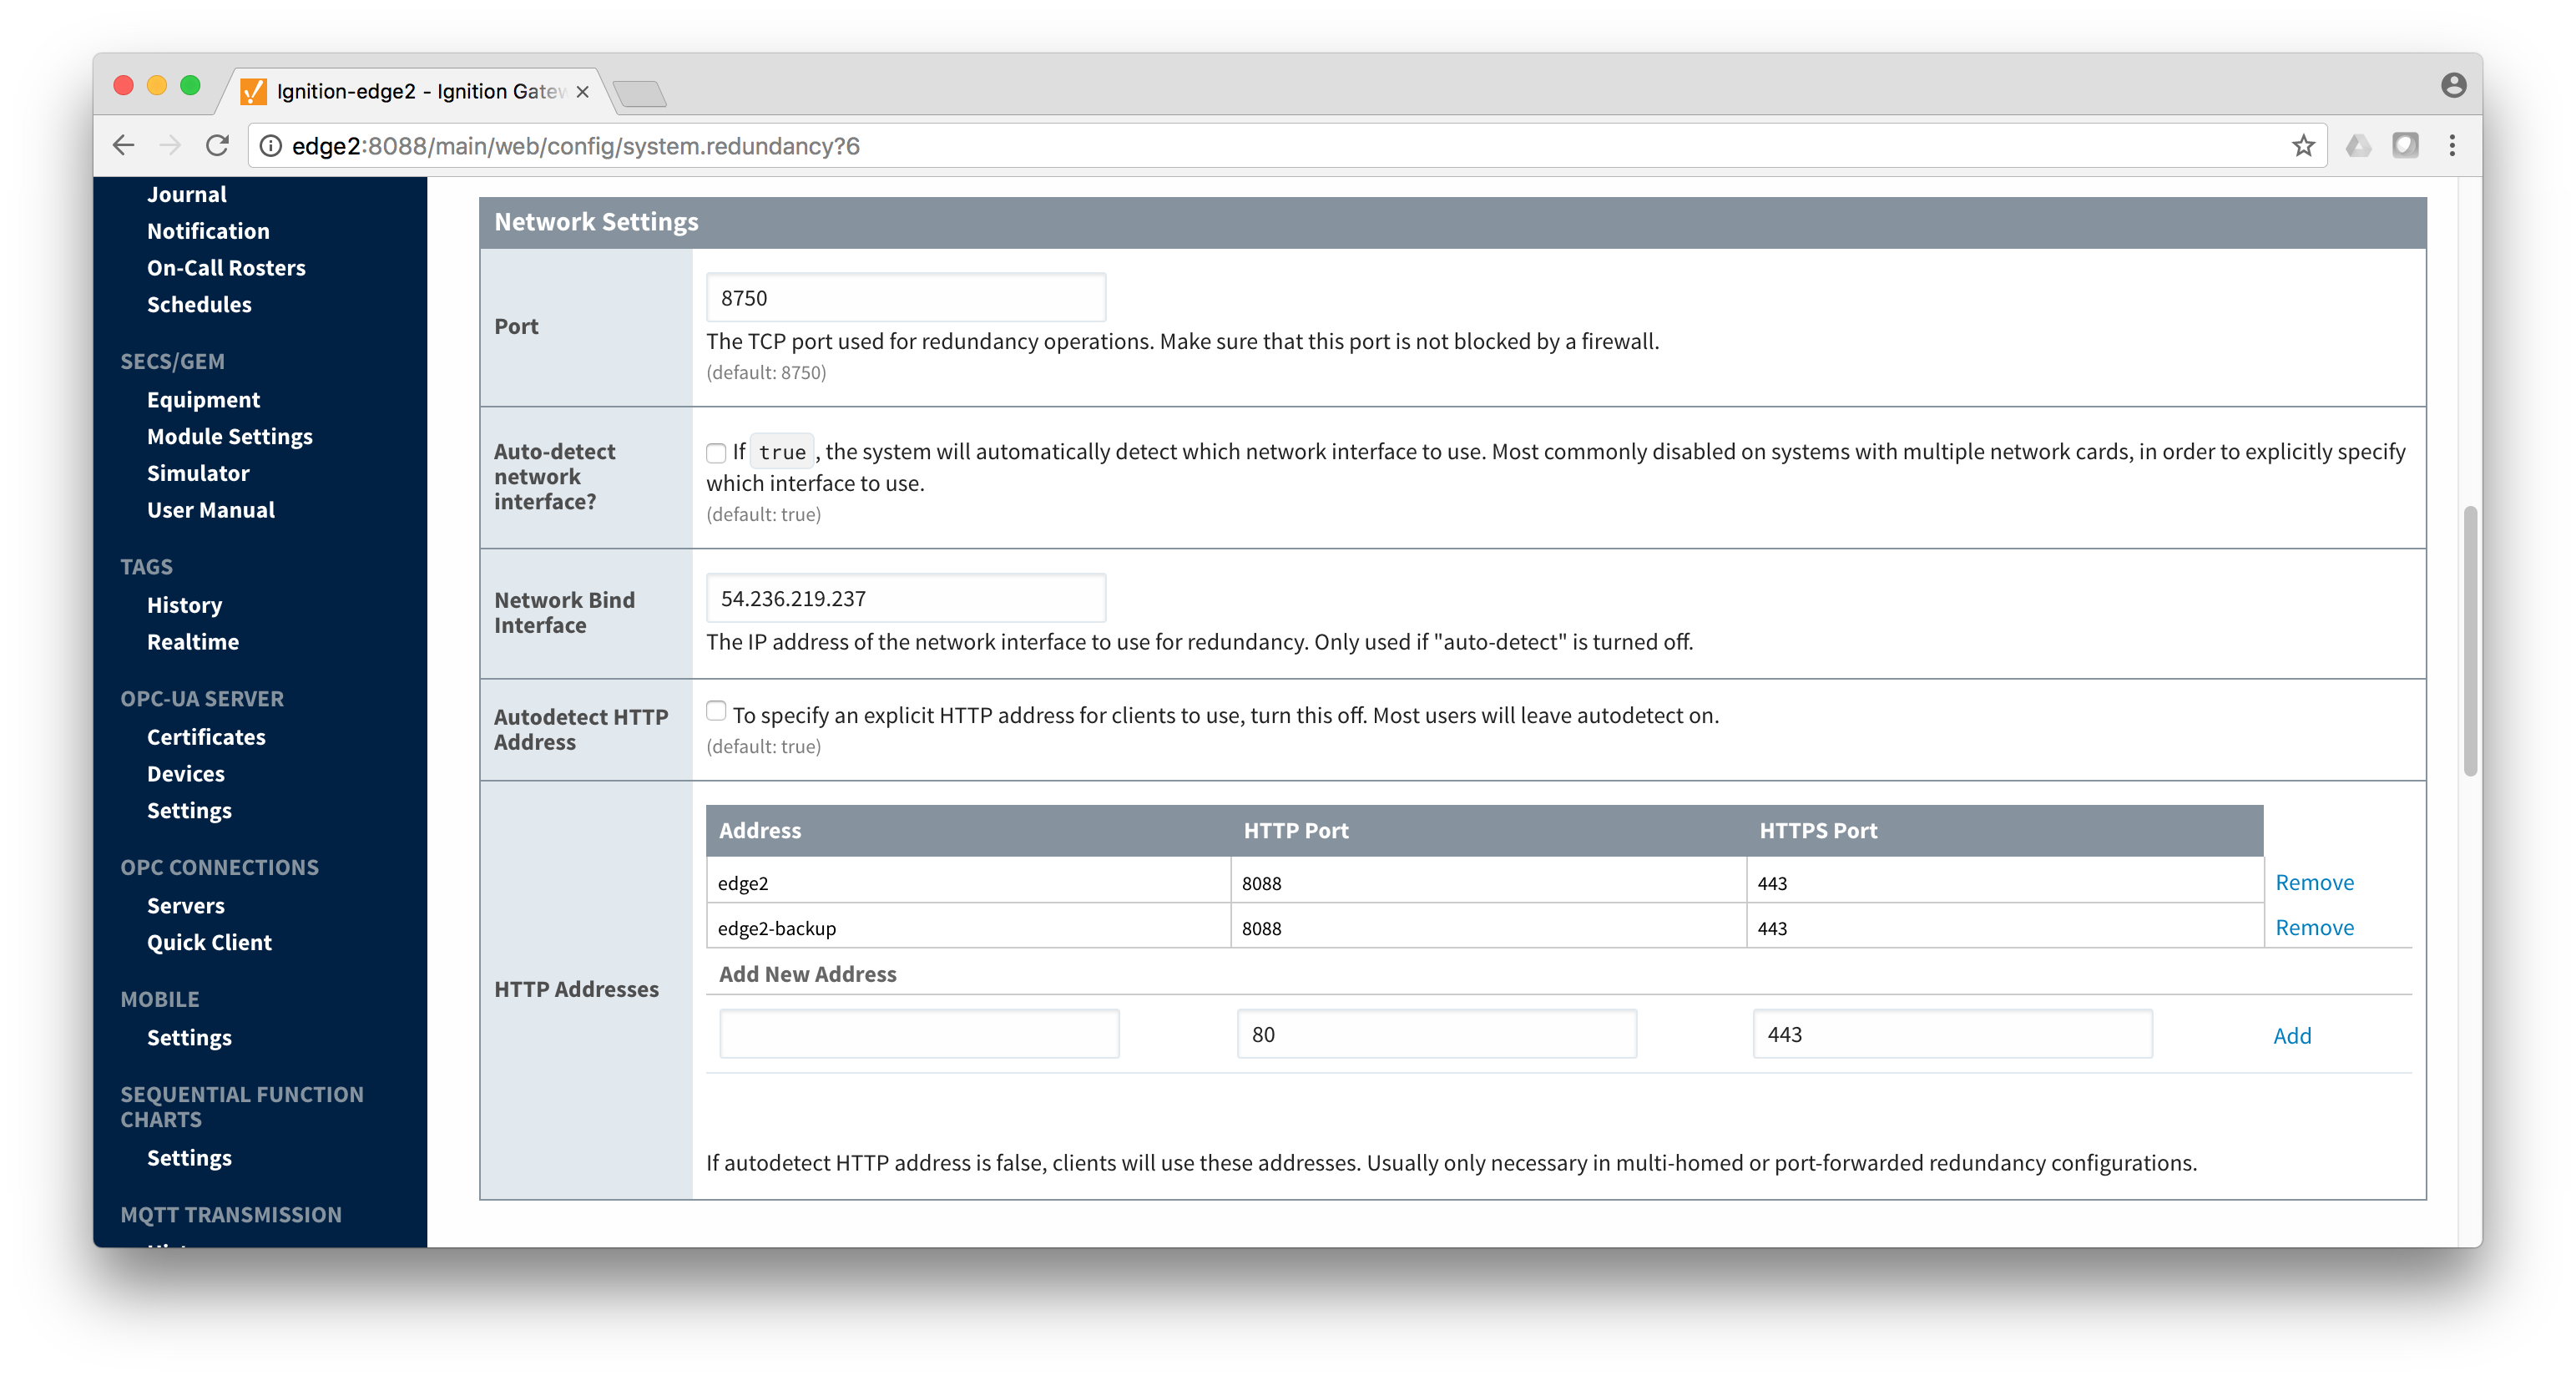
- Set up the Redundancy Network Settings. The settings here are specific to your network setup. On many LAN configurations none of these changes are required. What is shown below was the configuration for setting up all of these components in Amazon's AWS EC2 instances. The changes were:
- Uncheck 'Auto-detect network interface'
- Set the 'Network Bind Interface' to the public IP address of the Ignition Edge 2 EC2 instance. On a LAN this would be the primary network interface address of the Ignition Edge 2 machine.
- Uncheck the 'Autodetect HTTP Address' tickbox.
- Specify two explicit HTTP addresses for clients to use. These were the public IP addresses of the Ignition Edge 2 and Ignition Edge 2 Backup EC2 instances. On a LAN, these would be the primary network interface addresses of the Ignition Edge 2 and Ignition Edge 2 Backup machines. Also note the HTTP port is 8088 which is the default Ignition HTTP port.
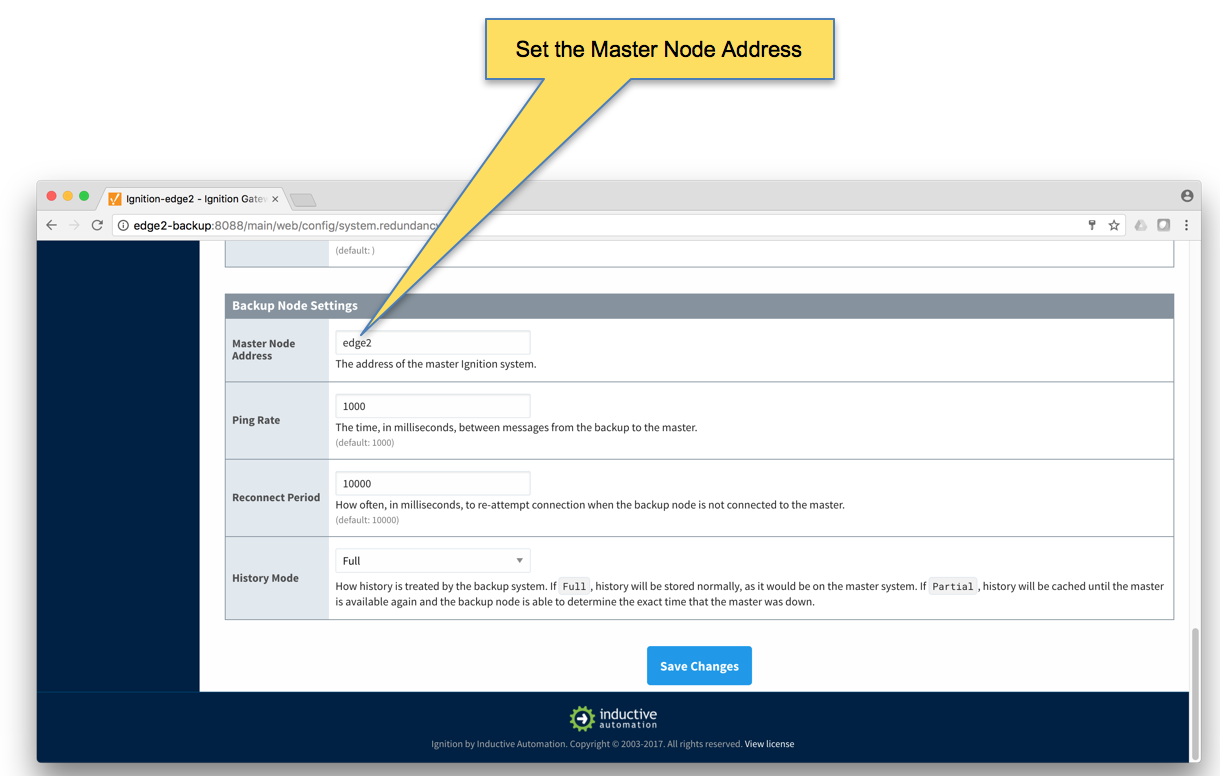
- Set the Master Node Address. Note in the configuration below a hostname is being used. This should be the primary network interface address of the Ignition Edge 2 Gateway.
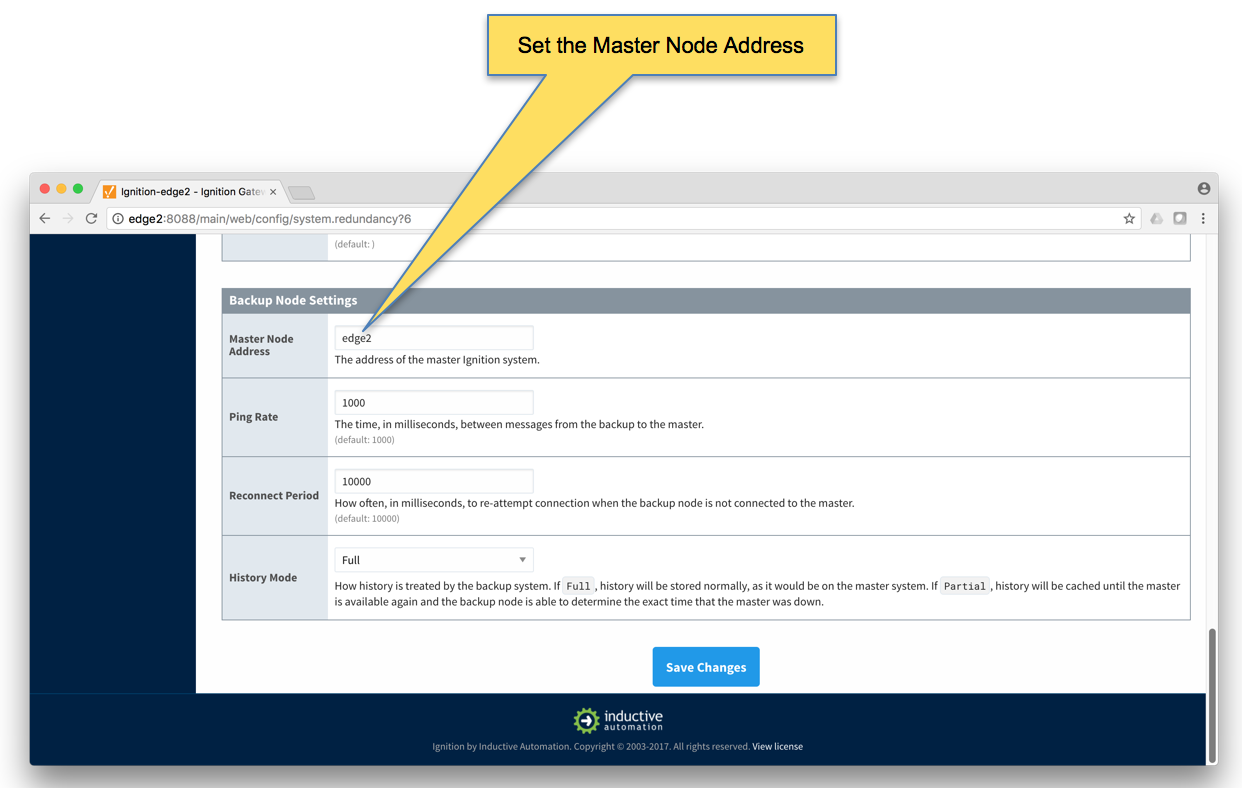
- Finally, click the 'Save Changes' button.
- Ignition Edge 2 Backup
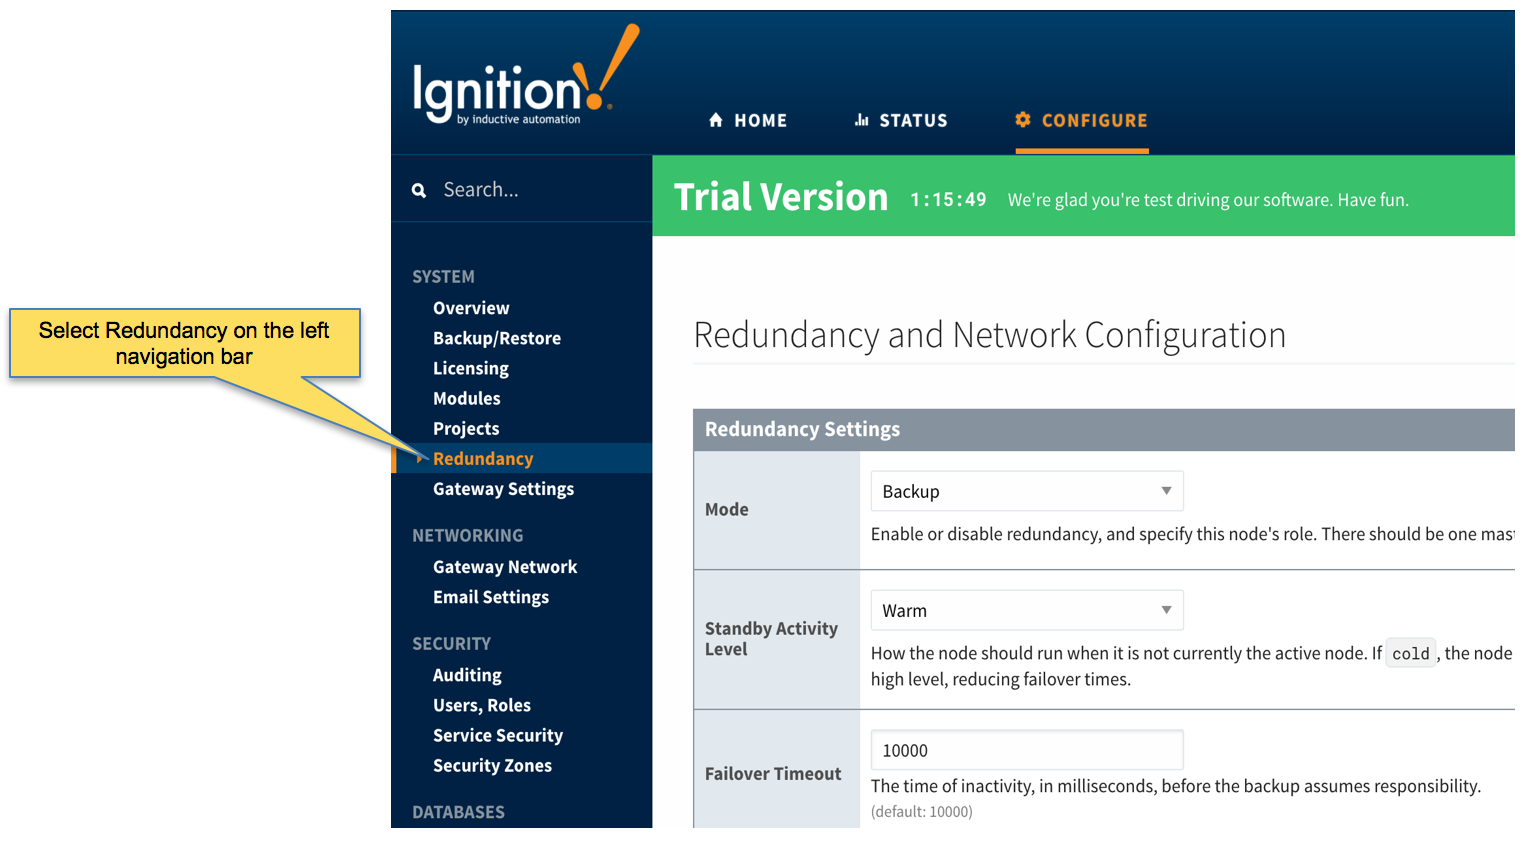
- Select Redundancy on the left navigation bar. Then set the Mode to 'Backup' and set the Standby Activity left to 'Warm' as shown below.
- Set up the Redundancy Network Settings. The settings here are specific to your network setup. On many LAN configurations none of these changes are required. What is shown below was the configuration for setting up all of these components in Amazon's AWS EC2 instances. The changes were:
- Uncheck 'Auto-detect network interface'
- Set the 'Network Bind Interface' to the public IP address of the Ignition Edge 2 Backup EC2 instance. On a LAN this would be the primary network interface address of the Ignition Edge 2 Backup machine.
- Uncheck the 'Autodetect HTTP Address' tickbox.
- Specify two explicit HTTP addresses for clients to use. These were the public IP addresses of the Ignition Edge 2 and Ignition Edge 2 Backup EC2 instances. On a LAN, these would be the primary network interface addresses of the Ignition Edge 2 and Ignition Edge 2 Backup machines. Also note the HTTP port is 8088 which is the default Ignition HTTP port.

- Set the Master Node Address. Note in the configuration below a hostname is being used. This should be the primary network interface address of the Ignition Edge 2 Gateway.
- Finally, click the 'Save Changes' button.
Step 5: Create some tags in Edge 1 and Edge 2
In this step we will use Ignition Designer in the Ignition Edge 1 and Edge 2 instances to create some tags. These tags will be used by MQTT Transmission and the Default Transmitter to push data to MQTT Distributor and MQTT Engine in the Ignition Primary instances.
- Using Ignition Designer on Edge 1, do the following:
- Create a new project called 'Test'.
- In the Tag Browser, confirm there is a folder called 'Edge Nodes'. If there is not, confirm MQTT Transmission is installed.
- In the 'Edge Nodes' folder, create a folder called 'Group 1'.
- In the 'Group 1' folder, create a folder called 'Edge 1'.
- In the 'Edge 1' folder, create a folder called 'Device 1'.
- In the 'Device 1' folder, create a Tag called 'Tag 1'.
- At the end, you should see something similar to what is shown below.
 Image Added
- Using Ignition Designer on Edge 2, do the following:
- Create a new project called 'Test'.
- In the Tag Browser, confirm there is a folder called 'Edge Nodes'. If there is not, confirm MQTT Transmission is installed.
- In the 'Edge Nodes' folder, create a folder called 'Group 1'.
- In the 'Group 1' folder, create a folder called 'Edge 2'.
- In the 'Edge 2' folder, create a folder called 'Device 1'.
- In the 'Device 1' folder, create a Tag called 'Tag 1'.
- At the end, you should see something similar to what is shown below
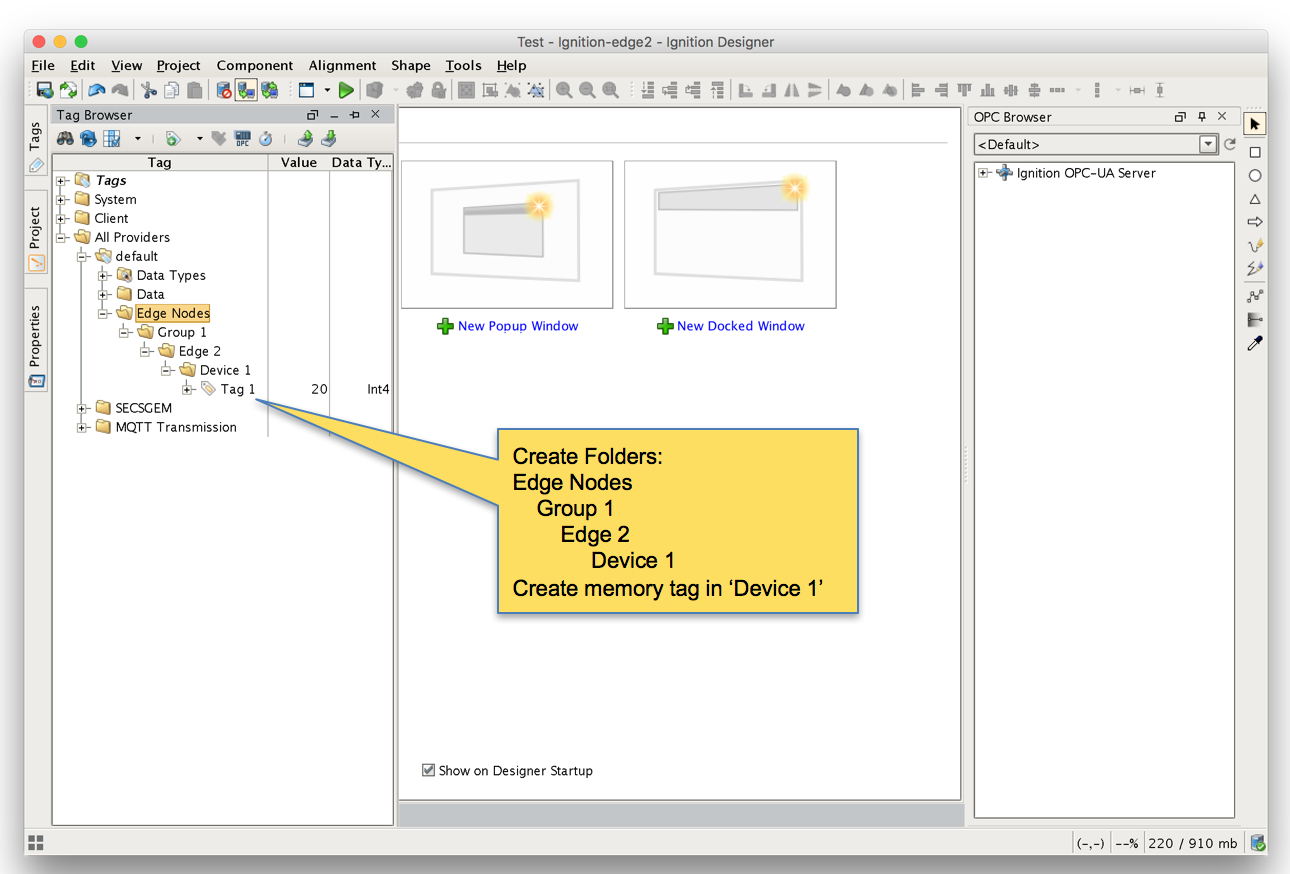 Image Added
- Finally, refresh the Transmission runtime. This is done by clicking the 'MQTT Transmission/Transmission Control/Refresh' Boolean tag.
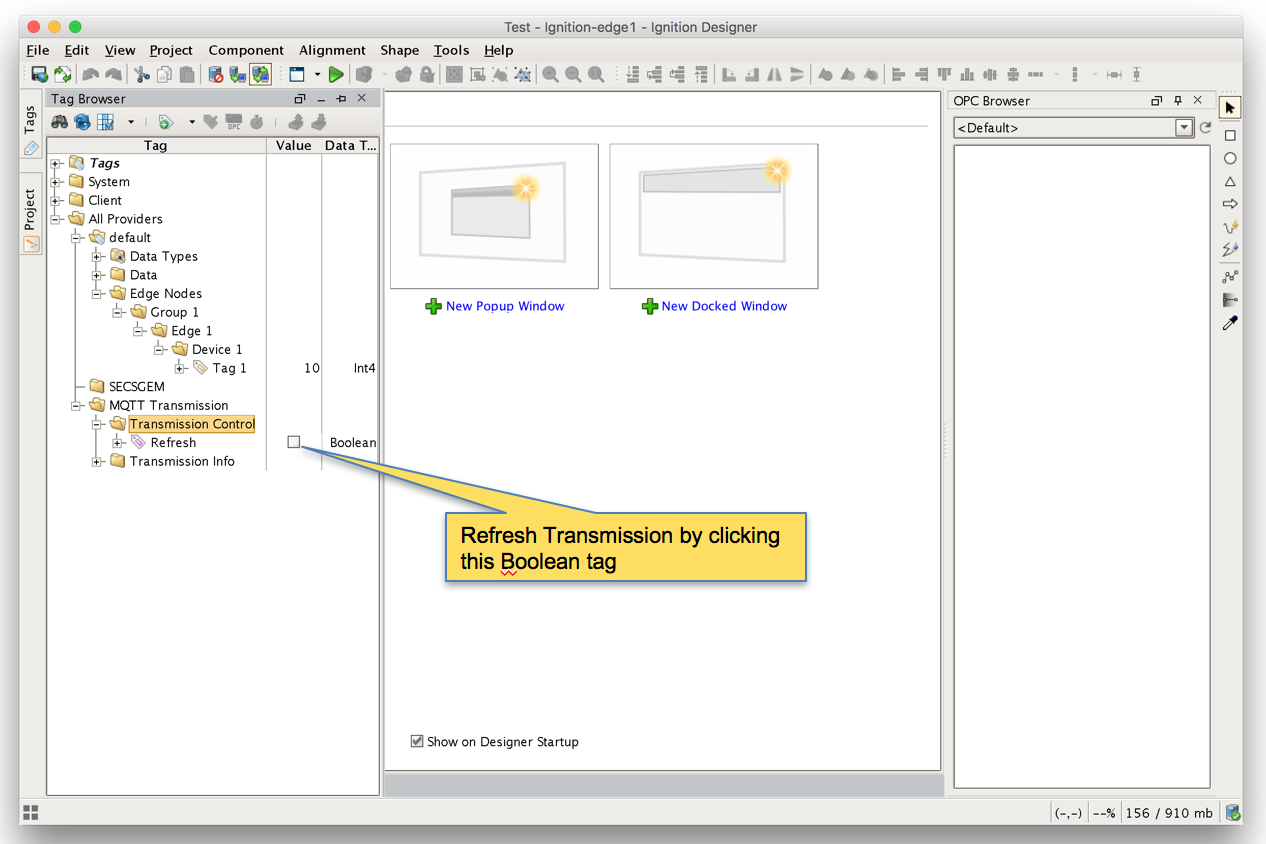 Image Added
- After clicking the Boolean tag you may need to 'Enable
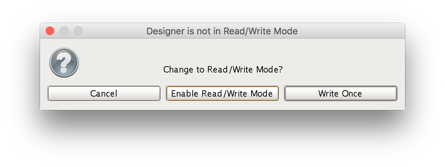 Image AddedStep 6: Force Sync of Backup Instances
The next step to to force the backup Ignition instances to receive their configurations from the master Ignition instances. This will happen automatically eventually but for expediency we're going to force the action.
- Repeat the following steps for the following Ignition instances: Primary, Edge 1, and Edge 2
- Browse to the Status menu and then click in the Redundancy box as shown below.
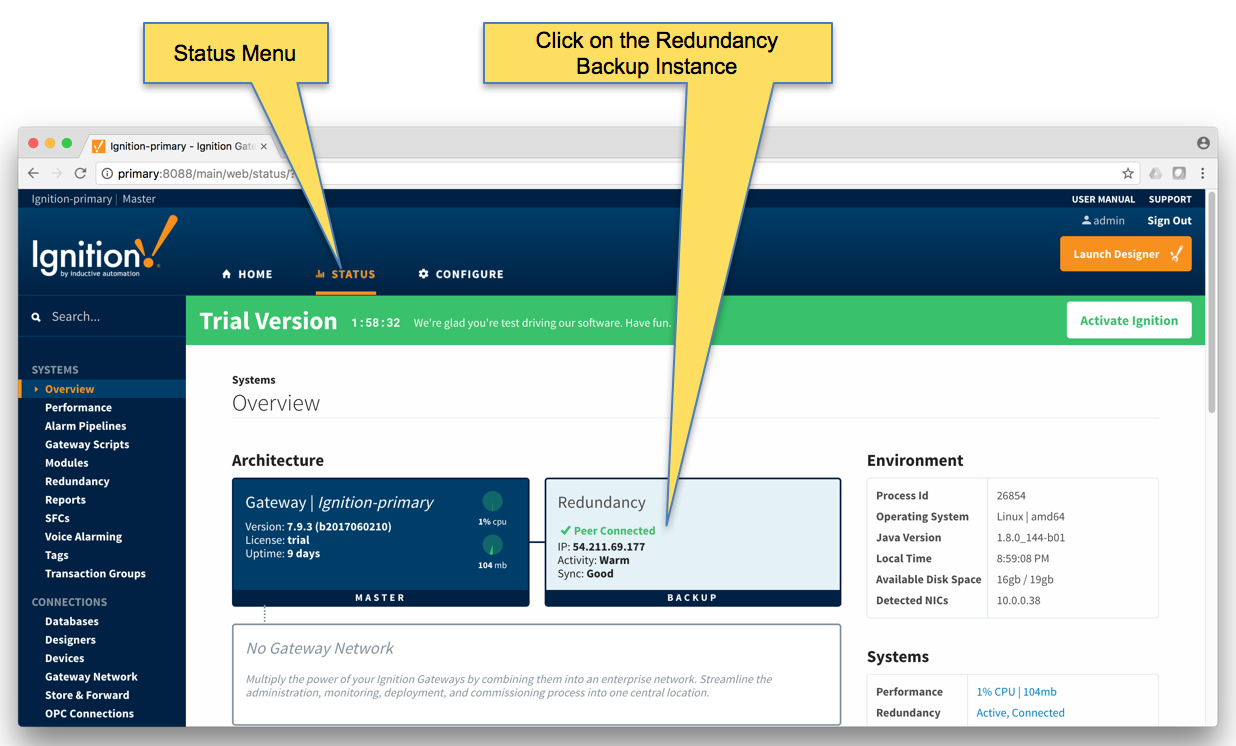 Image Added
 - Force the Re-sync via the button below. This will duplicate the master configuration to the backup Ignition instance it is connected to.
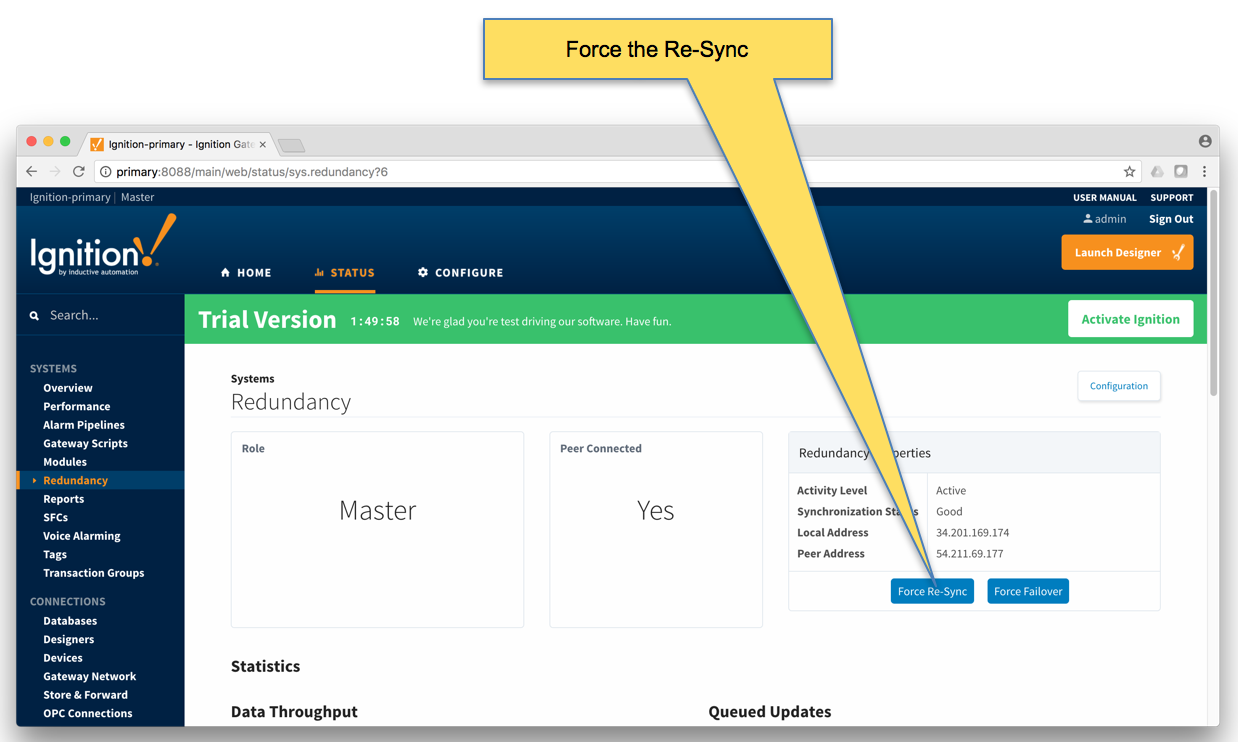 Image Added
 - Repeat the above Re-sync steps on the Edge 1 and Edge 2 Ignition instances.
Step 7: Verify MQTT Engine is getting data from the MQTT Transmission Edge 1 and Edge 2
Open Ignition Designer on the Ignition Primary instance. Expand the MQTT Engine tag tree and validate the following tags are present.
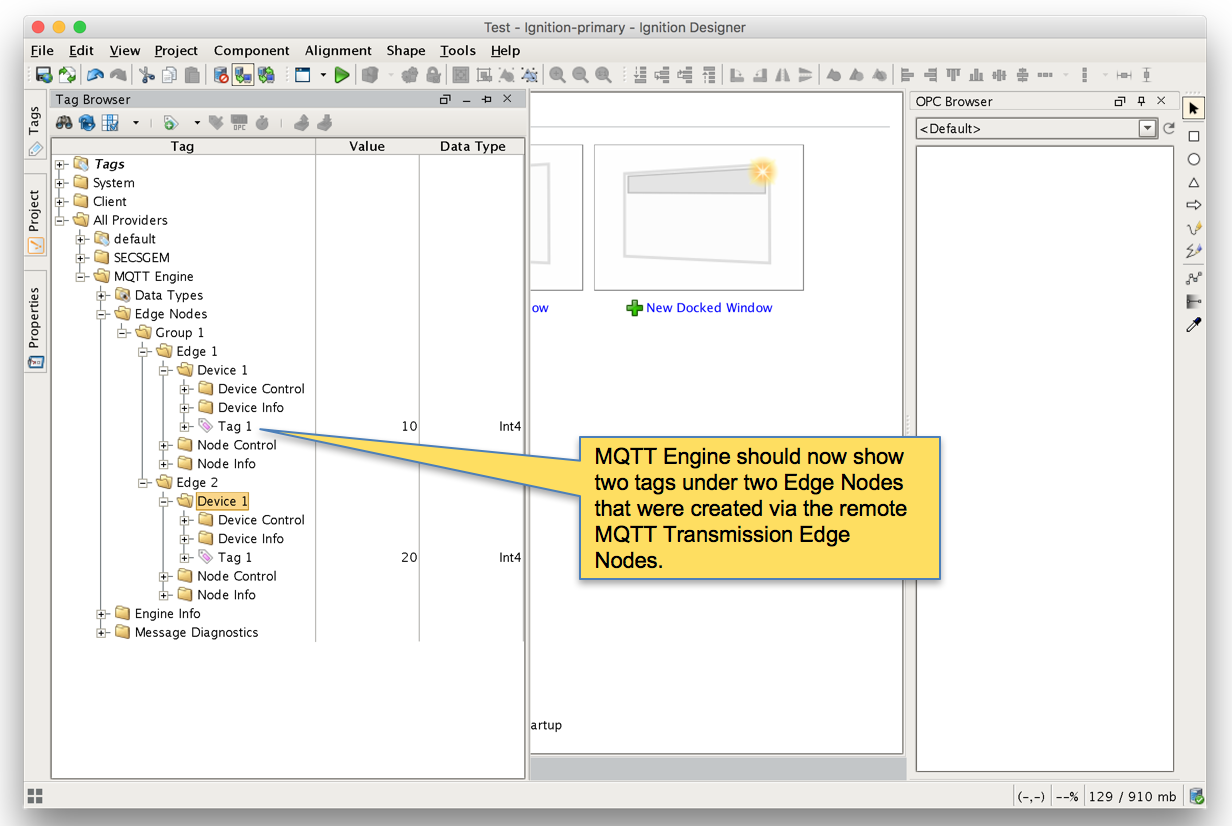 Image Added