![]()
Contents
Cirrus Link Resources
Cirrus Link Website![]()
Contact Us (Sales/Support)![]()
Inductive Resources
Ignition User Manual![]()
Knowledge Base Articles![]()
Inductive University![]()
Forum![]()
![]()
Cirrus Link Website![]()
Contact Us (Sales/Support)![]()
Ignition User Manual![]()
Knowledge Base Articles![]()
Inductive University![]()
Forum![]()
...
With the above steps completed, run the following commands to get the sparkplug library and sample application:
cd ~/dev
git clone https://github.com/Cirrus-Link/Sparkplug.git
cd Sparkplug/client_libraries/c/
make
cd ~/dev/Sparkplug/sparkplug_b/stand_alone_examples/c/udt_example/
At this point the example.c file should be edited to properly reflect your MQTT server URL, port, credentials, etc. Finally, build the application:
make
Now simply start the application with the following command:
./example
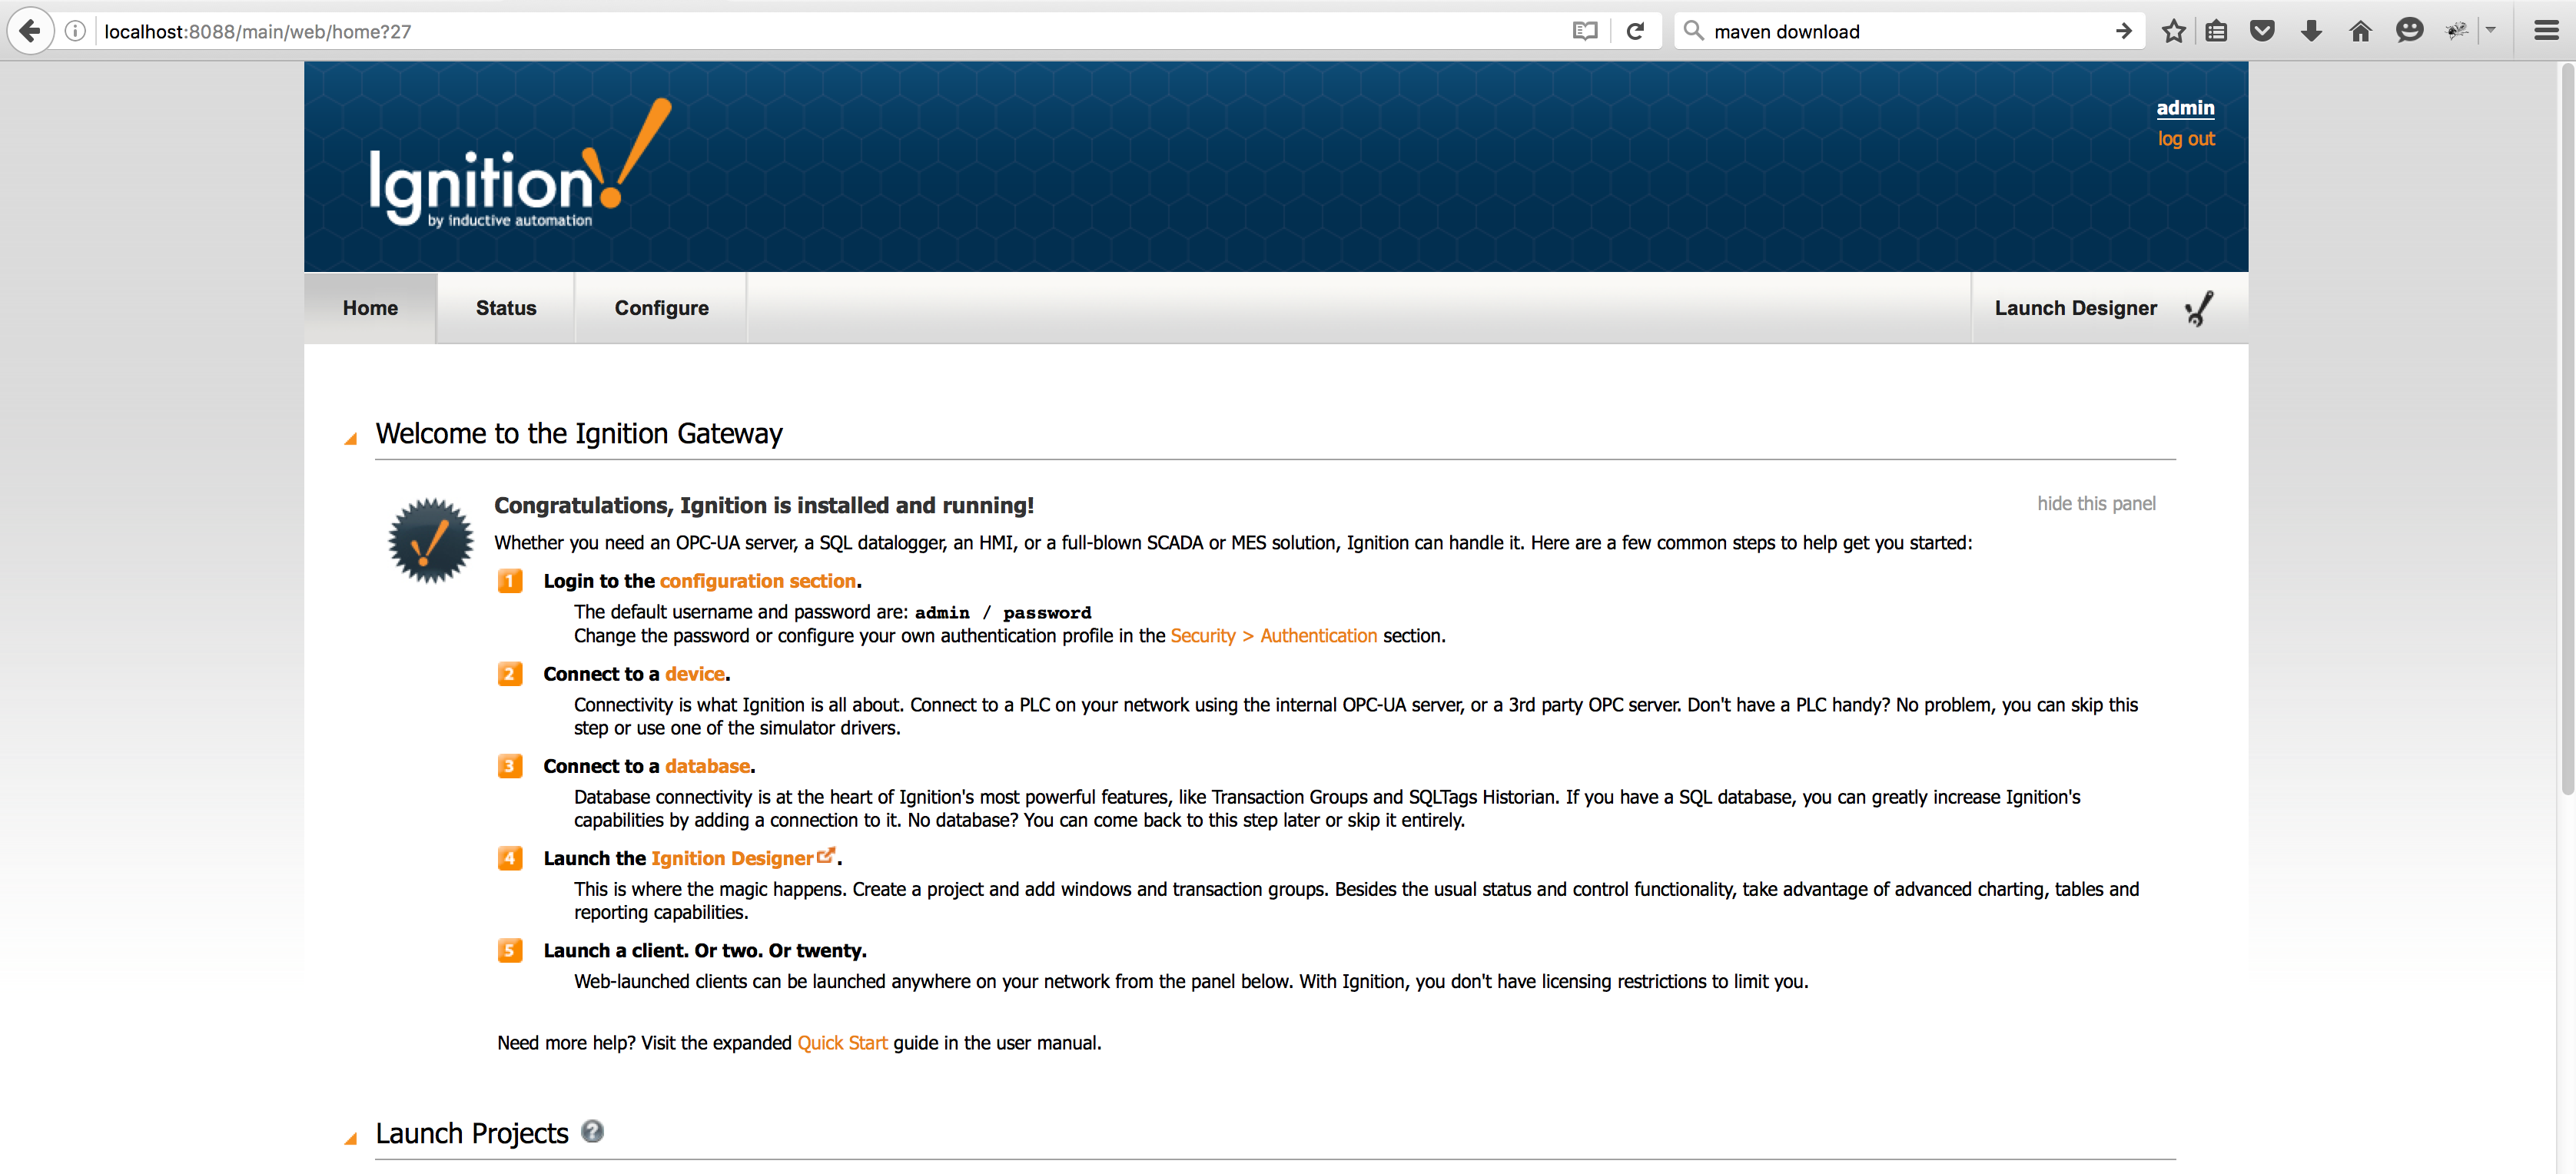
At this point, the application will start, connect to the MQTT server, publish a Edge Node Birth Certificate, publish a Device Birth Certificate, and begin periodically reporting random data values to Ignition via MQTT Engine. This can be verified via Ignition Designer. Using a Web Browser, browse to the Ignition Gateway on your Ignition Gateway. If it is running on your development machine, that is: http://localhost:8088. You should see this:
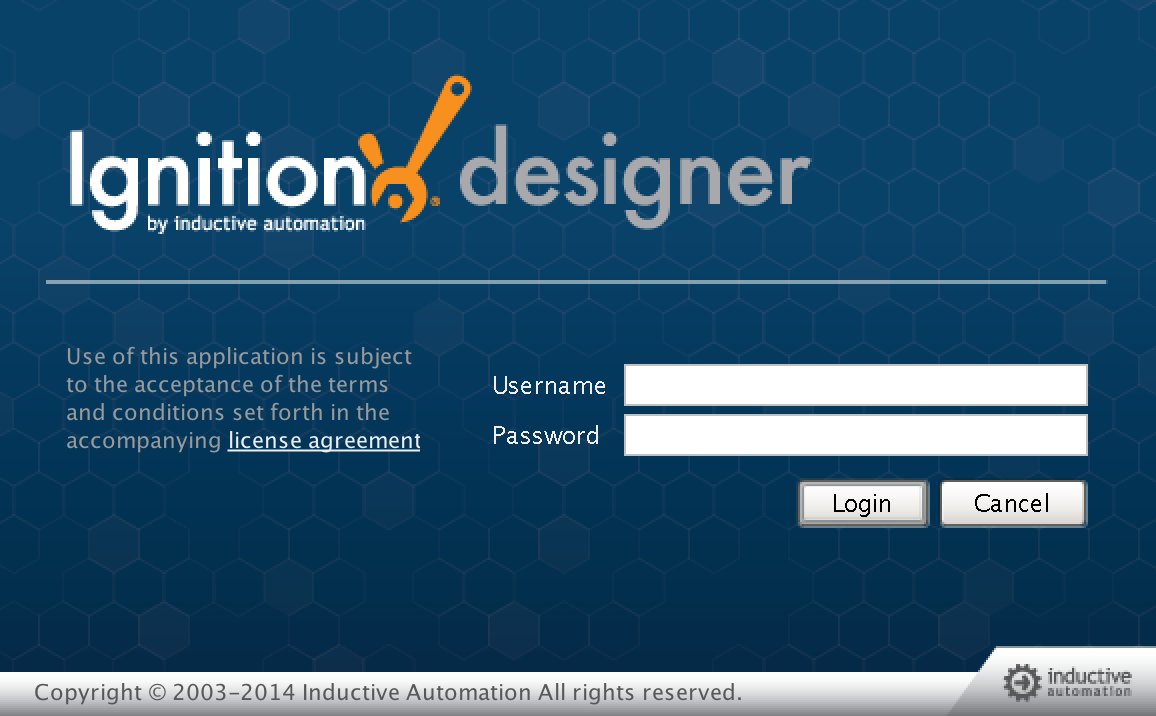
Near the upper right corner, click 'Launch Designer'. This will open the following window after downloading the .jnlp file and executing it. Note the default username/password is admin/password. Type those into the appropriate fields and click 'Login'.
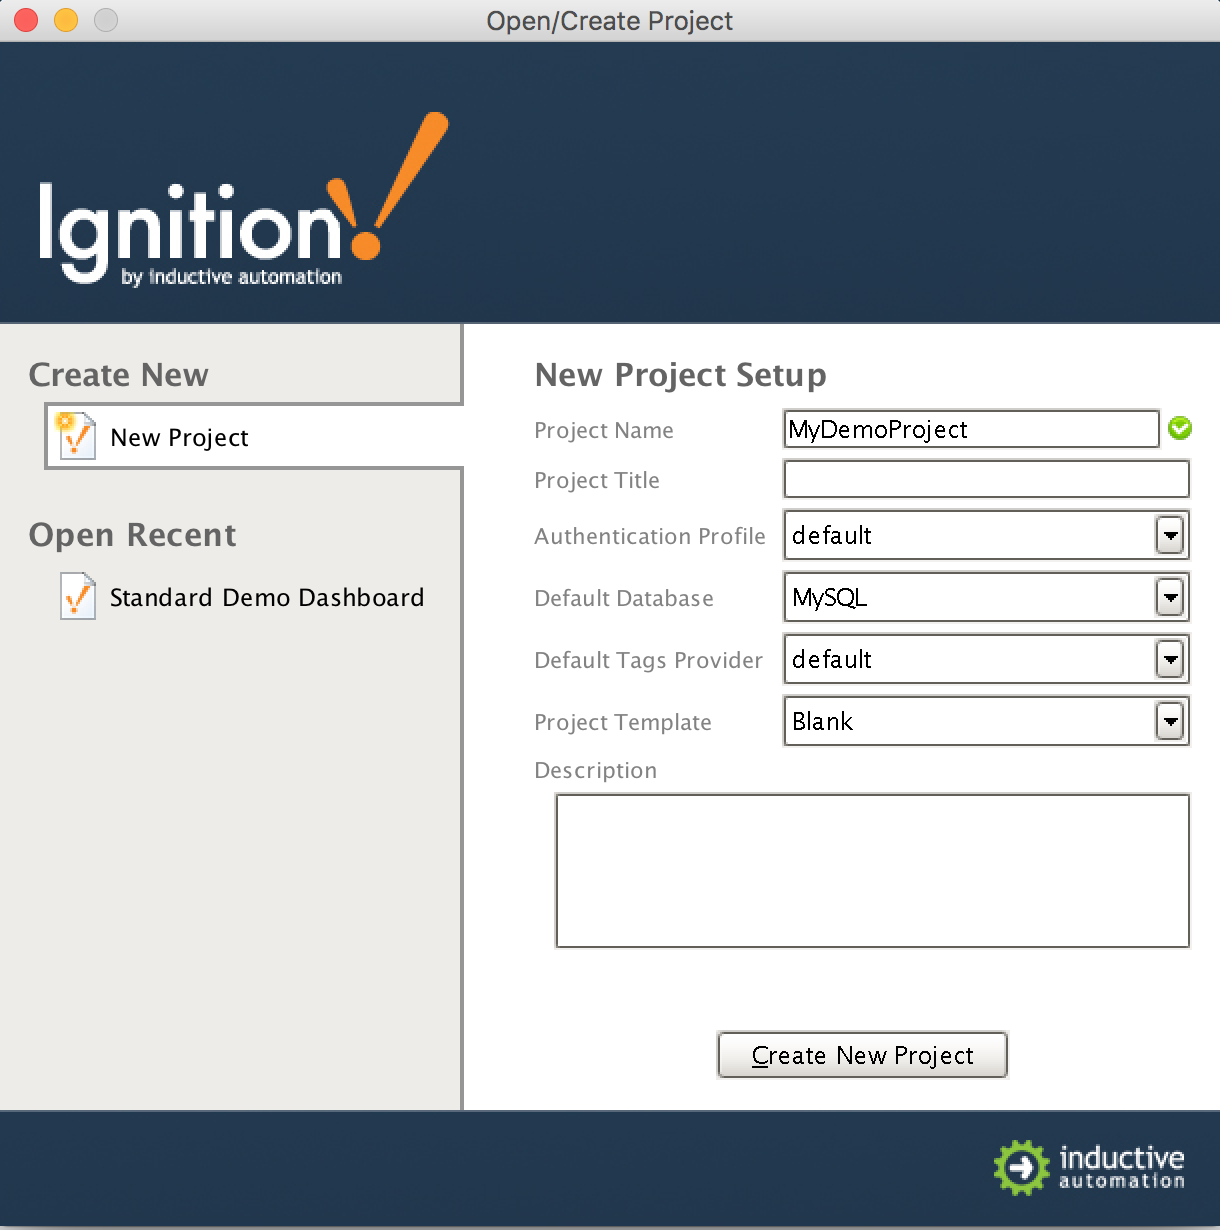
This will bring you to a new Window where you can select an Ignition Project or create a new one. Create a new project by giving it a name and clicking 'Create New Project'.
Now you should be in designer. In the left hand side of the main window is a 'Tag Browser' window. In it, expand 'All Providers -> MQTT Engine -> Edge Nodes -> Sparkplug B Devices -> C Edge Node 1 -> Emulated Device'. You should see the following:
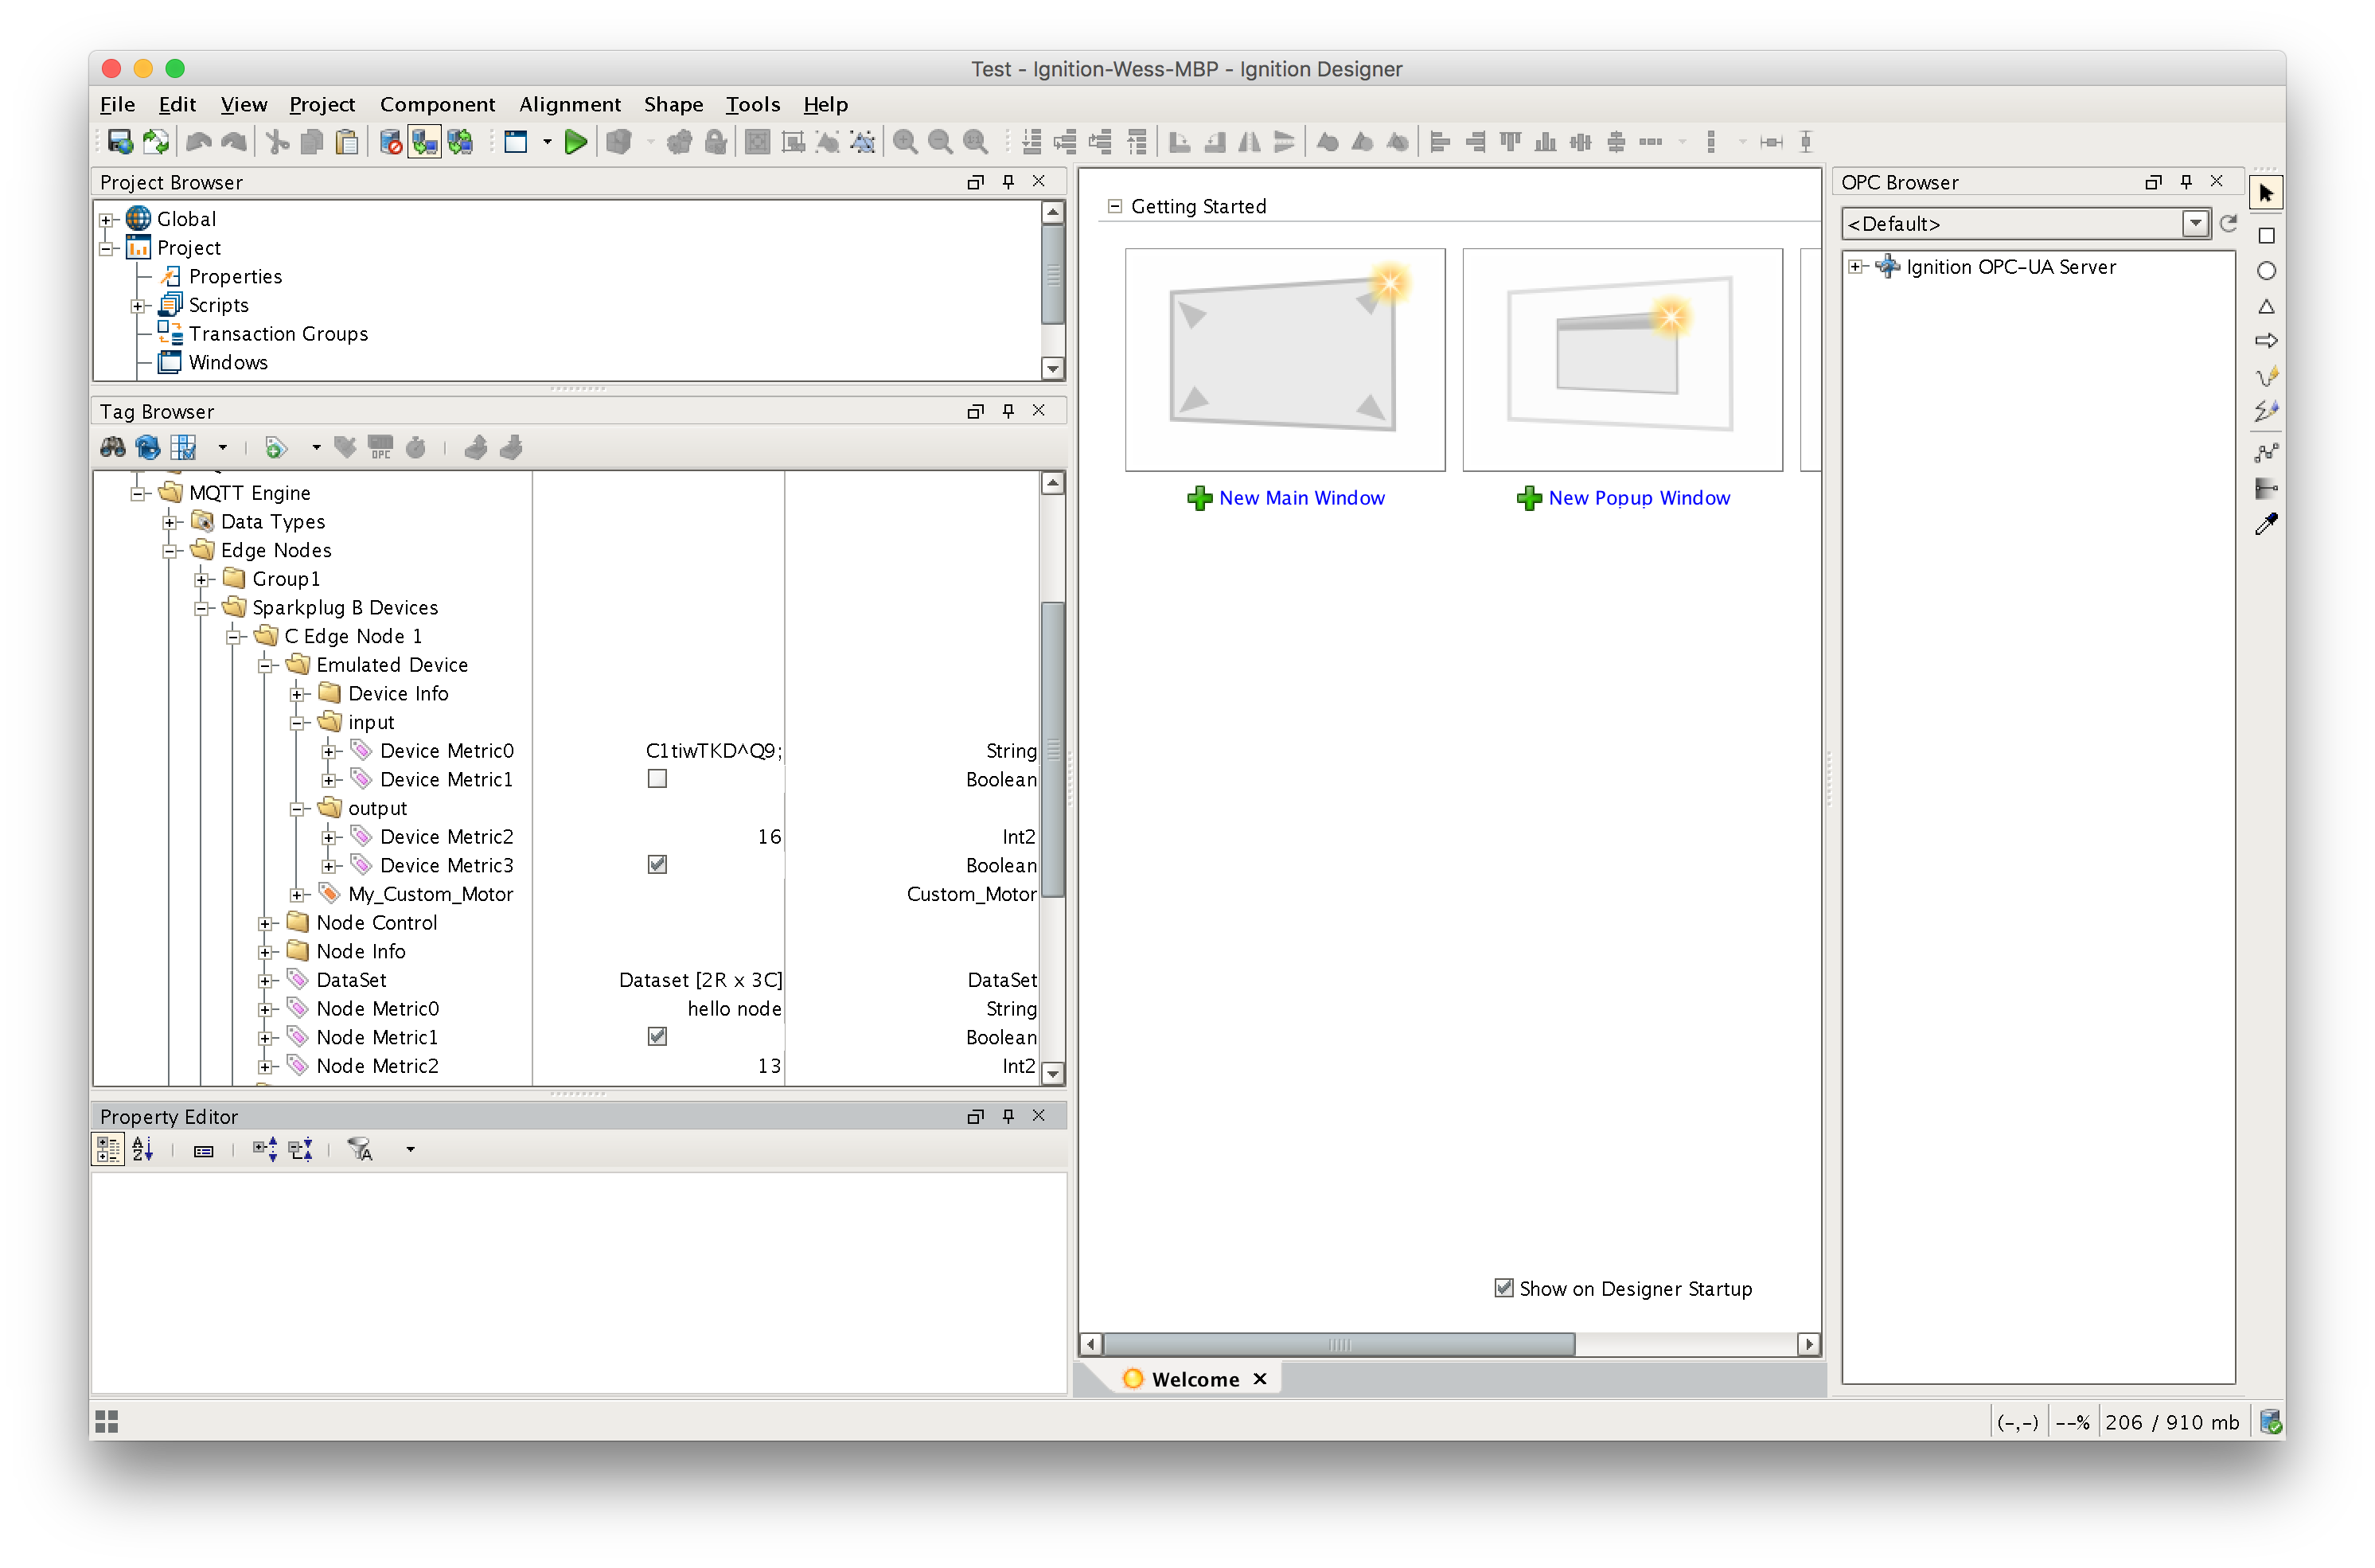
You will see the result of MQTT Engine seeing a new edge node and device connect to the MQTT Server and publish an NBIRTH and DBIRTH message. As a result, MQTT Engine created the Ignition Tags shown above. These are also dynamically updated as the values change. You can also write to the outputs after you Enable Device Writes from Ignition. This can be done by putting designer into read/write mode. Do so by clicking this button in the menu to enable read/write mode:
![]()
