![]()
Contents
Cirrus Link Resources
Cirrus Link Website![]()
Contact Us (Sales/Support)![]()
Inductive Resources
Ignition User Manual![]()
Knowledge Base Articles![]()
Inductive University![]()
Forum![]()
![]()
Cirrus Link Website![]()
Contact Us (Sales/Support)![]()
Ignition User Manual![]()
Knowledge Base Articles![]()
Inductive University![]()
Forum![]()
...
On the 'Instance Details' page leave the defaults but make sure 'Auto-assign Public IP' is set to Enable as shown below. Then click 'Next: Add Storage' in the lower right.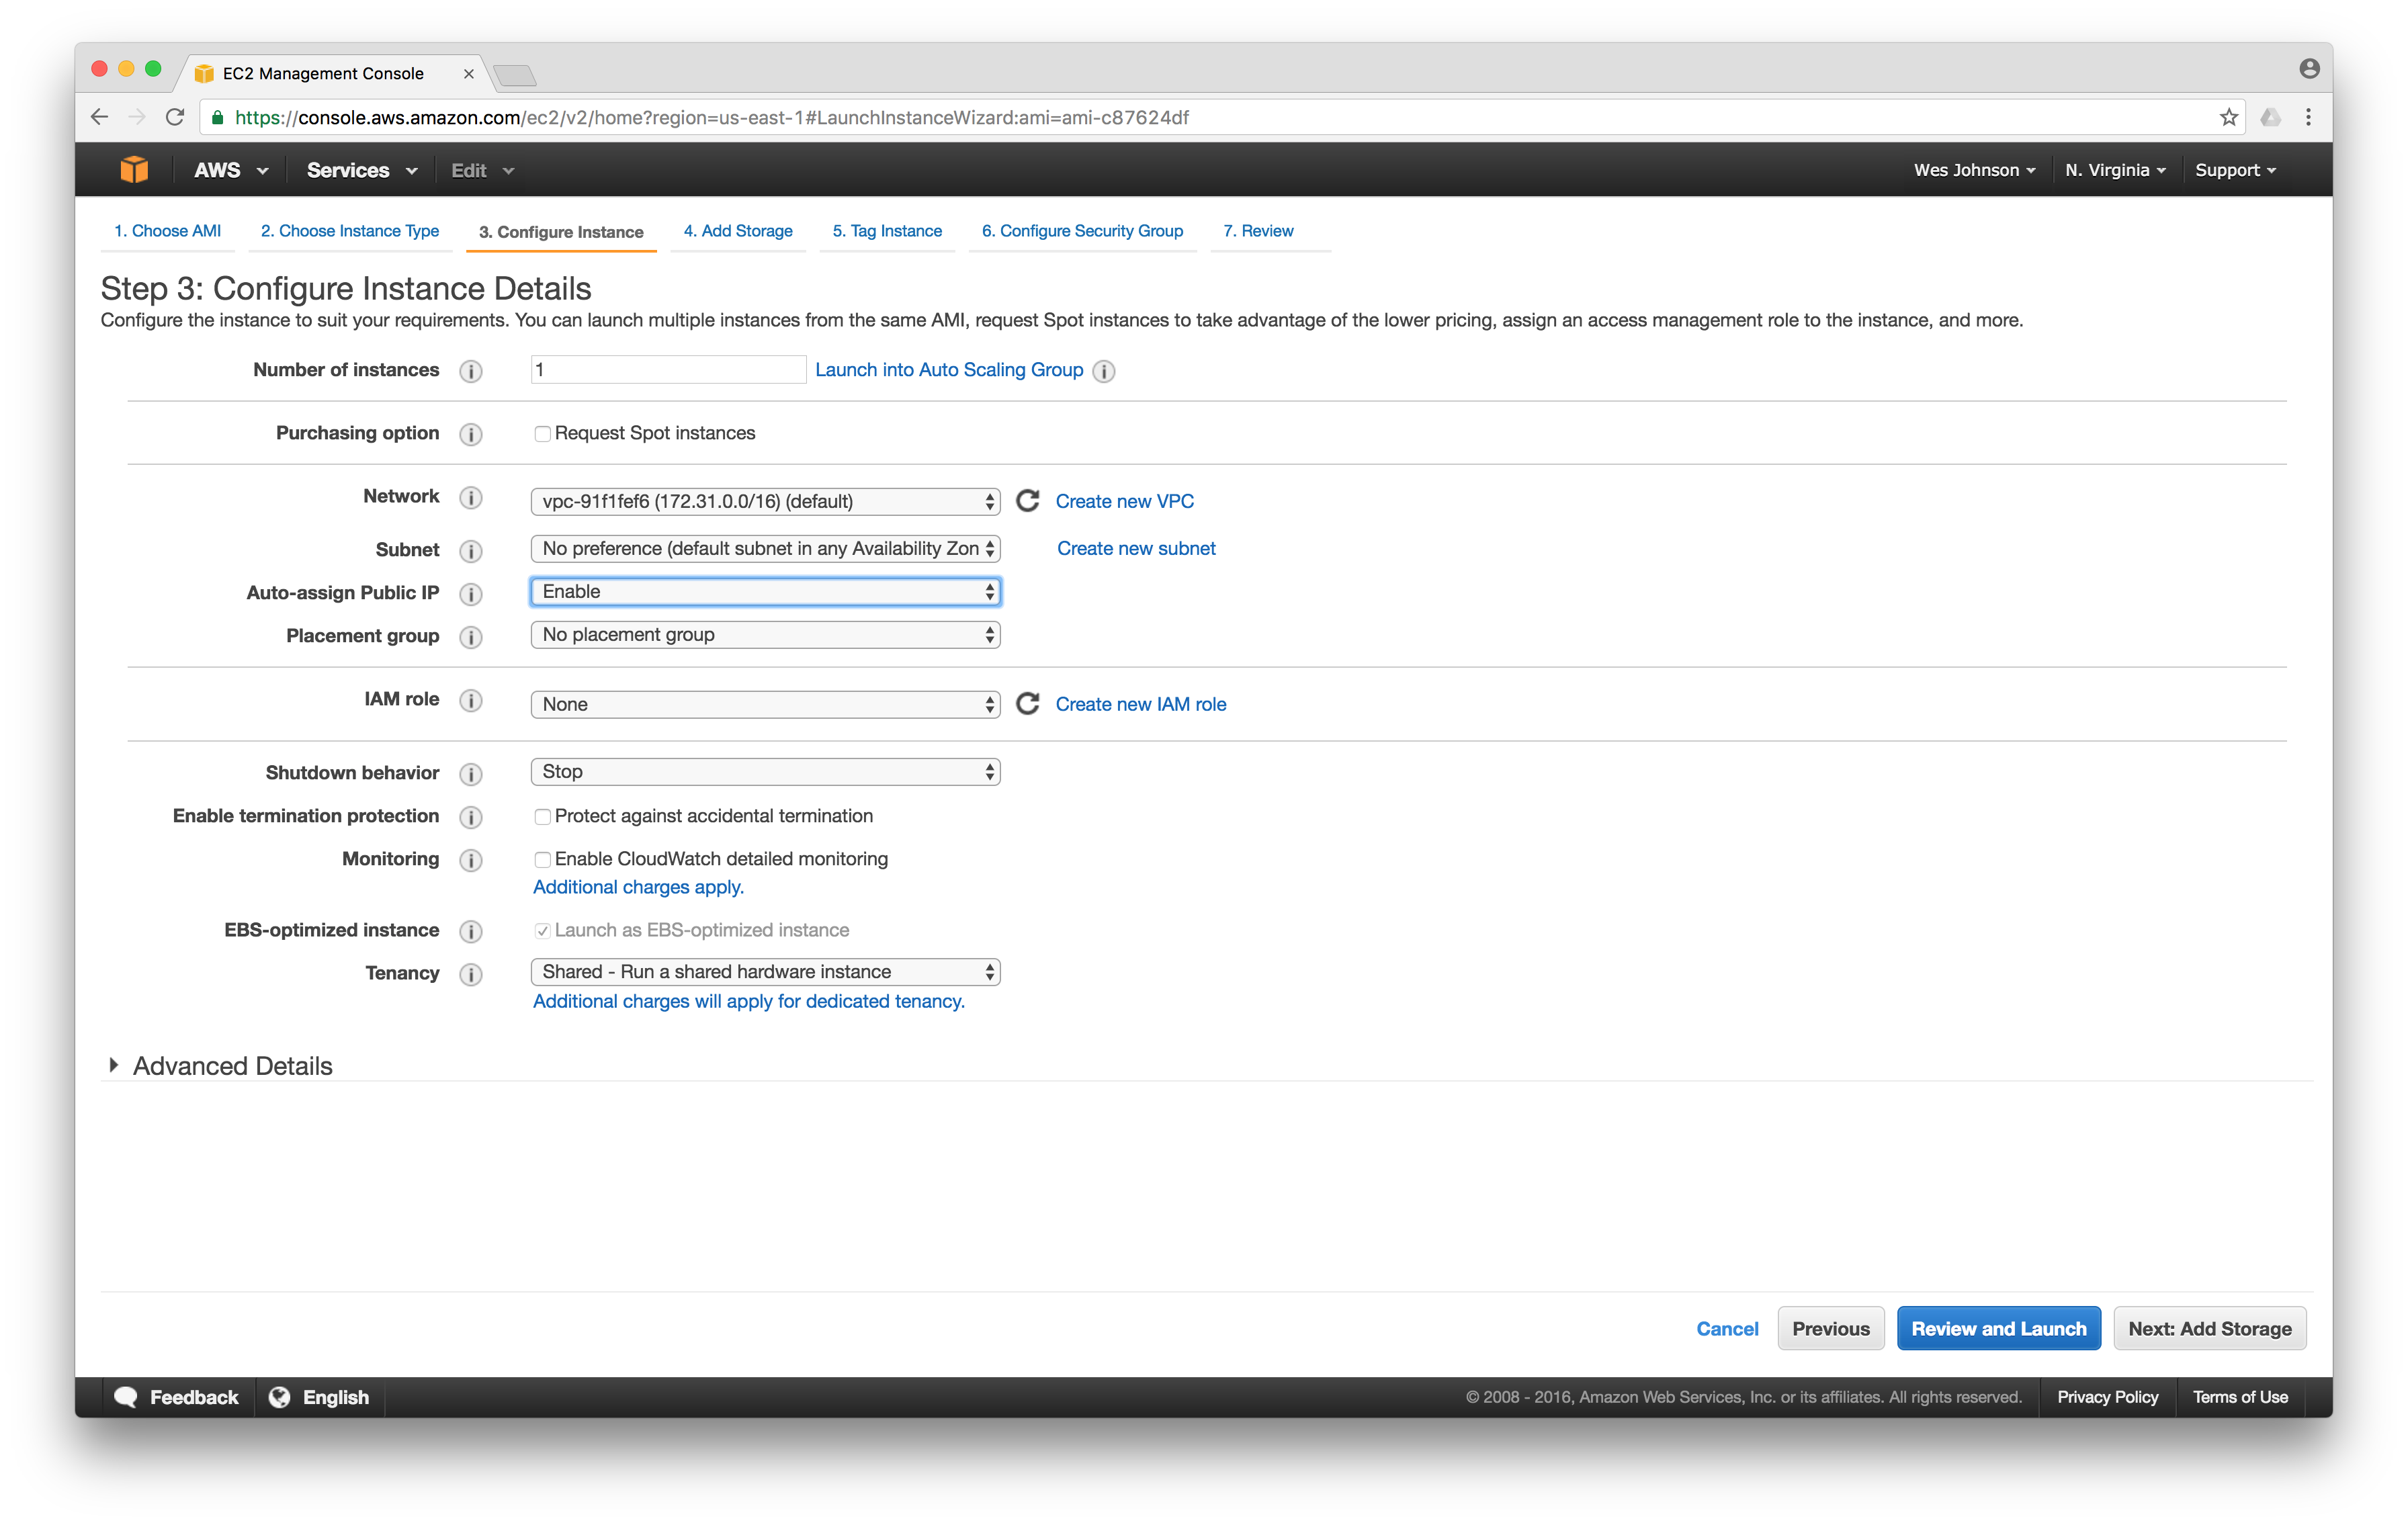
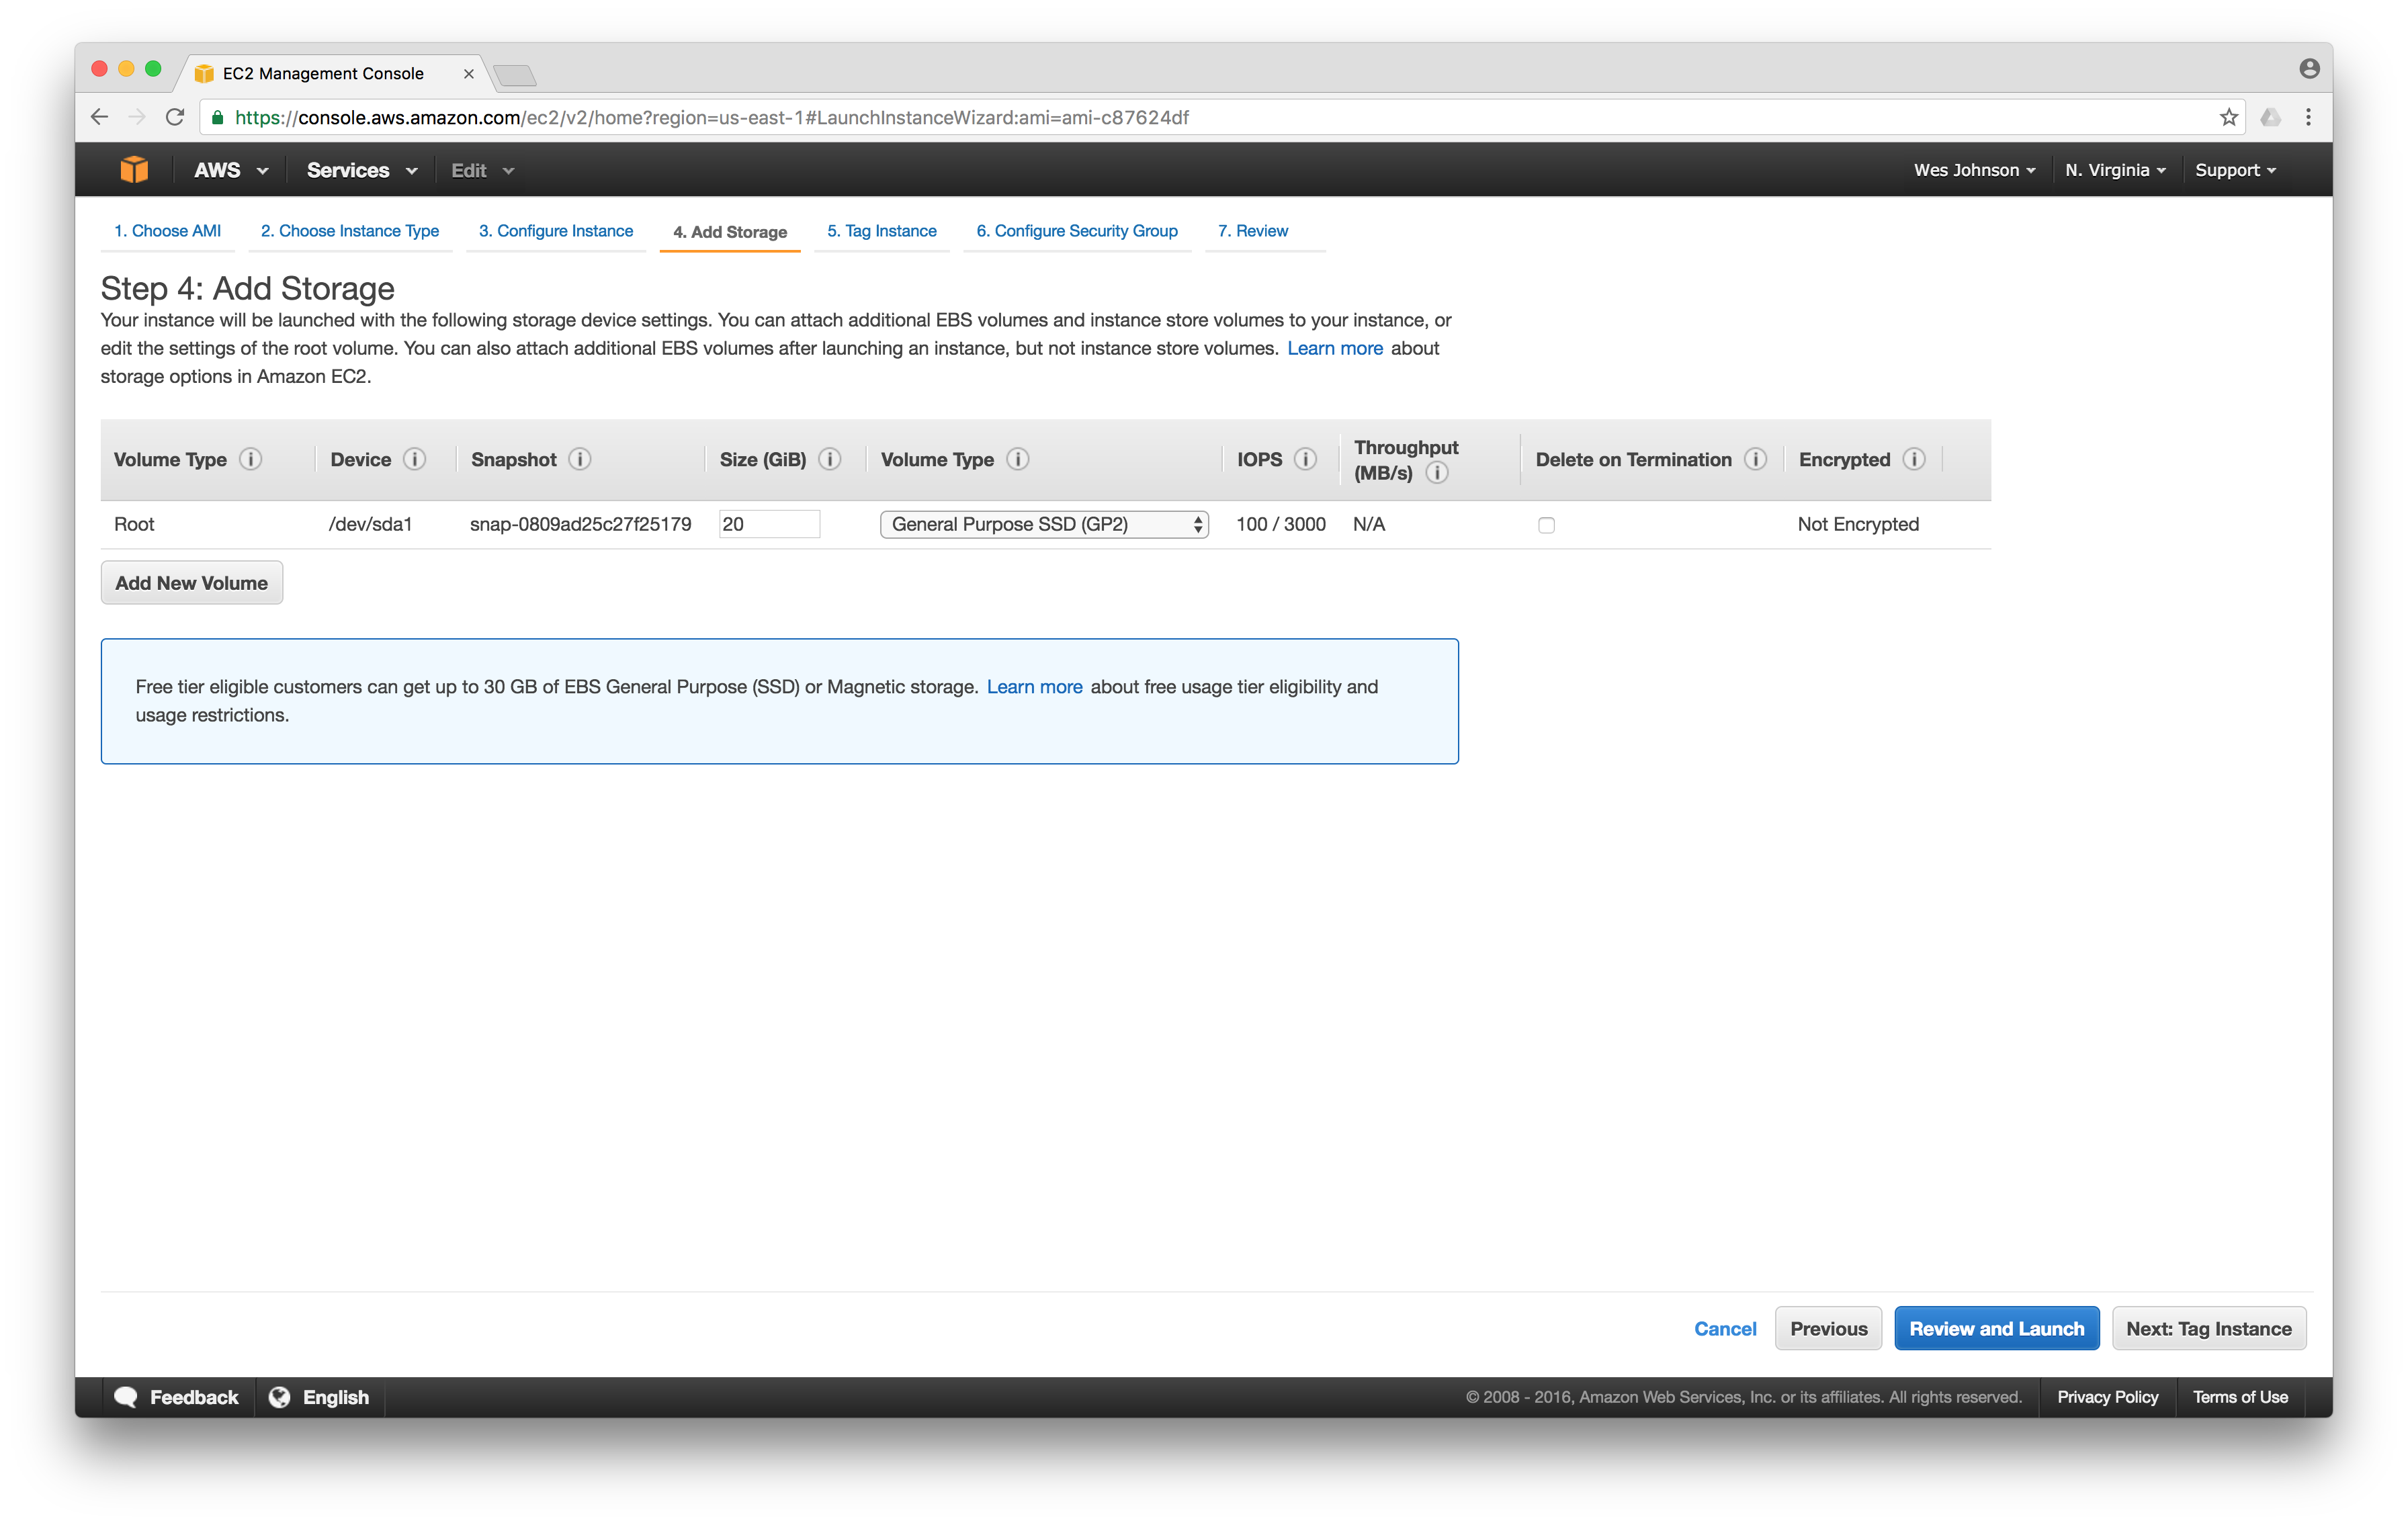
On the 'Add Storage' page, leave the defaults and click 'Next: Tag Instance' in the lower right.
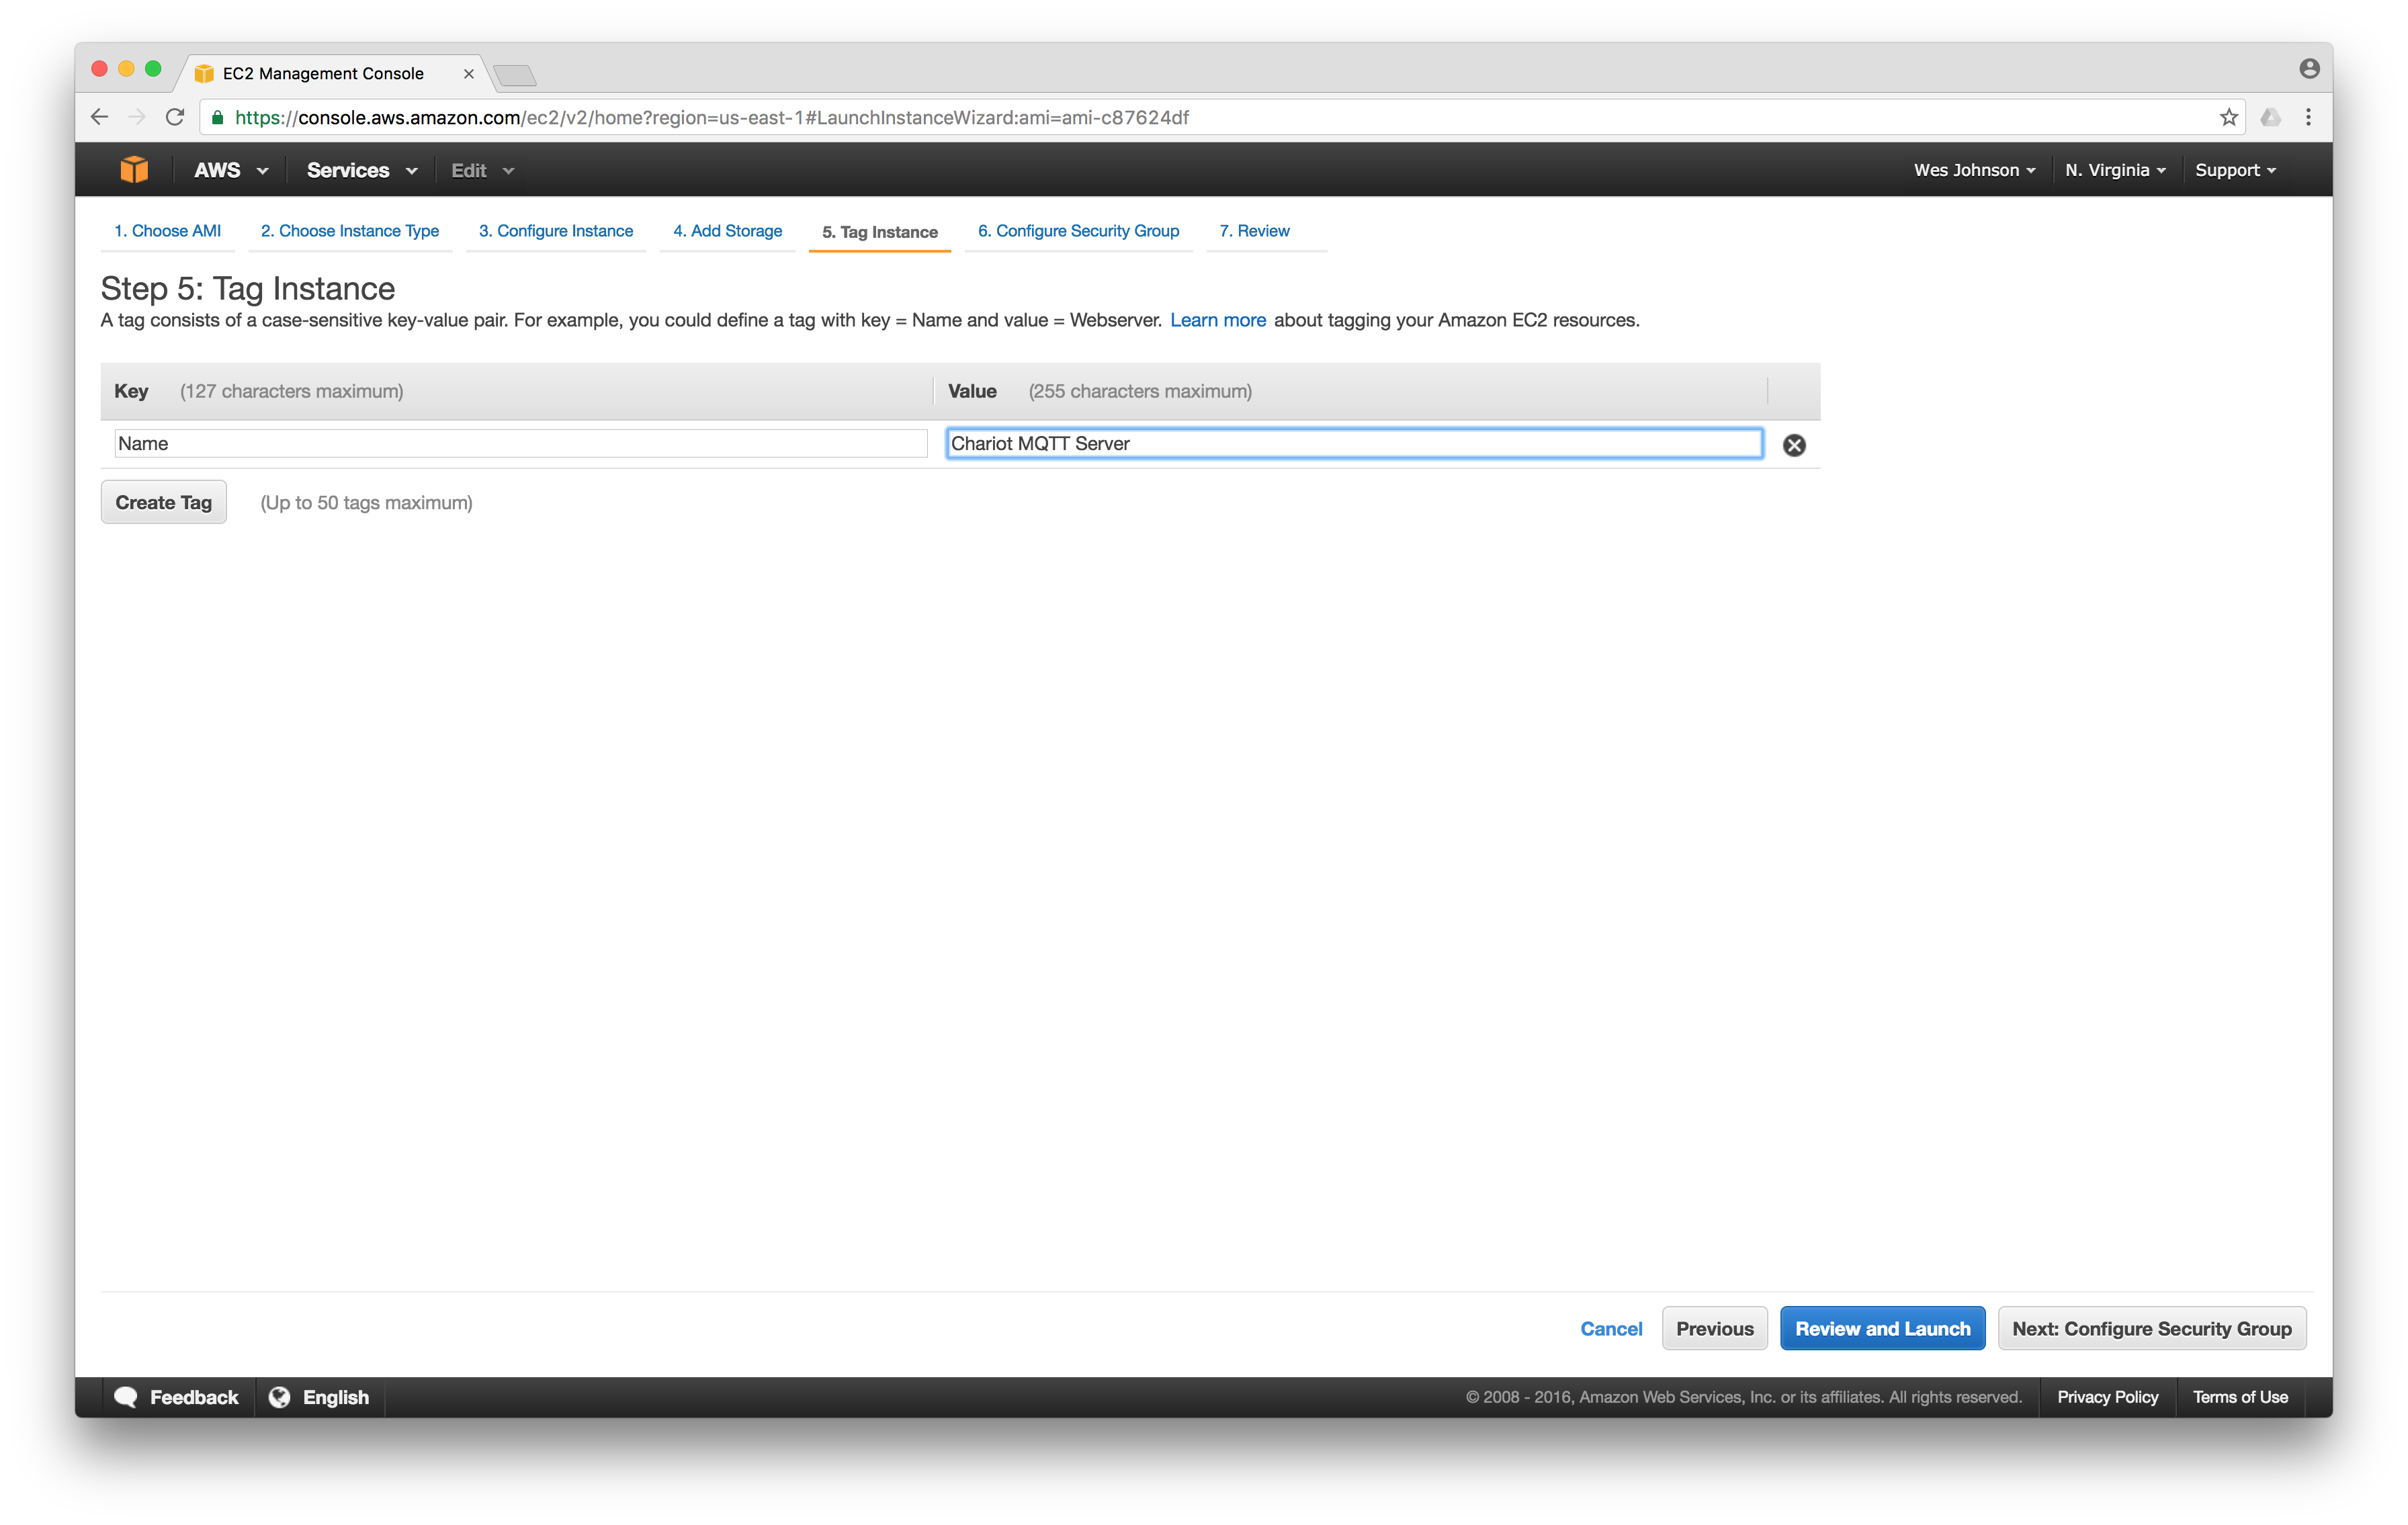
On the 'Tag Instance' screen, set the 'Name' value to 'Chariot MQTT Server' or some other name that you prefer. This is a name that will allow you to quickly identify this EC2 instance in the AWS console. Then click 'Next: Configure Security Group' in the lower right.
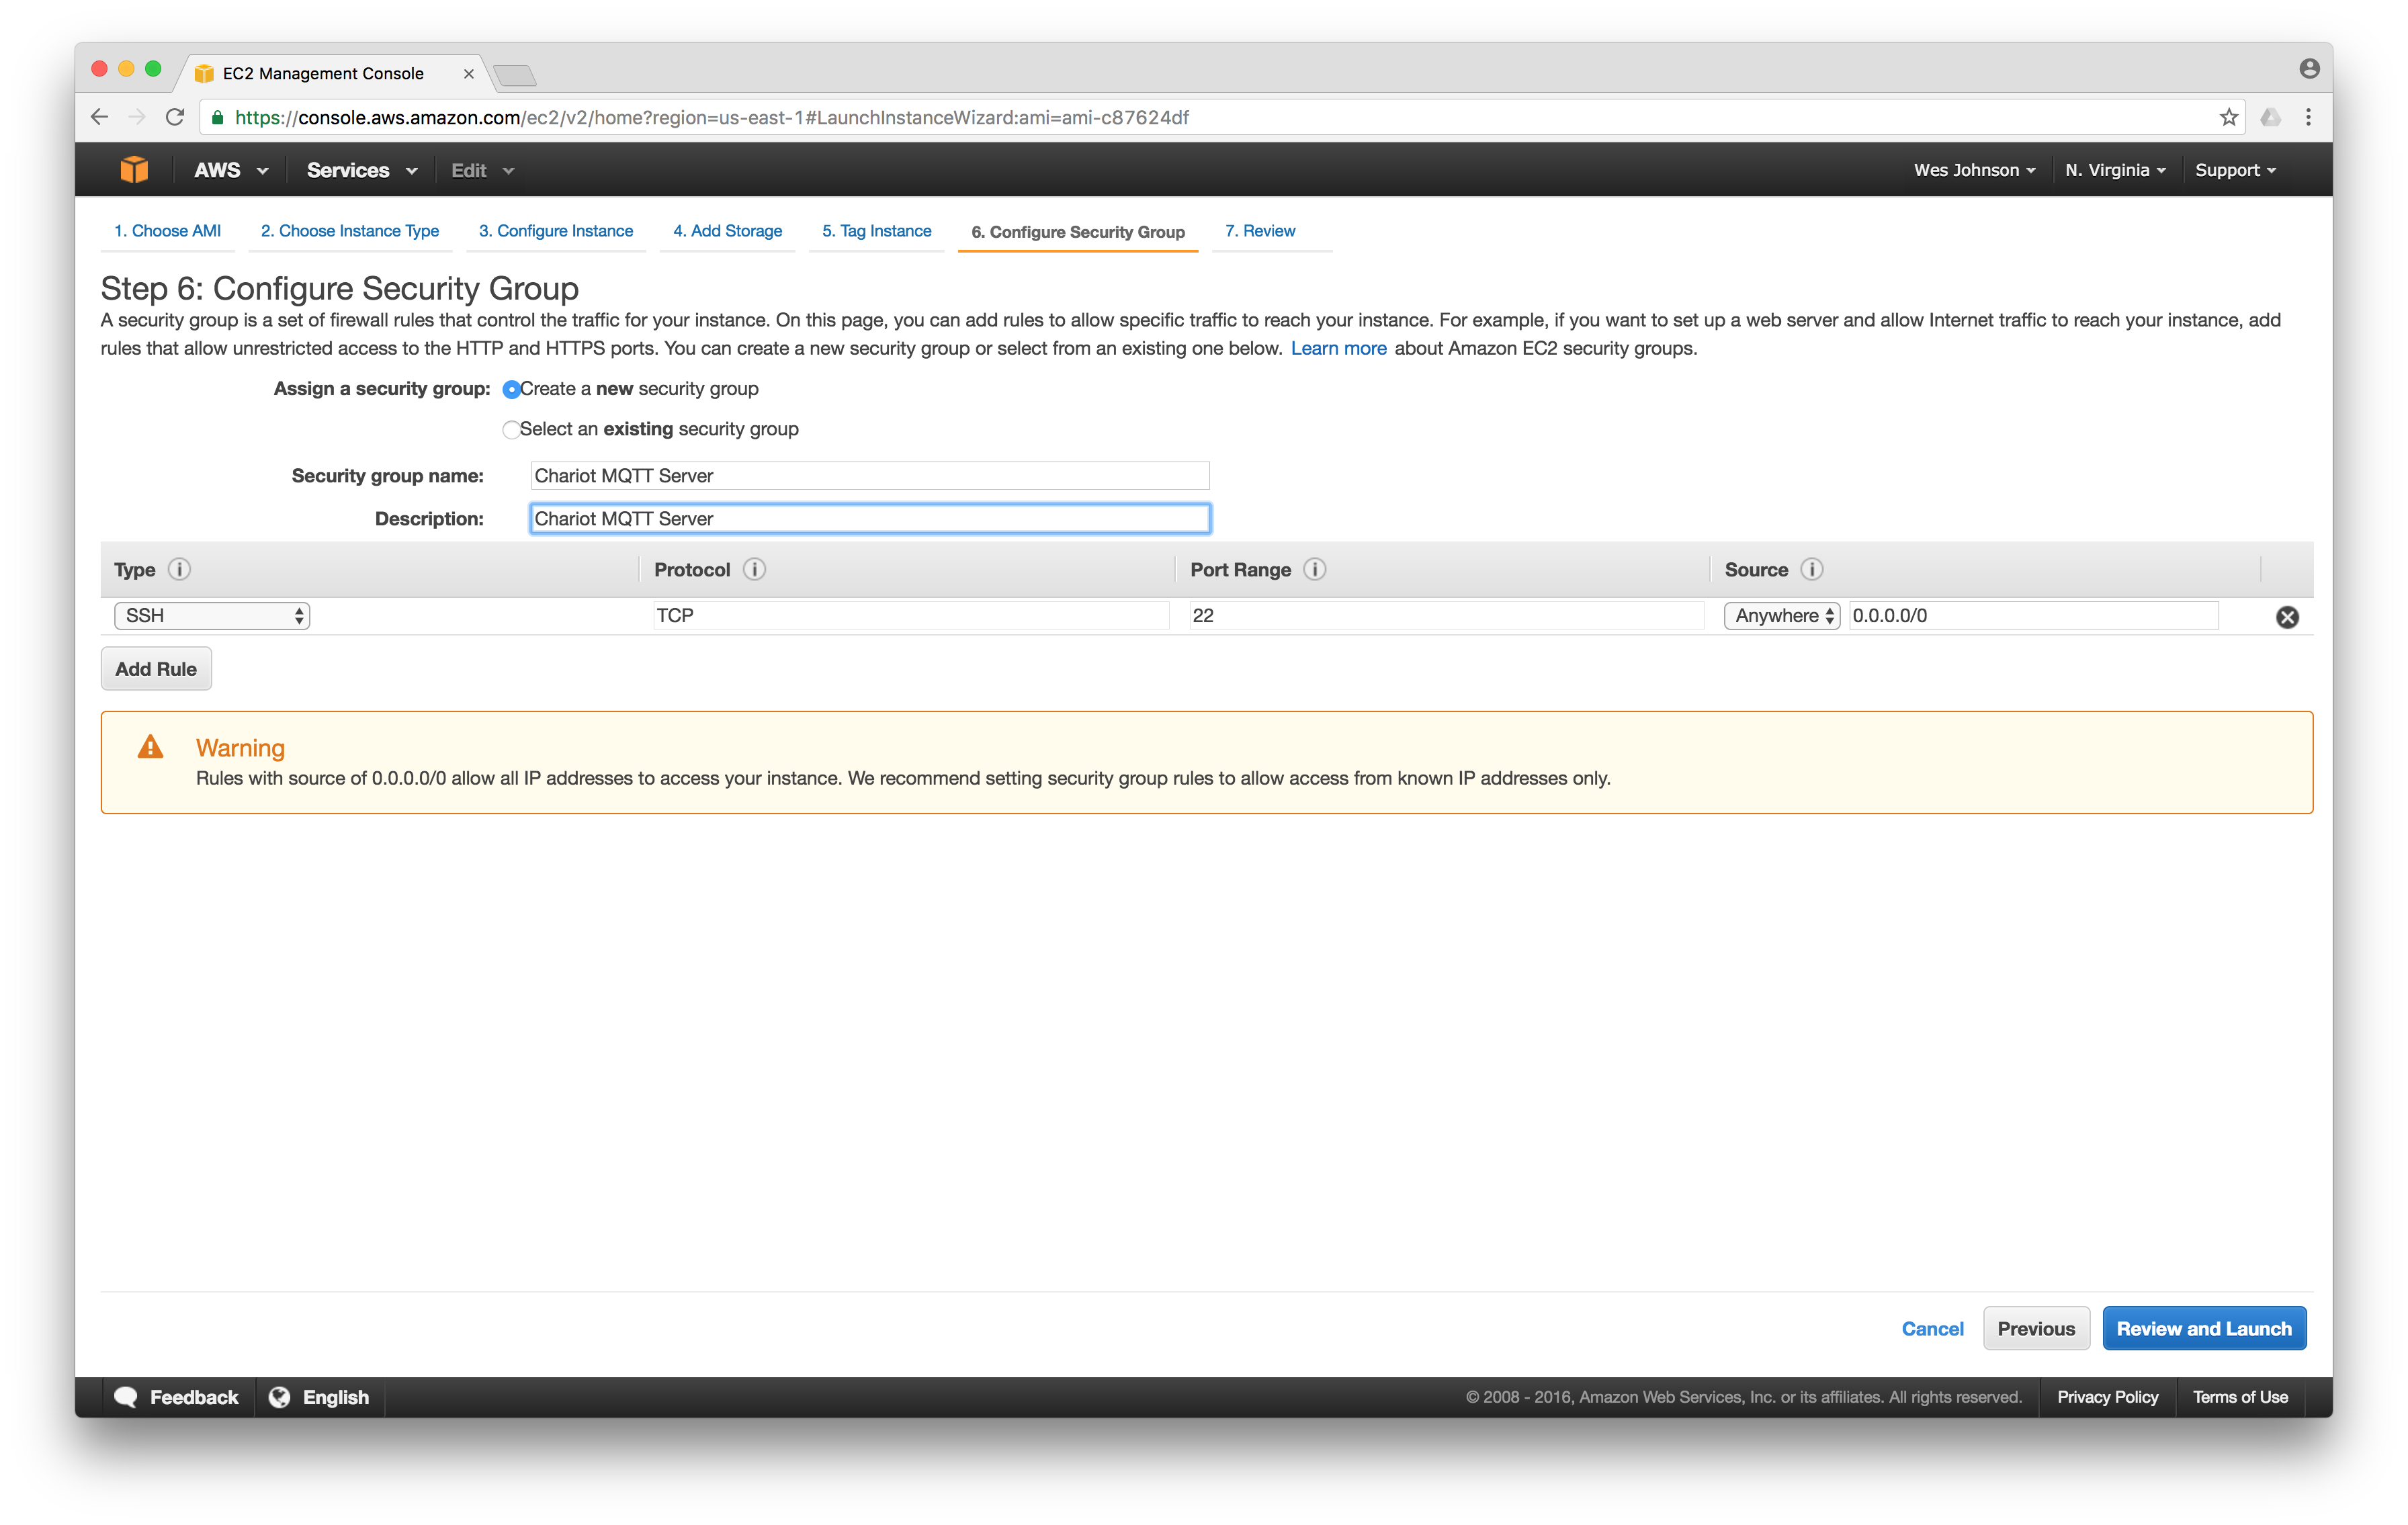
Now leave 'Create a new security group' selected. Give the 'Security group name' and 'Description' names that will help you identify the rules associated with this group as shown below.
Now click 'Add Rule' to add a new open port to list. This will create a new entry. Leave the 'Protocol' as 'TCP' and set the 'Port Range' to 443. Also, set the 'Source' to 'Anywhere' which will set the CIDR to 0.0.0.0/0. When done, it should look as follows.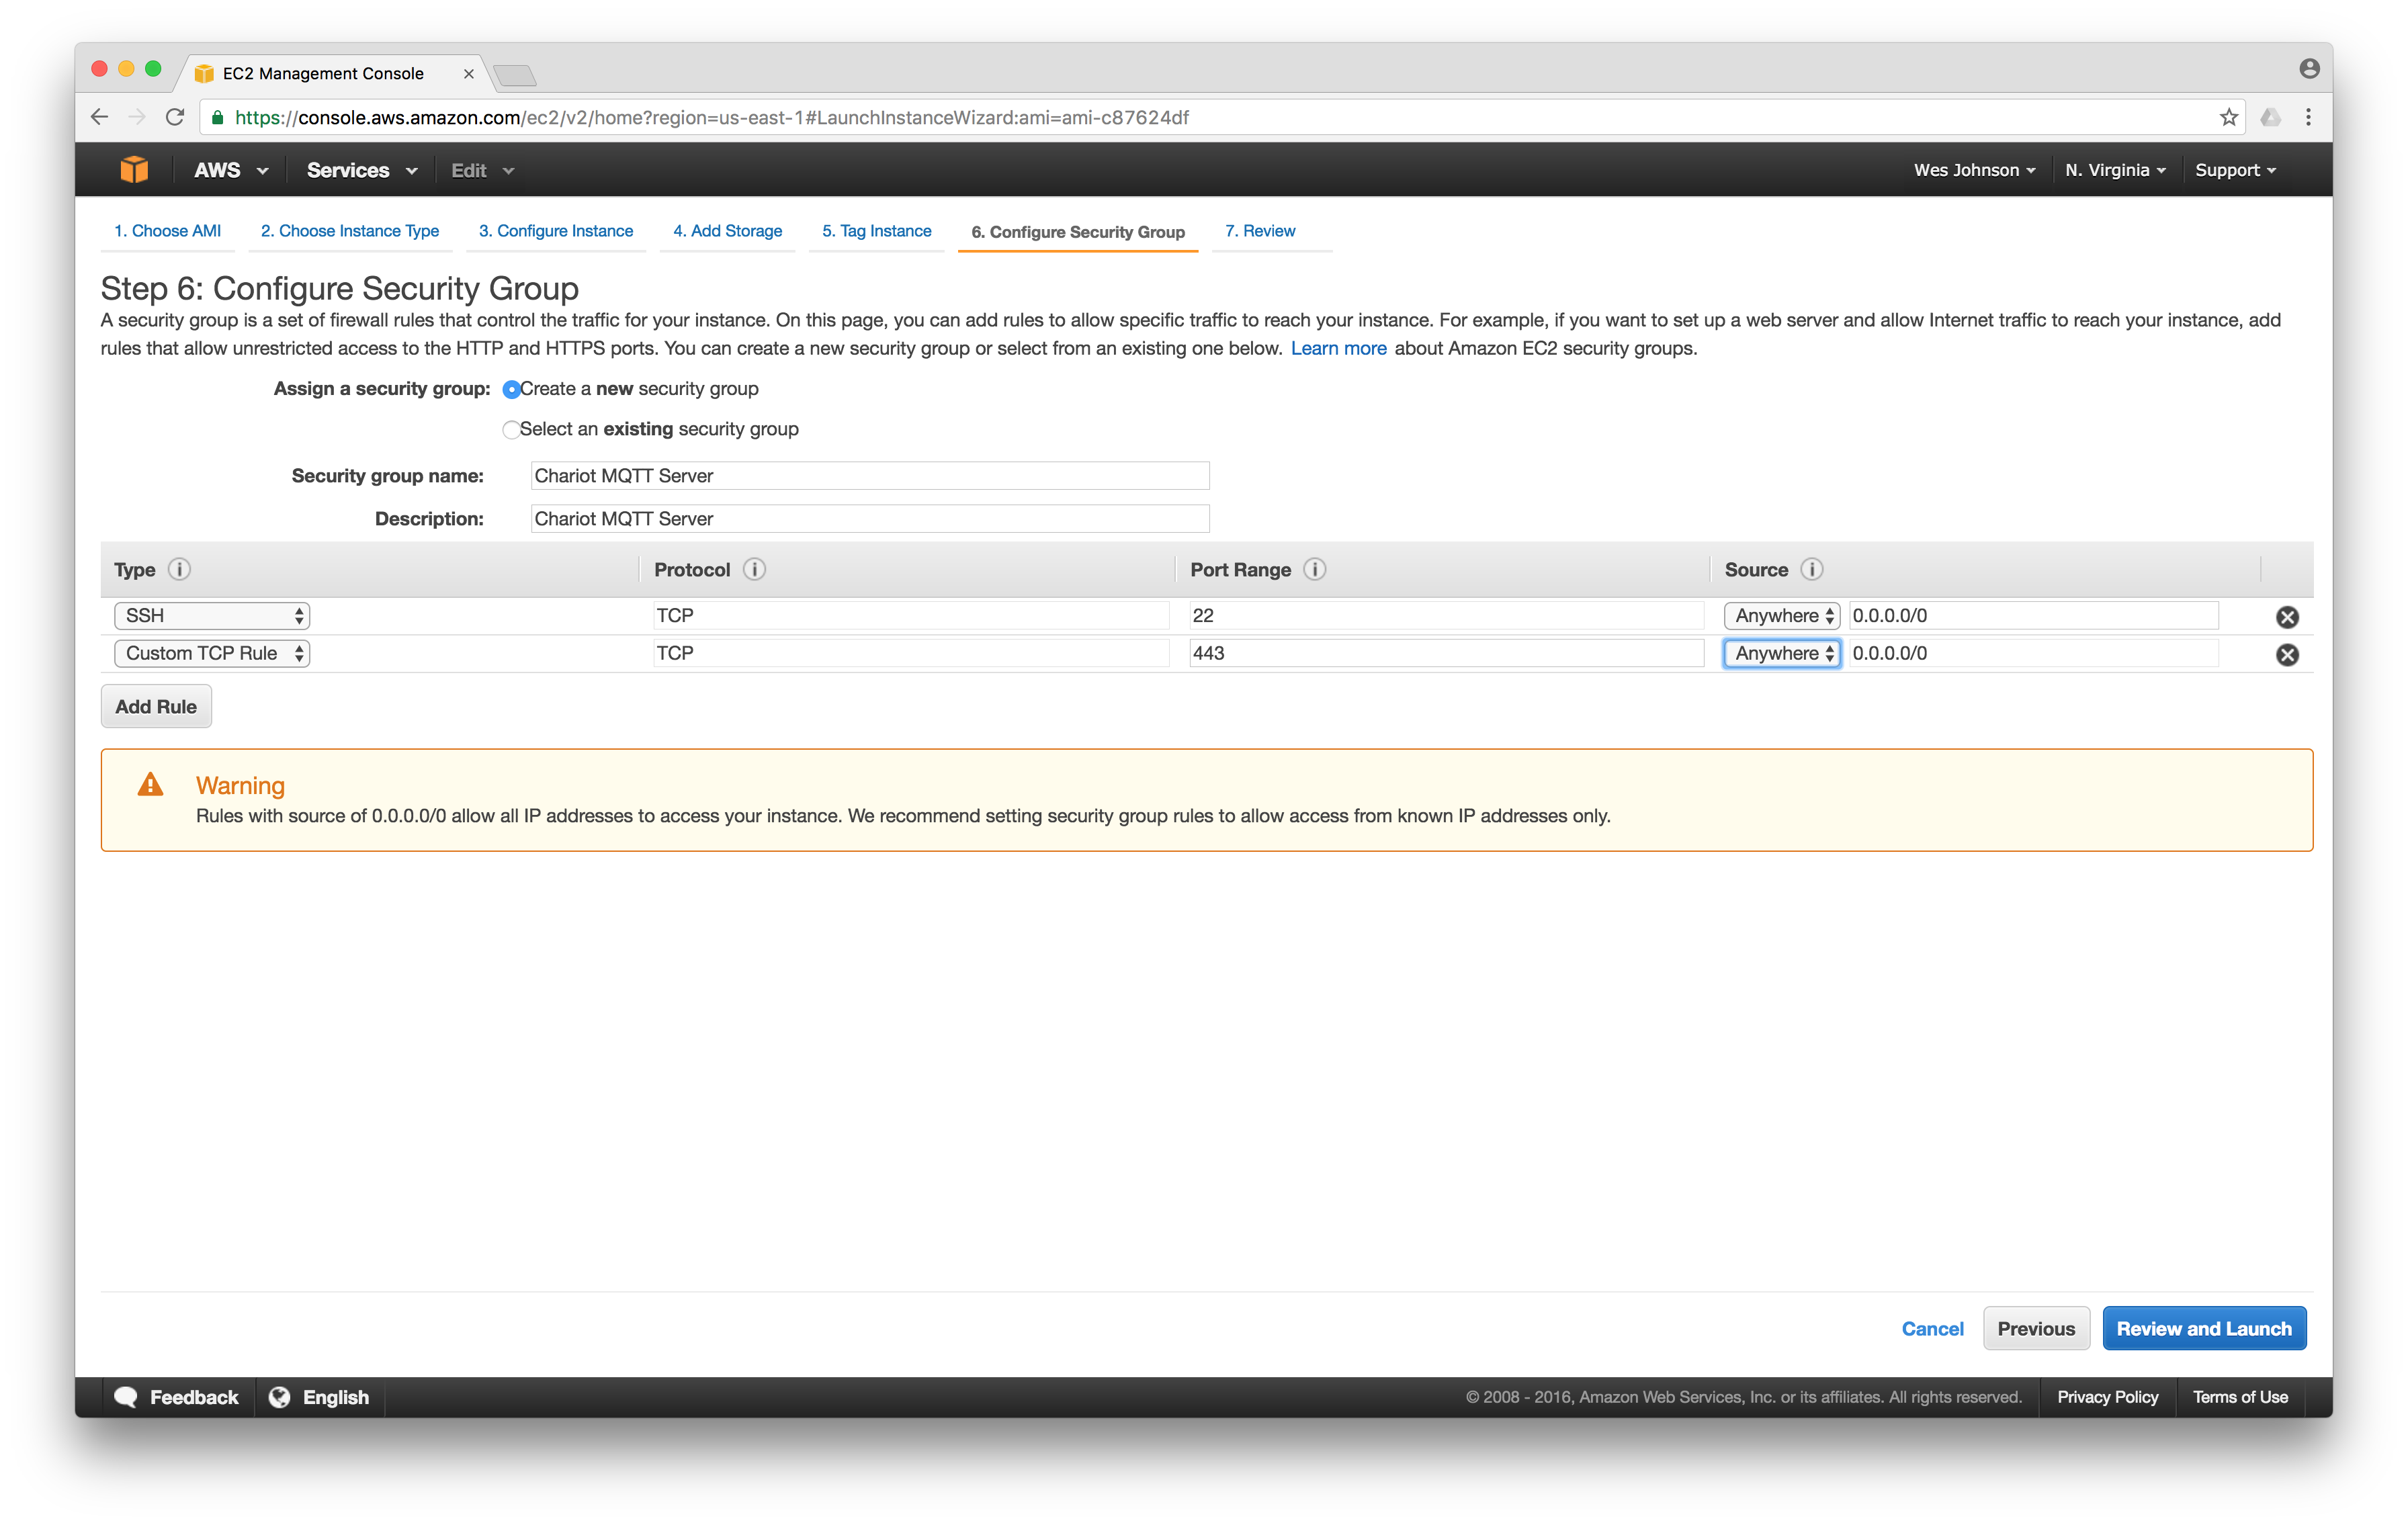
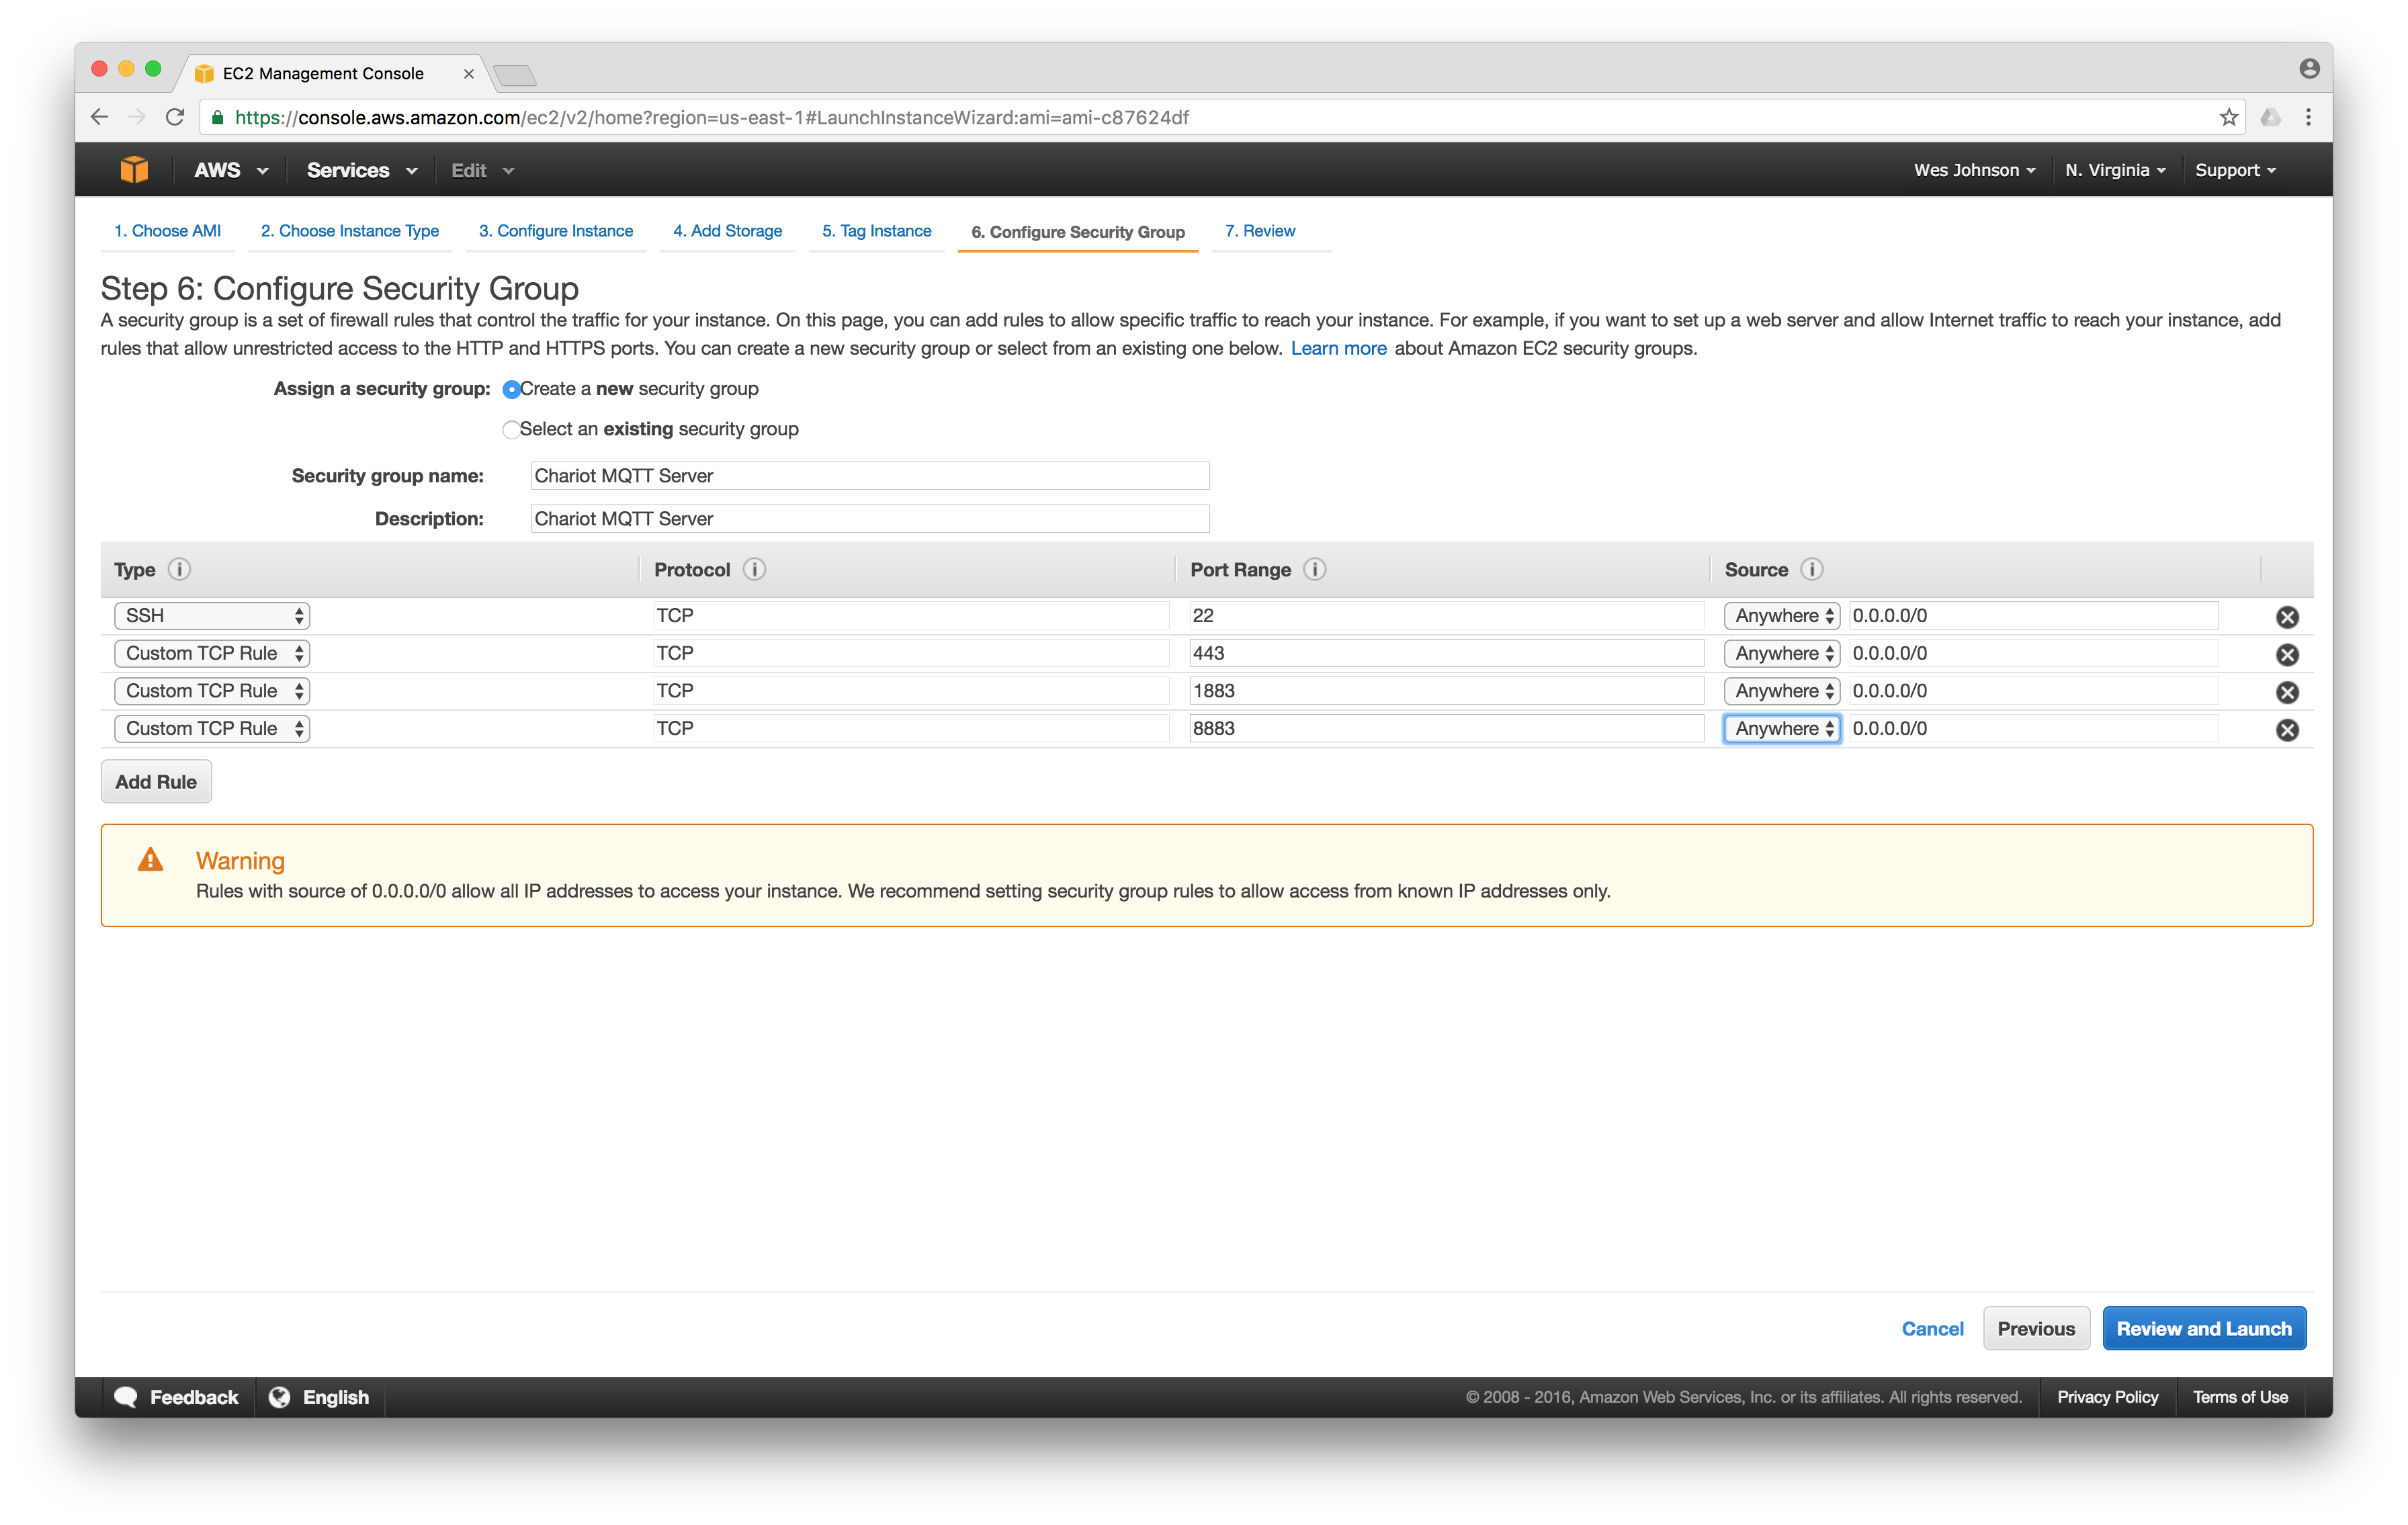
Additional rules need to be added for ports 1883 and 8883. When complete, it should look as shown below. Then click 'Review and Launch' in the lower right corner.
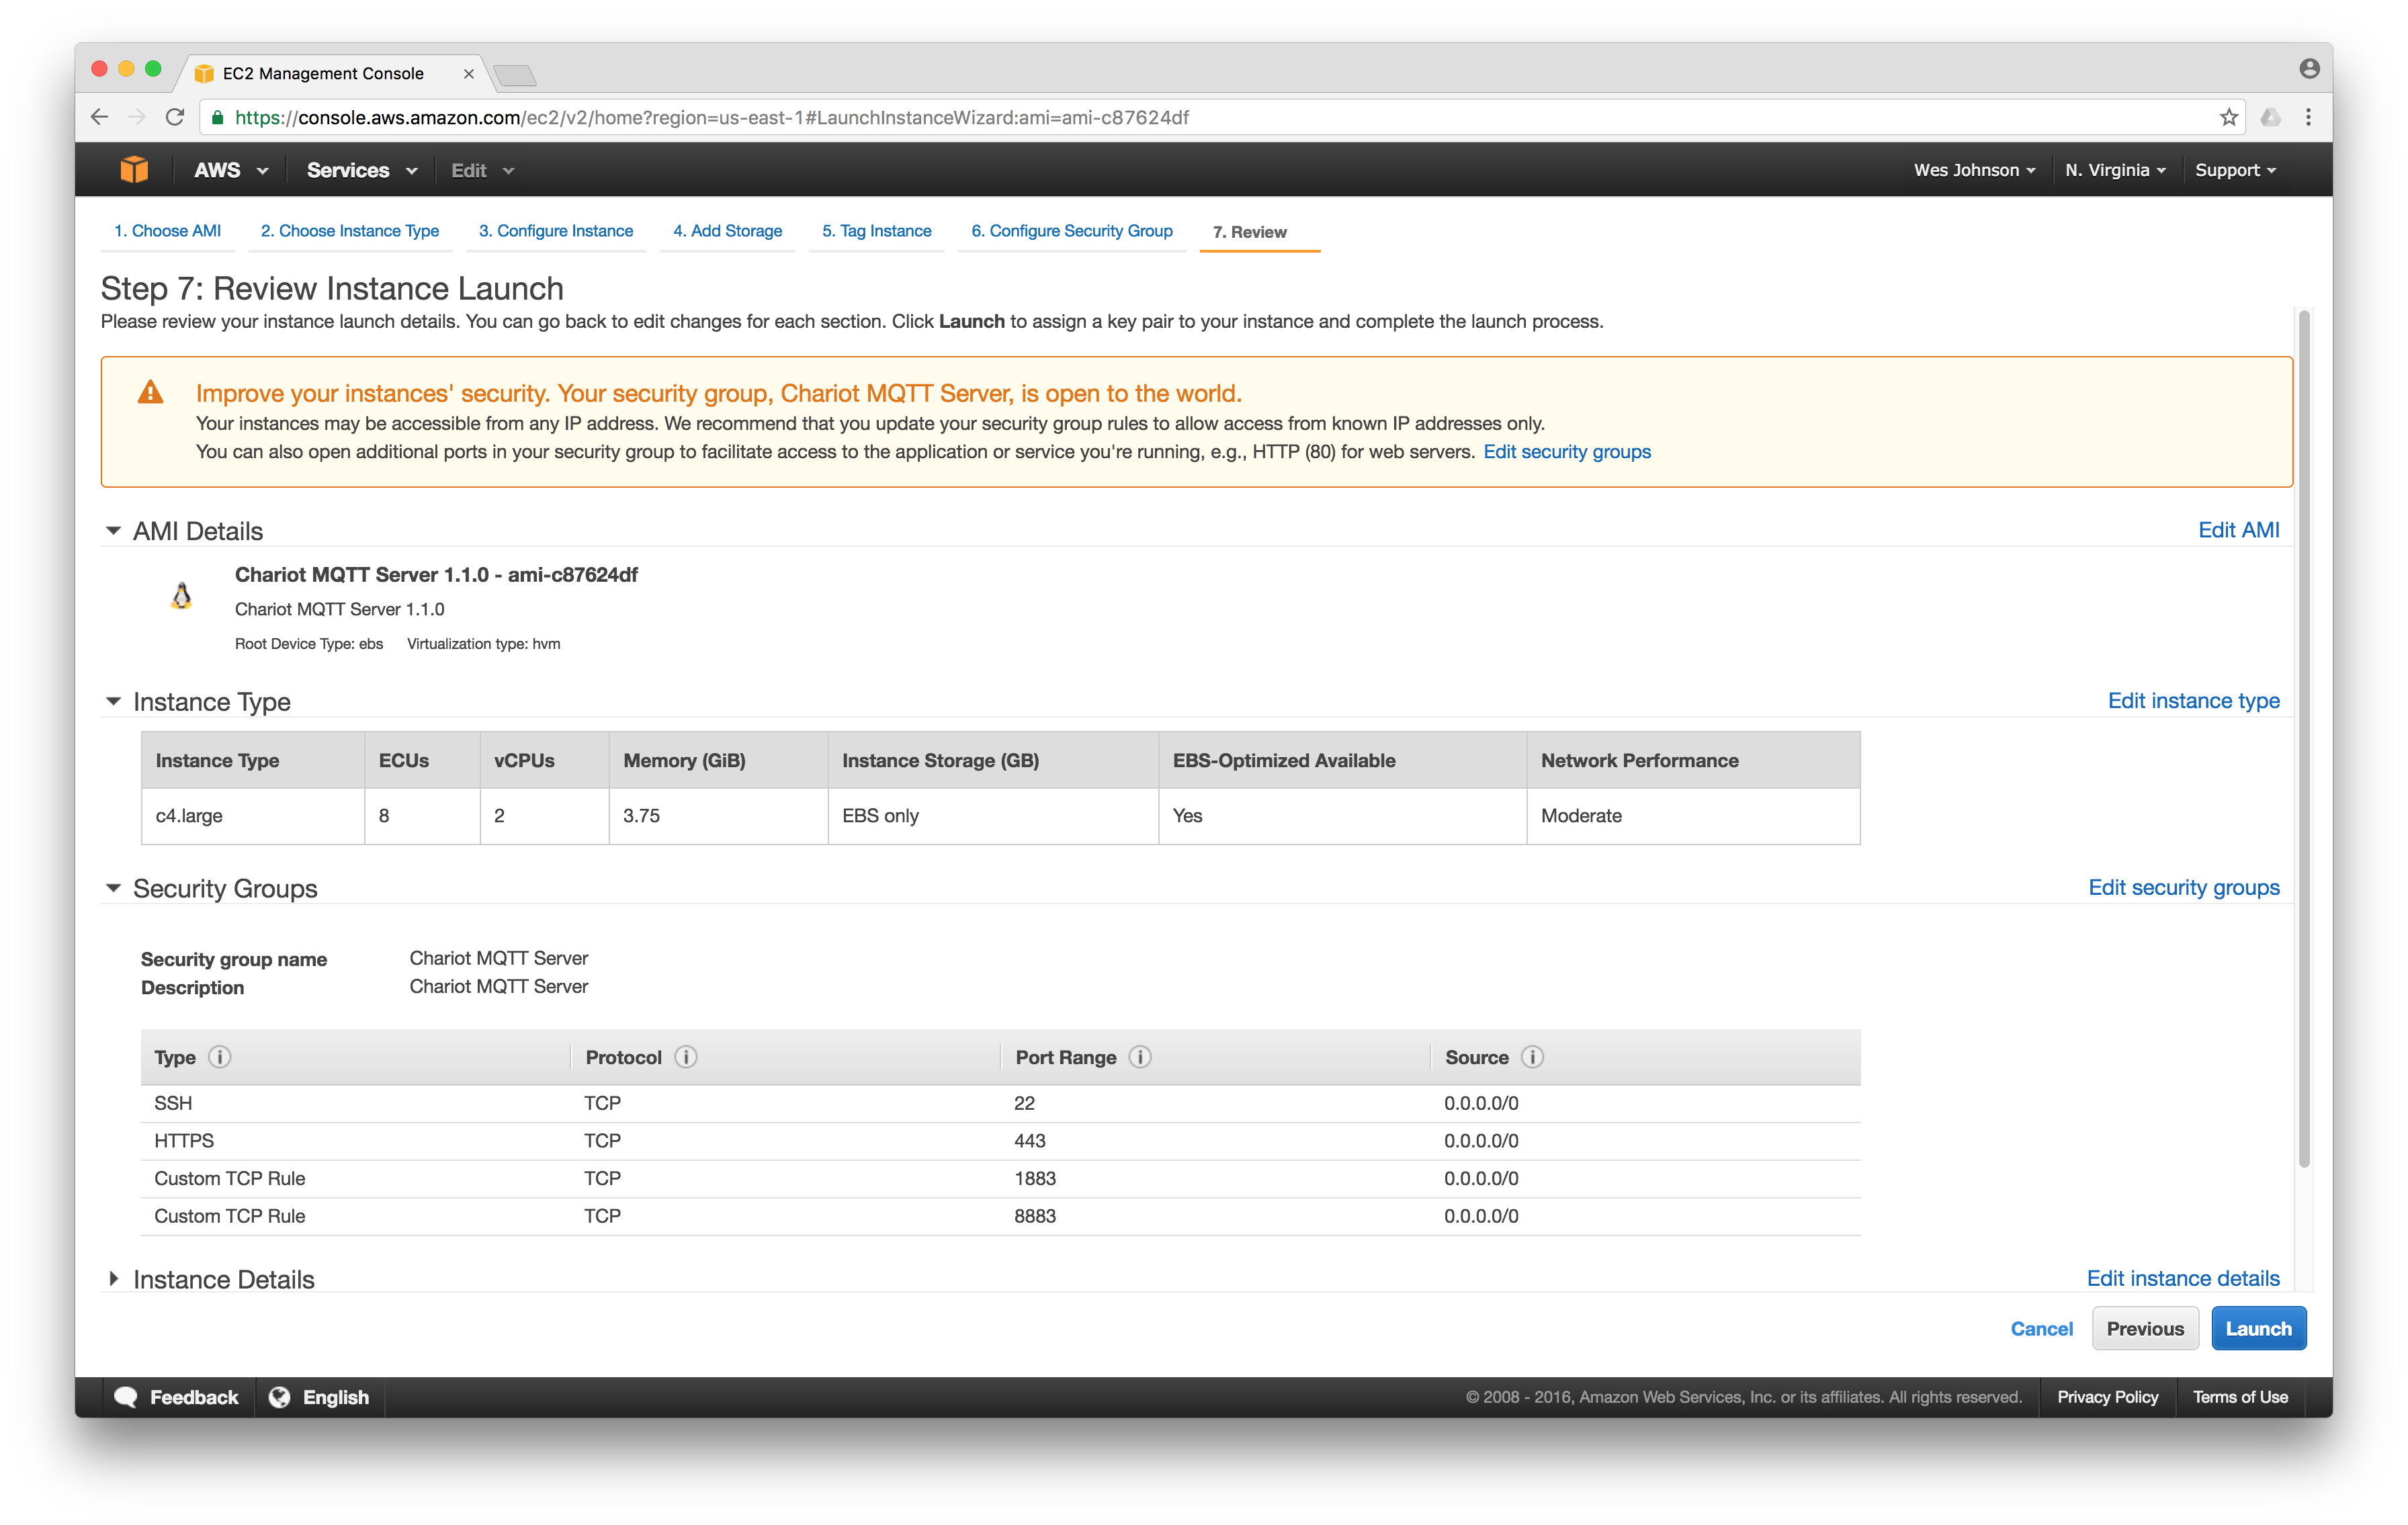
At this point, you will see a 'Review Instance Launch' screen that will look like what is shown below. Finally click 'Launch' as shown in the lower right corner.
At this point you will be asked to create or select an existing keypair. Choose 'Create a new key pair', give it a name, and then click the 'Download Key Pair', and finally click 'Launch Instances'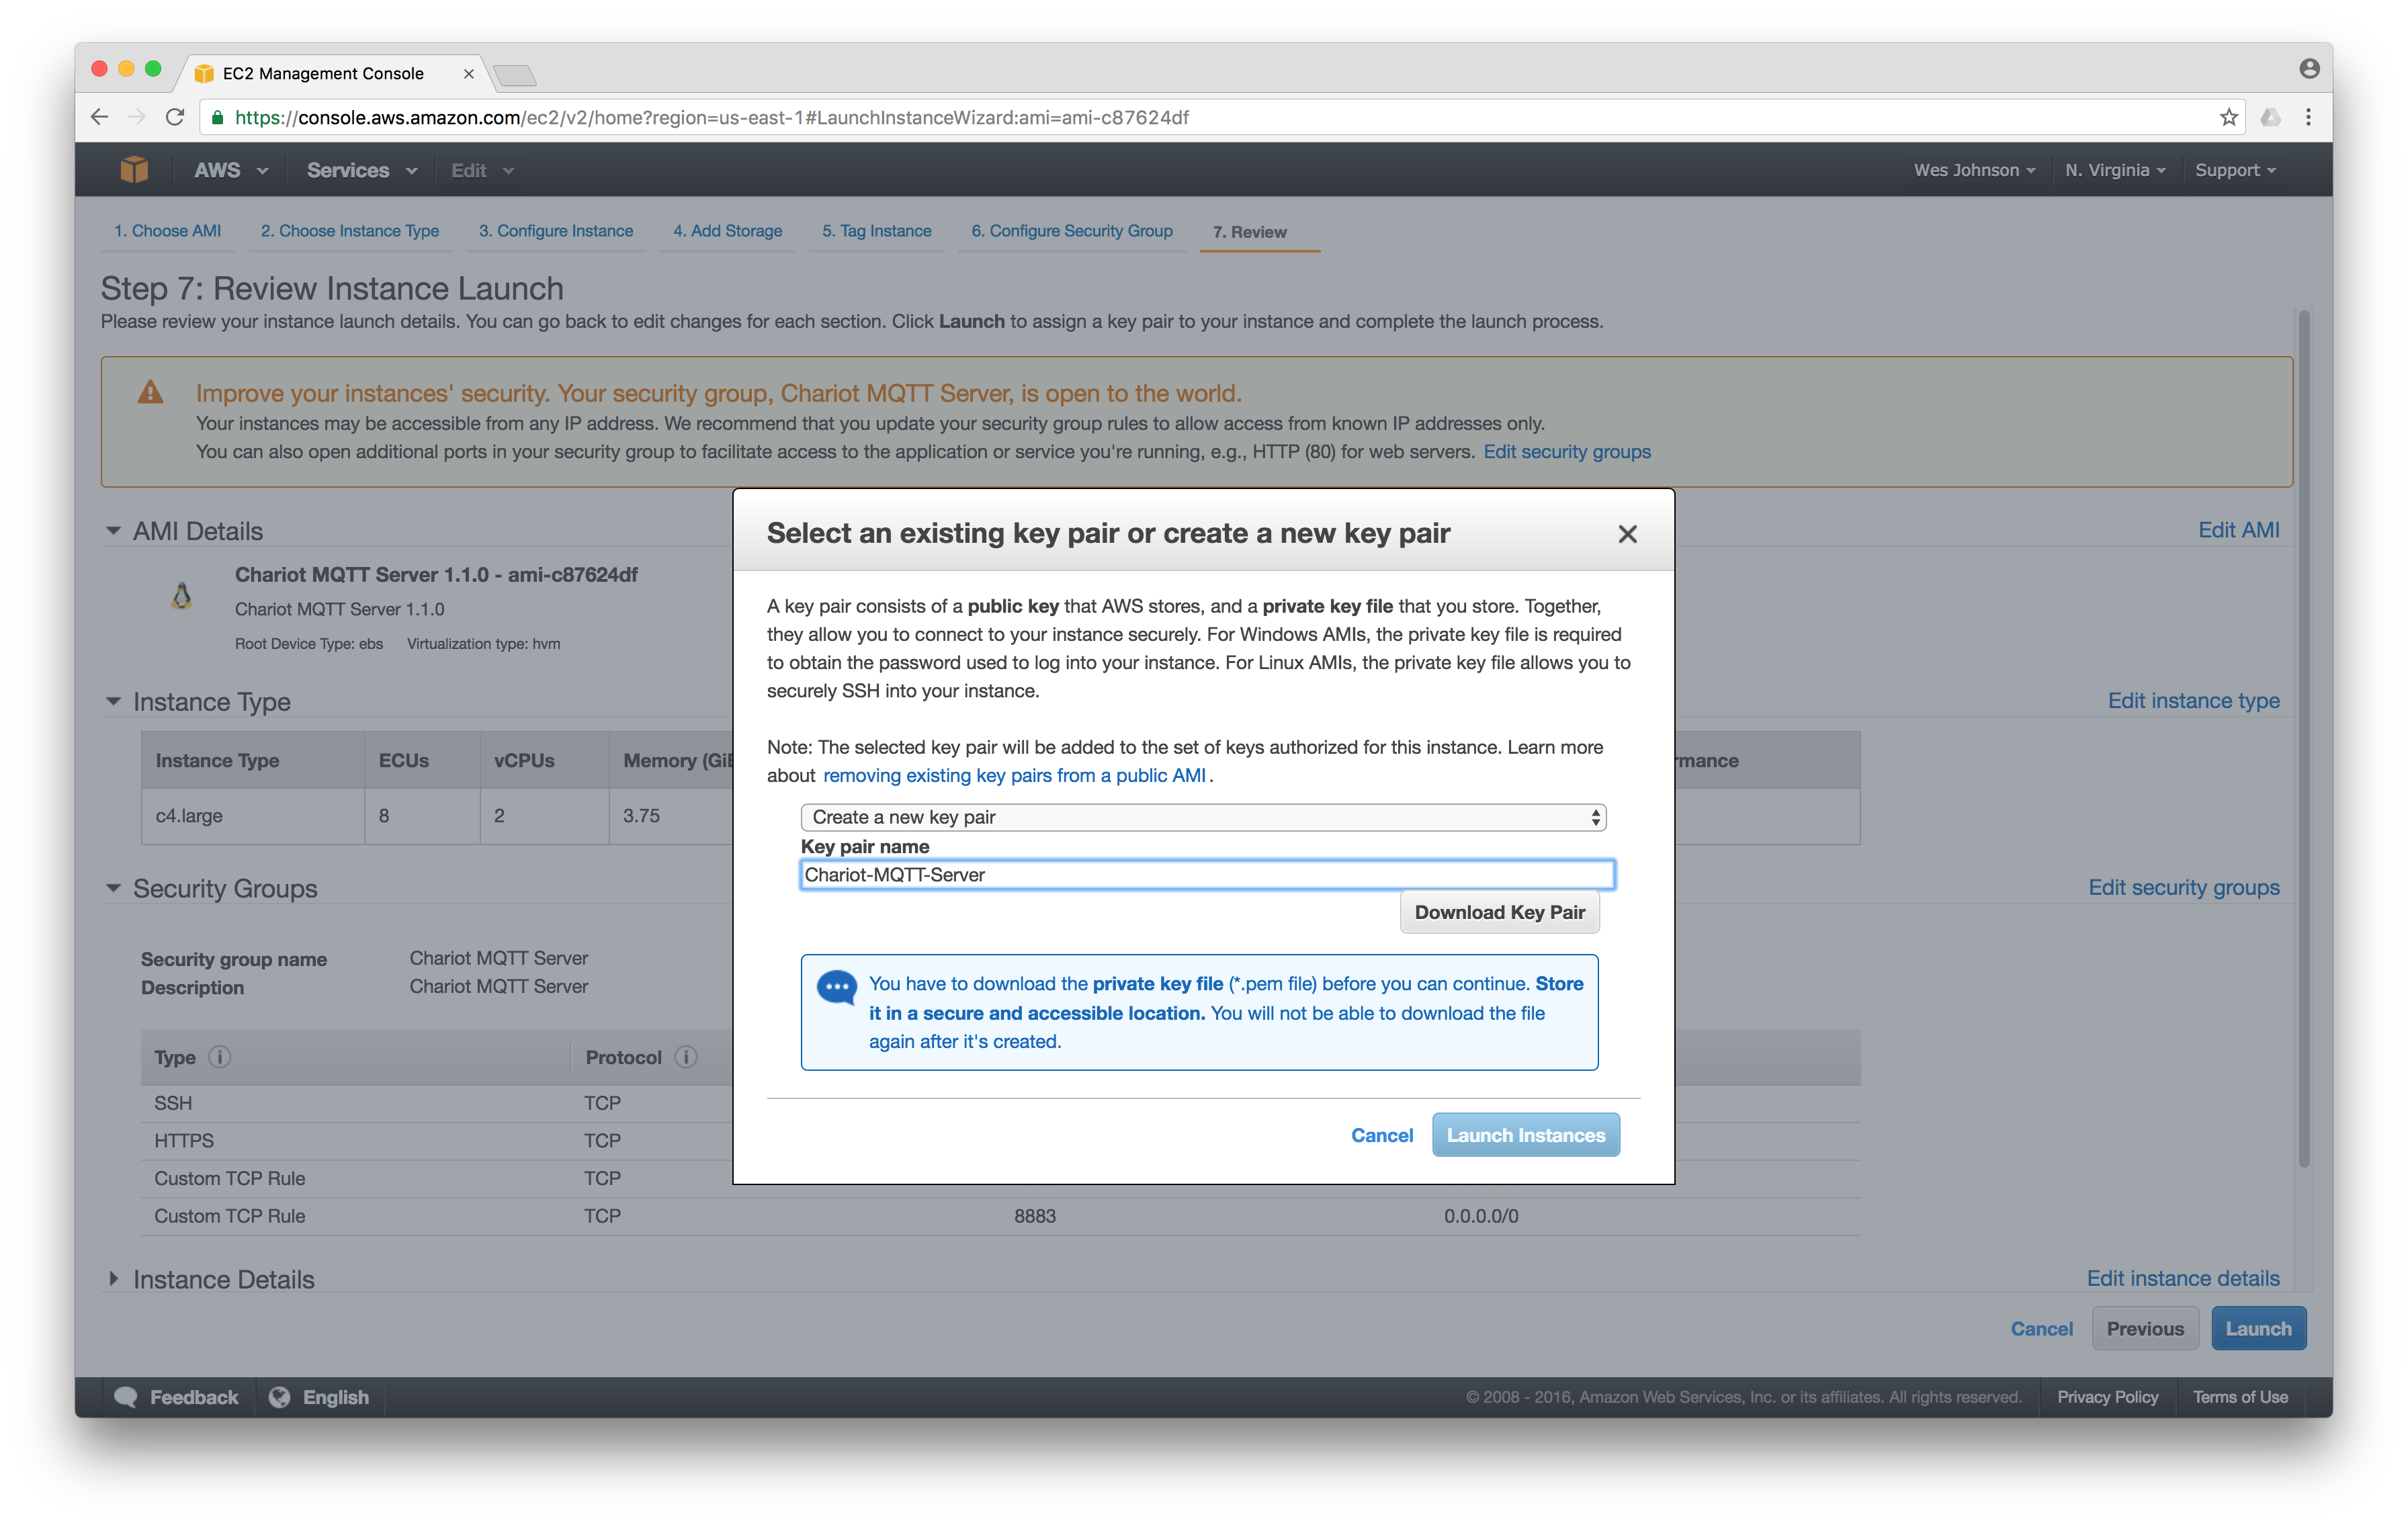
At this point, the instance will be created by Amazon AWS. Click 'View Instances' in the lower right.

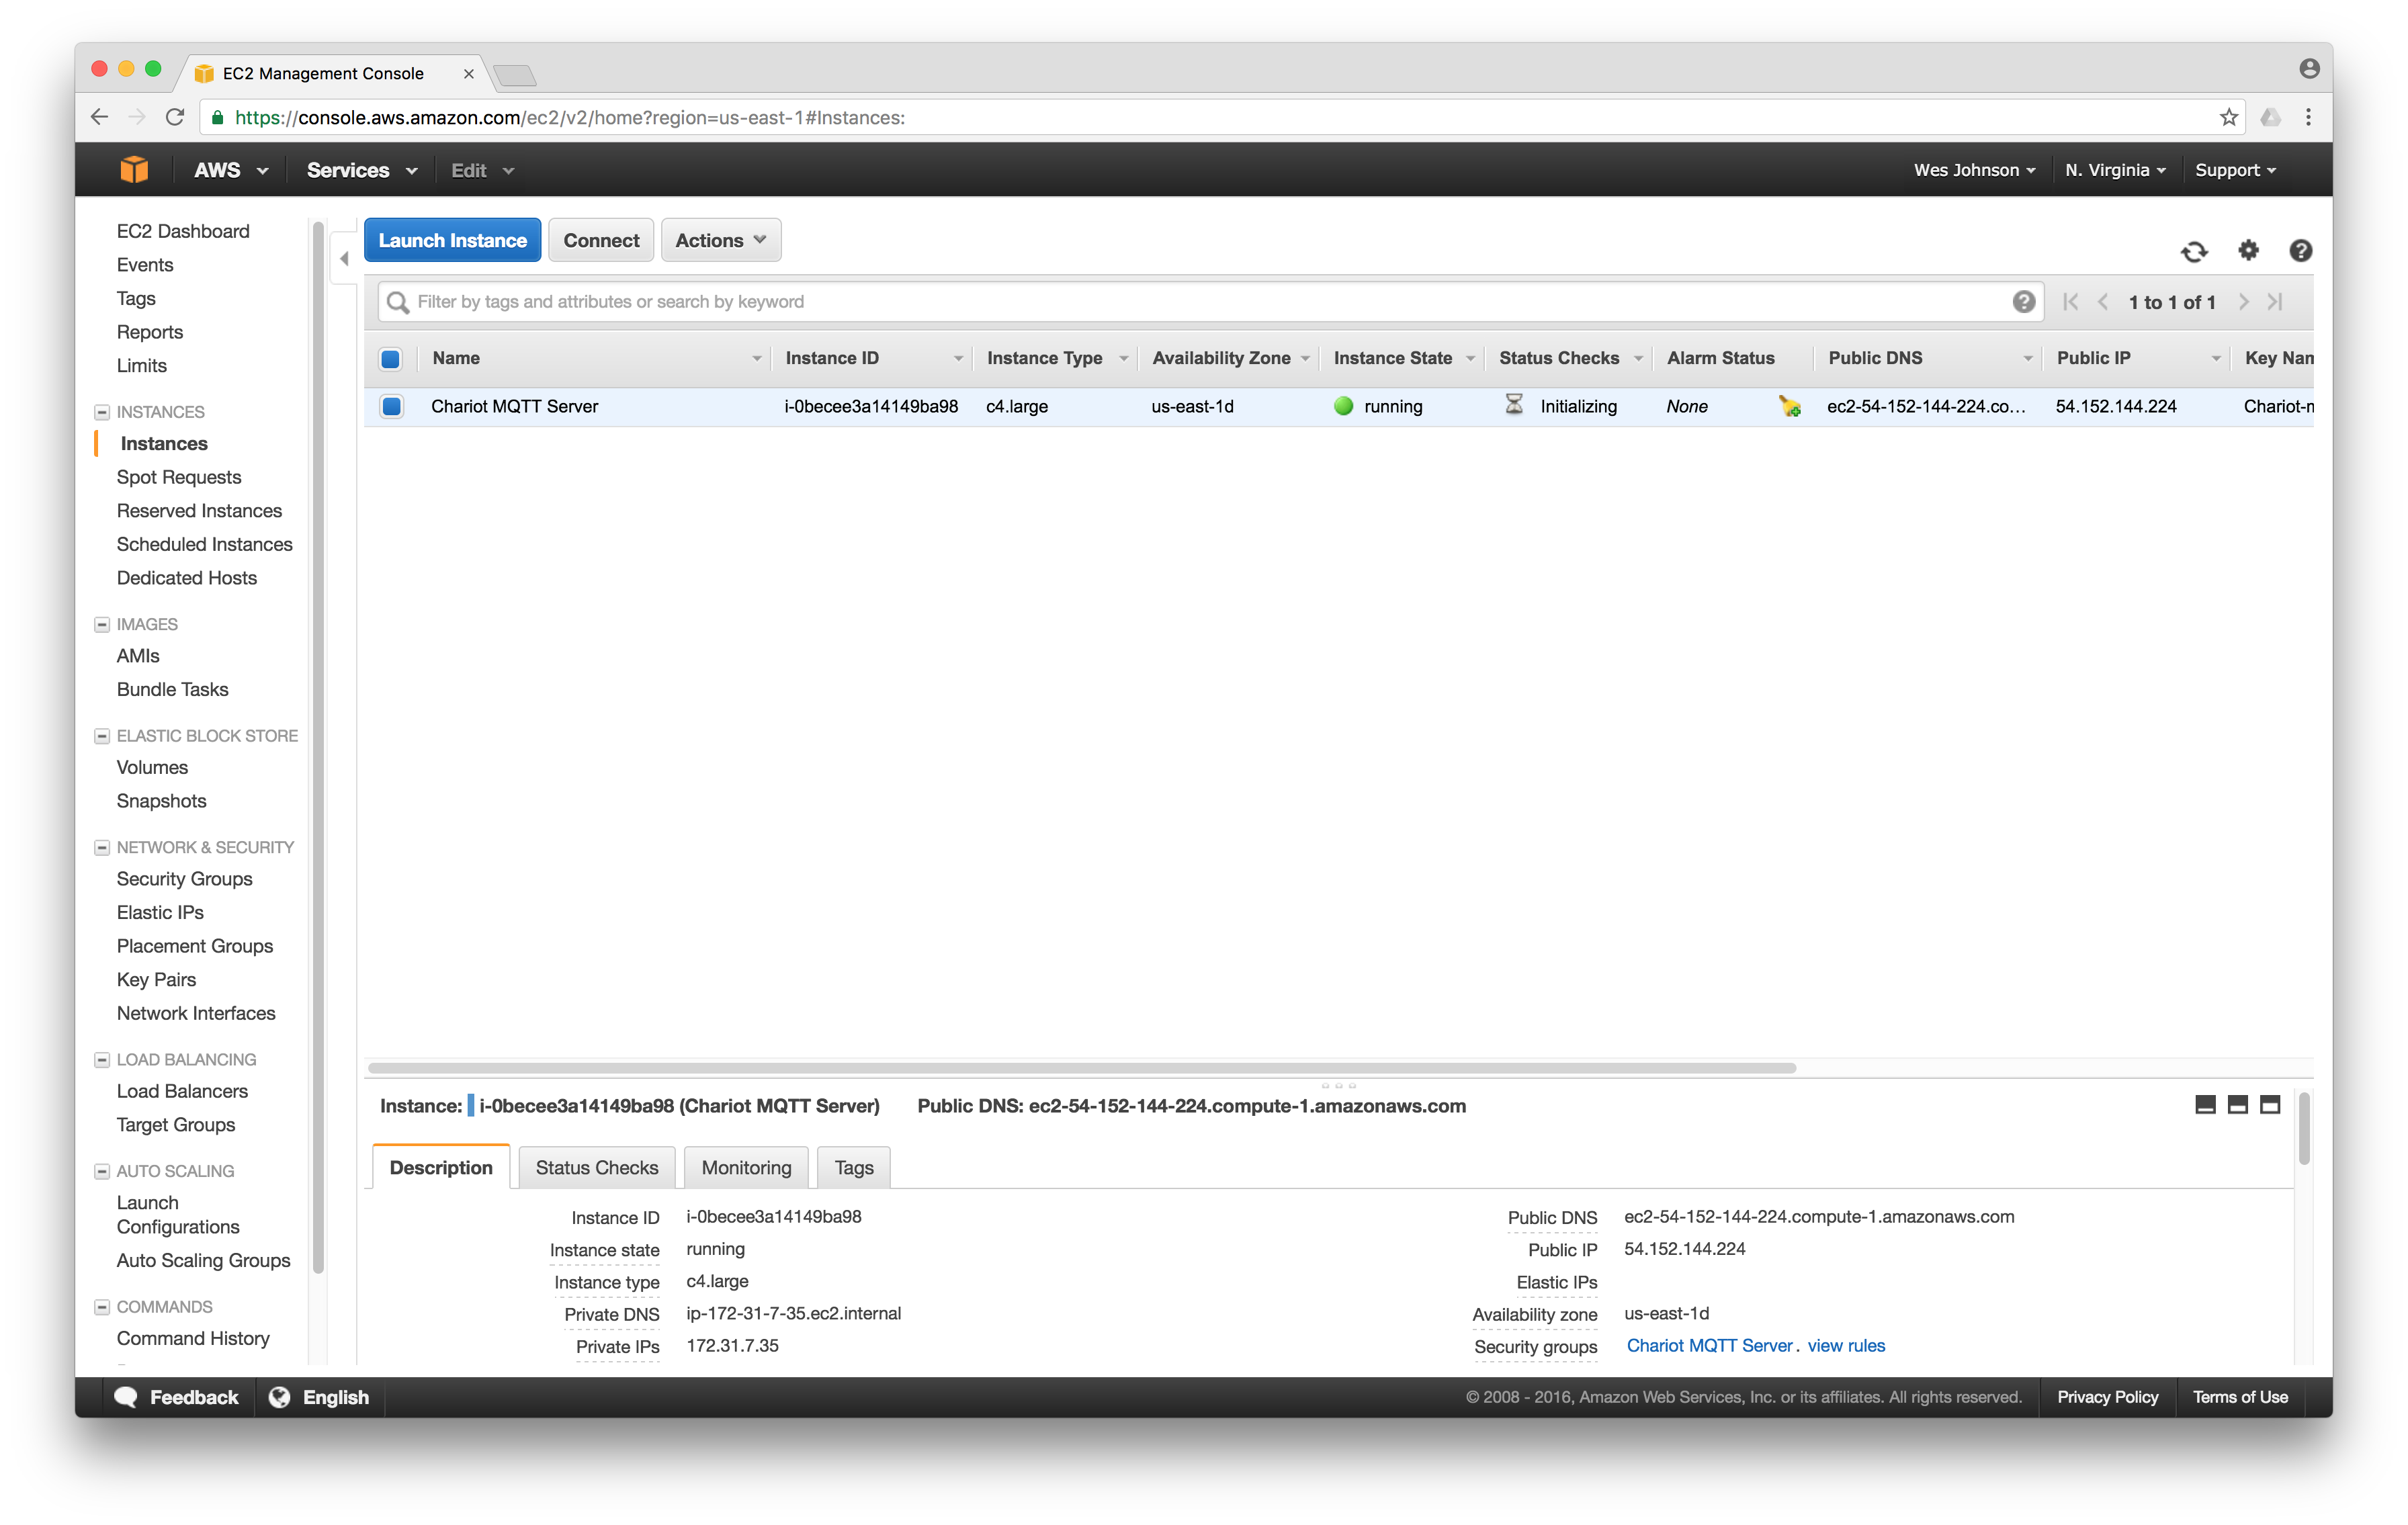
This will show the EC2 'Instances' screen and will show the newly created Chariot MQTT Server. It takes a few minutes for the instance to become fully ready. It will show Initializing under 'Instance State' and/or 'Status Checks'