...
- Ignition with Google Cloud Injector Module installed
- Ignition Designer installed
- Review the Inductive Automation documentation for Launching Designer against the Ignition gateway
- An existing Microsoft Azure account with an active IoT Hub and a registered device.
- Documentation on creating an IoT Hub and registering an new device can be found here
...
Navigate to the Azure Injector Module configuration section from the left side bar in the Ignition Gateway. From the Azure IoT Hubs tab, click on the "Add IoT Hub" link to bring up the following configuration form:
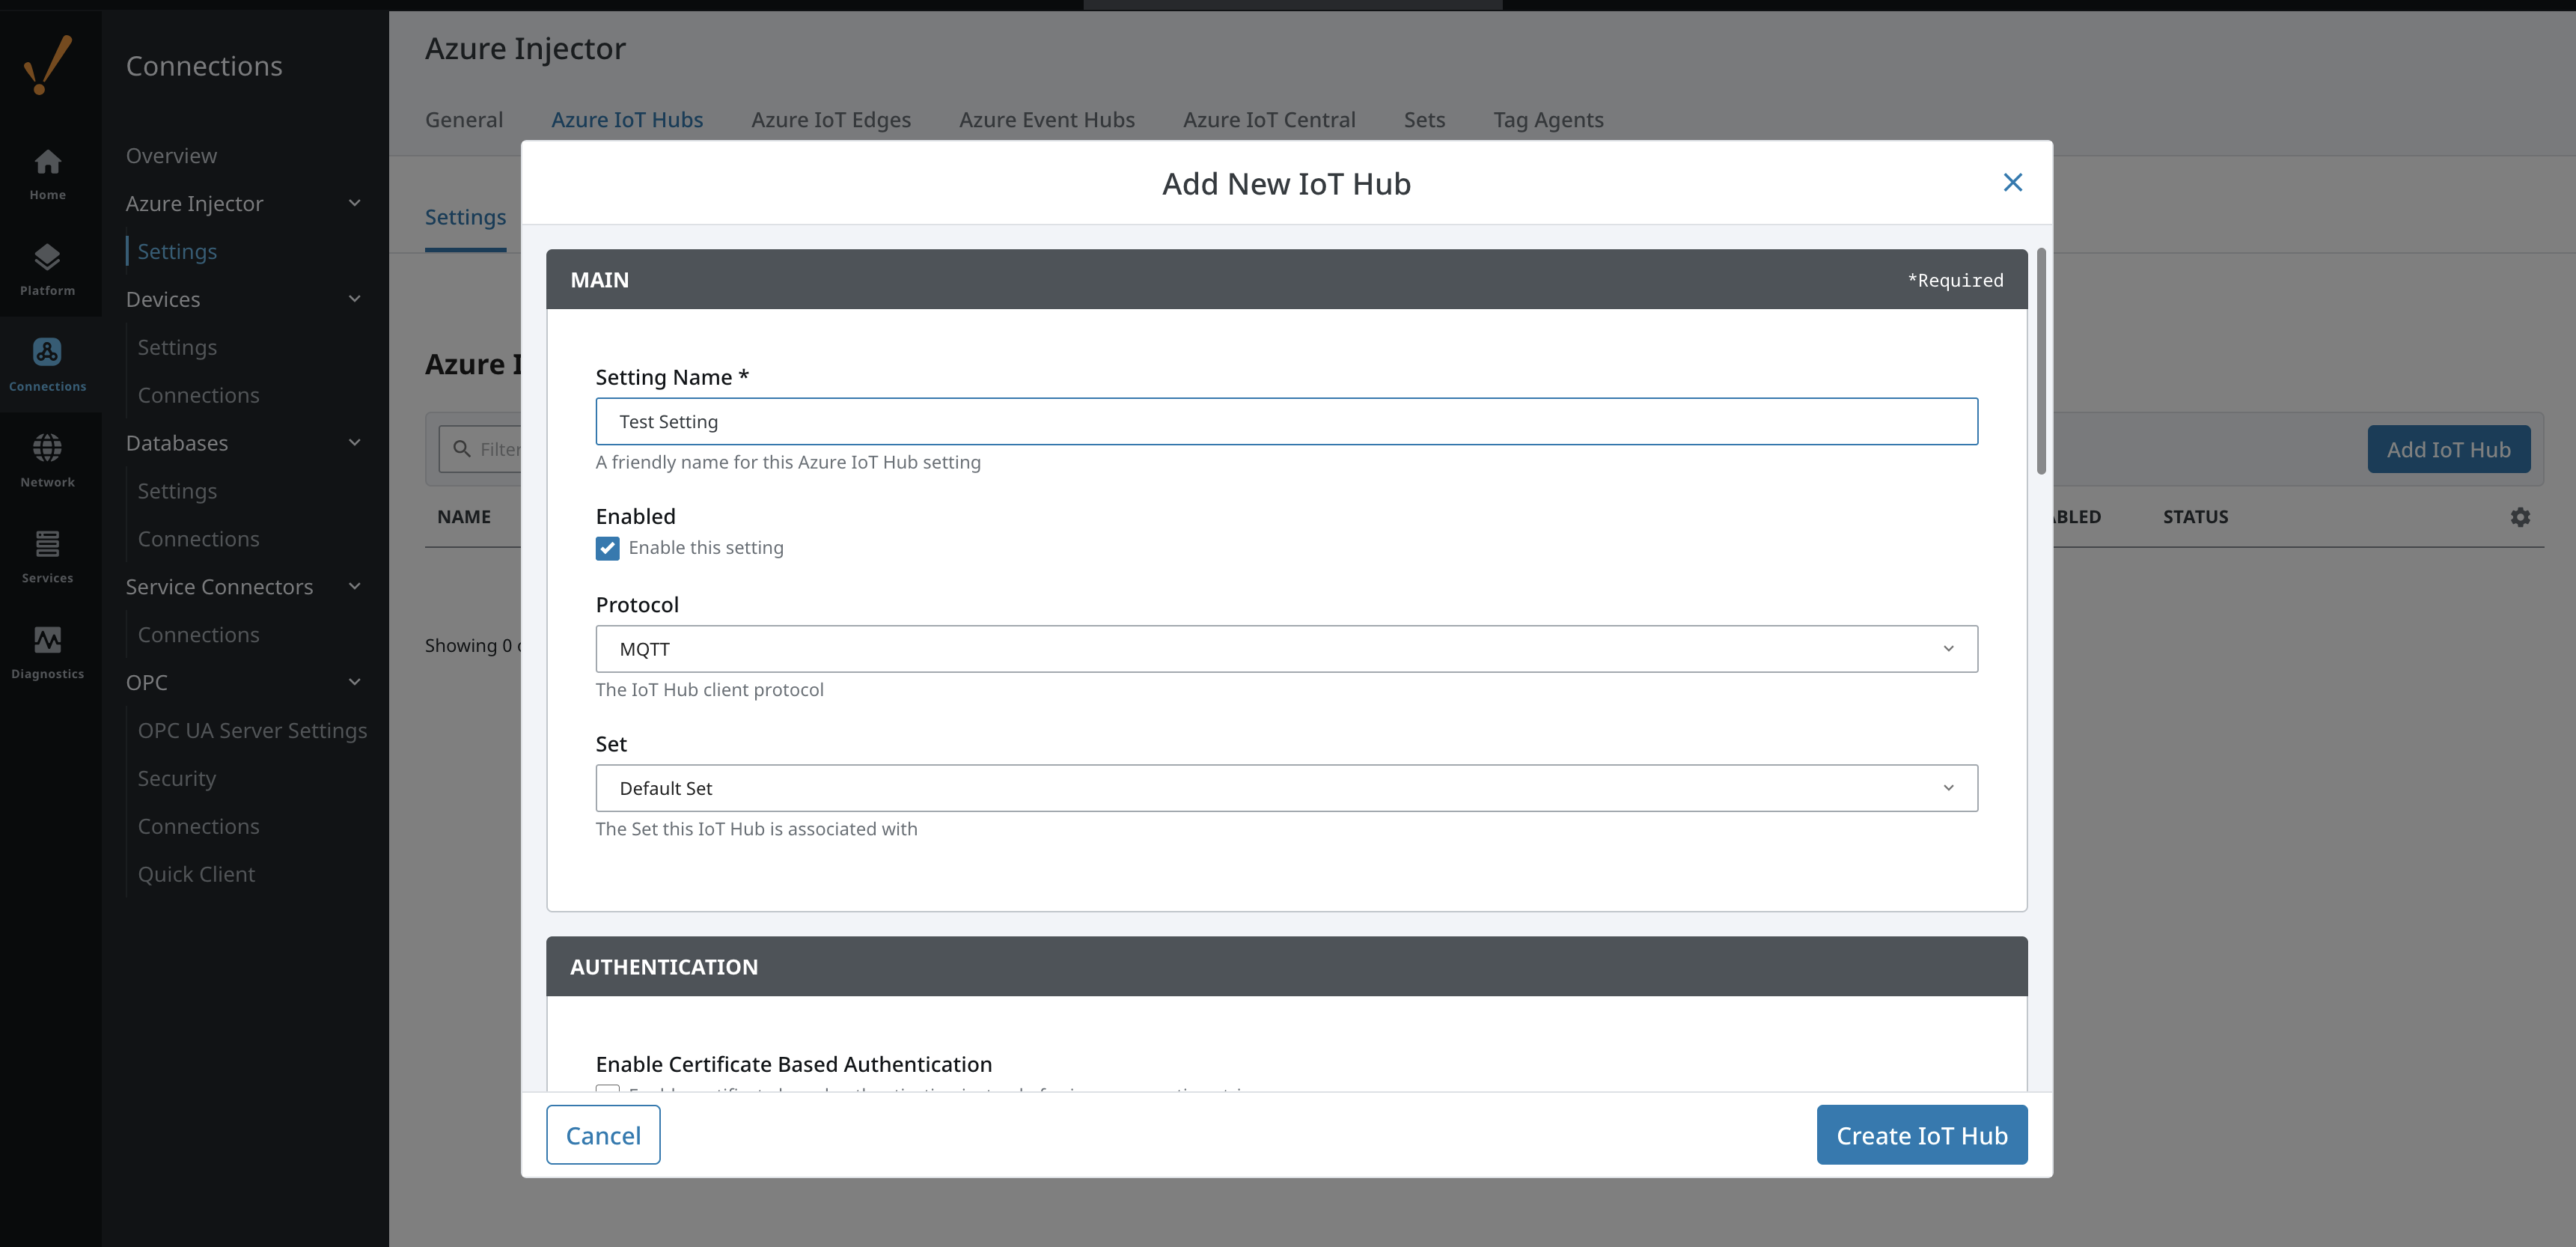 Image Modified
Set the following parameters:
- Setting Name
- This can be any unique identifier. For this tutorial we will use "Test Setting".
- Password
- This the IoT Hub Device Connection String from your Azure IoT Hub. This can be found by navigating to a provisioned Device within the Device Explorer of the IoT Hub that you wish to use.
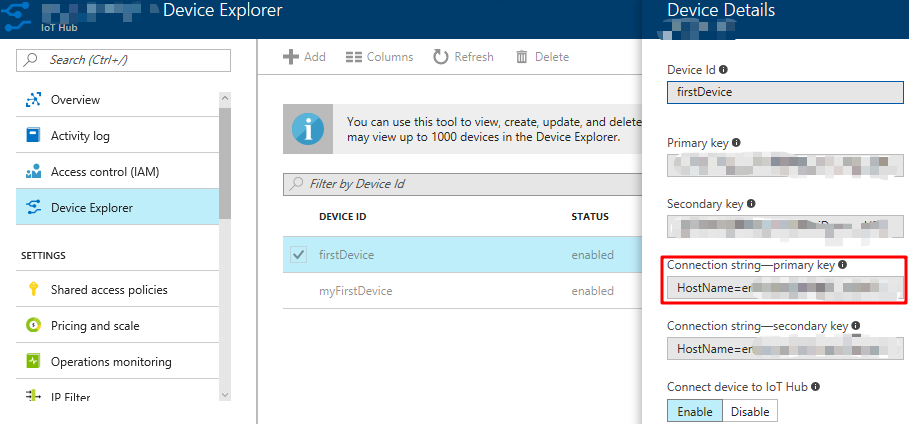 Image Modified
Click on "Create New Azure IoT Hub Setting" to finish creating the new configuration setting.
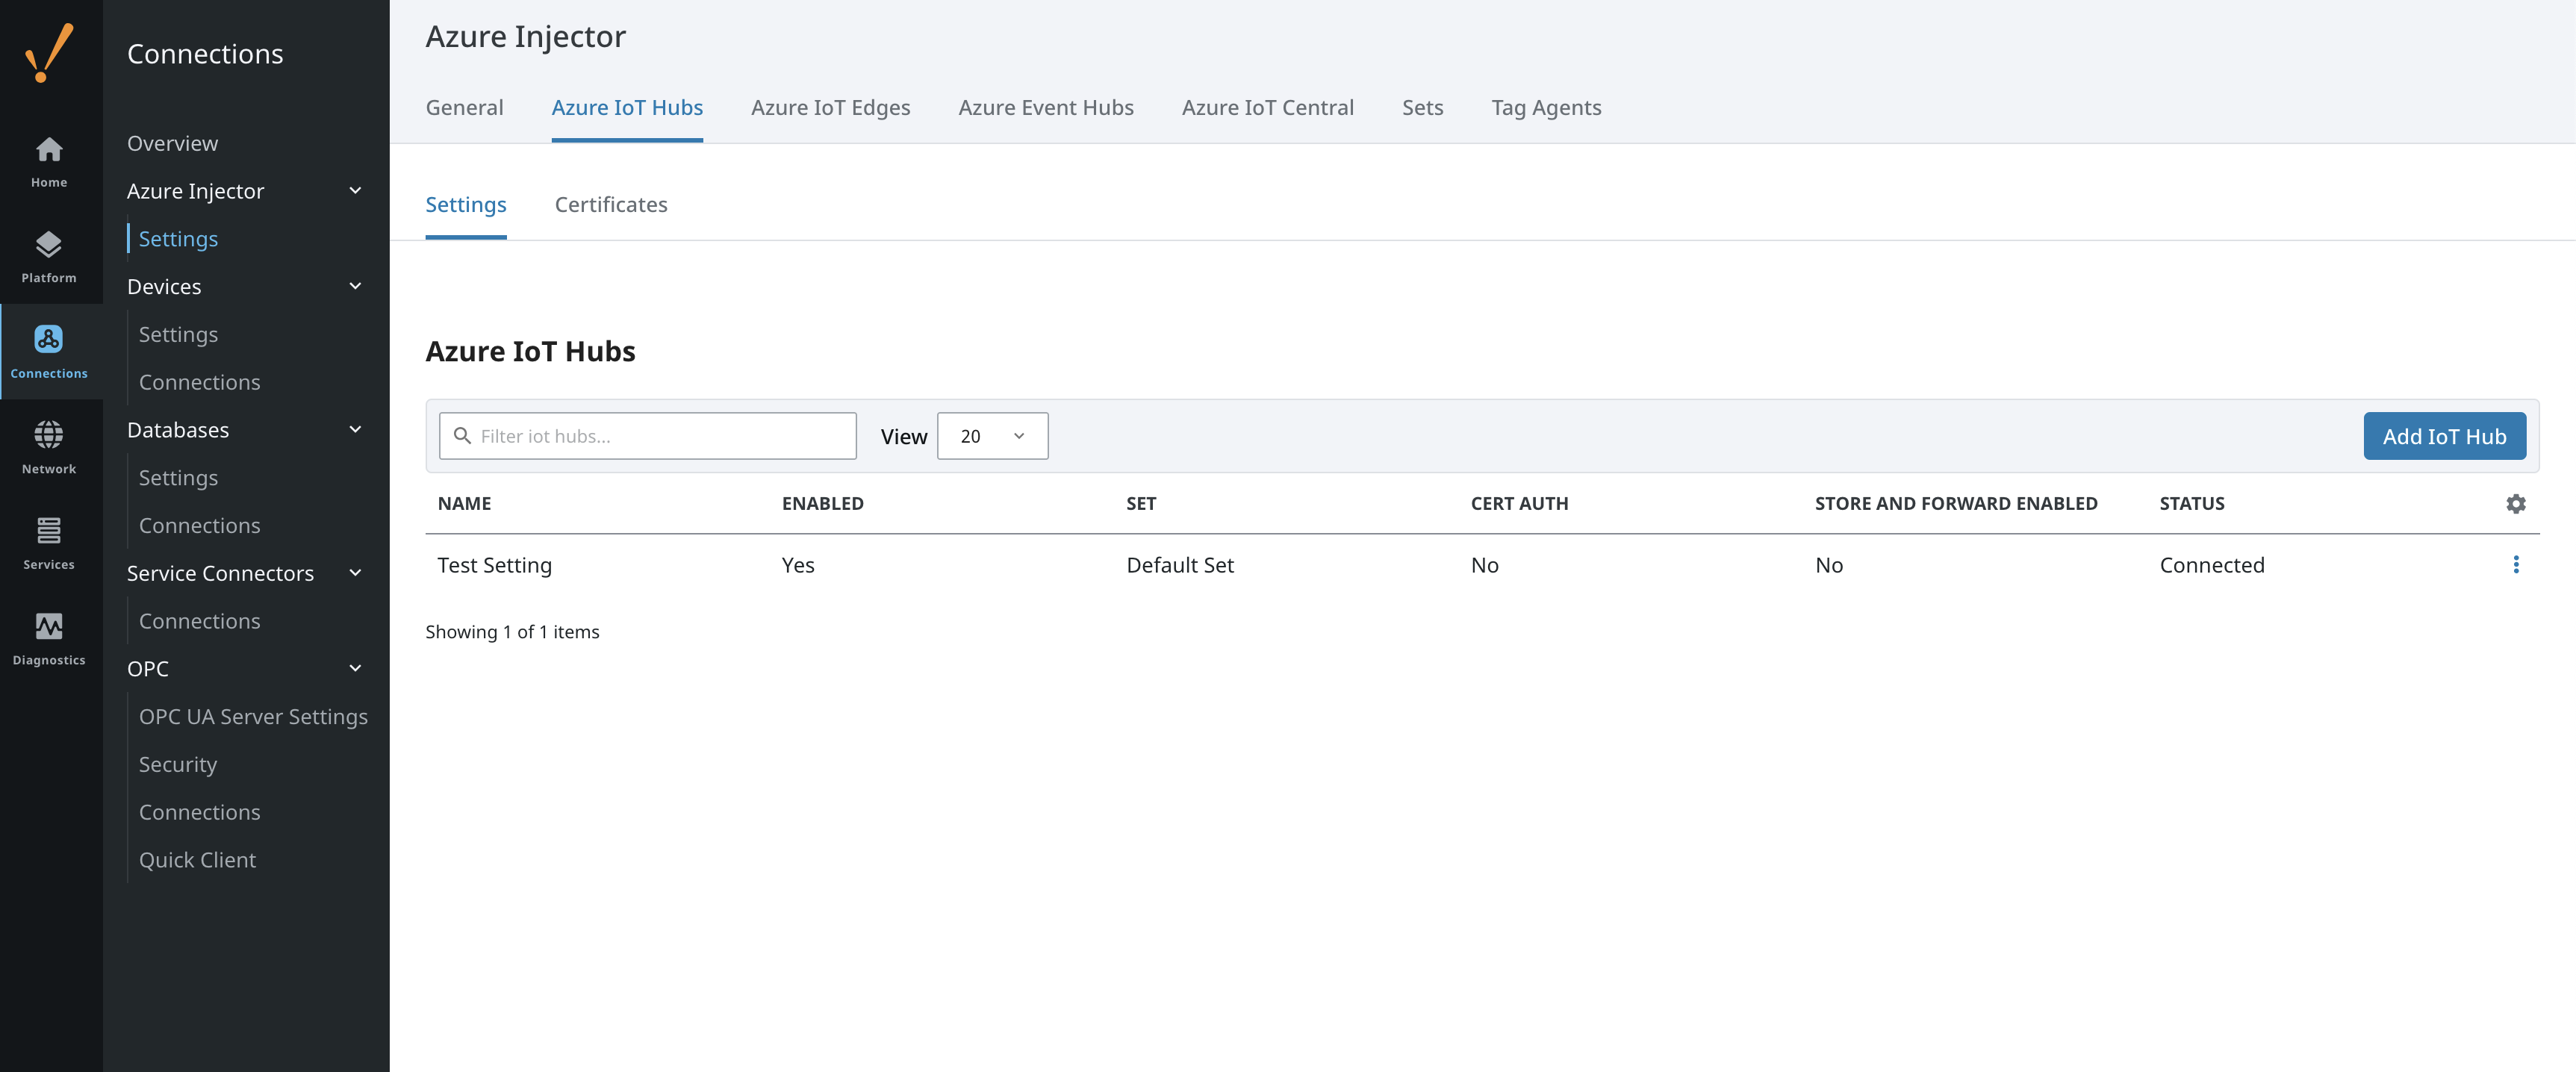 Image Modified
Now the Azure Injector module is connected to the IoT Hub, we have to determine if there are are changes needed to the Tag Agent tab to be able to push data.
...
| Tip |
|---|
| Refer to the Ignition Tag Browser and Creating Tags documentation for assistance in configuring Ignition tags |
 Image Removed
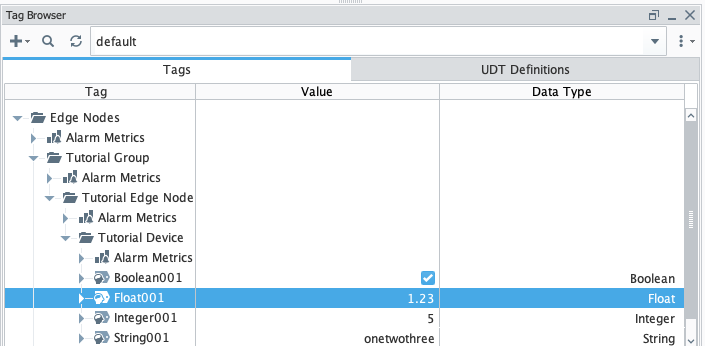 Image Added
Step 3: Publishing data
...
It is beyond the scope of this tutorial to show how to design an application in Azure to handle the payloads as they are pushed in to the Azure IoT Hub. For additional information on developing applications to consume this data see https://docs.microsoft.com/en-us/azure/.
| Excerpt Include |
|---|
| CLD83:FAQ: Ignition Modules |
|---|
| CLD83:FAQ: Ignition Modules |
|---|
| nopanel | true |
|---|
|