...
Click 'Create' in the upper left corner. This will open the following window:
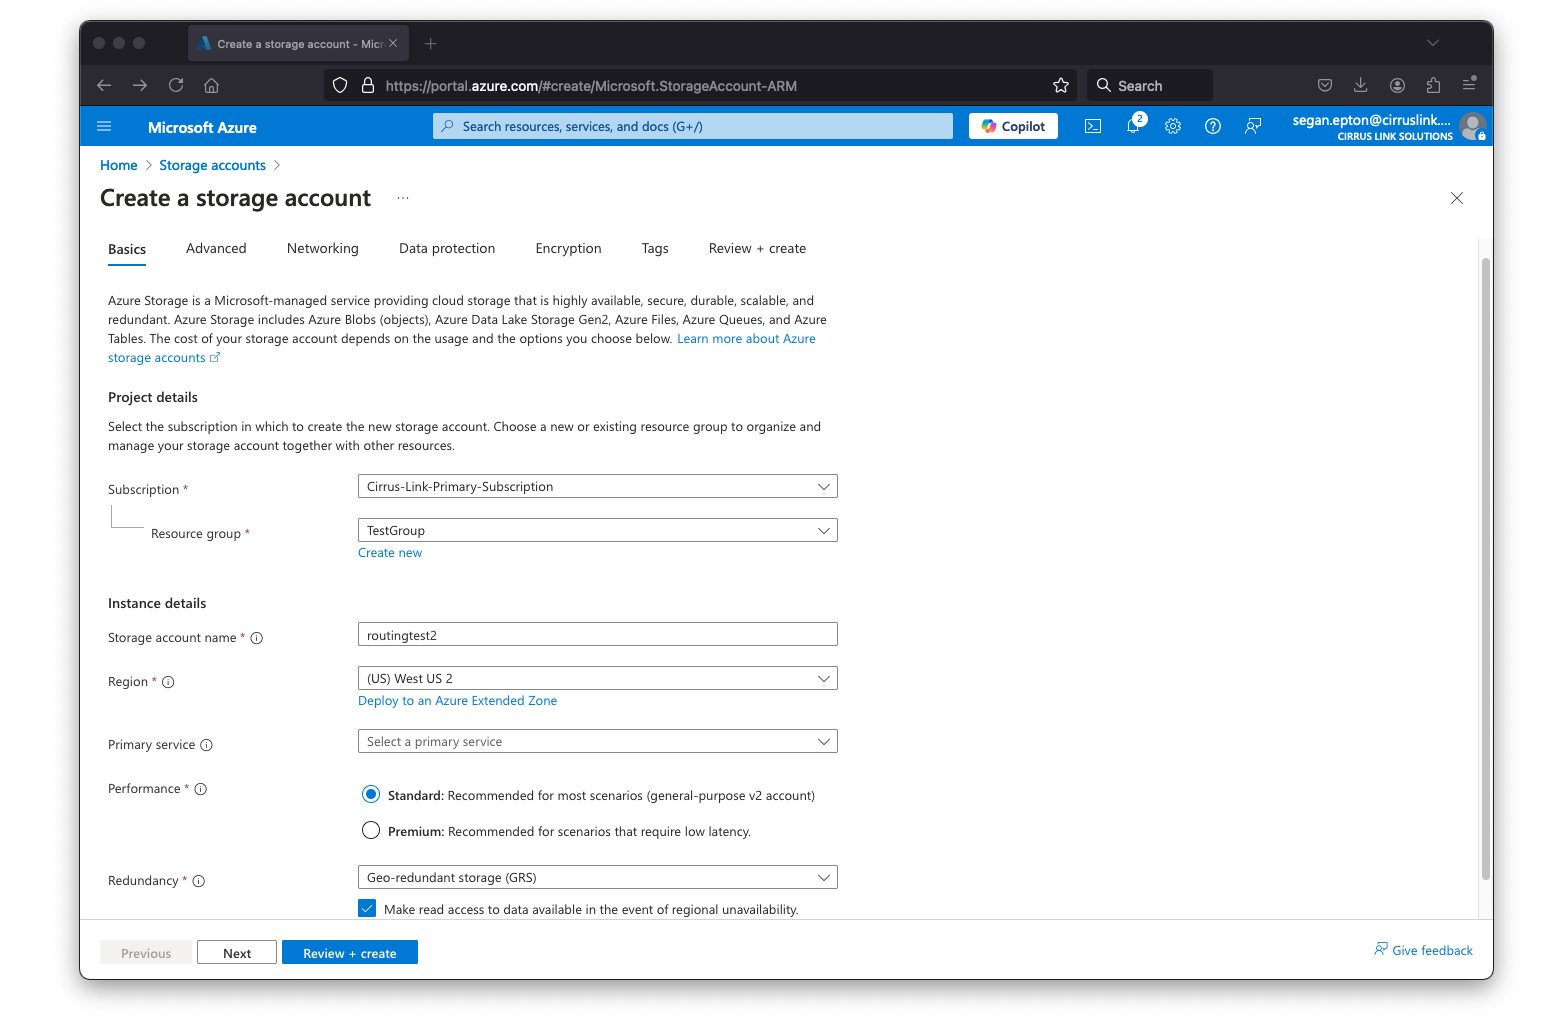
Specify the Subscription, Resource Group, Storage account name, and Location as shown above. Leave the other fields default. Now click 'Review + Create' near the bottom of the screen. All of the other tab fields (under Networking, Data Protection, Advanced, and Tags) can be left default for the purposes of this example. However, if this is intended to run in production make sure to visit these tabs and set up the Storage Account appropriately for your use case and security needs. After creating the Storage Account, you should see it on the main Storage Accounts page as shown below:
...
Step 4: Reconfigure Azure Injector to Support Message Based Routing
Now browse to the Ignition Gateway Web UI and to the Azure Injector Settings and finally to the 'Azure IoT Hubs'. You should see the 'Test Setting' that was created in the prerequisite tutorial as shown below.
...
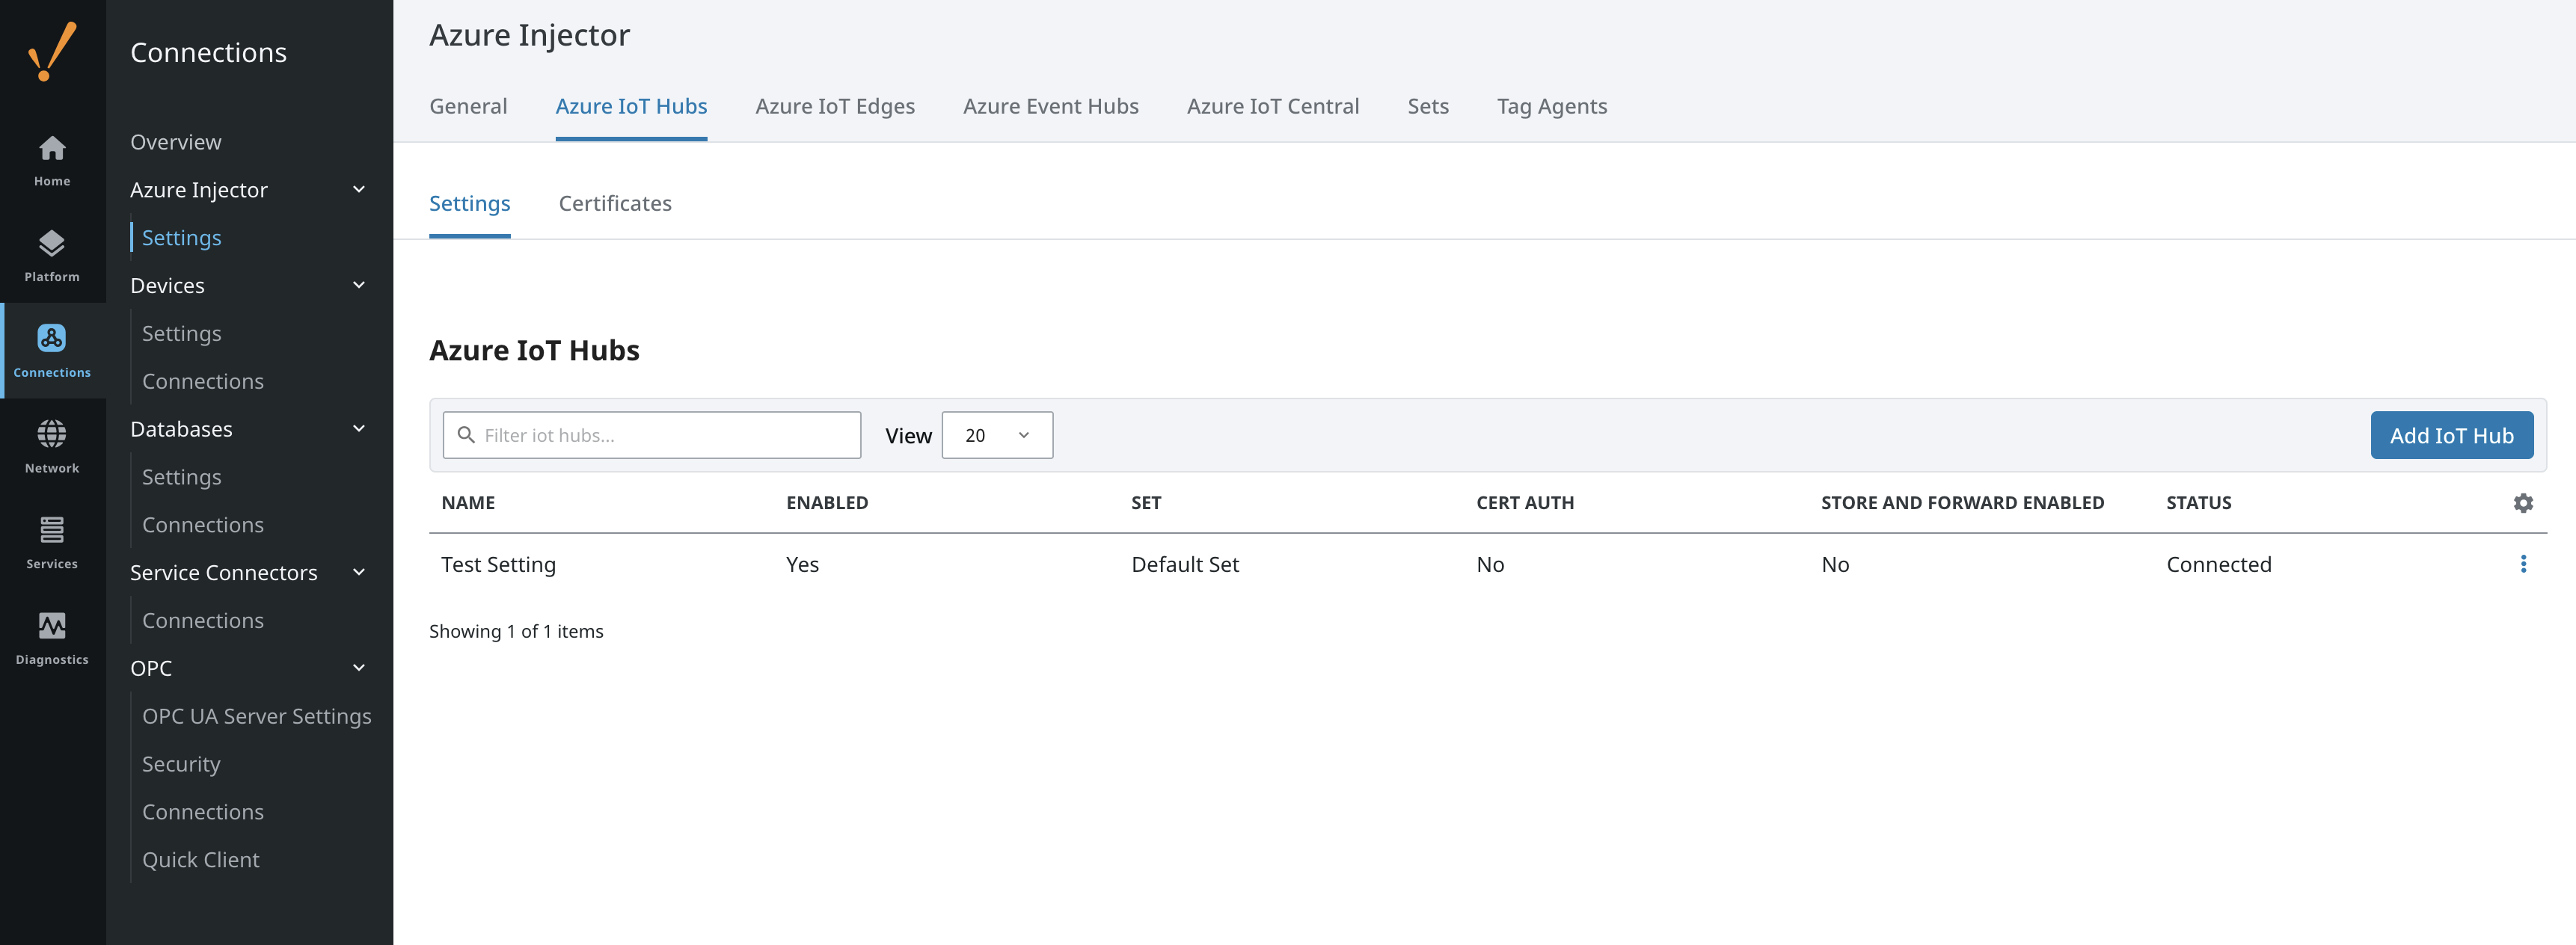 Image Added
Click the 'edit' button under the three dots on the right for that setting to edit it. Then scroll down and click the 'Show advanced properties' checkbox near the bottom as shown below.
 Image Removed
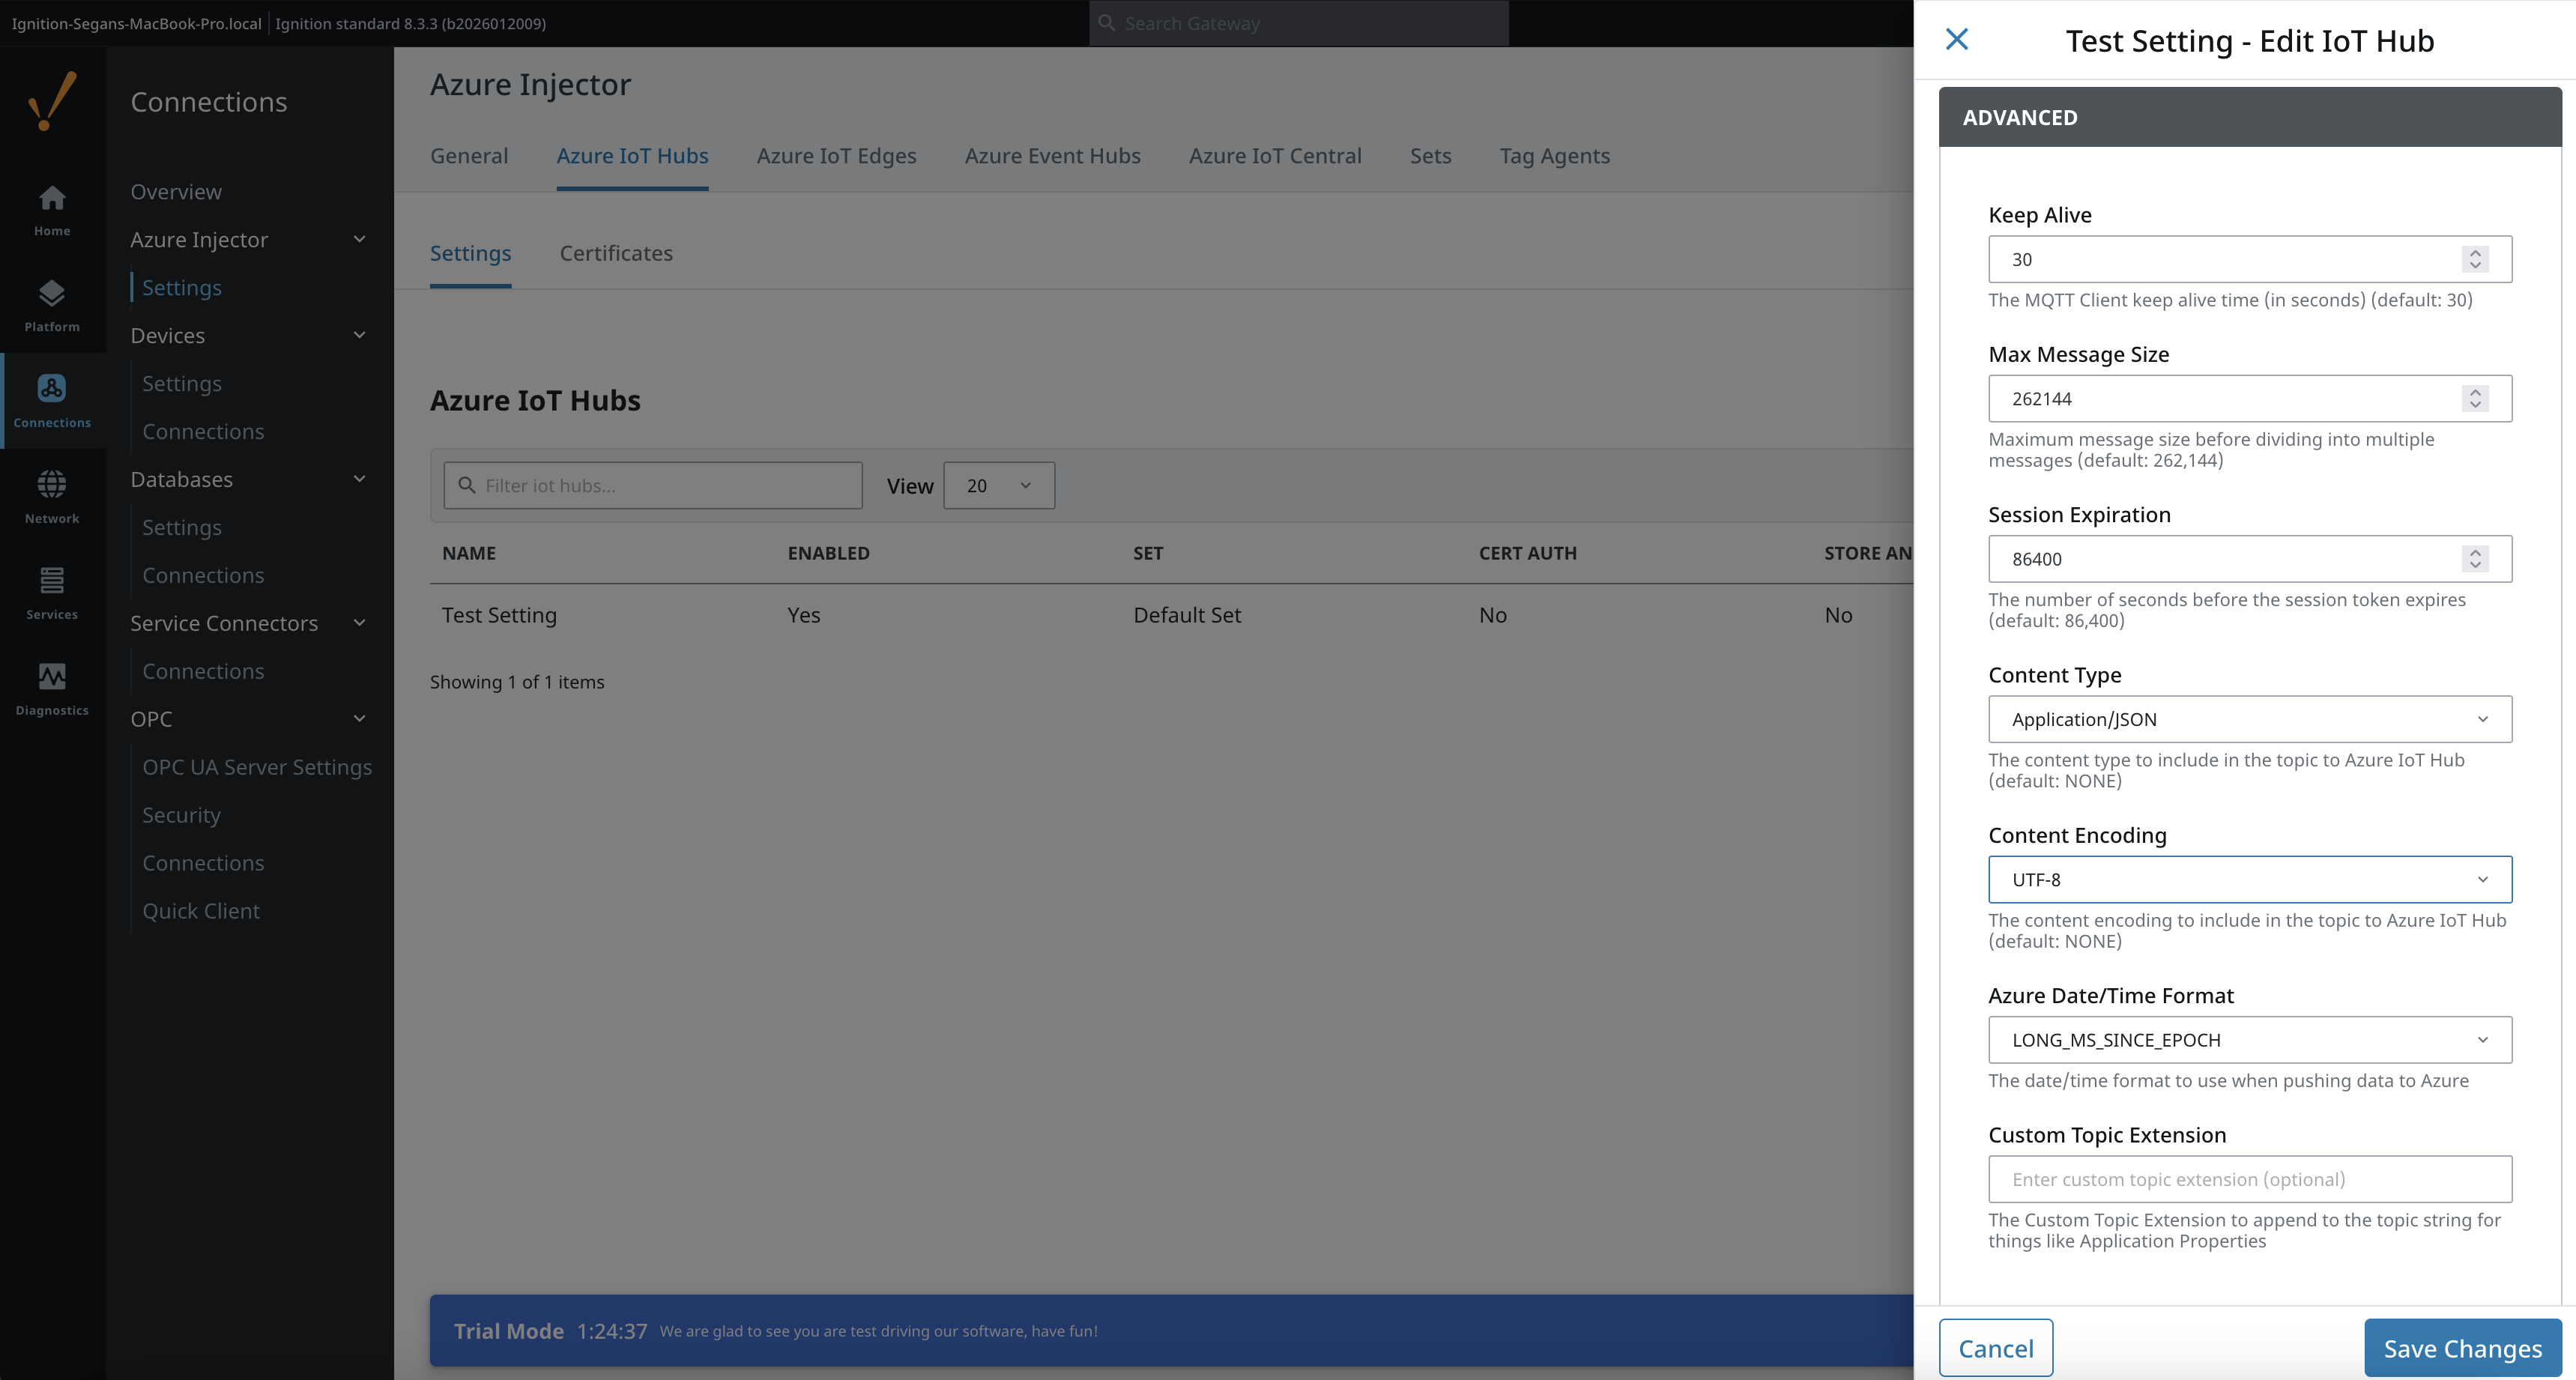 Image Added
Note the 'Content Type' and 'Content Encoding' fields. In order for Azure message routing to work, the 'Content Type' MUST be set to APPLICATION_JSON and the 'Content Encoding' should be set to UTF_8.
During the prerequisite tutorial a set of tags were created to publish to Azure IoT Hub. At this point, we will create some new tags that will be will be routed to the container based on the configuration that now exists in Azure. Because we created a message route that filtered on a Sparkplug Group ID of 'Routed Group' we should create a structure that includes this in the tag tree. Expanding on the tag tree created previously, add a new Sparkplug Group, Edge Node, and Device folder structure with a single boolean tag along side the original structure created in the quickstart as shown below. Note for the message route in Azure to work properly, the Group ID MUST be 'Routed Group' as shown below.
 Image Removed
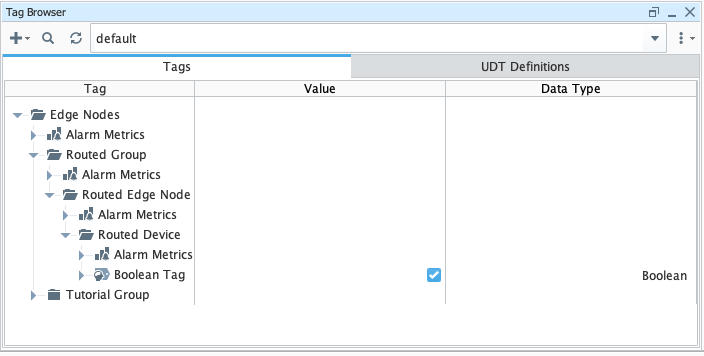 Image Added
Step 5: Publish Data to Azure IoT Hub
After creating this tag structure with the 'Routed Group', browse to the Azure Injector tag provider and write a 'true' to the 'Azure Injector Control/Refresh' tag shown below. This will cause Azure Injector to rescan the tag tree and publish messages to IoT Hub.
 Image Removed
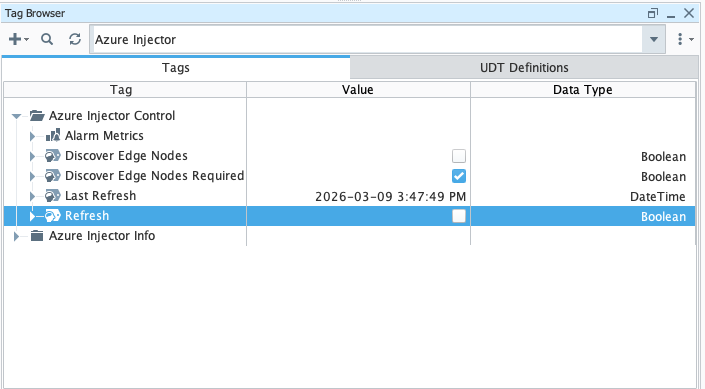 Image Added
Now that Azure Injector has scanned the tag tree, generate some tag change events by manually changing the following two tags. Make sure as you change these values you wait a couple of seconds between each change. This will ensure that a series of MQTT messages will be published to Azure IoT Hub.
...