![]()
Contents
Cirrus Link Resources
Cirrus Link Website![]()
Contact Us (Sales/Support)![]()
Forum![]()
Cirrus Link Modules Docs for Ignition 7.9.x![]()
Inductive Resources
Ignition User Manual![]()
Knowledge Base Articles![]()
Inductive University![]()
Forum![]()
![]()
Cirrus Link Website![]()
Contact Us (Sales/Support)![]()
Forum![]()
Cirrus Link Modules Docs for Ignition 7.9.x![]()
Ignition User Manual![]()
Knowledge Base Articles![]()
Inductive University![]()
Forum![]()
...
Configure anything else that may be required here. Generally, nothing must be set here given that the user you are logged in as has the permissions to create everything that will created as part of the CloudFormation deployment. After setting any additional configuration here, click the 'Next' button in the lower right corner. This will bring up the review screen as shown below.
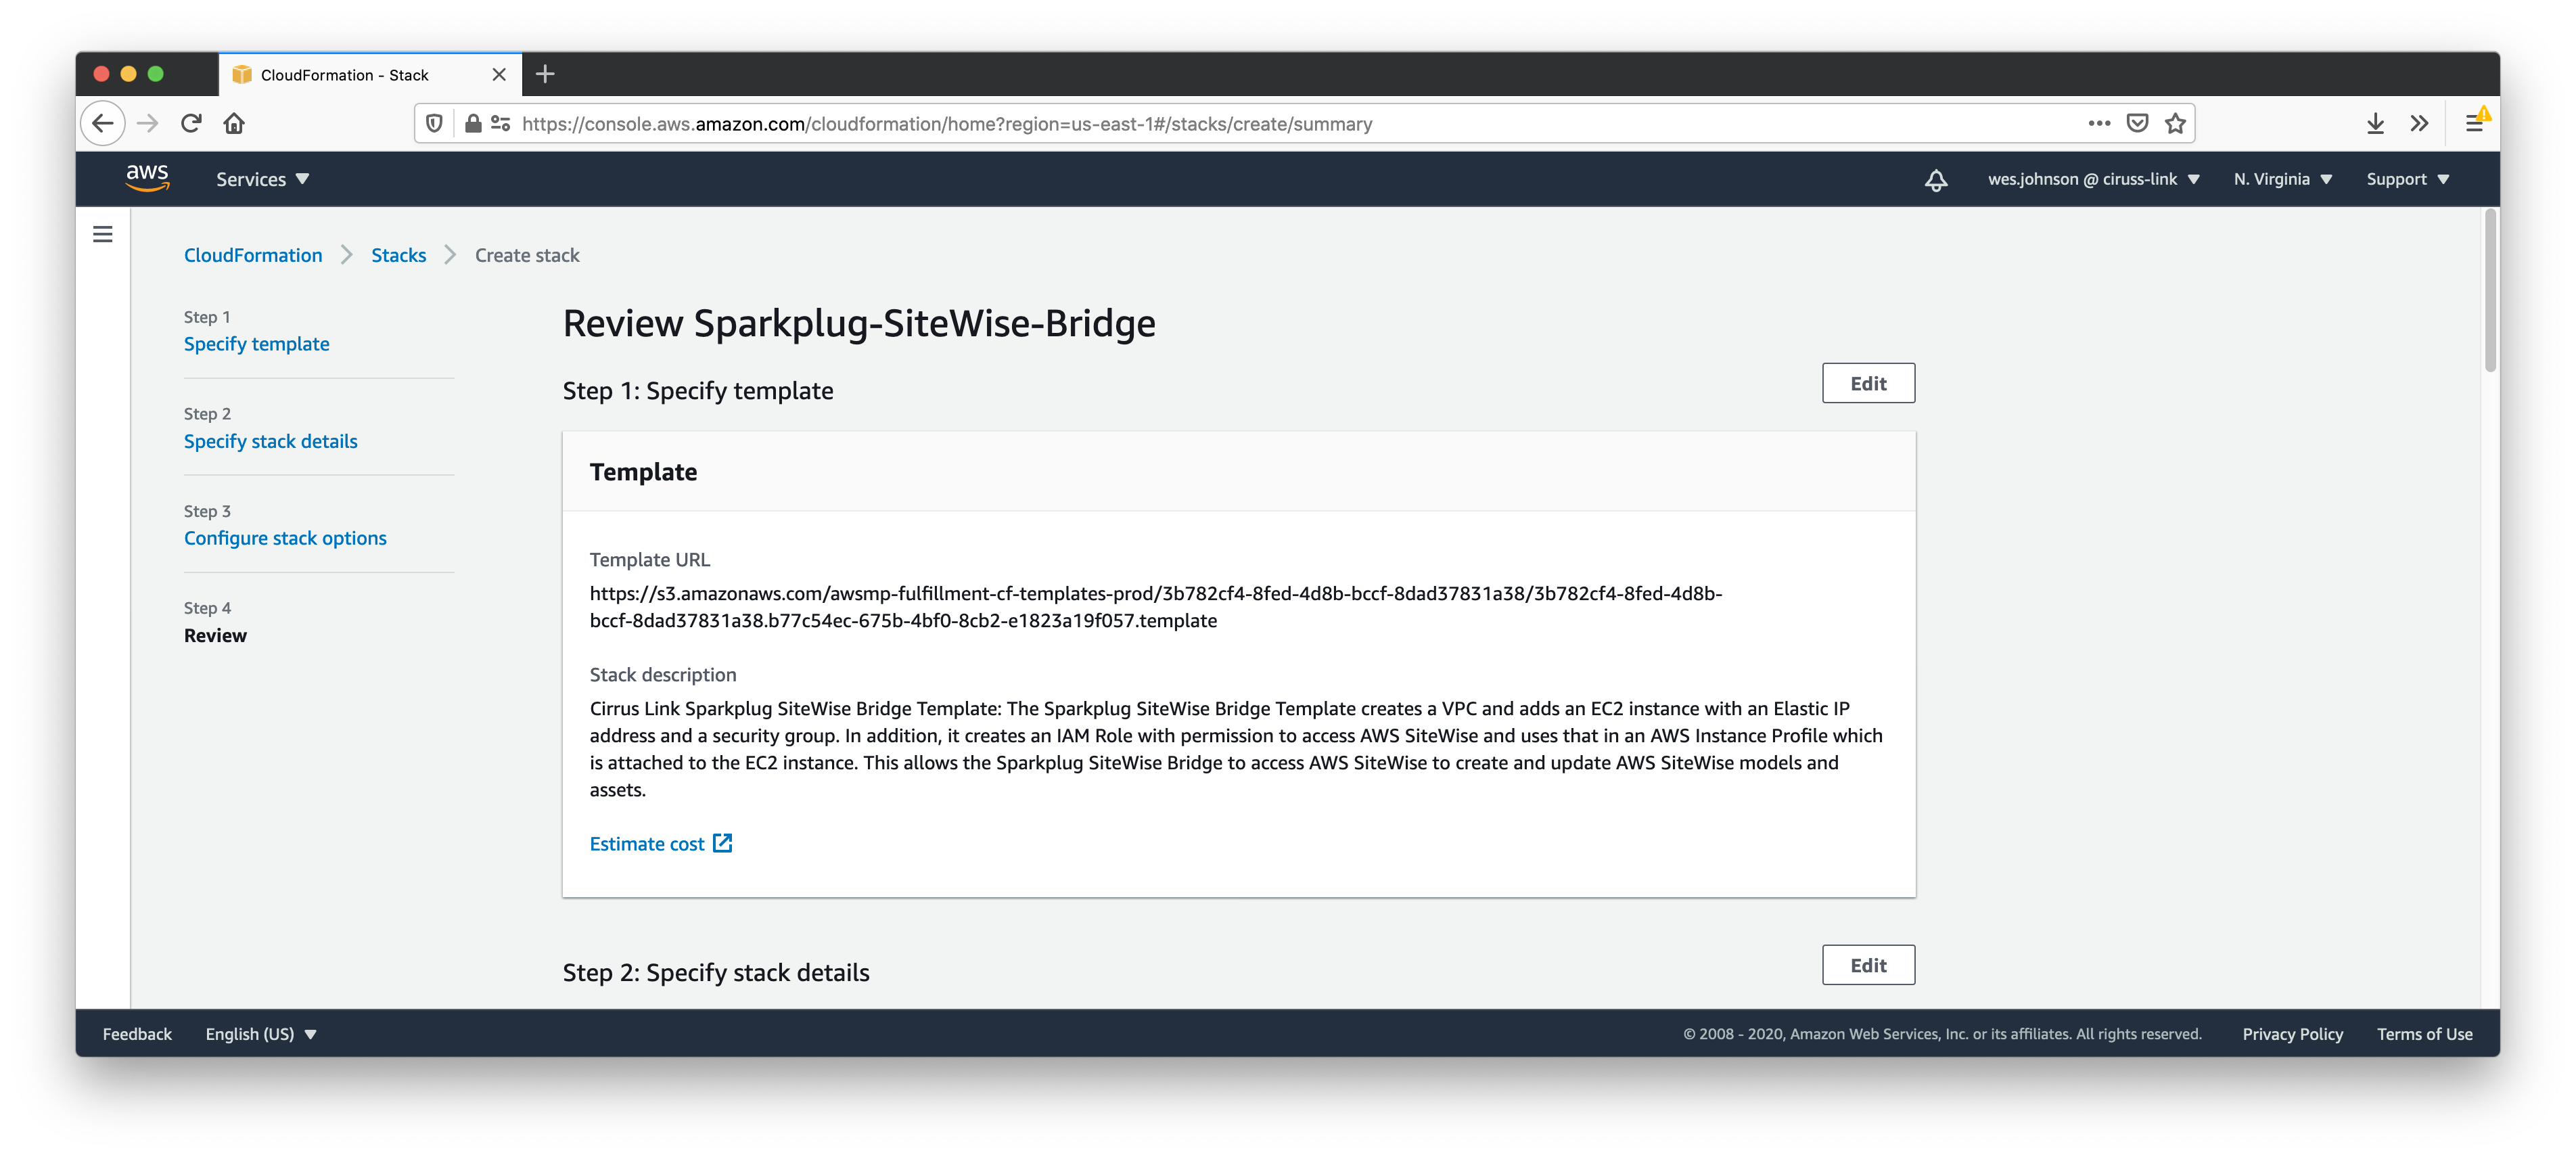
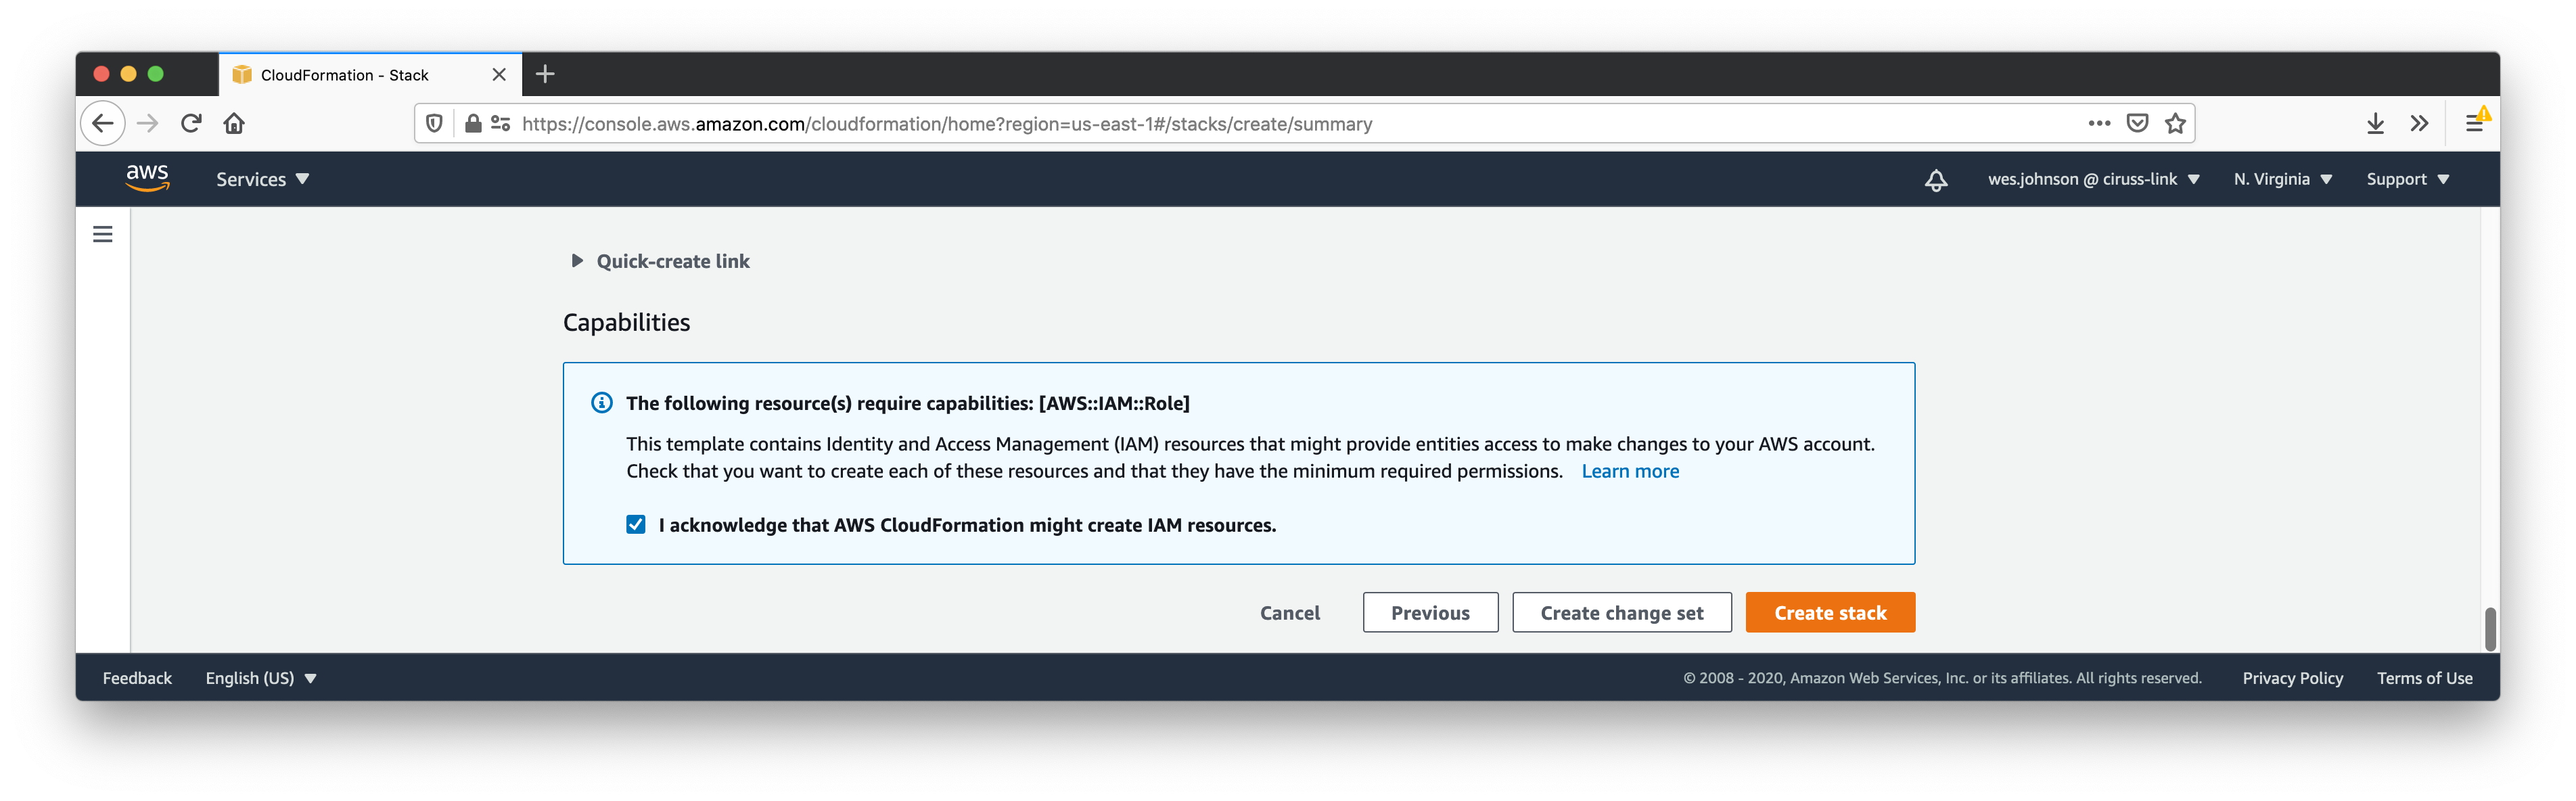
Double check the configuration and finally click 'Create ttack' in the bottom right corner of the screen. Note you also must accept the IAM changes that the Sparkplug SiteWise Bridge Cloud Formation deployment makes to your AWS account. If you agree to this, click the checkbox shown below and then click the 'Create stack' button.
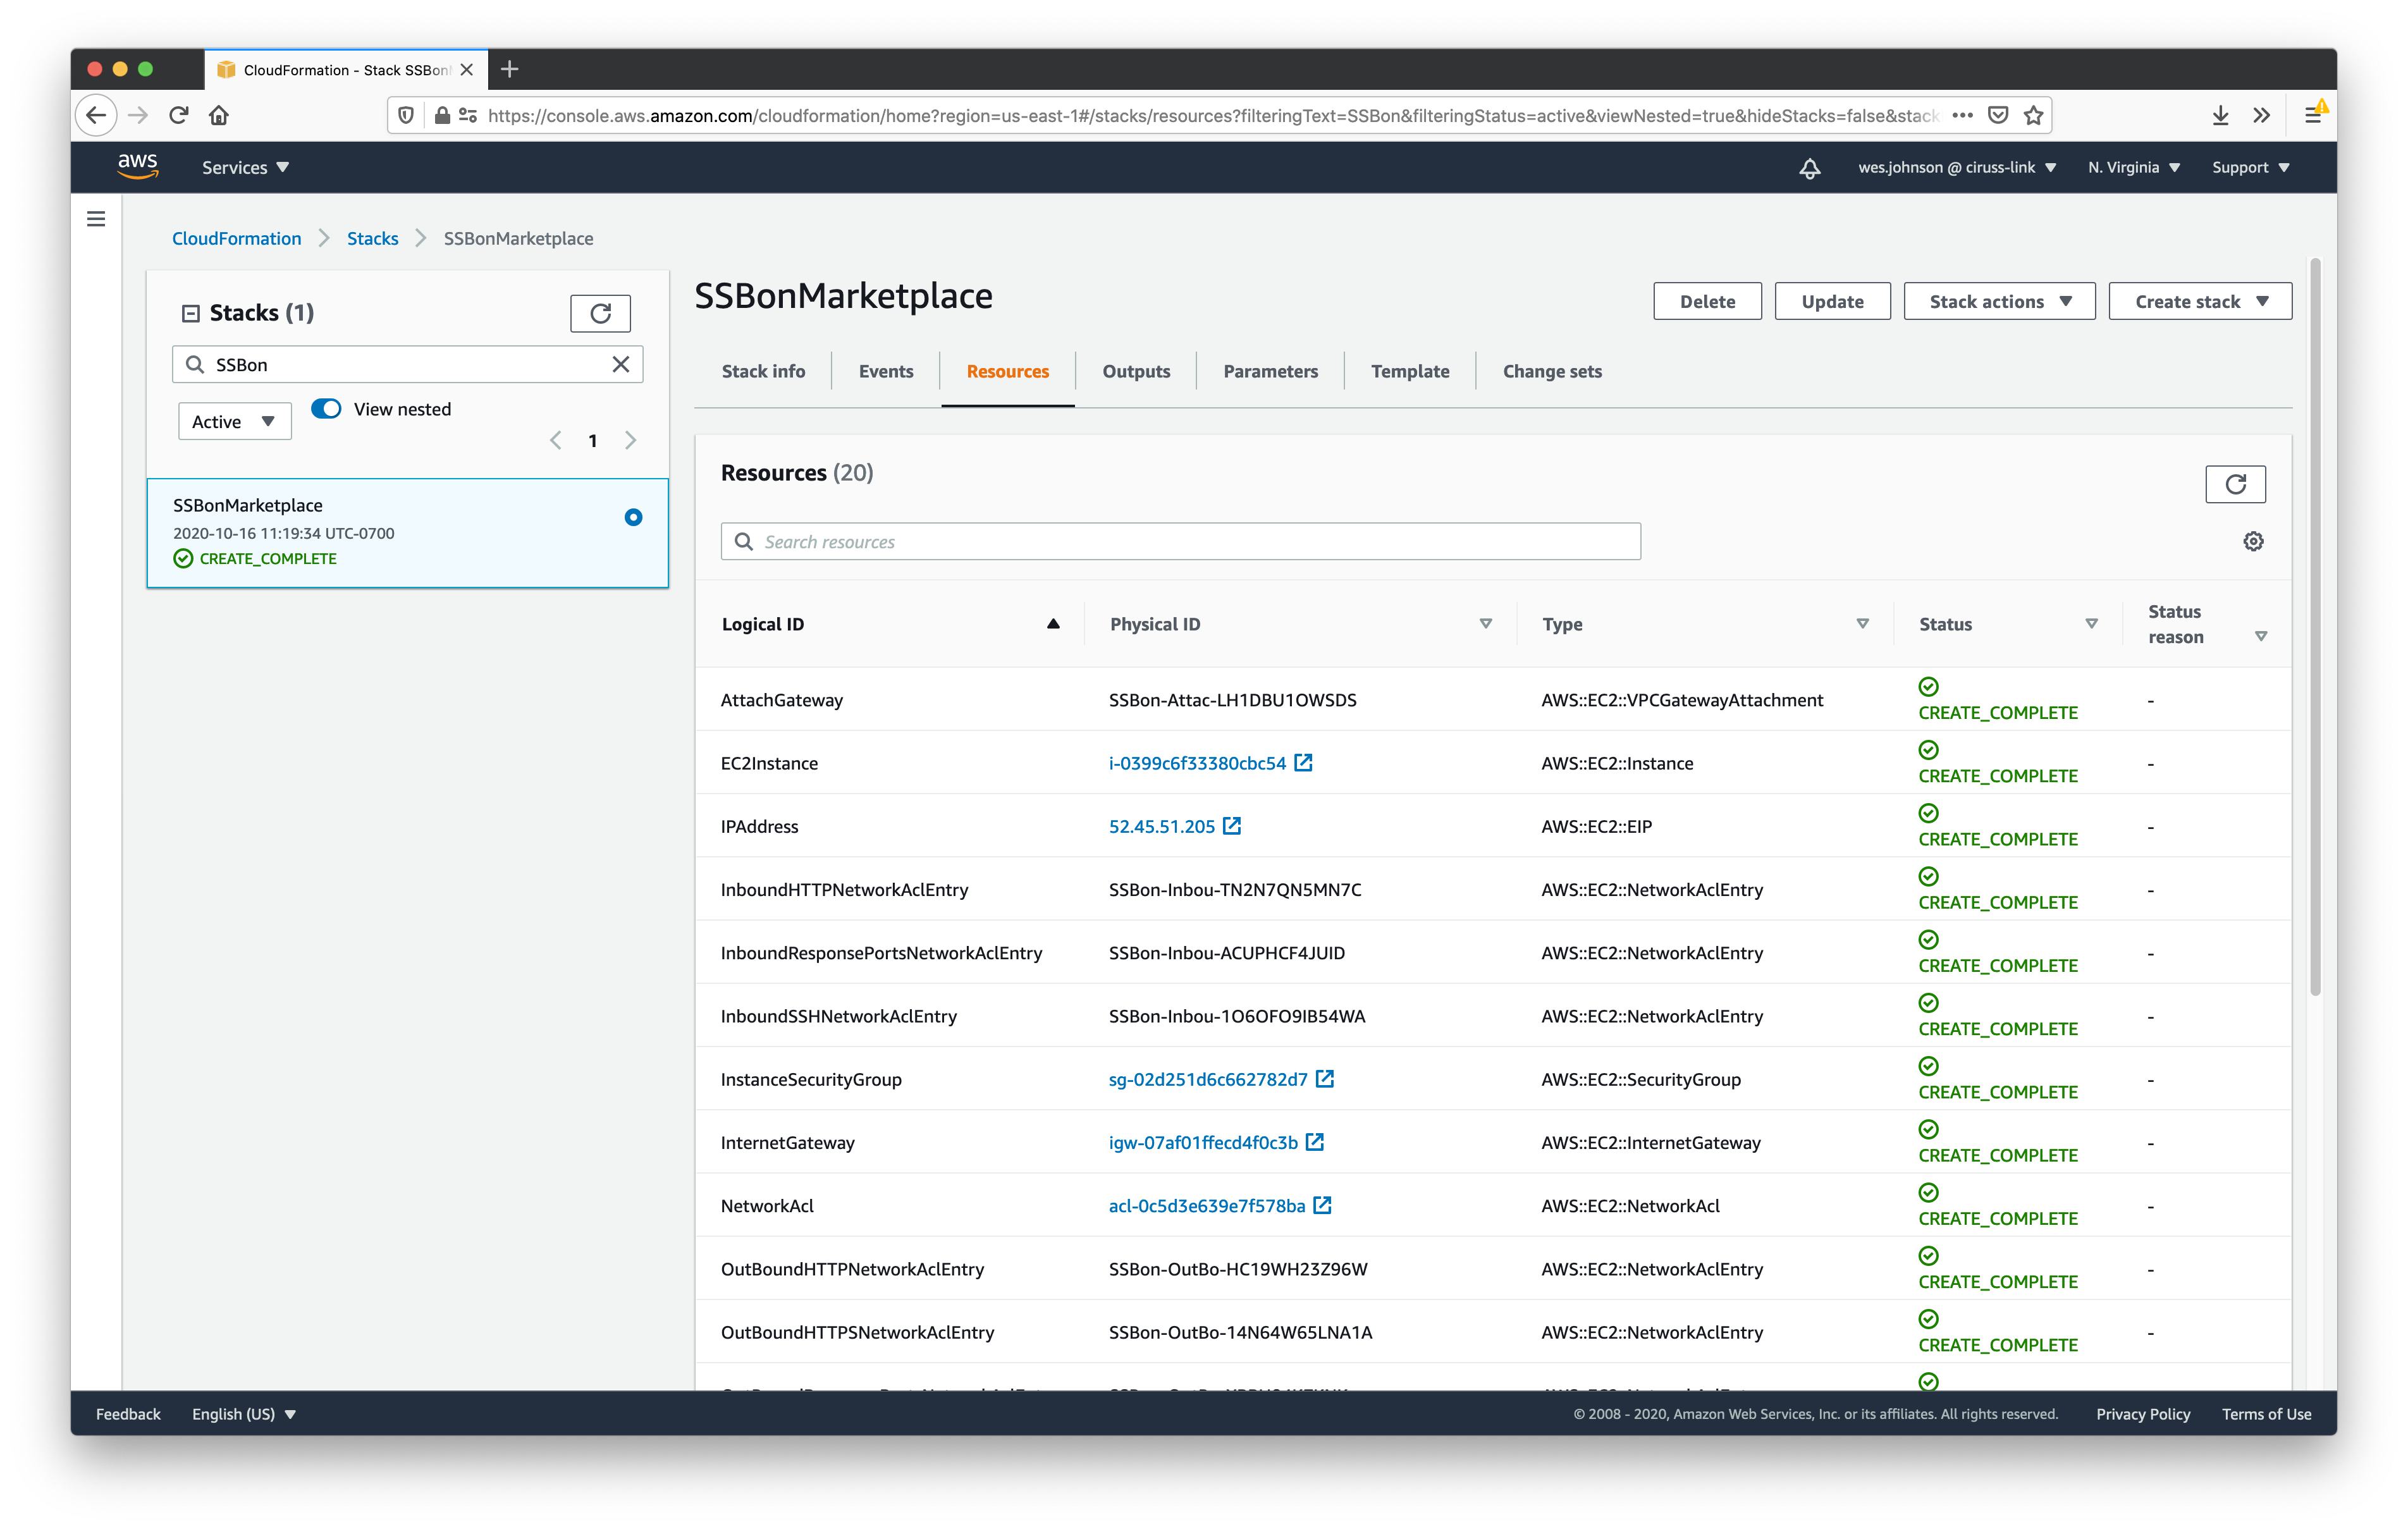
This will begin the stack deployment. You can check on the progress by clicking both the Events and Resources tab as shown below. Deployment takes a few minutes to complete. When it completes, you should see something similar to what is shown below with all of the resources showing 'CREATE_COMPLETE' for the status.
Note deployments can fail for multiple reasons included account resource limitations.
After the AWS Infrastructure has been deployed via the AWS Marketplace 1-click procedure, the application must be configured. In order to configure the application you must be able to access the EC2 instance via SSH. Information on accessing the EC2 instance via SSH can be found here. Additional details on the filesystem layout of this EC2 instance can be found here.
...