![]()
Contents
Cirrus Link Resources
Cirrus Link Website![]()
Contact Us (Sales/Support)![]()
Inductive Resources
Ignition User Manual![]()
Knowledge Base Articles![]()
Inductive University![]()
Forum![]()
![]()
Cirrus Link Website![]()
Contact Us (Sales/Support)![]()
Ignition User Manual![]()
Knowledge Base Articles![]()
Inductive University![]()
Forum![]()
...
Open a Web Browser to your Portainer instance and select images 'Images' on the left. In the name section enter one of the two following strings depending on your platform architecture:
...
Shown below is an example for 64-bit Linux. After entering the target image into the name field, click the 'Pull the Image' button to download it. You must have internet connectivity for this to succeed.

Once the download is complete, you should see something similar to the following.

Select volumes 'Volumes' on the left and add two new ones by clicking the 'Add Volume' button. Then type the name of the first volume as 'ignition-data' as shown below and click 'Create the volume'. Ensure 'Access control' is also disabled.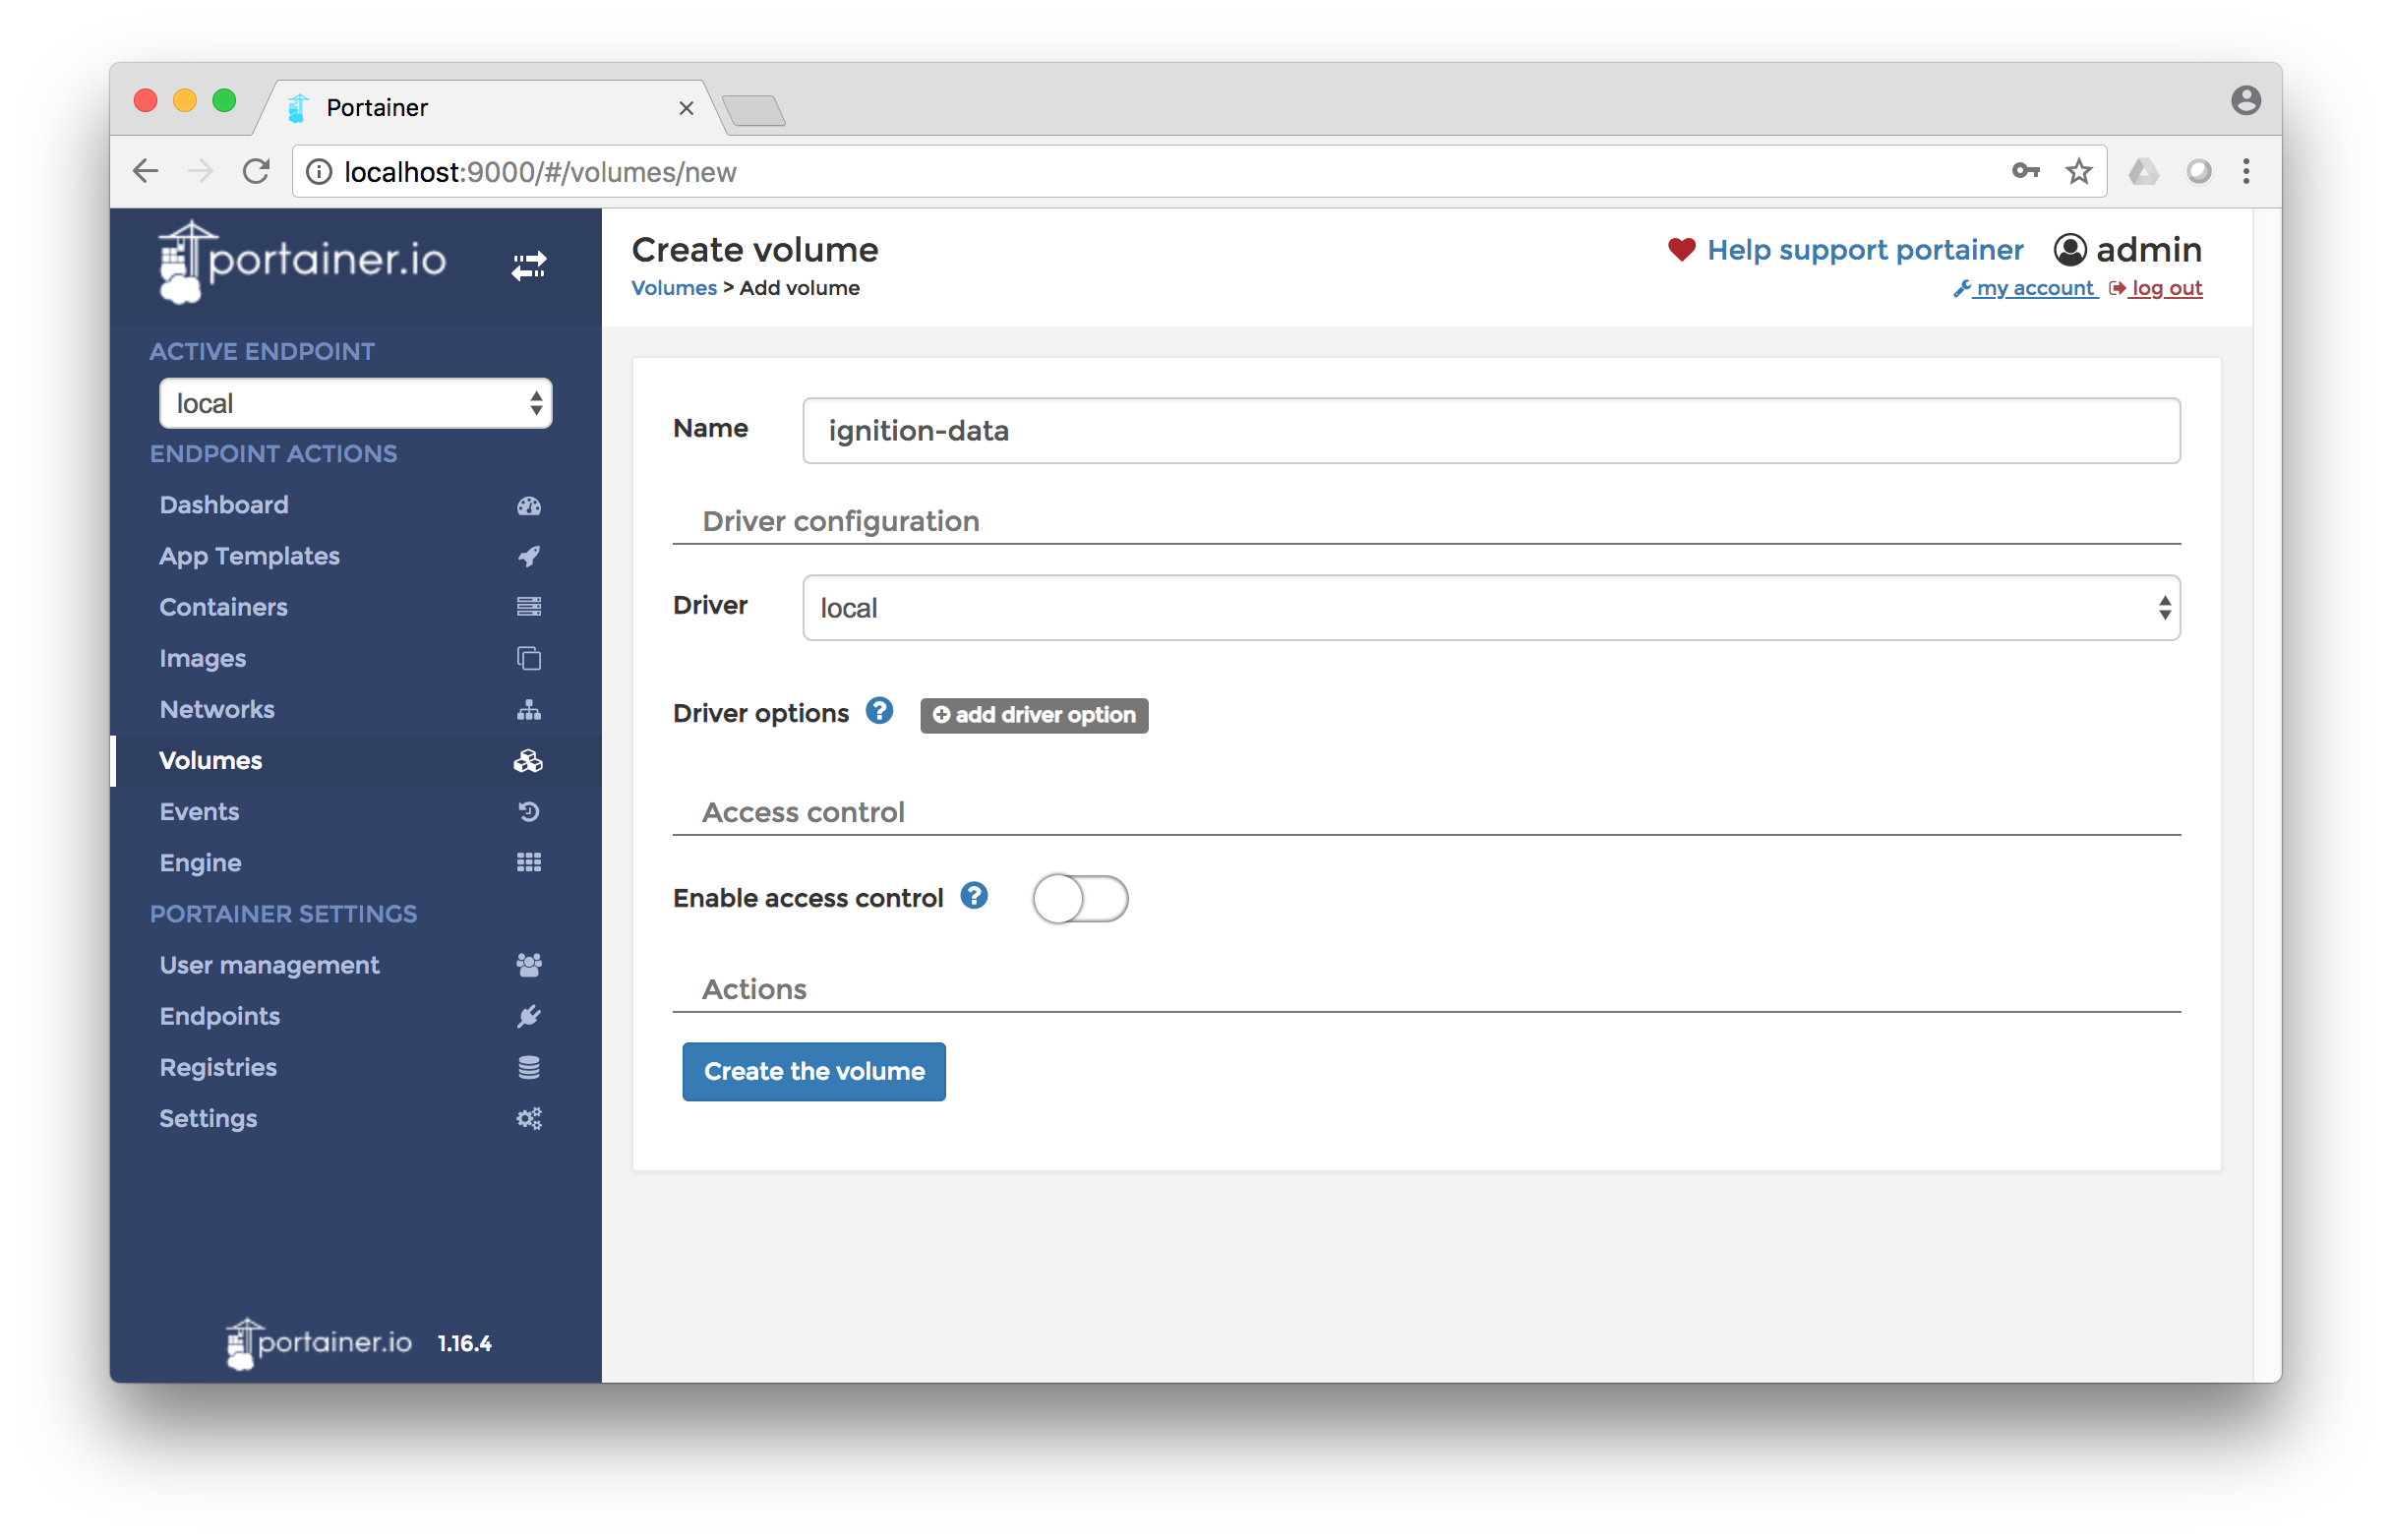
Repeat the volume creation process described above to create a second volume called 'ignition-bin'.
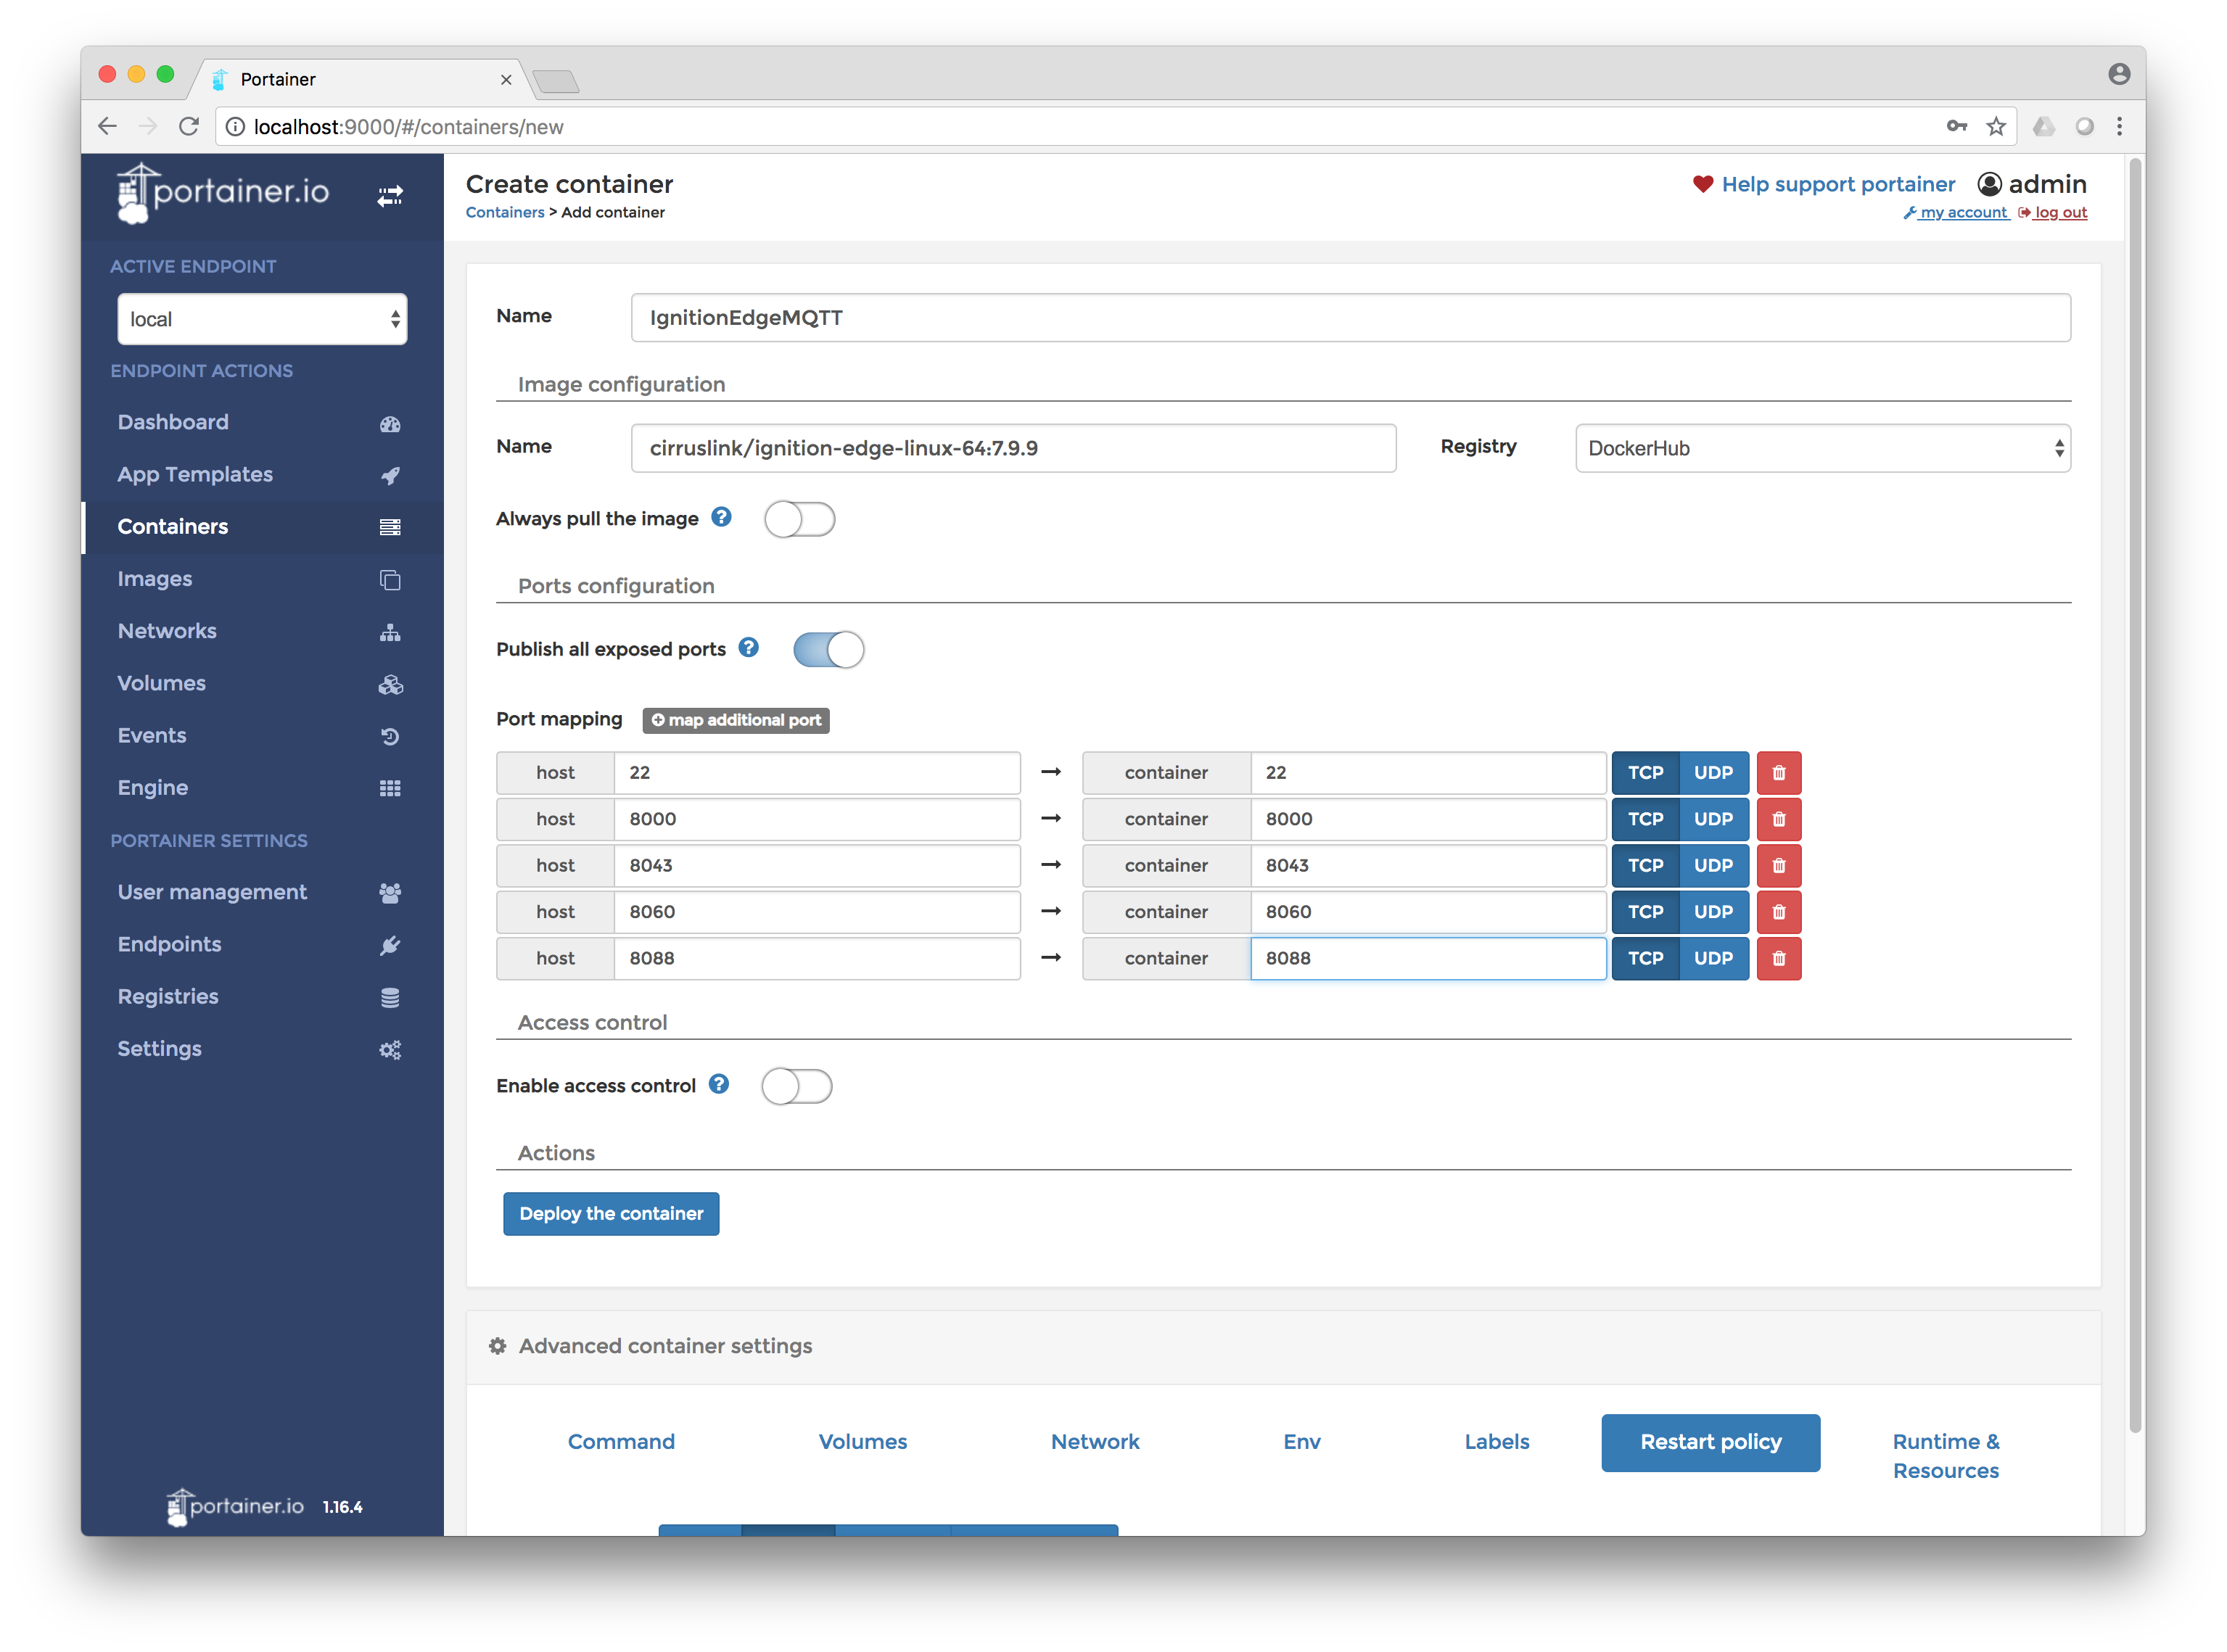
Now select 'Containers' on the left and click the 'Add Container' button. Set the following parameters:
This is all shown below in the 64-bit Linux example.
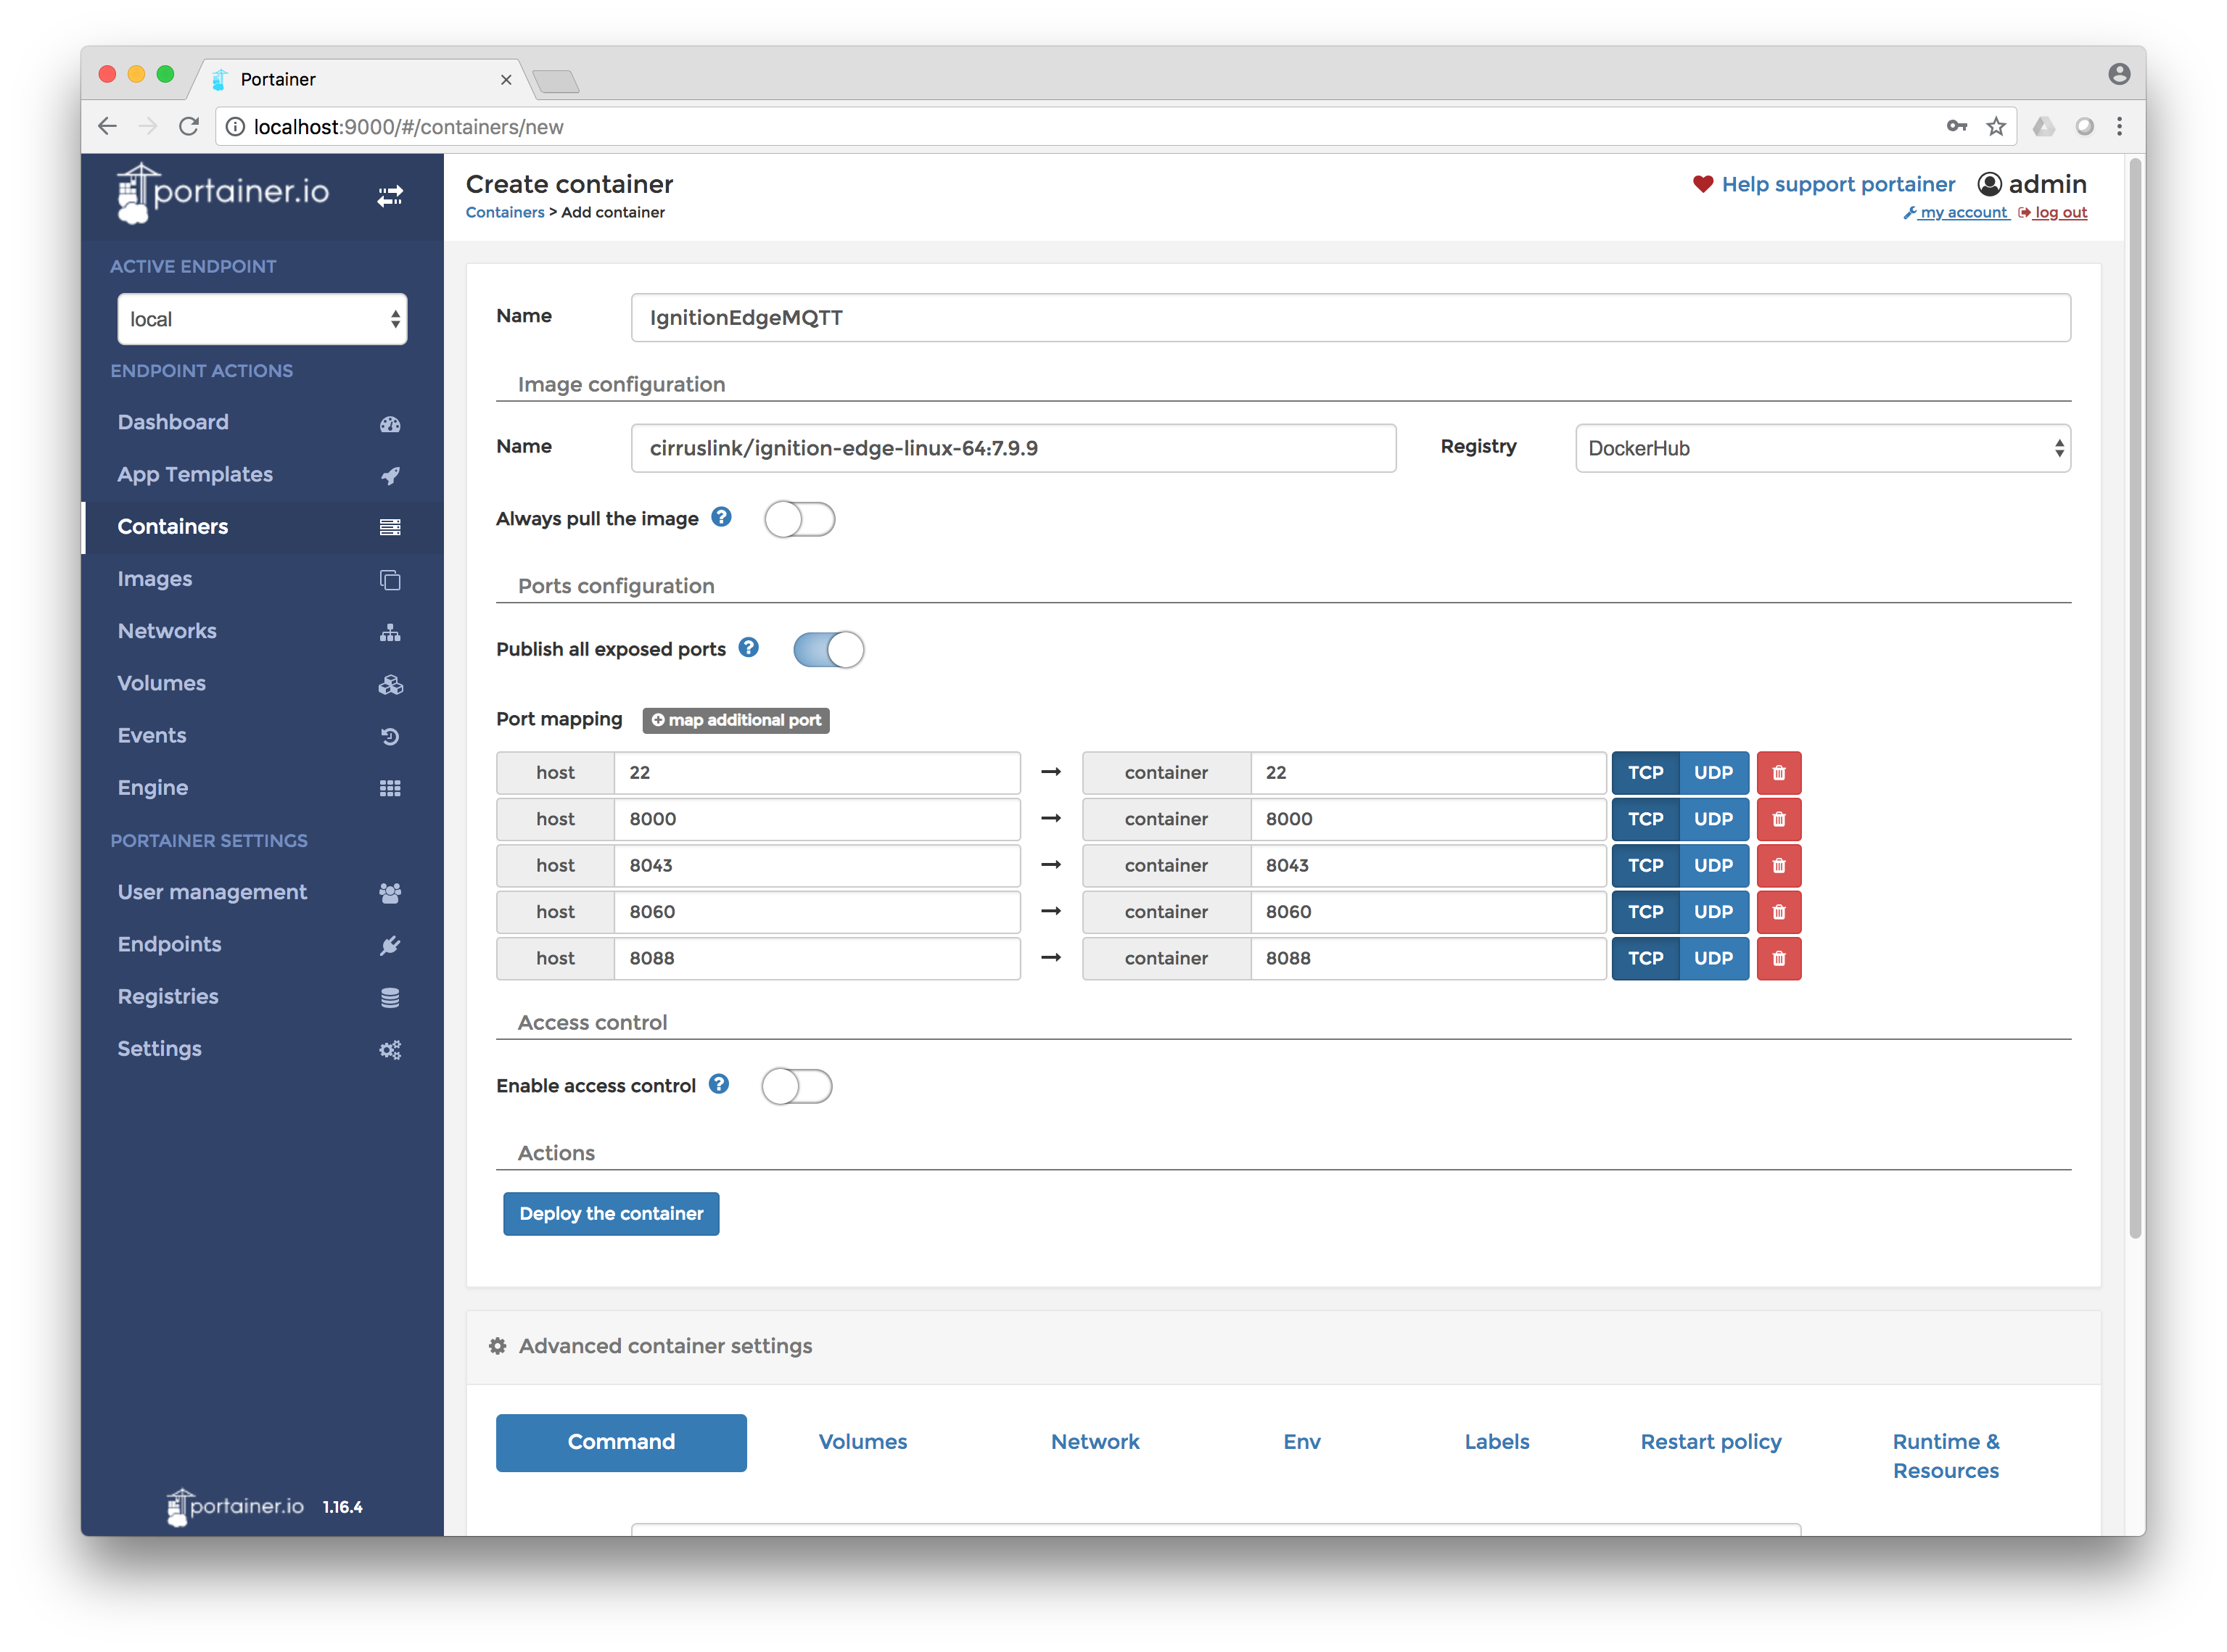
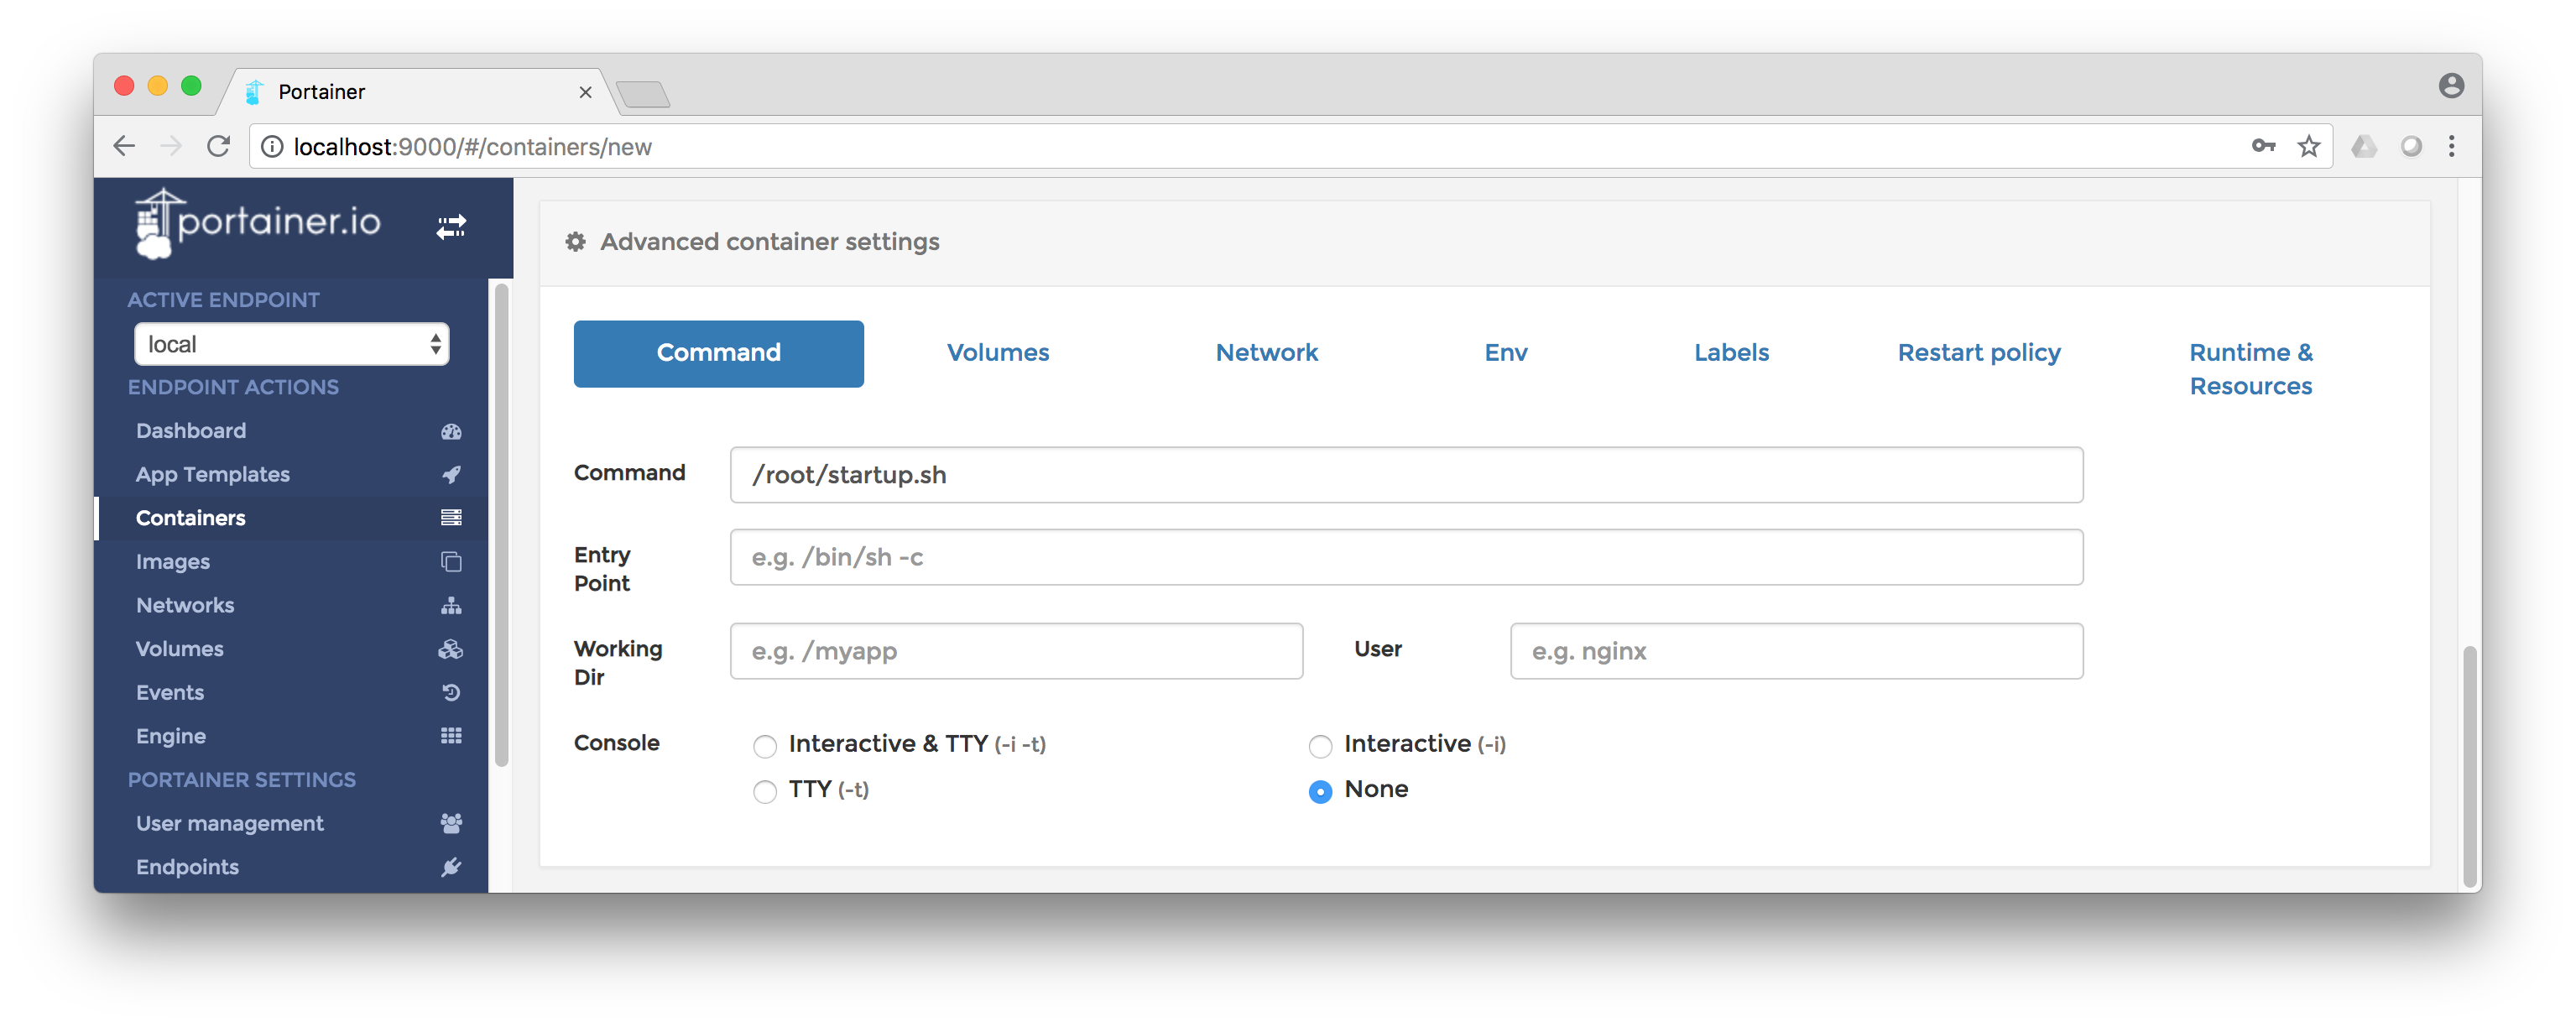
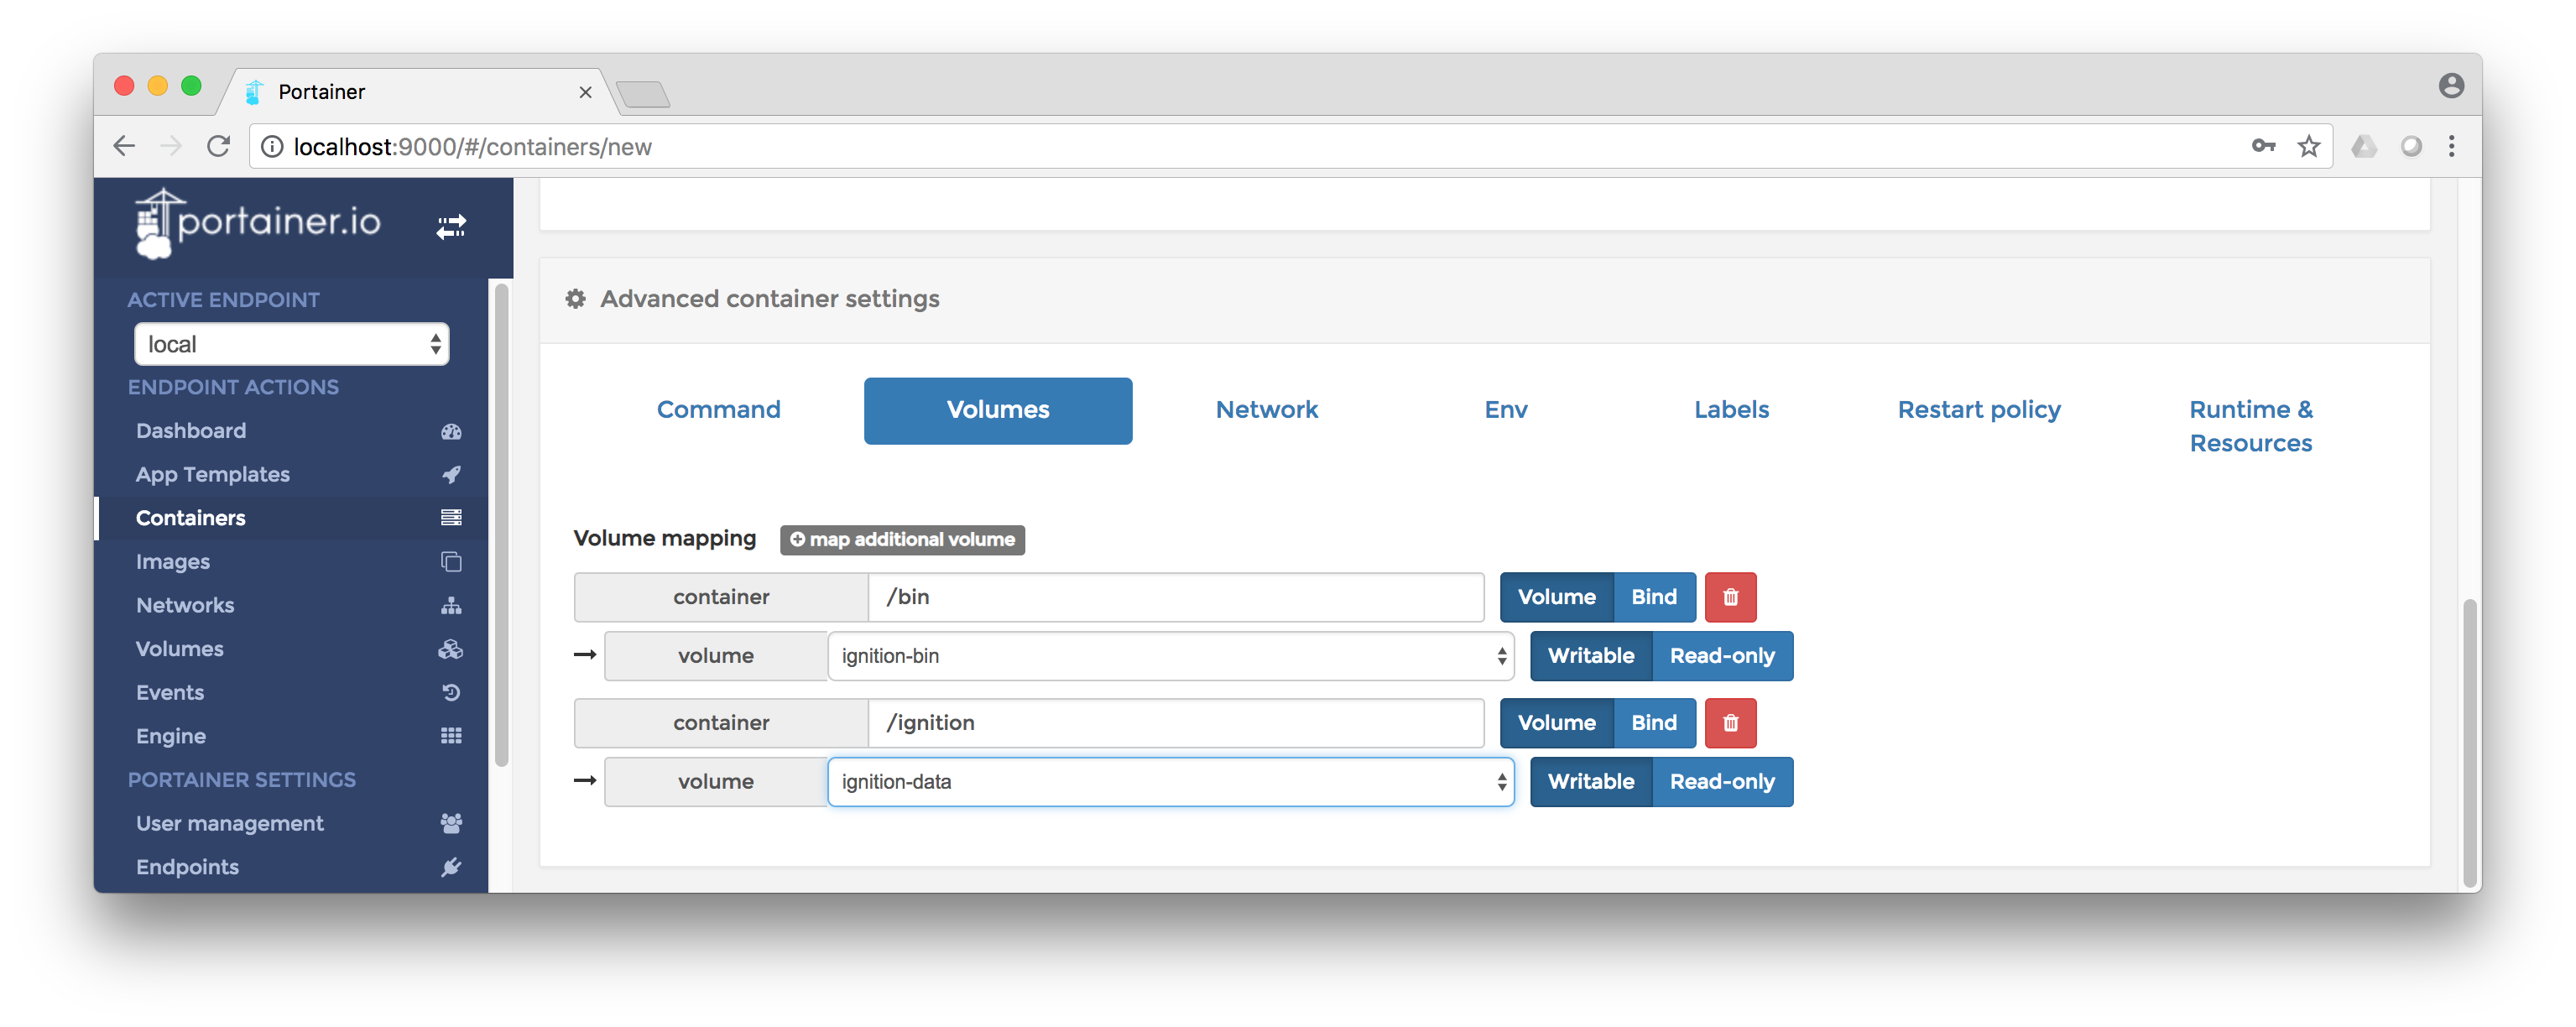
In addition set the following advanced properties via the bottom tabs.
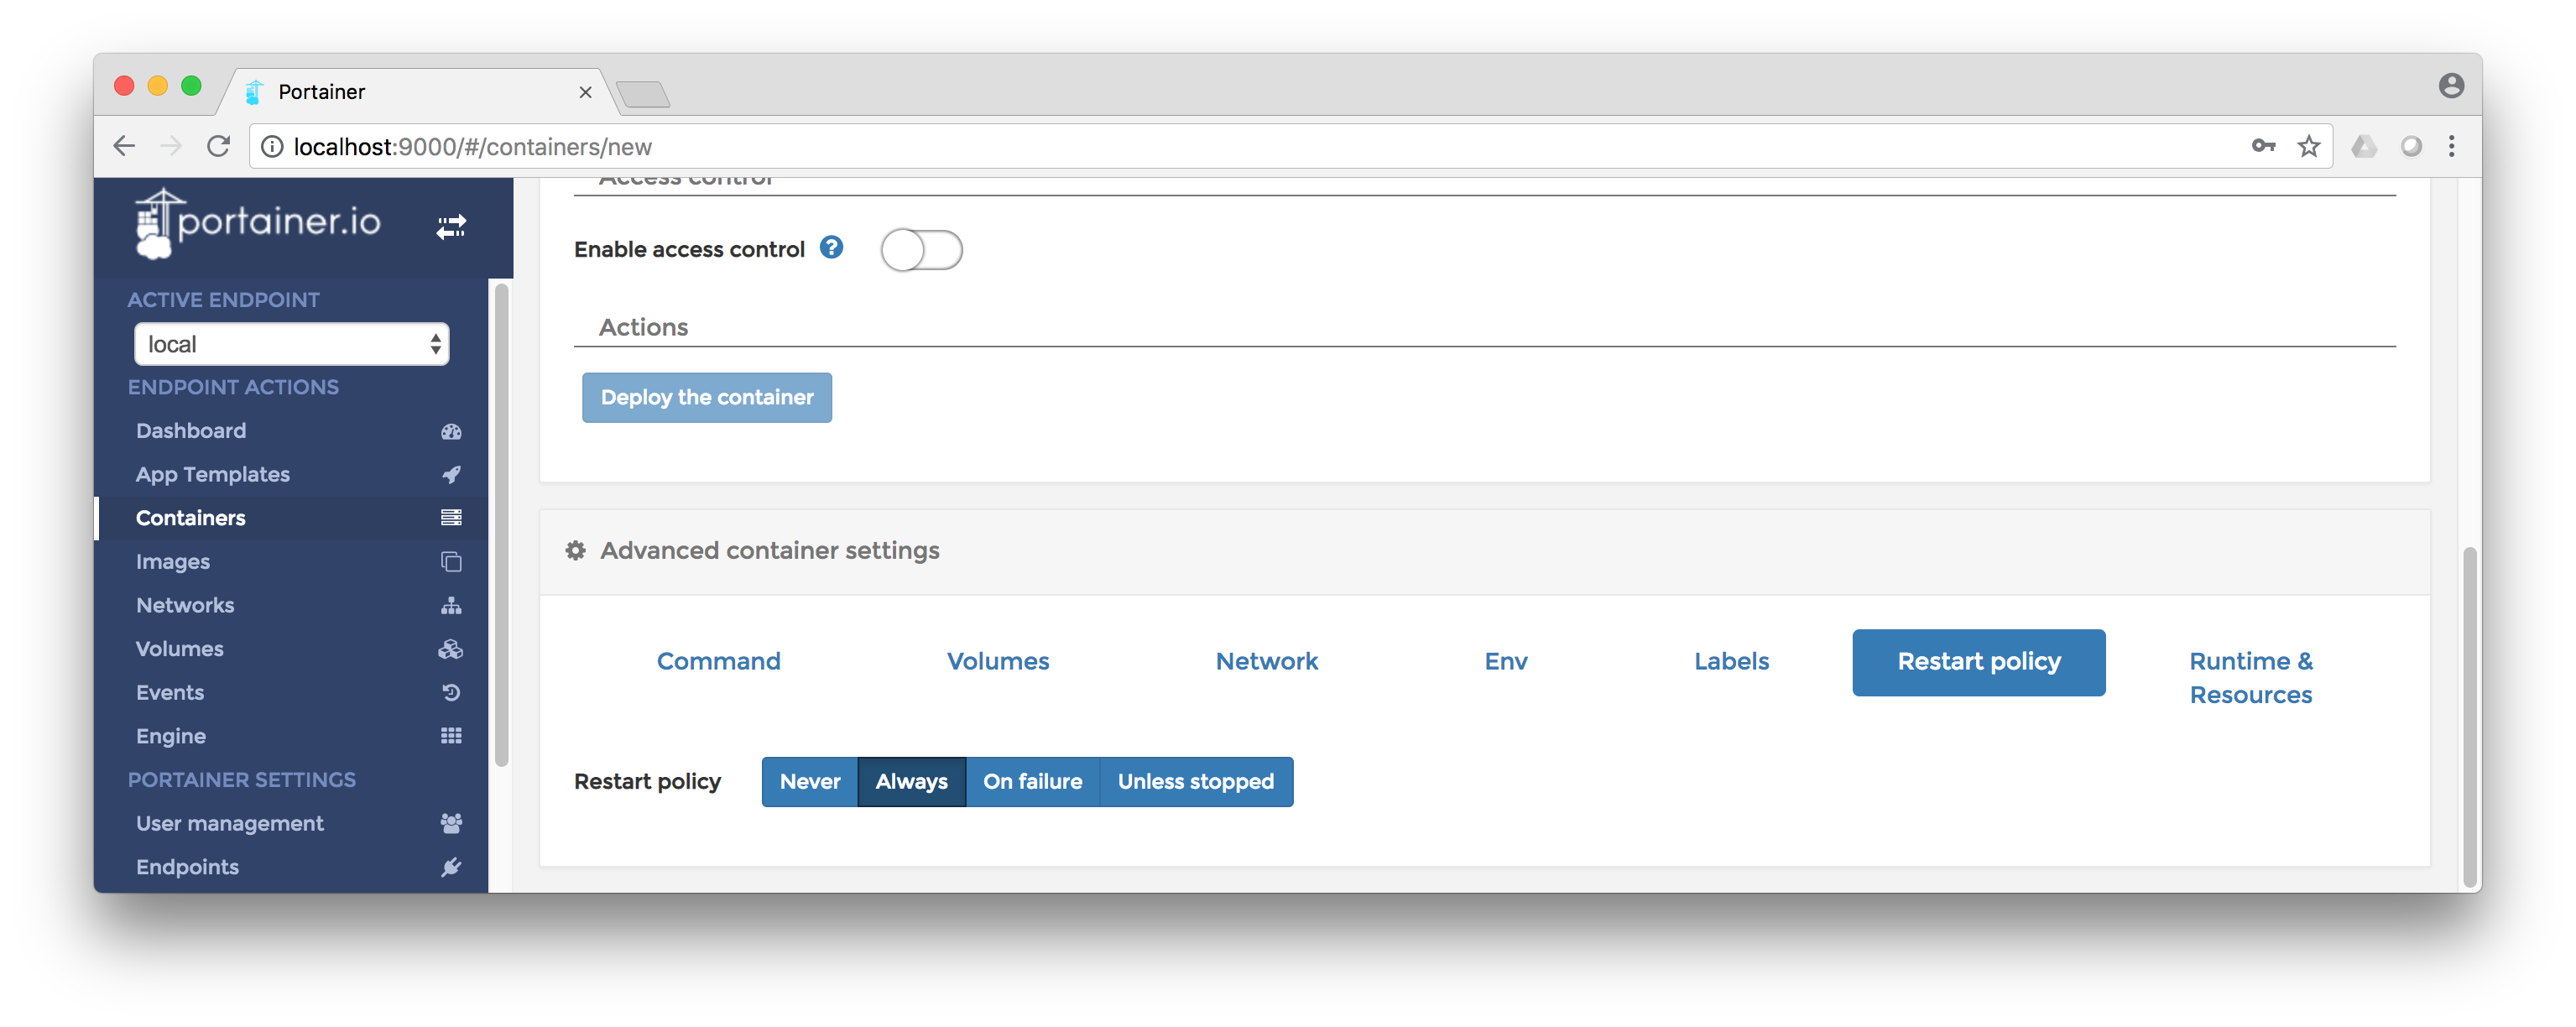 Finally, start the container by clicking the 'Deploy the container' under the 'Actions' section as shown below.