![]()
Contents
Cirrus Link Resources
Cirrus Link Website![]()
Contact Us (Sales/Support)![]()
Forum![]()
Cirrus Link Modules Docs for Ignition 7.9.x![]()
Inductive Resources
Ignition User Manual![]()
Knowledge Base Articles![]()
Inductive University![]()
Forum![]()
![]()
Cirrus Link Website![]()
Contact Us (Sales/Support)![]()
Forum![]()
Cirrus Link Modules Docs for Ignition 7.9.x![]()
Ignition User Manual![]()
Knowledge Base Articles![]()
Inductive University![]()
Forum![]()
...
Click the blue 'Create' button near the top of the page. This will bring you to the following page.
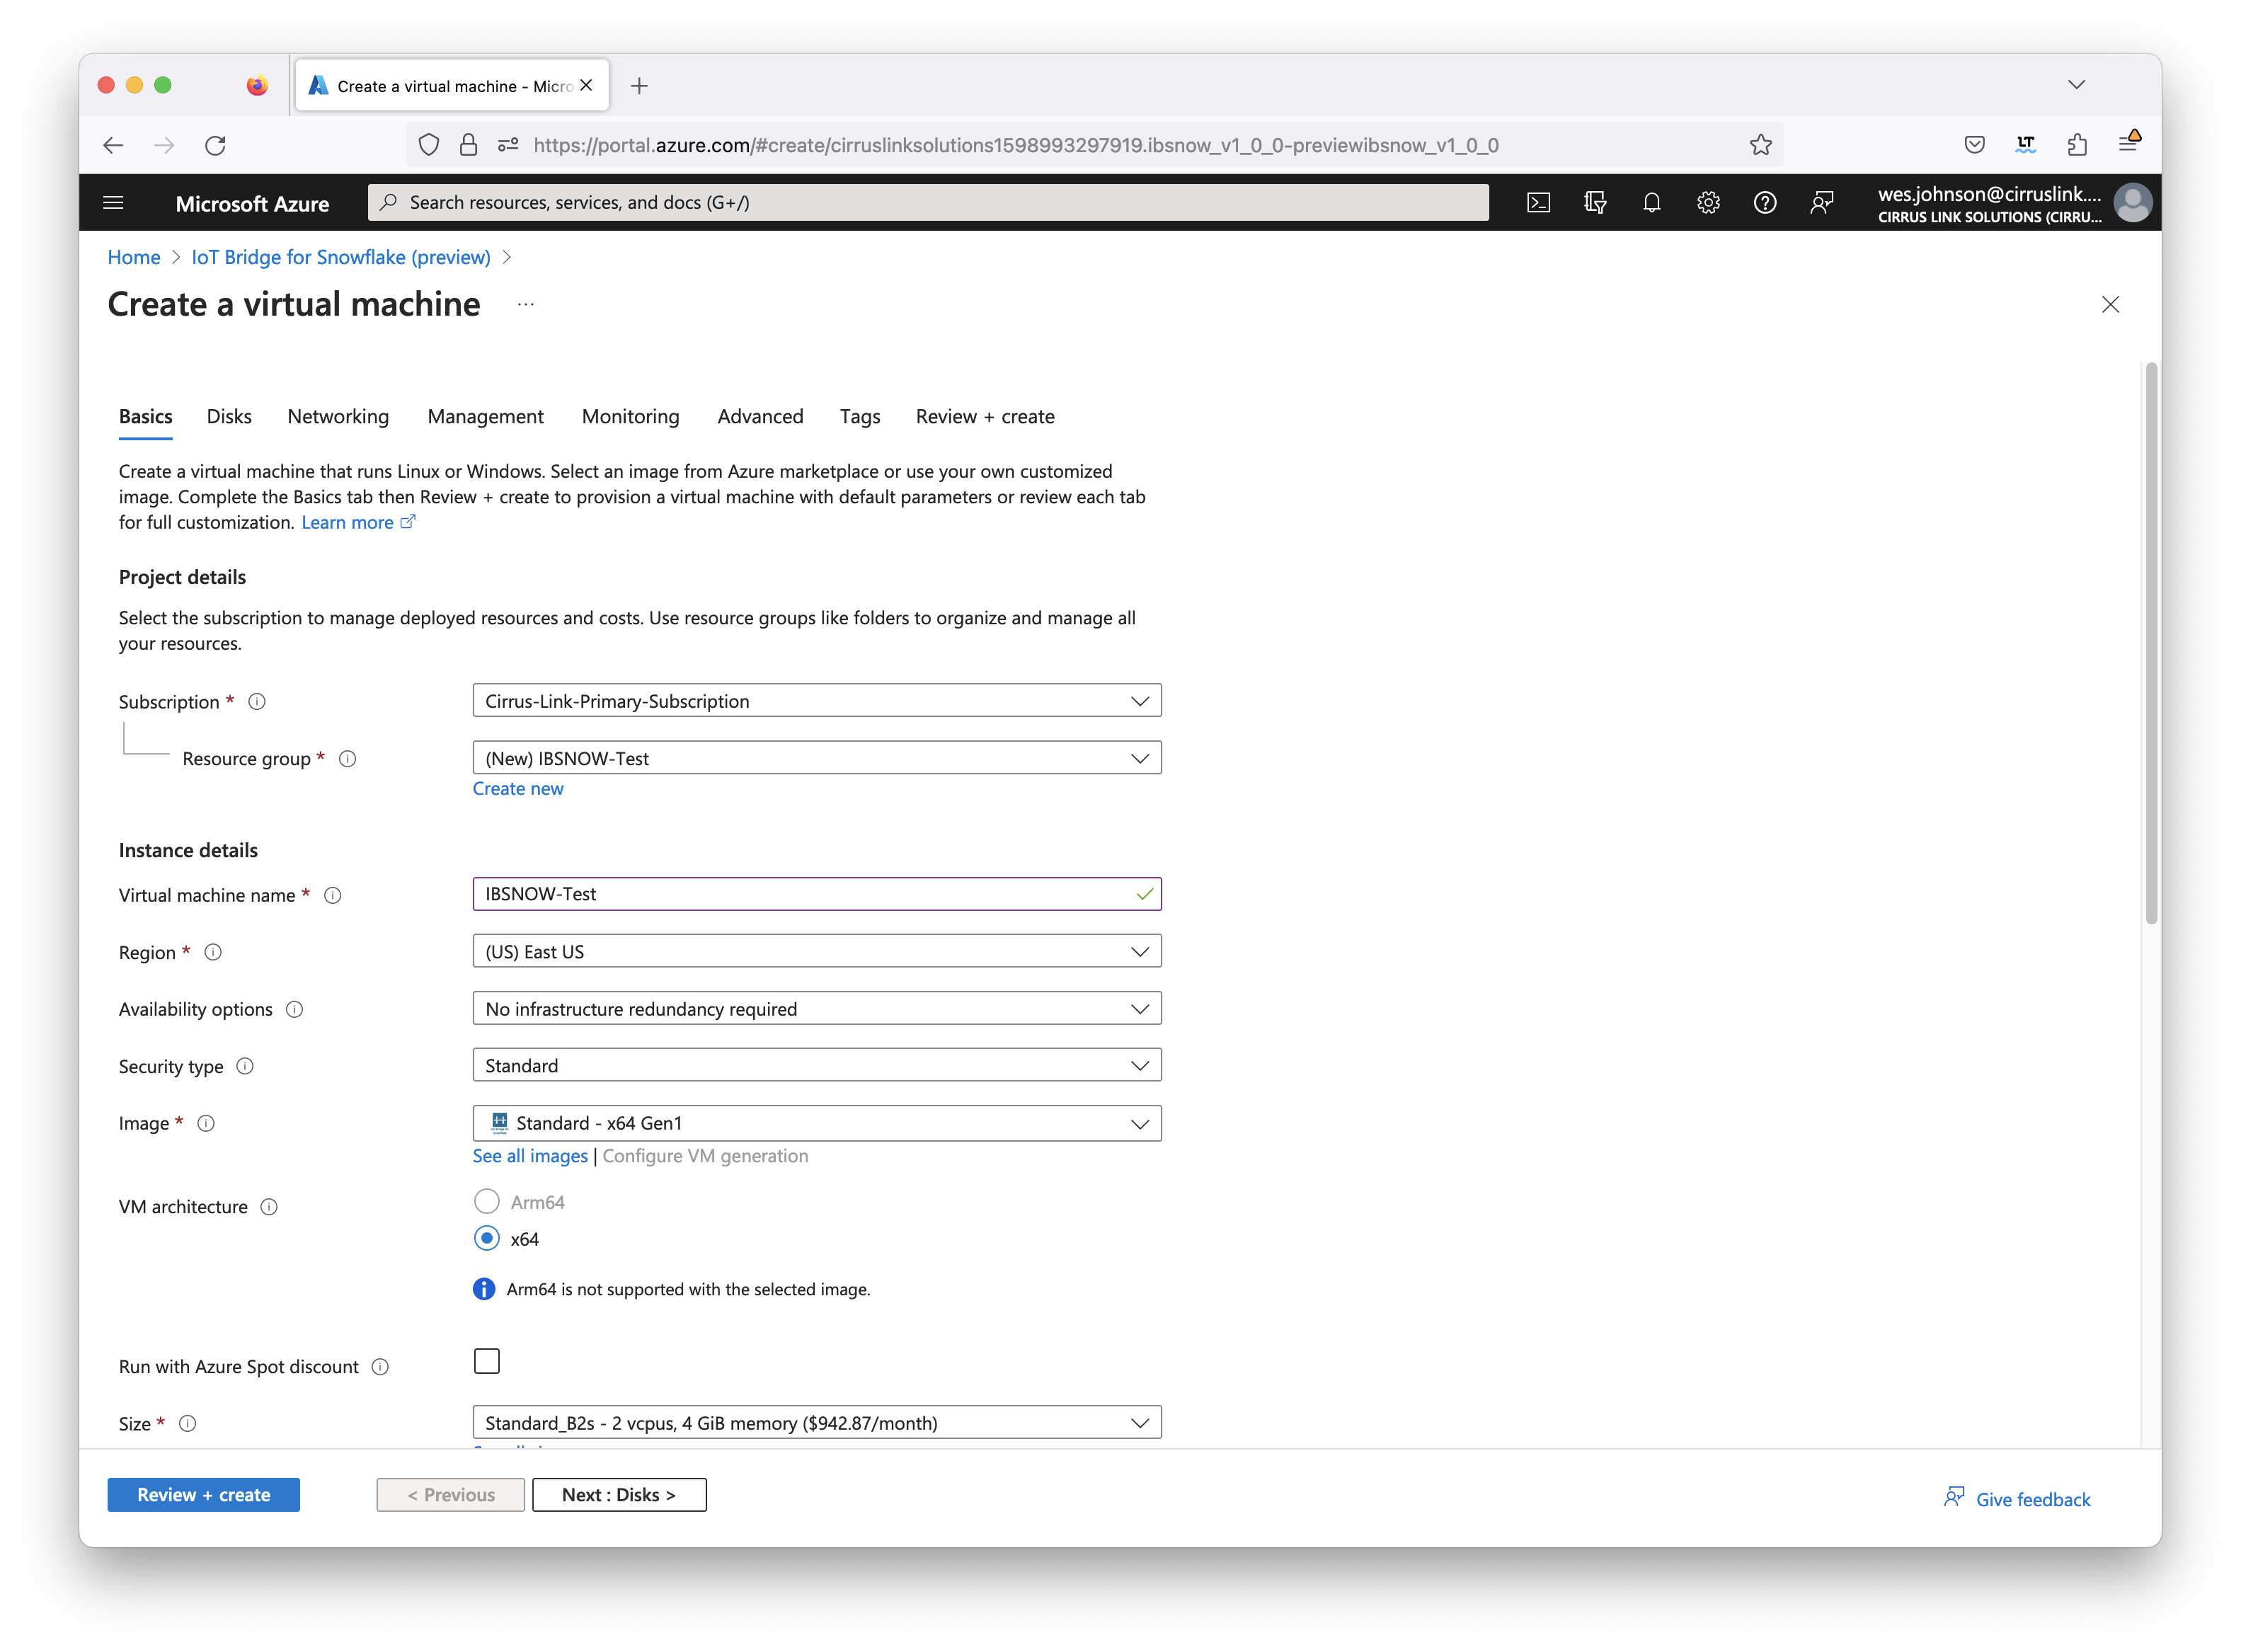
In the page above, make sure you specify the following (and any other settings you want).
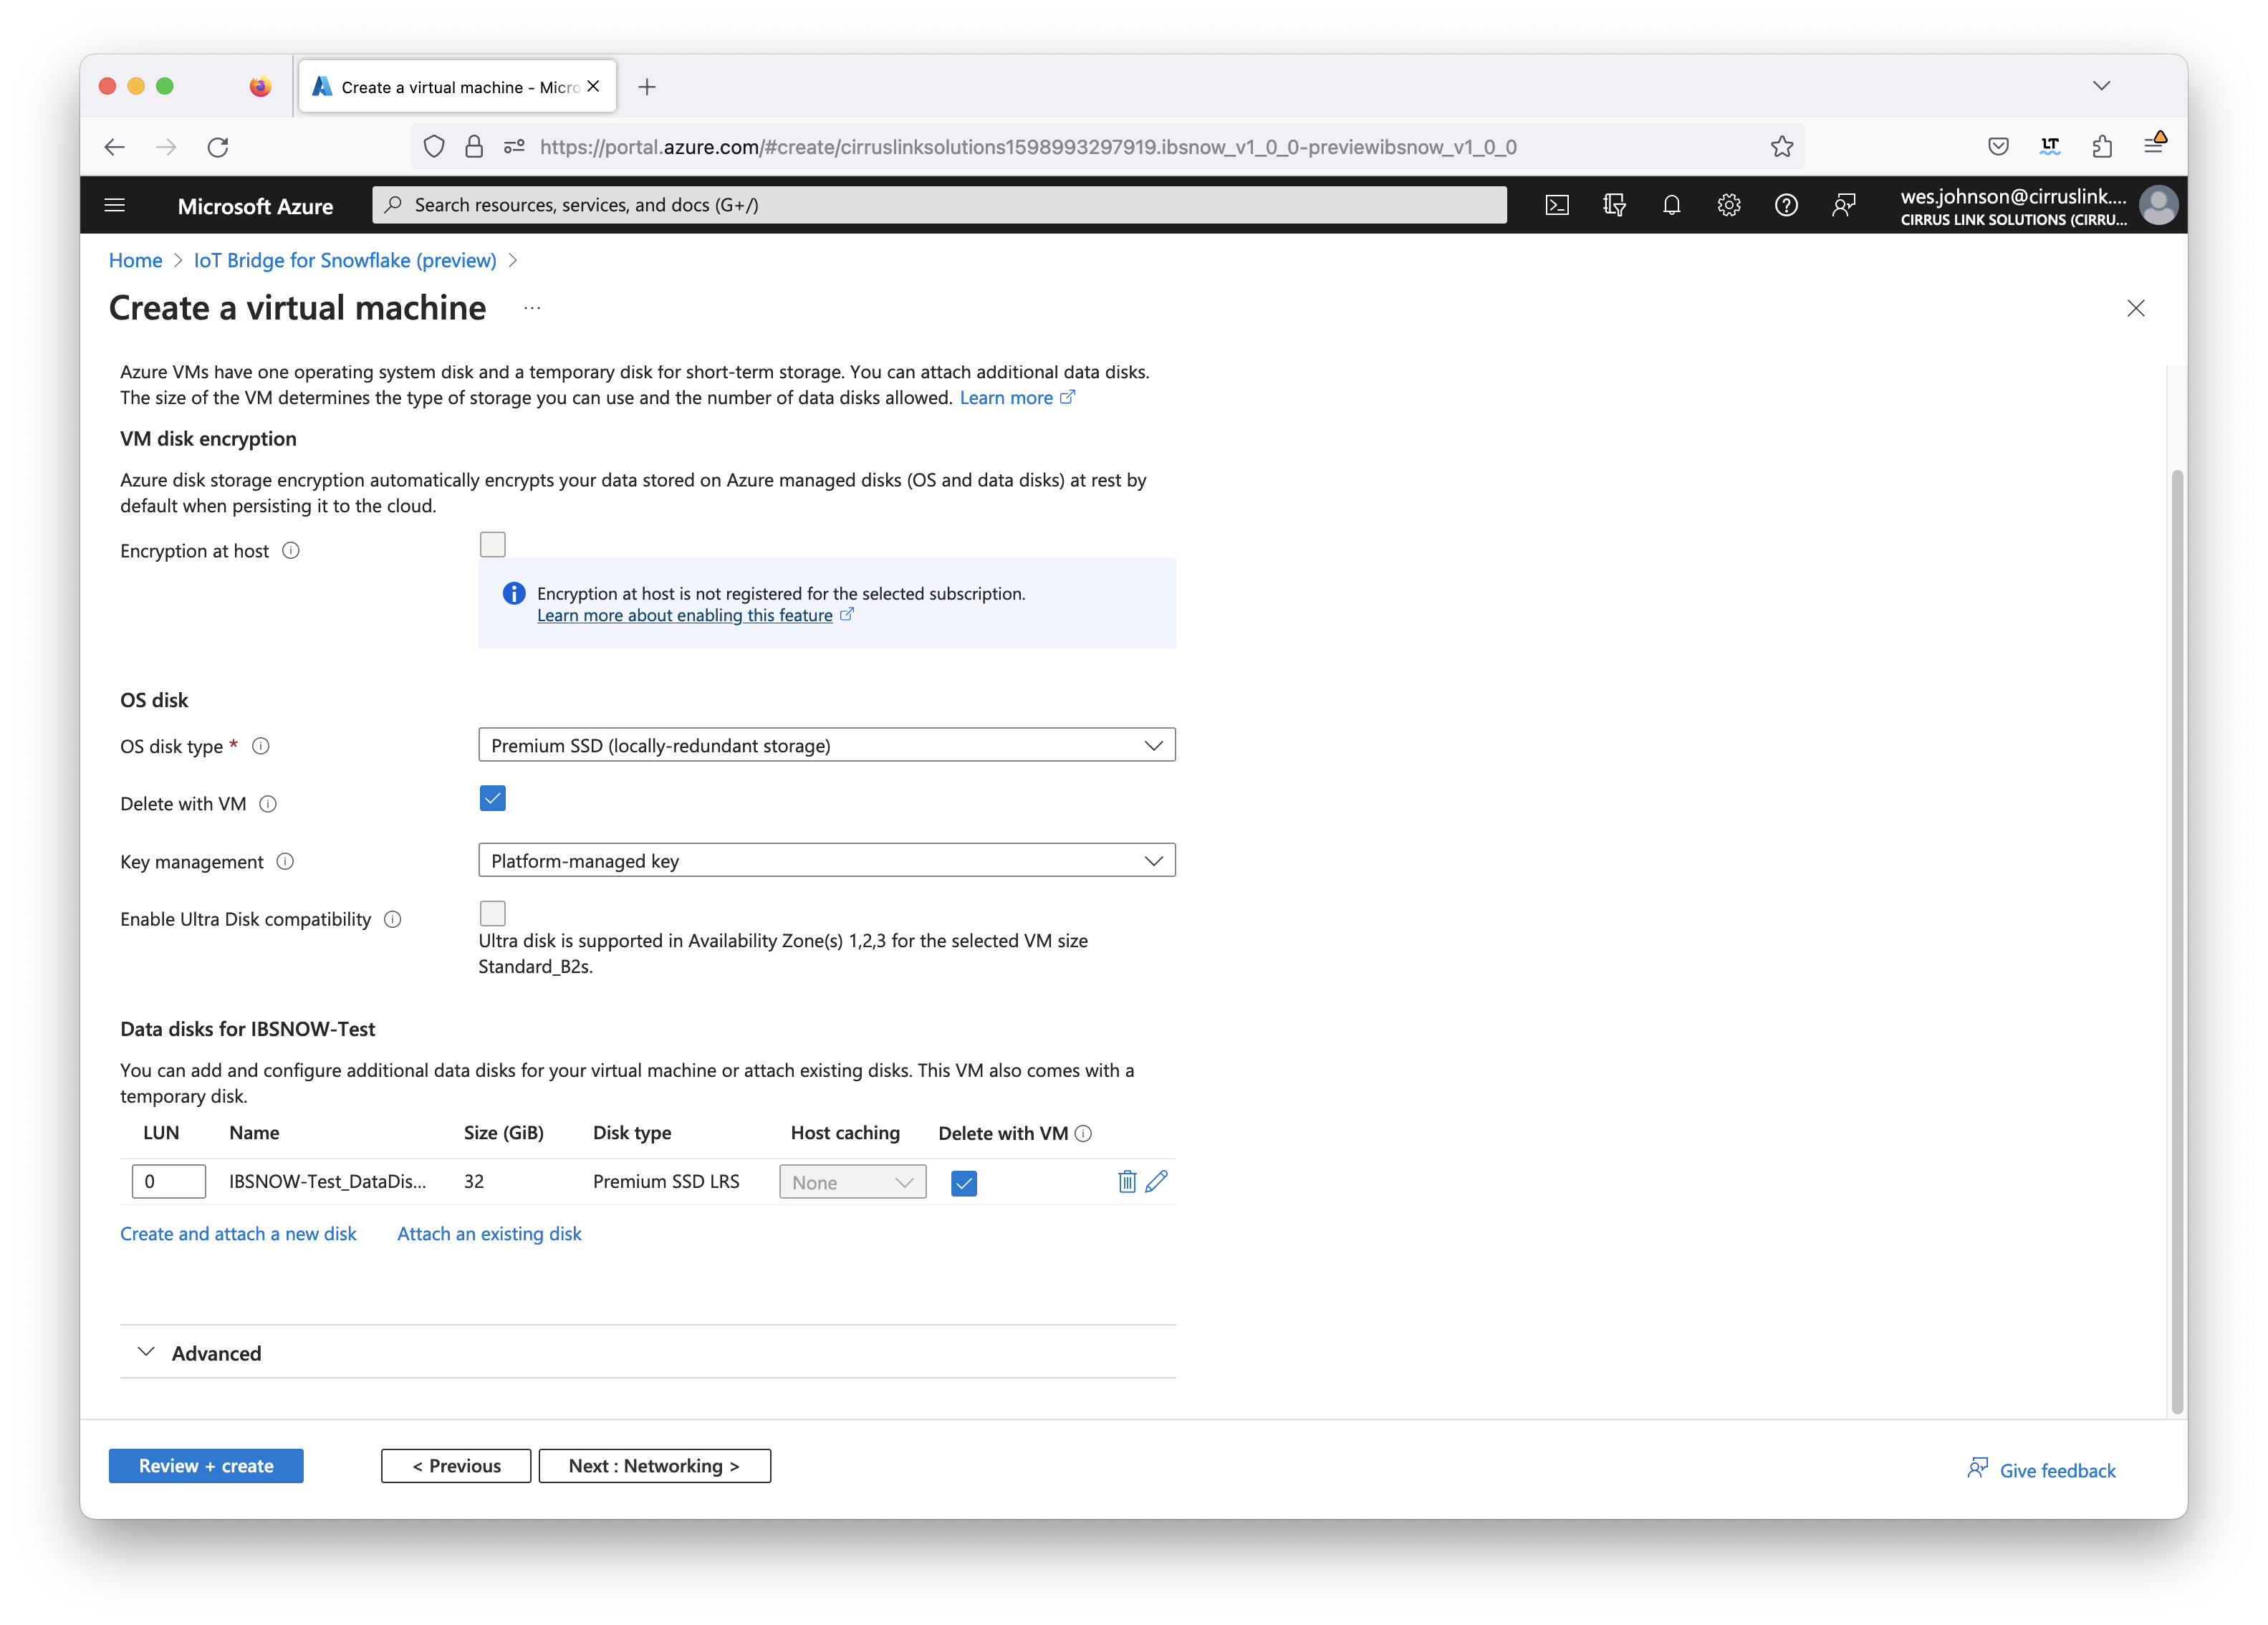
After configuring the above items, select 'Next: Disks'. This will bring you to the following page.

Select 'Create and attach a new disk' near the bottom of the page. This will bring you to the following page:
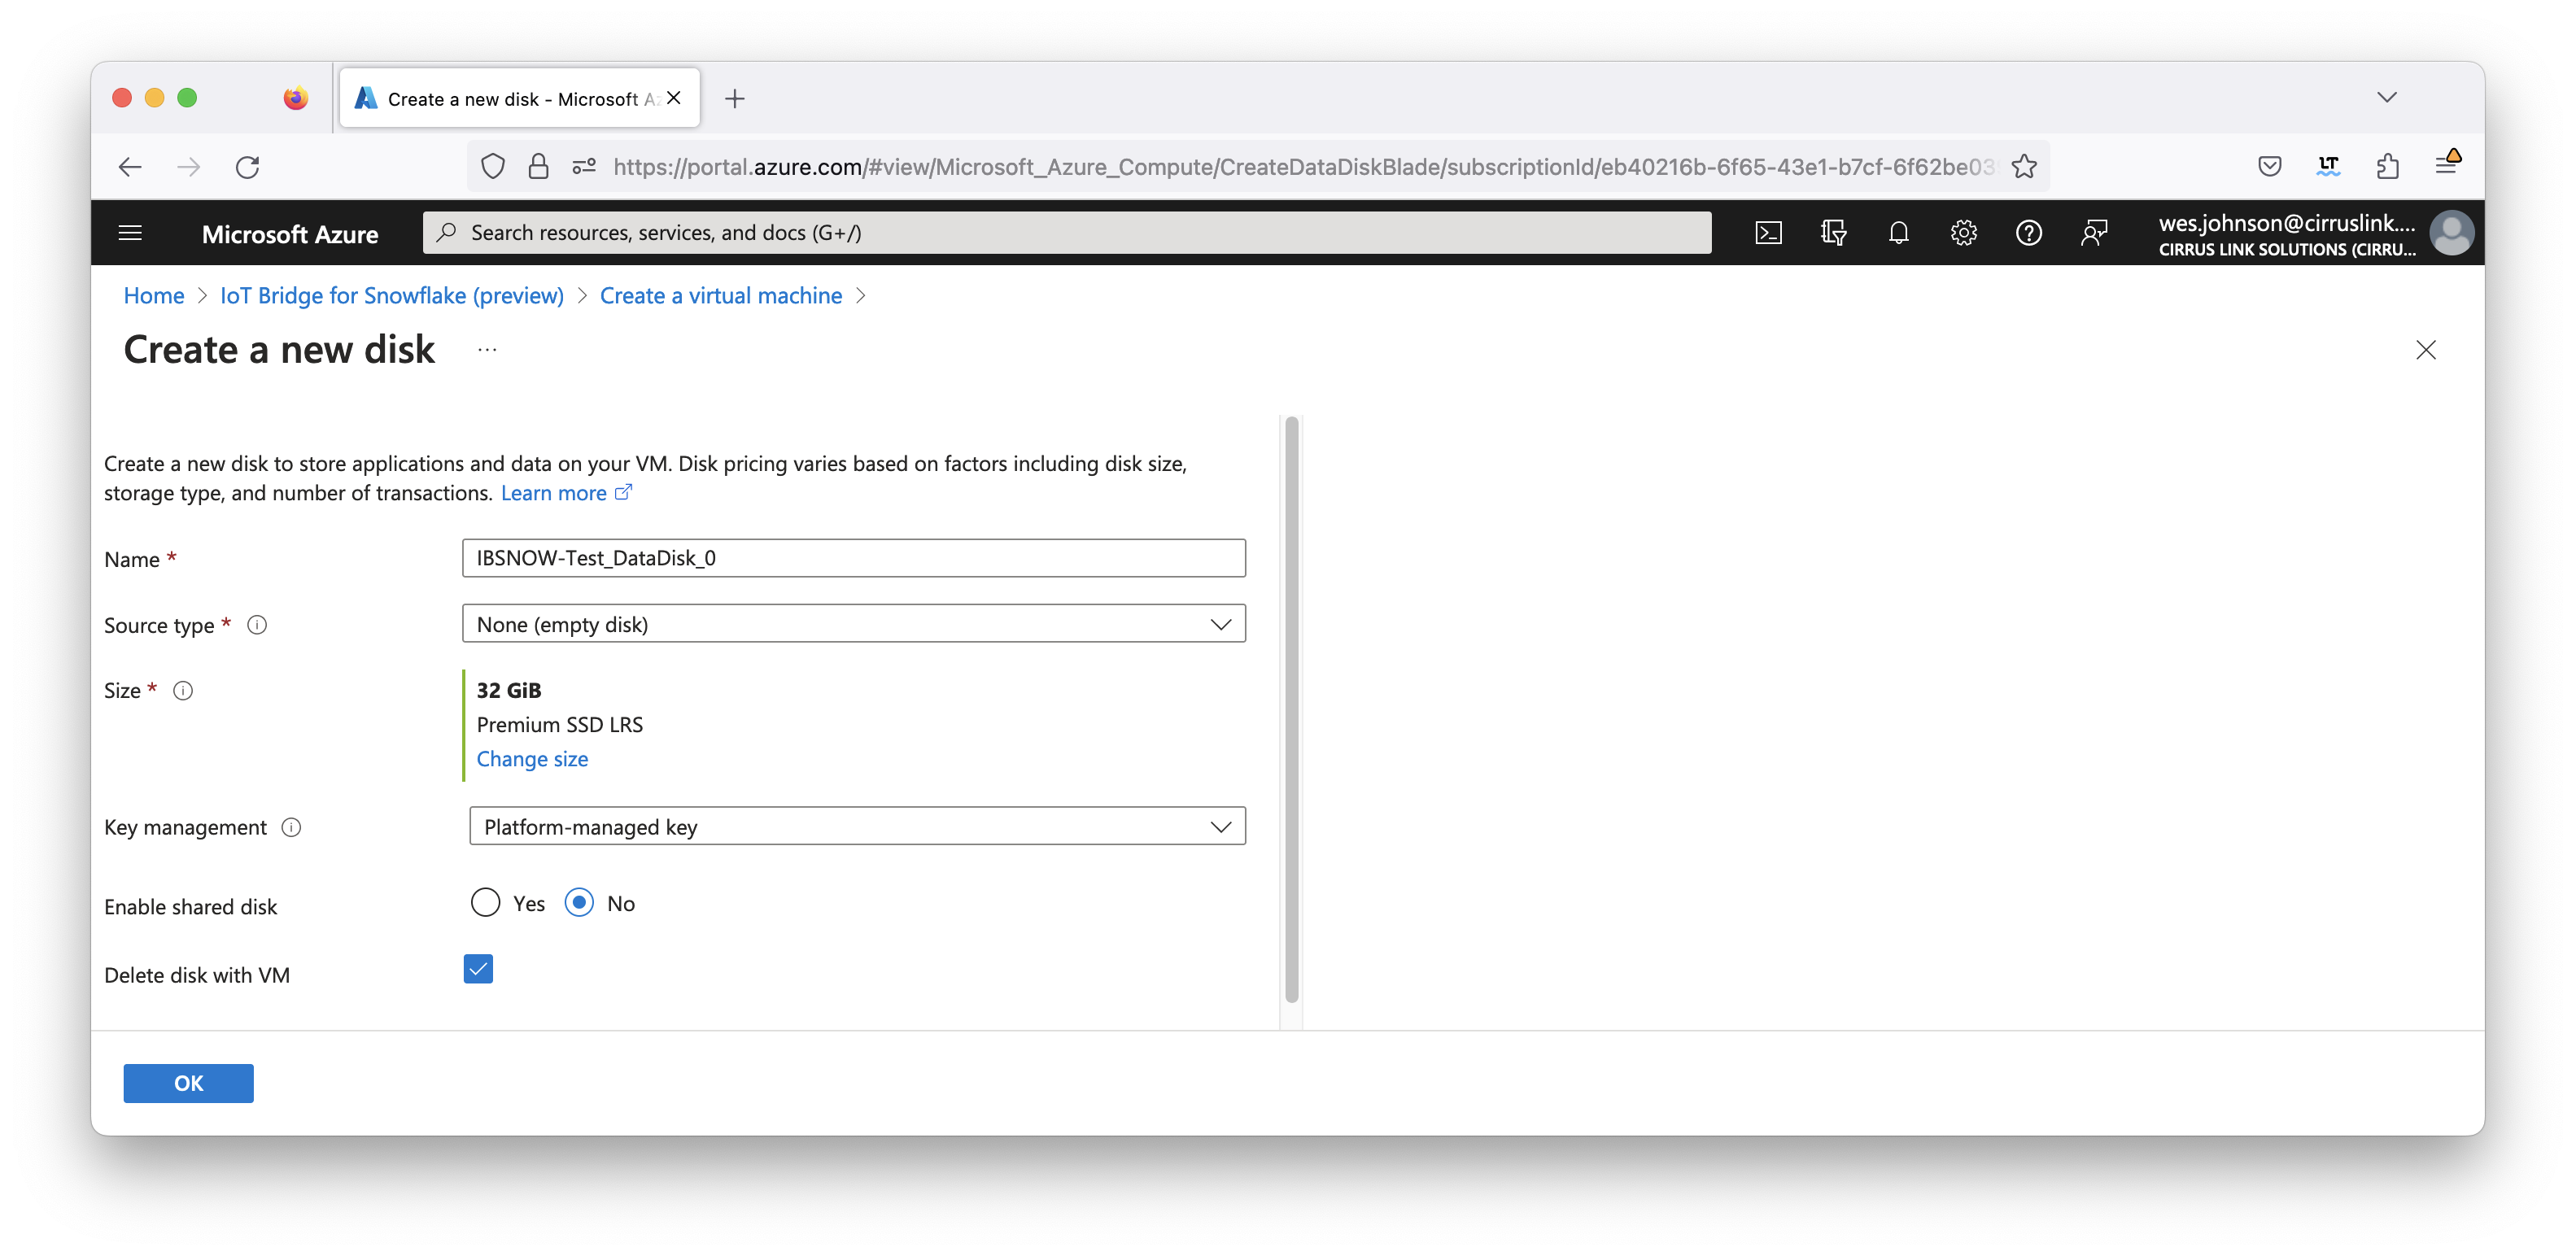
Set the values as you want. Note IBSNOW doesn't need a lot of disk space as there isn't a lot of persisted data. Also, it is recommended to 'Delete disk with VM' as shown above so resources are cleaned up when the VM is deleted. After setting the variables as you want, click 'OK'. At this point you should see the disk as shown below: